A Two Holiday Reversible Fall Jumper
One garment for two fall holidays! This easy reversible A-line jumper features Halloween designs on one side and Thanksgiving on the other.The easy lining/reversing technique requires only 4” of handsewing. This might be one of your favorite patterns!
Requirements:
- Fabric: Black pique’, brown pique’ (yardage according to size), orange gingham 3/8 yd. for hemline border and 1/3 yd. for optional self-made piping
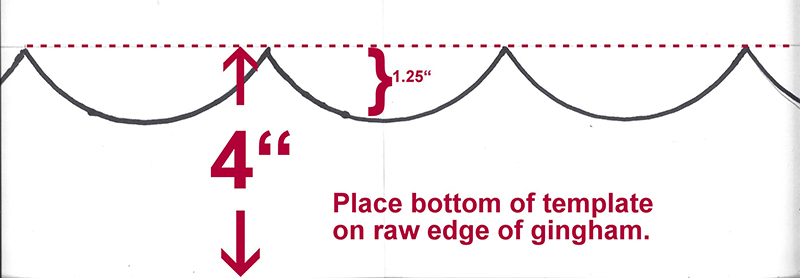
- Scallop template
- Purple spaghetti bias or bias tape: 1 2/3 yd for size 3
- Notions: orange piping, self-made from gingham or purchased commercially, 1 yd. of 3/8” orange grosgrain ribbon, card stock for scallop template, six ¾” buttons
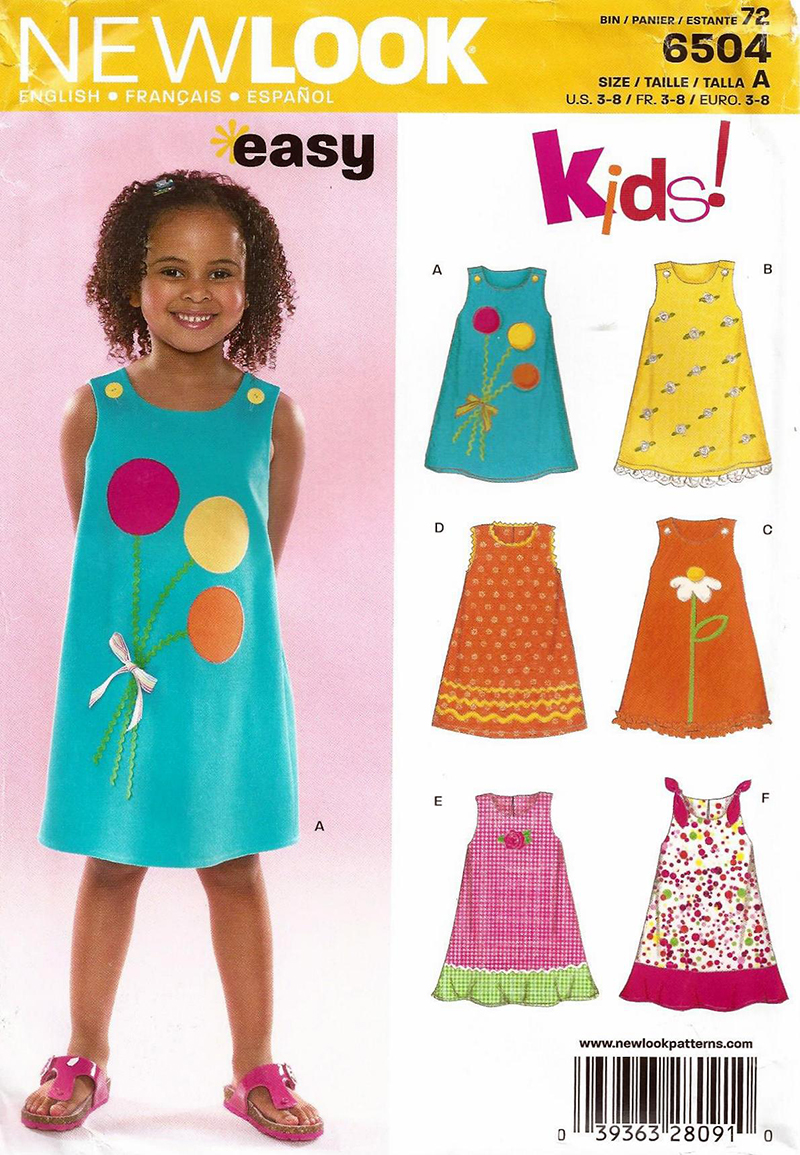
- New Look pattern 6504
-
Brother International Corporation makes no representations or warranties regarding such products.
Optional but Helpful:
- Spray adhesive, fray block, basting glue
- Stabilizer: Tearaway + optional iron-on for light to medium weight fabrics
- Threads: black and brown for construction, white or orange for basting scalloped hemline, monofilament for spaghetti bias and rick rack attachment, embroidery threads
Designs:
- Halloween:
- Sunflower - 200910494
- Girl with Bow - BIC-MTGPPK014
- Girl with Hat - BIC-MTGPPK013
- Pumpkin Spray for Skirt Back - 200910459
- HAPPY HALLOWEEN 4x4.pes
- Happy halloween 5x7 ravie 15F.pes
- Thanksgiving:
- Leaf 4x4 Border - BIC-MTGDED016
- Leaf - BIC-MTGTTF003
- Pumpkin - DC HY0Y791
- Brother embroidery machine
with 4x4 for all designs including small Happy Halloween or 5x7 frame needed for larger Happy Halloween text as shown.
The Black Halloween Dress Side
Dress Front
- Cut one front from black pique. Press vertical crease at center.
- Cut one orange gingham strip 4” x width of skirt hemline + 2”. Spray starch and press until crisp and mark the center.
- Print template which will require two 8.5x11” sheets. Tape them together on the short side.
Note: Printing on card stock makes tracing onto gingham easier and more accurate.
- Cut out the template.
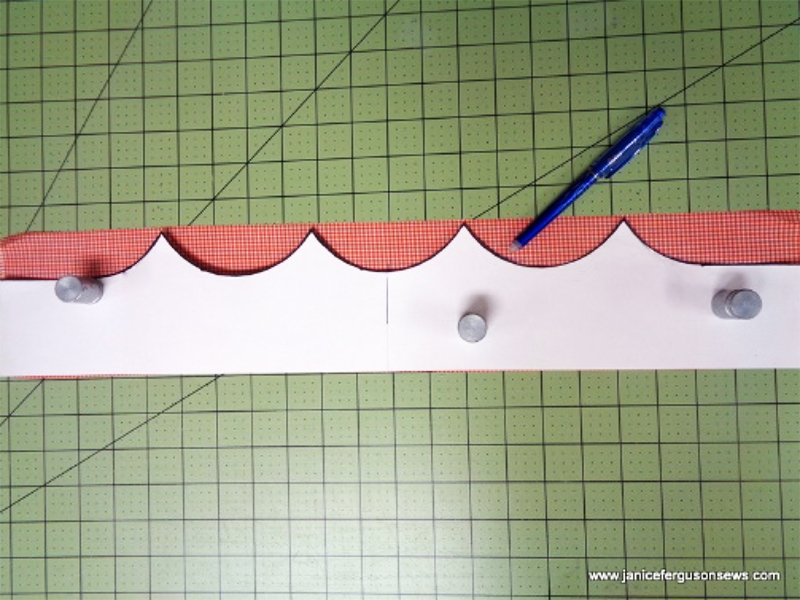
- Place bottom of template on the raw edge of the gingham strip, matching the center of the strip with the mark on the center template scallop. Trace scallops on the gingham with a water or heat erasable marker.
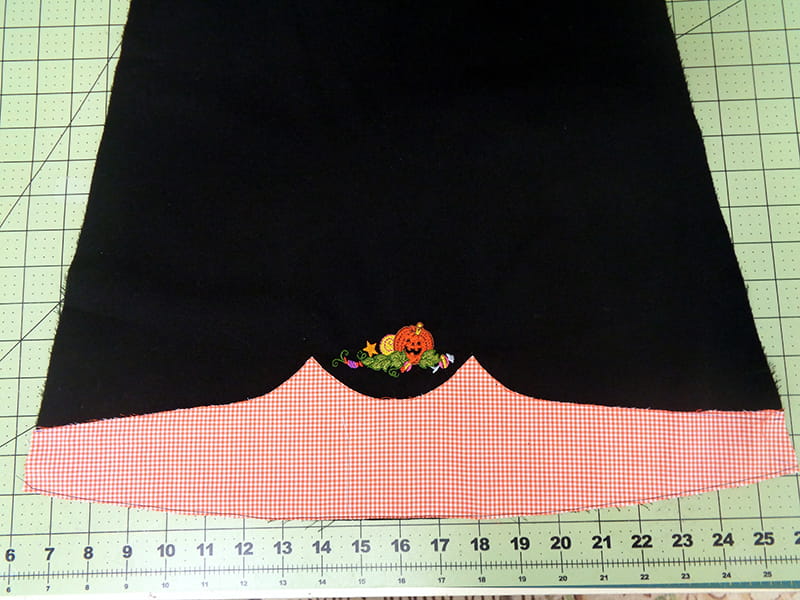
- Adhere orange gingham to front with spray adhesive, matching the cneter line of the gingham scallop with the black front crease. Disregard the skirt’s curved hemline.
- Straight stitch on marked line with shortened stitch length of 2.0.
- Trim close to stitching with shortened stitch length of 2.0.
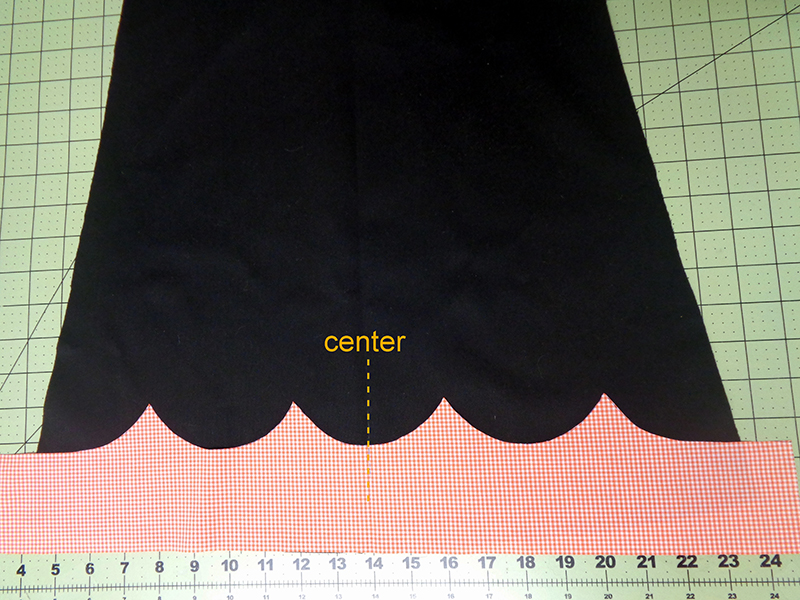
- Join scalloped edge to black front by straight stitching very close to the raw edge with a shortened stitch length of 2.0.
- Trim gingham to match black side raw edge.
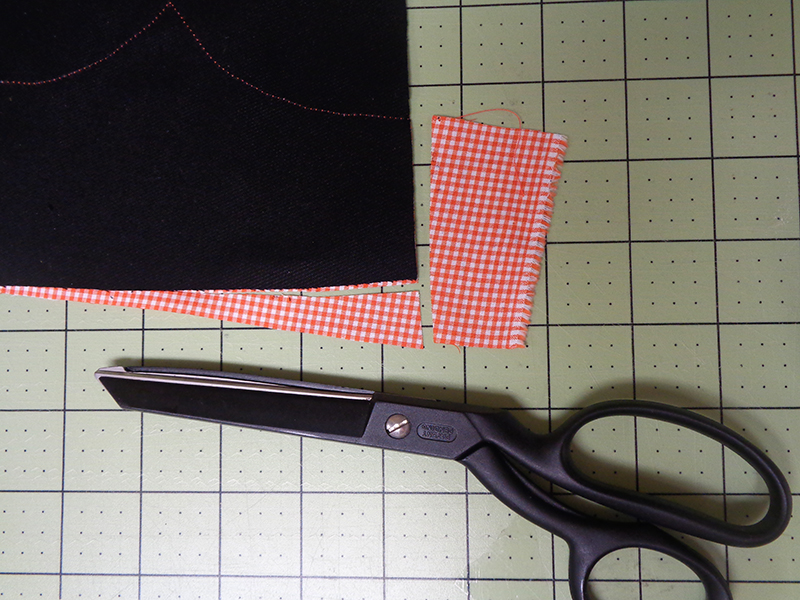
- Stitch gingham to hemline in same manner. Double check to see that the width of the gingham is the same at each side. It should be 1.5”. If not, make adjustment.
Embroidery
- Center and embroider a pumpkin patch kid in outer scallops as shown and the sunflower in the center scallop. All will fit in 4x4 frame.
Note: Your fabric may require an iron on tearaway stabilizer with another tearaway in the frame.
- Embroider Happy Halloween below neckline.
- Center Happy Halloween text 3” below neckline. Text is for 4x4 (simple font) and 5x7. Or use PE-Design to create larger or other text if you prefer.

Dress Back
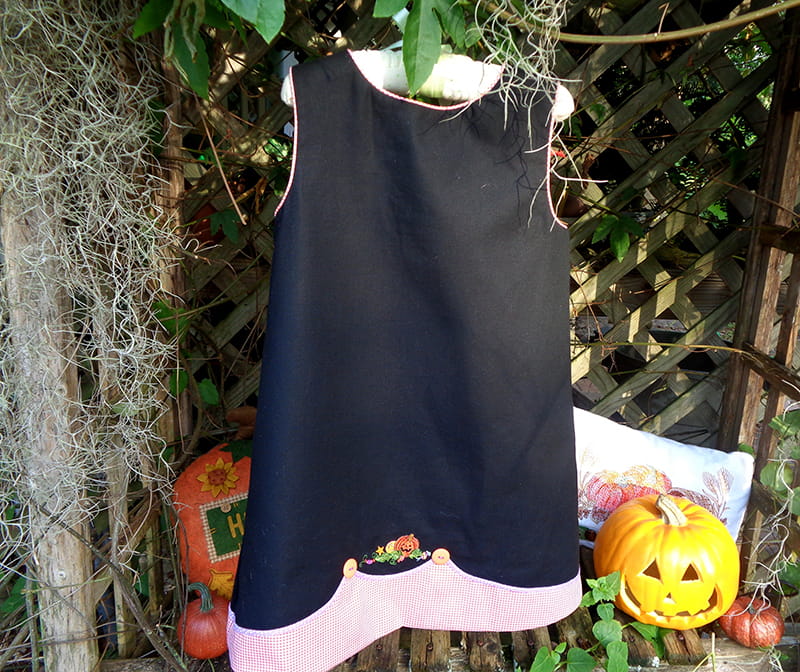
- Cut out back pattern piece.
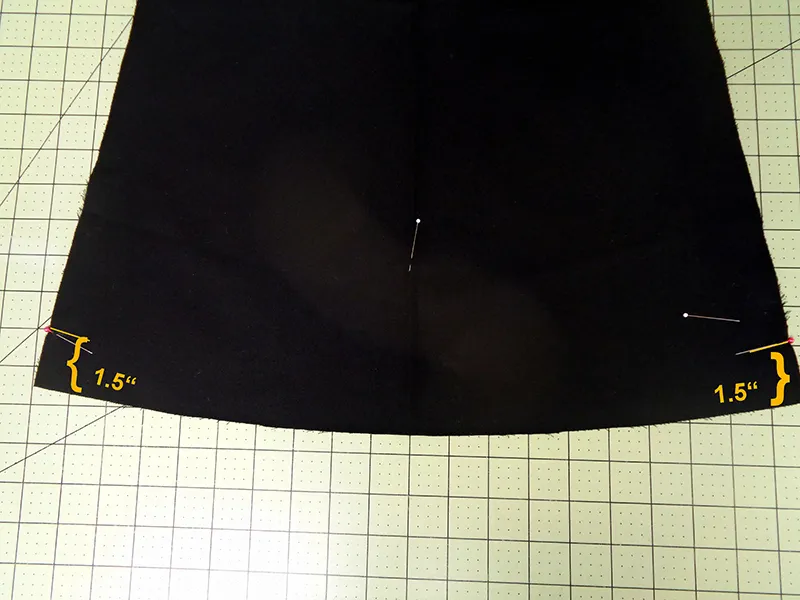
- Press vertical crease back. Mark crease with straight pin at hemline.
- Place mark 1 ½´” at each side.
- Cut one orange gingham strip 4”wide. Starch, press, and mark center.
- Adhere gingham to skirt hemline, using template to mark center scallop on gingham. Transfer 1 ½” mark to outer edge of gingham, matching to edge of black skirt. Continue marks to edge of skirt.
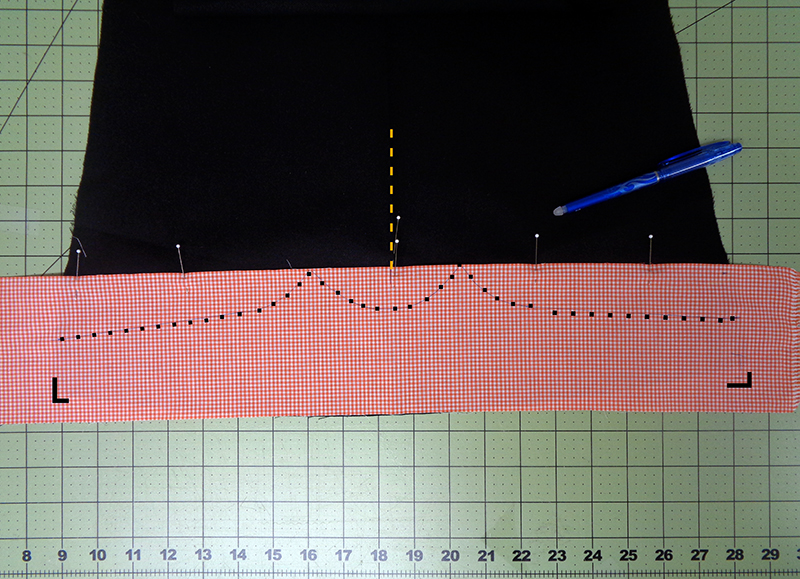
Note: Ouch! The gingham border would have been much nicer if a French curve had been used to curve the line from the last scallop to the skirt side. Instead a straight edge was used.
- Stitch gingham to skirt along marked line with shortened stitch length of 2.0.
- Trim close to stitching line.
- Trim gingham along sides and bottom as on front in step #10.
- Stitch gingham to skirt very close to raw edge of hemline.
Embroidery
- Open Pumpkin Spray in PE-Design. Reduce size to width 82.6 and height to 36.10.
- Transfer design to machine. Center and embroider in scallop.
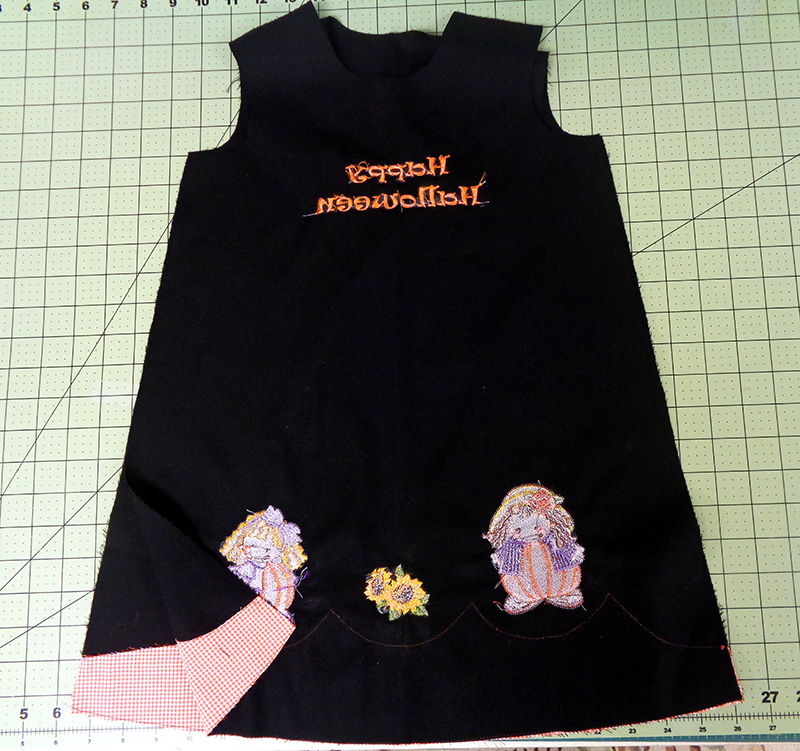
- Stack right sides together with front on top. Seam right side with 5/8” seam allowance and press seam open.
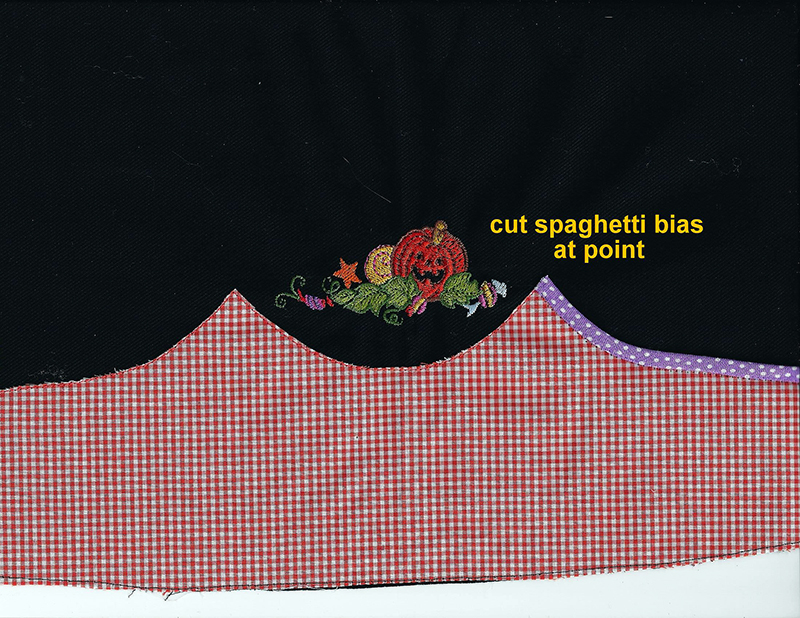
- Cover top raw edge of gingham hemline trim with spaghetti bias. Apply a small amount of basting glue near the raw edge, along one section at a time. Promptly apply the bias taking care to place the seam side of the bias against the glue.
- Stitch on lower side of bias with monofilament thread and zig zag W 1.0, L 1.0 stitch. Cut spaghetti bias when peak of scallop is reached.
Note: Raw bias edges should be treated with fray block. They will be covered by a ¾” button. Folding over the bias creates unnecessary bulk and exposes the seamline of the bias.
- Continue in this manner along the length of the gingham hemline trim.
- Return to the beginning of the bias and stitch the opposite side, as before.
- Cover bias cuts at scallop points with ¾” buttons stitched in place.
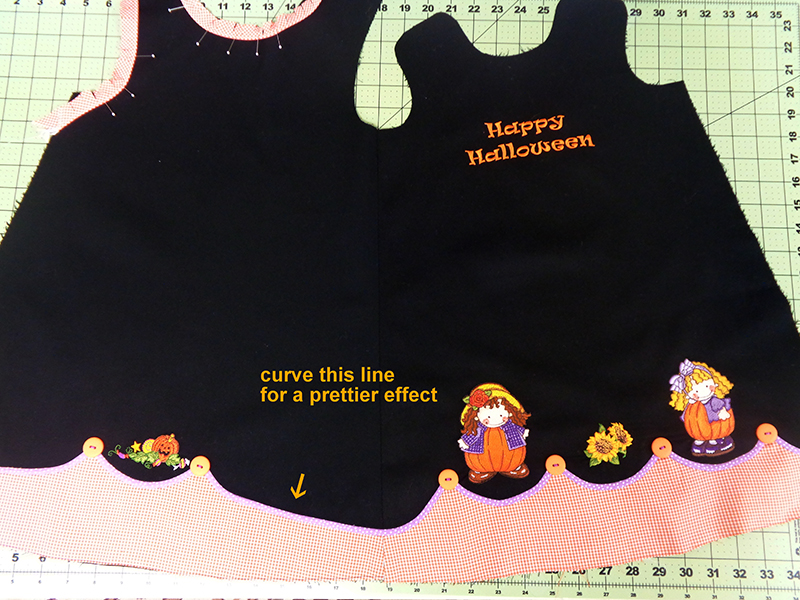
Note: I really regret not curving the back bias to the side.
- Apply piping across top, from left armhole to right armhole. By using white contrasting bobbin thread, it will be easier later to seam the Halloween and Thanksgiving sides by stitching directly on the piping seam line.
Note: Clipping the bias very frequently and closely makes smoother application. The corners were curved slightly. It is easier to apply piping to a curved corner and in my humble opinion the visual effect is not diminished.

The Brown Thanksgiving Dress Side
Note: Construction differs from front. Read step #37 carefully!
- Cut out front and back from brown pique’. Fold the brown Thanksgiving front in half vertically, as before, and iron in a center crease.
Note: These corners were not curved.
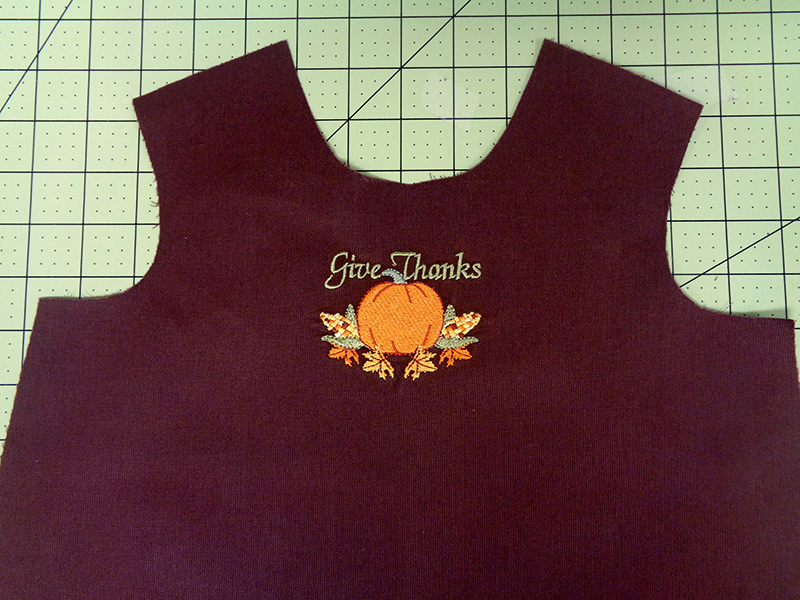
- Embroider Give Thanks pumpkin below neckline.
Note: Fall leaves border is made up of two designs combined, BIC-MTGDED016 with multiple leaves and a bunch of grapes and BIC-MTGTTF003 a single leaf. Three BIC-MTGDED016 are separated by the single leaf BIC-MTGTTF003. Arranged as shown, the border measures 13.85”, and will fit in the 9.5 x 14”Dream Machine frame. Individual segments will fit in the 4x4 or 5x7 hoop. The border hoop makes easy work of the combined designs.
- Embroider the fall leaf border.
Note: If the skirt is too short to fit in your largest hoop, join a scrap on either side to lengthen it.
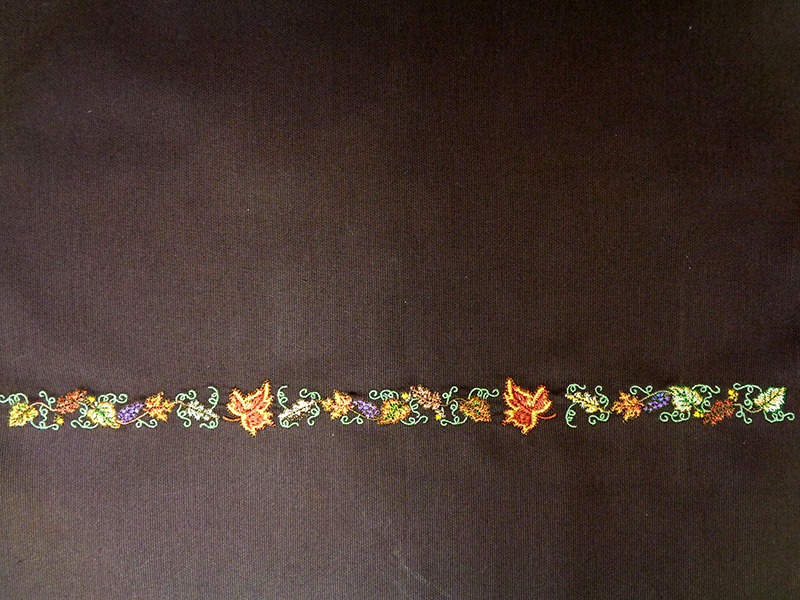
- The back leaf border is shorter.
Construction
- Stack the front and back, right sides together with the front on top. Now here is how the back construction differs from the front.
- Seam the LEFT side and press seam open.
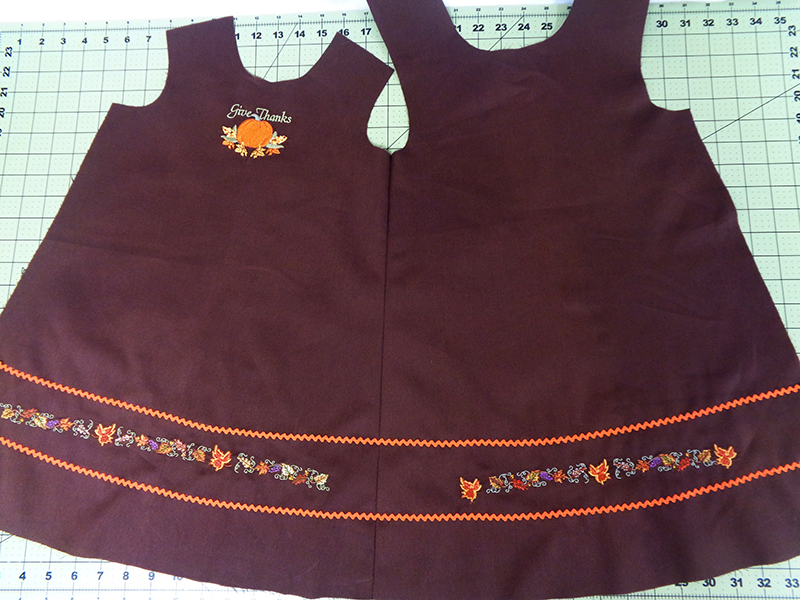
- Apply orange baby piping below leaf border across seamed skirt. A tiny zig zag w 1.5, L 1.5 stitched with monofilament works well. On this dress, a line was drawn 3 ½” from the raw bottom edge, following the curve. A second line was drawn 5 ¾” from the bottom raw edge, again following the curve.
- Stack front to back, with front on top. Pin in place and stitch across top, from armhole to armhole, directly on top of white stitching which joined piping to dress front and back.
Note: The brown pique straps have not been curved. They will be trimmed after the tops are seamed together.
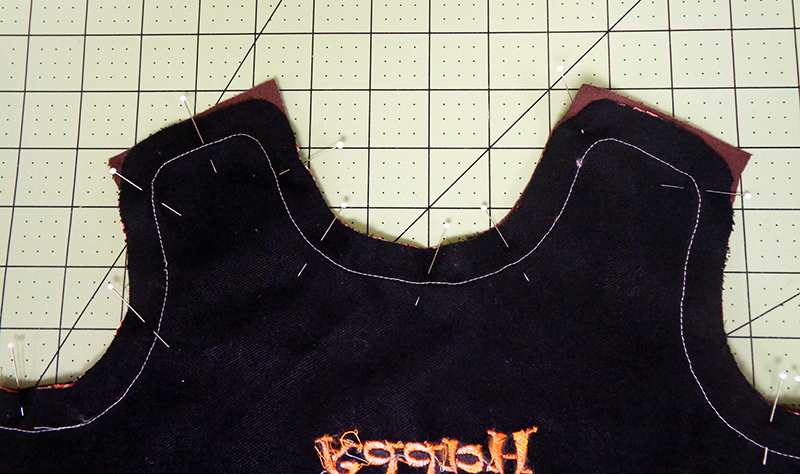
- Stitch along hemline, joining the two dresses, leaving side seams open. Clip curves and grade seams. I prefer trimming one seam to ¼” and the other to 3/8”. The two dresses are now seamed together along the top and hemline, everywhere but the sides. Now here is the part that seems tricky but like learning to ride a bike, it really is easy once you do it.
- With black/Halloween side on top, reach your left hand in between layers. We’ll call that side #1. Reach across to the right open side and grasp the black dress front, called-- you guessed it-- side #2.
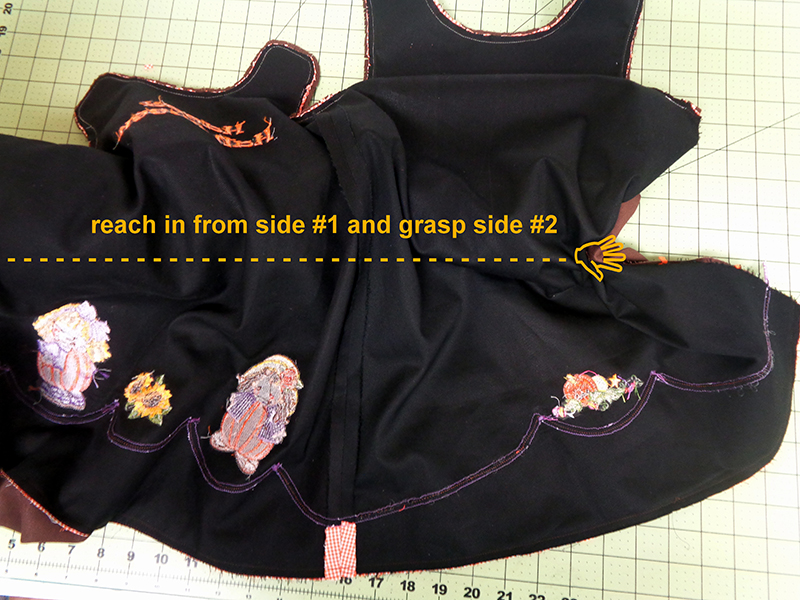
- Bring side #2 to side #1, matching black to black and brown to brown. This creates a circular opening.
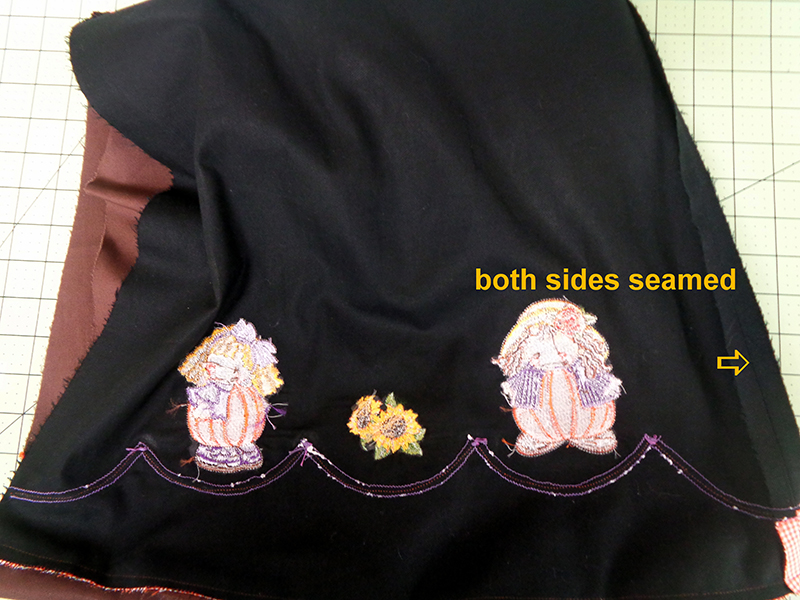
- Pin, matching underarm seams and hemline.
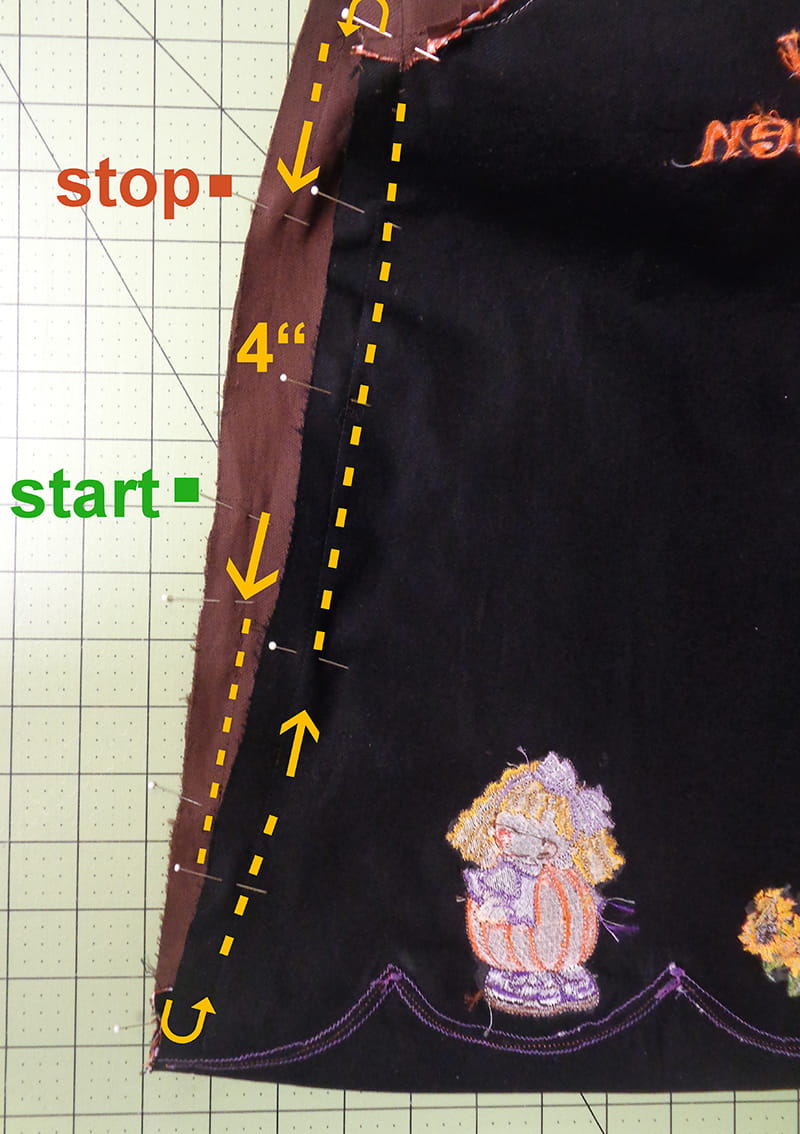
- Begin and end with a few stitches perpendicular to the seam. This makes closing the seam easier later.
- Pull jumper through opening, smoothing out straps. Press.
- Hand stitch the 4” opening closed.
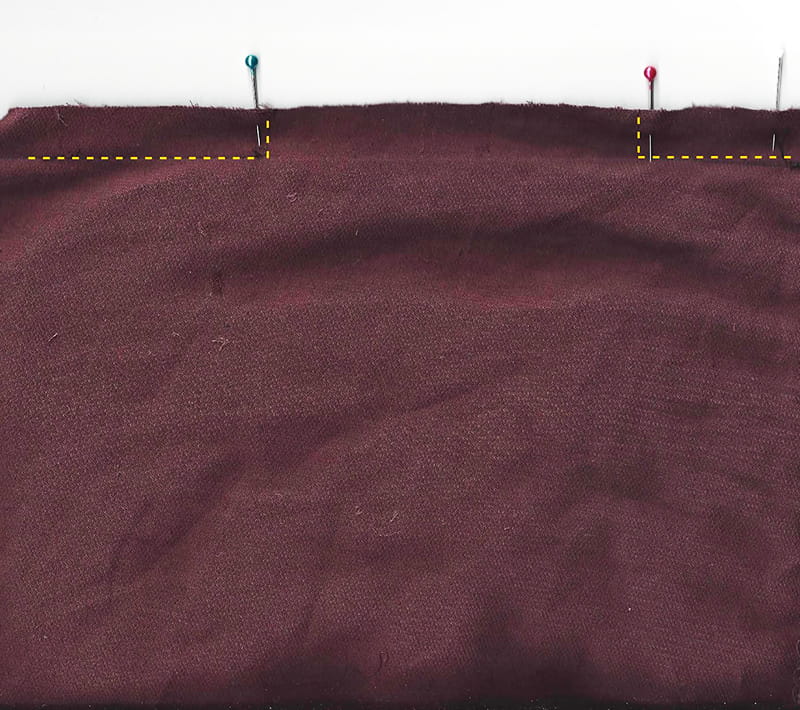
- Stitch 2 buttonholes in each strap. Match the width of the buttonhole with the width of the ribbon that will be used for ties.
Note: I like to make buttonholes on THE Dream Machine.
Various standard sizes were downloaded and a sample piece of color coded sizes was made. By slipping a button through the appropriate hole, I can immediately stitch it perfectly on THE Dream Machine.
Various standard sizes were downloaded and a sample piece of color coded sizes was made. By slipping a button through the appropriate hole, I can immediately stitch it perfectly on THE Dream Machine.
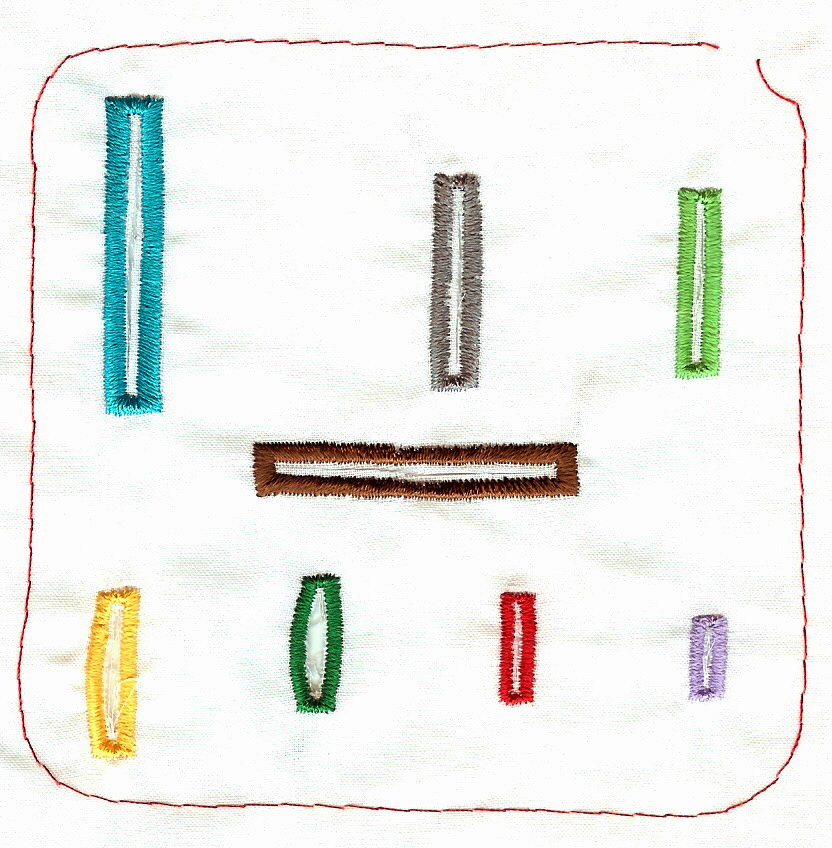
- After marking the buttonhole placement, the two back straps were pinned near the top of hooped stabilizer and the scan function highlighted below was engaged.

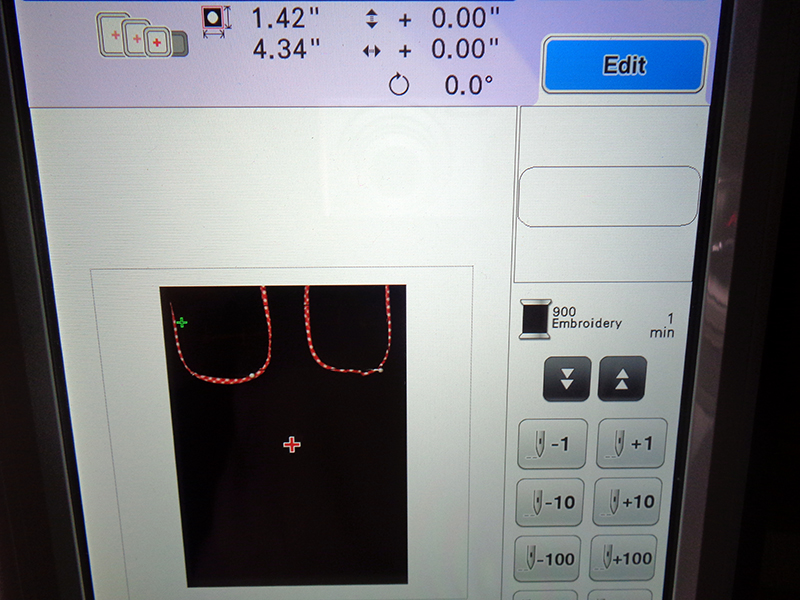
- A straight stitch rectangle was selected from the shapes menu on the opening screen and used to baste the straps in place.
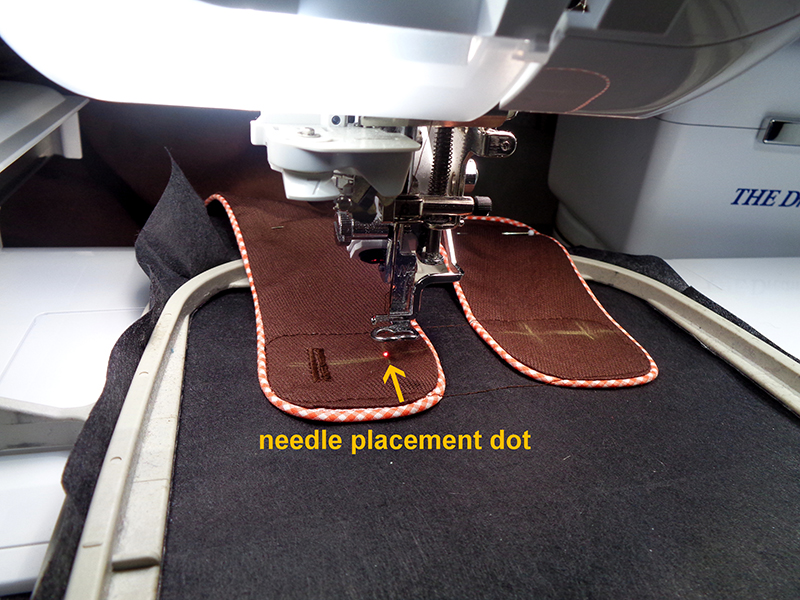
Overview: Notice the red dot which shows exactly where the center of the design will be. The first box highlighted above does that for you. The front straps were pulled to the front. The buttonholes there were embroidered in the same manner in the same frame just in front of the back straps. It required only one hooping. That’s nice.
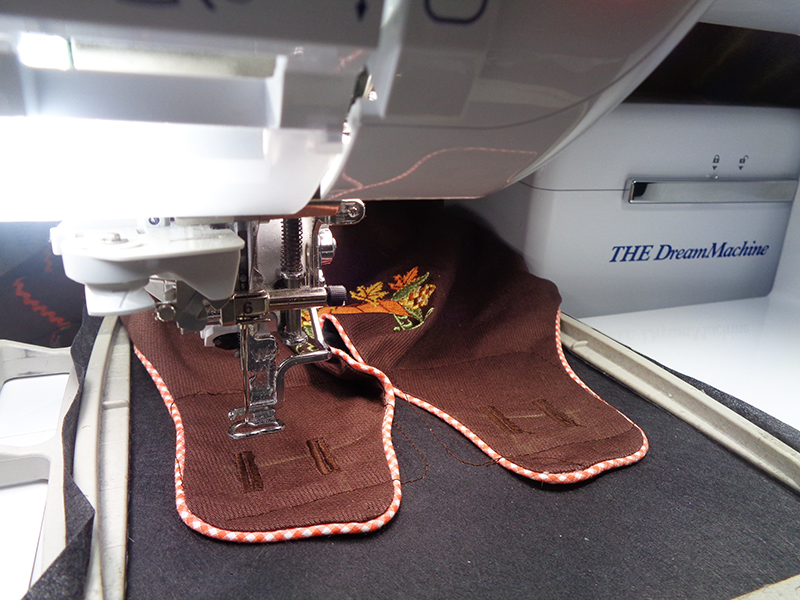
- Remove straps from frame. Cut open buttonholes.
- Overlap straps and tie inserted ribbon. But pay attention. Can you spot the boo boo in this photo?
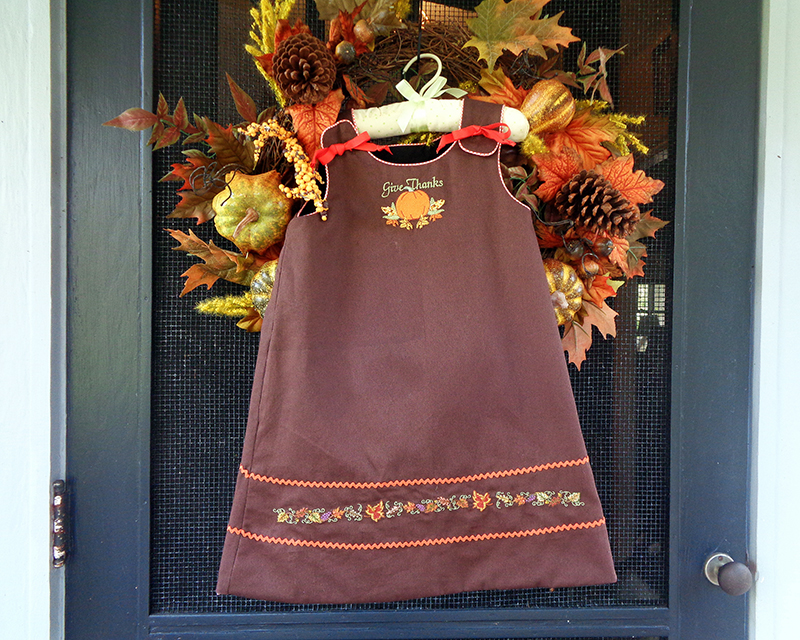 With one garment you cover two holidays. This same easy reversible technique can be applied to many other patterns. Happy Halloween and Happy Thanksgiving to all you dear readers.

