His and Hers Appliqué Mickey & Minnie Roadsters
Kids of all ages will love the very detailed and delightful embroidery designs in Disney’s Mickey Roadster collection. And it’s not just for the boys. Minnie is racing in the fast lane just like Mickey! With your Disney embroidery machine you can stitch roadster fun on garments, backpacks or one-of-a-kind brother/sister outfits like these little bubbles. This Mickey's Roadsters collection is available at Brother’s iBroidery.com
and includes designs for the 4x4 hoop as well as 5x7. I love, love, love the appliqué feature on my Brother embroidery and sewing machine, THE Dream Machine®!
Pairing the XV8500D and its' accessory feet with Disney’s adorable new Mickey's Roadsters collection made these little bubbles easy while helping me around a challenge. Like all large, detailed designs, these are stitch intensive. Minnie’s 4.05" X 5.69" race car requires a sturdy fabric for support. Mickey’s roadster is slightly larger measuring 4.72" X 5.80". The challenge was that the ginghams I wanted to use are light-to-medium weight, not heavy enough to support the designs. So the embroideries were stitched through the gingham as well as rugged poplin, all stabilized with cutaway. This appliqué gave the embroidery the support it needed. THE Dream Machine’s remarkable feature gives you a trim line to which a perfectly shaped satin stitch is applied.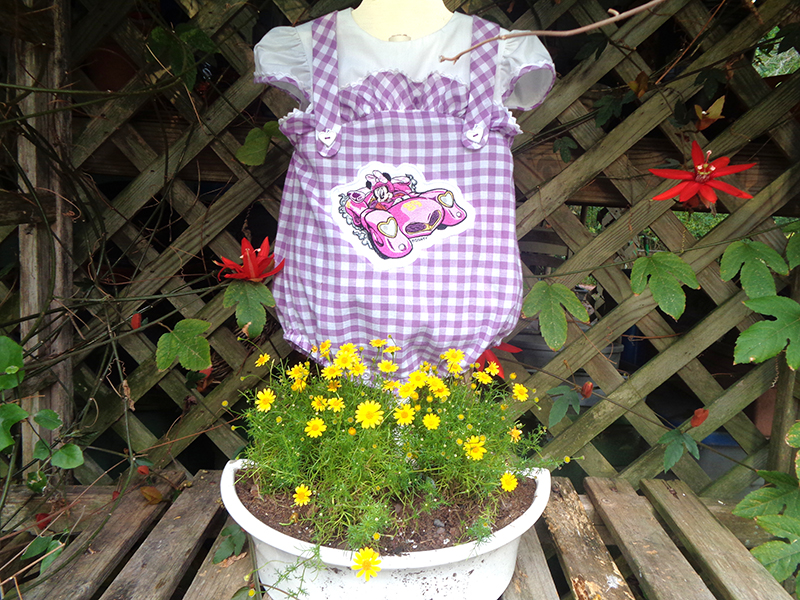
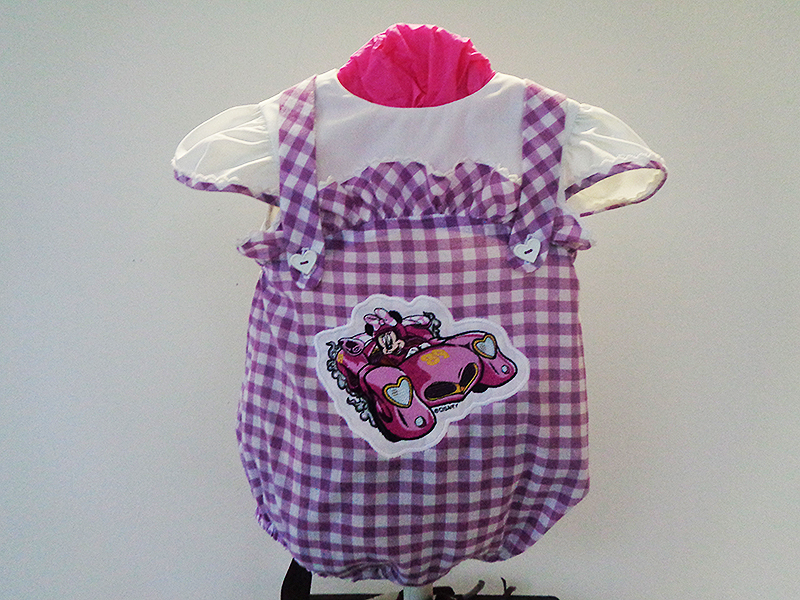
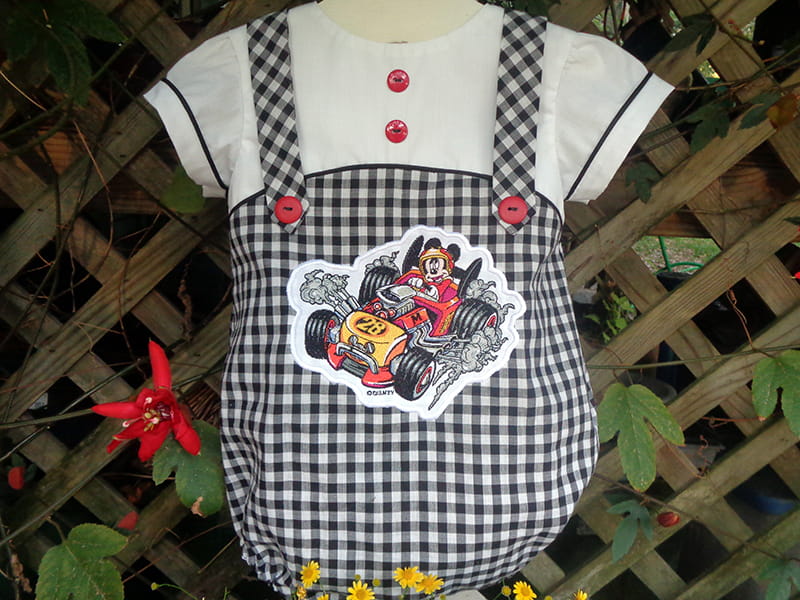
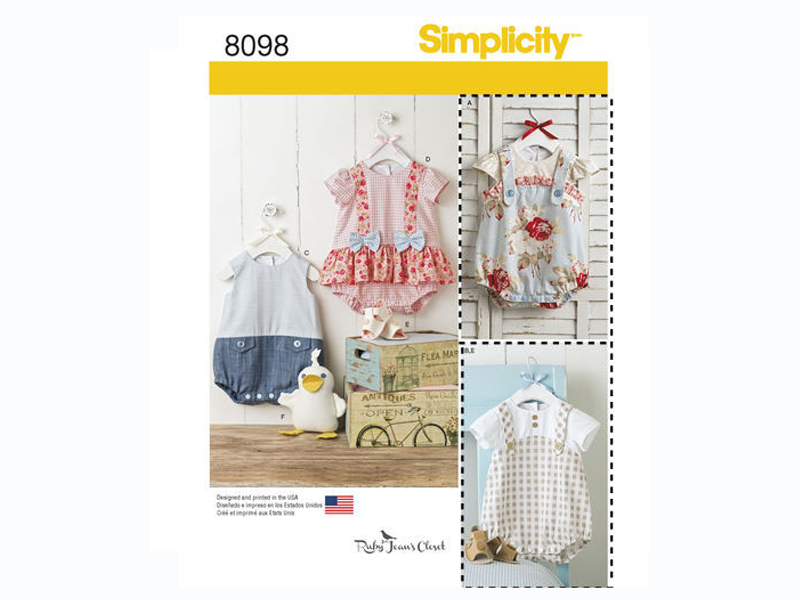 The options for size and design are numerous. But even better is the blank canvas it offers for the addition of other embellishments. For the Mickey Roadster bubble, machine embroidery, bias sleeve binding, and scallop trims have been added to Minnie’s version.
The pattern’s guide sheet instructions are clear and more than adequate. The only features addressed in this tutorial are the extra design additions.

 Notice a satin stitch surrounding the design has been added. Making an appliqué of the design does much more than add a satin stitch. Read on. Also note that the distance between the embroidery and the satin stitch can be adjusted on page 8 in the information section in the pink boxed page icon in the above image. Other options are available, such as satin stitch width.

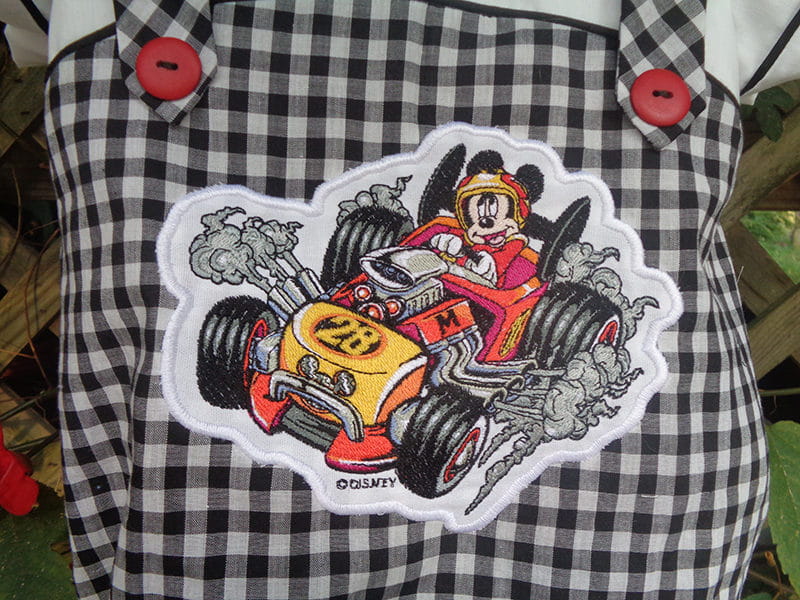 With a few modifications, Mickey’s Roadster bubble, View B, was constructed as directed in the pattern’s guide sheet.
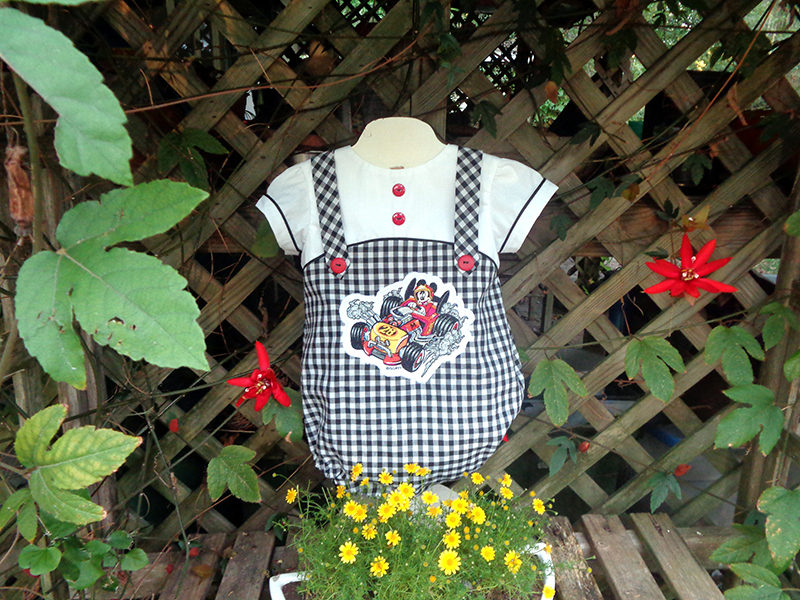
 Wouldn’t any little guy look adorable in this?
and includes designs for the 4x4 hoop as well as 5x7. I love, love, love the appliqué feature on my Brother embroidery and sewing machine, THE Dream Machine®!
Pairing the XV8500D and its' accessory feet with Disney’s adorable new Mickey's Roadsters collection made these little bubbles easy while helping me around a challenge. Like all large, detailed designs, these are stitch intensive. Minnie’s 4.05" X 5.69" race car requires a sturdy fabric for support. Mickey’s roadster is slightly larger measuring 4.72" X 5.80". The challenge was that the ginghams I wanted to use are light-to-medium weight, not heavy enough to support the designs. So the embroideries were stitched through the gingham as well as rugged poplin, all stabilized with cutaway. This appliqué gave the embroidery the support it needed. THE Dream Machine’s remarkable feature gives you a trim line to which a perfectly shaped satin stitch is applied.
DESIGNER TIP: The owner’s manual gives clear directions for another method. If you haven’t yet tried this great technique or the variation used here, read below for this alternate, easy step-by-step process.


Minnie Roadster Bubble

MACHINE & ACCESSORIES USED:
- THE Dream Machine® Innov-ís XV8500D
/THE Dream Machine® 2 Innov-ís XV8550D - 8x8 frame (options for a 5x7 frame are also listed below in post)
- SA184 Edge Joining Foot
- SA178 Side Cutter
- SA120 Gathering Foot
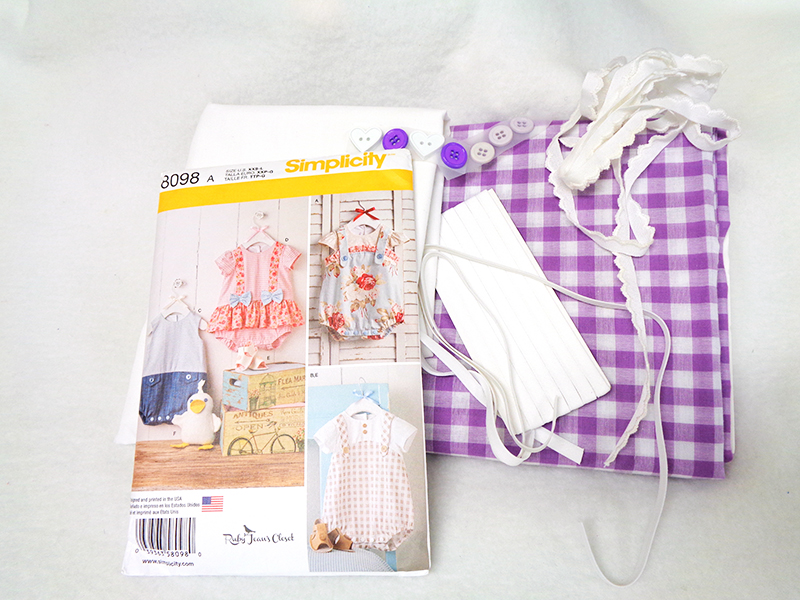
Materials and Supplies
- 5/8 yd. Wisteria Gingham fabric
- 3/8 yd. White Broadcloth
- Two 6" x 8” White Poplin pieces or another sturdy fabric for embroidered appliqué
- Cutaway stabilizer
- ¼ yd. double fold bias ½” wide
NOTE: You only need a short piece of 2” wide bias. I used a scrap of the same white fabric as that used on the bodice. For the 18 month size I cut 10” x 2” and had a little left over. Making your own is easy peasy.
- Buttons: two ¾” for front straps, two or three ½” for back opening, 4 snap fasteners or 3 buttons for the crotch
- ¾ yd. elastic ¼” wide
NOTE: The 5x7 hoop which comes with Brother’s Quattro
, Duetta
and other machines is large enough if the distance between the embroidery and the satin stitch is minimized. I think Minnie’s bubble would have been more attractive if I had remembered to adjust that distance. Notice the closeness of the satin stitch on Mickey’s bubble.
, Duetta
and other machines is large enough if the distance between the embroidery and the satin stitch is minimized. I think Minnie’s bubble would have been more attractive if I had remembered to adjust that distance. Notice the closeness of the satin stitch on Mickey’s bubble.
- 1 yd. scallop trim or lace 3/8” wide for ruffle and sleeves
 The options for size and design are numerous. But even better is the blank canvas it offers for the addition of other embellishments. For the Mickey Roadster bubble, machine embroidery, bias sleeve binding, and scallop trims have been added to Minnie’s version.
The pattern’s guide sheet instructions are clear and more than adequate. The only features addressed in this tutorial are the extra design additions.
- Cut out pattern as directed.
NOTE: The bodice is designed to be lined. Because the gingham is very light weight, lining was also cut for the straps. The sleeves are a single thickness.
Embroidery
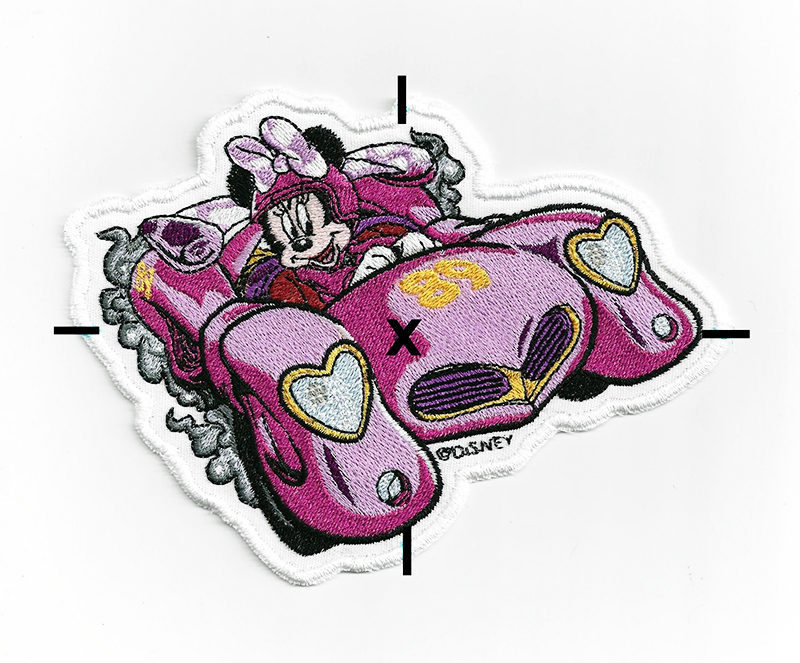
Stitch a sample of the design in order to select the perfect threads to coordinate with your chosen fabric. The finished embroidery sample also will be used as a placement template for the final embroidery which will be stitched and appliquéd to the gingham. Take care to mark the center of the design as well as the horizontal and vertical axes. Note that the design is digitized to be angled.- Load iBroidery.com design Minnie Roadster MKRS05
in to the machine from your memory stick and open the file MKRS05.

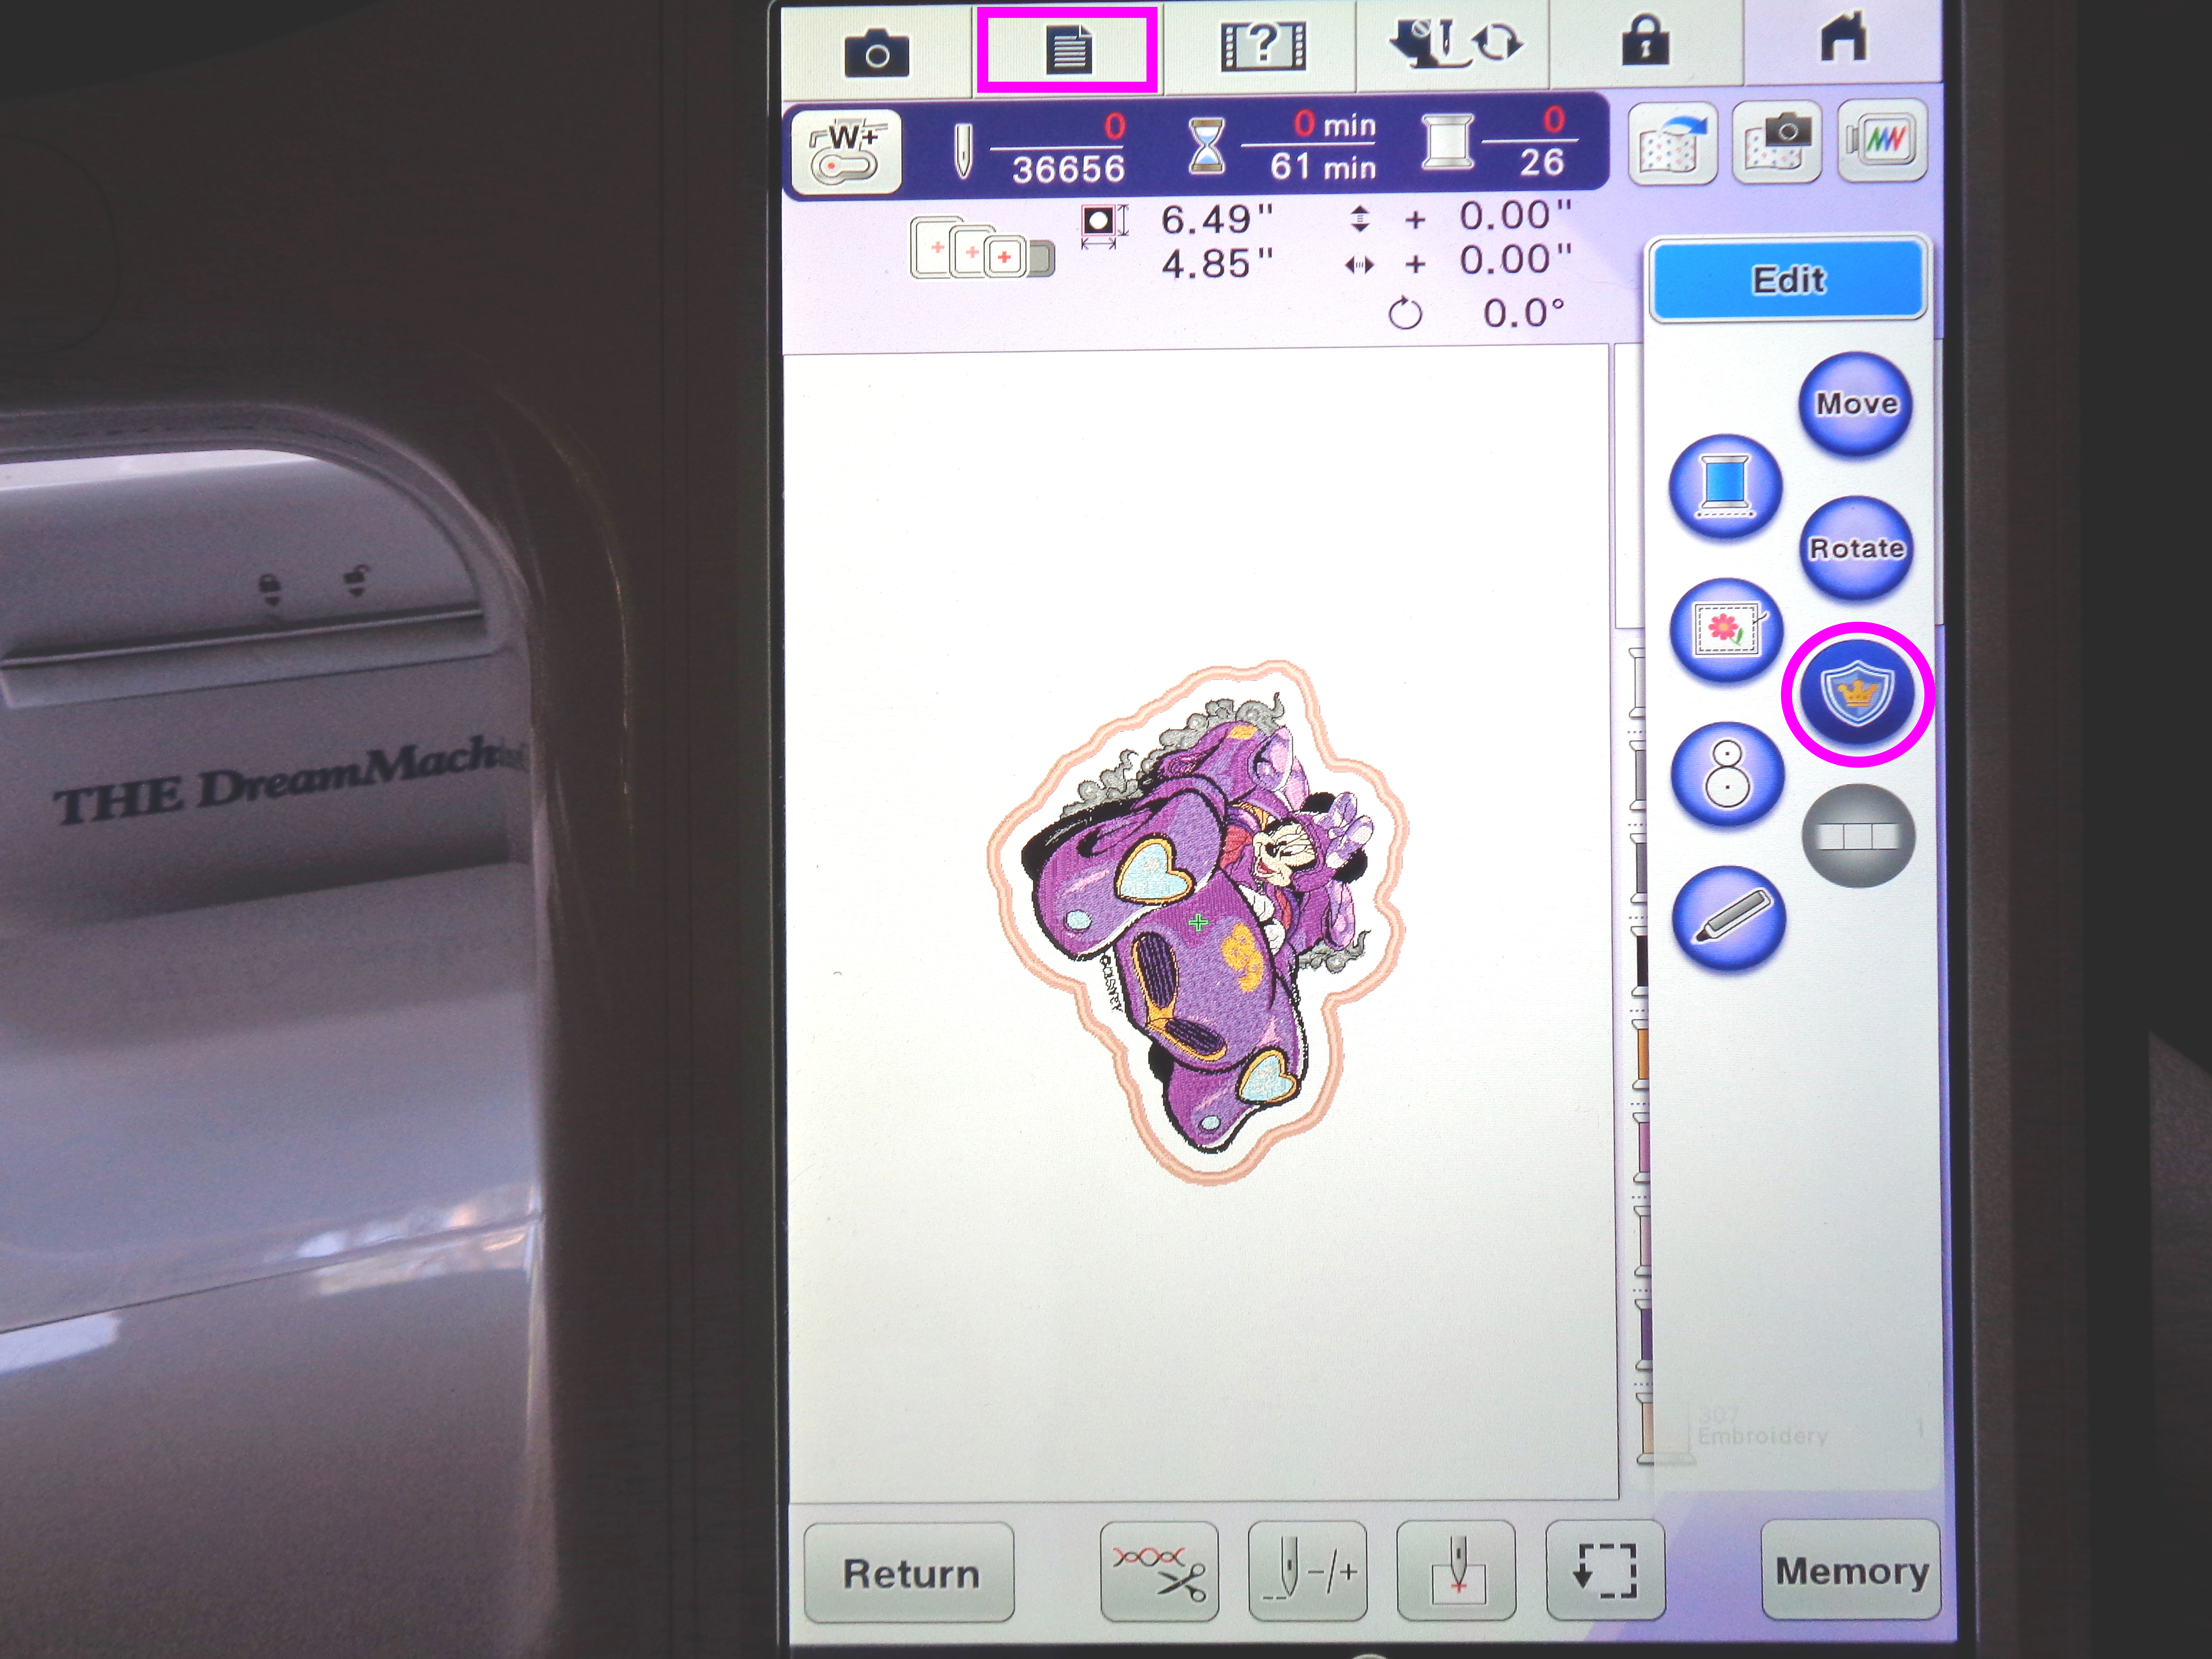
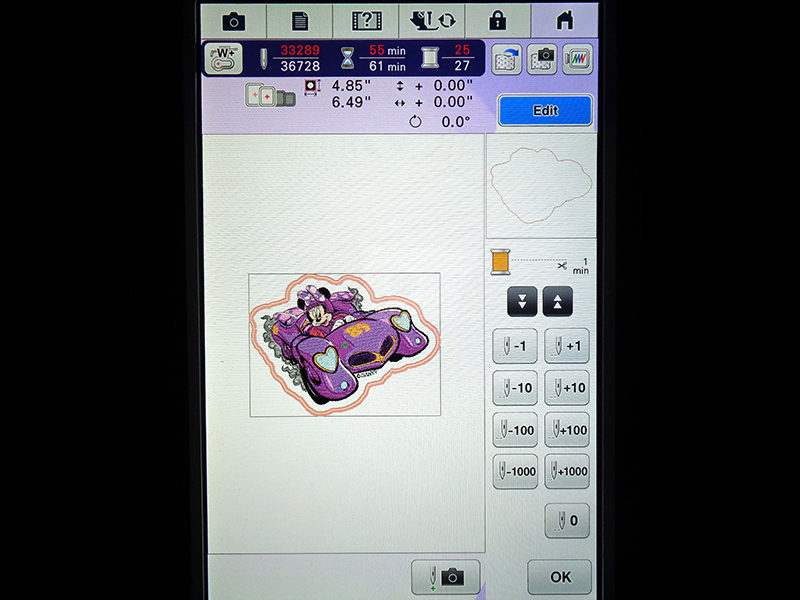
- Tap Set then the embroidery screen will open. After selecting Edit, the option of appliqué is available by choosing the Badge icon. See the circled button in the image below.
 Notice a satin stitch surrounding the design has been added. Making an appliqué of the design does much more than add a satin stitch. Read on. Also note that the distance between the embroidery and the satin stitch can be adjusted on page 8 in the information section in the pink boxed page icon in the above image. Other options are available, such as satin stitch width.
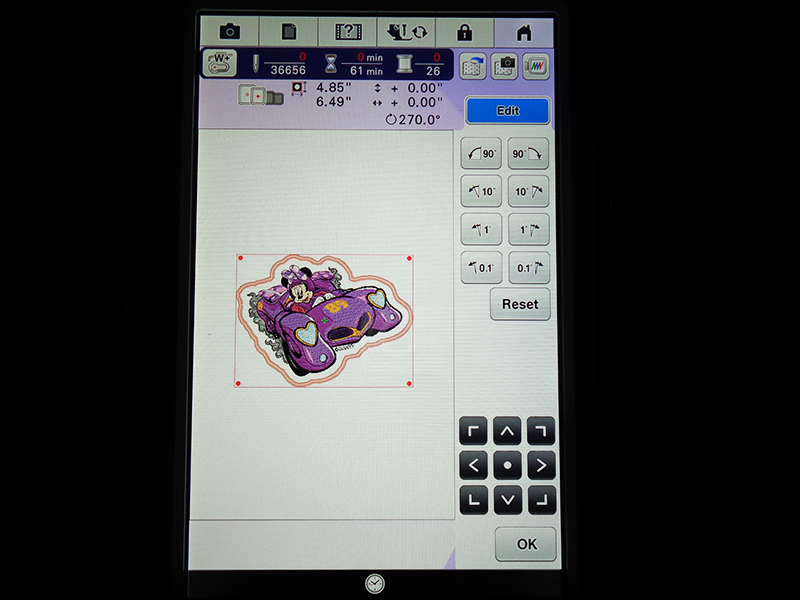
- Edit to rotate the design 90 degrees as shown below for an 8x8 frame. Leave the position vertical as shown above for a 5x7 frame if embroidering without the appliqué feature.

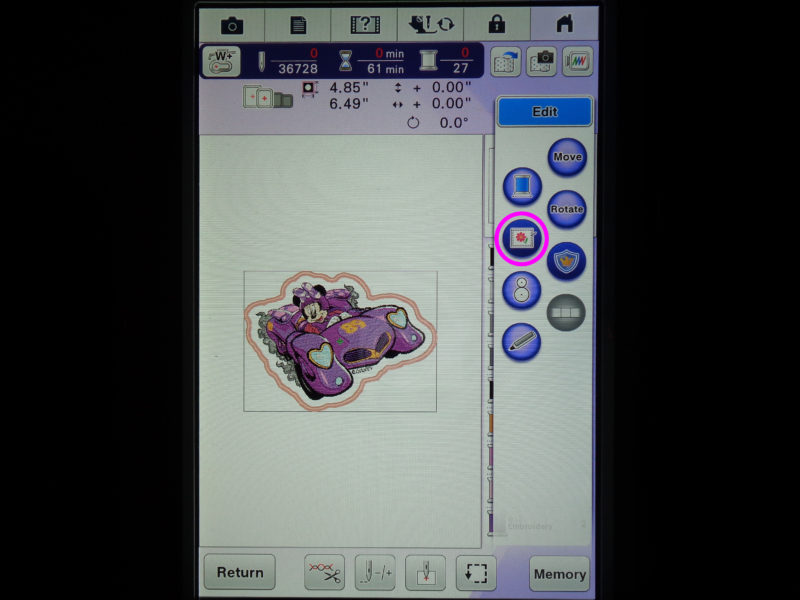
- Edit once again to add basting frame. See the circled button in the image below.

- Hoop cutaway stabilizer and sturdy white fabric in 8x8 or 5x7 frame.
- Embroider Minnie and her roadster, MLRS05.
- Mark design’s center, vertical and horizontal axes before removing from the frame as shown in the image below.
- Trim close to the satin stitching so the embroidery can be used as a template for placement on the lower front.
- Mark design center on lower front. Use embroidery template for placement, keeping the marked axes at north, south, east and west.

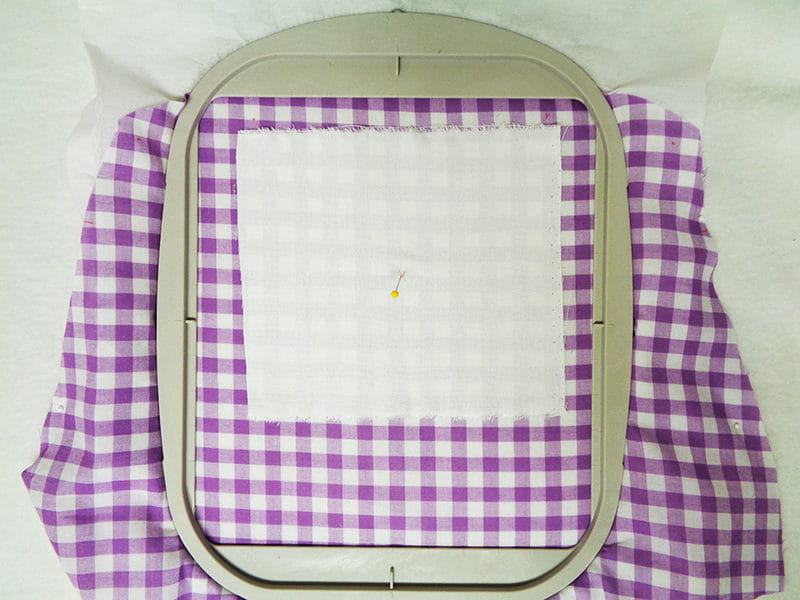
- Hoop cutaway stabilizer and lower front piece.
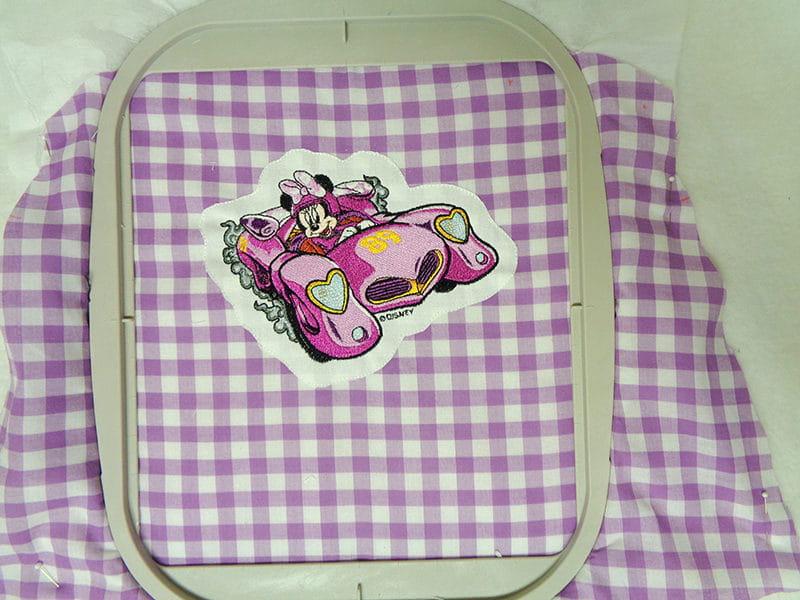
TIP: Take care that the lower front is placed low enough in the frame that the design can be stitched. The top of the gingham piece may not be completely secured within the frame but that’s okay. Especially for sizes smaller than 18 months, you may choose to spray baste the gingham to the cutaway for extra security as you insert the piece into the frame. The top of the gingham piece will likely fall below the top of the frame. But that will create no problems. The area to be embroidered will be basted through the appliqué fabric, through the gingham and through the cutaway stabilizer, securing it all together.
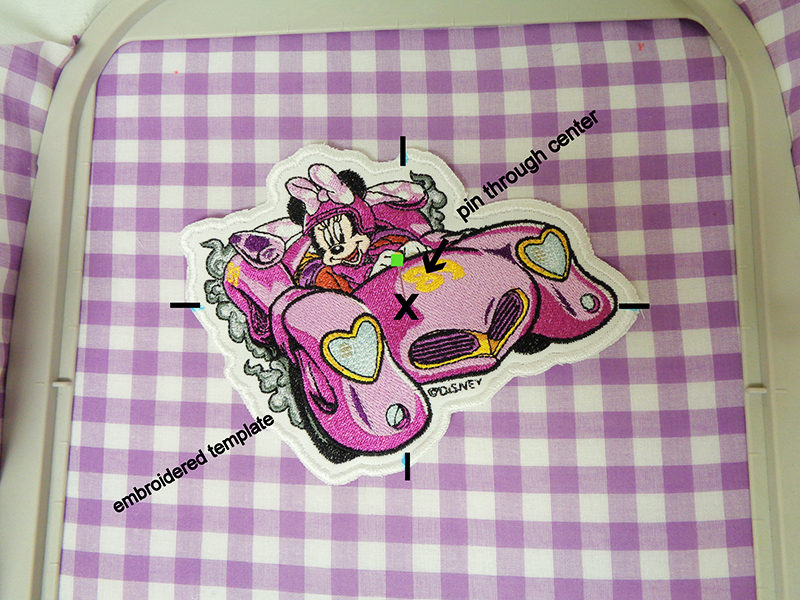
- Place embroidered template where it suits you. Remember to consider the seam allowance when placing the embroidered template. Mark design center on bubble lower front.

- Insert a pin through the center of the sample embroidery and through the marked center of the lower front to be certain the design will be placed properly. Remove the embroidered template.
- Cut a piece of the sturdy white fabric 5 ½” x 7” wide. Mark the center.
- Use basting spray or glue stick to secure white fabric to gingham, matching centers.

- Baste white fabric to gingham with the first color, the basting frame.
- Embroider Minnie and her roadster, stopping after completion of the first outline stitches.

- Remove frame from machine but DO NOT REMOVE FABRIC FROM FRAME. Place frame on flat surface and trim very close to stitching.
- Stitch second outline which would be used for placement if the embroidery had not been stitched through both fabrics. In this case, it may add a little more security, but you may skip this second outline.
- Embroider the last color in the design, the satin stitch.
NOTE: It is recommended that the satin stitch be worked in thread the same color as the appliqué fabric. So on this sample, it is stitched in white.

STRAPS
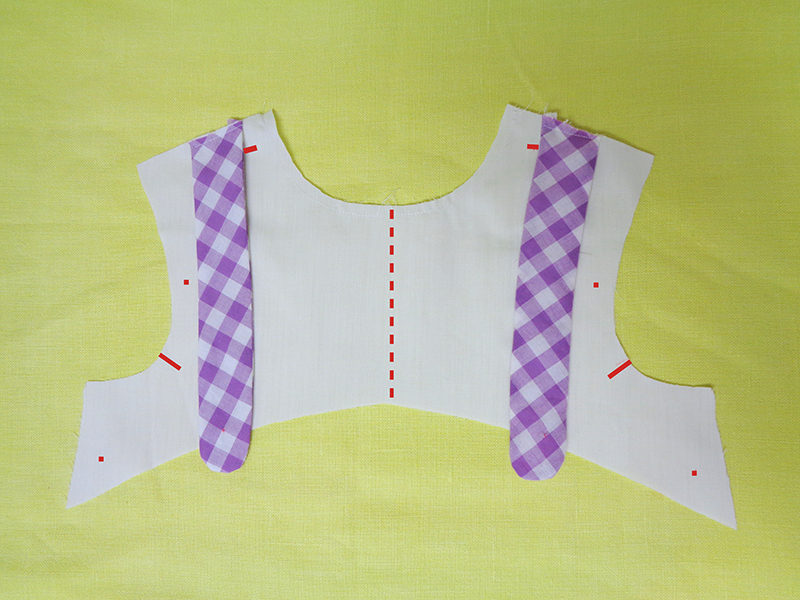
The directions are very straight forward. But remember to add the lining. This photo is included as a reminder to point the straps toward the waist and to include all markings. Finish straps as directed, marking where indicated.- Join the straps to the upper front yoke, aligning the markings and stitching within the seam allowance.

RUFFLE
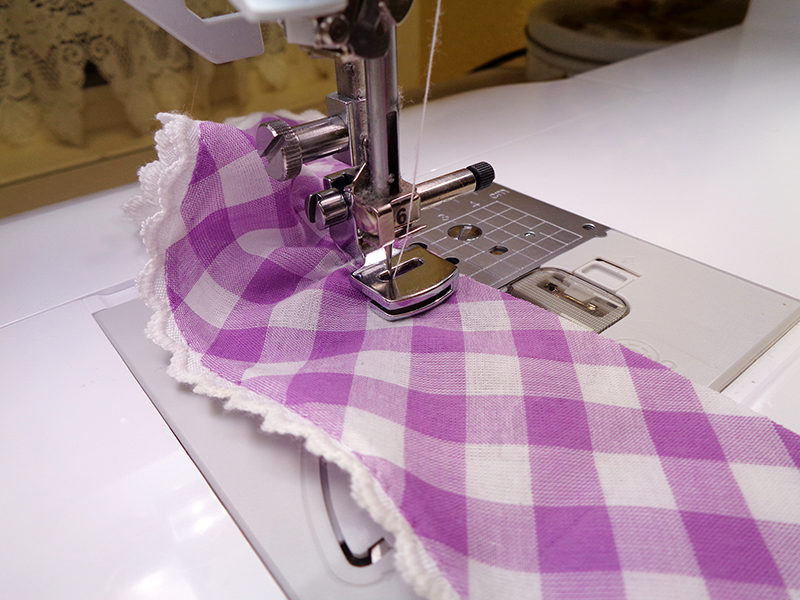
- Finish one long side of ruffle with shirt tail hem or add trim, as shown.
- Use Gathering Foot SA120 to gather ruffle to the same width as the yoke, where it will be attached.

- Stitch ruffle to lower front as shown in pattern guide sheet.
SLEEVES
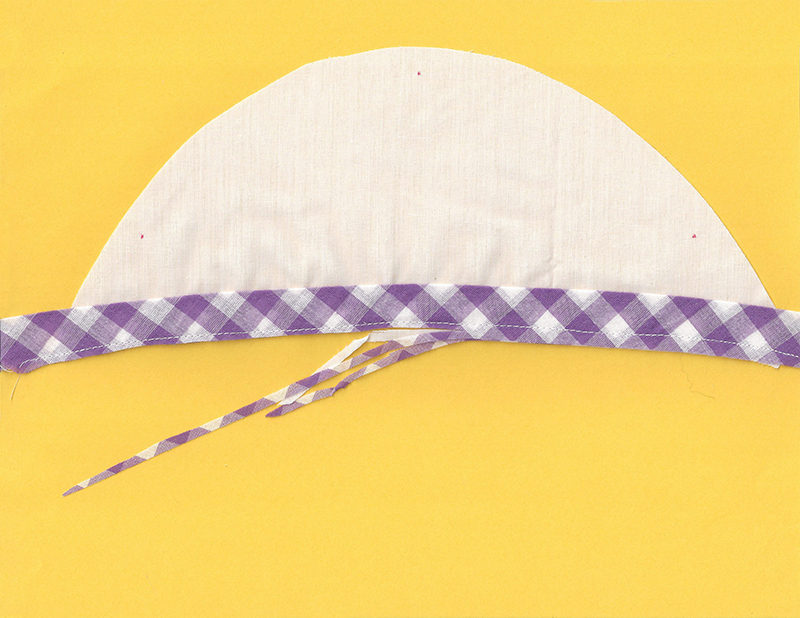
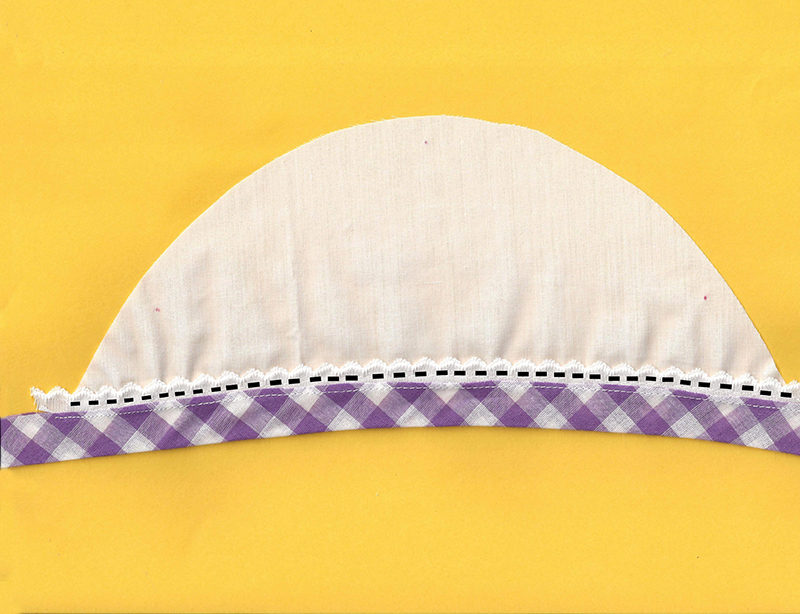
- Sew 5/8” hem as directed or add bias cut binding from the gingham.
- To bind with bias gingham binding: Cut 1/4" from the hem edge of the sleeve. The sleeve pattern allows for a 5/8” seam but the gingham binding treatment requires only ¼”for the seam allowance. The bias trim adds 1/8”. So removing 1/4” will maintain the intended sleeve width.
- Cut 11” of gingham bias 1 ½” wide then press in half lengthwise, per sleeve. (Bias binding piece 11" x 1 ½” per sleeve.)
- Match raw edges of sleeve and bias trim. Seam together on right side of the sleeve with 1/4” seam. Use of ¼“ foot SA185 and ¼” mark on the bobbin cover for guidance increases accuracy.

- Trim seam to 1/8”.

- Press folded edge of bias away from sleeve. Tuck trim snugly under 1/8” seam allowance. Baste in place.

- Wrap bias around 1/8” seam and up to base of trim scallops. Baste.
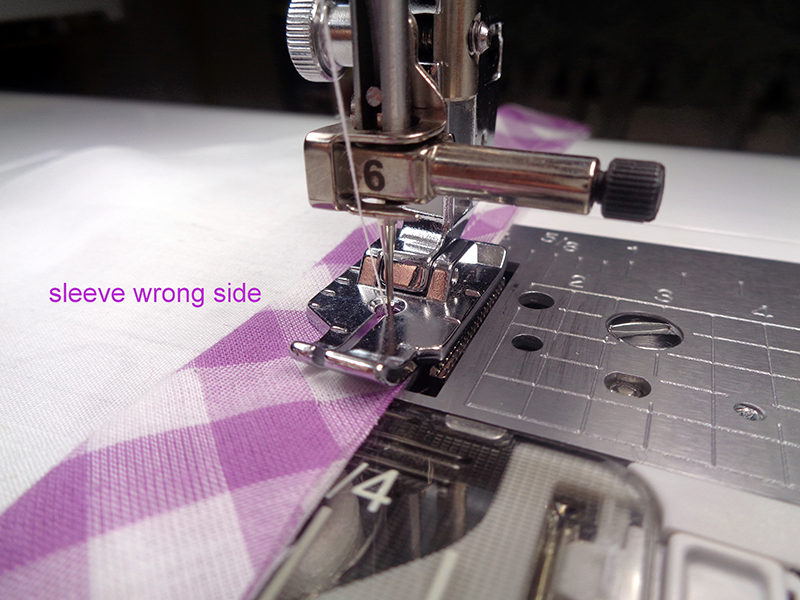
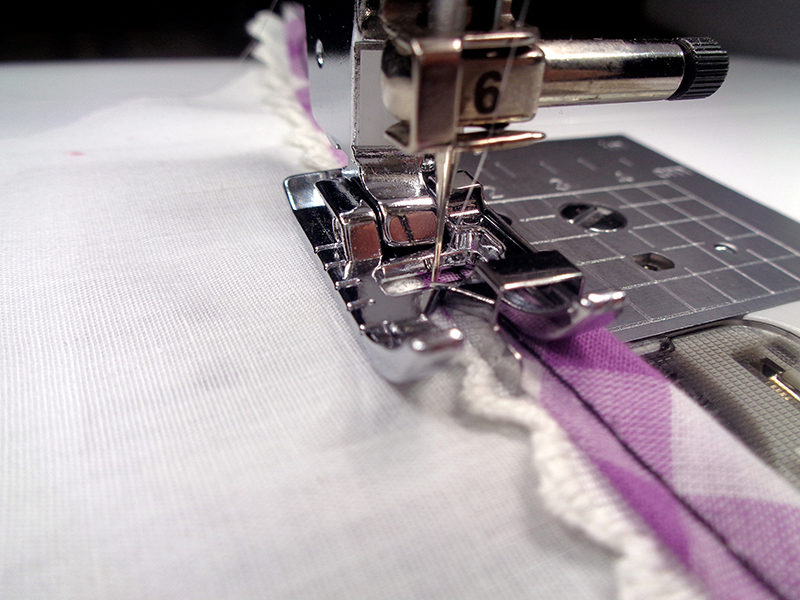
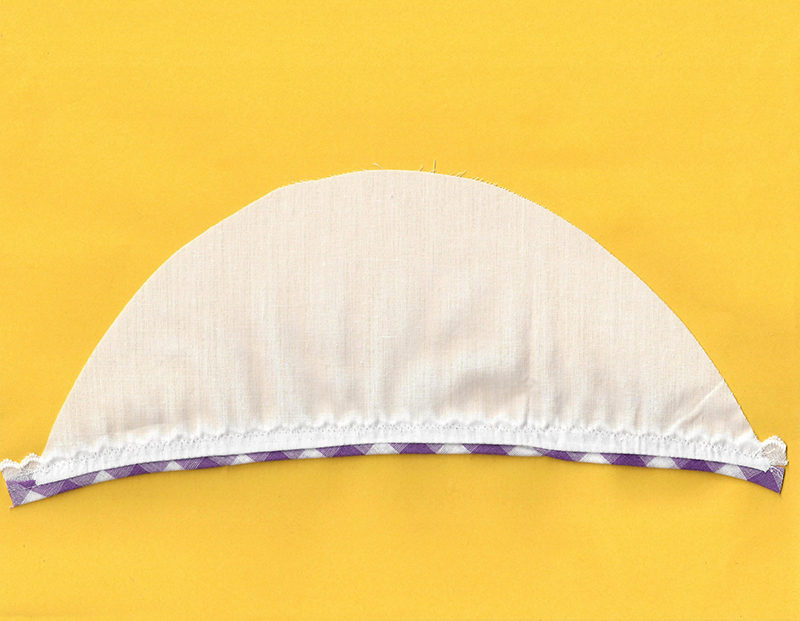
- Join bias binding to sleeve with zig zag utility stitch 1-10, W 1.0, L 1.4. Edge joining foot SA184 give precise results. This foot, in combination with monofilament thread and a #60 needle, makes the stitching nearly invisible. (In my humble opinion) this is one of the most useful feet available. For joining lace, for topstitching and for a multitude of other uses, this foot is invaluable. CAUTION: Do not use the needle threader with monofilament or the #60 needle.

- Remove basting threads.


- Follow guide sheet instructions to stay stitch necklines and construct bodice.
- Finish seams.
NOTE: The seams were finished with overcast stitch # 1-18 in the utility stitch menu on THE Dream Machine®. If you have the side cutter SA178, you will see that this is a great way to finish seams neatly.
- Follow guide sheet instructions to construct lower/gingham portion of the bubble with its Minnie Roadster embroidery, join it to the bodice, complete the elasticized leg openings and crotch placket.
FINISHING TOUCHES
- Add buttonholes and buttons to back bodice and straps.
- Add snaps or buttons and buttonholes to crotch.
- FINISHED! Now wasn’t that fun?
Mickey Roadster Bubble
 With a few modifications, Mickey’s Roadster bubble, View B, was constructed as directed in the pattern’s guide sheet.
- Download the Mickey Roadster design (MKRS04) from iBroidery.com
. - The seams were finished. THE Dream Machine® offers a variety of stitches for this purpose. I like overcast stitch # 1-18 in the utility stitch menu. If you have the Side Cutter SA178
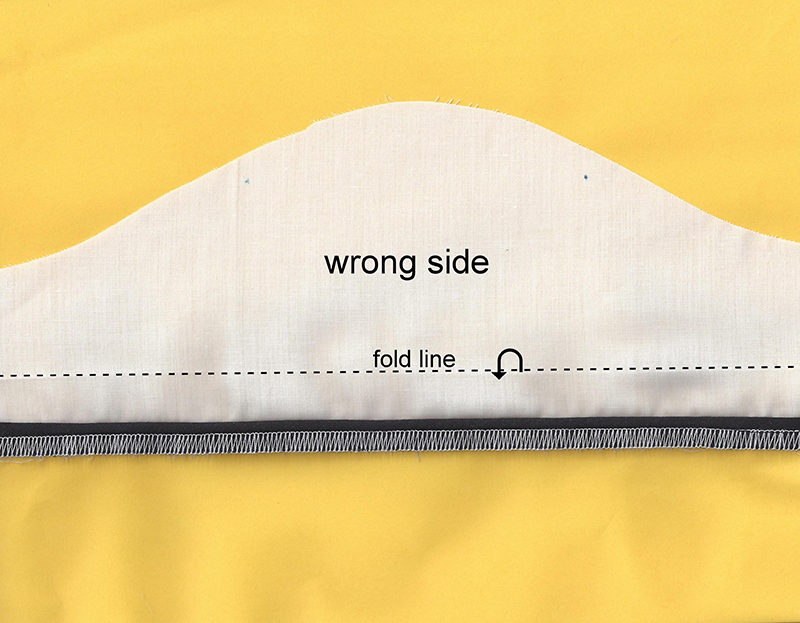
, select a stitch from the utility menu with S following the number. You will see that this is a great way to finish seams quickly and neatly. - Black piping was added across the gingham front and on the sleeve.
- The sleeve hem was folded to the front and piping stitched to the raw edge.

- The hem was then folded under. The piping was tucked under the hem and stitched in the ditch with monofilament thread. With the Edge Joining Foot SA184
, this step is quick and accurate.
 Wouldn’t any little guy look adorable in this?

-
The Disney embroidery patterns offered on this website are for personal non-commercial use only.
-
Simplicity Pattern #8098 is a product of Simplicity Pattern Company Inc., and Brother International Corporation makes no representations or warranties regarding such products.

