Free Design of the Month for August – Embroidered Friendship Mini Pillow

Did you know August 7th is widely celebrated as National Friendship Day? Celebrate by giving the gift of a strikingly colorful pillow, created with the Brother Free Design of the Month as the focal point. This design is especially nice for gardening friends. However, the pretty embroidered flowers and flowerpots are sure to show anyone how much you value their friendship. I’ve added one of my favorite accents in the form of what I like to call striped piping, made by using SA150, the Brother Pearls and Sequins Foot, which is also ideal for dressmaker size piping. Wait till you see how easy it is to make this unique trim! Are you ready? Let’s go sew!
Materials and Supplies for Zip Code Pillow:
- Brother sewing and embroidery machine with 6-inch X 10-inch or larger hoop capability.
- SA580 Brother medium-weight tear-away stabilizer for embroidering.
- SA150 Pearls and Sequins Foot for creating striped piping.
- Embroidery threads and size 11 embroidery needle for embroidering.
- Brother Foot “G” Overcasting Foot for clean finishing raw edges.
- Brother Foot “M” Button Sewing Foot for tacking ribbon in place.
- One package of pre-purchased 1⁄2-inch wide Maxi Piping to coordinate with pillow fabric.
- Basic sewing notions including thread to match fabric, a hand sewing needle, and embroidery thread for trimming piping.
- Fiberfill for stuffing pillow form.
- One 15-inch piece of 1/8 to ¼-inch wide satin ribbon to coordinate with design colors.
- BrotherFree Design of the Month.See Figure #1a and Figure #1b below.
- Paper pattern for pillow created by rounding corners of an 8 ½” X 11” piece of paper. Note: I used a glass with a 3-inch diameter to round corners.
- Fabrics for pillow:
- For pillow front: Medium weight cotton or linen fabric backed with medium weight fusible interfacing. Note: I prefer fusible interfacing design for cuffs and collars on shirts. Important: You will need front fabric piece cut to fit your selected hoop, making sure it is large enough for use with the pillow pattern after embroidery is completed.
- For pillow back: Matching medium weight cotton or linen fabric, two pieces measuring at least 13- inches wide X 10-inches long.
- For pillow insert: Muslin or light weight cotton, two pieces measuring at least 8-inches wide X 11-inches long.
Note: Finished pillow measures approximately 10-inches wide X 8-inches long. Please read through all instructions before beginning this project. Featured embroidery design fits a 6-inch X 10-inch or larger hoop. You can use any one of many Brother embroidery and sewing machine models to complete this project. Featured machine in the instructions is the XP3 Luminaire 3.
Figure #1a

Figure #1b

Basic steps to create pillow are as follows:
- Create pattern for pillow.
- Prepare fabric to fit hoop and pattern, then embroider design using desired colors.
- Cut pieces for pillow front, back, and pillow insert.
- Create piping, add to pillow, and sew pillow together.
- Add ribbon to pillow front.
- Create pillow insert and stuff pillow.
All Steps to Create Friendship Pillow:
- Transfer design to your machine. Place interfaced fabric in the hoop. Cut a piece of tear away stabilizer to fit entire area under hoop. Layer stabilizer underneath hooped fabric and embroider design. Tip: I frequently change thread colors for a design. When a design has lots of different colors I will often try to repeat selected colors where possible. This not only minimizes the amount of thread spools needed, but it can also help tie the color scheme together. See completed embroidery design in Figure #2.
- Remove piece from hoop, remove excess stabilizer, then press. Center pattern over embroidery and cut out front piece. See Figure #3a and Figure #3b. Figure #3a
- Center pattern over pieces cut for pillow insert and cut to fit pattern. See Figure #4.
- To prepare back pieces, begin by folding pattern in half crosswise, marking a line for the center and cutting pattern in half. Fold each of the back pieces in half crosswise, then place pattern on top with 1-inch extending at the foldline. This extra inch at the foldline will create an overlap for each piece. Trim fabric to match pattern. See Figure #5.
- Gather your front and back pieces, your piping, and decorative thread for accenting piping and creating striped trim. See Figure #6.
- Set up machine for sewing and attach presser foot “G.” Select a zig zag stitch and overcast raw edges of front and back pieces. See position of the foot for overcasting in Figure #7.
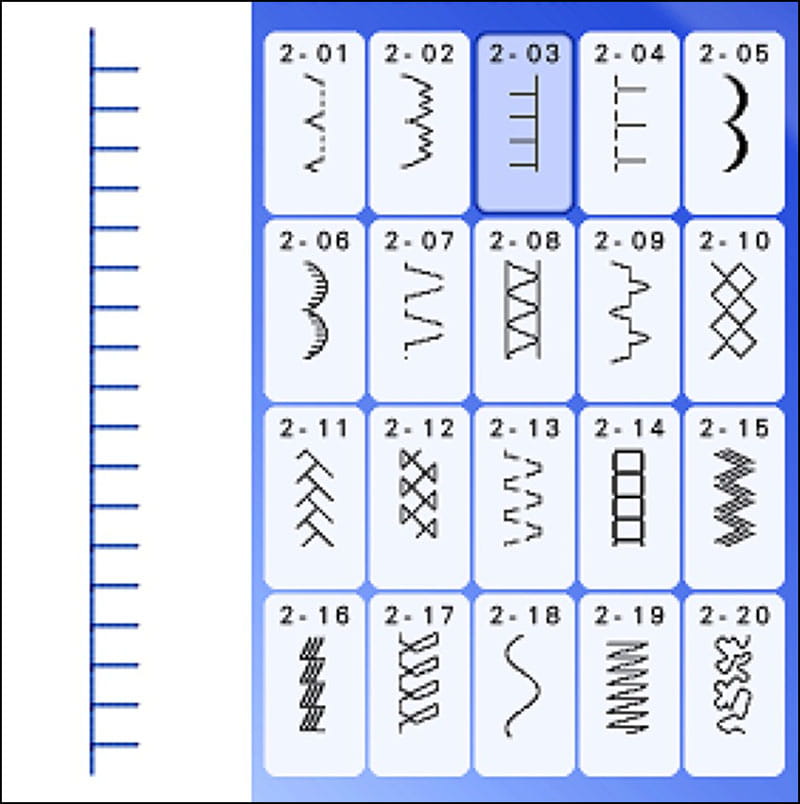
- Cut a length of piping to go all around outer edge of pillow front, adding several extra inches to overlap piping at the beginning and end. To create striped piping, set up machine for sewing with embroidery thread in top and bobbin. Attach pearls and sequins foot. Select a plain blanket stitch using a long stitch length and a width set to cover the piping. Stitch featured in this example is Luminaire stitch No. 2-03, width 6.0, length 4.5, with a slightly increased tension setting of 4.6. I mirrored the stitch to sew the blanket stitch on the right-hand side of the piping. Locate a similar stitch on your machine and change settings to mimic the stitch shown in Figure #8.
- Pin piping around outer edge of pillow front, easing piping around curves and leaving a little excess where ends cross over at the center of the bottom edge. See Figure #11.
- Switch to thread that matches fabric. Set up for basting piping to pillow front by selecting a straight stitch, setting stitch length to 5.0 and needle position to 7.0. With the needle moved to the far right, the basting stitch will form next to the blanket stitch but not on top of it. Next, baste piping all around outer edge of pillow front, beginning and ending at the center of the bottom edge, overlapping piping in a criss-cross fashion where they meet at the center. Be sure to remove pins as you sew and adjust piping as needed. Note: At the point where cording overlaps the cording will no longer flow through the foot, you will need to sew right across the cording where it joins together. See Figure #12.
- Select pillow front and layer back pieces over the top, with right sides together and back pieces overlapping at the center. Pin layers together with pins well away from seam allowance, having back overlap secured. See Figure #13a and Figure #13b.
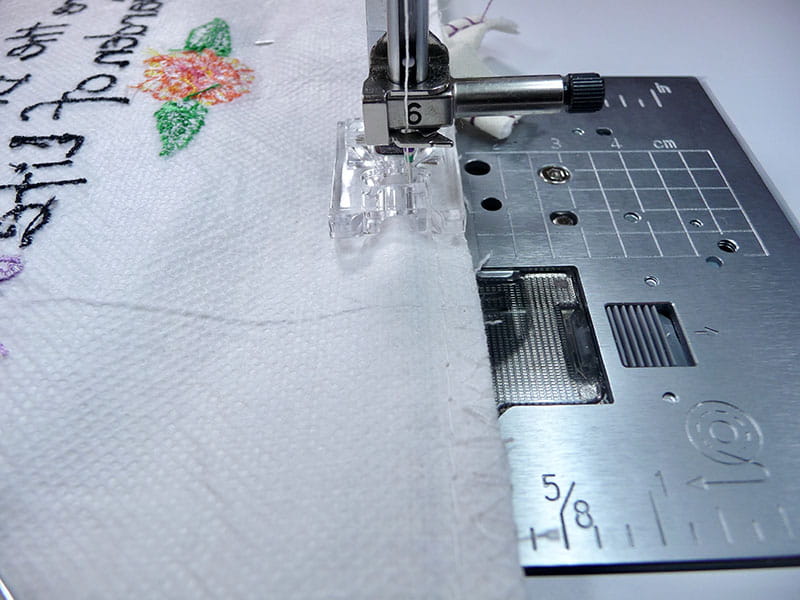
- Attach pearls and sequins foot. Set machine for a straight stitch with needle position set for 5.5. Sew all around pillow having cording under the channel of the foot and the edge of the foot running along the edge of the fabric layers. Note: When sewing this seam the straight stitch should be snug against the piping cord. See Figure #14.
- Switch to standard presser foot and create pillow insert as follows:
- Place pillow insert pieces right sides together and sew using a ¼-inch seam allowance, leaving a 3-4-inch opening along one long edge, having needle position set at 5.5 and sewing with the raw edge of fabric right along presser foot “J” for a perfect ¼-inch seam. Tip: I like to use a triple stitch to sew narrow seams on something like this pillow form. With this strong stitch corners are automatically reinforced.
- Trim a scant amount of seam allowance around corners to reduce bulk. Turn pillow form right side out and press lightly, pressing under seam allowance at the opening. Lightly stuff pillow insert through opening, then close opening with small hand stitches. See Figure #16.
- Find center of top edge of pillow and pin ribbon in place to prepare for attaching it. Thread machine with thread to match ribbon. Tip: I used embroidery thread. Place foot “M” on the machine and select button sewing stitch. See example of stitch in Figure #17.
- Slip pillow form into pillow through back opening. Tie ribbon in a neat bow. You are finished! Enjoy!
Figure #2

Figure #3a
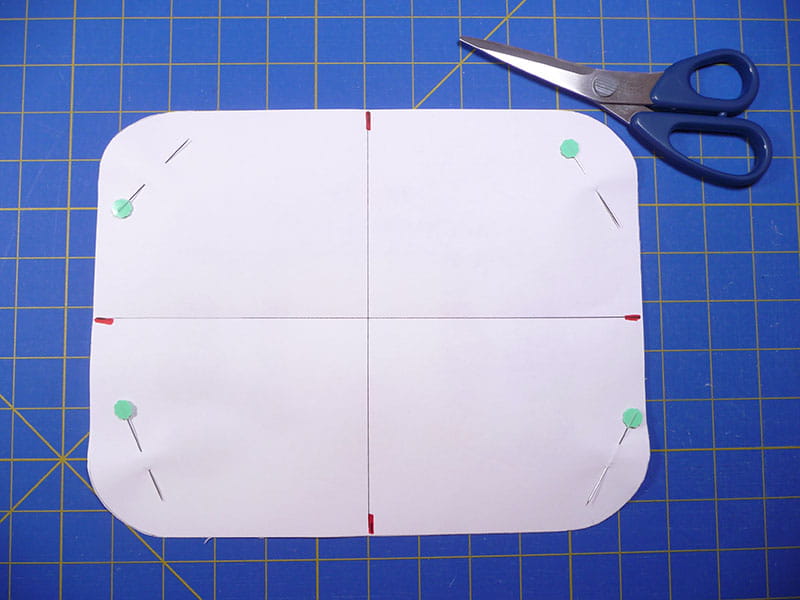
Figure #3b
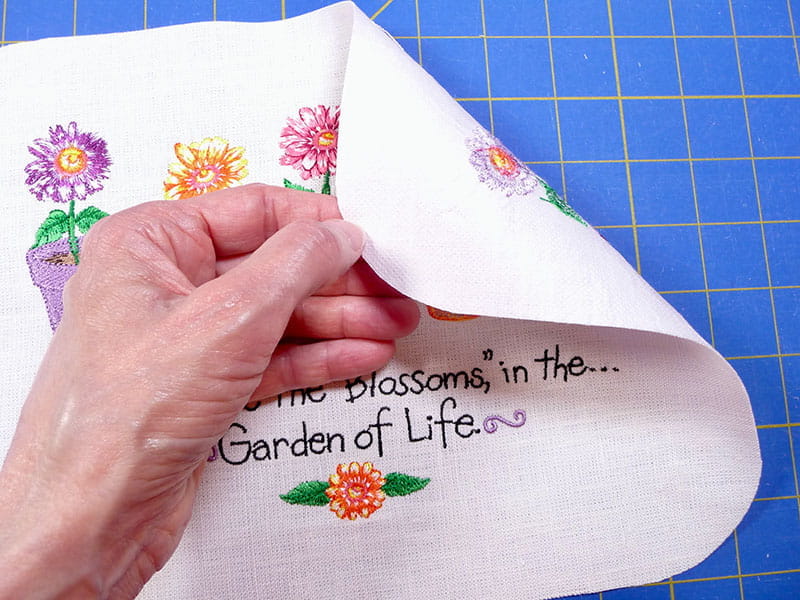
Figure #4
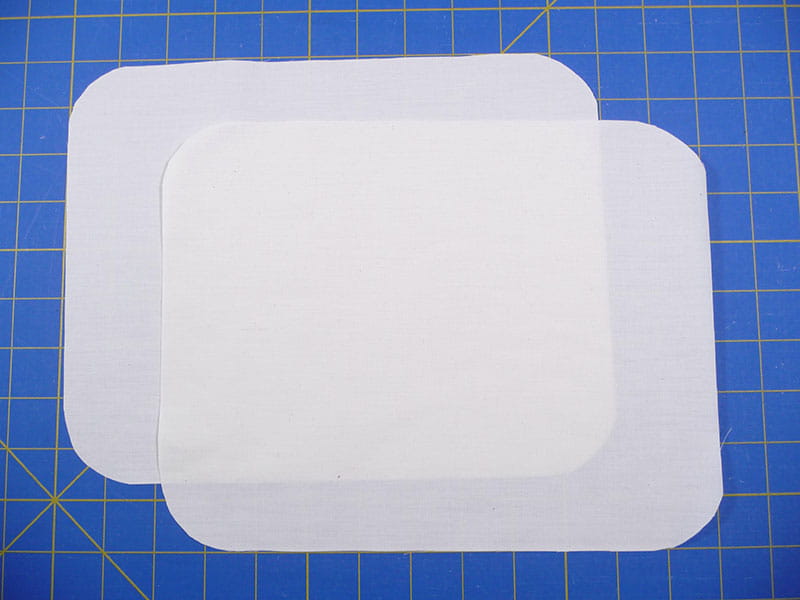
Figure #5
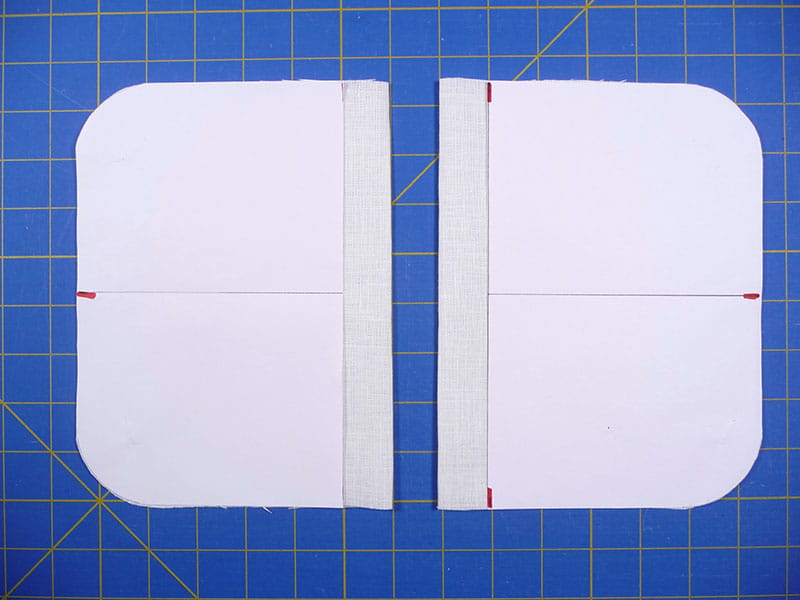
Figure #6
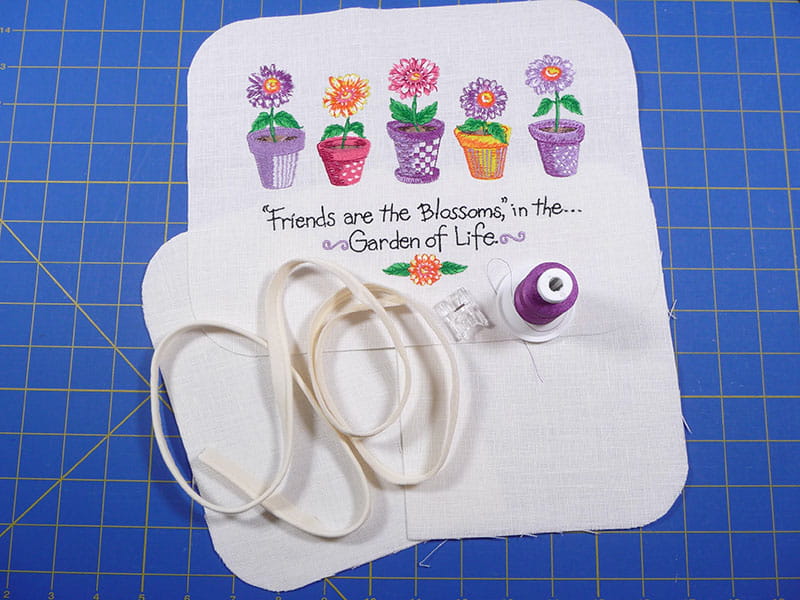
Figure #7
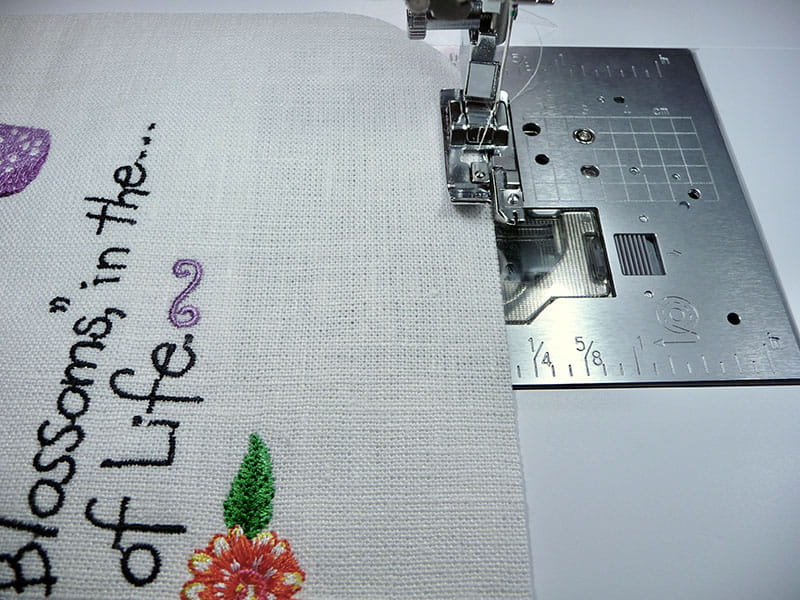
Figure #8
Tip: If you have a machine with the Brother My Custom Stitch feature you can create a wide blanket stitch very easily. You’ll find instructions in this archived Brother blog post: https://www.brother-usa.com/blogs/stitching-sewcial/quick-tip-using-the-my-custom-stitch-feature Place piping so cording is seated underneath channel in foot. See Figure #9.
Figure #9
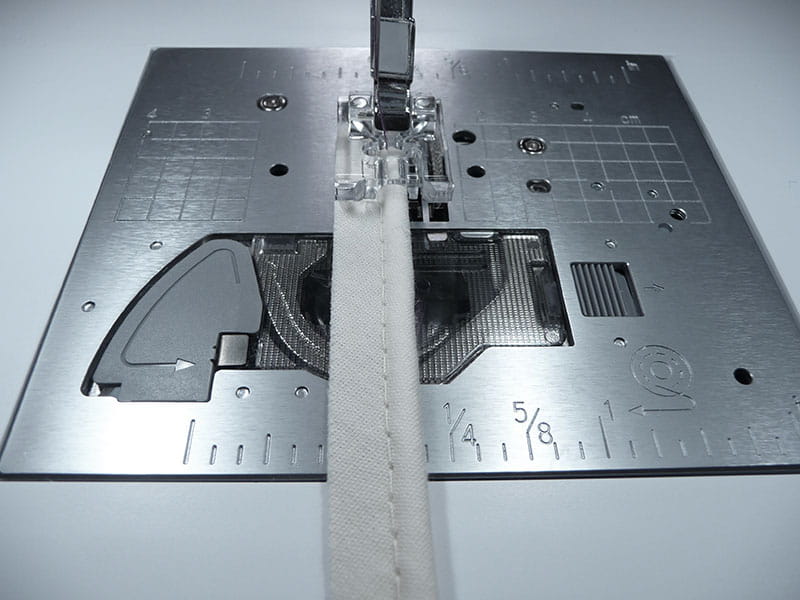
Grab a small strip of extra piping and test your stitch on a few inches before creating the piece for your pillow. Stitch blanket stitch over piping cord with the right and left swing of the stitch forming over the piping cord, and the straight stitches running alongside piping cord. See Figure #10a and Figure #10b.
Figure #10a
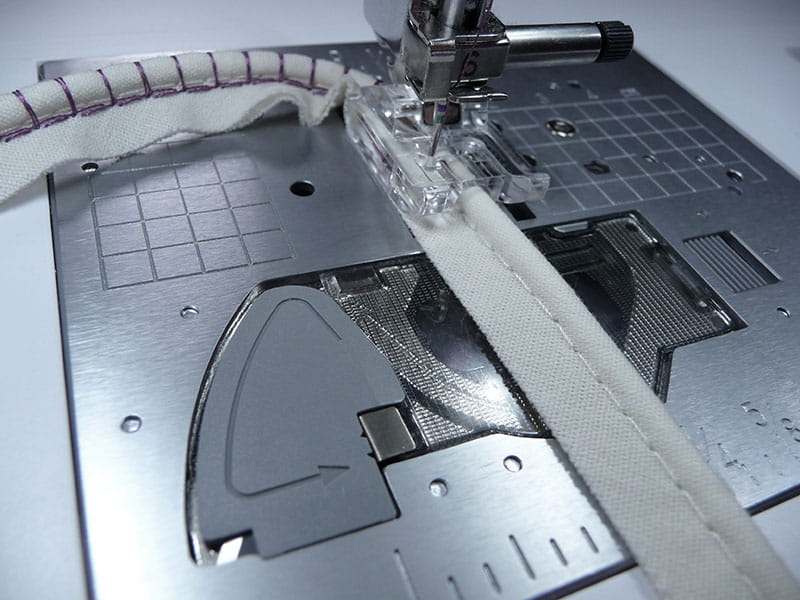
Figure #10b
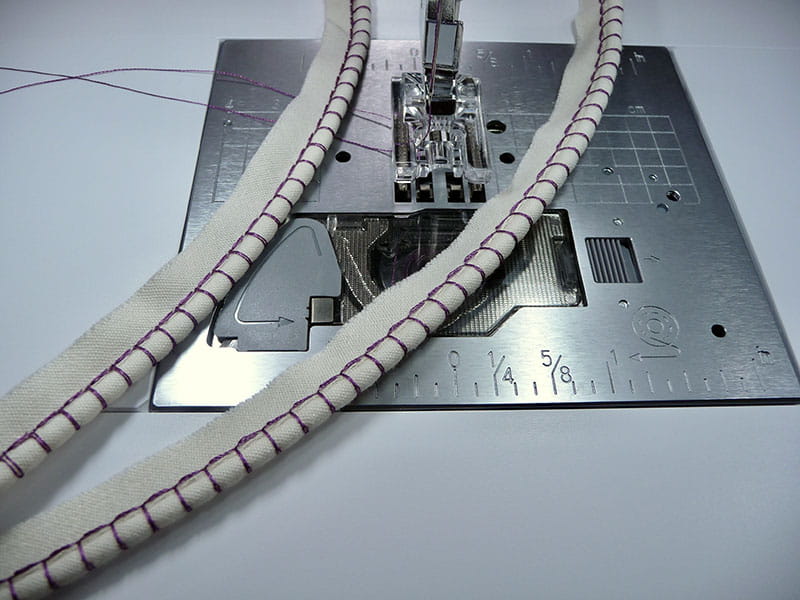
Figure #11
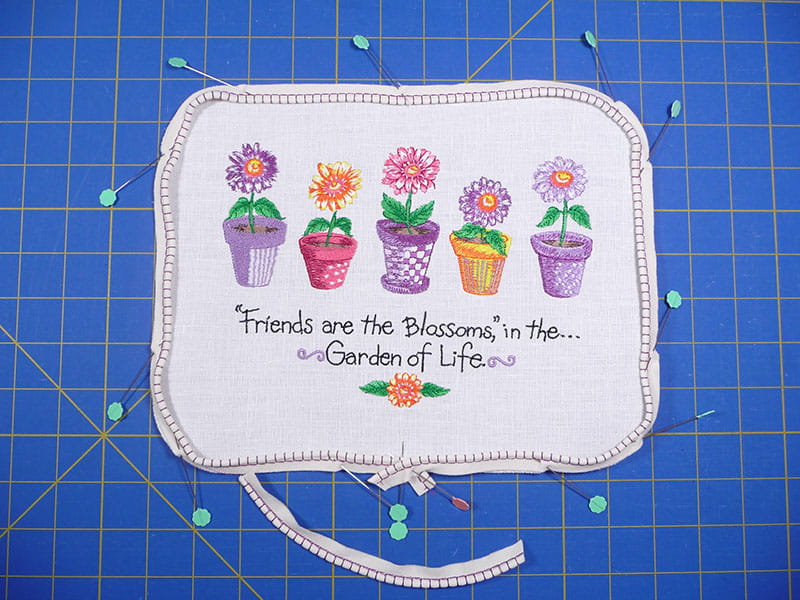
Figure #12
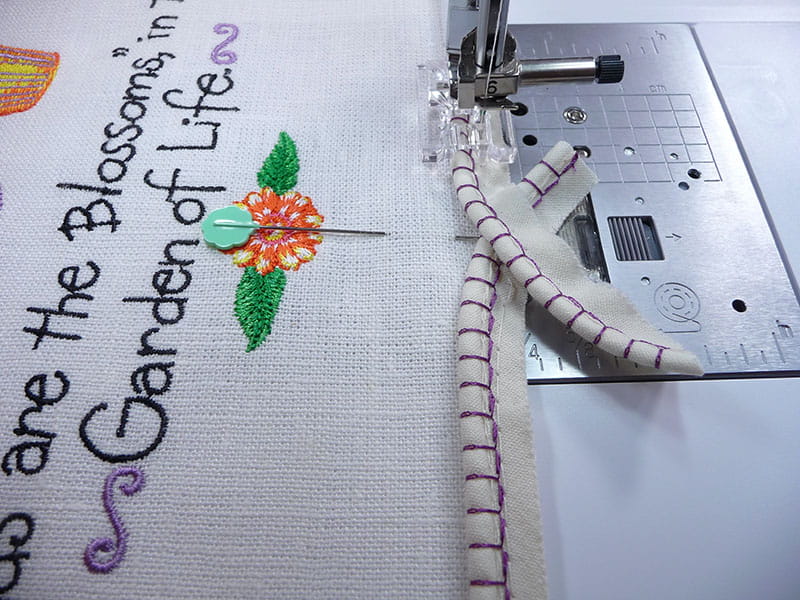
Figure #13a
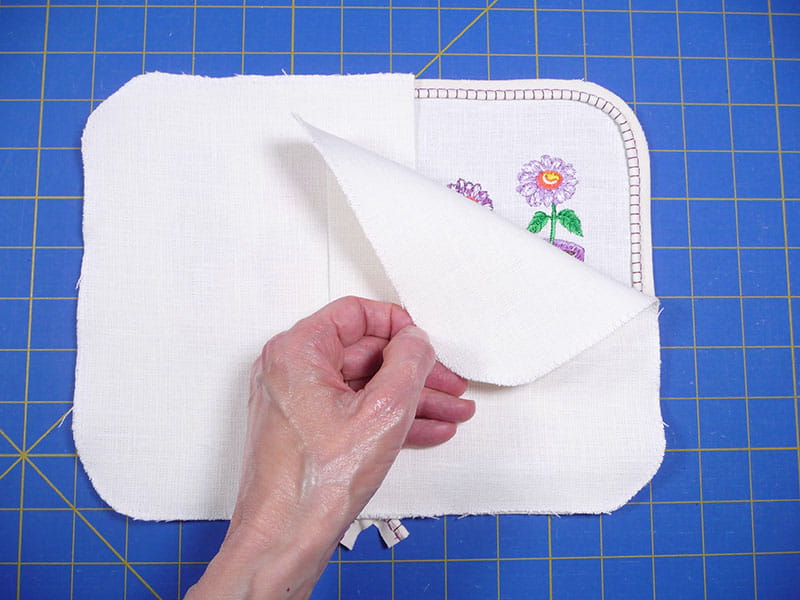
Figure #13b
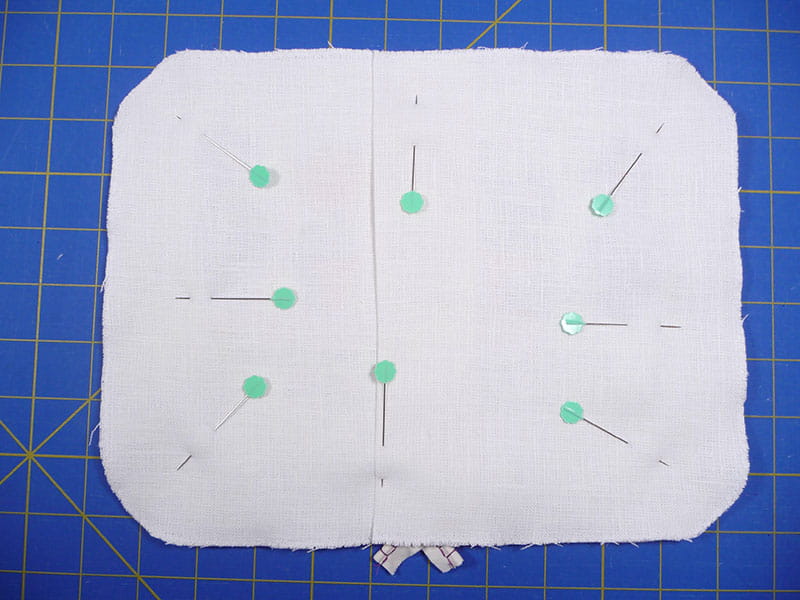
Figure #14
Turn pillow right side out and press. See back of pillow in Figure #15.
Figure #15
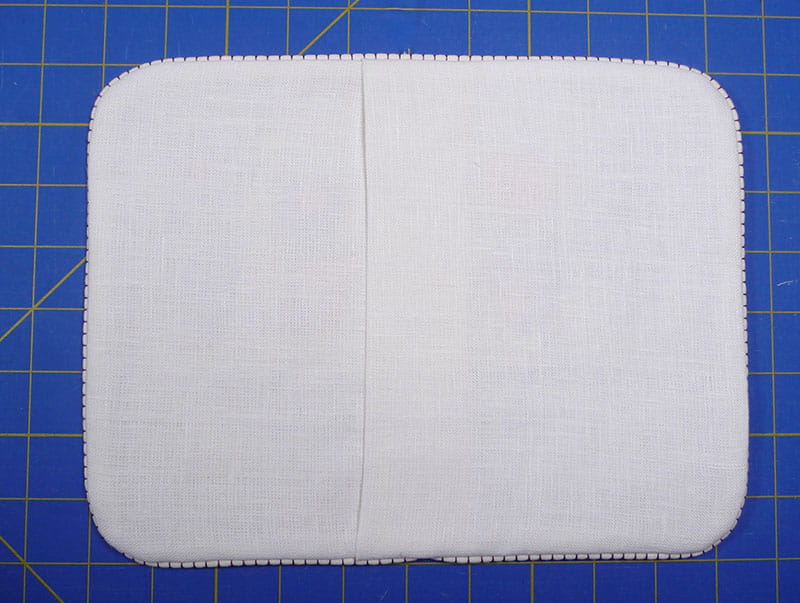
Figure #16
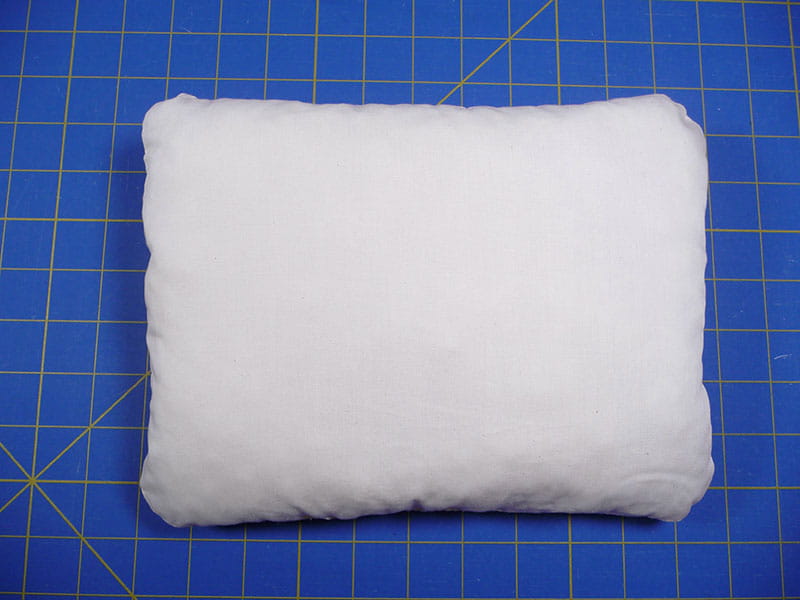
Figure #17
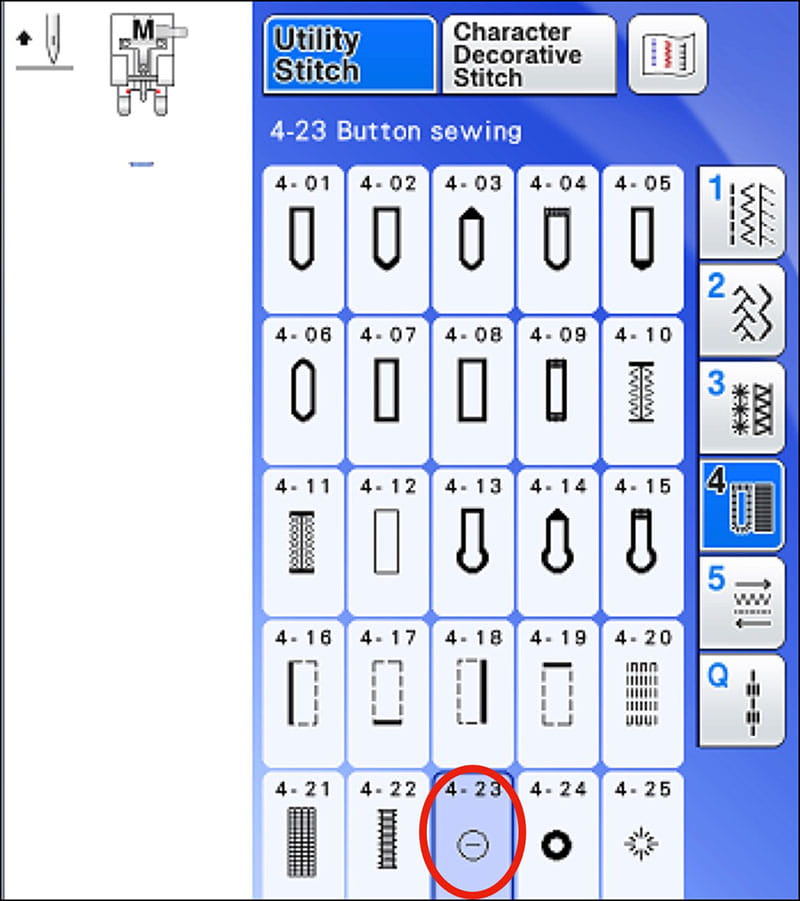
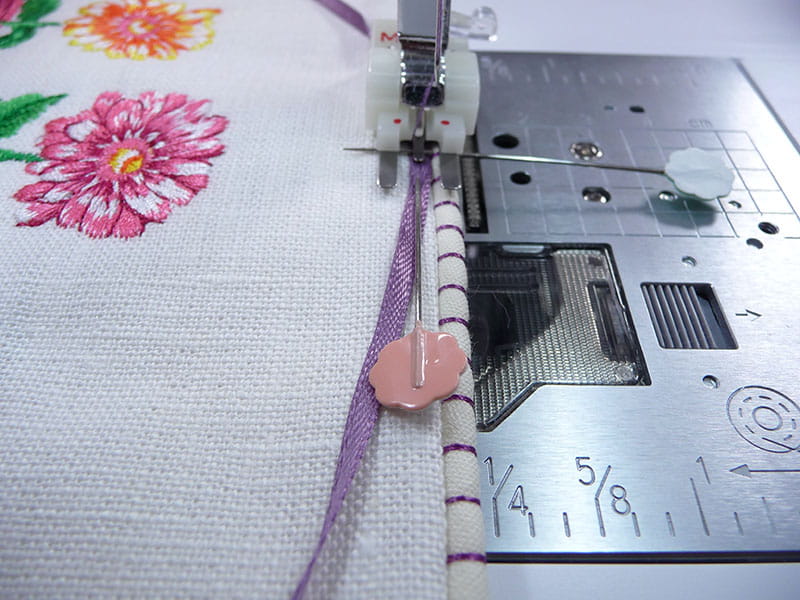
Tack ribbon in place using this stitch, removing pins before you sew. Note: The button sewing stitch is essentially a bar tack. When selecting this stitch, feed dogs are disengaged. This stitch is ideal for securely tacking ribbons and other trims in place. See Figure #18a and Figure #18b.
Figure #18a
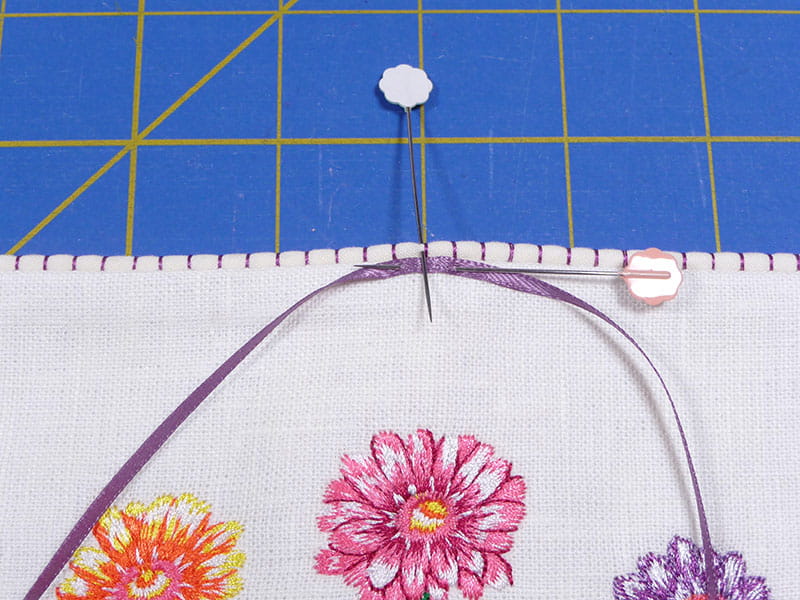
Figure #18b
Options and ideas:
Tie the ribbon with a knot at the top and this pillow could be hung in place. You could also consider using this design as the focal point for a wall hanging, on a tote bag, or other bags and pouches. This beautiful design has lots of possibilities!


