Create Your Own Pillow Appliqué
Brother Sews Blogger
See how the Luminaire Innov-îs XP1
and the ScanNCut DX Innov-îs Edition SDX225
come together to create a wonderful birthday cake pillow appliqué!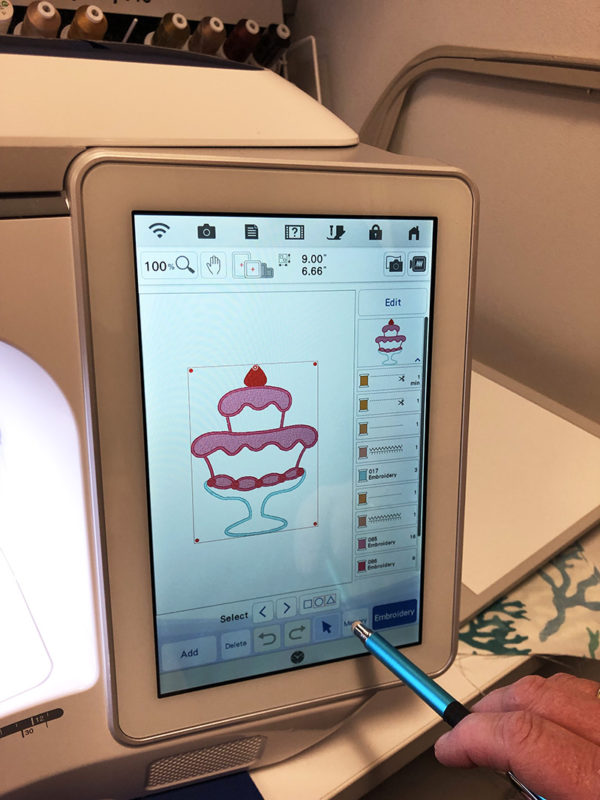 Step 2. Remove USB from Luminaire, insert USB into ScanNCut DX and retrieve data. Select USB and press B pocket. Select the embroidery design. Touch Appliqué Icon. Select Part A (the cake plate), press OK, and press Set. Press Add, select Part B (the frosting), touch Ok and press Set.
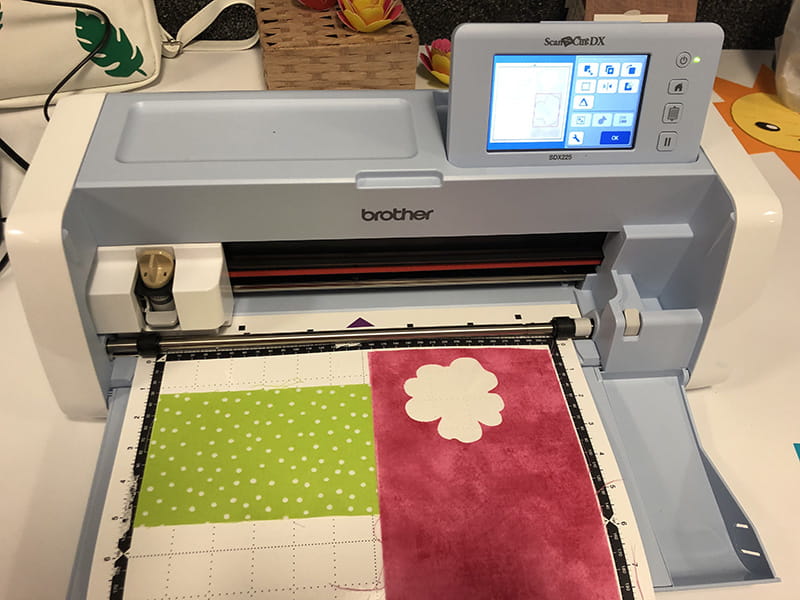
 Step 3. Iron adhesive backing onto your appliqué fabrics and then arrange on a mat. Load mat and press Scan. Next, add Fabric Blade (if you haven't already). On the screen, arrange cut files on fabric, press Ok, and select Cut.
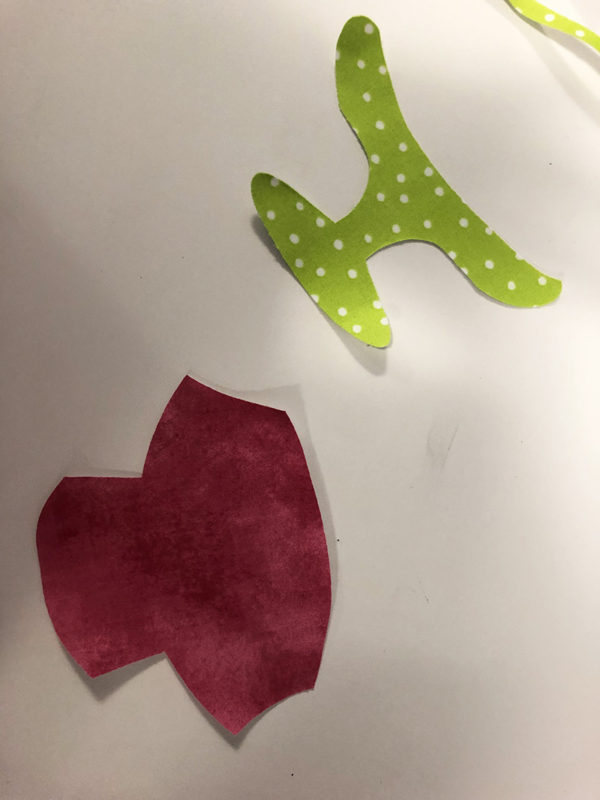
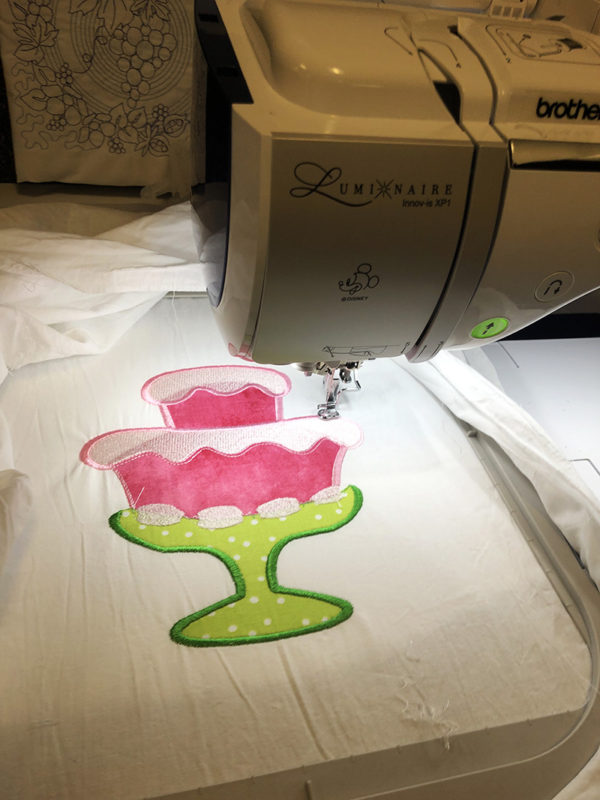
 Step 4. Weed the cut pieces and then take your cut pieces to the Luminaire and hoop your fabric (our pillow case has a zipper). Press Embroidery and embroider the appliqué placement stitches. For the birthday cake, it is the first 2 embroidery segments. Remove the paper backing from the appliqué cut pieces, place inside the placement stitches and press into place with a hot iron. Continue the embroidery, following the steps on the embroidery machine. When you are finished, embellish with ribbon and enjoy the pillow cover at all your birthdays celebrations.
 Create Your Own Pillow Appliqué _ Stitching Sewcial.pdf
See how the Luminaire Innov-îs XP1
and the ScanNCut DX Innov-îs Edition SDX225
come together to create a wonderful birthday cake pillow appliqué!
Supplies:
- ScanNCut DX Innov-îs Edition SDX225,
your color choice of fabrics, Luminaire Innov-îs XP1,
High Tack Fabric Support Sheet, pillow case
Step 2. Remove USB from Luminaire, insert USB into ScanNCut DX and retrieve data. Select USB and press B pocket. Select the embroidery design. Touch Appliqué Icon. Select Part A (the cake plate), press OK, and press Set. Press Add, select Part B (the frosting), touch Ok and press Set.
Step 3. Iron adhesive backing onto your appliqué fabrics and then arrange on a mat. Load mat and press Scan. Next, add Fabric Blade (if you haven't already). On the screen, arrange cut files on fabric, press Ok, and select Cut.
Step 4. Weed the cut pieces and then take your cut pieces to the Luminaire and hoop your fabric (our pillow case has a zipper). Press Embroidery and embroider the appliqué placement stitches. For the birthday cake, it is the first 2 embroidery segments. Remove the paper backing from the appliqué cut pieces, place inside the placement stitches and press into place with a hot iron. Continue the embroidery, following the steps on the embroidery machine. When you are finished, embellish with ribbon and enjoy the pillow cover at all your birthdays celebrations.
Create Your Own Pillow Appliqué _ Stitching Sewcial.pdfRelated Projects
Stay Connected
* Required fields