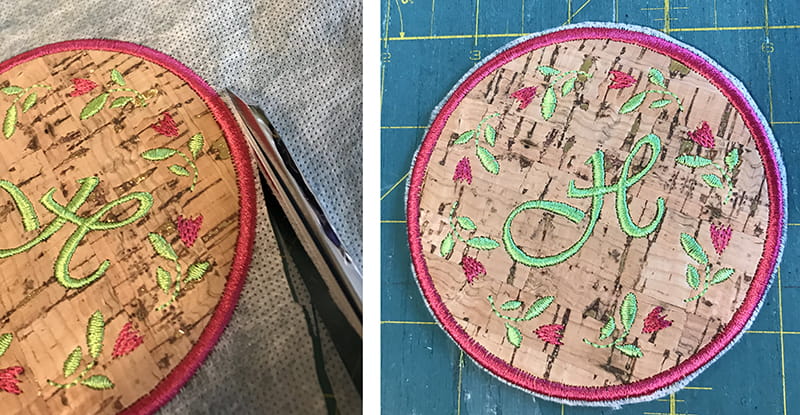
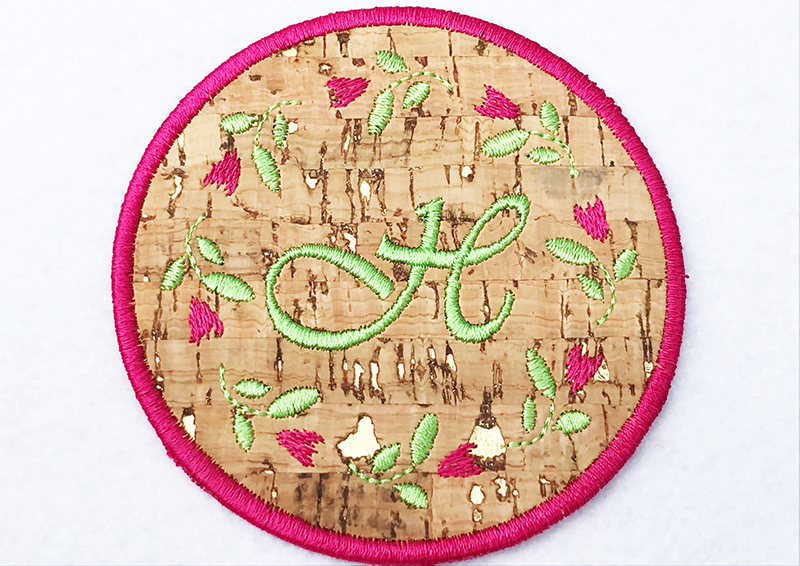
Creative Cork Fabric Coasters
With summer on the horizon, it is time to think about sprucing things up around the house a bit. I thought it would be fun to create cork coasters for outdoors so that when it warms up and the glasses start sweating, the cork would absorb the sweat. If you have never embroidered with cork, it is a fun and easy material to embroider. There are many colors and styles from which to choose. I found some with gold flecks in it and I really loved the way it cut with my ScanNCut
and embroidered with my Brother embroidery machine. These would be great to use for a Mother’s Day brunch. As a bonus, put your mom’s initial on them and send them home with her. To begin this project, we will start in PE-DESIGN 10.
Supplies Needed
- PE-DESIGN 10
- Cork Fabric
- Embroidery threads of your choice
- Embroidery Bobbin thread
- Water Soluble stabilizer SA540
- 4x4 hoop
Open Layout and Editing
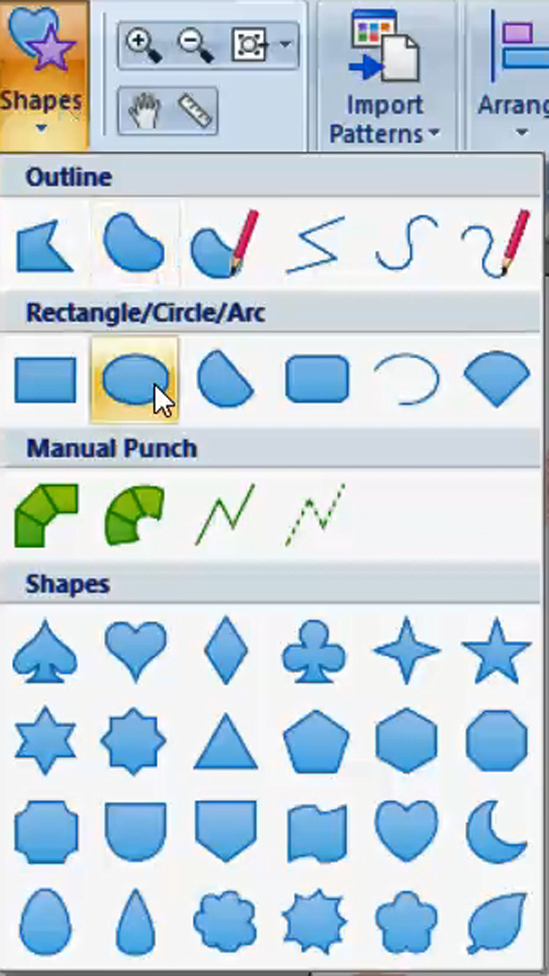
- Click on the Shapes tool dropdown menu and select the Circle drawing tool.
- Hold down the Shift key on the Keyboard and the left mouse button. Drag to draw a circle. Release the mouse when the shape is about 90 mm (3.54 in). Don’t worry if it isn’t the exact size, this can be adjusted. To be perfectly honest, I’d love to tell you I went and measured a coaster, but I can’t. I pulled this number out of the air. I thought it would fit the bottom of the cup that was sitting next to me. For you to follow along and get the same result, you need to have the same numbers. 😊
Tip: The Shift key draws a perfect shape.
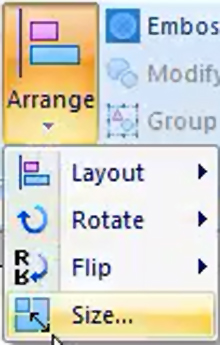
- After you have drawn your circle, click on the Arrange tool dropdown menu and select Size. The shape should automatically be selected. If you accidentally clicked off the shape, click back on it to reselect the shape.
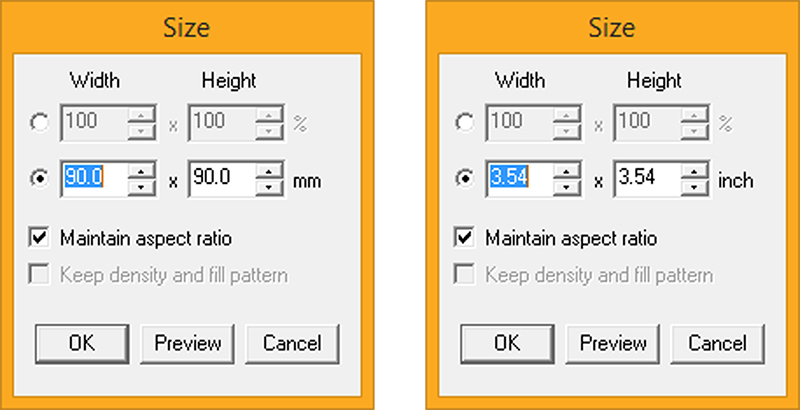
- Place a dot in front of the second sizing option and change the size to 90 x 90 mm or 3.54 x 3.54 inches and then click OK.
- Click on the Appliqué Wizard button.

- Place a dot in front of Replace in the Output pattern area. Place a dot in front of Yes for Appliqué Material, choose Yes for Tackdown and choose Satin Stitch from the Tackdown dropdown menu. Choose Satin Stitch for the Covering Stitch, change the Covering Stitch Width to 4.0mm (0.16 in) and then click OK.
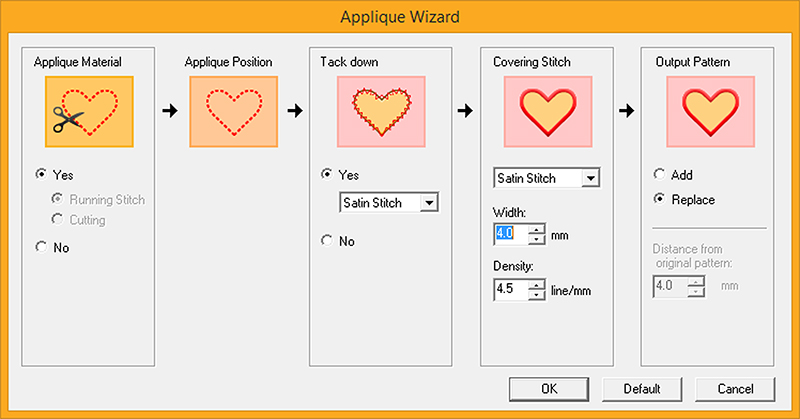
- You will have an appliqué circle on your screen.
- In the Sewing Order window, click on the 2nd segment, the appliqué position color and then click on the Select tool (the large arrow) or the Select Patterns icon (the small arrow in the Sewing order window).
- Click on the Arrange tool down arrow and choose Size.
- Choose the Second Sizing option and then change the size to 90mm (3.54 in). When the Appliqué is created, the circle sizes are changed a bit. Changing the 2nd circle to 90 mm will reduce the size so that when it embroiders it will tack the fabric down. This is especially important if you are using a ScanNCut
digital cutting machine without a heat applied material on the back of the fabric. If you don’t change the size, the cork fabric will not be caught by the Tackdown stitch. Since this project with not be using a heat applied material, the size needs to be adjusted. If you are hand cutting your appliqué material in the hoop you may skip this step.
- In the Integrated Sewing Attribute window, click on the Import tab.
- From the From dropdown menu, select Design Library.

- From the Category dropdown menu choose Floral 2.

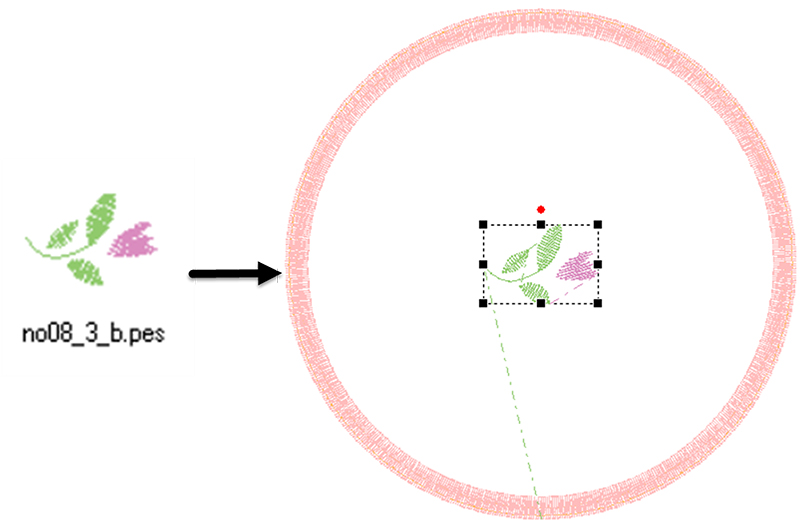
- Double click on design no08_3_b or click on the design and then click Import.
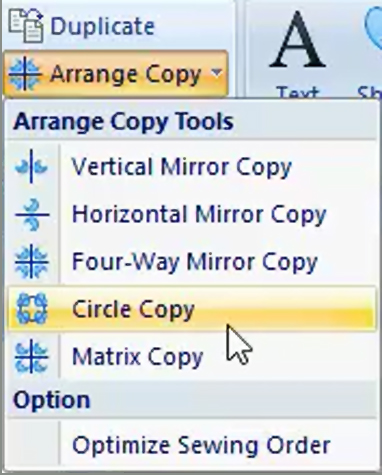
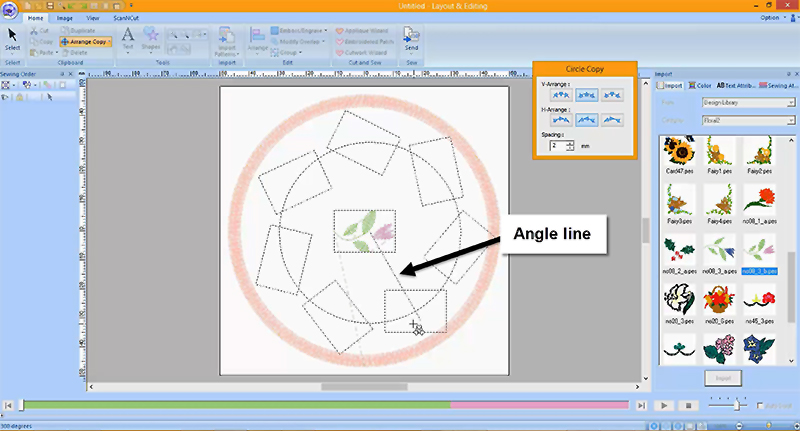
- Click on the Arrange Copy tool down arrow and choose the Circle Copy tool.
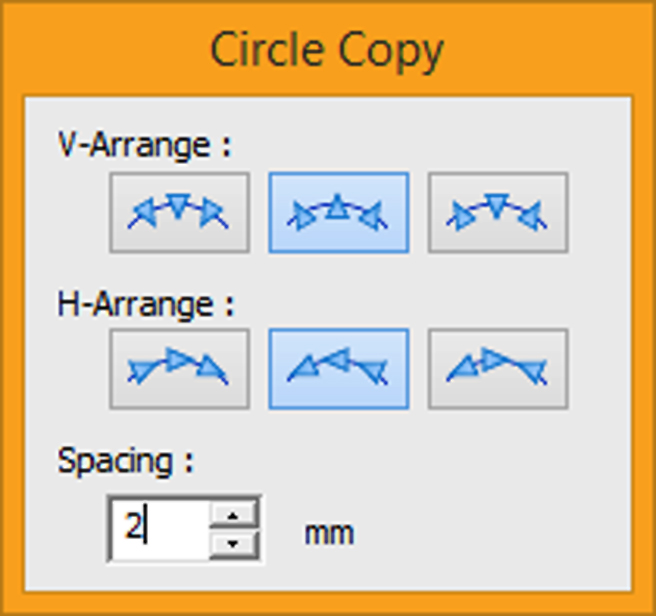
- Choose the Center option for V-Arrange and H-Arrange and change the spacing to 2 mm (0.08 inches).
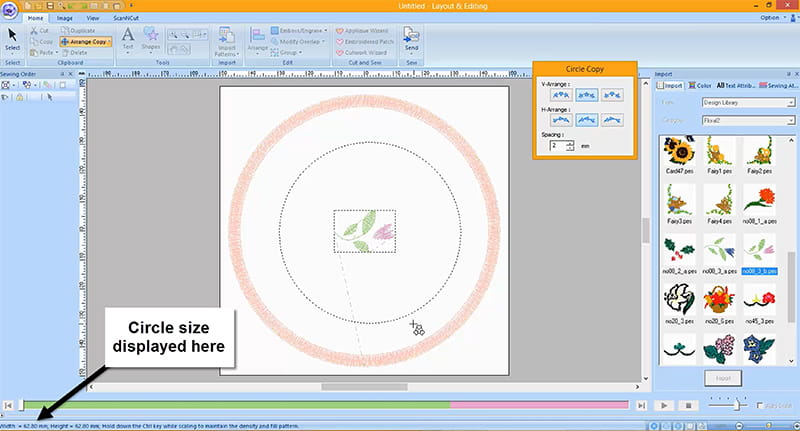
- Place the cursor inside the circle, hold down the Shift key on the keyboard, hold down the left mouse button and draw a circle that is about 63mm (2.48 inches). The circle size will be displayed at the bottom left of the window while you are drawing. Release the mouse when the circle is the desired size.
- A line will appear that allows you to control the angle of the designs. Move the mouse to the top center of the circle (90 degrees) and then left mouse click.
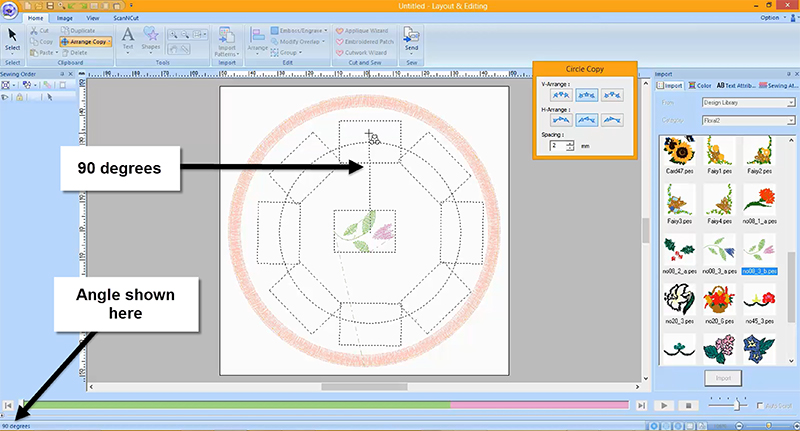
- The patterns will be set.
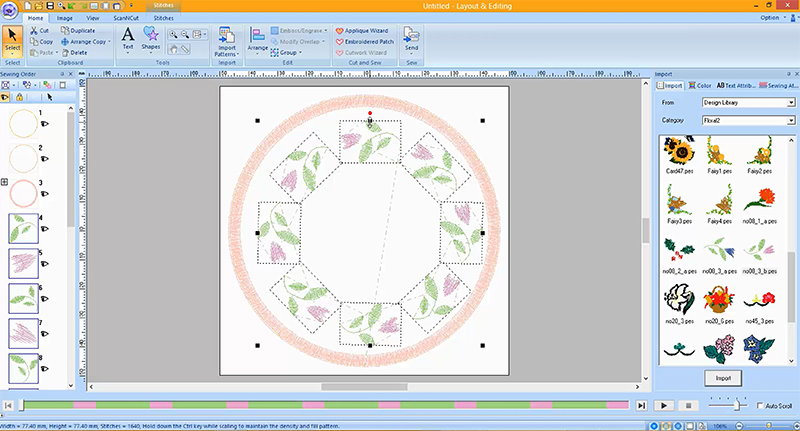
- Hold down the Control key with the M key on the keyboard to move the arrayed designs to the center of the design page.
Tip: Press the Control key with the M key to move any design to the center of the design page.
Ctrl + M = Middle
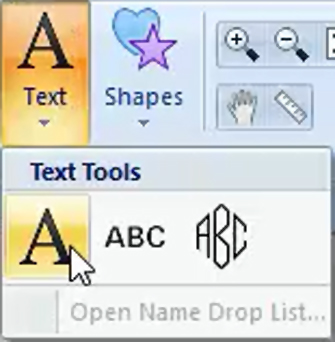
- Click on the Text tool and choose the first tool, the Text tool.
- Click in the center of the circle and type in the initial for the last name and press Enter on the keyboard.
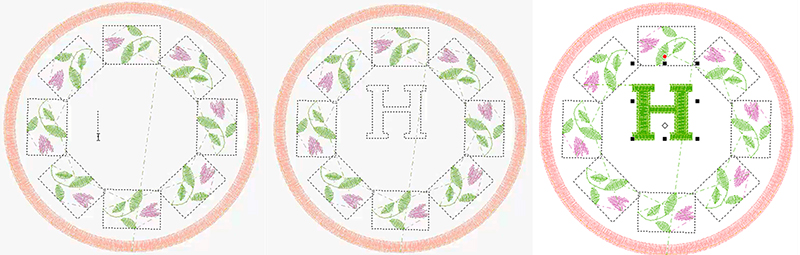
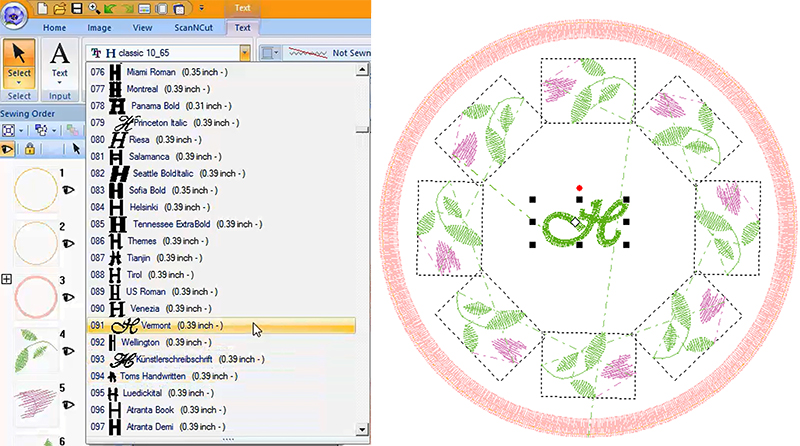
- The Text Tab should activate. Click on the font drop down menu, scroll through the fonts and select a font that you would like to use. For my coaster, I selected font number 91 (Vermont). The font will automatically change when it is selected.
- Pull the letter outward from one of the corners to resize the letter.
- Hold down the Control key and press the M key to move the letter to the Center of the design.
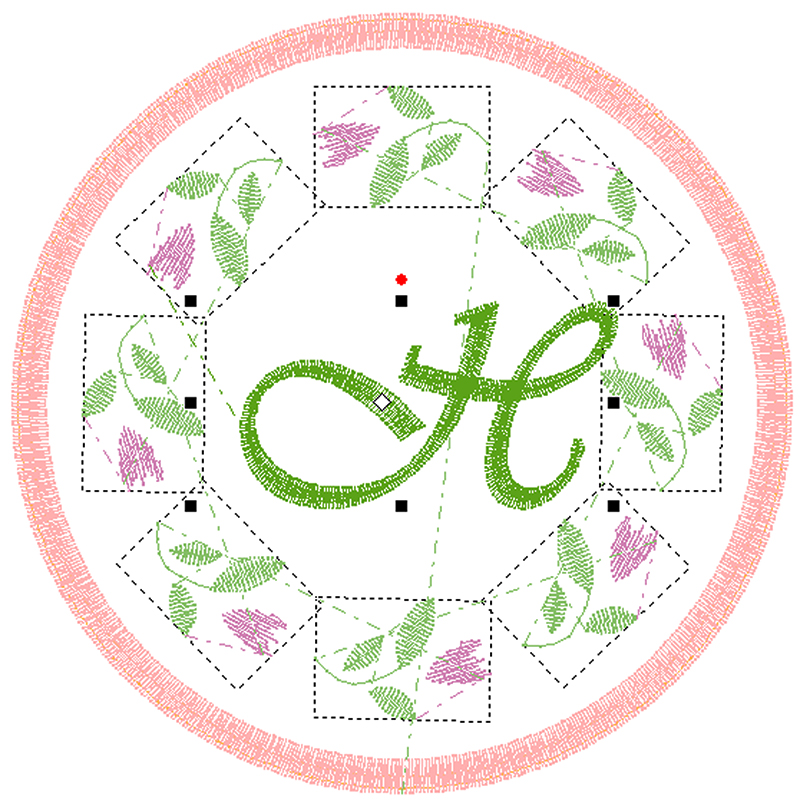
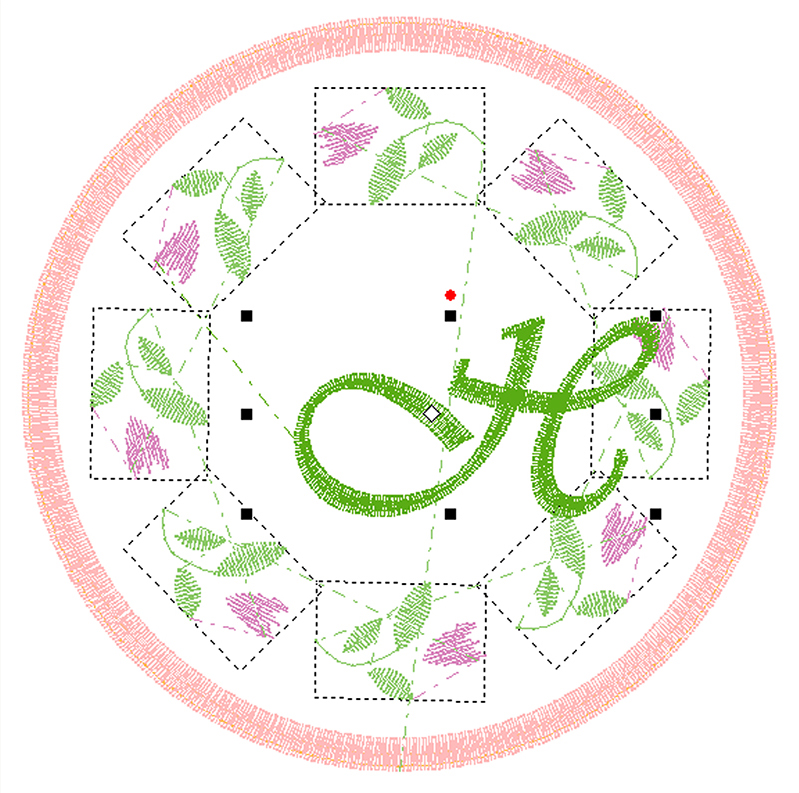
- My letter is mathematically centered but isn’t visually centered. I need to move the H to the left to make it visually appealing. If this is the case for your letter, press the left arrow key until the letter looks appropriate in the space.
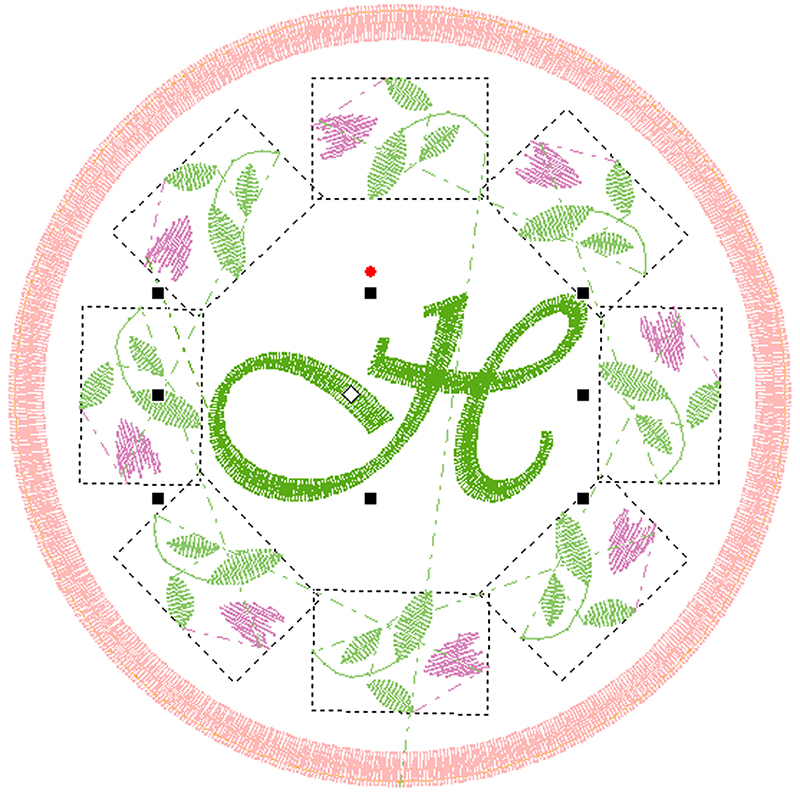
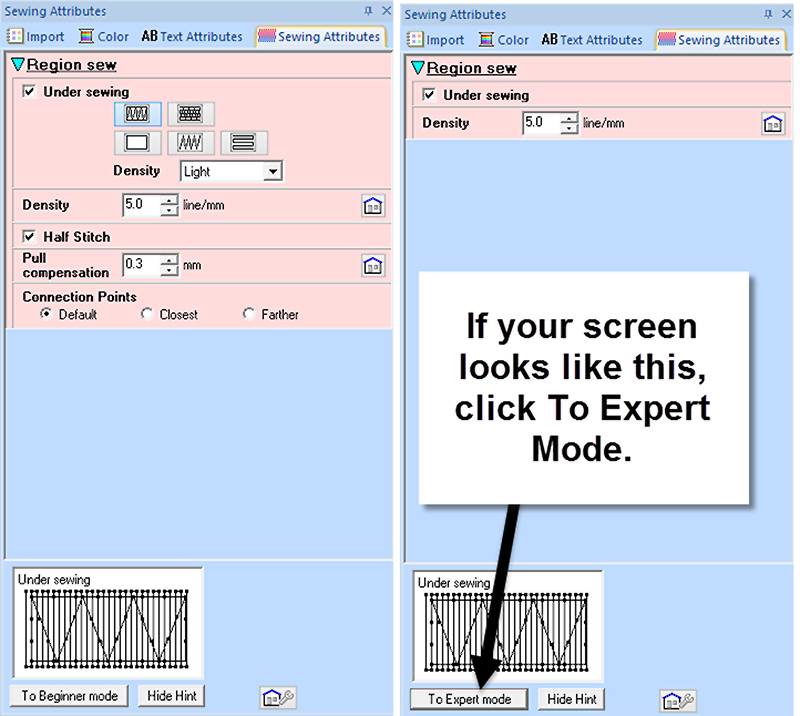
- If you want your letter to be bolder, you can apply Pull Compensation to the letter. Pull Compensation extends the stitches in the direction that they are going to account for the pull of fabric. A byproduct of this is that it will bold your text. In the Integrated Sewing Attributes Window, click on the Sewing Attributes tab

- If your Screen doesn’t show Pull Compensation, click on the button at the bottom of the Sewing Attributes window that says, “To Expert Mode”.
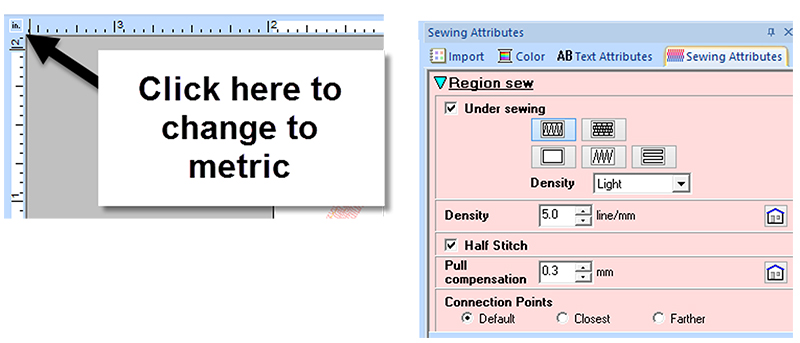
- Change the Pull Compensation to .3mm. The setting will automatically apply.
- If you are working in inches, please change to metric by clicking on the “in” in the corner of the page ruler to adjust the setting.
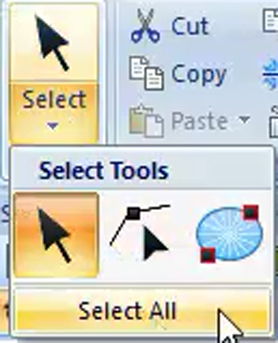
- The last thing we need to do to get this ready to embroider is to arrange the order of embroidery for the design. To get the flowers to embroider all the green and then pinks, we can press the Optimize Sewing Order button in the Sewing Order window. For this to activate, click on the Select tool down arrow and choose Select All (Tip: Ctrl+A is the keyboard shortcut).
- In the Sewing Order Window, press the Optimize Sewing Order button.
- The design will be color sorted.

- So that our back can be attached after the top embroiders, click on segment 2 and then click on the Select tool or the Select Patterns tool in the Sewing order window.

- Press the Home tab.
- Press Copy and then Paste to Paste the copy of the circle.

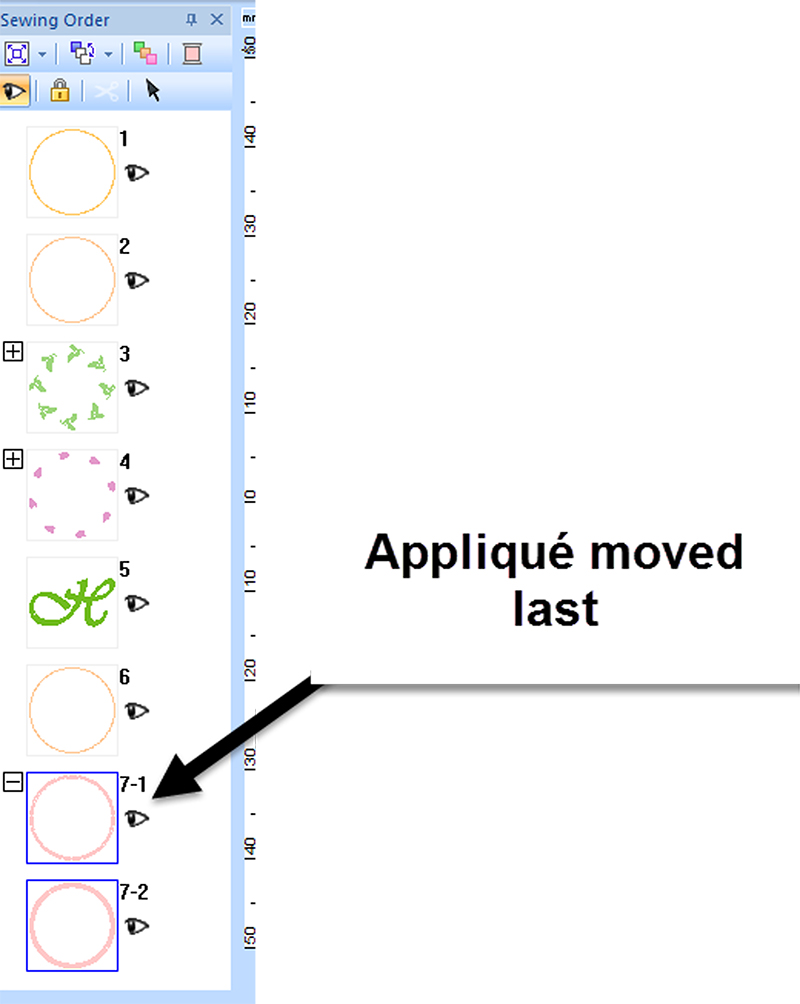
- In the Sewing Order window, click on the covering stitch circle (segment 3) and drag it to embroider last.

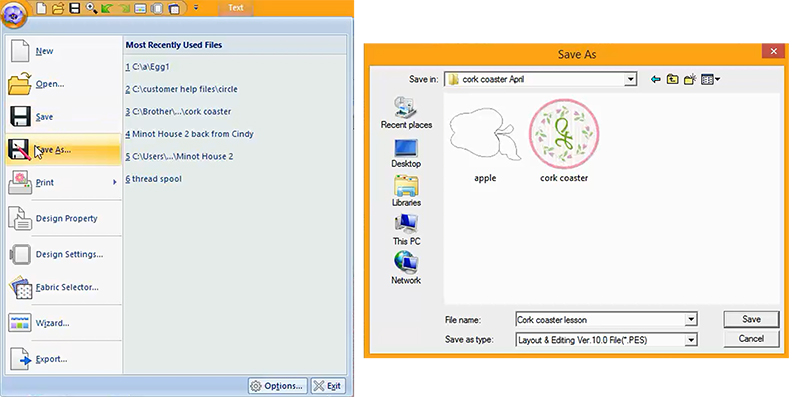
- Click on the Flower dropdown menu (this is the File dropdown menu), choose Save as, name the design and save it in a location you will remember.
Tip: If you have a larger embroidery frame such as the 8x12 inch hoop 200x300 mm, you can use the matrix copy tool to create 6 copies of the design. Select Design Settings and choose the hoop. Group the design, click on the Arrange copy tool, choose Matrix copy. Left mouse click at the top left of the hoop, drag the mouse to the bottom right until you see 6 across on your hoop. Left mouse click to set the copies. You would then choose Optimize Sewing Order to color sort the design.


Generating ScanNCut
fcm file for a Single Coaster.
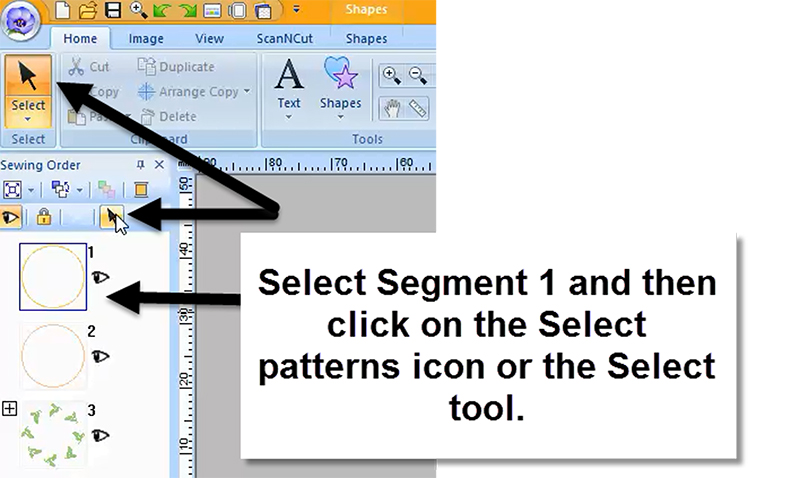
- In the Sewing Order window, click on segment 1 and then click on the Select Patterns icon or the Select tool.
- Click on the ScanNCut
Tab - Press Export.
- Change the Offset Spacing to 0 and then press Save FCM. Choose a location to save the file and then press Save.
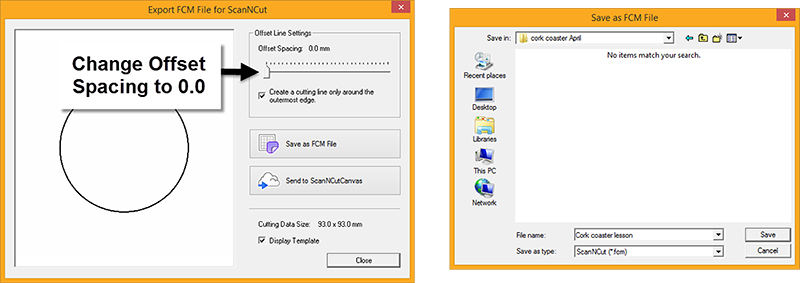
- If you have a wirelessly enabled ScanNCut
machine, you can select Send to ScanNCut Canvas. It will send the cut file to the CanvasWorkspace and then ask you if you want to send it to your machine as well. If you select yes, you can press the cloud button to retrieve the pattern on the ScanNCut machine.
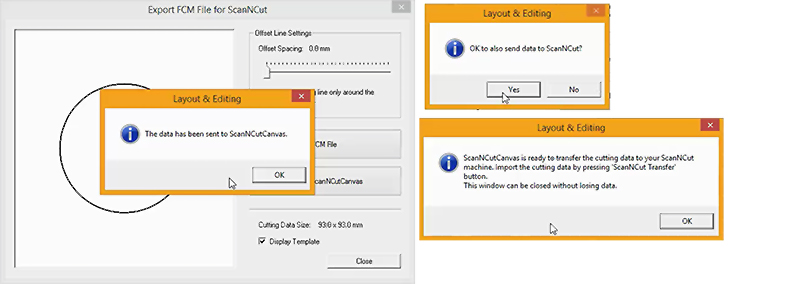
- Click OK and then press Close.
- For each coaster, you will cut 2 circles on the ScanNCut machine.
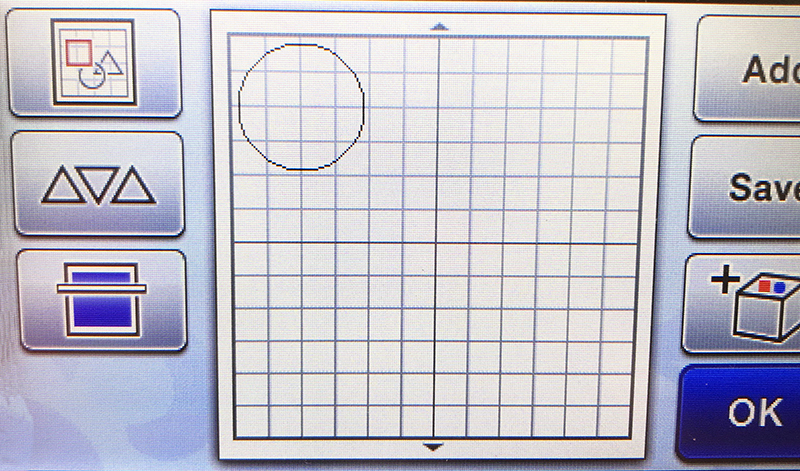
- At the ScanNCut machine,
press Pattern. - Press the ScanNCut Transfer button (the cloud). If you saved to a usb media, select the USB media instead.
- The circle will appear on the screen.
- Place the cork fabric on the Standard mat. I cut face up on a clean mat. You may like cutting face down better. It depends on how your cork reacts.
- Press the load mat button.
- Insert the Standard Blade holder.
Note: My settings may be different from yours, but my blade depth was 9 and pressure 0. VERY IMPORTANT! Please make sure you do a test cut starting at a lower blade depth setting to avoid cutting through your mat. I started my test cuts at about 6 based on how far the blade extended beyond my cork when I placed the blade next to the cork. You may wish to start lower. I would much rather do multiple test cuts than cut through my mat.
- Press the Mat Scan button. This will scan what is on your mat so you can see where to place your cut files.
- Click on the Edit button the square/ circle/triangle button at the top left of the screen.
- Press Resize.
- Change the number of patterns to 2 and press OK. (We do not need to resize the file, just need to create a duplicate).
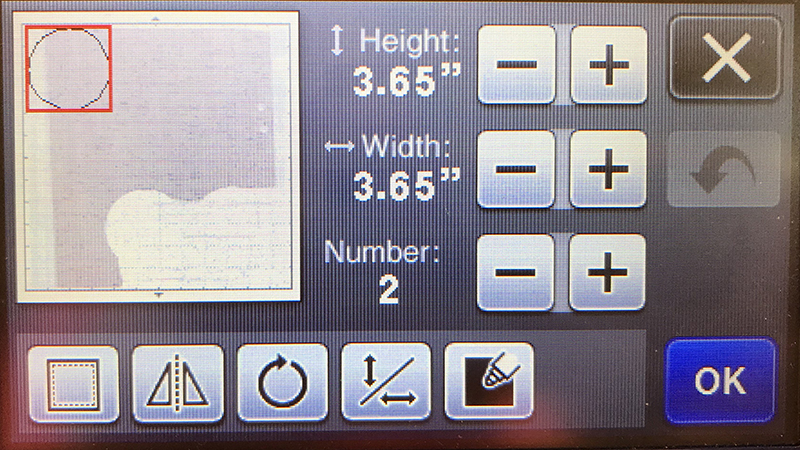
- Press OK again.
- Press Add.
- Press Test Pattern.
- Press the circle T-04.

- Press Set.
- Move the circle to the bottom of the fabric to make it easy to see if the test pattern cut by lifting.
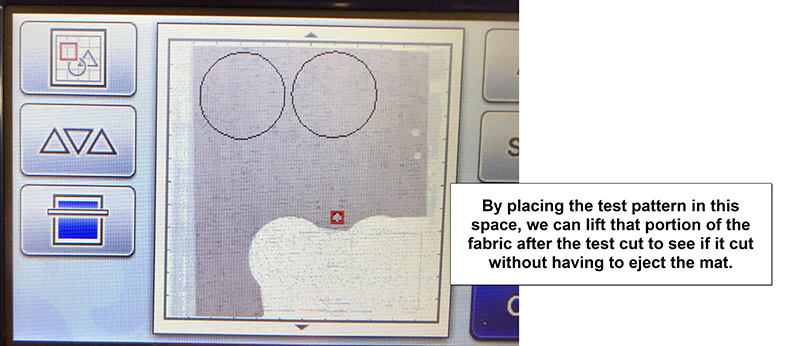
- Press OK.
- Press Cut.
- Press the Start button.
- The test circle will cut and the machine will stop. Look to see if the circle cut. If it cleanly cut, press the start button. If it didn’t, press Quit Cutting on the screen.
- Press the back arrow on the screen.
- Move the test circle to a different location.
- Change your blade depth a little bit (not large increments).
- Press OK.
- Press Cut.
- Press Start.
- If it cleanly cuts, press Start again. If not, repeat the above procedure.
- Once the coaster pieces have been cut, remove from the mat and set aside for the embroidery.
Embroidery Instructions
- To embroider the design – these instructions are for a single coaster.
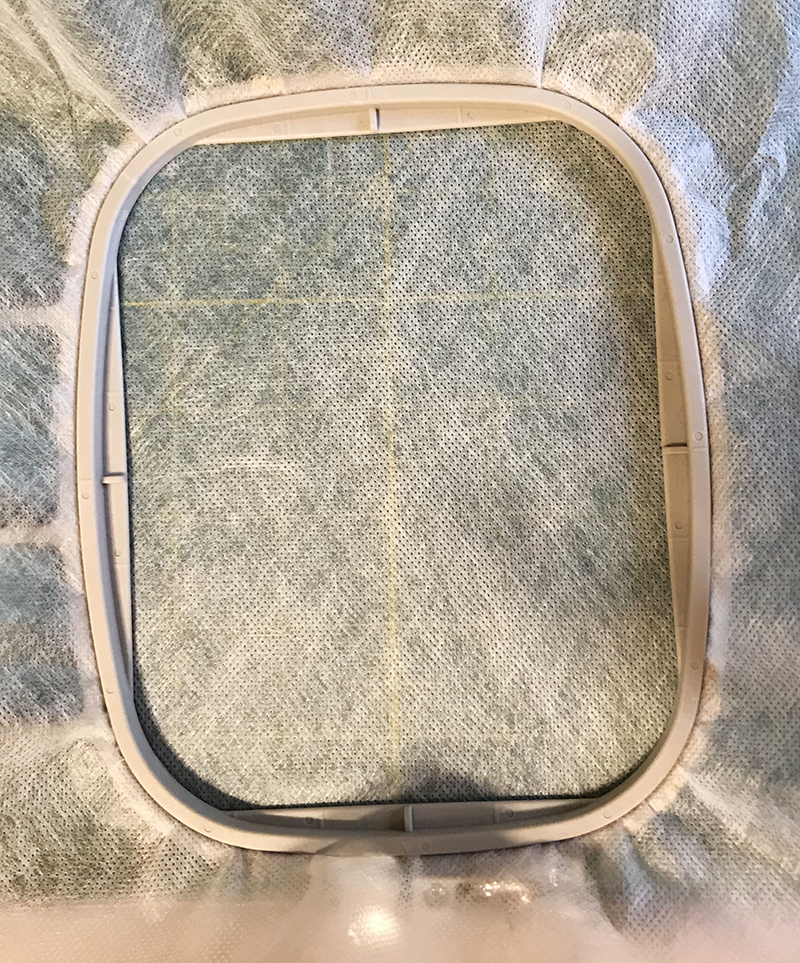
- Hoop a piece of Water Soluble stabilizer in the 4x4 hoop.
- Insert the hoop into the embroidery machine.
- Embroider the first segment.
- Remove the hoop from the machine.
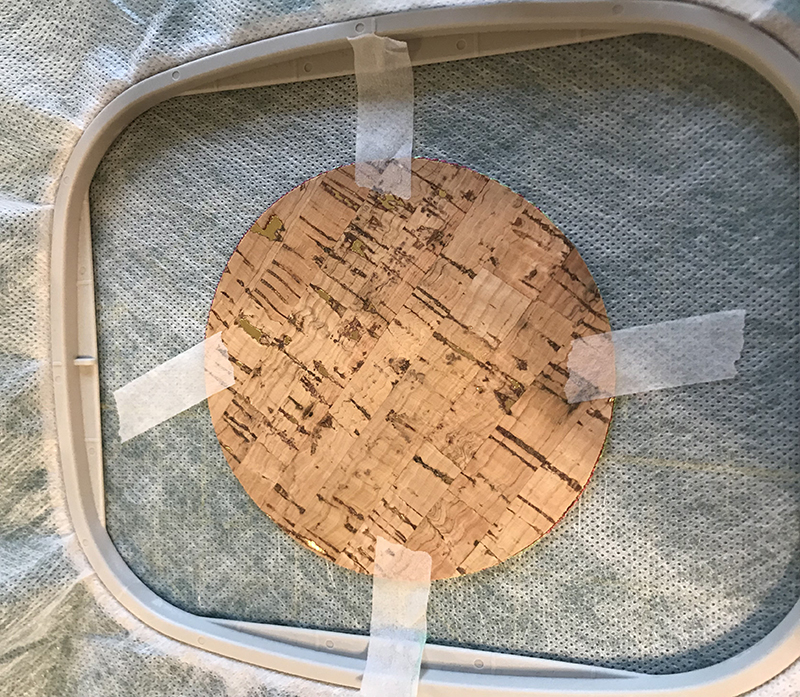
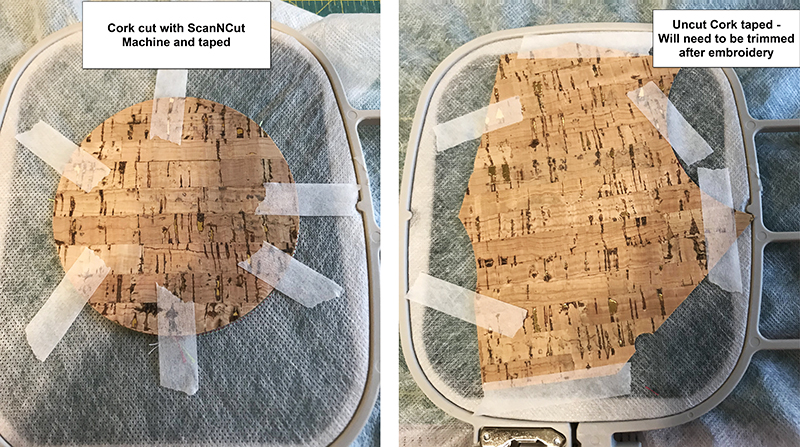
- If you precut your pieces with a ScanNCut machine
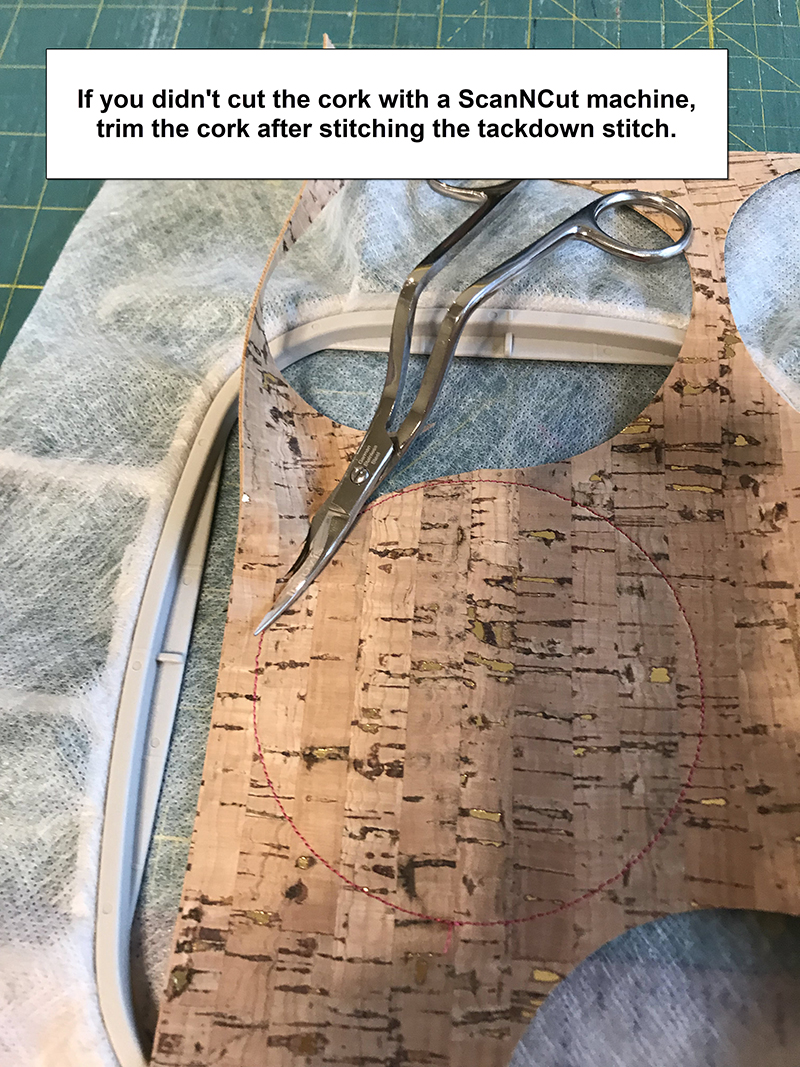
, tape the Cork fabric on top of the stitch, put the hoop back in the machine and then embroider segment 2, the Tackdown stitch. You won’t need to trim the cork. - If you didn’t use a ScanNCut machine,
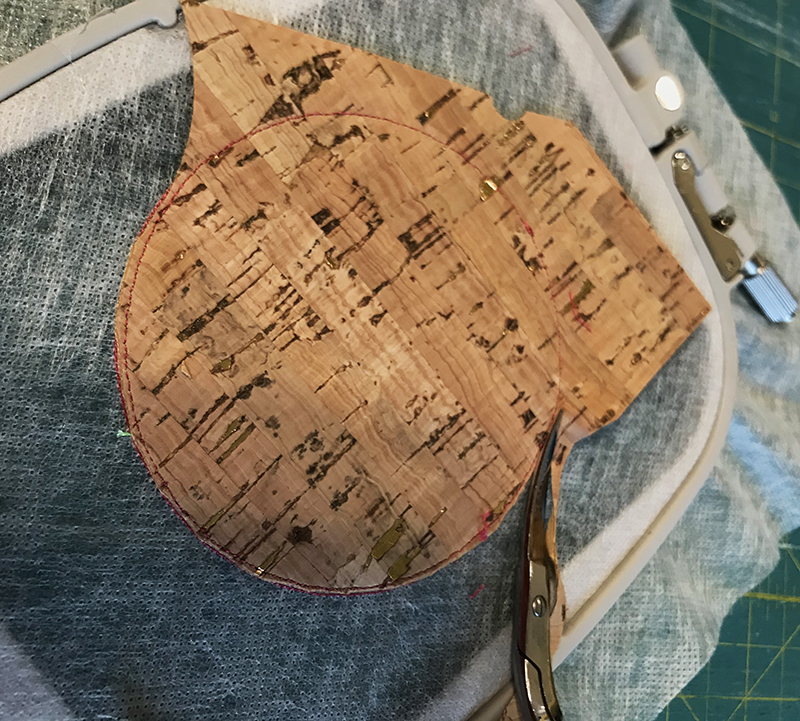
tape the cork on top of the stitch line, tape, place back into the embroidery machine and then stitch the second segment. - Remove from the machine. Trim the cork to the first stitch line. Be careful not to shift the stabilizer in the hoop. I suggest setting the hoop on a flat surface to trim.
- Insert the hoop back into the embroidery machine. Embroider the flowers and initial and then remove the hoop from the machine and tape the back cork to the project.
- Embroider the next step.
- Remove the tape from the back. If you precut your pieces with a ScanNCut machine
, you don’t need to trim. If you didn’t, trim the cork to the first stitch line. Be careful not to shift the stabilizer in the hoop. I suggest setting the hoop on a flat surface to trim.
- Wind a bobbin to match the color you want for the covering stitch for the outer edge of the coaster and insert into the bobbin case.
- Insert the hoop back into the embroidery machine.
- Finish the embroidery.
- Trim excess Stabilizer and then wet the edges to remove the remaining Water Soluble stabilizer.
 Enjoy!
Create something fun today,
Cindy Hogan
Enjoy!
Create something fun today,
Cindy Hogan
Related Projects
Stay Connected
* Required fields