DIY Cute Ruffled Spring Outfit for Kids
Brother Sews Ambassador
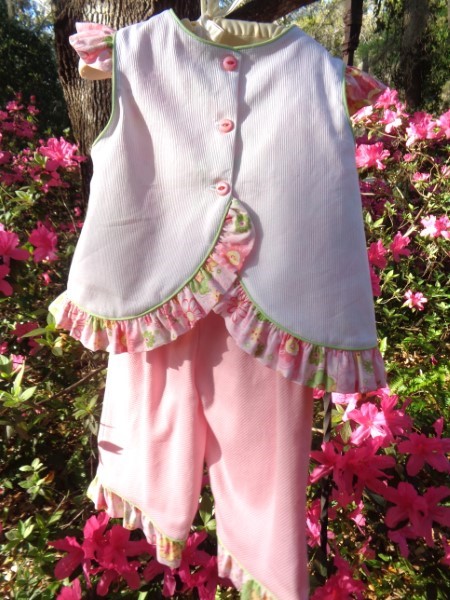
Spring has sprung and the time has come for children to play outdoors. This Bambi-like embroidery design from our Brother Dream Machine incorporates elements of the world’s awakening from a long, cold winter—a carpet of flowers and mushrooms at the feet of the curious fawn as it gazes at the butterflies flitting about. Not only will our Brother sewing machine embroider the design flawlessly, it will stitch the lined top and capris effortlessly, as well as make perfect buttonholes. Your little one will love playing in the warm weather with this cute and comfortable outfit. Let’s get sewing! Note how lower portions of the design were embroidered above the ruffle of the capris.

Bambi Materials:
- Bonnie Blue “Riley” pattern for the top
- Children’s Corner Parker’s Pants for the capris
- Fabric: check yardage amount requirements for size
- White pique’ for top
- Floral pique’ for top lining and ruffles
- Pink pique’ for capris
- Notions: (3) 5/8” buttons, 1” elastic for waistband, thread for embroidery and construction, Brother water soluble stabilizer SA540, water soluble and heat erasable markers, green mini Piping
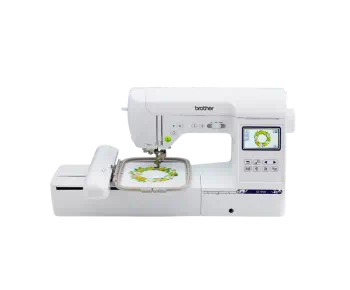
- Brother Dream Machine 1 or 2, 5x7 frame,
- Bambi-like fawn, built-in design on Brother Dream Machine 1 and 2 located in Disney Tinkerbell menu (Via IBroidery)
Instructions: all seams are ¼”.
Preparation:
A. Prewash and press all fabric before beginning.
B. Stitch embroidery design on a practice piece to work out colors. Record your color choices if they differ from those suggested. You will see that the “hiya” text in the design has been omitted from the pictured garment. If you also choose to omit it, note that this is stitched in color #7. Watch carefully for the beginning of the text (just as the choose to omit this, note that it is stitched last in color #7. After the fawn head is outlined followed by a small butterfly, the text begins. It is helpful to drop stitching speed to 350 stitches per minute when you begin the butterfly outline for best control so you can stop when the text begins. Back up a few stitches and repeat in order to lock the stitches then progress to the next color. Use this practice piece as a placement template.
C. Trace off correct size printed paper pattern piece for top. Place your copy on a paper fold as directed and cut out a full front paper pattern piece and mark the center front and ruffle placement line. Trace the pattern back, marking all lines.
D. Draw around the front pattern on a block of white pique transferring the center front and ruffle placement marks with water soluble marker but do not cut out. Use the practice piece to mark design placement. NOTE: Because the water soluble stabilizer will need to be soaked for removal, the water soluble marker works satisfactorily for easy removal and provides better visibility than the heat erasable marker on pique’.
RILEY TOP
1. Hoop stabilizer and garment front in 5x7 frame. Embroider the design.
2. Remove the piece from the hoop and cut away excess stabilizer.
3. Stitch around marked pattern outline with lengthened stitch and contrasting thread. Stitch through ruffle placement lines.
4. Soak embroidered front to remove stabilizer and marker lines. Roll in a towel and air dry.
5. Cut out pique’ backs, transfer marks with heat erasable markers.
6. Cut out floral print front and backs.
7. Spray water or starch on air dried Riley front and press with right side down against thick toweling. Cut out using the pattern piece. Do not rely on stitched outlines which may or may not be accurate. Double check ruffle placement lines.
8. Stitch shoulder seams of embroidered front and lining. Press seams open.
9. Apply piping to neckline and armscyes. TIP #1: Attach knee lift. It is very helpful with all the necessary pivoting. TIP #2: Use contrasting thread in bobbin for accuracy when later joining shoulder ruffle snug to piping.
SHOULDER RUFFLES
10. Cut two shoulder ruffles. Press in half, wrong sides together, mark center along raw edge. Gather to fit within ruffle placement shoulder marks, matching center mark to shoulder seam as shown in the pattern instruction sheet.

11. Stitch both ruffles in place.
12. Place lining right side to right side of embroidered pique’. Stitch around neckline, center back to marked dot and armscyes. Turn to right side through shoulder seams as directed.
13. Continue with construction according to instructions joining lining and pique’.
14. Join piping to pique’ from raw edge at center back across the entire hemline, up opposite raw edged center back. Again, contrasting bobbin thread and the use of the knee lift is very helpful.
15. Create the required length of ruffle for your size, marking center and quarter points. Mark center and quarter points of garment hemline.
16. Gather ruffle, match center and quarter marks. Taper ruffle to a point at center back dot. Seam to pique’. Finish according to pattern instructions.

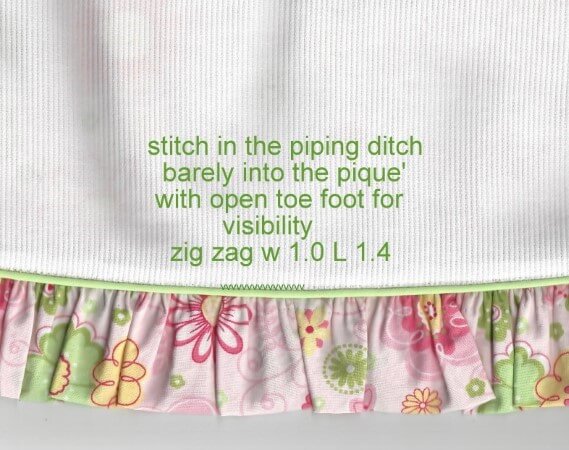
NOTE: The double ruffle, piping and pique’ created significant bulk, making the seam tend to roll. To make it lie flat, stitching a tiny zig zag w 1.0 and L 1.4 with monofilament and the open toe foot forced the seam to cooperate.
17. Stitch buttonholes and attach buttons as directed in pattern instructions. All done!

Children’s Corner “Parker’s Pants” pattern was chosen for a slimmer fit. It was made according to instructions with piping added to the ruffled version in order to match the Bonnie Blue “Riley” top.
Another addition to the pattern was the embroidery above the ruffle on the front left leg.

This is only recommended for those with the utmost determination and patience. The way the design is created causes the color stops to jump back and forth from butterflies to the flowers and mushrooms. It is definitely a challenging project, but well worth the effort in the end. I suggest you try this design on a practice piece to get a feel for it before endeavoring to embroider on a garment. But if you have the patience for this project, the results are well worth all the effort!


