Pete’s Dragon Sleepover Set Part 1
Delight your favorite youngster with a unique Disney Pete’s Dragon
sleepover set. Download designs from iBroidery.com
, load them into your Brother Embroidery Machine and you can whip this up. Ready for the overnighter, he (or she) will arrive clad in comfy shorts and shirt embroidered with the newly awesome and assertive Elliot. Imagining that he is Pete, your child is off to sleep in a cave and have a magical adventure with his dragon pal. In Part One you will find instructions for the Pillow Case/Drawstring Tote his pillowcase tote features Elliot spewing glow-in-the-dark fire which will enchant him and his friends. The bag might be stuffed with a travel size pillow, a fuzzy blanket, his favorite stuffed animal (probably a dragon), and a Stippled and Quilted, Zippered Sundry Bag with his toothbrush and comb, project in Part Two. At home, with the tote drawstring removed, the pillowcase will give him reason to dream of glory days with this beloved fire breathing dragon. For pajamas, which will be Part Three of the series, make the shorts and shirt with flame resistant sleepwear fabric.
Pillowcase/Drawstring Tote
 When my grandchildren come for sleepovers, they bring everything but the kitchen sink. Our older grandson brings a plastic grocery sack. Packed to overflowing with his “stuff,” it usually has a hole and carries all manner of snips and snails and puppy dog tails electronic devices. This pillowcase tote is an easy sewing project and would be large enough to carry all of his gear.
The finished pillowcase is 30” x 20,” which includes a tan hem with 1” drawstring.
Materials and Supplies
- Brother Sewing and Embroidery machine
- Embroidery Design: PTD02 Fire Breathing Elliot from iBroidery.com [click this line to go right to iBroidery.com]
- OPTIONAL: SA191 Stitch in the Ditch foot
- 3/8 yd. tan (13.5" x width of fabric)
- 7/8 yd. forest print (31.5" x width of fabric)
- SA5929 Cut-Away Stabilizer
- SA5810 Medium-weight Tear Away Stabilizer
- tearaway stabilizer
- embroidery thread
- thread for construction
- 1 ¼ yds. green rick rack
- OPTIONAL: long knitting needle (see Burrito Roll Technique)
- OPTIONAL: yellow or green glow-in-the-dark thread
Instructions - Pillowcase/Drawstring Tote
Drawstring
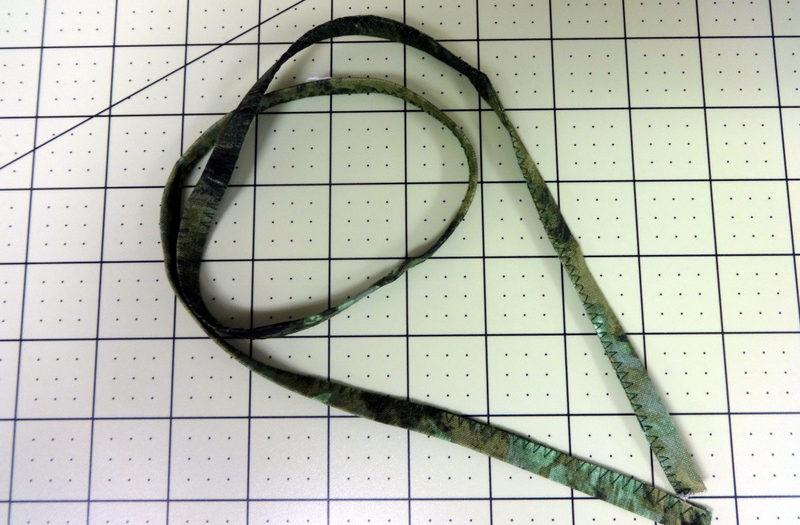
- Cut two 1 ¼” x 30” strips of forest fabric.
- Press ¼” to wrong side on each long side toward center.
- Fold and press again with wrong sides together.
- Stitch along fold with a zig-zag of an approximate stitch length of 2.0 and width of 3.5.
Hem preparation
- Fold and press lengthwise, to 6 1/2” x width of fabric, 42-45”.
- Cut to 6 1/2” x 41”. Press again making a crease that marks center, 20 ½” from each side, identifying front and back.
- Stitch four ½” buttonholes near the hem fold. Each is centered in the 1” casing at the red X marks. Stitched through only one thickness (be sure to unfold before you make these buttonholes), on the side which will be embroidered. The first two buttonholes are positioned 2” from unseamed side edges. Placement of one is shown in the photo below. The other should be placed 2" in from the other edge.
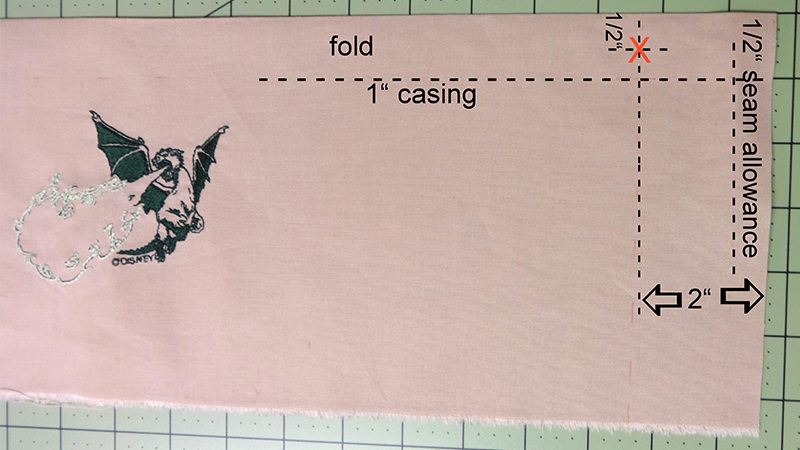 The first two buttonholes are positioned 2” from unseamed side edges as shown here with RED "X".[/caption]
The remaining two buttonholes are stitched 1 1/2” on either side of the center vertical crease.
[caption id="attachment_5001" align="aligncenter" width="800"]
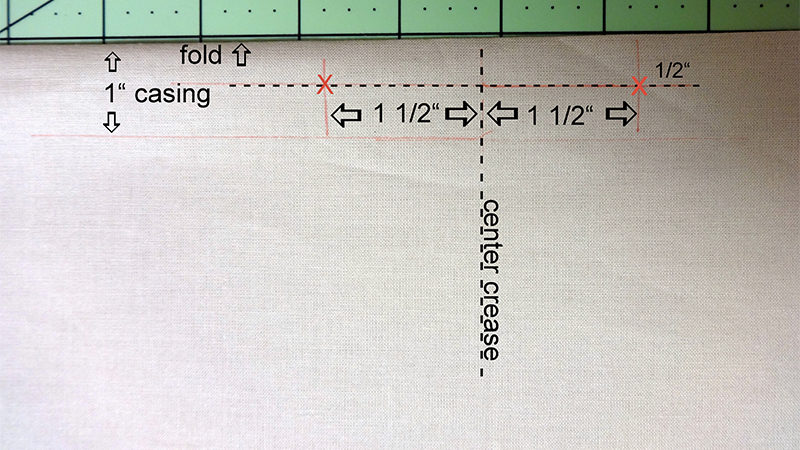 Placement of the remaining two buttonholes on either side of the center vertical crease.[/caption]
TIP: place a piece of cutaway stabilizer
under the buttonhole to reinforce it.
under the buttonhole to reinforce it.
Hem Embroidery: Fire Breathing Elliot PTD02
- Place design 10” from center vertical crease and 3 1/2” from bottom raw edge. Stitch through one layer only. Don't forget to layer the tear away stabilizer
below the tan fabric before adding the embroidery design.
NOTE: Elliot is positioned to look toward the pillowcase body with his head toward the fold. Lying in bed, a child can gaze on the dragon’s glow-in-the-dark fire. When used as a tote, the dragon is upright.
[caption id="attachment_5378" align="aligncenter" width="800"]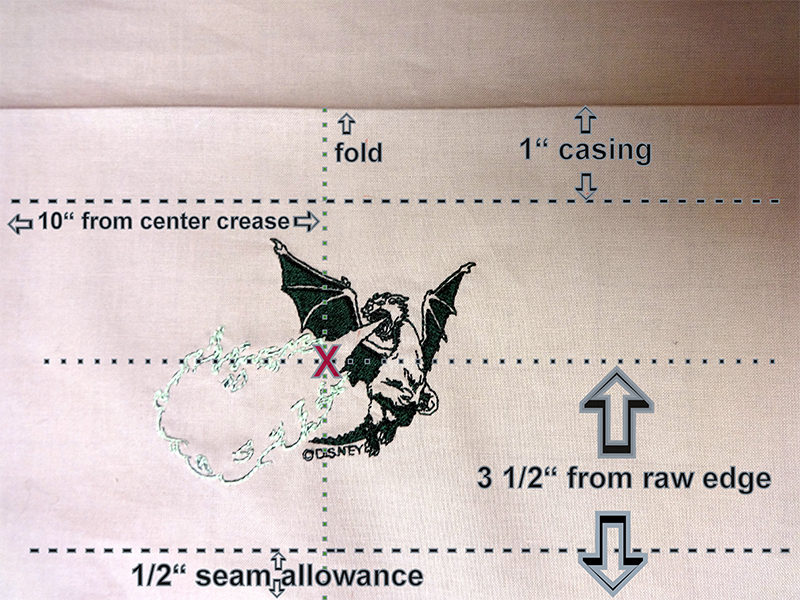 Embroidery Placement[/caption]
- Embroider complete design in one color as indicated. OPTIONAL: Stitch over fire portion of design with glow in the dark thread. Fire stitches are #1983-2076 and then # 3673-4436. NOTE: If you’ve added a basting frame, recalculate with the addition of those stitches.
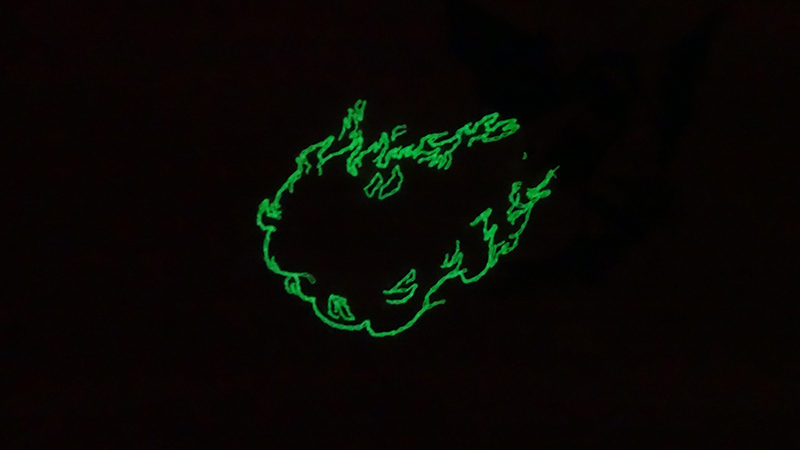
Tips for glow-in-the-dark “fire” embroidery:
a. Be sure to tie off at the start and finish of each section by backstitching.
b. Reduce speed to 500 stitches per minute or less. This fussy, exotic thread shreds easily.
c. Watch the stitch number carefully so you can stop at exactly the right place.
Construction ~ all seam allowances are 1/2”
- Stitch green rick rack on tan fabric,below Elliot, on the ½” seam line.
- Sew tan hem to forest fabric along 41” side, right sides together. Use the contrasting bobbin thread as a guide.
- Stitch parallel to that line with needle moved one or two positions from the previous stitching line, toward Elliot. This covers any visible stitches peeking out next to the rick rack.
TIP: Use contrasting thread in bobbin for better visibility in next step.
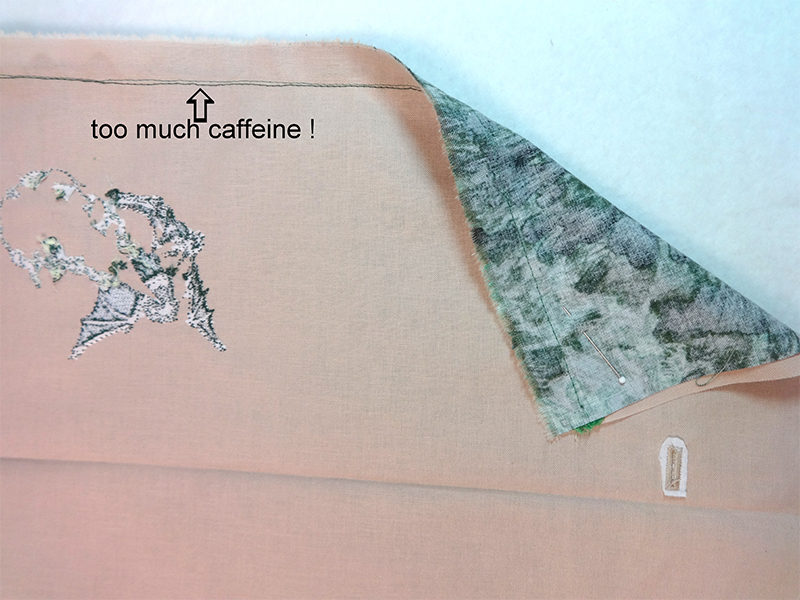
Technique Alert: Burrito Hem
Now comes the fun of the burrito hem. If you’ve never tried this technique, I think you will be intrigued. It can also be used on tea towels and other items which are not too bulky to fit within the burrito hem. So here we go.- Place the pillowcase flat with the hem against the table. Fold up the forest fabric a few times and finally roll it snugly until the roll rests an inch or so before the previously stitched seam.
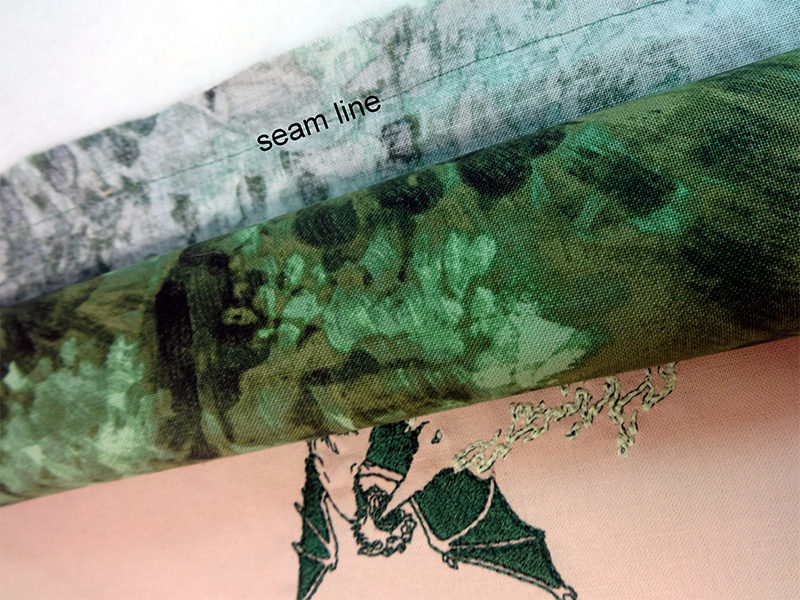
- Wrap the unfinished edge of the tan hem fabric up to the seam, matching raw edges. Encase the forest fabric roll. Pin in place.
 Do you wonder what the knitting needle is for? You might need it.[/caption]
- Flip the roll to opposite side and sew over stitching line furthest from the raw edge. Take care that the forest fabric roll does not creep up and get caught in the stitches. This is where the knitting needle comes in. If there is any possibility of stitching into the roll, use the knitting needle to poke the roll away from the seam line.
- Remove loose threads with a tape roller. Any that remain will be trapped and might shadow through.

- Pull the forest fabric from inside the burrito roll…. Now that’s magic.
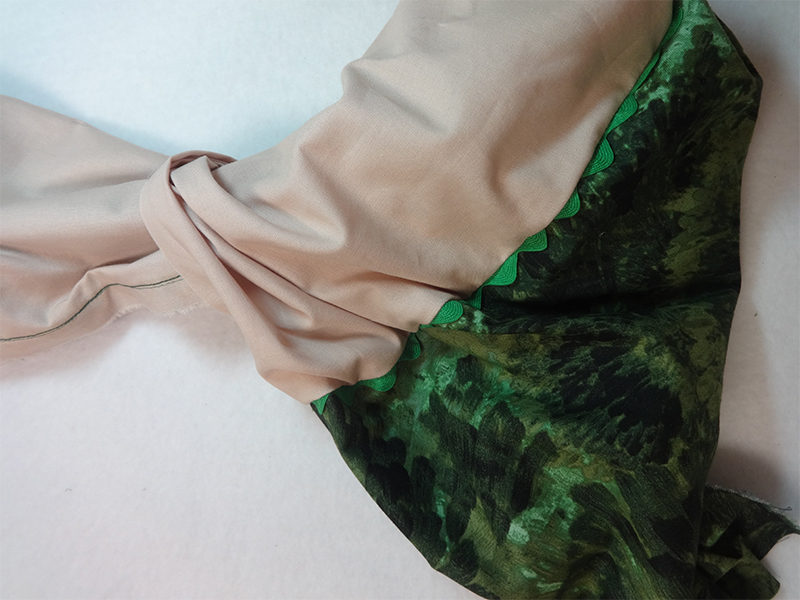 And (drum roll…) see what you’ve got!
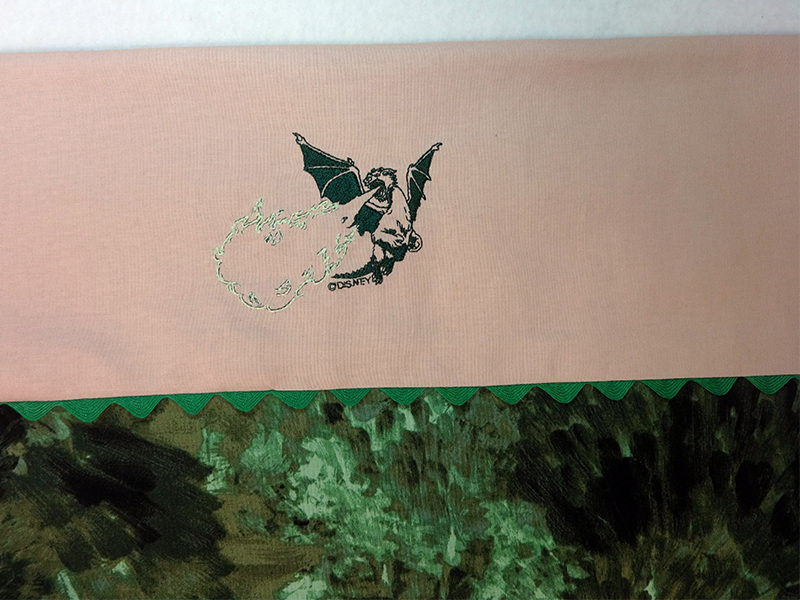 The contrasting hem is finished with raw edges completely enclosed.
- Sew casing 1” from folded edge.
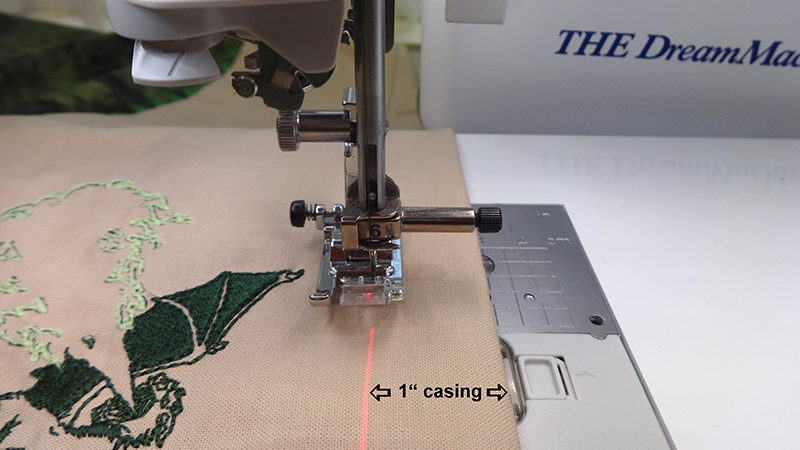
- Straight stitch narrow header just above buttonholes. Use of Brother’s Stitch in the Ditch foot SA191
helps make this a breeze.
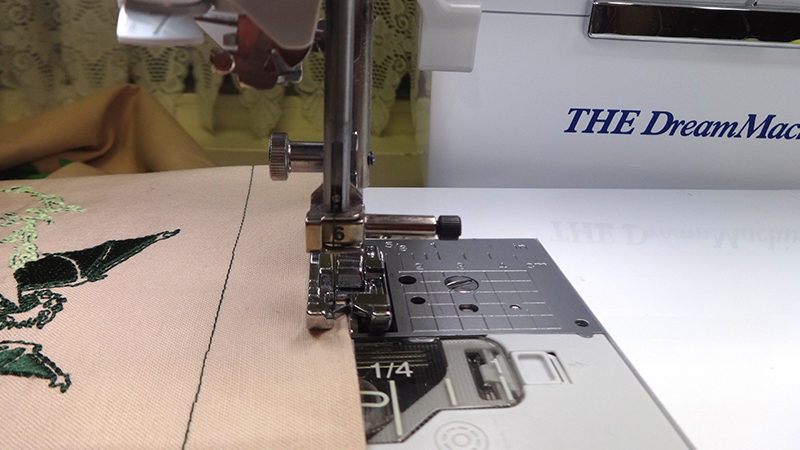
- Stitch ½” seam with wrong sides together. Clean finish the raw edges.
- Turn right side out, press and the pillowcase is done.
- Insert one drawstring (remember them from the beginning of the directions?) into casing through front buttonholes. Insert second drawstring in same manner through back buttonholes.
- Voila’! Now it’s a tote.
These embroidery designs have been manufactured by Brother under a licensing agreement with The Walt Disney Company, through which Brother has permission to use Disney images. The embroidery patterns offered on iBroidery are for personal non-commercial use only. No license is granted for any commercial use of these embroidery patterns and any such use is strictly prohibited.

