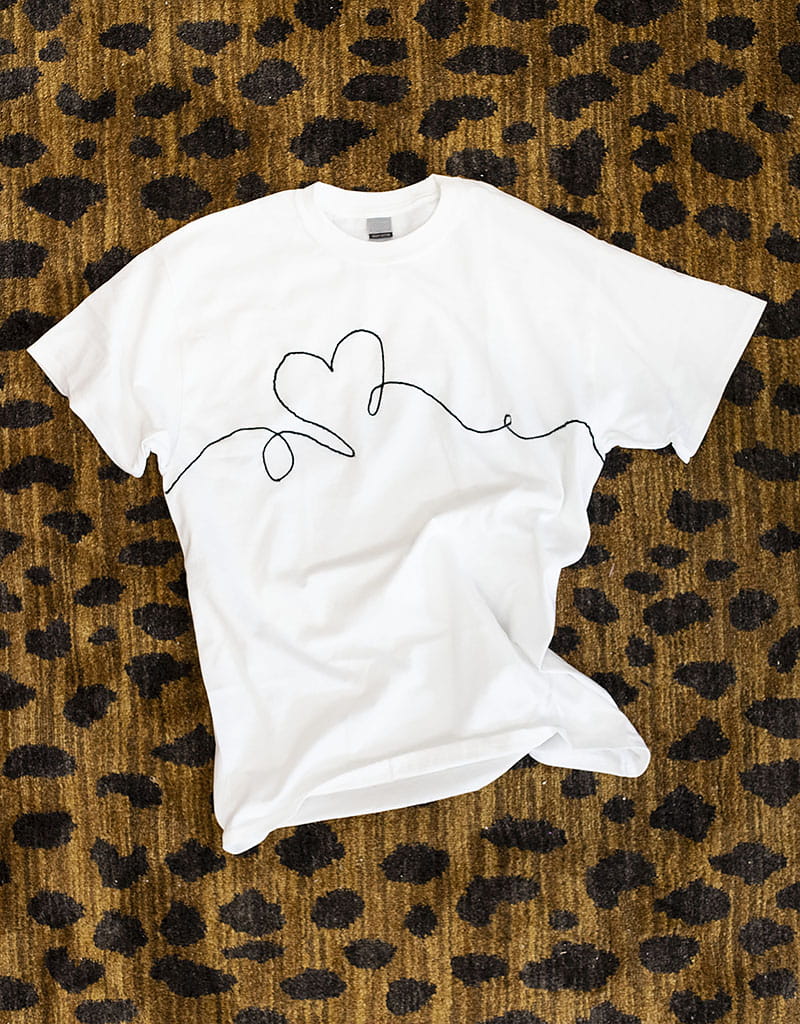
How To Draw With Yarn
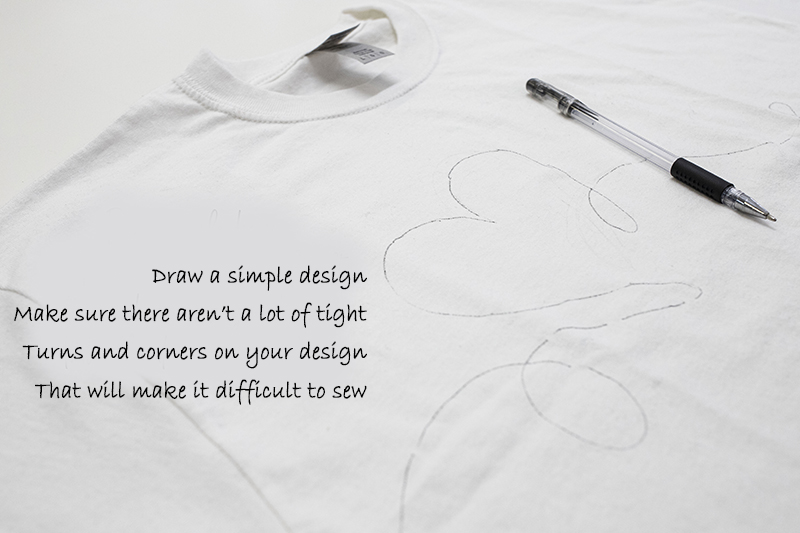
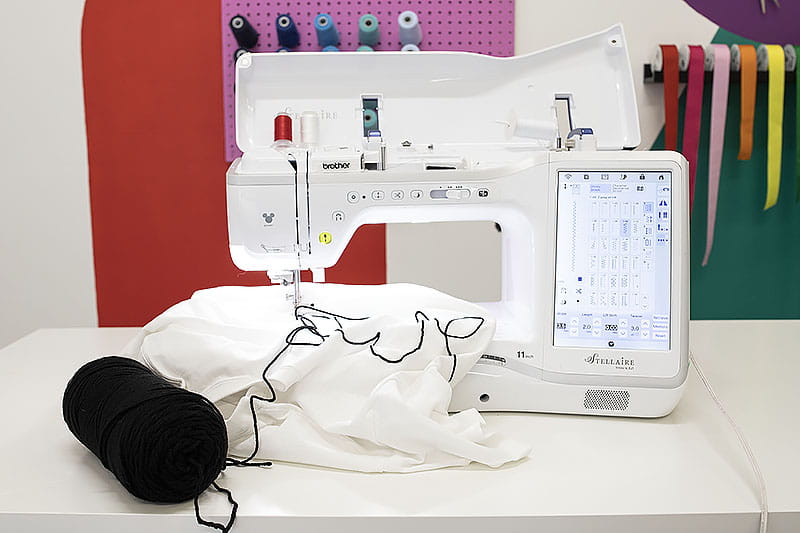
~Tabitha Sewer, Brother Sews Ambassador Hey everyone! This month I was so excited to try something I’ve never done before - drawing with yarn! I’ve seen a couple of examples online, and couldn’t wait to try this cool craft out for myself. Drawing with yarn is a great way to add more texture to your favorite projects, whether it’s a garment, bag, or even a quilt! I wanted to try a fun minimalist design that’s been trending for years, so I sat down and made it happen! This is a great crafting tip if you want to add some more personality and unique design to your craft. Drawing with yarn can make a great gift idea, too!! The process for how to draw with yarn was pretty simple. I was inspired by the popular line drawings online and sketched out this design and then I traced it onto my fabric using my marking tool. Next, thread the yarn through the cording foot and make sure that the end of the yarn falls to the back side of the foot. Starting at the beginning of your drawing, place the presser foot down and guide your yarn across your drawing. As you're sewing machine zigzag stitches across the yarn, the presser foot should help to hold your yarn in place and keep it straight. If you do not have the cording foot, another trick that you can use is to lightly glue the yarn in place until you have secured it and use a Brother Open Toe Foot SA147
to complete the project. *Pro Tip: Make sure you test your stitching before starting on your final project! You’ll want to figure out which zigzag stitch settings are going to work best for the yarn thickness you have and you want to encase the yarn in the stitches. Also take your time! Those curves can be tricky!* Once I had my settings figured out, I sewed over the yarn all the way around the design until it was completely secured to my fabric. From there you can decide what you want to make (if you haven’t already cut that design out yet), sew it up, and you’re set with a fun 3D design!
Materials:
- Brother Stellaire Innov-ís XJ-1
- Brother Cording Foot SA110
- T-Shirt
- Thread to match yarn color (or try different color thread for a fun, colorful design!)
- Scissors
- Fabric Marking Tool
- Zip Zag Stitch
- Width 3.5
- Length- 1.5
- Tension- 3 or mid
Instructions: 1. Draw out your design with a fabric pen.
 2. Thread the end of the yarn through the cording foot.
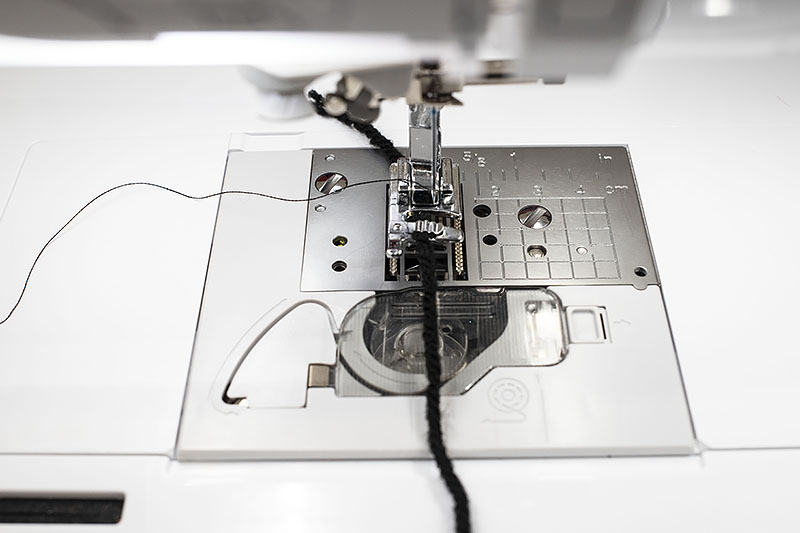 3. Guiding your yarn, zig zag stitch across the drawing you created.
 4. Don't forget to backstitch at the beginning and end of your seam.
Tags
Learn More
Inspired to try to this at home? Brother has you covered! The products in this snazzy project are available for purchase so you can click, shop, and get to crafting!
Sewing Machines
Related Projects
Stay Connected
* Required fields