Using Fun Colors to Create a Stylish LOVED Sweatshirt
How to make your own sweatshirt with “Loved” writing
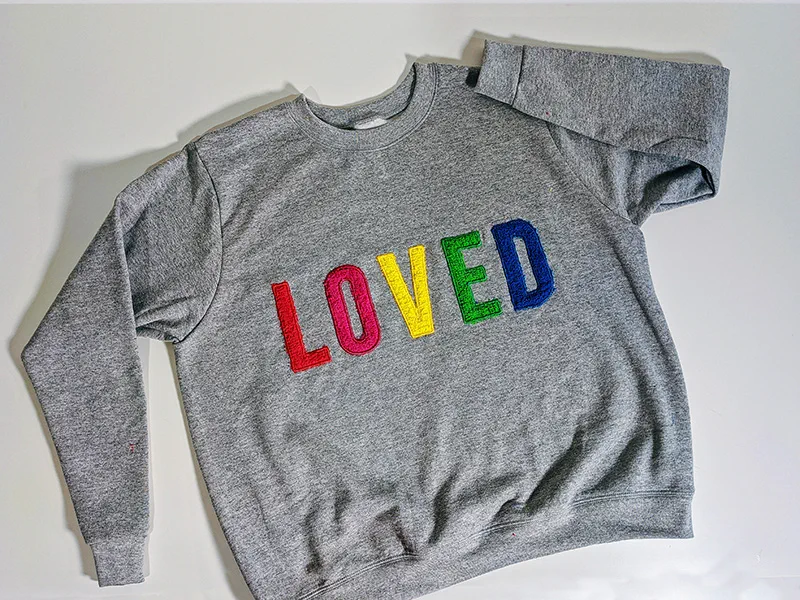
Ever walked into a store, spotted a sweatshirt you loved, but thought, “I could totally make this myself!”? Well, you absolutely can. Crafting your own DIY sweatshirt is not only a chance to showcase your creativity but also a perfect way to explore your sewing techniques. This guide shows you, step by step, how to create a fun, colorful appliqué sweatshirt spelling out the word' LOVED'. This project is ideal for sewing hobbyists and DIYers looking to add a playful flair to their wardrobe. Let's get started!
Here’s what you’ll need to get started sewing your sweatshirt
Supplies:
- Brother Sewing machine (I used the Stellaire XJ1 for this project, but the Stellaire XJ2 is the next best thing)
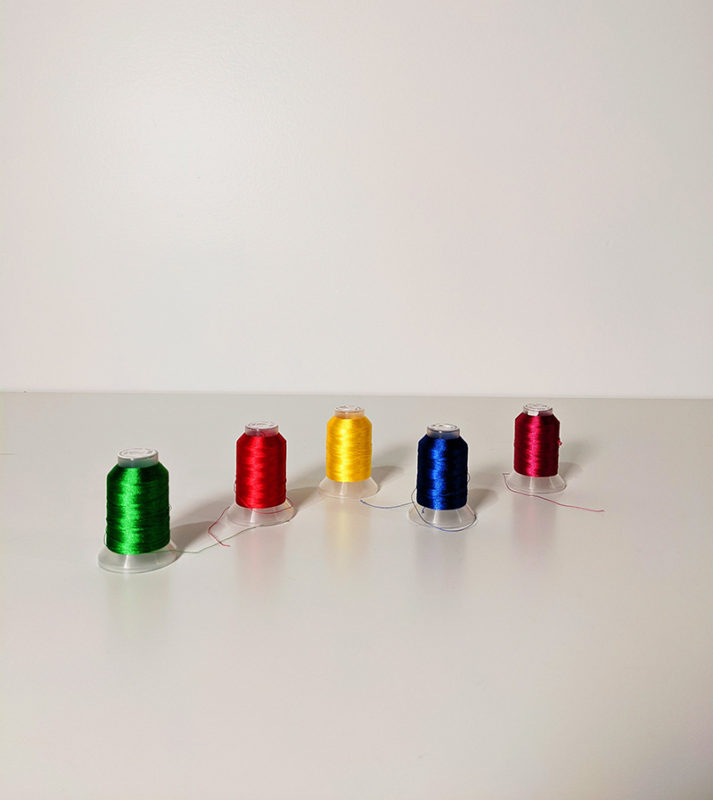
- Embroidery and bobbin thread
- Sweatshirt
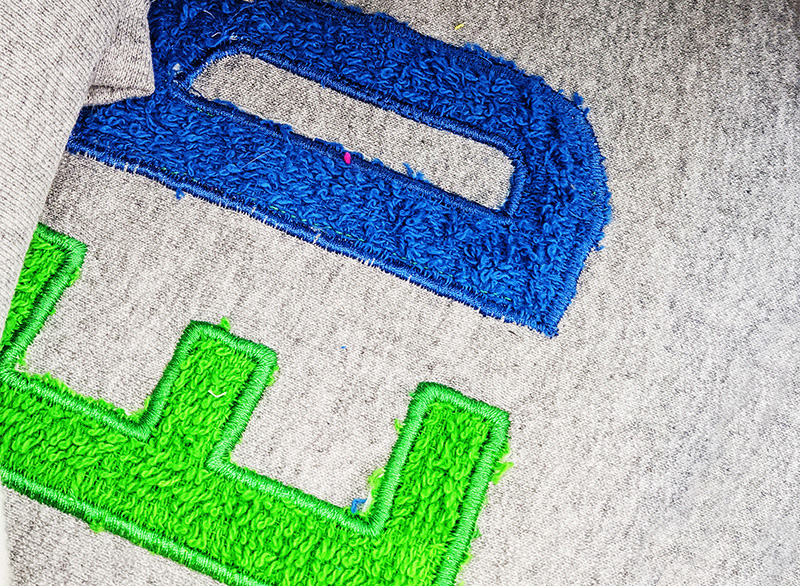
- Applique fabric (I used a washcloth)
- Medium weight fusible interfacing to back the applique fabric
- Medium weight cut-away stabilizer
- Sewing notions
8 steps to sewing your “Loved” appliqué sweatshirt
1. Sew up your sweatshirt
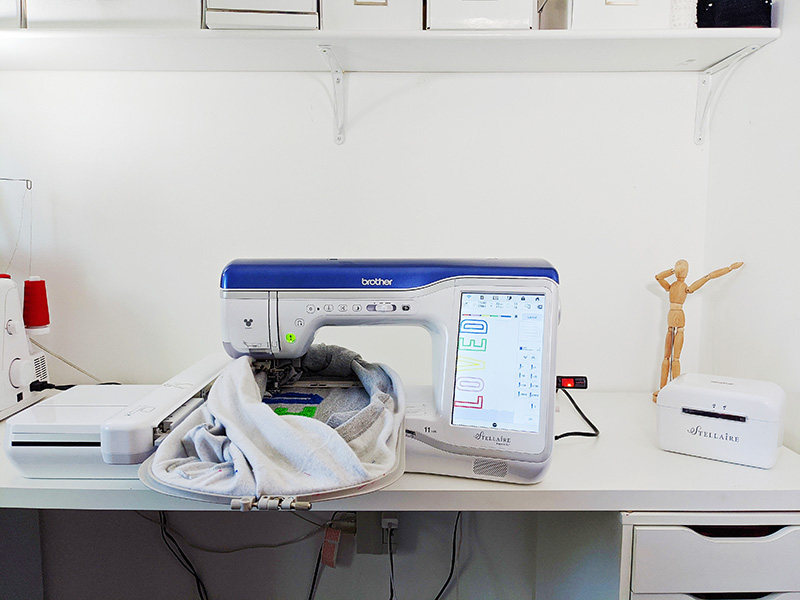
Hoop your sweatshirt with stabilizer in an embroidery hoop that is the right size for your desired design. Prepare your machine with the embroidery foot.
2. Select and prepare your design
Choose an outline-style appliqué font (in three steps: placement, tack-down, covering/satin stitch). Download and save it onto a thumb drive. Sketch your design on paper as a guide, keeping it simple yet bold.
3. Upload and arrange letters on the machine
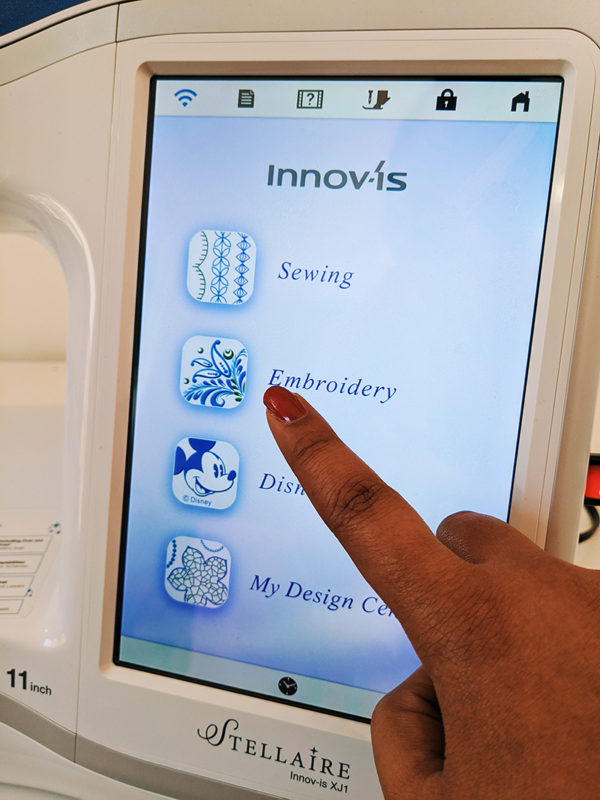
Insert the thumb drive into the sewing machine. Turn your machine on and tap ‘Embroidery.’
In the bottom right corner, tap on the USB icon and a folder of your new font will be displayed on the screen.

4. Stitch the initial outline
Tap the folder to open it and, one at a time, click on your desired letters and arrange them as desired on screen. Move and rotate each letter using the options in the Edit menu. Also, this is the time to choose the color of each letter. Once your letters are laid out the way you want them to look, tap on the ‘Embroidery’ button in the bottom right corner.
On the front of your machine, lower your presser foot. The Start/Stop button will light up green. Push the green button to begin embroidery. Your machine will start by stitching a placement line, an outline that shows you where to position the applique fabric for your first letter.
5. Prepare and attach the fabric
Use the stitched outline as a guide and cut your desired applique fabric (I’m using washcloths) into a rectangle that is about ½-inch wider and longer than the stitched outline. Press a medium-weight interfacing onto the back of the fabric to give it some structure.
6. Secure the fabric
Place the prepared applique fabric on top of your sweatshirt, directly covering the stitched outline. Next the machine will sew a tack-down stitch to hold the applique fabric to your sweatshirt. Once this is finished, remove the embroidery hoop from the machine but do not take the sweatshirt out of the hoop. Carefully cut away the excess fabric from outside the stitch line. Cut as close as you can without cutting the stitches and take care not to move your fabric within the hoop.
7. Add the satin stitch
After trimming, reattach the embroidery hoop to the machine to continue with embroidery. Your machine will now sew a satin stitch around the letter to cover the raw edges of the applique fabric. Ensure that the correct color is in the machine before you start sewing.

8. Repeat for additional letters
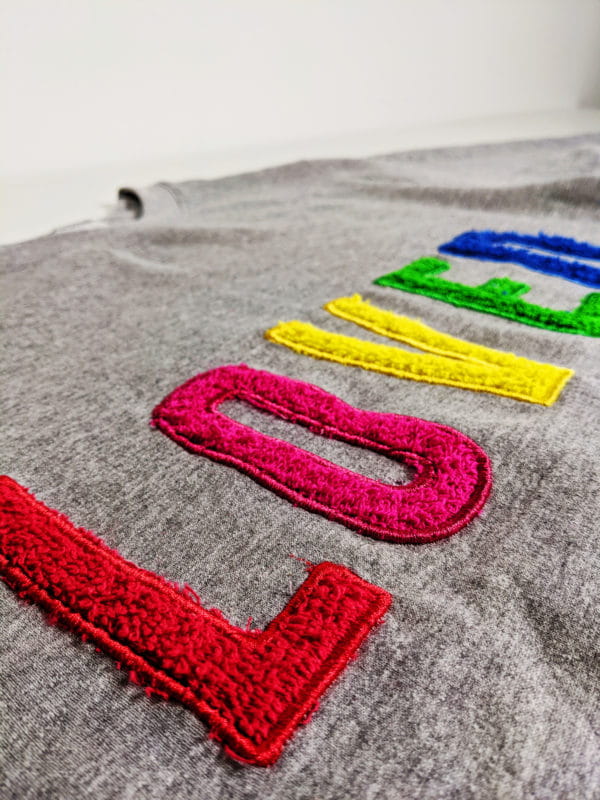
If your design contains multiple letters, repeat all steps for each one. Once finished, detach the hoop, give your sweatshirt a final inspection, and enjoy your finished masterpiece!
Personalize your sweatshirt with bold fonts
Congratulations on creating your own bold and colorful “LOVED” sweatshirt! By personalizing the colors, fabrics, and fonts, you’ve turned a basic sweatshirt into a statement piece. If you’re ready for your next DIY sewing project, remember to explore other embroidery techniques or venture into custom designs. Check out these DIY summer shoes or learn how to embroider on knit fabrics.
We’d love to see your work! Share your creations on social media and tag us @BrotherSews to inspire our maker community.
FAQs
Q: What sewing experience do I need for this project?
A: This tutorial is beginner-friendly! The detailed steps and use of an embroidery machine simplify the process, making it approachable for all skill levels.
Q: Can I use a different sewing machine?
A: Absolutely! While the Stellaire XJ1 offers incredible precision for this project, most embroidery-capable machines will work. Simply adapt the steps to suit your machine's specifications.
Q: How do I find appliqué fonts?
A: Search for appliqué fonts online. Many embroidery font websites offer free and paid designs that are compatible with most embroidery machines.
Related Projects
Stay Connected
* Required fields