Free Design of the Month for July: Embroidered Bottle Sling
We’re celebrating summer with a colorful design as the Brother Free Design of the Month for July. If you’re planning any outdoor activities or traveling to various places during the summertime, you’ll want to have your personal beverage bottle handy. With your Brother sewing and embroidery machine, you can make a custom carryall for your bottle. This style will fit your bottle perfectly. Sling it over your shoulder or wear it crossbody style and head out for some summer fun! Be prepared for friends and family to ask for one of their own! Are you ready? Let’s go sew!
Note: Featured embroidery design fits 4-inch or larger hoop.
Materials and Supplies for Embroidered Bottle Sling:
- Brother sewing and embroidery machine with 4-inch hoop capability.
- SA580 Brother medium-weight tear-away stabilizer for embroidering.
- Embroidery threads in desired colors, bobbin thread, and size 11 embroidery needle for embroidering.
- Basic sewing notions including thread to match fabric, sewing machine needle, tape measure, pins, and small clips for securing fabric layers.
- Cotton quilt weight fabric, in a color that coordinates with embroidery design. I chose a marbleized cotton print. Note: Size for outside (embroidered) and inside (lining) bottle pieces determined after taking custom measurements.
- Strips of fusible craft fleece to add to outside and inside bottle cover pieces, plus one-inch wide strips for fusing to bottom straps and shoulder strap. More size information found in Step One.
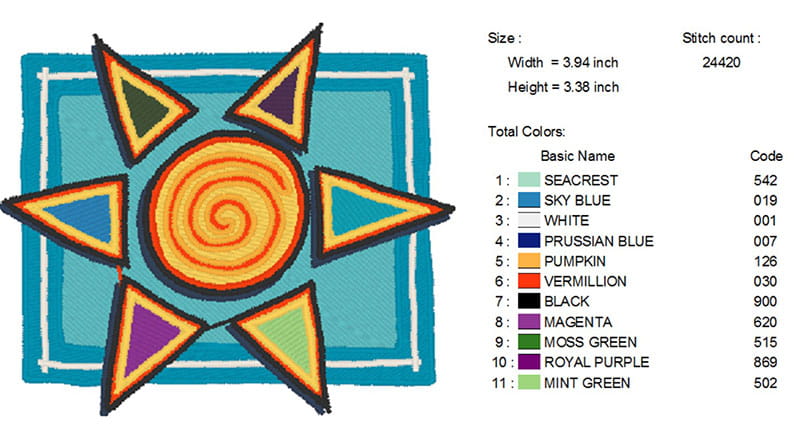
- Brother Free Design of the Month FD_7_2023.See Figure #1 below.
Figure 1
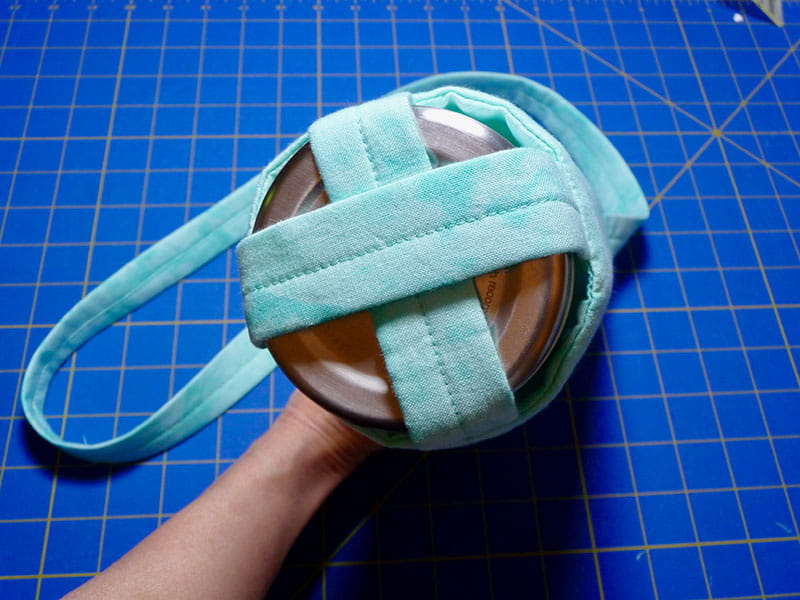
Finished size of bottle cover depends on bottle size. This project is recommended for a bottle with a 3-inch or larger diameter for the bottom measurement. See close-up of bottom of bottle in Figure #2a and Figure #2b.
Figure 2a

Figure 2b
Please read through all instructions before beginning this project. Basic steps are as follows:
- Measure bottle and use formula to cut custom sized pieces from fabric and fusible fleece.
- Prepare pieces for sewing.
- Embroider front of outside piece.
- Construct bottle sling following step by step instructions.
All Steps to Create Embroidered Water Bottle Sling:
- Measure bottle height from bottom to top edge below the bottle opening. Note: If your bottle narrows at the top, start your measurement beginning at the widest part of the top edge. See example in Figure #3.
- Measure around bottle circumference. See example in Figure #4.
- Cut fabric pieces for main bottle cover as follows: Cut one outside (for embroidered piece) and one inside (for lining piece), using final width and length totals for measurements A and B.
- Cut two pieces of fusible fleece to fuse to wrong side of outside and inside piece, trimming away 1-inch from the (A) length and (B) width measurements to keep fleece out of seam and hem allowance.
- Next, we’ll determine measurement C for length of bottom straps using this formula: C equals B, minus 1-inch, divided by 2. See example of my finished bottom strap measurement below for reference:
- For the shoulder/cross body strap, cut one piece measuring 3-inches wide X 44-inches long. Cut one piece of fusible fleece measuring 1-inch wide X 44-inches long.
- Prepare pieces for sewing as follows: Fuse fleece to wrong side of outside and inside pieces. To fuse 1-inch fleece strips for bottom straps and shoulder straps, begin by fusing fleece along one long edge. Next, fold strip under 1-inch toward opposite long edge and press. Fold under opposite raw edge toward the middle and press. Finally, press one more time so fold is in the center and all raw edges are hidden. See steps below in Figure #6a to Figure #6d.
- Select your desired thread colors for embroidery design. See Figure #9.
- Hoop outside piece, having it centered in the 4-inch hoop. Slip a piece of tear away under hoop and embroider design. See Figure #10.
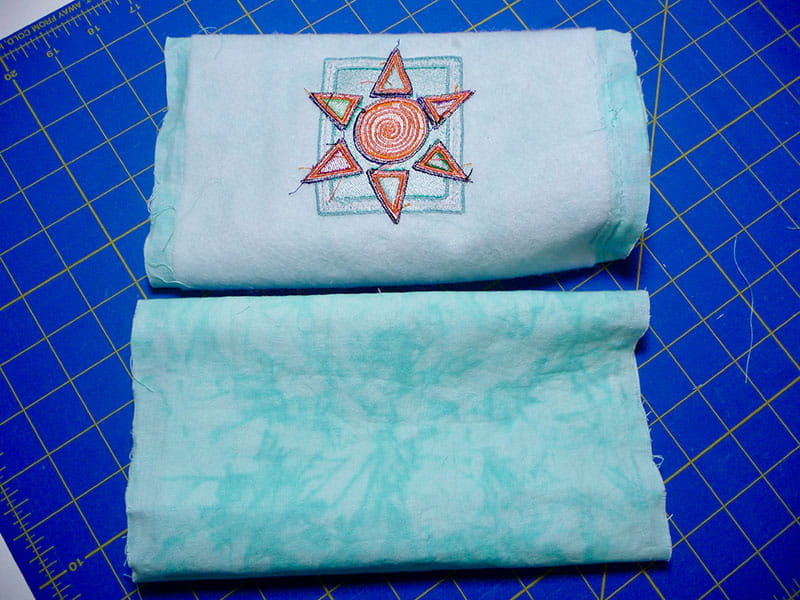
- Remove excess stabilizer and press embroidered piece, then sew lengthwise seam for center back. Repeat for lining piece. Press seams open. See Figure #11a and Figure #11b.
- You now have two cylinders. Quarter mark embroidered cylinder with pins. See Figure #12.
- It’s time to sew the two cylinders together to form bottle sling. Turn lining right side out and select both outside and inside pieces. See Figure #14.
- Select a straight stitch set for a length of 2.0 to help maneuver around the circle. Sew around this entire circle to create bottom seam. Note that sewing a small circle like this will require sewing a short distance at a time. Sew slowly and carefully, using needle down feature and stopping to adjust layers as you go. See Figure #17a and Figure 17b.
- Remove all basting stitches. Open out the layers. I’ll warn you that it’s going to look a little twisted! That’s okay. See Figure #18.
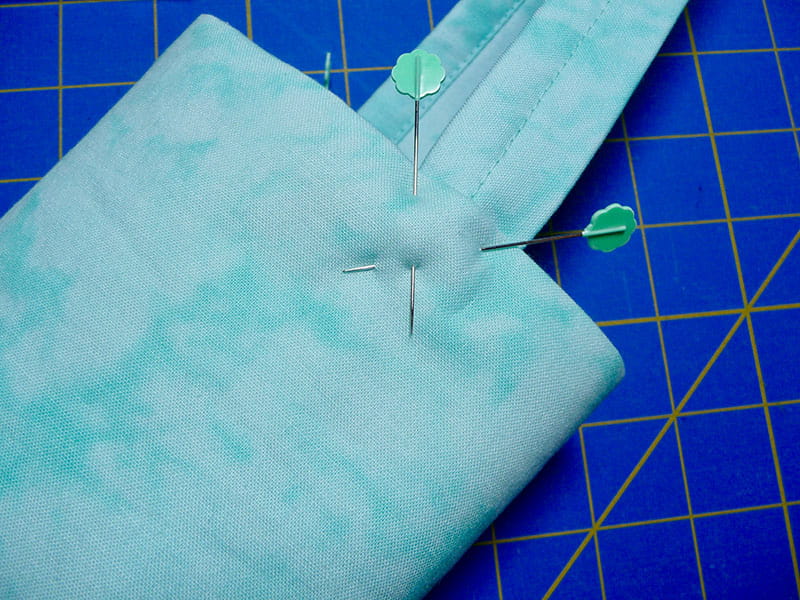
- Now, tuck lining inside outer piece, smoothing out layers so top raw edges match. To hem top edges, press under ½ inch of both pieces. Tip: A sleeve roll commonly used for dressmaking makes it easy to press cylinder shaped items. For another option, tightly roll up a towel and slip inside cylinder for a pressing surface. I also like to use a touch of light spray starch to help press a crisp hem on cotton. Mark sides and slip ends of shoulder strap between layers. Pin in place using two crisscrossed pins to secure strap ends. See Figure #19a and Figure #19b.
We’ll measure the bottle and work out a formula to cut custom sized pieces. I’m not much for formulas myself, but trust me, this one is easy if you take it one step at a time and record everything on paper. Measure bottle and create formula for cutting pieces as follows, rounding small fractions to the nearest whole or half number:
Figure #3
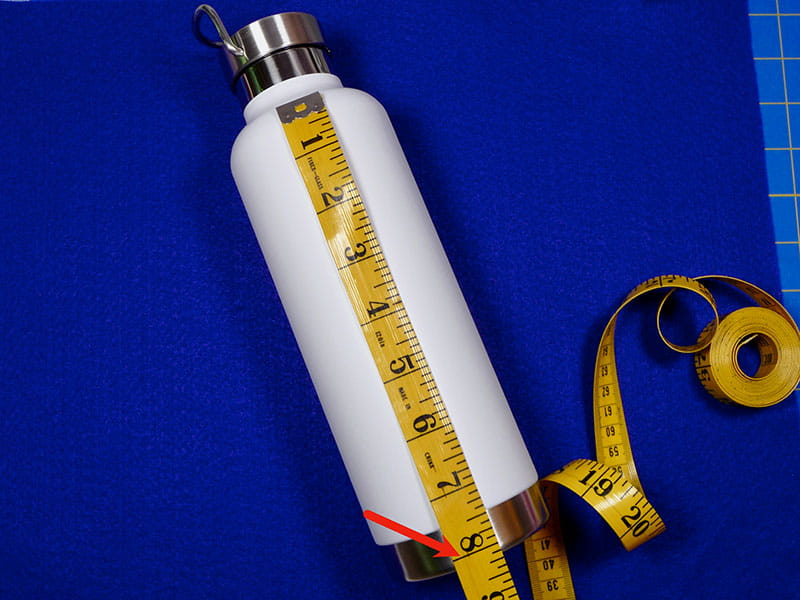
Add 1-inch to bottle height for seam allowance. Record measurement as measurement A.
Figure #4
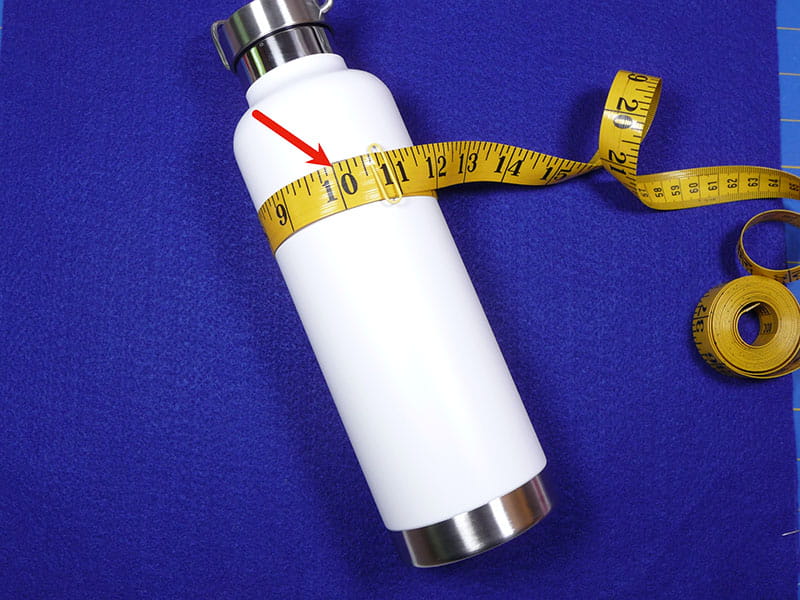
Add 2-inches to bottle circumference for ease and seam allowance. Record measurement as measurement B. See example of my finished measurements below for reference:
A equals 8-inches plus 1-inch for a total of 9-inches for LENGTH measurement.
B equals 10-inches plus 2-inches for a total of 12-inches for WIDTH measurement.
C equals B (12-inches) minus 1-inch for a measurement of 11-inches. Divide 11-inches by 2 for a total of 5 ½-inches for length of each bottom strap. Cut two bottom straps measuring 3-inches wide X length determined by measurement C. Cut two pieces of fusible fleece measuring 1-inch wide X length for measurement C.
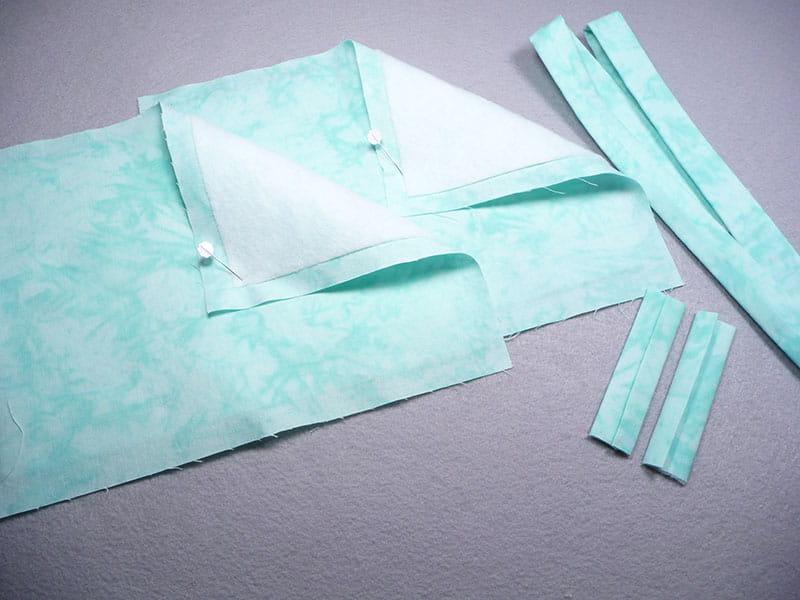
See all cut pieces in Figure #5.
Figure #5
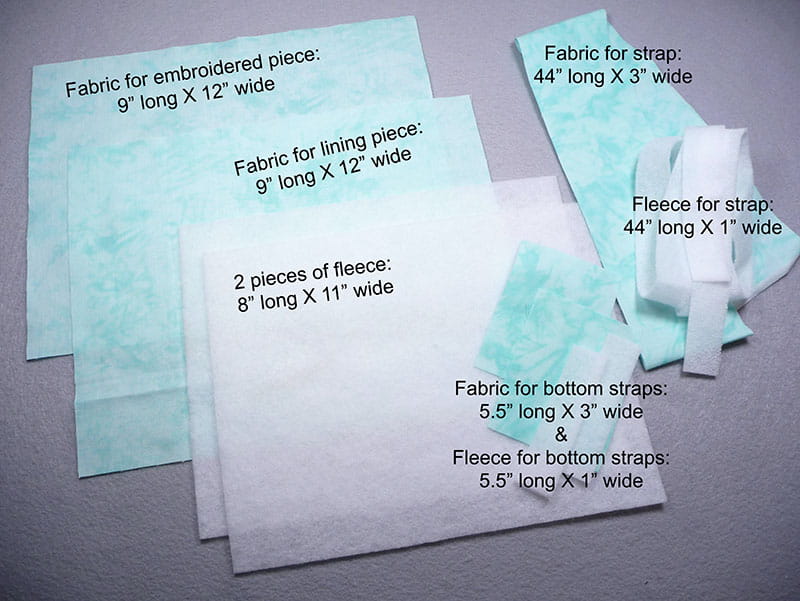
Figure #6a
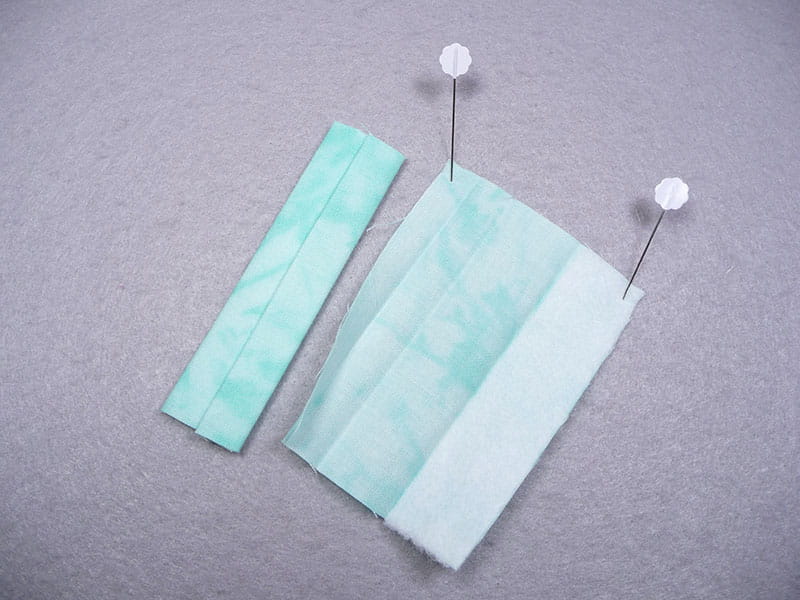
Figure #6b
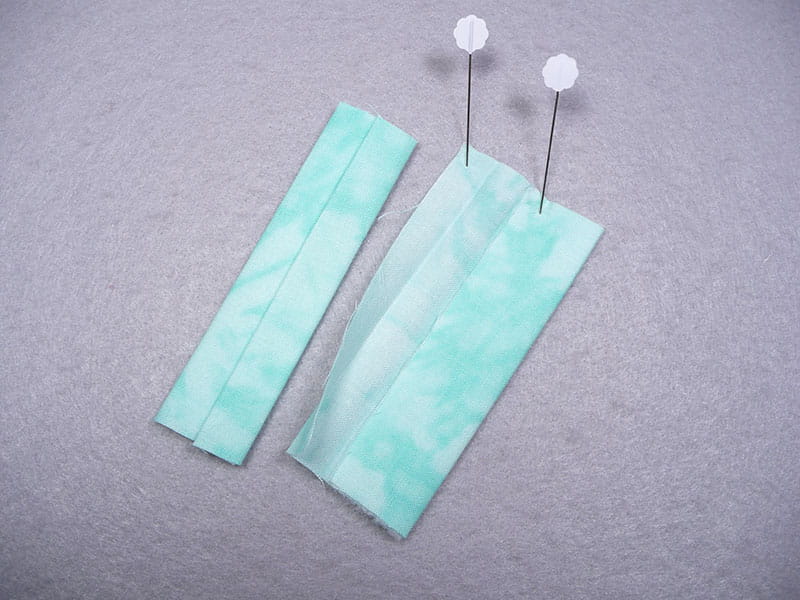
Figure #6c
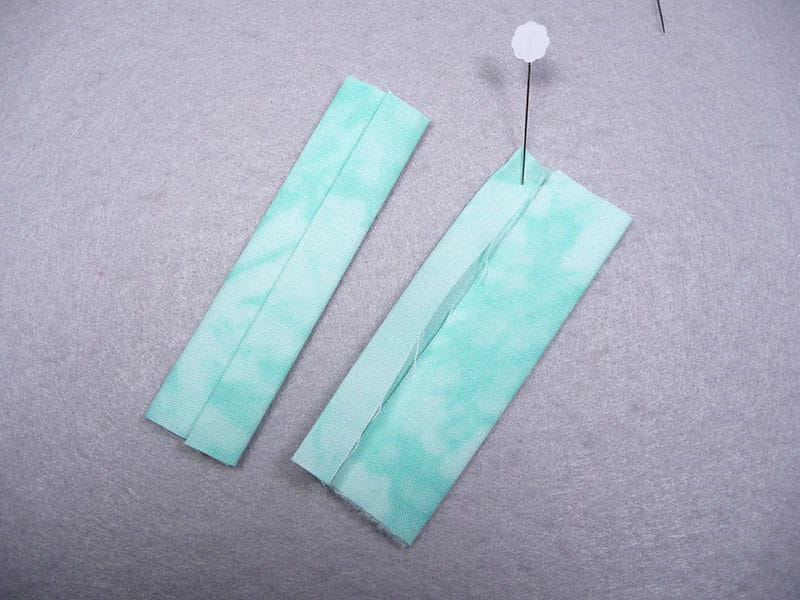
Figure #6d
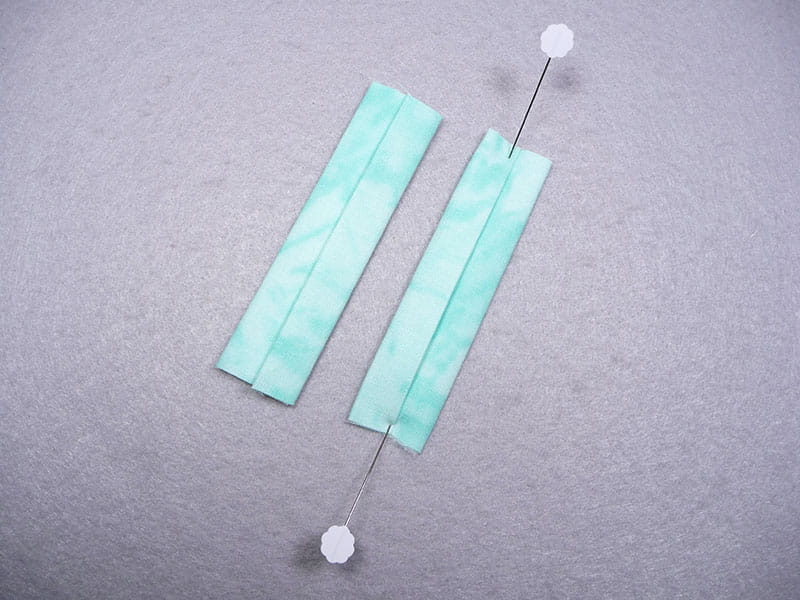
Follow the same steps to prepare shoulder strap. See prepared pieces in Figure #7.
Figure #7
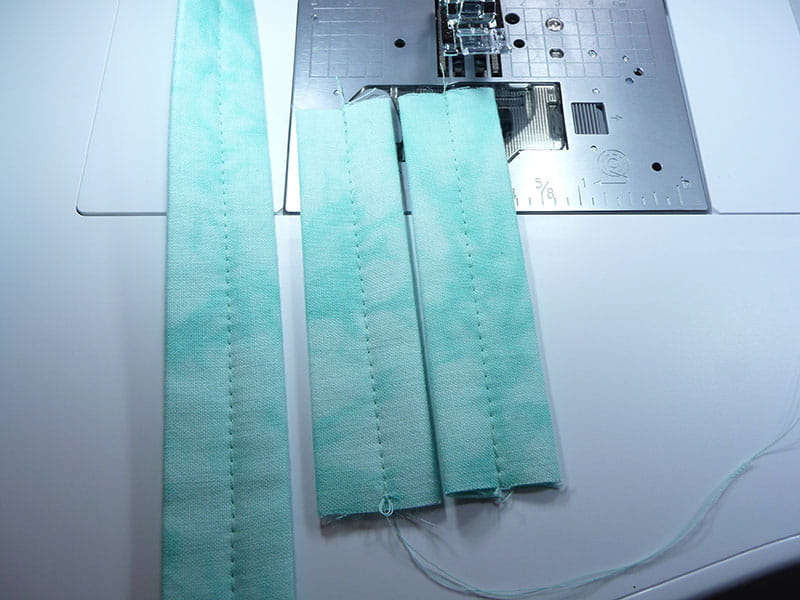
Next, topstitch along center folded edge of each bottom strap piece and shoulder strap piece. See Figure #8a and Figure #8b.
Figure #8a
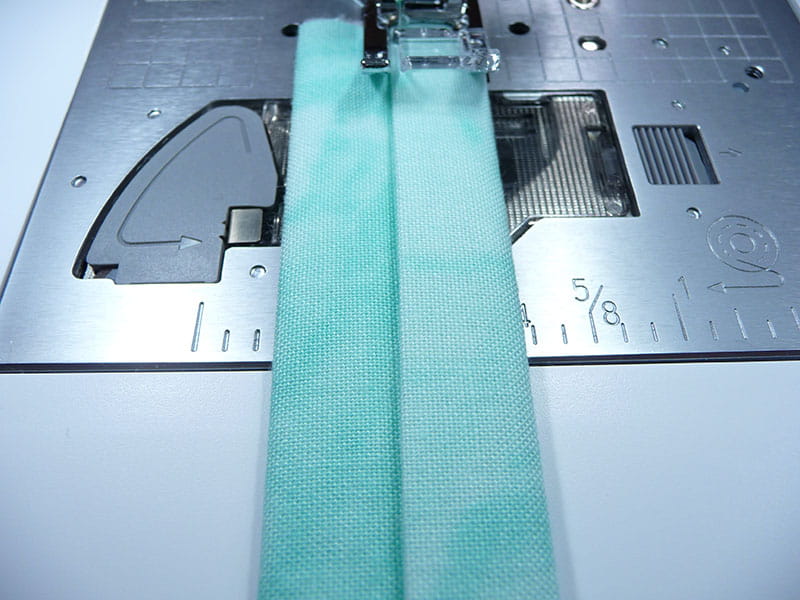
Figure #8b
Set these pieces aside temporarily.
Figure #9
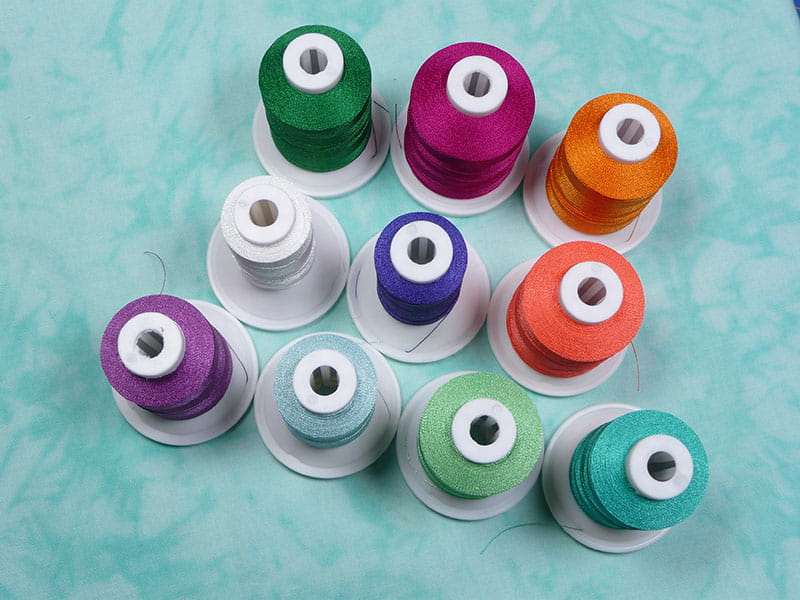
Figure #10
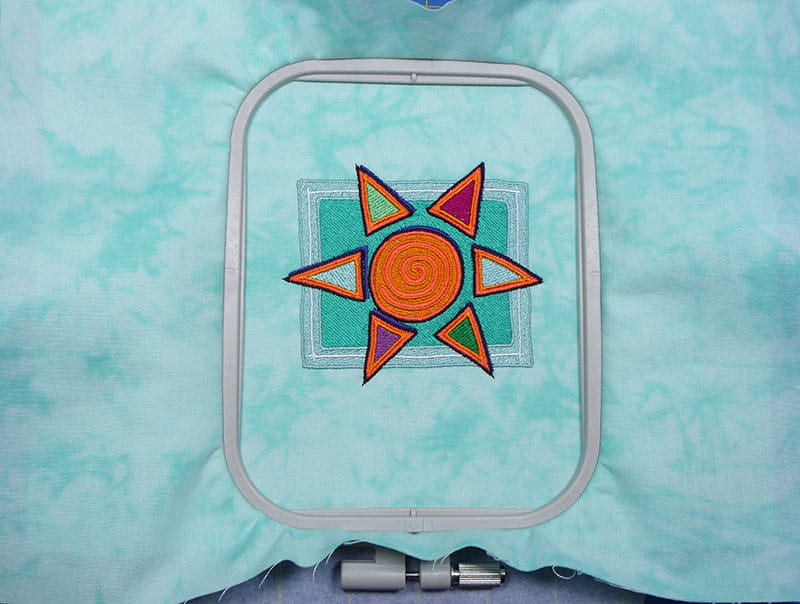
Figure #11a
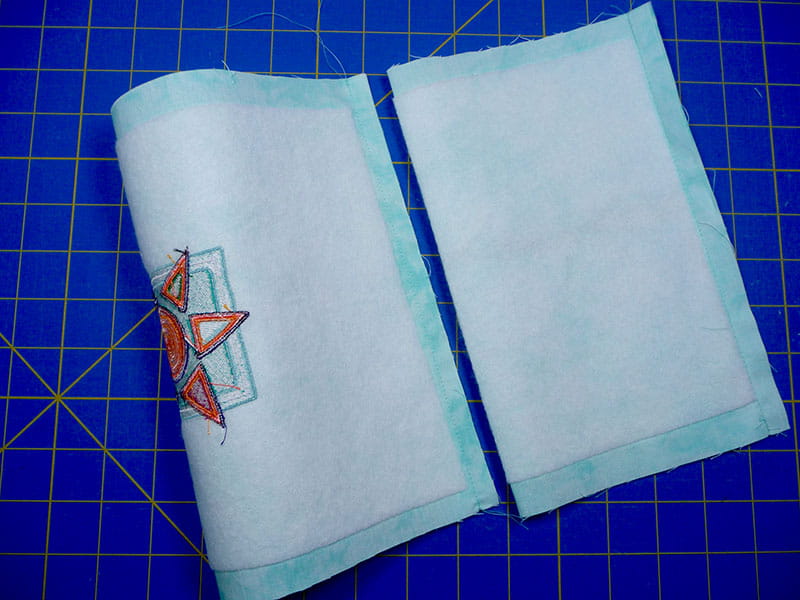
Figure #11b
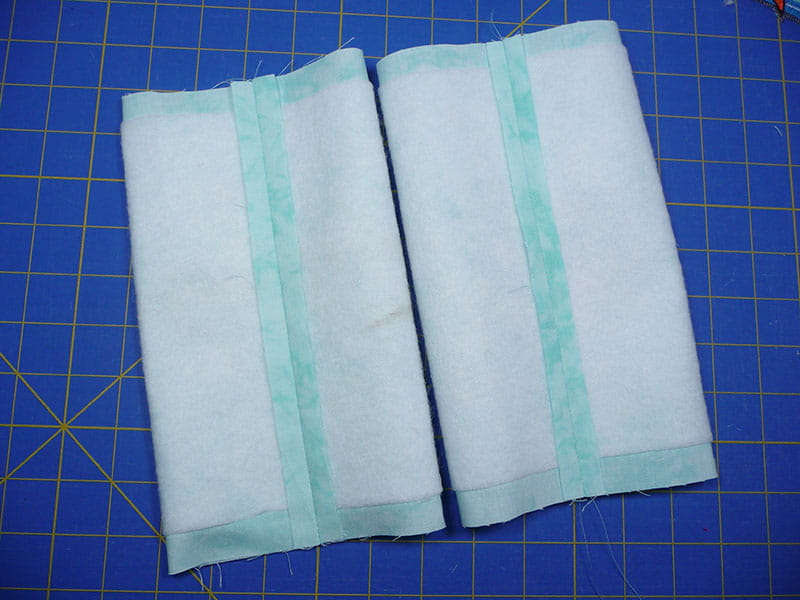
Figure #12

Crisscross bottom strips, matching center of strips with quarter markings, then baste in place, basting ½-inch from raw edge and again ¼-inch below first basting. See Figure #13a and close-up of basting stitches in Figure #13b.
Figure #13a

Figure #13b
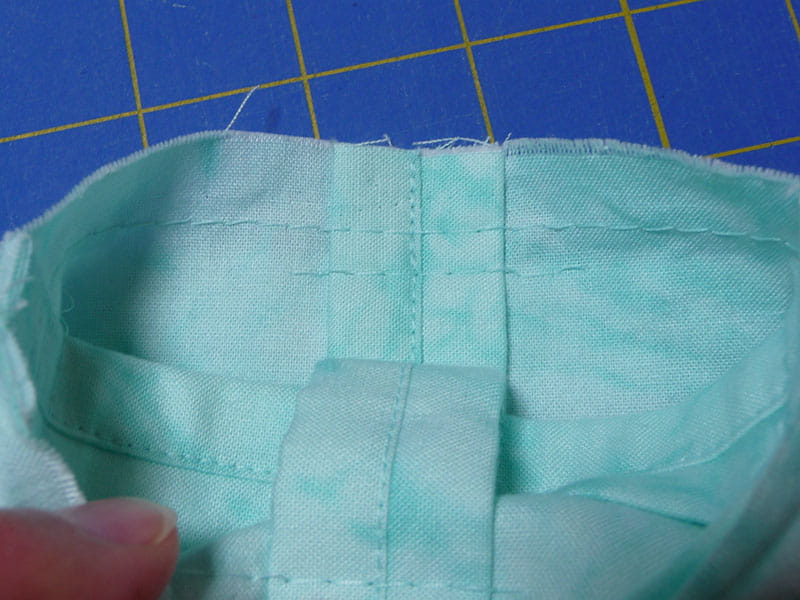
Figure #14
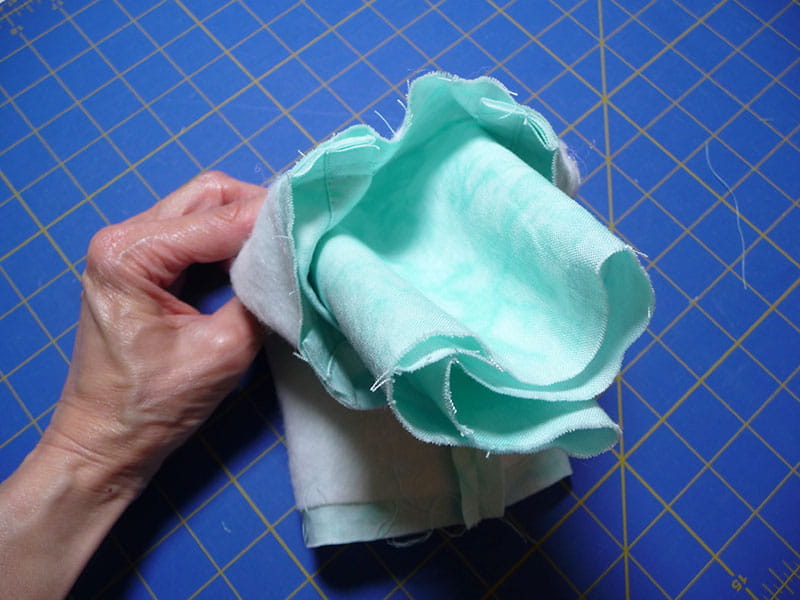
Next, tuck lining piece inside embroidered piece, having right sides together and pushing lining through small open space between bottom straps. See Figure #15.
Figure #15
Push lining piece down inside so that you can match top raw edges of both pieces, then clip them together with center back seams matching, and edges of bottom straps sandwiched in between. Note that lining will fit tightly within open space of bottom straps. See Figure #16.
Figure #16
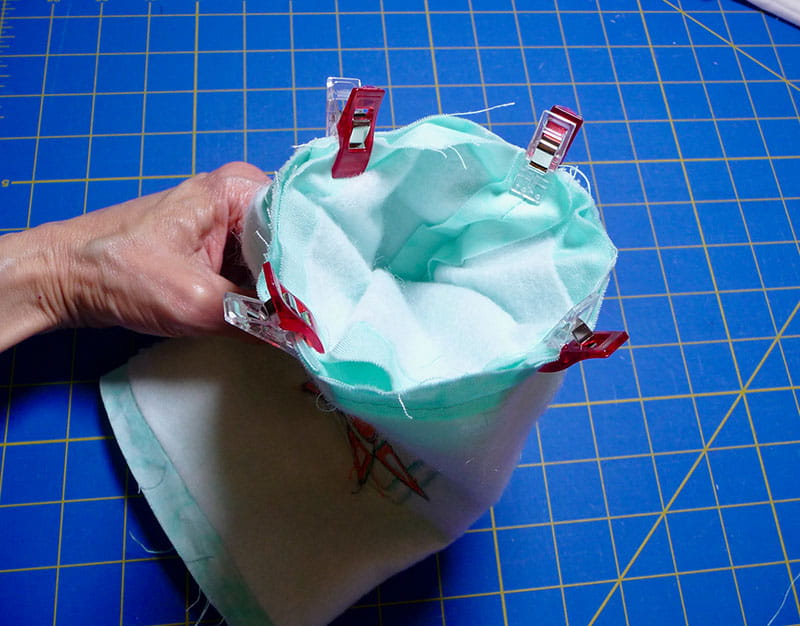
Figure #17a

Figure #17b
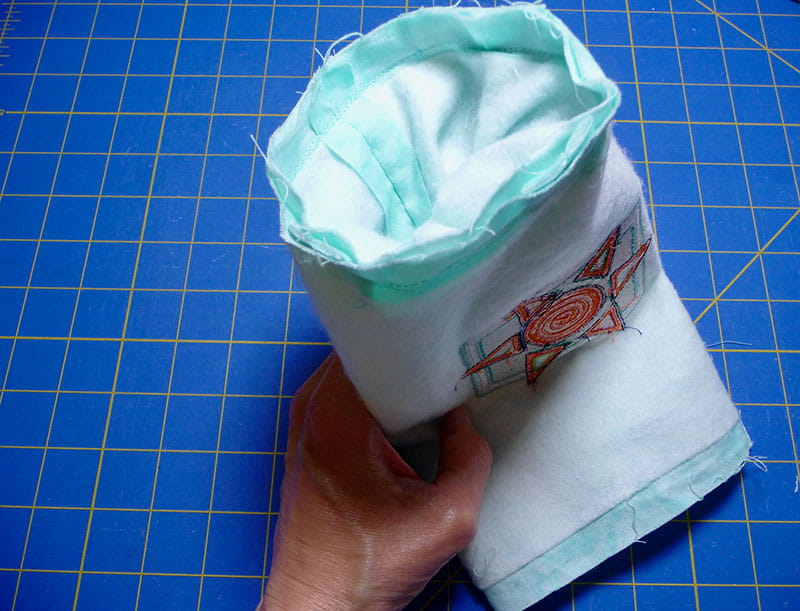
Figure #18
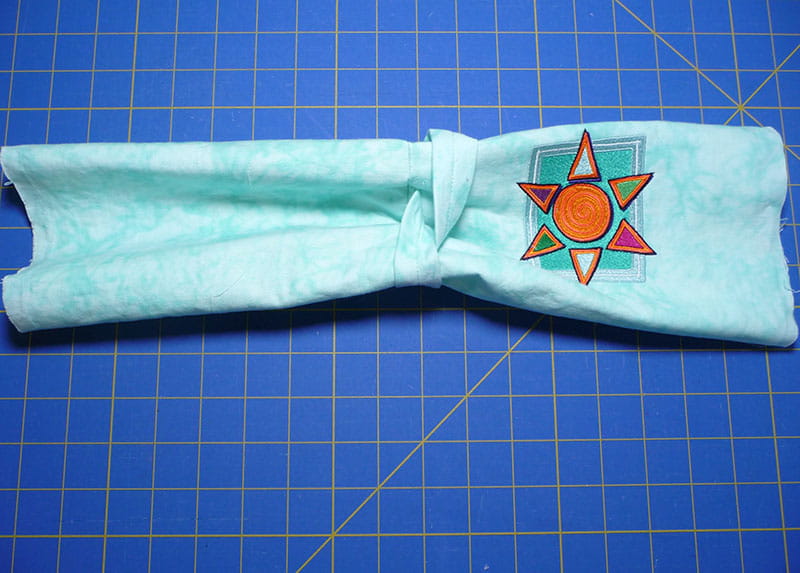
Figure #19a
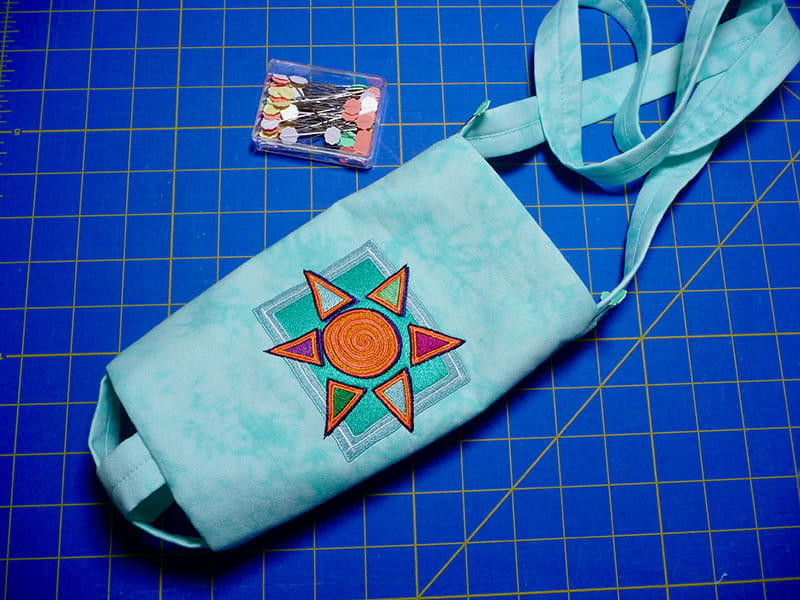
Figure #19b
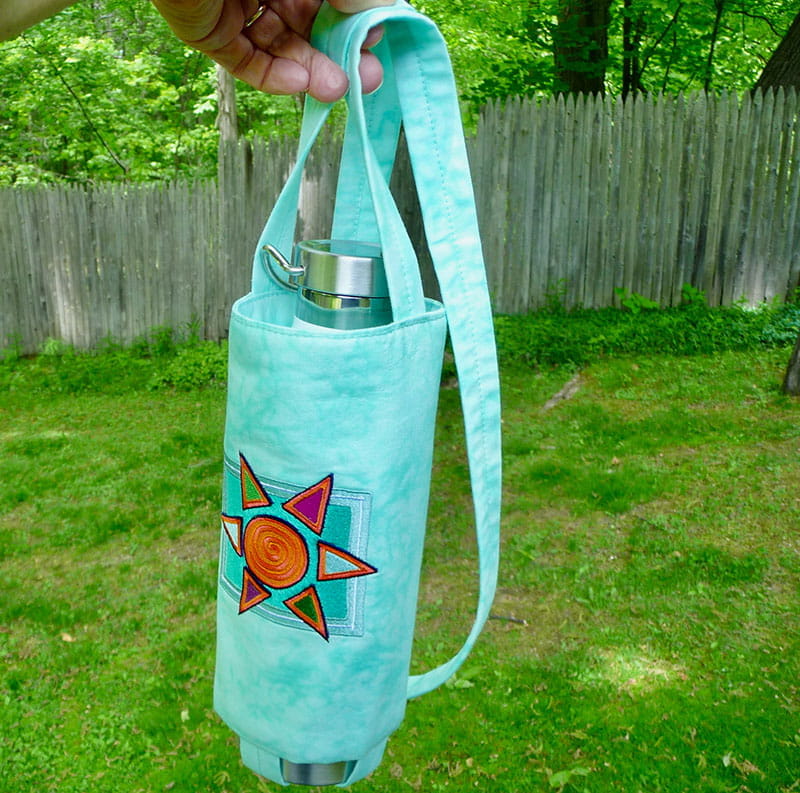
Edge stitch close to folded top edge, securing straps as you sew. Again, you will need to sew a short length at a time to maneuver around the circle. Tip: You want straps to be well secured. Consider using the triple stretch stitch set for a length of 3.0 to sew top edge. This will look decorative and be a strong stitch with good holding power for stress on the strap. You are finished! Fill your bottle, pop it into your beautiful new sling and head out for your favorite summer activity! See finished embroidered water bottle sling in Figure #20.
Figure #20
Related Projects
Stay Connected
* Required fields