Free Design Of The Month - Embroidered Pattern Weights

September is National Sewing Month! With the Brother Free Design of the Month, you can create these easy to make pattern weights and celebrate your love of sewing. The cute little scissor design is perfect for the center. Simply add circular frame shapes and lettering built-in to your machine, hoop up some ordinary craft felt, and you’re on your way to making some fun new pattern weights to hold patterns in place while cutting with scissors or a rotary cutter. Are you ready? Let’s go sew!
Note: You can create this project using Brother embroidery machines with a 4-inch hoop. This project features embroidery machine editing capabilities to create a combined design and array lettering to curve at the top and bottom of the circle. Adjust the combination design as necessary if you don’t have all the features available.
Finished size of each pattern weight is approximately 3-inches in diameter.
Materials and Supplies for Pattern Weights:
- Brother embroidery machine with 4-inch hoop capability.
- SA5810 Brother medium-weight tear-away stabilizer for embroidering.
- Embroidery threads and size 11 embroidery needle for embroidering.
- Transparent tape to hold felt in place during embroidery.
- Temporary adhesive spray specifically for embroidery.
- Chopstick to put gentle pressure on fabric while stitching final outline, and to use for turning piece right side out.
- Weighted pieces to fill finished circles, I used two stainless steel washers measuring 2-inches in diameter for each pattern weight. My weights were labeled “Fender Washers.” You could choose to fill your finished circles with something similar such as flat stones or other dull metal objects.
- One 9-inch X 12-inch sheet of craft felt will yield two complete pattern weights.
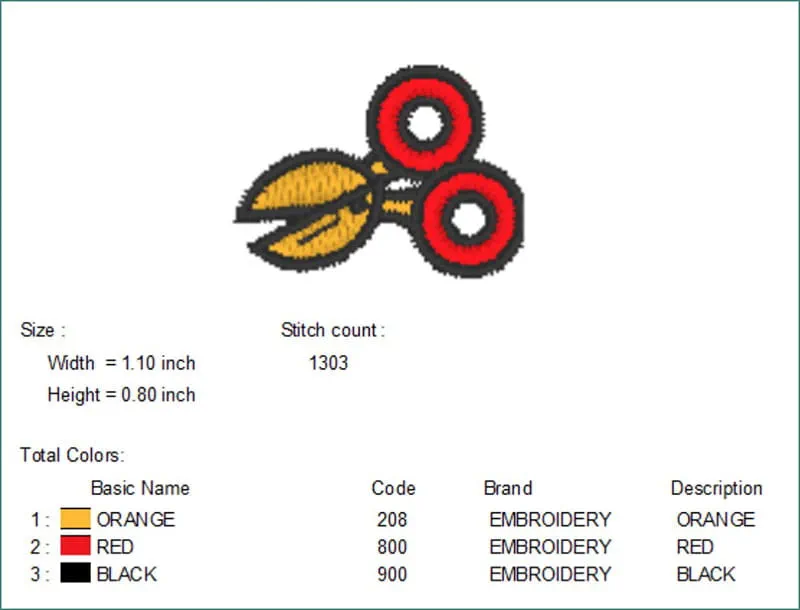
- Brother Free Design of the month, See Figure #1 below.
Figure #1
Please read through all instructions before beginning this project. Basic steps are as follows:
- Prepare felt pieces for embroidering.
- Create a combination design with featured free design, built-in frame shapes, & built-in lettering.
- Embroider top piece on stabilizer, then add back pieces. Finish with final straight stitched circle shape.
- Trim, turn, press, & fill with weights.
Important Tips:
- I found that transparent tape such as the type used for wrapping presents works well with felt. Other tapes may be too tacky and are hard to release from the fabric.
- It is very important to stay with your machine while stitching final overlapped pieces. Pieces need to be securely attached with tape and kept flat while stitching, to avoid catching in embroidery foot. I like to use a chopstick to help hold fabric in place. It’s important to keep fingers and any other tools away from the needle and foot while embroidering.
- When using temporary adhesive spray, it’s important to follow manufacturer’s instructions and avoid over spray in unwanted areas.
All Steps to Create Pattern Weights:
- Note: Instructions are for creating one completed pattern weight. Repeat to create as many as you like. Transfer design to machine. For each pattern weight you will need the following:
• One piece of felt measuring 4” square for top piece, and two pieces of felt measuring 4 ½” wide X 4” long for overlapping back pieces.
See guide in Figure #2 below for cutting 9” X 12” sheet of felt into enough pieces to make two complete pattern weights. Red X indicates discarded material. - Hoop a piece of tear-away stabilizer in the 4-inch hoop. Lightly spray wrong side of 4” square cut for front and center on top of stabilizer. Tape corners in place for extra security. See Figure #3.
- Create a combination design as follows and save to memory to create additional pieces:
• Select and set free scissor design.
• Choose a circle shape with the satin stitch and create a circle approximately 2.92” in diameter.
• Choose block font No.1. Program the words MEASURE TWICE, using the small font size. Use Array function and the ability to change curve of lettering to arch the letters and position them under the top of the circle.
• Next, choose block font No.1 again and program the words CUT ONCE, using the small font size. Use Array function, the ability to change curve of lettering, and spacing options to arch the letters and position them over the bottom of the circle.
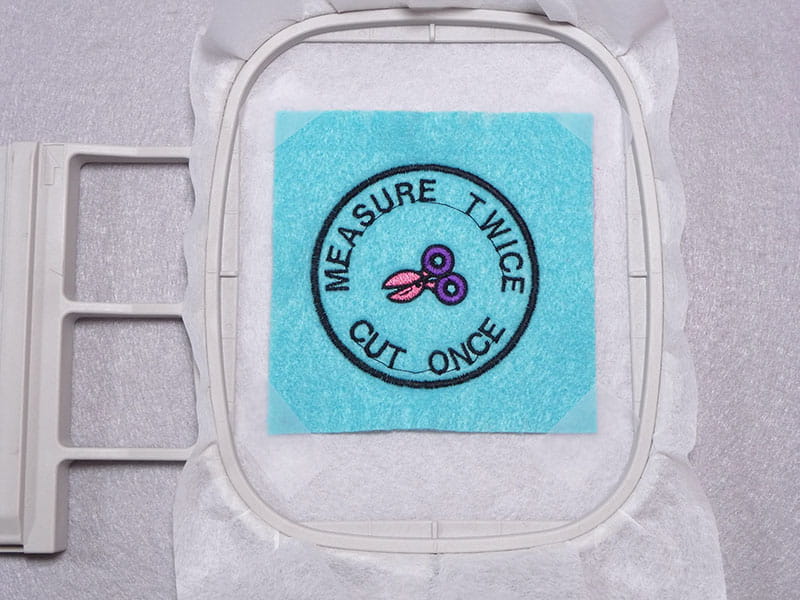
• Add a final frame shape circle using the triple straight stich option, re-sizing the circle to equal approximately 3.06” in diameter. See final combination design in Figure #4. - Using desired thread colors, embroider as follows: Stitch scissors, satin stitch circle, and lettering, then stop. See Figure #5.
- Layer back pieces over the embroidered front, overlapping edges at the center by ½-inch. Place a piece of tape across the entire overlapped edge. Pin loose side edges to the stabilizer. See Figure #6.
- Stitch the final outline, taking great care to make sure overlapped edges stay flat when embroidery stitches cross this area. You can use the chopstick to put gentle pressure on the taped area, to help keep fabric flat as the stitches form over this spot. Be prepared to stop the machine if necessary to make sure fabric pieces stay flat. Add extra tape if necessary. Note: I had no problem stitching through the transparent tape.
- Remove tape and excess tear way stabilizer, and then cut excess felt outside the final circle, leaving a seam allowance of approximately ¼-inch. See Figure #7.
- Turn right side out, pushing the edges out until they are smooth and even. Dampen the felt piece on both sides. Check iron for appropriate temperature for felt, then thoroughly press with steam to flatten out the piece. See example of finished front and back in Figure #8 below.
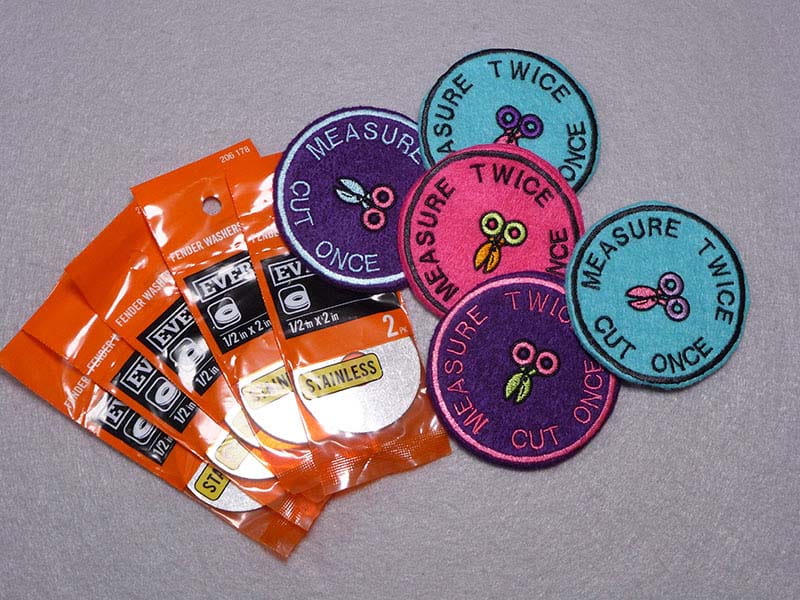
- Use the steps outlined above to embroider as many pattern weights as desired. Gather finished pieces along with the weights and prepare to assemble. See Figure #9.
Figure #2
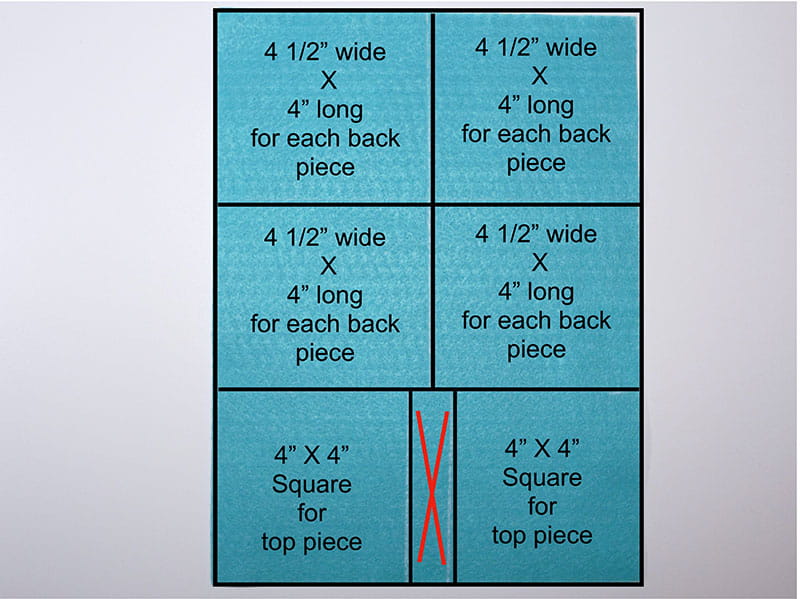
Figure #3
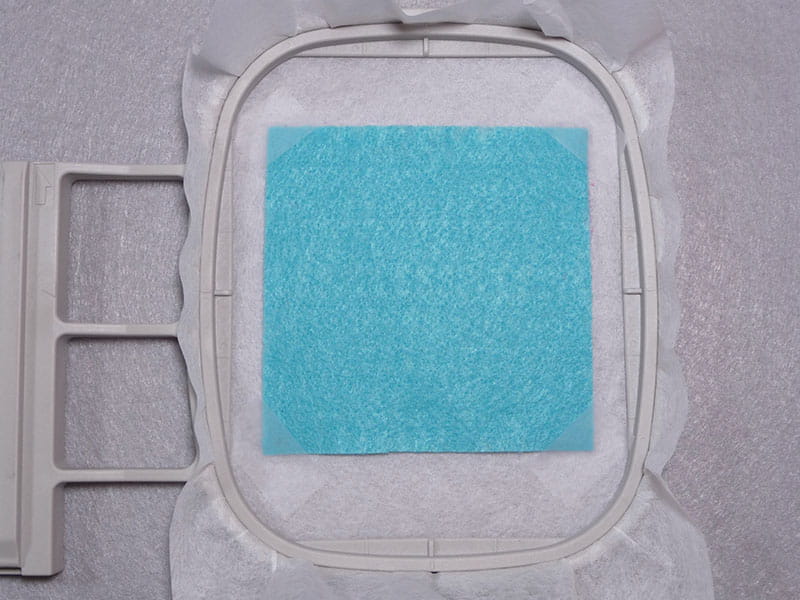
Figure #4
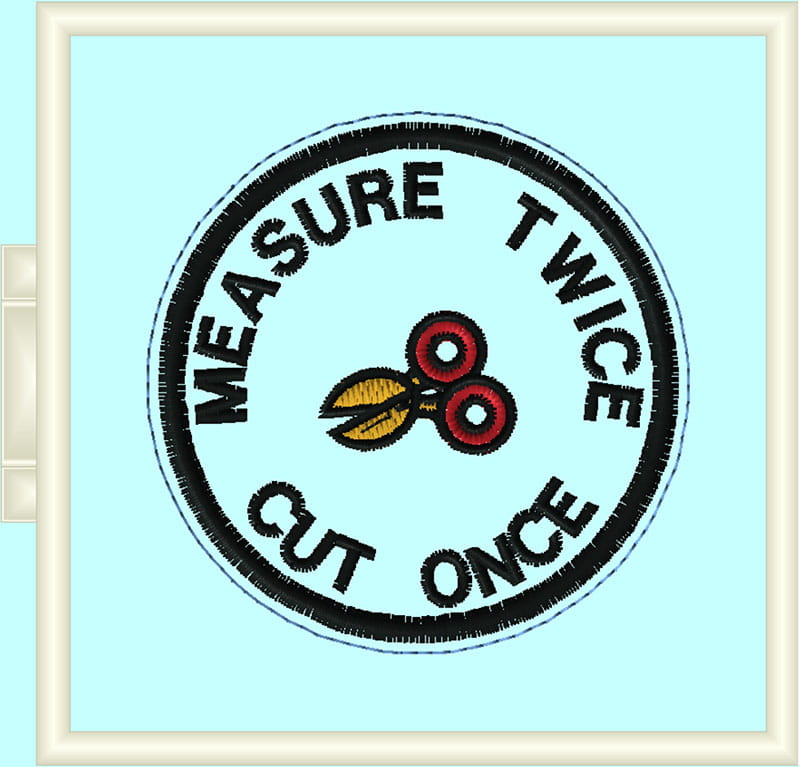
Figure #5
Tip: You may find it helpful to switch to black bobbin thread when stitching small letters with black thread on light fabric.
Figure #6

Figure #7
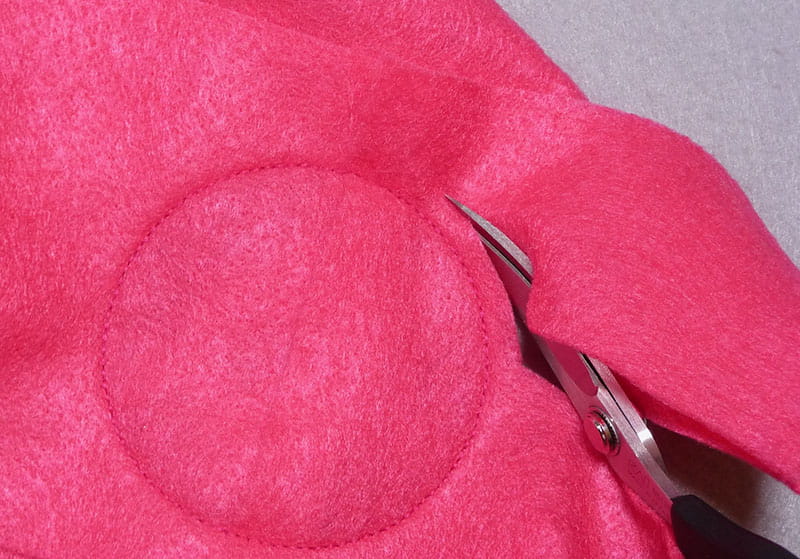
Figure #8
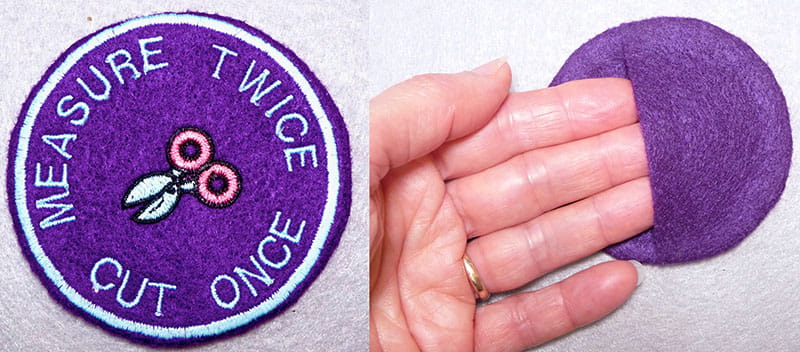
Figure #9
Slip washers inside the back opening, folding material to keep weight enclosed.
Note: I used two washers per weighted piece. See Figure #10.
Figure #10

To use your new creations, place weights on top of pattern pieces to hold them in place on fabric. You can use these weights in addition to, or in place of pins to hold fabric flat and secure when cutting with scissors or a rotary cutter. See Figure #11.
Figure #11

Enjoy!
Tags
Shop this Project
No sewing or embroidery machine? No problem! Any products mentioned in this project are available to buy here so you can stay stitching.

Brother Sewing and Embroidery Machines
Related Projects
Stay Connected
* Required fields