Free Design of the Month for September - Embroidered Sewing Notebook Cover

September is National Sewing Month! Hooray! Isn’t it wonderful to have a whole month dedicated to the art of sewing? Of course, sewing enthusiasts celebrate sewing all year long, planning projects and spending time creating with their beloved Brother sewing and embroidery machines. Living in a world full of creativity means there’s a constant need for organizing and streamlining in your sewing space. I designed this fun notebook cover to help you in this endeavor. Make this attractive cover to dress up an ordinary three ring binder, then use it to archive printed instructions, store patterns, keep notes on your projects, stash away stitch samples, and more! Use the Brother Free Design of the Month redwork design as the start for your notebook decoration, add some lettering, then add rows of your favorite decorative stitches to turn the cover into an inspirational work of art. Are you ready? Let’s go sew!
Note: Featured design fits within a 4-inch hoop. This project was created with the Luminaire XP3 machine, using the 5-inch X 7-inch hoop to create a combination design with added lettering. If your hoop capability is in the 4-inch range, you can opt to add the lettering in a second hooping.
- Brother sewing and embroidery machine with 4-inch or larger hoop capability.
- SA580 Brother medium-weight tear-away stabilizer for embroidering.
- Embroidery threads and size 11 embroidery needle for embroidering.
- Optional: Brother BES Blue Lettering and Customization Software.
- SA216 Brother N+ Monogramming foot for decorative stitching, or standard “N” foot.
- Basic sewing notions including thread to match fabric and a tool for pushing out corners.
- Low tack tape or removeable marker to mark areas on fabric. See instructions for more details.
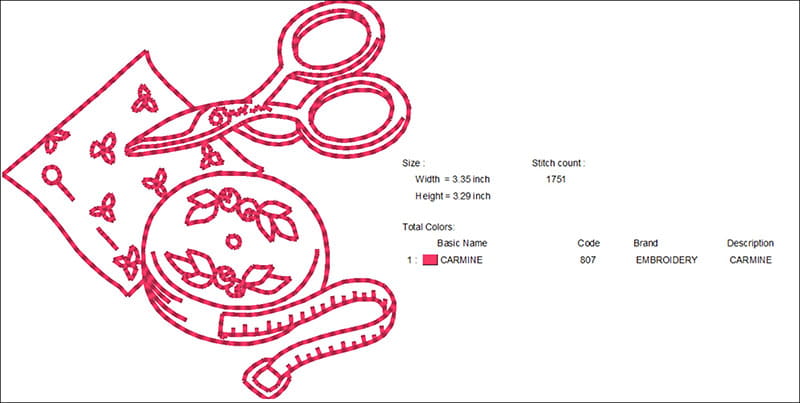
- Brother Free Design of the Month. See Figure #1 below.
- Three ring notebook of any size you choose. I selected a binder with 3-inch spine.
- Fabrics: Medium weight cotton canvas or duck cloth for notebook cover front and front and back flaps, good quality muslin for lining, and thin fusible craft fleece for backing front piece. Size of cut pieces will vary based on the notebook size. See instructions for more details.
Please read through all instructions before beginning this project. Basic steps are as follows:
- Cut and prepare pieces for embroidery and sewing.
- Embroider front area and trim with decorative stitches.
- Construct notebook cover.
Figure #1
All Steps to Create Embroidered Sewing Notebook Cover:
- Cut and prepare fabric pieces as follows:
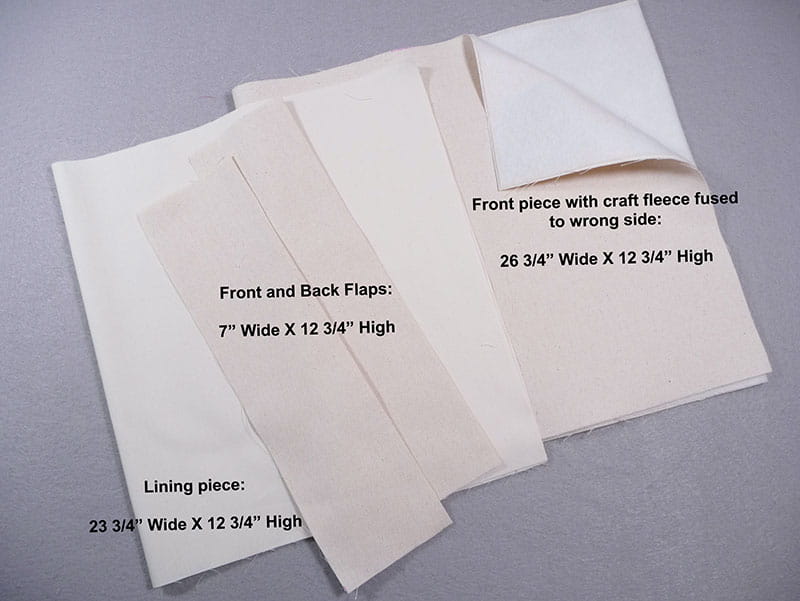
- Cut a piece of medium-weight duck cloth or canvas fabric 1-inch higher and 1-inch wider than outer dimensions of actual notebook for notebook cover. Note: You can choose to make a paper pattern or simply lay notebook on fabric and cut piece to size. Seam allowance for sewing top, bottom, and sides is ¼-inch. See Figure #2.
Figure #2
- Cut lining piece using the same measurement for height and subtracting 3-inches for the width.
- For front and back flaps, cut two pieces measuring 7-inches wide using same measurement as outside piece and lining for height. Fold each flap piece in half lengthwise with wrong sides together and press.
- Place notebook on front piece and mark edge where spine begins to define front of notebook cover. Tip: I used pins in place of a marking pen to avoid having to remove marks. See Figure #4.
Figure #4

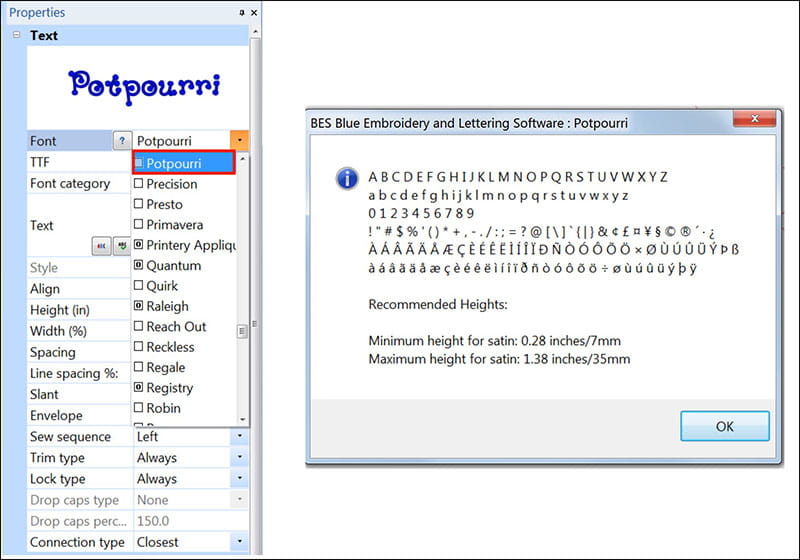
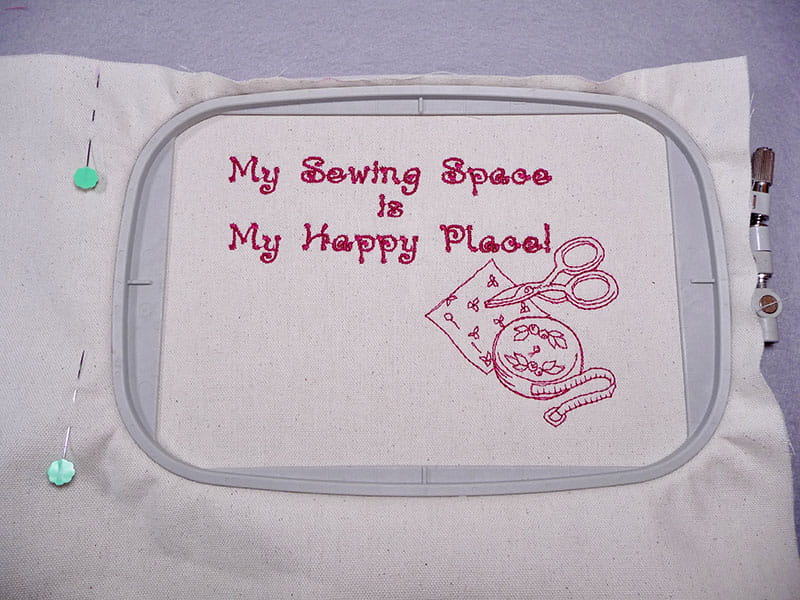
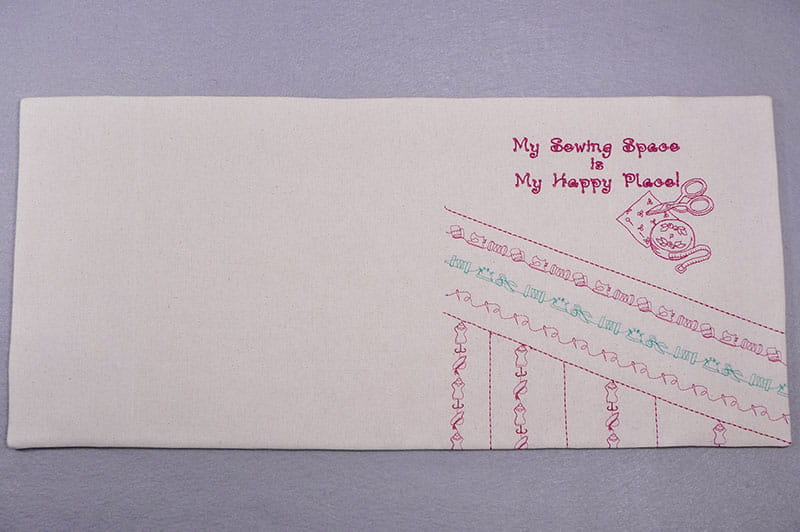
- Create a combination design adding lettering to redwork sewing design. You can use lettering built into your machine or create the design in software. I used the Brother BES Blue software and font style Potpourri to create a combination design to fit a 5-inch X 7-inch hoop. See Figure #5a and Figure #5b.
Figure #5a
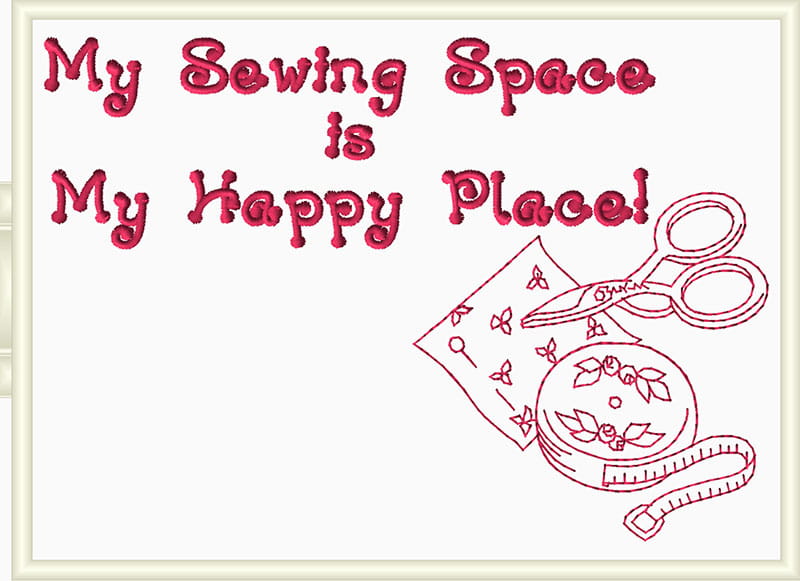
Figure #5b
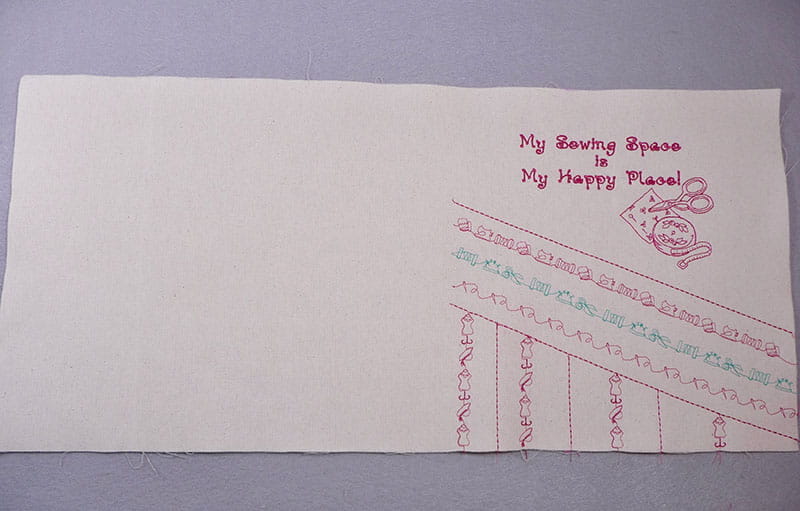
- Embroider design, centering it on the upper half of the front cover area. See Figure #6.
Figure #6
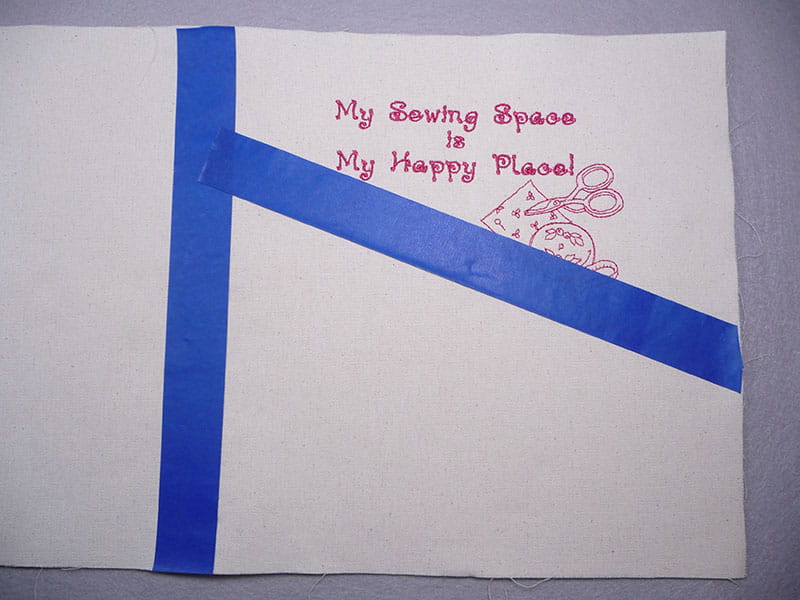
- Mark off front area of cover, along with the area just below embroidery.
Tip: I used low tack tape to avoid having to remove marks. See Figure #7.
Figure #7
- Set up machine for sewing decorative stitches, using a bobbin to match your decorative thread. Sew desired rows of decorative stitches.
Tips: I added straight stitches to define horizontal and vertical areas, then used a combination of horizontal and vertical rows of stitching. I attached SA216, the N+ foot for smooth and stable feeding of decorative stitches. In addition, I used the Grid Projector to help align my stitches. You’ll find this feature especially helpful for alignment of stitches that have multi-motion movement and are larger than the standard 7mm throat plate opening. I love the way the gridlines help me sew lines of stitching without veering off track. Simply keep the gridline consistently parallel to a defined line and watch the line instead of the needle as you sew. You’ll find this serves as a big benefit for keeping the path straight as you stitch. See Figure #8a through Figure #8f.
Figure #8a
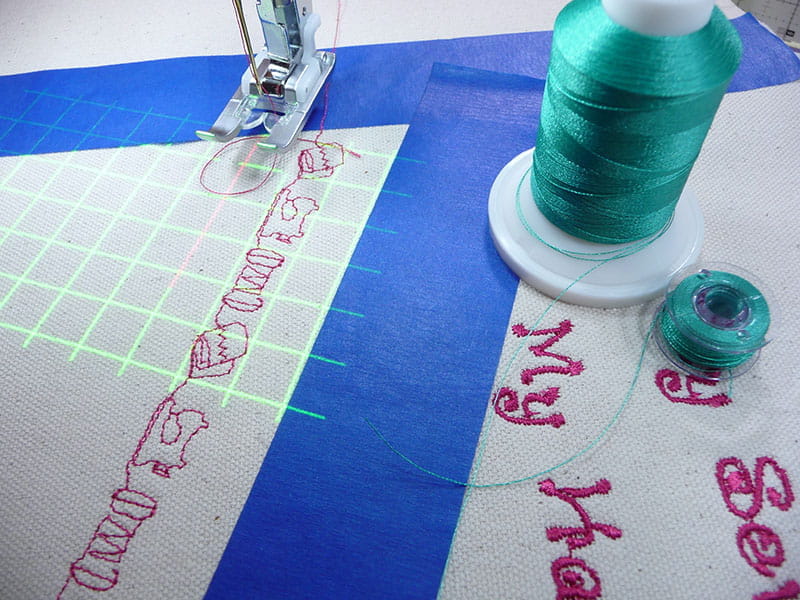
Figure #8b
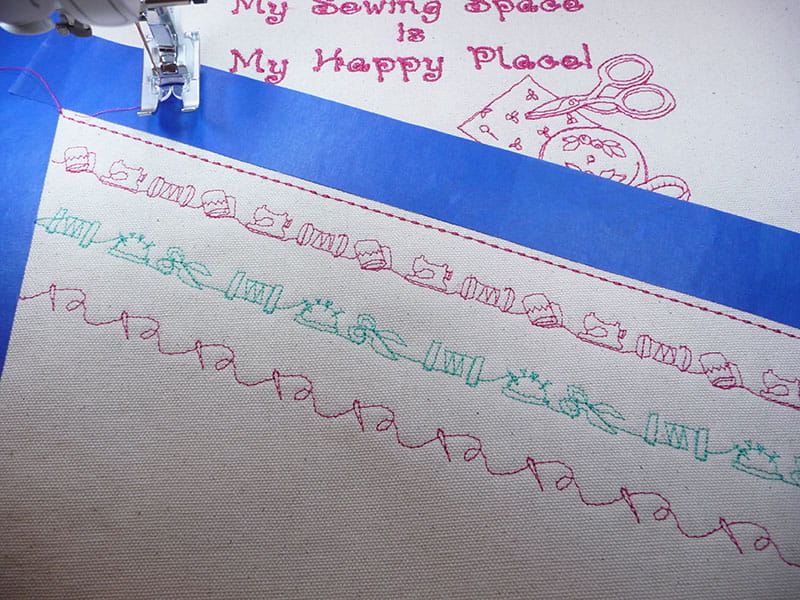
Figure #8c
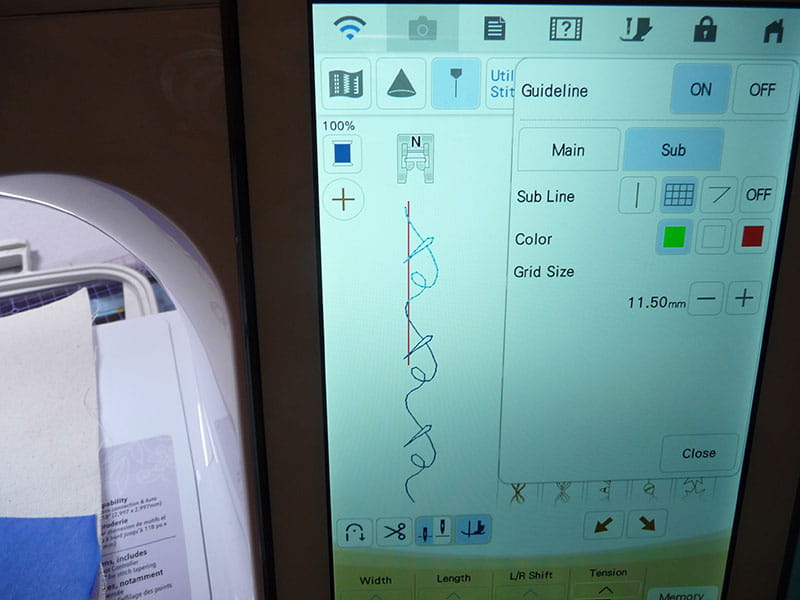
Figure #8d
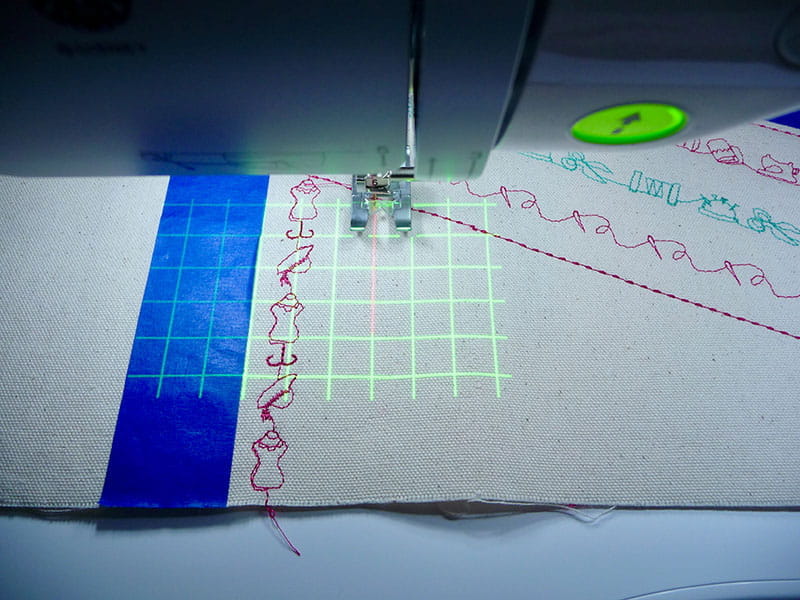
Figure #8e
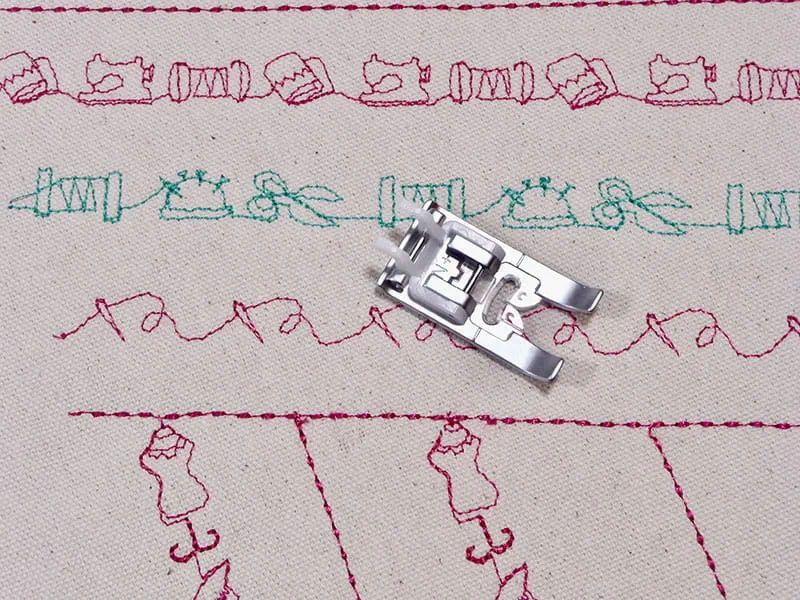
Figure #8f
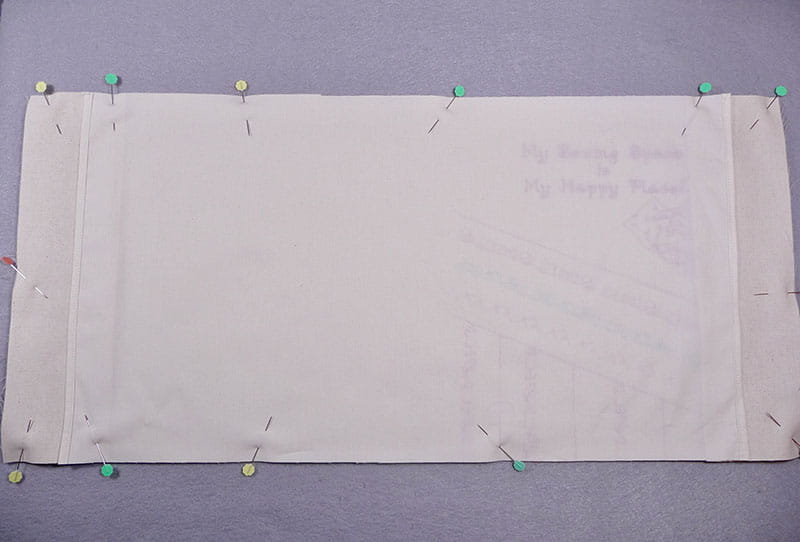
Remove markings and press piece. Trim slightly if necessary to even out the piece and square it up. Take care to trim very little if you need to trim at all. Hem short ends of lining with a double turned ¼-inch hem. It’s time to put the notebook cover together. Layer pieces and pin together as follows: Place cover right side up, then add flaps to each end, having raw edges match and folded edges pointing toward center. Mark center point of front cover and lining piece along top and bottom edge. Place lining right side down with long edges and centers matching. Note: Ends of lining piece do not extend to edges of cover. See Figure #9a.
Figure #9a
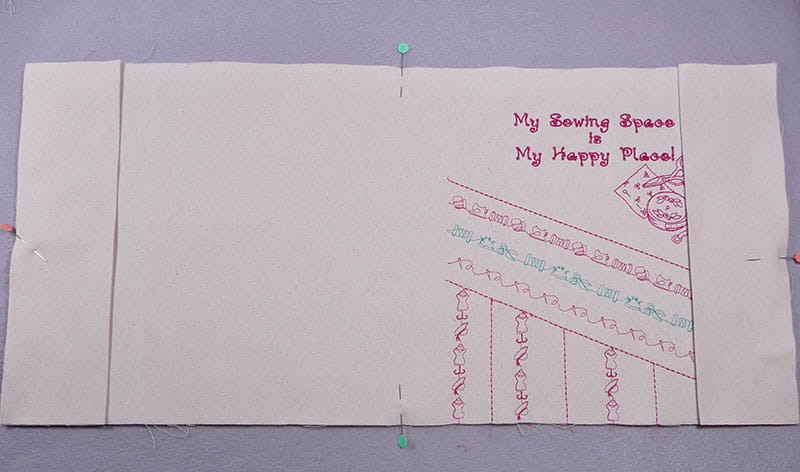
Figure #9b
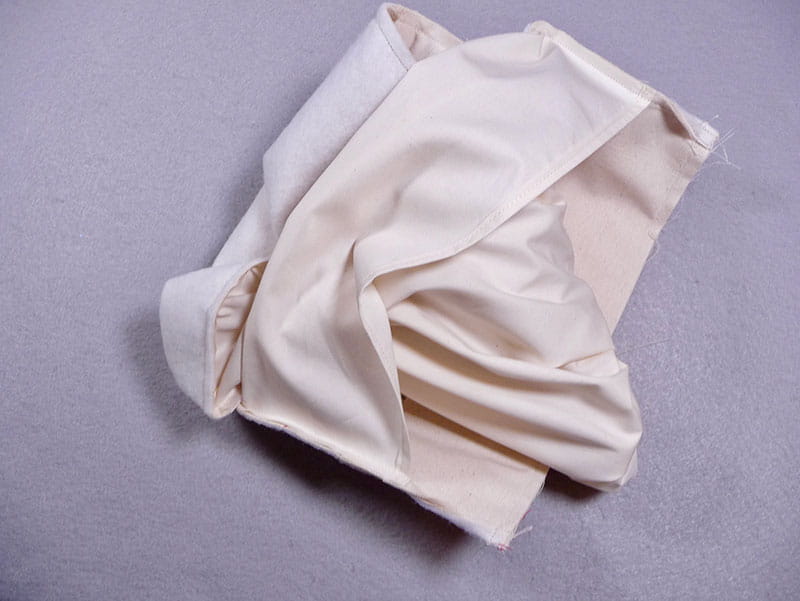
- Sew long and short edges using a ¼-inch seam allowance. Trim corners sightly. Turn right side out by reaching through lining.
Note: It’s going to look messy at this point but soon you’ll have a beautiful, finished notebook cover! See Figure #10.
Figure #10
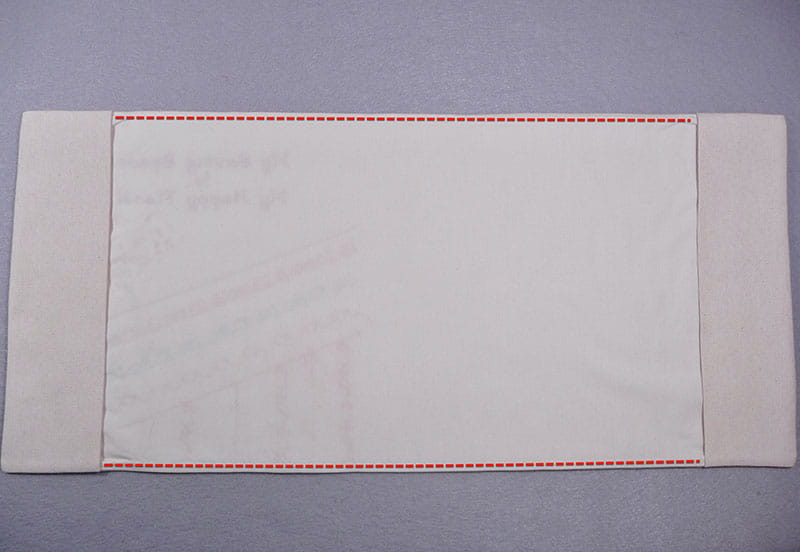
To help keep lining in place you can understitch top and bottom seams, stitching through layers of seam allowance only, working your way from one end to the center when stitching. Carefully press piece flat. See understitching shown in red in enhanced photo in Figure #11.
Figure #11
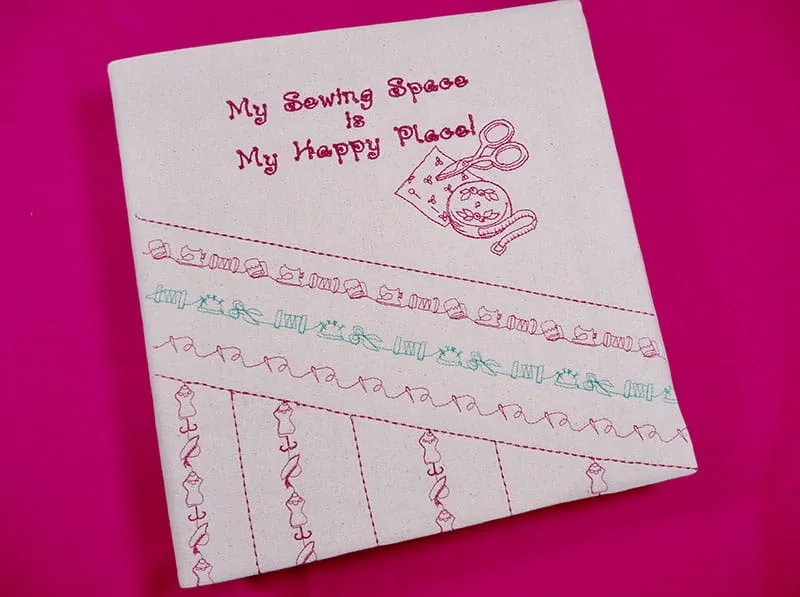
Take a look at finished cover in Figure #12.
Figure #12
Bend notebook backwards and slip into flaps. You are finished! Enjoy!
Fuse craft fleece to wrong side of front cover piece. See example of all cut pieces and sizes for my 3-inch binder in Figure #3.
Figure #3
Related Projects
Stay Connected
* Required fields