Free Design of the Month for March - How to Make a Custom Quilted & Embroidered Zipper Bag for Storage in Your Crafting Space
-Brother Sews Blogger
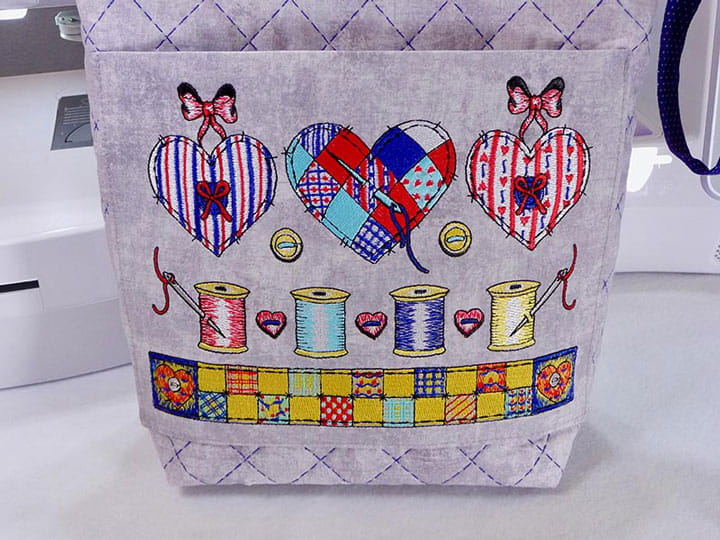
Celebrate your love for Quilting, Crafting, Sewing, and Machine Embroidery with this striking free embroidery design of the month from Brother. To showcase the embroidery, I designed a simple quilted zipper bag with a handy pocket. Custom quilt your own fabric with a variety of options found on Brother quilting machines. You can use a regular straight stitch, a common hand-look quilting stitch built into a wide range of Brother machines, or use the special “Sashiko Style” stitch built-in to the Brother Luminaire XP2 and found in SAVRXPUGK1 Luminaire XP1 Upgrade kit. Use the original thread color scheme or use my primary palette for a bright and colorful bag. This bag is a handy way to store notions, projects in progress, or carry a small project with you when you want to sew on the go. Are you ready? Let’s go sew!
Materials and Supplies for Zipper Bag:
• Brother embroidery machine with 6-inch X 10-inch or larger hoop capability.
• 12-inch polyester zipper.
• SA580 Brother medium-weight tear-away stabilizer.
• SA208 Brother Snap-on Narrow Base zipper foot, or another zipper foot for your machine. In my sewing space this zipper foot is essential. The narrow toe and flat bottom on the foot make it ideal for so many zipper applications!
• SA538 Brother Seam Guide, optional but very helpful for sewing a variety of seams. I consider this another essential accessory. It’s adjustable and easily screws onto the throat plate of the machine.
• Brother Overcast foot “G,” included with many Brother machines and used for ease in overcasting quilted layers. This is optional but makes overcasting accurate and easy. You’ll need presser foot “N” for “Sashiko Style” stitch.
• Basic sewing notions including good quality thread for sewing seams, removeable marker or chalk for marking fabric, and a tool for turning tubes right side out.
• Embroidery needle for embroidering and quilting needle size 14 for quilting with standard thread. You can also use the quilting needle for bag construction.
• Decorative thread for Hand-Look Quilting or “Sashiko Style” stitch, including good quality fine, clear (monofilament) type thread if you choose that option. Note that some thread manufacturers recommend using a topstitch needle for sewing with this thread. Check with thread manufacturer for details.
• One piece of ribbon measuring 1/8-inch wide X 6-inches long for zipper pull.
• Firm non-woven fusible interfacing to back fabric piece for embroidered pocket.
• Quilt weight cotton fabric cut into pieces listed below:
o Fabric #1: Two pieces measuring 12-inches wide X 14-inches long for quilted outer bag.
o Fabric #1: One piece cut to fit your selected hoop, to use for embroidered pocket.
o Fabric #2: Two pieces measuring 12-inches wide X 13 ¾-inches long for bag lining.
o Fabric #2: One piece measuring 10-inches wide X 8-inches long for pocket lining.
o Fabric #2: One strip measuring 2-inches wide X 12-inches long for loop.
o Fabric #2: One strip measuring 1 ½-inches wide X 3-inches long for tab.
o Low loft quilt batting: Two pieces measuring 12-inches wide X 14-inches long for quilted outer bag.
• Brother Free Design of the month. See Figure #1a with original colors and Figure #1b with my modified colors below:
Figure #1a

Figure #1b

Please read through all instructions before beginning this project. Basic steps are as follows:
• Embroider design for pocket on stabilized fabric.
• Quilt outer bag pieces.
• Make tabs, create pocket, and sew to front piece.
• Sew zipper and add lining.
• Sew bag seams and box corners to shape bag.
Tip: Yardage for this bag will vary. To figure exact yardage I recommend making paper patterns of each piece and using them to plan your layout and determine yardage.
Note: Project was created with the Brother Luminaire. You can use any Brother machine with 6-inch X 10-inch or larger hoop capability to embroider the design. Options are included in the instructions for quilting with other Brother machine models.
All Steps to Create Zipper Bag:
1. Transfer free design to machine and prepare to embroider pocket piece as follows:
Set up machine for embroidery. Cut fabric to fit comfortably in your chosen hoop. Design size is shown above in Figure #1. The minimum size hoop for this design is 6-inches X 10-inches. I don’t have that size, so I used an 8-inch X 12-inch hoop. You can use a larger hoop. Just make sure to cut your fabric piece to fill the entire hoop. Begin by fusing firm interfacing to wrong side of pocket piece. Hoop fabric with a layer of tear-away stabilizer. Embroider design using desired thread colors. Note: This design is very dense, requiring extra measures for stabilizing pocket piece embroidered on quilt weight cotton fabric. See completed design in Figure #2.
Figure #2

2. With design centered, cut pocket piece 10-inches wide X 8-inches long to match pocket lining. Set aside temporarily.
3. Set up machine for sewing. It’s time to quilt bag front and back piece with what I like to call channel quilting, using a diamond pattern for the finished look. Begin by layering low loft batting on wrong side of each outer bag piece. See Figure #3a. Mark an “X” on each piece of fabric to use for your first quilting lines. See example in Figure #3b.
Figure #3a

Figure #3b

4. Let’s explore some options for quilting the bag pieces.
• Option one: Use a standard straight stitch. For this method, sew equally spaced lines using standard thread and your regular presser foot, an optional walking foot, or Dual Feed foot. Using a quilt guide with one of those feet will help with evenly spaced lines, or you can choose to draw lines on your fabric. You can search the official Brother blog for additional quilted projects featuring the quilt guide and the accessory feet mentioned above.
• Option two: Use a Hand-Look quilting stitch. This commonly found stitch looks great stitched at the default setting. This stitch forms when the machine sews a stitch forward, forward, backward, and then forward again. This creates a buildup of thread in between the single stitches. However, when stitched with clear thread in the needle, a tighter upper tension, and contrast colored thread in the bobbin, this stitch is transformed into a Hand-Look quilting stitch. The needle thread pulls up the bobbin thread when it goes backward, pulling the contrasting thread to the topside. Then, when the stitch goes forward the clear thread is prominent. I start with an upper tension of 7 and increase as necessary to bring up the bobbin thread, using a stitch length of 3.0 to 3.5. It’s really quite unique! Check your machine menu for this stitch. It may be in more than one location. See Figure #4a and Figure #4b.
Figure #4a

Figure #4b
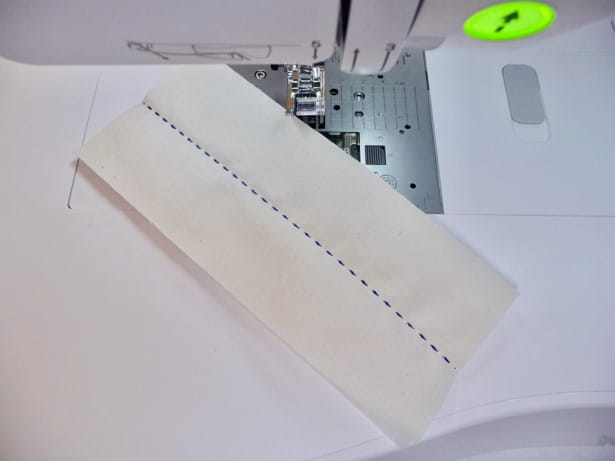
• Option three: This project features the Brother Luminaire Special “Sashiko Style” stitch. It is also a Hand-Look stitch but formed in a unique way. Choose from three different stitch lengths. For this project, I used clear (monofilament) thread in the needle and contrasting blue embroidery thread in the bobbin. The tight upper tension for this stitch is pre-set. Change to presser foot “N” for this stitch. See stitch found in “S” menu on machine in Figure #5.
Figure #5

Quilt outer bag pieces as follows:
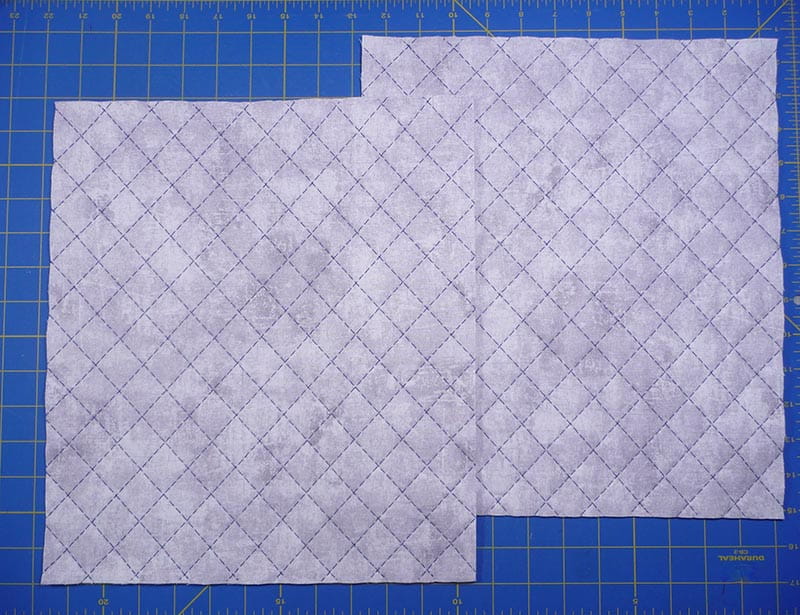
Begin by stitching along the two marked lines. Continue to stitch equally spaced lines until the whole piece is quilted. You can mark additional lines but there are other ways to space your quilt stitching. One option is to use a quilt guide mentioned previously. On my bag I opted to use the laser projection feature on the Luminaire. For this method, select Sub in the Guideline window and set grid size at 13mm. Align grid with stitched line and sew each subsequent line of stitching two grids apart from each line to space quilting lines spaces approximately 1-inch apart.
See Figure #6a, and #6b.
Figure #6a

Figure #6b

Remove markings and lightly press quilted pieces. See Figure #7.
Figure #7
5. Overcast edges with a zig zag stitch to keep quilted layers together. I like to use foot “G” and a zig zag stitch set for a width of 5.0 and a length of 2.5. overcast the edges with a zig zag stitch. Place the raw edge so it’s aligned with the long toe of the foot. The overcast stitch will form perfectly along the edge. See Figure #8a and Figure #8b.
Figure #8a

Figure #8b

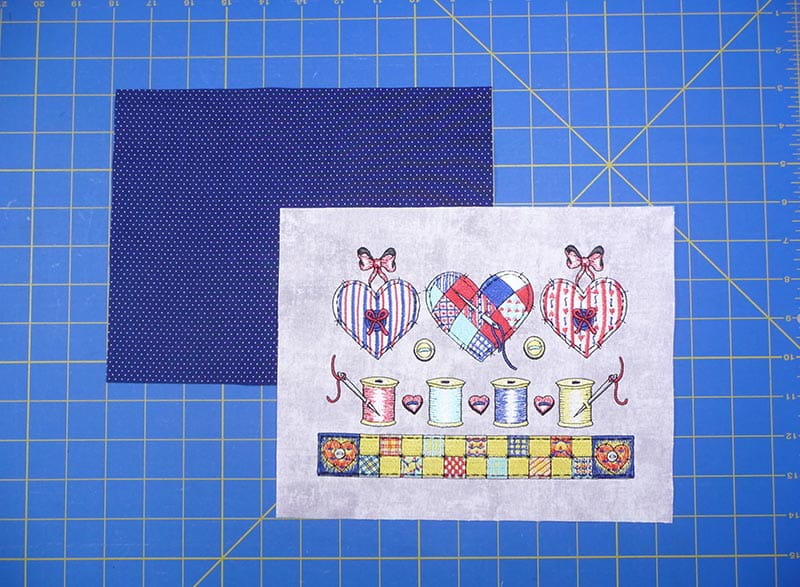
6. Create pocket pieces as follows: Select pieces for pocket See Figure #9.
Figure #9
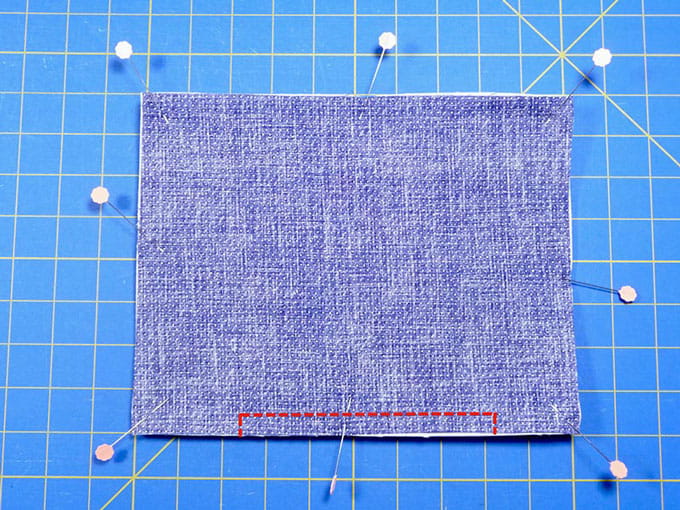
Place embroidered pocket piece and lining right sides together. Sew pieces together using a ½-inch seam allowance, leaving a 4-inch opening along the bottom for turning right side out. See stitching line in Figure #10.
Figure #10
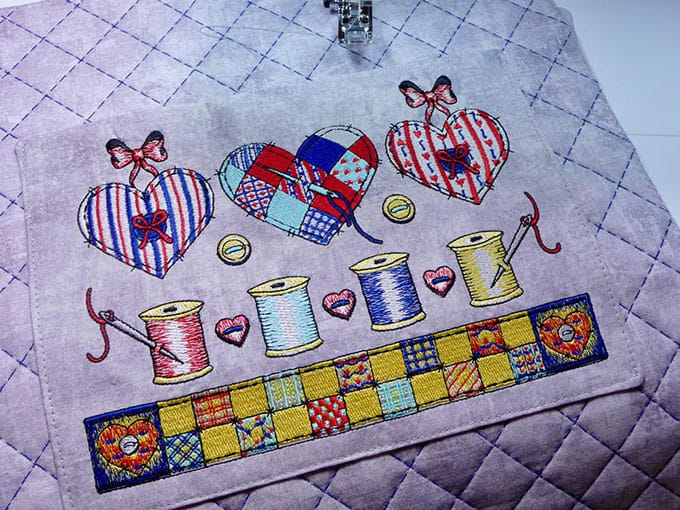
Turn right side out and press, folding in seam allowance at opening. Select one of the quilted pieces to use for bag front. Pin pocket piece to center. Stitch pocket in place, closing the opening at the bottom edge in the process. See Figure #11a and Figure 11b.
Figure #11a

Figure #11b
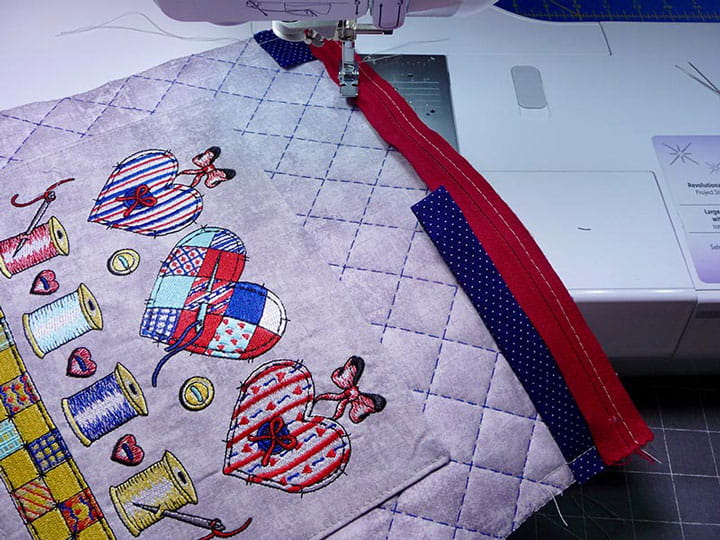
7. It’s time to put the pieces together. Gather zipper, tab piece, and strap. Prepare tab and strap as follows:
For strap, fold 2-inches wide X 12-inches long piece in half lengthwise. Sew along raw edges with ¼-inch seam allowance. Turn right side out and press flat. Fold 1 ½-inches wide X 3-inches long tab piece in half so it measures 1 ½-inches wide X 1 ½-inches long. Sew sides using ¼-inch seam allowance, leaving edge opposite the fold open. Turn right side out and press. Pin tab and strap 5/8-inch from top edge on front piece, having tab on the left and folded strap on the right, with raw edges facing out. Machine-baste tab and strap in place. See Figure #12.
Figure #12

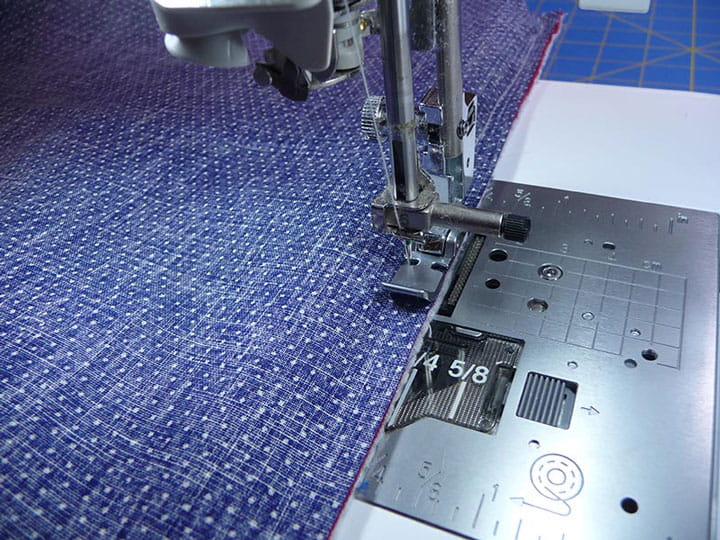
8. Snap on zipper foot. Important: If you’re using SA208, you need to make sure you use just two needle positions, either the far-left straight stitch or the far-right straight stitch. Place zipper face down on bag front with zipper pull at tab end and zipper half way open so you can stitch without hitting zipper pull. With needle in the far-left position, baste zipper in place, stitching ¼-inch from edge of zipper tape, stopping halfway to leave the needle down, raise the presser foot, and then close zipper to finish stitching. You’ll need to sew the zipper each time, beginning with the zipper open and closing zipper once you have stitched part way. See basted zipper in Figure #13. Tip: Pin layers with long pins or use sewing clips to keep layers secure. Always make sure to remove pins as you stitch.
Figure #13
Layer lining piece over bag front, matching raw edge with edge of zipper tape and sandwiching zipper between bag fabric and lining. See Figure #14a.
Figure #14a

Next, sew close to zipper with lining facing up. See Figure #14b
Figure #14b
Pin back of bag to zipper tape. See Figure #14c.
Figure #14c
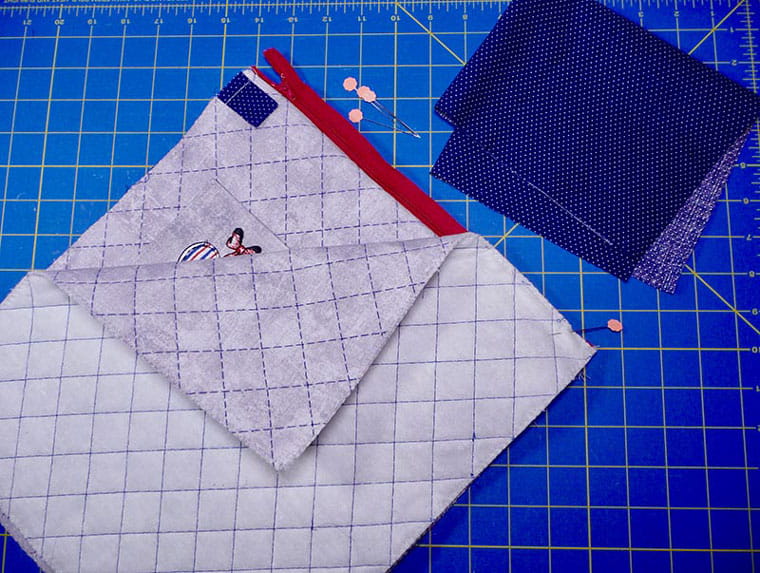
Baste zipper as you did previously, sewing with zipper tape facing you.
Push away lining from front piece so it’s not in the way and layer second lining piece over right side of back fabric and zipper tape. See Figure #14d.
Figure #14d

Sew close to zipper with lining facing up as you did previously.
9. Open out bag pieces and press. See outer bag and lining below in Figure #15a and Figure #15b.
Figure #15a

Figure #15b

Working from the outside, topstitch edge close to zipper tape to keep lining from rolling to the outside.
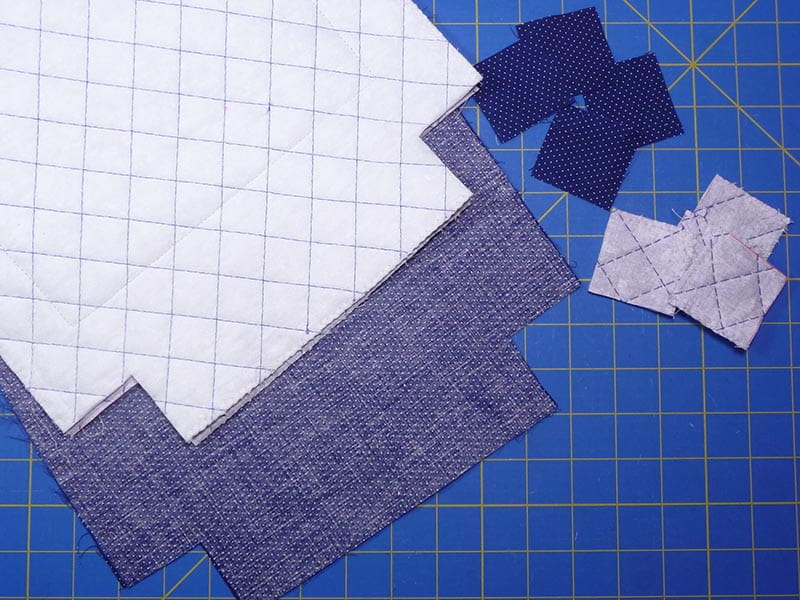
10. Your bag is almost finished. It’s time to box the bottom corners and sew seams together using a ½-inch seam allowance. Use a ruler to mark off a 2-inch square on each of the bottom corners of bag and bag lining pieces, then cut out each square. See Figure #16.
Figure #16
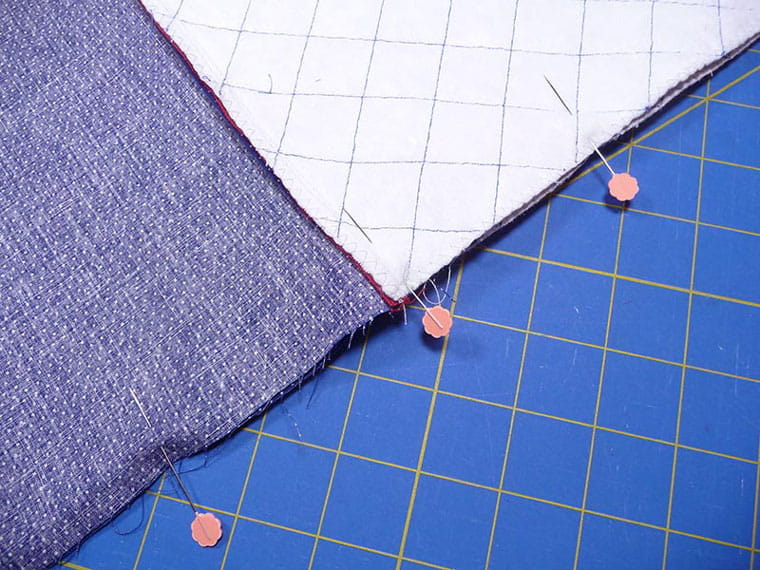
Important: Open zipper halfway. Next, lay bag flat, with lining facing lining, and bag front and back matching. Make sure zipper tape and seams are pushed toward lining side. Pin side seams. See example in Figure #17.
Figure #17
Sew both side seams, sewing each one from end to end, with lining layers matching and quilted bag layers matching. See Figure #18.
Figure #18
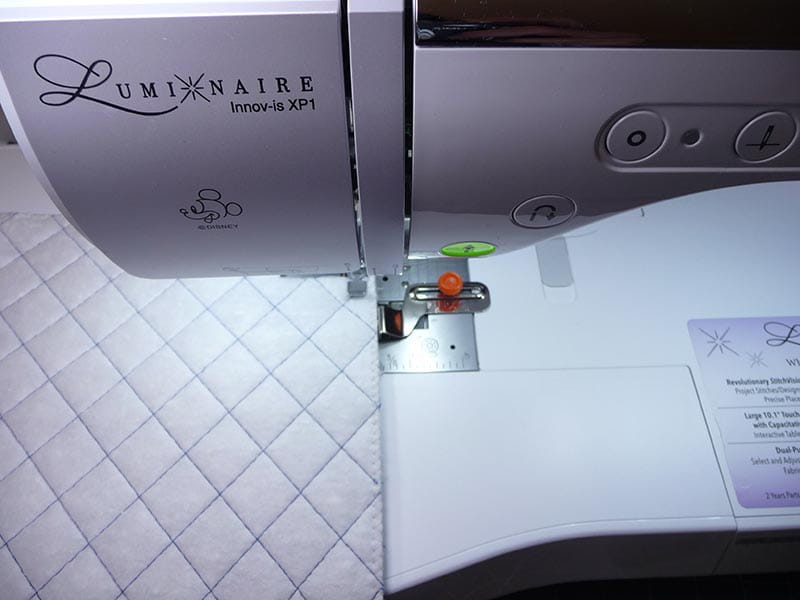
Sew bottom seam of quilted bag. Sew bottom seam of lining, leaving a 5-inch opening in the center for turning bag right side out.
Box each of the four corners by matching side seam with bottom seam having raw edges even, with bottom seam and side seams flipped so they are opposite one another to avoid excess bulk. See examples in Figure #19a and Figure #19b below.
Figure #19a

Figure #19b
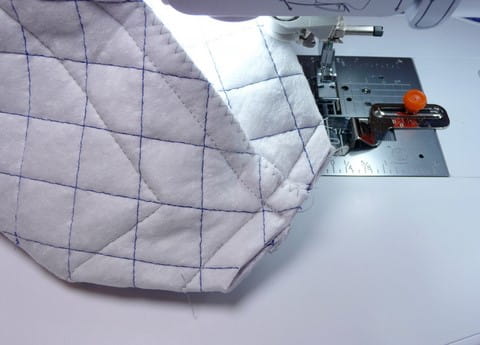
Reach inside through bottom opening and open zipper all the way. Grab outer quilted bag and pull through opening in lining to turn right side out. Press and fold opening in bottom seam to inside. Pin so edges are even and then sew close to edge to close bottom seam. See Figure #20a and Figure #20b.
Figure #20a

Figure #20b

Tuck lining to inside, push out boxed corners, and give the bag a pressing. Tie ribbon to zipper pull tab. You are finished! Enjoy using your crafty embroidered and quilted bag!


