Free Design of the Month for March – Embroidered Zip Code Pillow
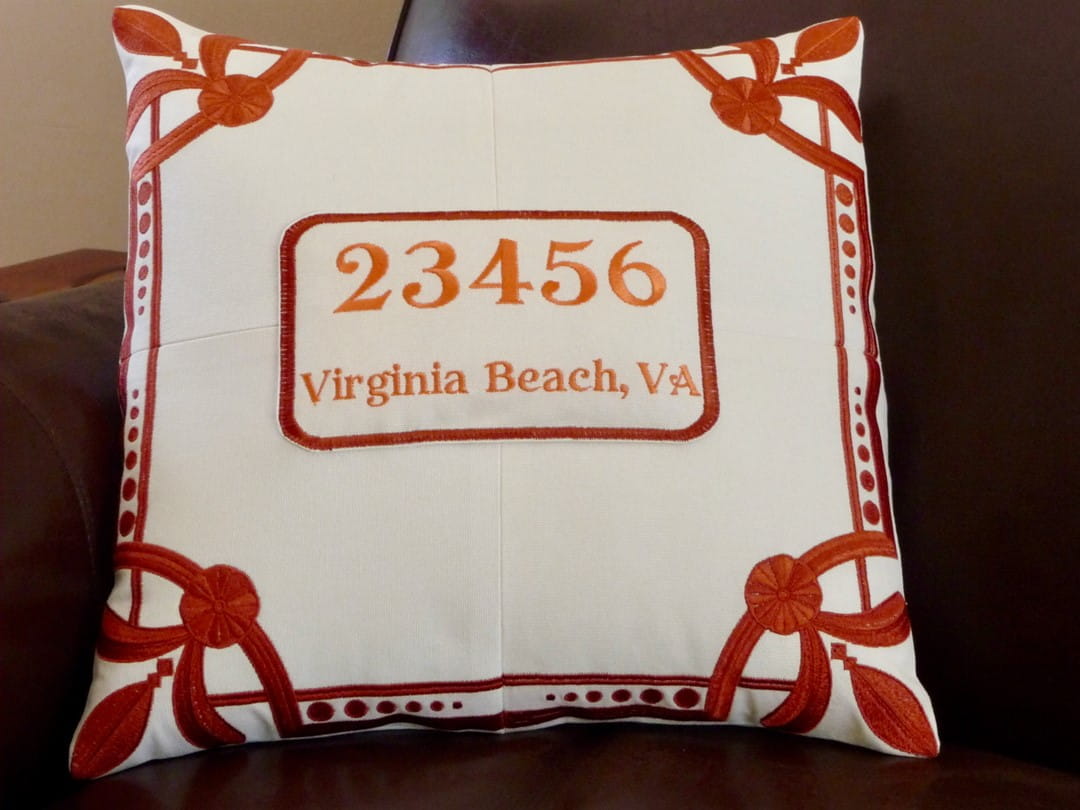
Zip code pillows are a popular home décor item. Make one for yourself or to give as a distinctive personalized gift for a housewarming present or other special occasion. I designed the pillow with a three-dimensional center patch using built in numbers, lettering, and a frame shape, all built into the Brother machine. This center patch is lightly stuffed to stand out and form a unique focal point in the center of the pillow. Pillow features Brother’s Free Design of the Month, stitched in four separate blocks for a super-sized frame, giving the pillow a high-end custom look. This method makes building a big embroidery design easy and accurate. Are you ready? Let’s go sew!
Note: The featured embroidery design fits an 8-inch or larger hoop. Use any Brother embroidery machine with 8-inch or larger hoop capability and any Brother sewing machine to complete the project.
Materials and Supplies for Zip Code Pillow:
- Brother sewing and embroidery machine with 8-inch or larger hoop capability.
- SA446 Brother 8-inch square hoop featured in this project.
- SA580Brother medium-weight tear-away stabilizer for embroidering.
- Embroidery threads and size 11 embroidery needle for embroidering.
- Brother Foot “G” Overcasting foot.
- Basic sewing notions including thread, seam sealant for treating edge of center patch, and a tool for pushing out points and corners.
- Rotary cutting tools, including a mat, ruler measuring at least 12-inches long, and a rotary cutter.
- Materials for pillow:
- Medium-weight cotton fabric, four pieces measuring 12- inches wide X 15-inches long to fit inside 8-inch hoop. Note: If you are using a different hoop, cut fabric to fit selected hoop. Cut a matching piece of medium-weight fusible interfacing and fuse to wrong side of each piece.
- Matching medium-weight cotton fabric for center patch. Cut piece large enough to fit your hoop and attach interfacing as described above. Note: I used the 8-inch hoop to create the center patch.
- Matching medium-weight cotton fabric for envelope style pillow back, cut two pieces measuring 13-inches wide X 16 ¾-inches long.
- 16-inch pillow form.
- Fiberfill for stuffing center patch and adding to pillow form if desired.
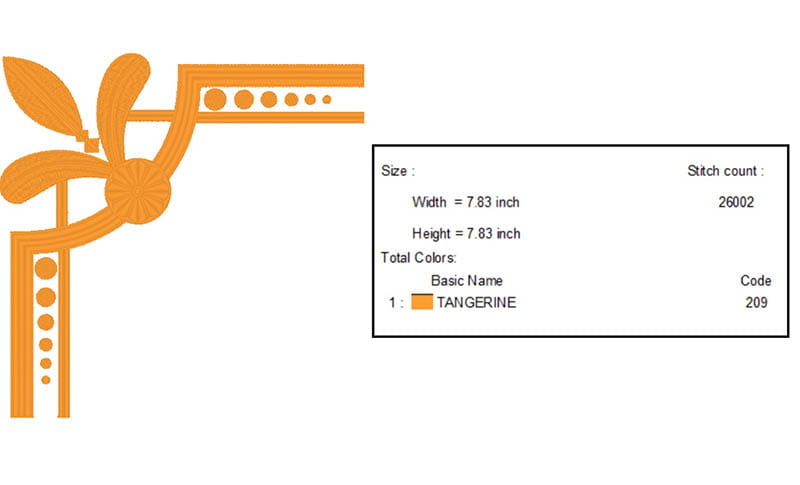
- Brother Free Design of the Month FD_3_2023. See Figure #1 below.
- Prepare fabric and embroider four blocks using the featured design, then embroider one rectangle with zip code information.
- Trim four blocks to size and sew together to create pillow front.
- Treat zip code rectangle with seam sealant, trim, and apply to pillow front.
- Prepare back pieces and construct pillow.
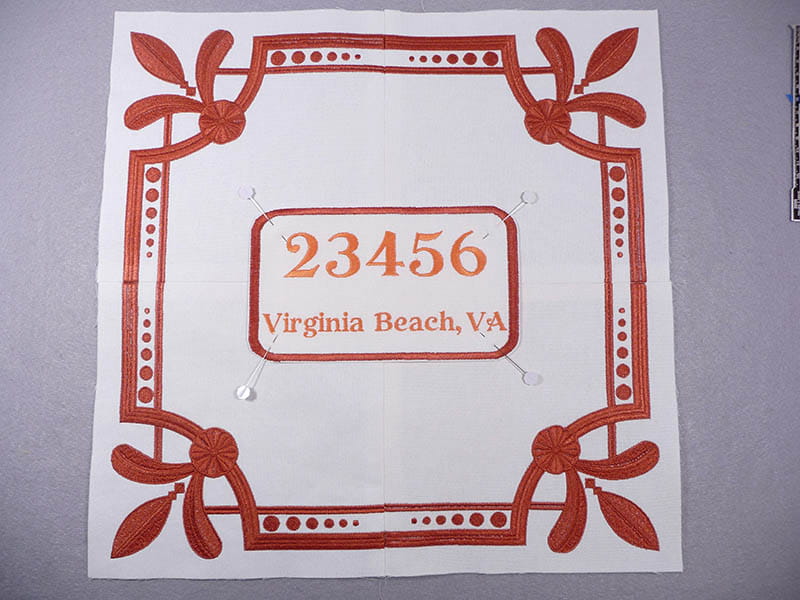
- Create a combination design for the zip code, city, state, and frame. Hoop fabric with tear away stabilizer and stitch in appropriately sized hoop. Note: I created my combination design using built-in letters and fonts. Grid shown in 8-inch square hoop below measures one inch. See Figure #2. Set aside for later use.
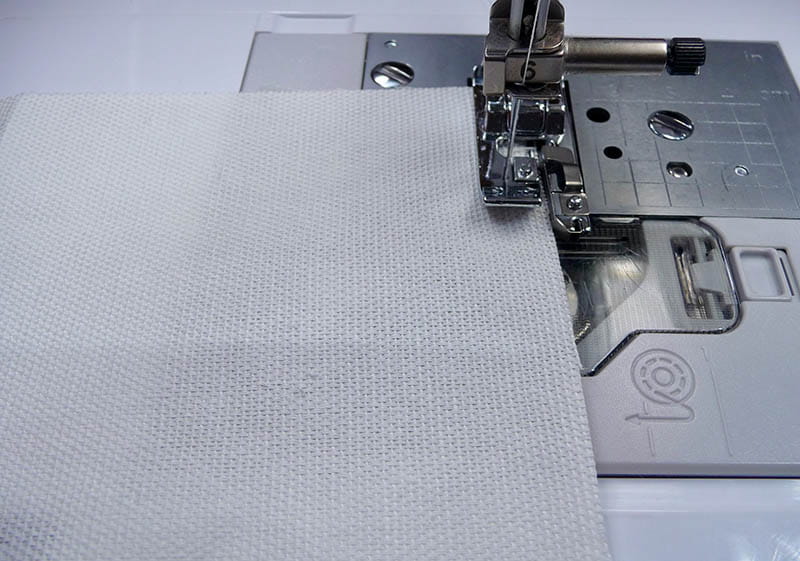
- Transfer design to machine. Select the four pieces prepared for embroidering pillow blocks. Hoop the first piece, layering it with medium-weight tear-away stabilizer. Stitch design. Repeat process for the three remaining pieces. See example of one block in Figure #3. Design is symmetrical so there is no need for mirror imaging or rotating the design. Note that my fabric includes a center marking, but as I progressed through the project, I found this wasn’t necessary.
- Remove tear-away stabilizer and press blocks so they are flat. Next, you need to carefully trim blocks to size, having each block identical to assure alignment when you stitch them together. Using a rotary cutter and a ruler, trim each block so there is exactly a ½-inch seam allowance around the outermost part of all four sides of the design. Tip: Line up the ½-inch line on your rotary cutter ruler along the outermost edge of the design, aligning the ruler and keeping it perfectly parallel to cut blocks accurately. See enhanced photo in Figure #4 with purple line showing outermost edges of design and green dashed line showing the precise cutting line ½-inch outside the edges.
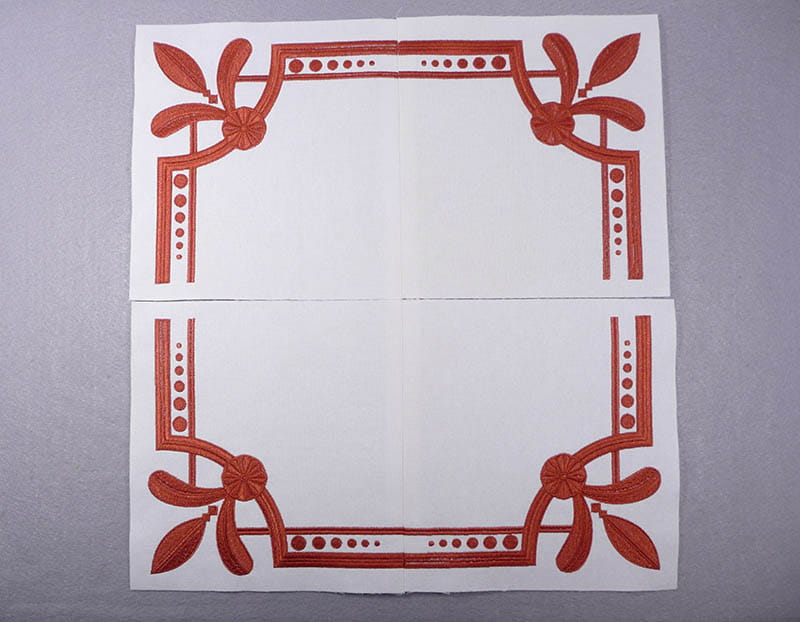
- Once blocks are trimmed, lay them out exactly as they will be stitched together with two blocks for the top half and two blocks for the lower half. See example in Figure #5a and Figure #5b below.
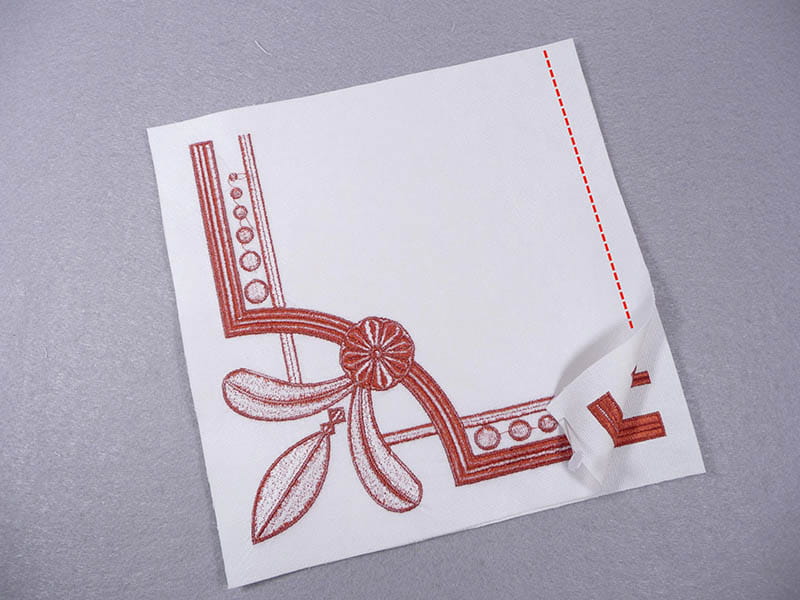
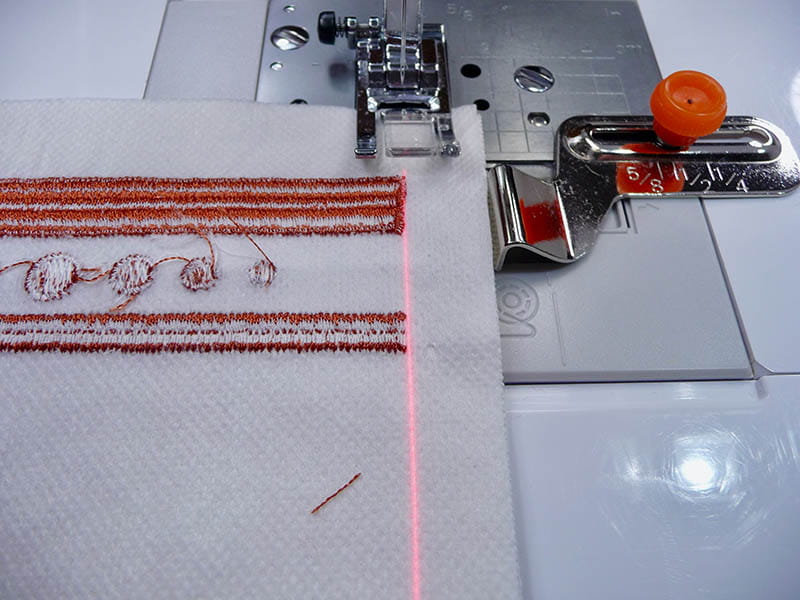
- Prepare to sew your first set of blocks by matching up the embroidered bars. See enhanced photo in Figure #6, with dashed red line showing the position for the line of stitching.
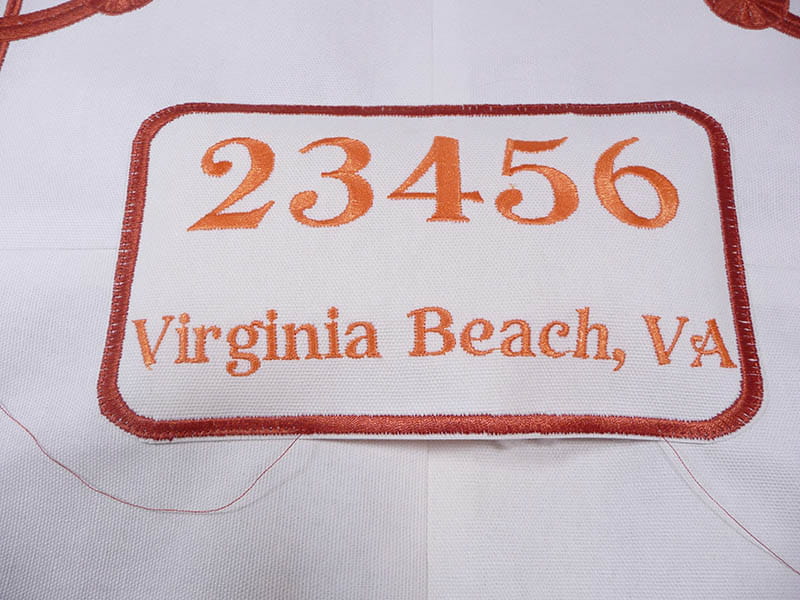
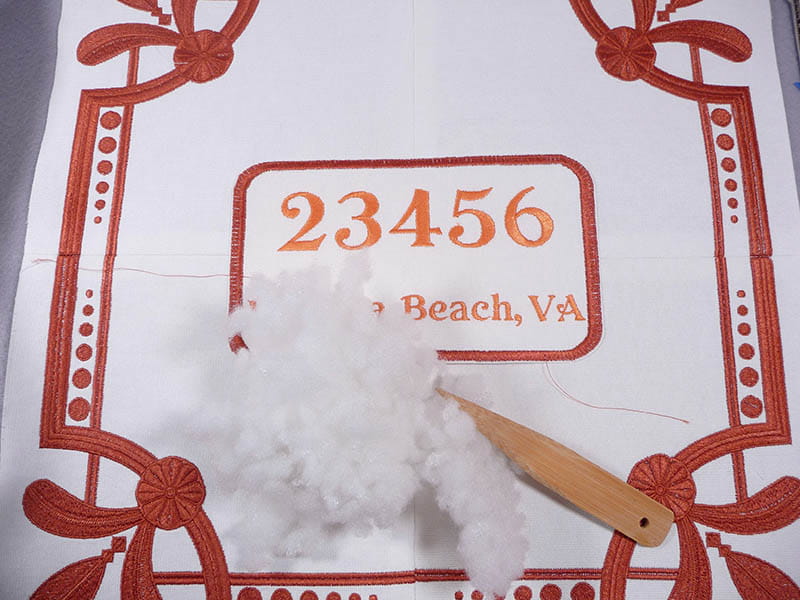
- Treat outer edge of satin stitch with seam sealant, let dry, then carefully trim close to satin stitches to create center patch. See Figure #12.
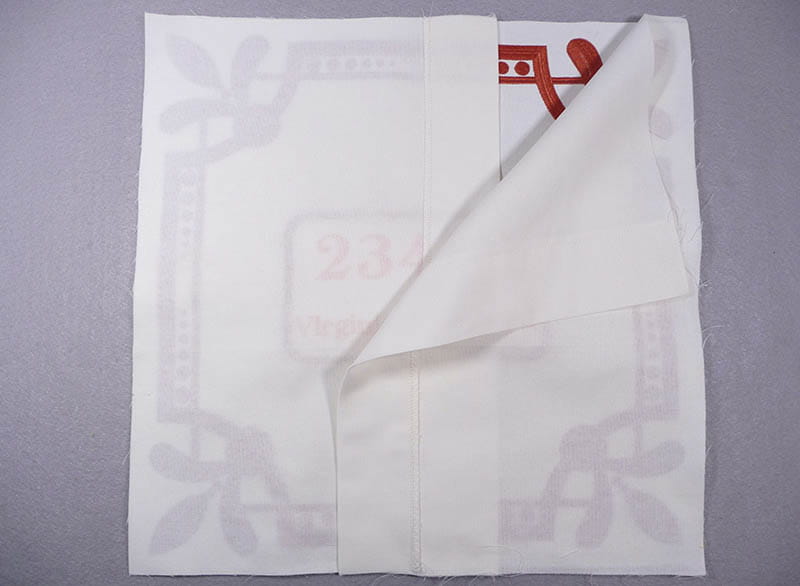
- Place foot “G” on machine and select a lightweight overcasting stitch that coordinates with foot G. Note: You could opt to use your Brother serger to finish the edges. Overcast one 16 ½-inch edge on each of the two pillow back pieces to clean finish overlaps. See example in Figure #17.
Note: Finished pillow measures 16-inches square. Thread colors are as follows: Reddish Brown #337 for numbers and letters. Clay Brown #339 for rectangular frame and the four block designs.
Figure #1
Please read through all instructions before beginning this project. Basic steps are as follows:
All Steps to Create Zip Code Pillow:
Figure #2
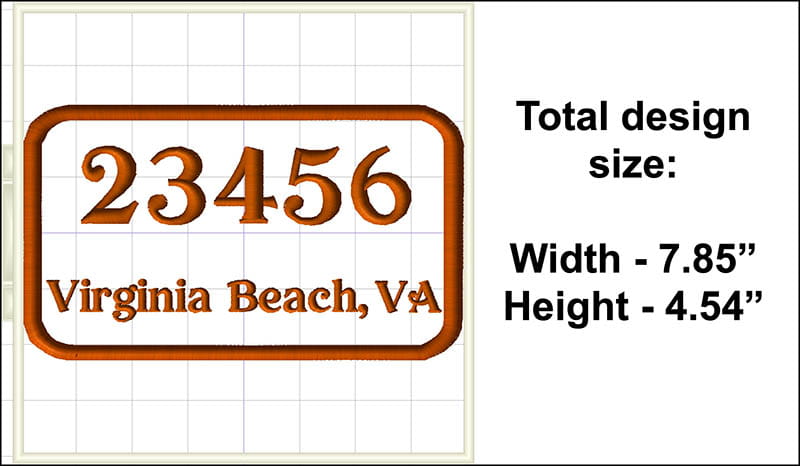
Figure #3
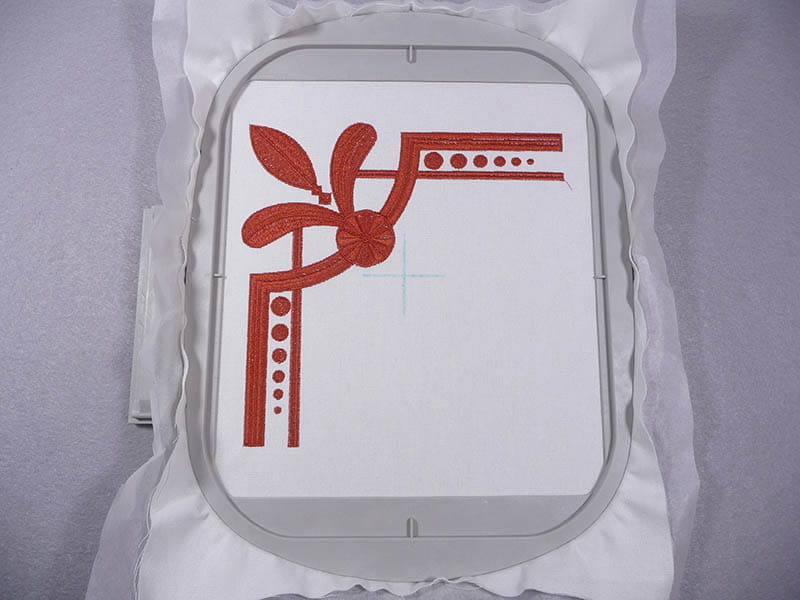
Figure #4
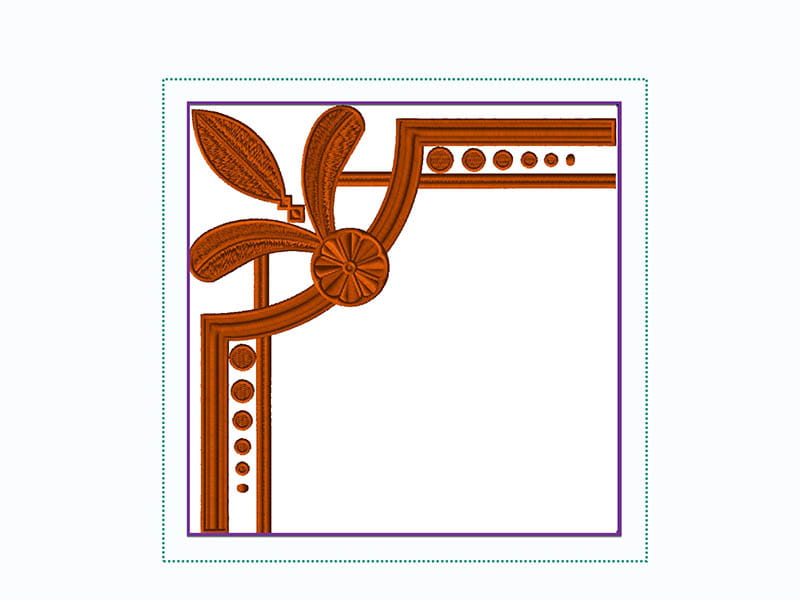
Figure #5a
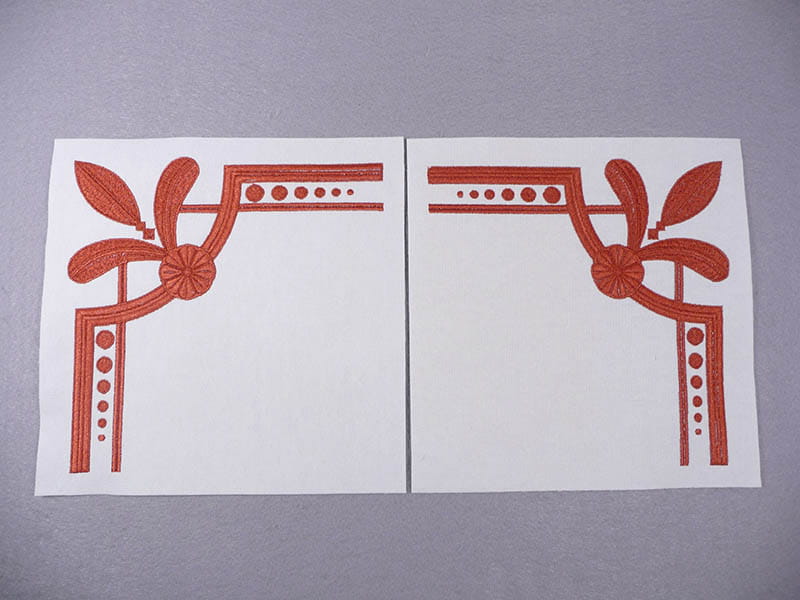
Figure #5b
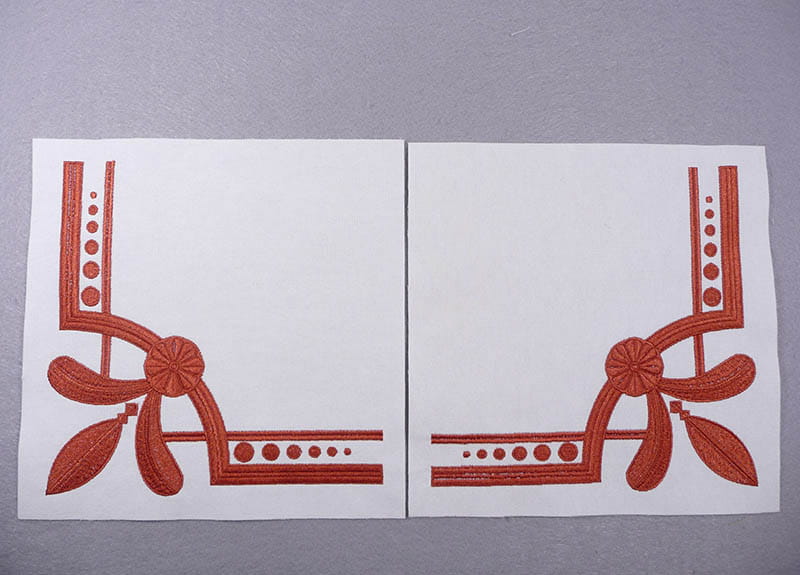
Figure #6
Stitch each set of blocks together using a ½-inch seam allowance and carefully matching the embroidered bars. See Figure #7.
Figure #7
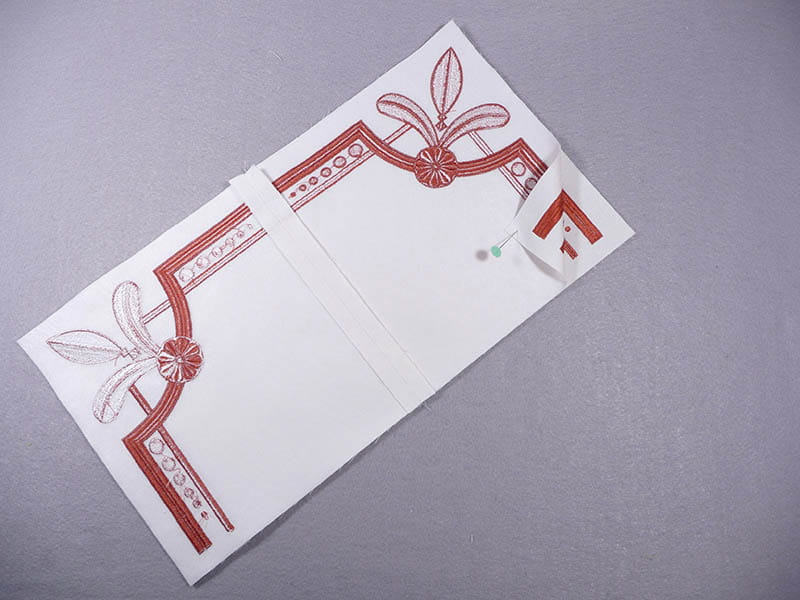
Press seams open and lay out upper and lower half of pillow as shown in Figure #8.
Figure #8
Once again, you’ll want to carefully match the embroidered bars. See Figure #9.
Figure #9
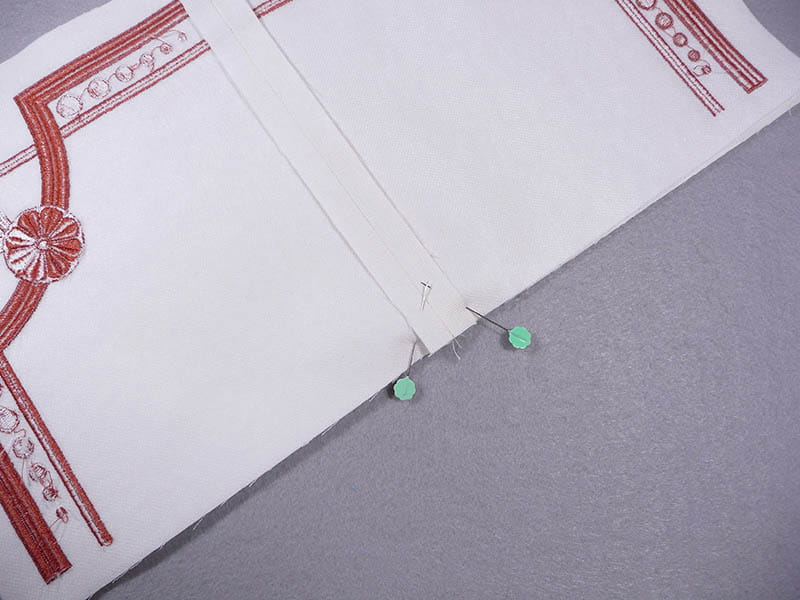
Pin intersection of seams to keep them from shifting. See Figure #10.
Figure #10
Sew the two halves together, press seams open and press pillow front so it is smooth and flat. See Figure #11.
Figure #11
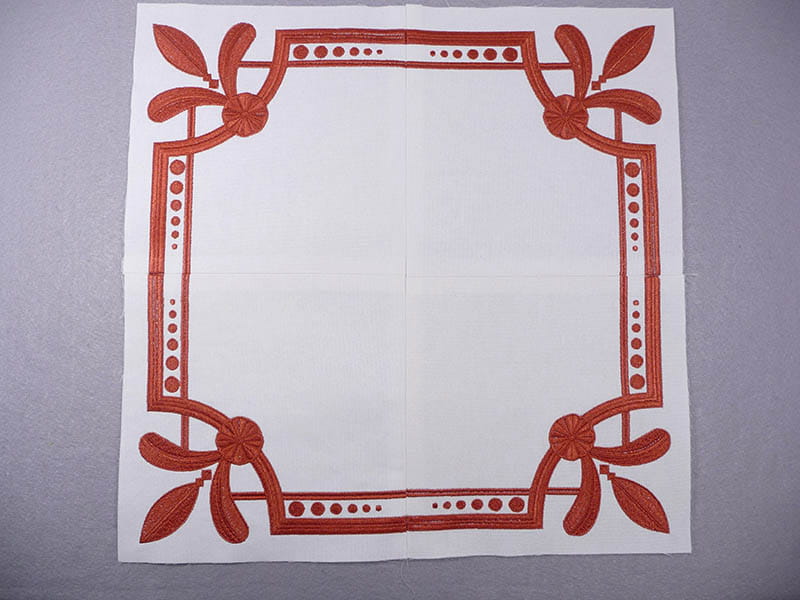
Figure #12

Pin patch in center of pillow front piece. See Figure #13.
Figure #13
Stitch patch to pillow front, stitching close to edge with a straight stitch, and leaving a small opening at the bottom to add fiberfill. See Figure #14a and Figure #14b.
Figure #14a
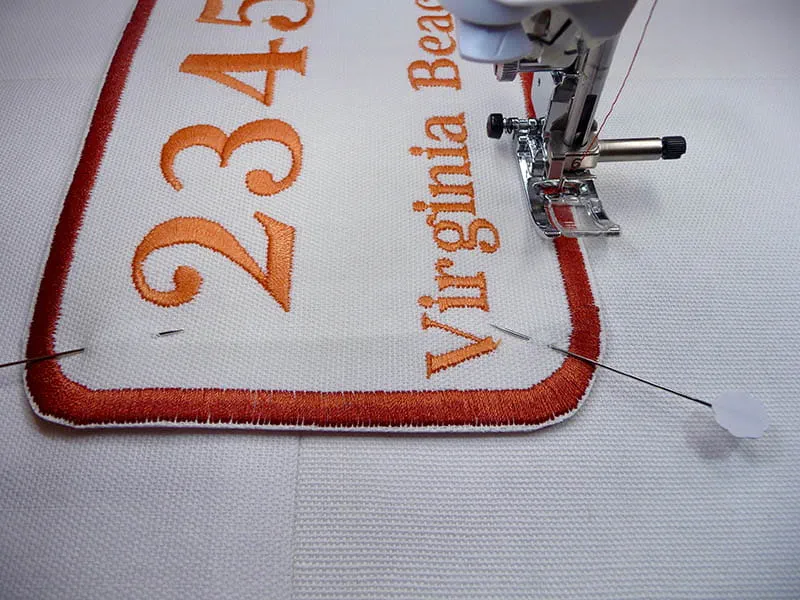
Figure #14b
Lightly fill patch with fiberfill, pushing it in, and distributing it so it’s even. See Figure #15.
Figure #15
Return to machine and stitch opening closed. See back side of stitching in Figure #16.
Figure #16
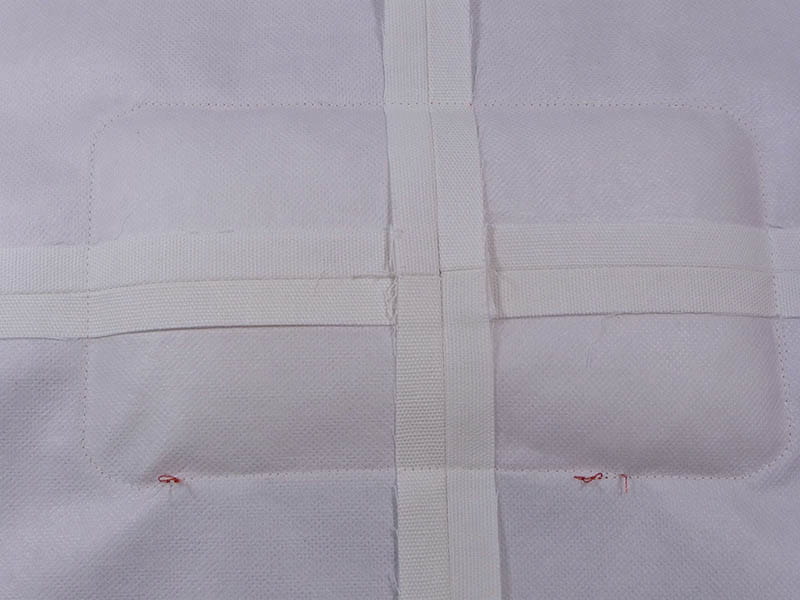
Figure #17
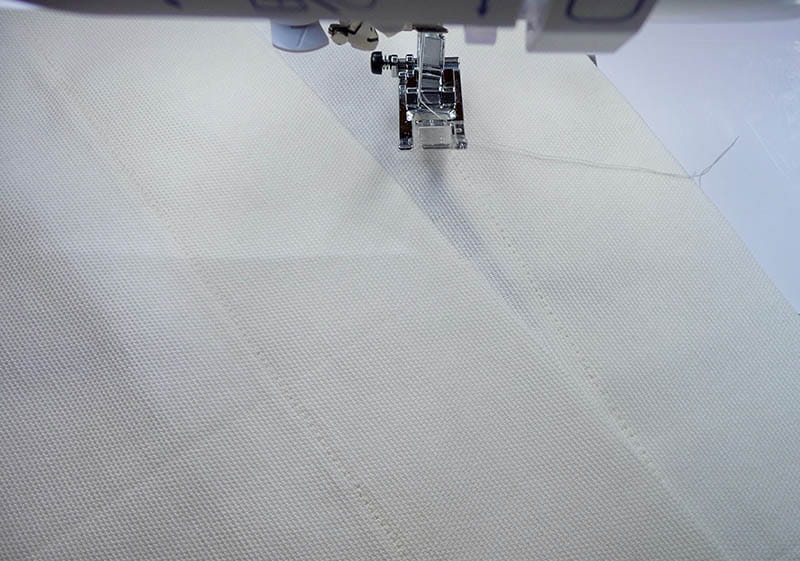
Next, press these edges 2 ¼-inches to the wrong side. Topstitch close to finished edges of overlaps to keep them flat. See Figure #18.
Figure #18
Layer back pieces, overlapping them in the center with right sides facing pillow front and all raw edges even. Tip: Due to slight differences in fabrics, your pillow back may be slightly larger than the pillow front. If that’s the case, simply trim any extending fabric so it is even with pillow front piece. See Figure #19.
Figure #19
Sew a ½-inch seam allowance around all four edges. Trim corners slightly to reduce bulk, turn right side out, and press. Insert pillow form. You are finished! Enjoy!
Tip: I prefer pillow forms that come with a zipper closure. That allows for adding additional fiberfill in the corners, making the pillow form fuller.
Options and ideas:
Use this basic method of construction for other embroidery designs that fit your personal hoop options. Using this method of creating evenly sized squares and sewing them together as blocks makes it easy to create larger designs with patterns evenly spaced. Consider adding an additional margin of fabric around each design to make larger blocks with smaller designs. You could also opt to add trim around your designs, creating color coordinated accents. While ideal for pillow tops, this basic idea can be used for many other projects.
Related Projects
Stay Connected
* Required fields