Foot of the Month: Gift bag with Pearls and Ribbon Trim
This elegant gift bag is the perfect wrapping for a variety of gifts. We used the featured Foot of the Month, the Pearls and Sequins Foot to trim the top with craft pearls for a festive touch. Interested in an idea for making this even more special? Craft a personalized message using custom ribbon made with the P-touch embellish ribbon and tape printer by Brother.
Whip up this gift bag in no time at all using inexpensive materials. Makes a great last minute hostess gift!
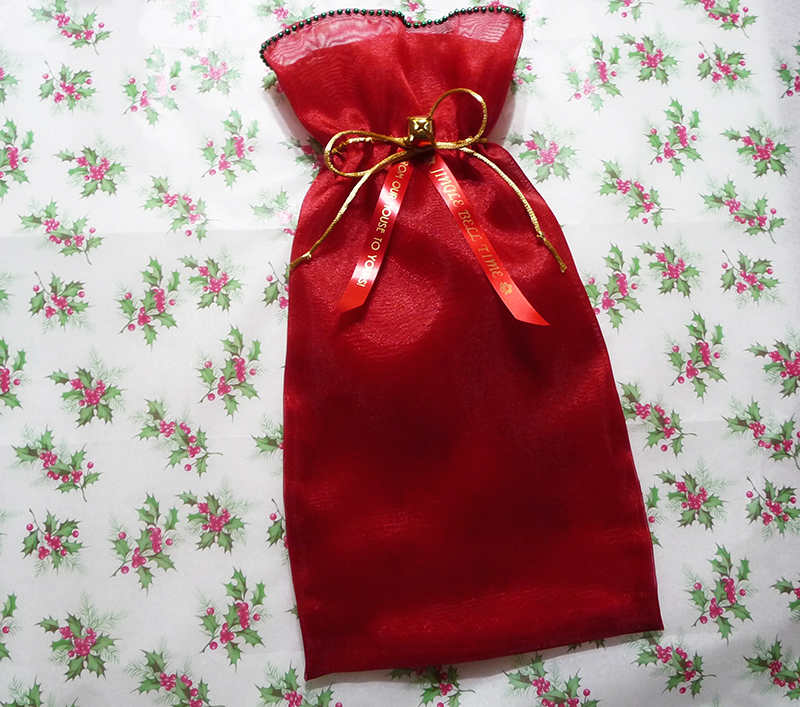
Materials and Supplies:
- Brother Sewing Machine
- SA150 Brother Pearl and Sequin foot
- SA141 Brother Braiding foot
- Basic sewing notions including sewing thread for the machine and a hand needle for hand sewing.
- One jingle bell or decorative button for center front of bag.
- Approximately 16-inches 4mm craft pearls for trimming top of bag.
- One piece of satin cording measuring 24-inches long for closing top of bag. This type of cording is commonly known as rat-tail cord
- Fabric for gift bag: One strip of fabric measuring 9-inches wide X 44-inches long.
- Two pieces of ribbon measuring approximately ½-inch wide X 4-8-inches long.
Note: This project features custom ribbon with a special printed message. You can create beautiful ribbon with many patterns and fonts using the P-touch embellish ribbon and tape printer by Brother
. Featured ribbon is Gold Print on red satin variety, TZe-RW34.
. Featured ribbon is Gold Print on red satin variety, TZe-RW34.
Note: Bag is made from ¼ yard of sheer organza using the selvedge-to-selvedge width of the fabric for the length measurement. Bag is self-lined with enclosed, French style seams at the sides. Most any light to medium weight fabric is suitable but sheer fabric combined with special trims makes this bag especially elegant!
Instructions for Making Gift Bag
- Set up machine for straight sewing with thread to match bag fabric. Fold fabric strip with right sides together and selvedge edges matching. Sew a ½-inch seam along the short, selvedge edges. See Figure #1.
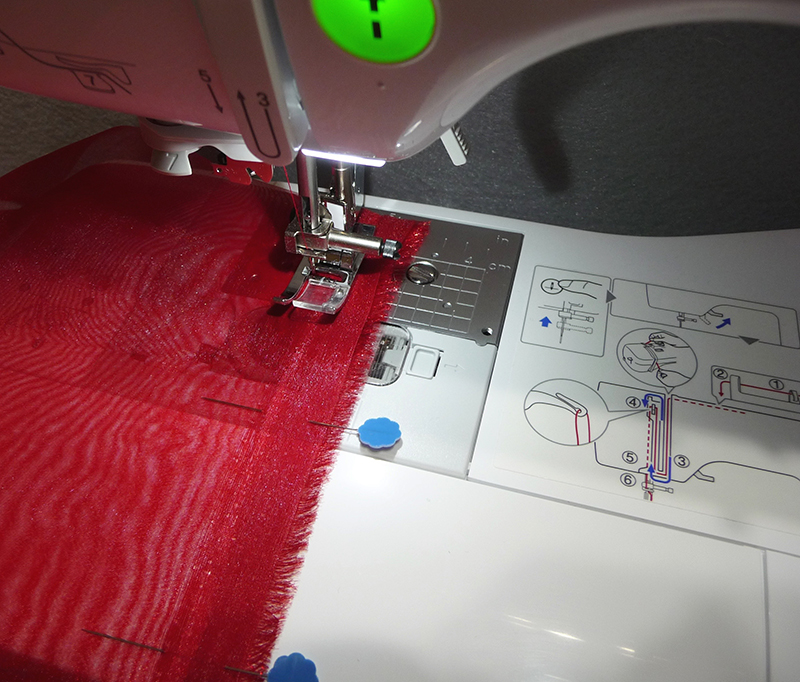 Figure #1[/caption]
- Next, fold the strip with wrong sides together, having the seam at the center with a folded edge at the top and the bottom. See Figure #2.
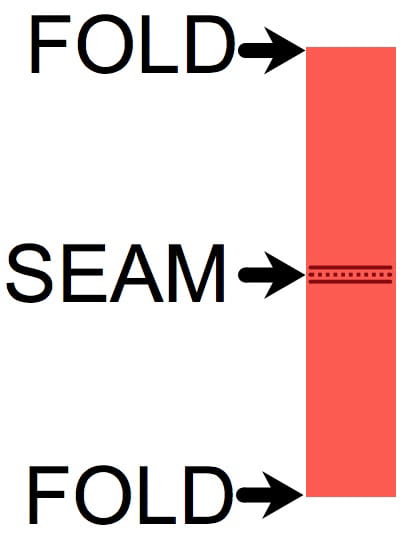 Figure #2[/caption]
- Fold strip once again, with seam at the bottom, raw edges matching at the side, and folded edges aligned with one another at the top edge. See Figure #3.
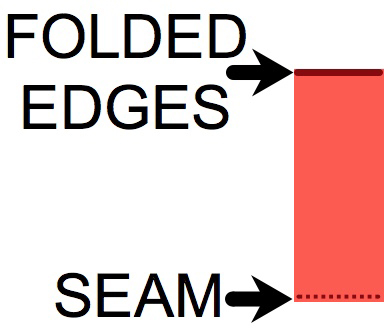 Figure #3[/caption]
- Pin raw edges together at sides and sew the two side seams using a ¼-inch seam allowance. Trim seam slightly to create a scant ¼-inch seam. Turn bag inside out. Press side seams flat. Next, sew side seams for the second time, using a 3/8-inch seam allowance to enclose all the raw edges.
- Turn bag to the right side and give it one more pressing, pressing both side seams in one direction so they lay flat at the top folded edge of the bag.
Tip: If you have a sleeve roll or a similar pressing tool you can use it to press seams inside the narrow area of the bag.
- Assemble trims in preparation for finishing the bag. You can print ribbon with a custom message and add a multitude of decorative elements with the P-touch embellish ribbon and tape printer by Brother.
See examples below: Trim ends of ribbon at an angle and overlap to prepare for attaching to bag. See Figure #4.
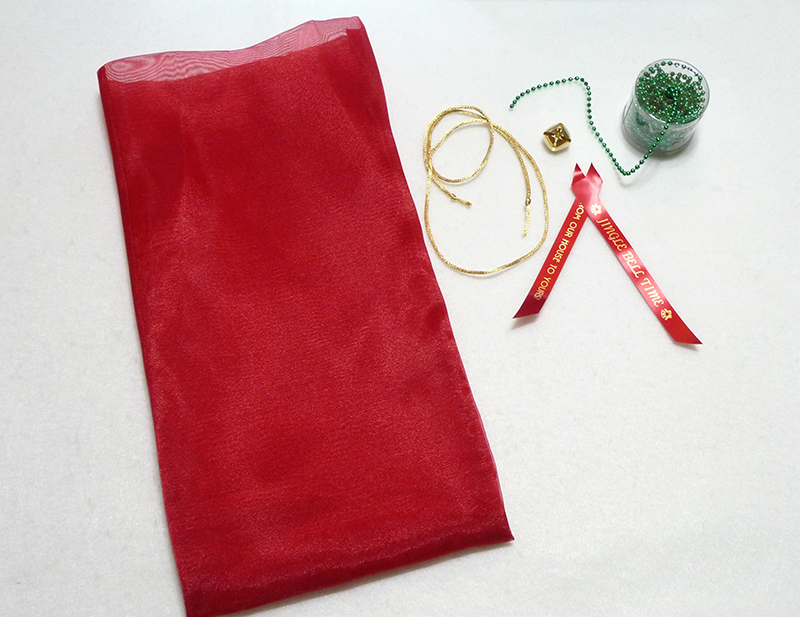 Figure #4[/caption]
- Set up machine for sewing with the free arm. Mark placement for ribbons 3-inches from top edge, at the center front of the bag. Slip bag over the free arm and anchor ribbons in place with a straight stitch. See Figure #5.
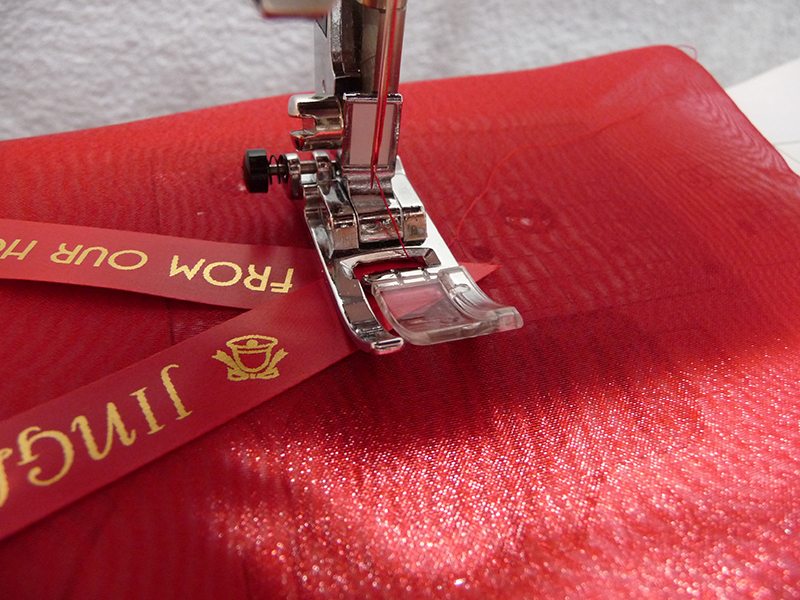 Figure #5[/caption]
- Attach pearl and sequin foot to the machine. Select a zigzag stitch and set both width and length at 4.0. Place string of beads under foot with about an inch extending at the back of the foot. Position beads along finished edge of the bag, beginning at the center back. Zigzag over beads to secure them to the edge, stopping the stitching as you approach the point where beads meet together. Cut away excess beads at the point where they meet and then finish stitching until you reach the end of the beads. See Figure #6.
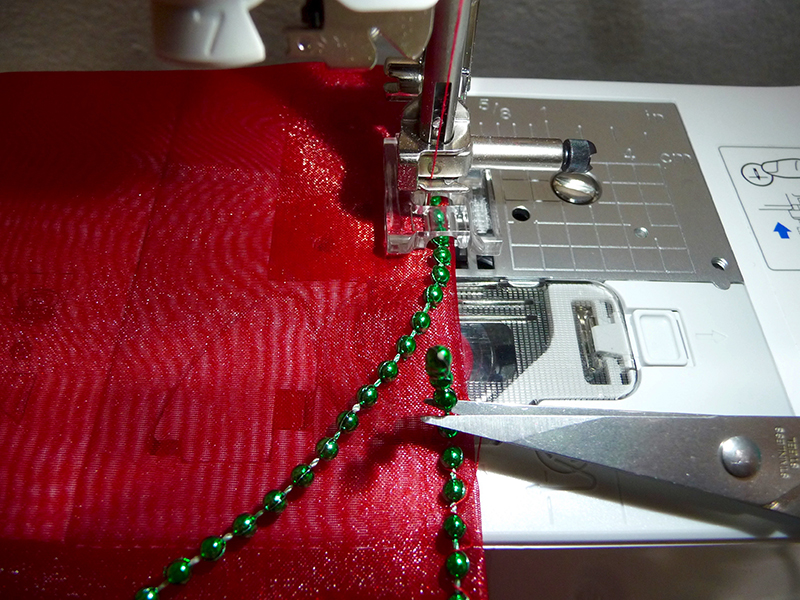 Figure #6[/caption]
Tips for stitching pearls: Be sure to tie off your stitch at the beginning and end of the stitching. With this zigzag stitch setting the thread blends in as it falls between the pearls. As an option you can switch to thread that matches your pearls. Stitch at a slow speed and let pearls flow freely while guiding them into the foot.
- Switch to Braiding foot. Insert cord into the slot and adjust screw to fit cord. Set zigzag width to 5.0 to make sure the stitch skips over the cord. Sew cord 3-inches from top edge, beginning and ending at the center front. See Figure #7a and #7b.
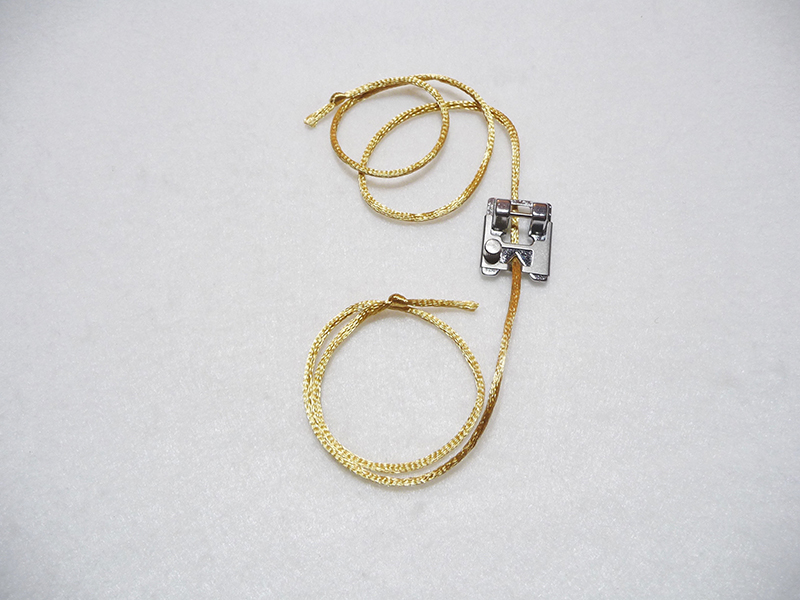 Figure #7a[/caption]
[caption id="attachment_11766" align="aligncenter" width="800"]
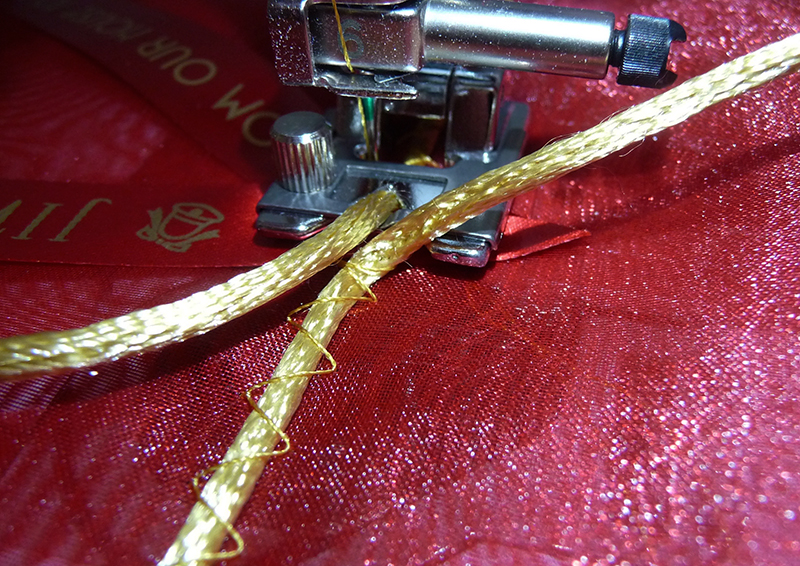 Figure #7b[/caption]
Tip: Temporarily attach a piece of paper from a sticky note pad to mark the distance of 3-inches.

- Hand-sew the jingle bell to center front of the bag, sewing through the crisscrossed ribbons. Fill your bag and pull cords to tie a bow. See Figure #8.
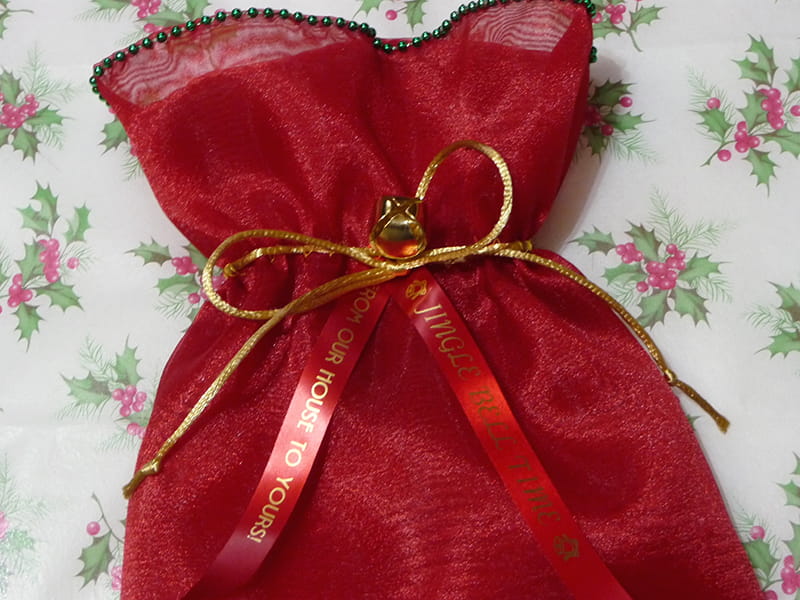 Figure #8[/caption]

