Free Design: Slippers Crowned for a King
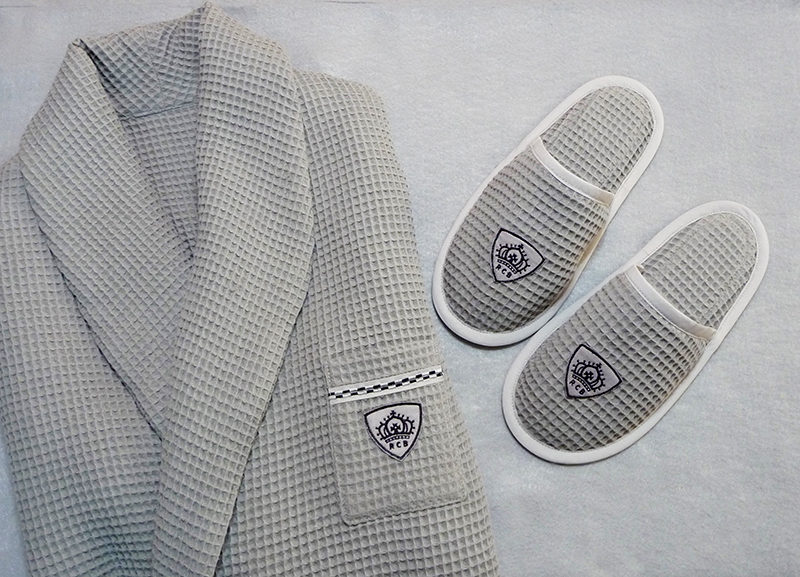
The featured design this month is a classy crown motif. Stitching this design in combination with a frame shape and a monogram makes it suitable for creating an appliquéd emblem. Use the appliqué to decorate a pair of spa style slippers. Make an additional emblem to decorate the pocket of a robe as shown in our feature companion project for this month.
Combine the slippers with a robe for a gift set fit for a king! Brother Free Design of the Month

Materials and Supplies
- Brother Sewing and Embroidery Machine
- Brother Embroidery Thread and Bobbin Thread
- SA190 Brother Non-stick roller foot
- FREE DESIGN - Crown <-- click="" here="" to="">
- One 8-inch square of fabric for appliquéd emblems. Fuse medium weight interfacing to the wrong side of this piece for added stability. This project features washable faux suede for the appliqué fabric. No additional stabilizer is necessary with this firm fabric.
Note: Please read all instructions before beginning this project. You can create the embroidered emblems and attach to pre-purchased ready-made slippers, or construct slippers using the pattern featured in these instructions. Purchase permanent fabric glue if your slippers will be laundered and you wish to attach emblem without stitching.
Pattern and fabric recommendations:
- Slippers featured here were modified, with several changes and additions made to the pattern. See Figure #1 for slipper pattern used for this project. Supplies for featured slippers are listed below:
- Main fabric for slippers: Silver gray Turkish Waffle fabric. For each slipper cut two pieces using pattern piece #8 (front shoe piece) and one piece using pattern piece #7 (inside sole).
- Fabric for bottom sole of slipper: Silver gray, washable faux suede fabric. For each slipper cut one piece using pattern piece #7 (outside sole).
- Anti-Skid Gripper Fabric for adding to bottom sole: For each slipper cut three 2 ½-inch square pieces. Round off corners to form ovals.
- Padding for sole of slipper: Sew-in soft foam stabilizer approximately ¼-inch thick. Trace a copy of pattern piece #7. Trim away 5/8-inch from outer edge of pattern piece and use the modified pattern to cut one piece of padding for each sole.
- One package of color coordinating, Extra Wide Double Fold bias tape for binding edges. Note: This is slightly wider than tape recommended on pattern.
- Basic sewing notions, including thread to match fabric.
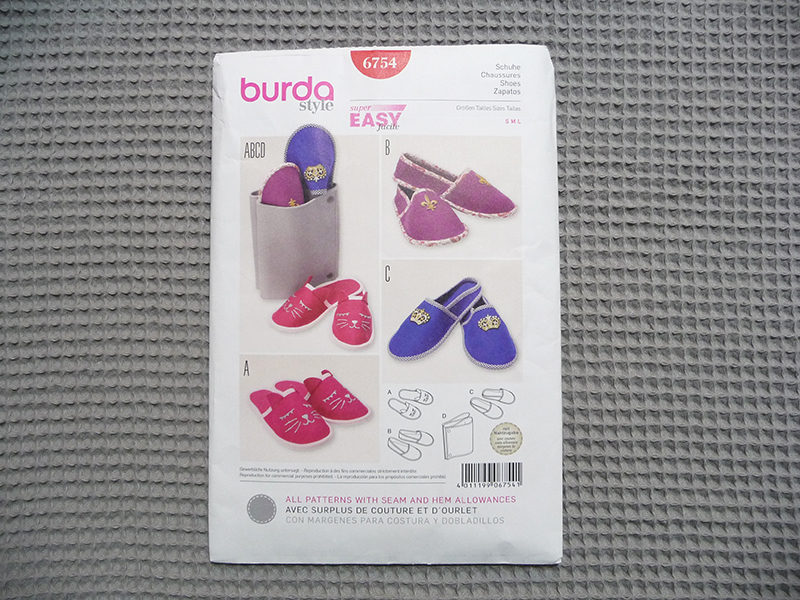
Pattern Cutting and Sizing Tips:
Be sure to cut for both left and right feet when using pattern piece #7. The pattern suggests using a shoe to select from the included sizes. If you find that you need to increase the size you can cut the sole pattern apart, draw a straight line on a piece of plain paper, and add a reasonable amount to increase the length of the sole. Match up the grain line with the line on the paper and then re-draw pattern lines on the sides of the sole.
See illustration below for an example:


Steps to Create Embroidered Emblem
Download the FREE Crown Design above. Import and save it to your embroidery machine. Create an emblem to use for appliqué patch following the steps below:- Select the shield shape from the frame pattern menu and choose the satin stitch option. See Figure #2.
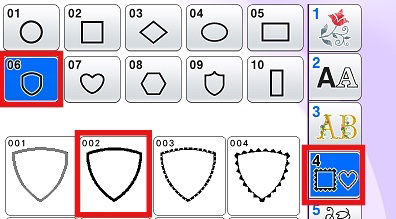 Figure #2[/caption]
- Reduce the size. See Figure #3.
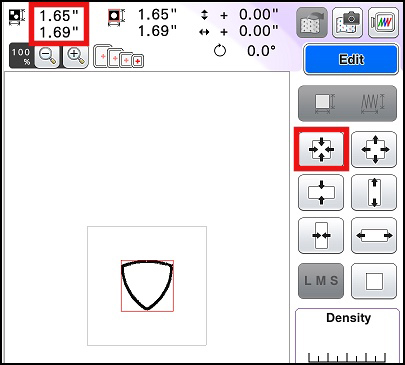 Figure #3[/caption]
- Add the crown design and move it towards the upper edge of the shape to make room for the monogram. Add a monogram below the crown using three small text letters or one single small letter from your built-in font menu. Options will vary depending on your machine. See Figure #4.
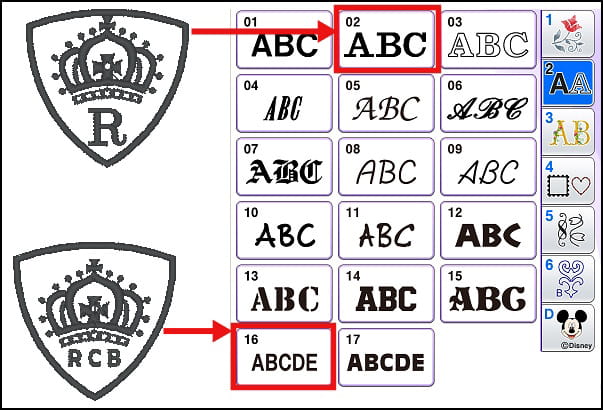 Figure #4[/caption]
- Hoop fabric in 4-inch hoop. Three emblems will fit if you move them into place as shown in Figure #5.
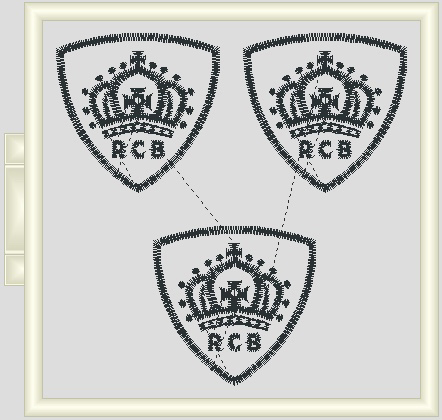 Figure #5[/caption]
Note: As an alternative you can prepare and hoop three separate squares of fabric and stitch one emblem at a time. Stitch motifs using your desired thread colors, remove from hoop and press from the wrong side. Trim close to outer satin stitching.
- Attach to purchased slippers with appropriate glue or set aside temporarily while you construct slippers using featured pattern and the instructions that follow below.
Tip: Thread colors are certainly a matter of personal preference but it is always interesting to stitch a sample. Originally I thought I would like the combination of Silver thread No. 005 and black but after stitching a sample I opted for Dark Grey No.007 for the entire combination.
Steps to Create Slippers
- Begin by reviewing the directions included with the pattern for a general idea of how these slippers are made. Originally designed for felt, these are made with waffle weave fabric commonly found in ready-made spa style slippers. In addition, I attached small ovals of anti-skid fabric to faux suede soles in place of liquid latex. Padding is added to make these slippers more comfortable. I used a package of purchased bias tape for binding edges.
- Set up machine for sewing using the roller foot. This foot is well suited for sewing on fabrics that tend to stick to a standard foot, such as the suede and the anti-skid fabric. Assemble supplies. See Figure #6.
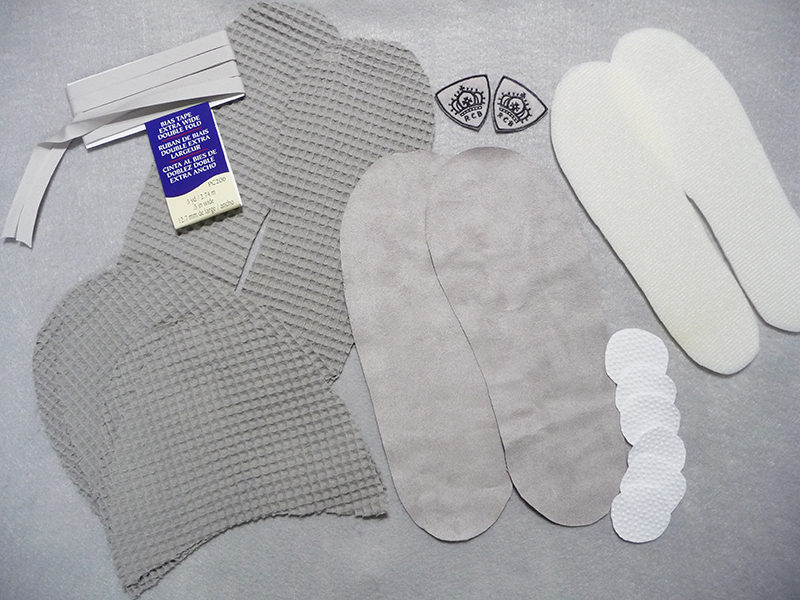 Figure #6[/caption]
- Layer each set of front shoe pieces with wrong sides together. Zigzag around raw edges to secure layers. Sew trimmed emblems onto center of each one. Use a narrow zigzag stitch to attach evenly spaced ovals to bottom of suede slipper soles, keeping them at least 1-inch from raw edges. See Figure #7.
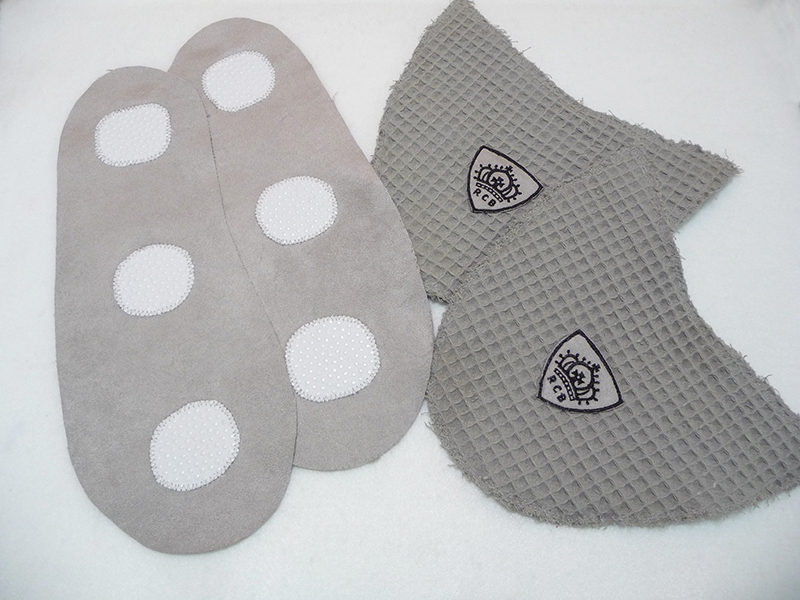 Figure #7[/caption]
- Center foam on the wrong side of each corresponding sole and sew ¼-inch from the foam edge to attach to slipper soles. With wrong sides together, layer each one with a suede sole. See Figure #8. Machine-baste ¼-inch from raw edges.
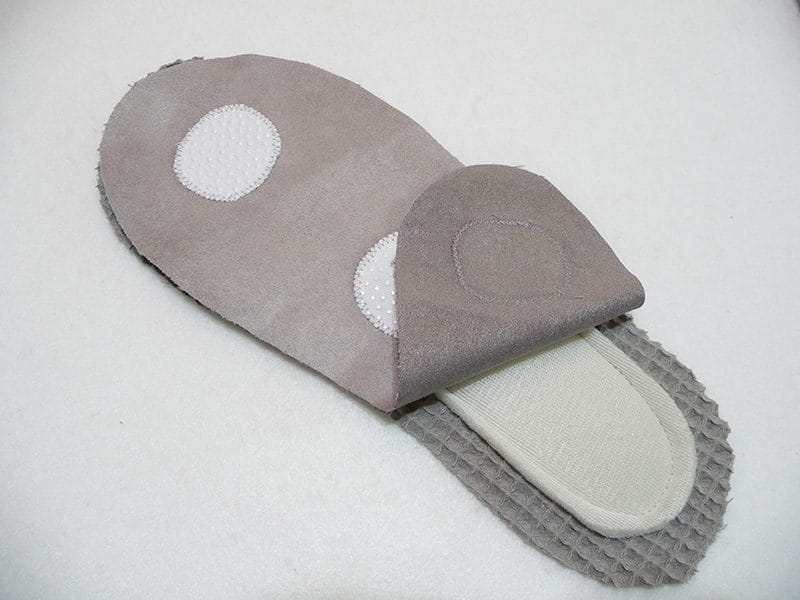 Figure #8[/caption]
- Sew binding to front shoe pieces. Zigzag raw edges together on remaining toe areas. See Figure #9.
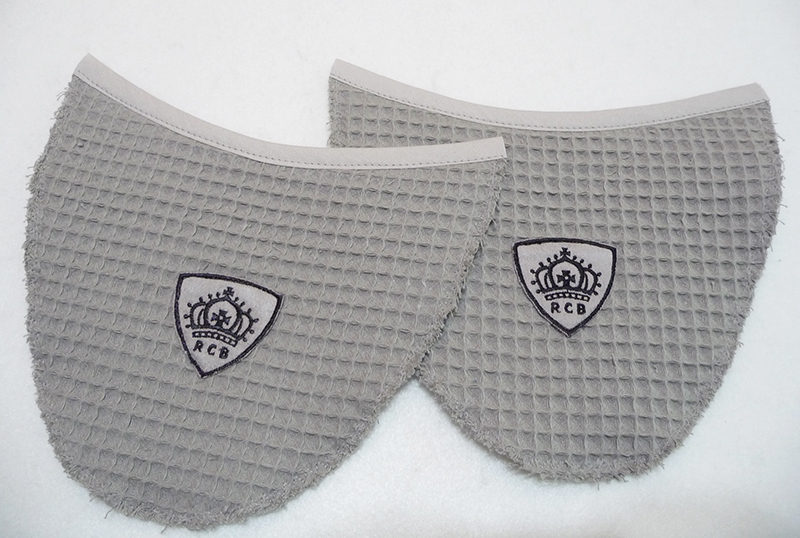 Figure #9[/caption]
Tip: Make sure to sew binding so the wider side is on the bottom. When topstitching for the top side you need to fully catch binding in your stitching.
- Using pattern directions as a guide, pin front shoe pieces to each sole and baste as directed. See Figure #10.
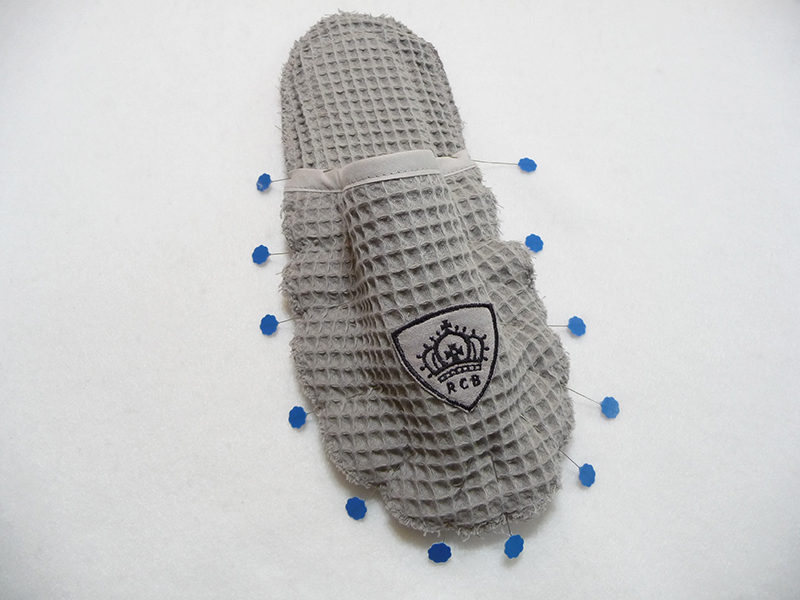 Figure #10[/caption]
- Bind outer edges, taking care to ease in fabric along the sharp curves. I chose to machine sew the binding repeating the method shown above. See Figure #11. You can opt to hand sew the second step of the binding in place if you choose.
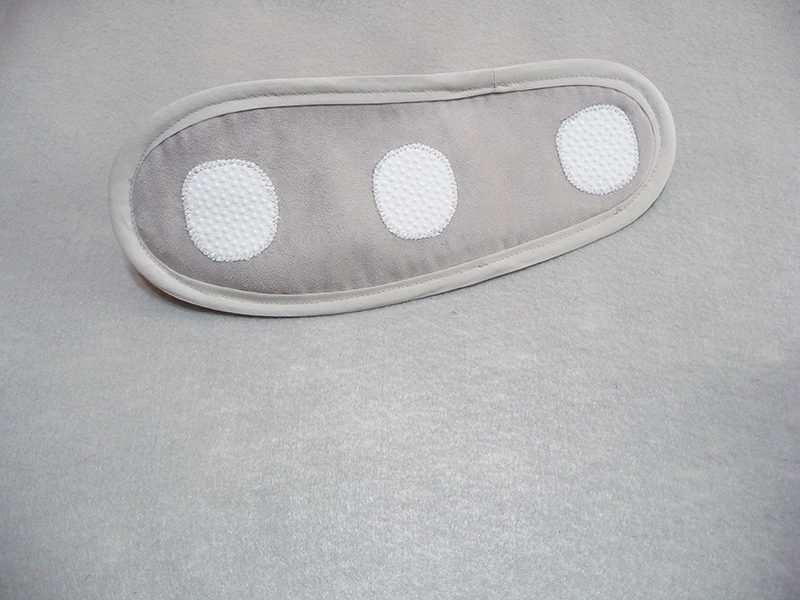 Figure #11[/caption]
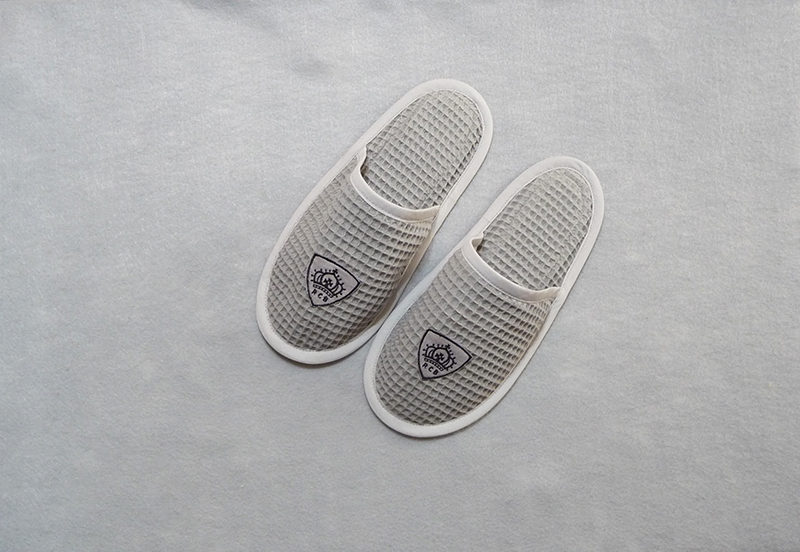
Your classy custom slippers are finished!
[caption id="attachment_7676" align="aligncenter" width="800"]
 Slippers![/caption]
Take a look at the wonderful gift set this makes when paired with the custom robe from the Brother Foot of the Month project
Slippers![/caption]
Take a look at the wonderful gift set this makes when paired with the custom robe from the Brother Foot of the Month project!
-
Featured BurdaStyle pattern is a product of: Verlag Aenne Burda GmbH & Co.
-
Featured 10 oz. Silver Turkish Waffle fabric and Silver Cuddle® Suede fabric are products of: Shannon Fabrics Inc.
-
Brother International Corporation makes no representations or warranties regarding such products.

