Free Design: Embroidered Appliqués on Towels
Looking for a quick way to update your décor? This classy set of towels is trimmed with nothing more than a bit of fabric and a stylish Brother embroidery design. A simple change of thread colors gives the design a whole new look! These instructions show how to trim the towel with the diamond shaped appliqués. Take a look at the companion Foot of the Month project for complete instructions on trimming the hand towel with strips of fabric
. Pair these two projects together and beautify your bath with a luxurious, yet economical embroidered set!
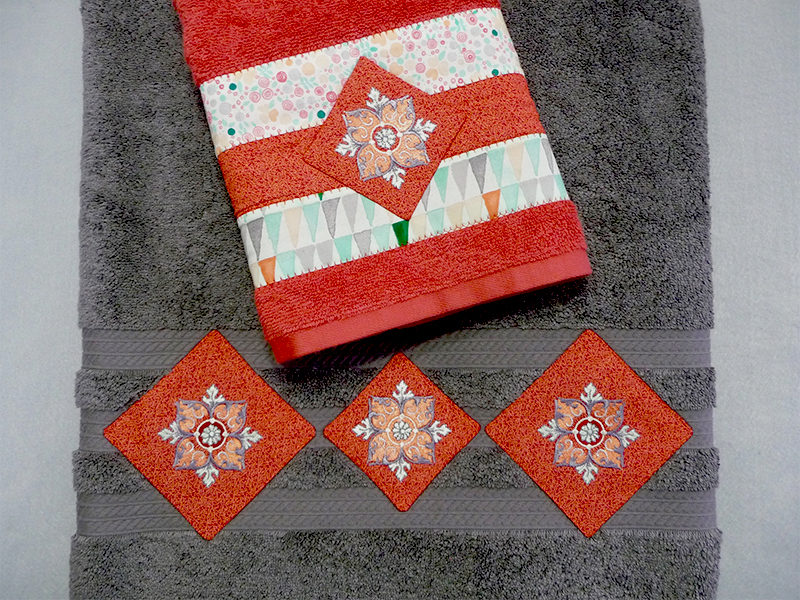 [caption id="attachment_4922" align="aligncenter" width="800"]
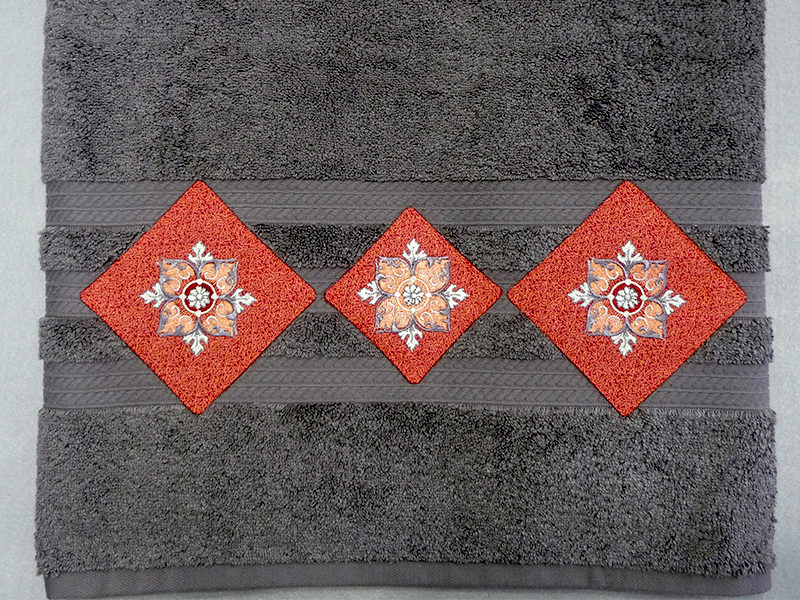 Close-Up of Appliqués[/caption]
Materials and Supplies:
- Brother Sewing and Embroidery Machine
- SA145 Brother Clearview Foot
– Optional but helpful - SA443 Brother 4-inch square hoop
- Brother Embroidery and Bobbin thread
& Embroidery Needle
for embroidered appliqué - Brother Free Design of the Month-Decorative Motif
- Basic sewing notions, including good quality polyester sewing thread and a tool for turning points such as a bamboo point presser
- Low tack tape for securing fabric appliqué
- Bath towel
- Light weight fusible interfacing for wrong side of each 8-inch piece
- One piece of cotton measuring 8-inches square for each embroidered piece.
- One piece of cotton measuring 4-inches square for lining each embroidered piece.
Note: Fuse lightweight interfacing to the wrong side of each 8-inch square piece.
[caption id="attachment_4932" align="aligncenter" width="800"] Original Design Colors (left) vs. Modified Design Colors (right)[/caption]
Steps to Create Embroidered Appliqués
- Choose various thread colors to coordinate with your color scheme. See Figure #1.
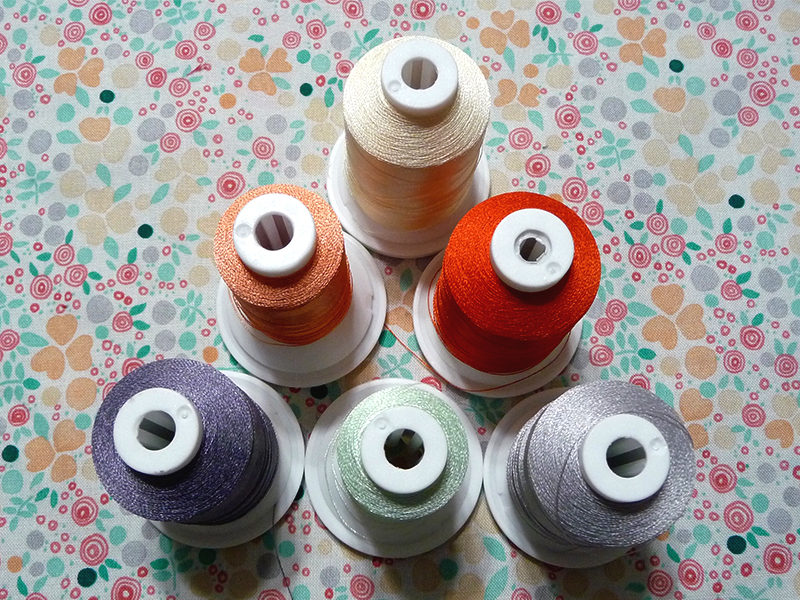 Figure #1[/caption]
Tip: Select prominent colors from a fabric print. If you are making the coordinating hand towel you can use one or more of these coordinating fabrics as a guide. Notice that the selvedge edge of fabric often includes dots of colors included in the print. Experiment with different color schemes and don't be afraid to minimize colors by eliminating some and repeating the same thread color more than once. See Figure #2.
[caption id="attachment_4925" align="aligncenter" width="800"]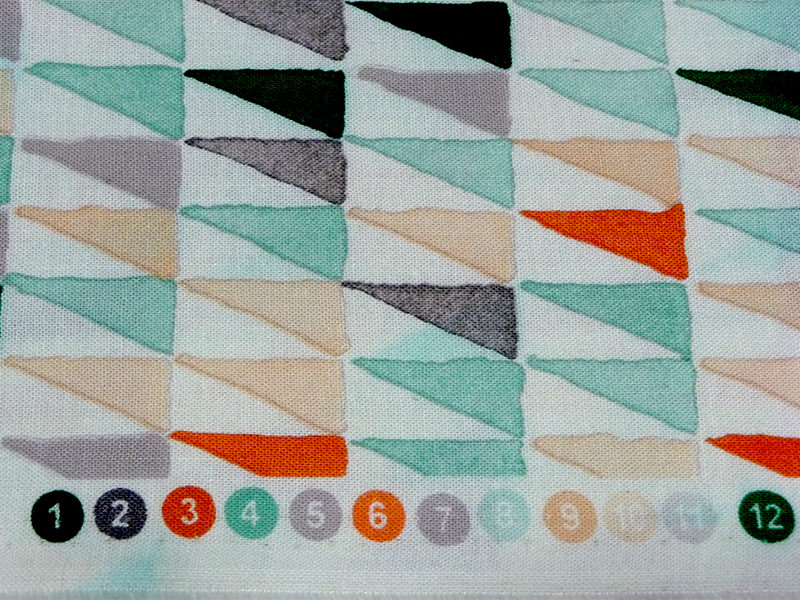 Figure #2[/caption]
If your machine includes the Color Shuffling™ option you can “pin” selected colors and let the machine work it’s magic to mix and match colors right before your very eyes!

 Figure #2[/caption]
If your machine includes the Color Shuffling™ option you can “pin” selected colors and let the machine work it’s magic to mix and match colors right before your very eyes!

- Place interfaced 8-inch square of fabric in 4-inch hoop. Embroider design in the center. See Figure #3.
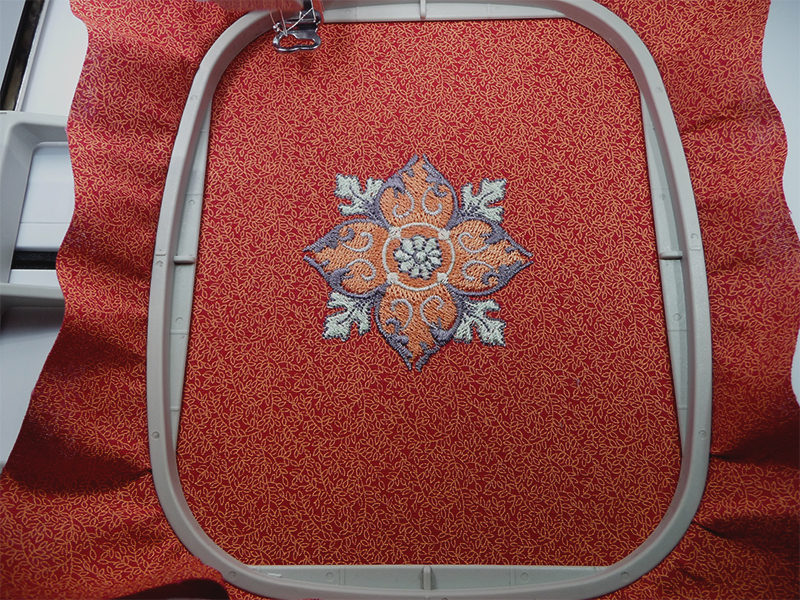 Figure #3[/caption]
- To create the actual appliqué begin by adding a square frame from the frame shape menu. See Figure #4.
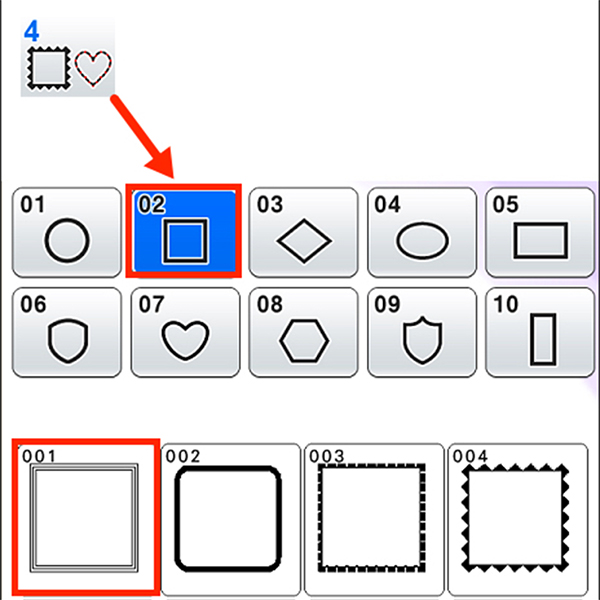 Figure #4[/caption]
Resize the triple stitch frame as desired, making sure to keep it at a maximum of 3.89” X 3.89”.
Note: In this example the center square is 3.02” X 3.02” and the two additional squares are 3.89” X 3.89”.


- Next, center the 4-inch square lining piece on top of the embroidered design, having right sides together. Tape edges to keep lining from moving. Stitch square frame shape in the center. See Figure #5.
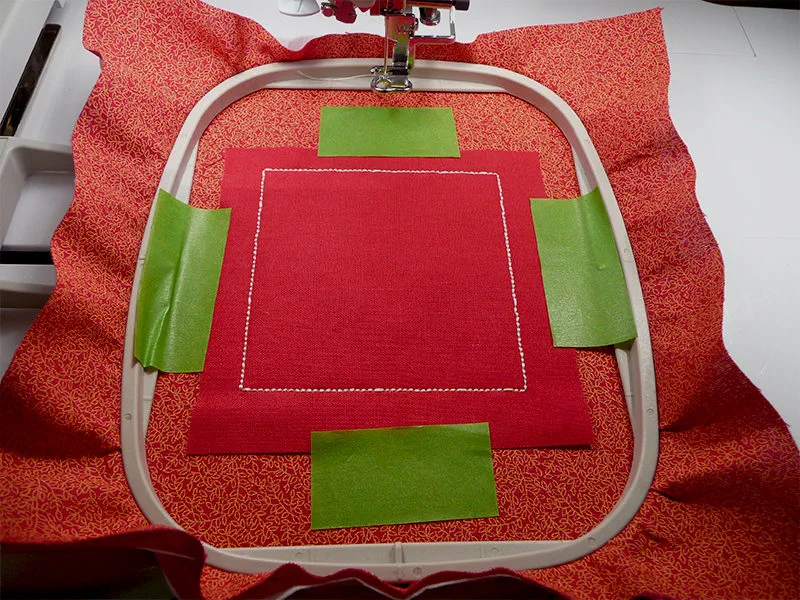 Figure #5[/caption]
- Pinch the lining layer with your fingers and cut small slits in a crisscross fashion, taking care to cut lining layer only. See Figure #6.
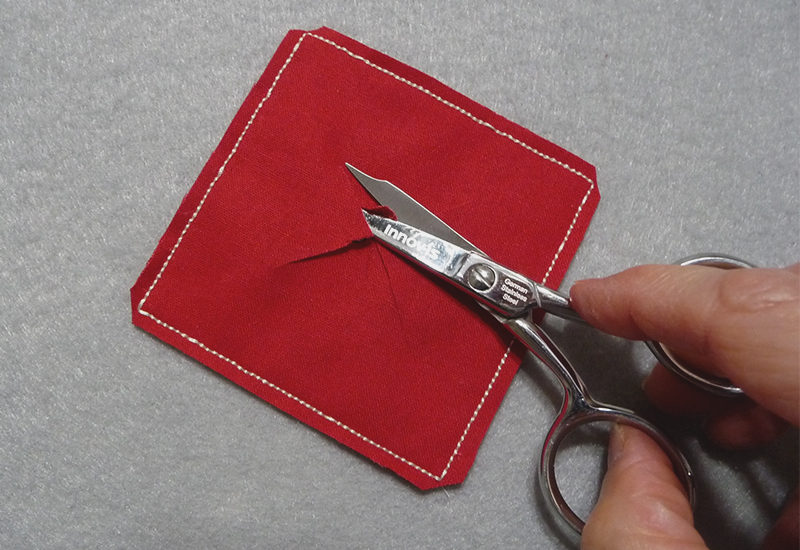 Figure #6[/caption]
- Turn right side out through slits, and carefully push out points. See Figure #7.
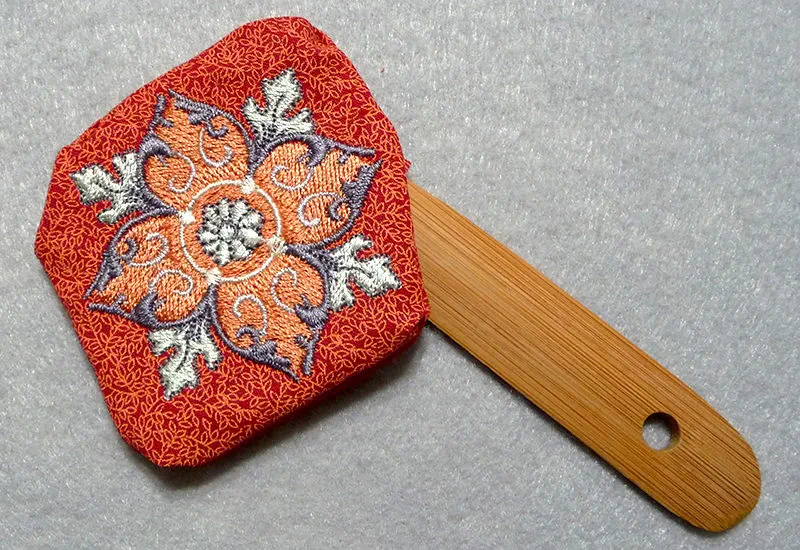 Figure #7[/caption]
- Press flat from right side. Repeat steps 2-6 for each appliqué.
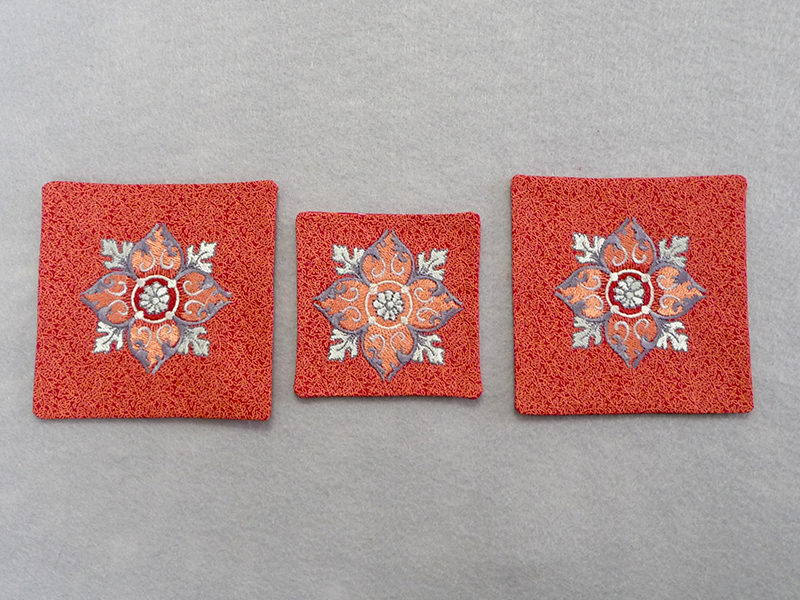
Steps to Attach Appliqués
- Turn squares on point. Position prepared appliqué pieces along towel band, working from the center outward and pinning each one in place.
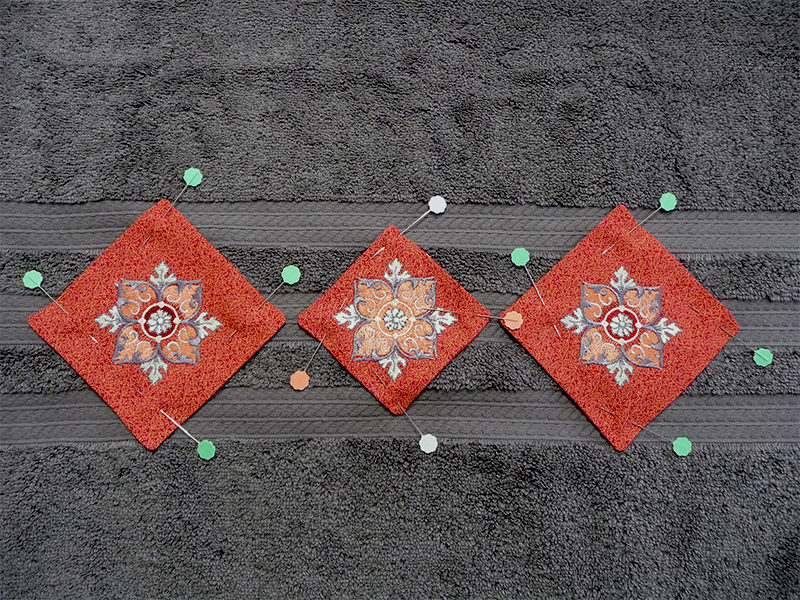
- Attach to towel using a narrow zigzag or a blanket style stitch, setting the stitch width to just catch the finished edge of the piece. Use foot “N” or use a clear view foot for better visibility. See Figure #8.
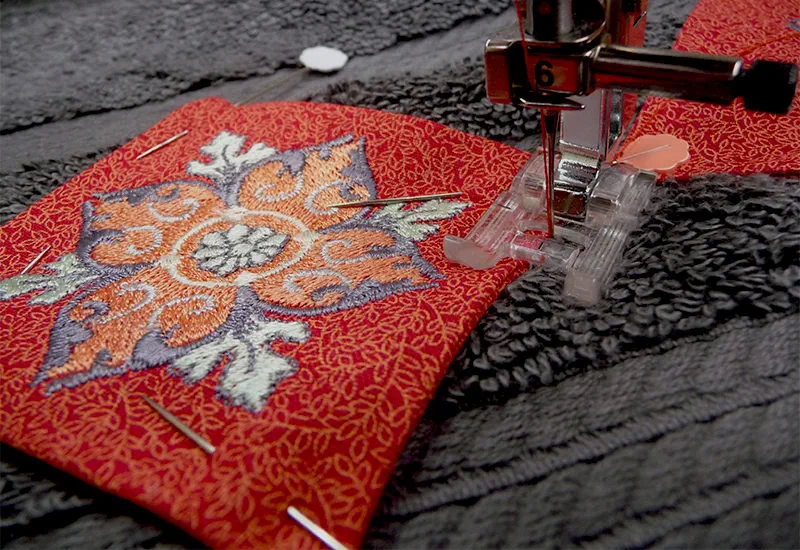 Figure #8[/caption]
- Lightly press the appliqués.

