Free Design: Fall Wreath with Embroidered Sunflowers
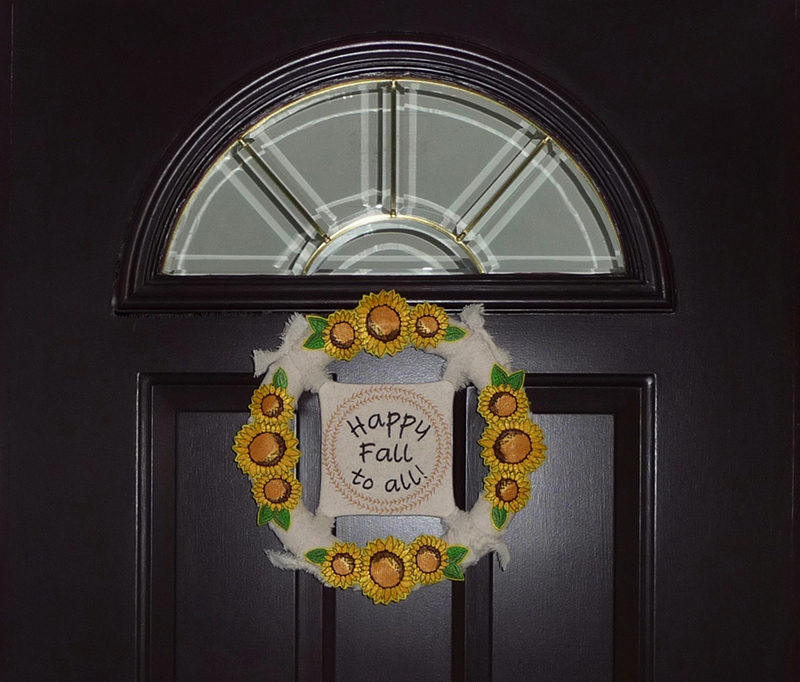
Welcome the season with a bright and happy wreath. This wreath is decorated with our featured Brother Free Design of the Month - a cheery swag of sunflowers! Add an easy in-the-hoop square to the center and embroider it with a short message to greet your guests at the front door. Let’s get started!
Materials and Supplies:
- Brother Sewing and Embroidery Machine
(with 5-inch X 7-inch hoop capability) - SA448,
the Brother 6-inch hoop is also featured in this project - Brother Embroidery Thread and bobbin thread
- SA5810
Brother Pacesetter medium weight tear-away stabilizer - Free Design October 2018_Three Sunflower Swag.pes
- Embroidery needle for embroidering
- 12-inch extruded foam wreath with a center opening measuring 8-inches
- Four sheets of yellow craft felt measuring 9-inches X 12-inches for embroidered sunflowers
Loose weave cotton fabric:
- One piece measuring 12-inches square for embroidered center square
- Matching Fabric for strips to cover wreath: Four strips measuring 2 ½-inches wide
- Matching fabric for narrow ties, two strips measuring 1-inch wide. See note for length of strips
Note: Featured fabric is unbleached Osnaburg cloth and ravels easily to form frayed edges. This fabric measures 44-45-inches wide from selvedge to selvedge. It’s best to tear the required strips across the full width of the fabric. Feel free to substitute with a similar fabric suitable for embroidering.
- Batting for center block: One piece of thin cotton quilt batting measuring 12-inches square
- Backing for center block: One piece of felt measuring 7-inches square
Note: This piece of felt should closely match fabric for center block. Ivory felt is shown in this example.
Misc. supplies:
- Basic sewing notions including sewing thread to match fabric and a tool for pushing out points
- Low tack tape for securing fabric pieces in hoop while embroidering
- Sharp, curved tip scissors for trimming felt. Small strip of fusible webbing to close back opening in felt
- Fabric glue that dries clear or hot melt glue and glue gun for attaching flowers to wreath
Brother Free Design of the Month
- Click here to download the October Free Design: Three Sunflower Swag.pes
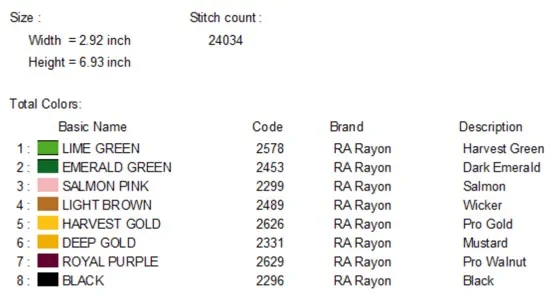
- Design size when sewn horizontally in a 5” X 7” hoop: 6.93” High X 2.92” Wide
Brother Polyester Embroidery Thread colors used in this example:
- Moss Green - #EPT515
- Lt. Emerald Green - #EPT0076
- Cream Yellow - #EPT812
- Deep Gold - #ETP214
- Harvest Gold – #ETP206
- Pollen - #ETP0332
- Dark Brown – ETP058
- Dark Grey - #ETP707
Steps to Create Wreath
- This wreath is easy to make by following these few steps: Prepare strips. Embroider and cut sunflowers for trim. Embroider center square. Assemble wreath.
- Prepare all strips by tearing fabric from selvedge to selvedge. Pull threads along each long edge to create a frayed look. Cut each narrow strip in half so you have four strips measuring approximately 22-inches long. See Figure #1a.
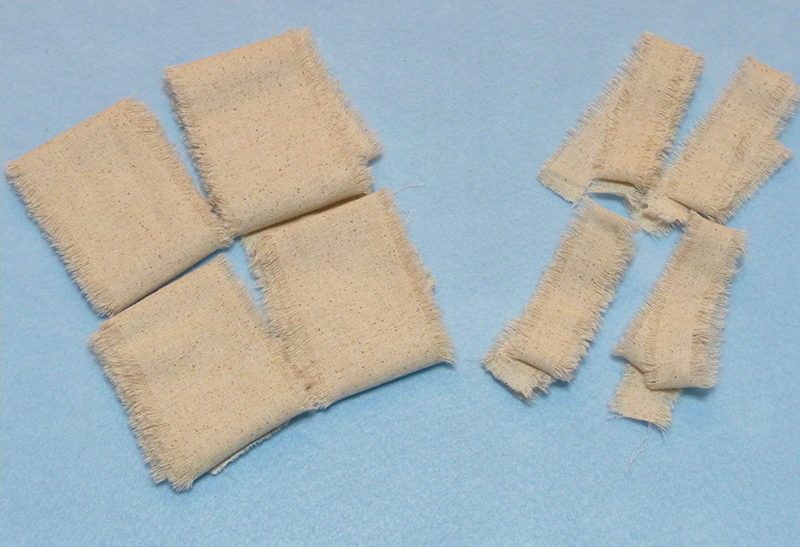 Figure #1a[/caption]
- Using a diagonal seam, sew 2 ½-inch strips together to create one long, continuous piece. See Figure #1b & #1c.
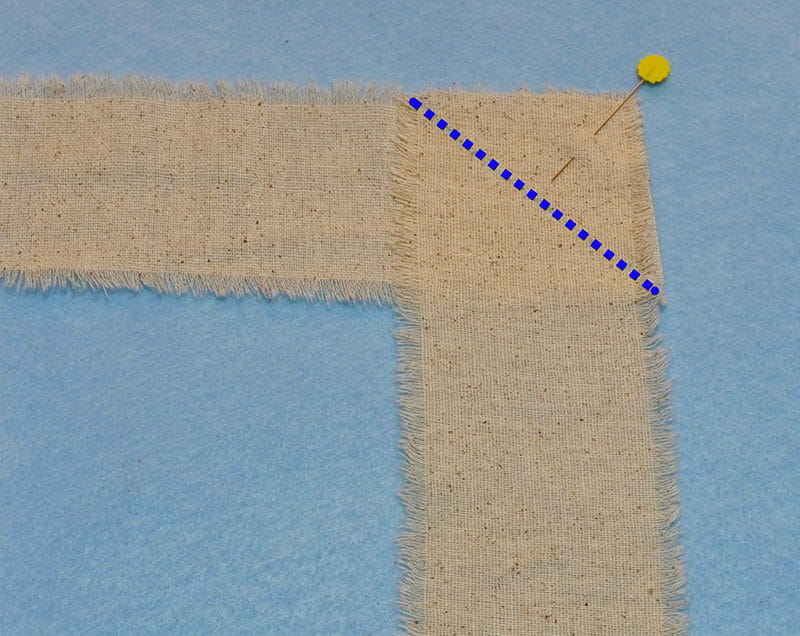 Figure #1b[/caption]
[caption id="attachment_17276" align="aligncenter" width="800"]
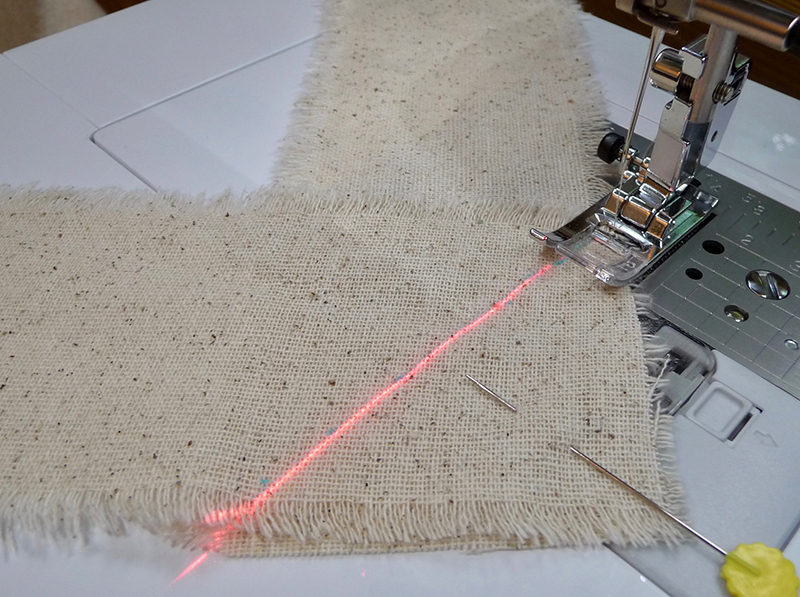 Figure #1c[/caption]
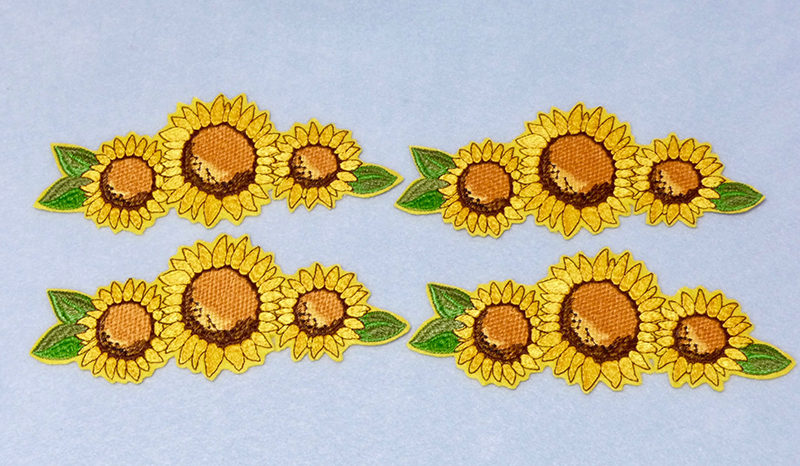
- To embroider sunflowers, begin by hooping felt rectangle layered with tear away on the wrong side. Transfer sunflower design to machine and embroider using desired colors. See Figure #2.
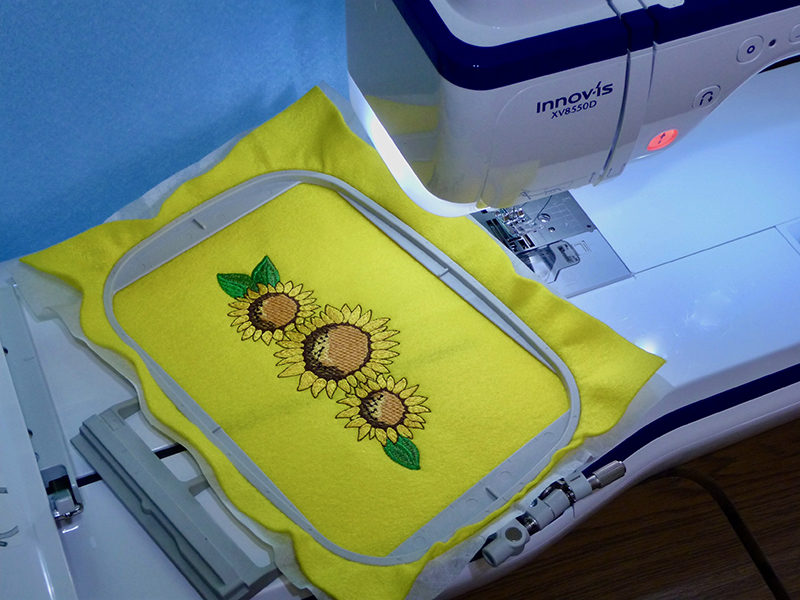 Figure #2[/caption]
- Trim flowers, leaving a very small margin of felt around the edge. See below:
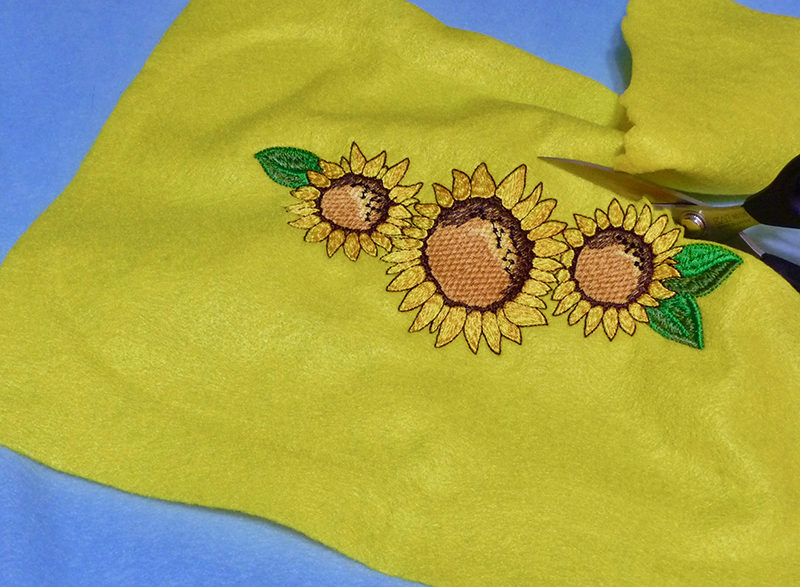
- Repeat steps two and three to create four felt pieces. See Figure #3.
 Figure #3[/caption]
- To embroider the center piece, hoop 12-inch piece of fabric layered with batting on the wrong side. Create a design for the center as follows: Select a circular frame shape and re-size to equal 5.75 X 5.75. Create a second circular frame slightly smaller. Next, add the lines of lettering. In this example the first and last lines are set to match the curve using the Array feature. Adjust each line of lettering so it looks centered within the circle. Finally, add a square frame using the option for the straight stitch that sews a square three times. Re-size square to fit the maximum for the 6-inch hoop. See Figure #4.
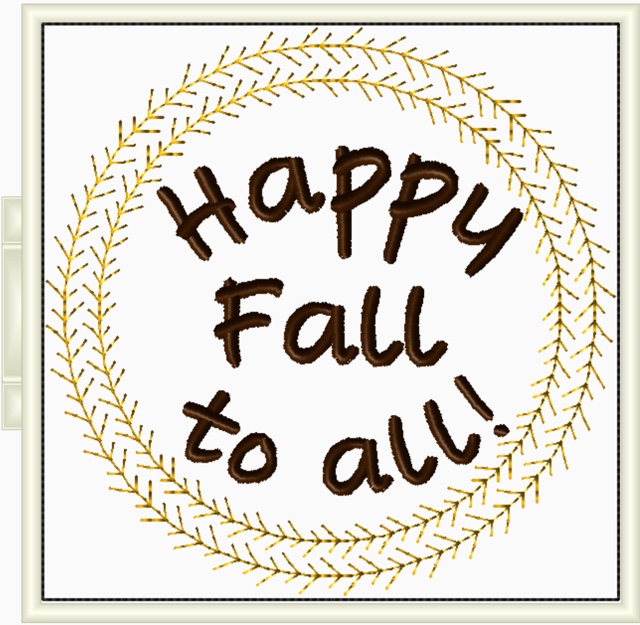 Figure #4[/caption]
Tip: Lettering combinations look different depending on the combination of letters, size, font style, etc. Learn to trust your eye when judging placement of lettering. Feel free to take advantage of all the lettering edit tools in your machine, including the ability to slightly rotate curved text. Use zoom and preview options to view the lettering as you make changes. The more you do this, the more you will see that slight editing and shifting of lettering combinations, produces a better overall look. This is especially true when attempting to center text within a frame.
- Stitch the center design as follows: Stitch the two circular frames and then stitch lettering. Begin to stitch square frame, stopping after it completes the first square. Cut the thread and carefully remove hoop from machine. Place on a flat surface. Layer narrow strips on top, folding each strip in half, and taping so fold overlaps each of the four corners. See enhanced photo in Figure #5a, with corners highlighted in blue.
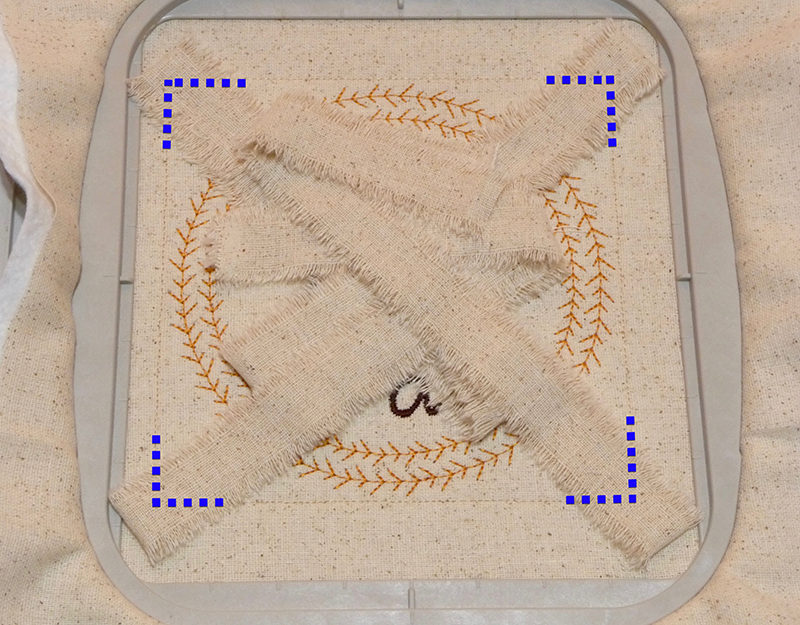 Figure #5a[/caption]
- Flatten out excess in center and tape to secure. Be sure to keep all ties within square frame. See enhanced photo in Figure #5b, with tape highlighted in grey.
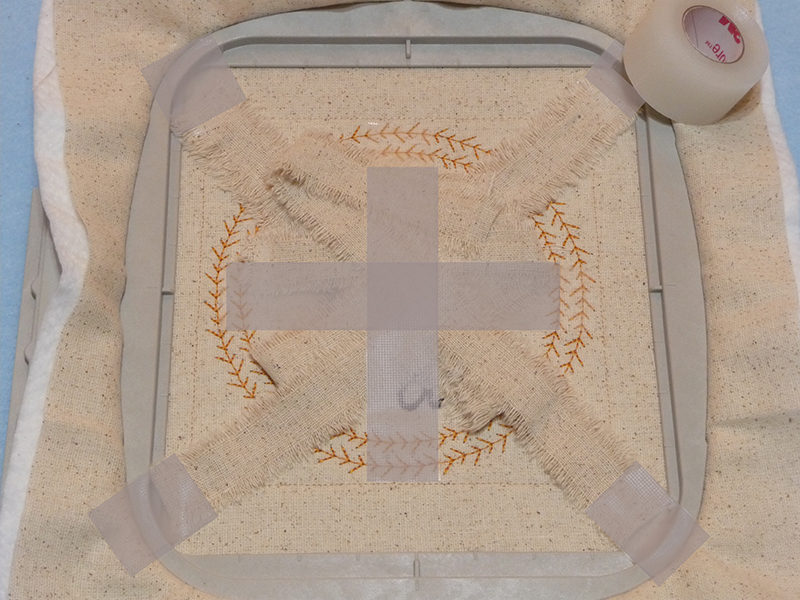 Figure #5b
[/caption]
- Next, layer felt over the top, centering it in the hoop and taping close to edges. See enhanced photo in Figure #6 with tape highlighted in grey.
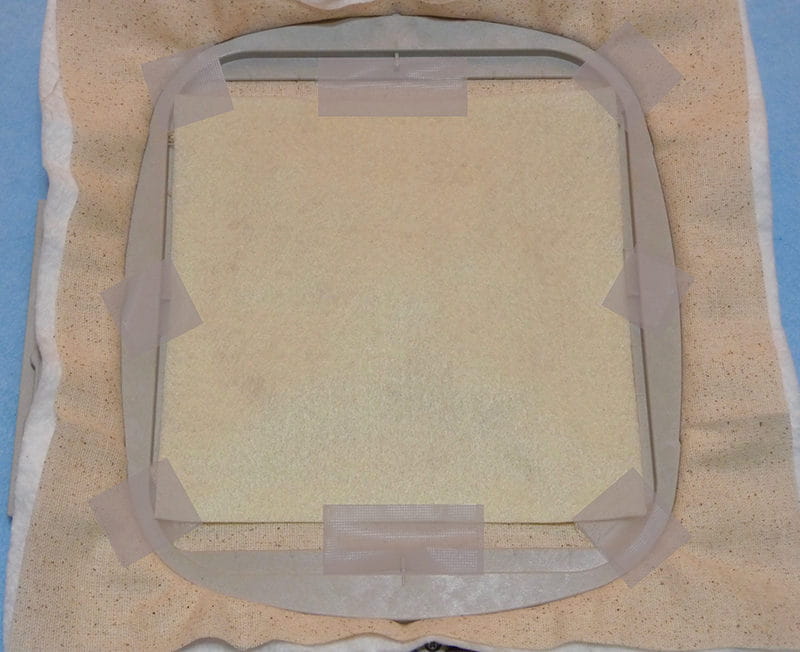 Figure #6[/caption]
- Place hoop back on machine and stitch remainder of frame. See Figure #7.
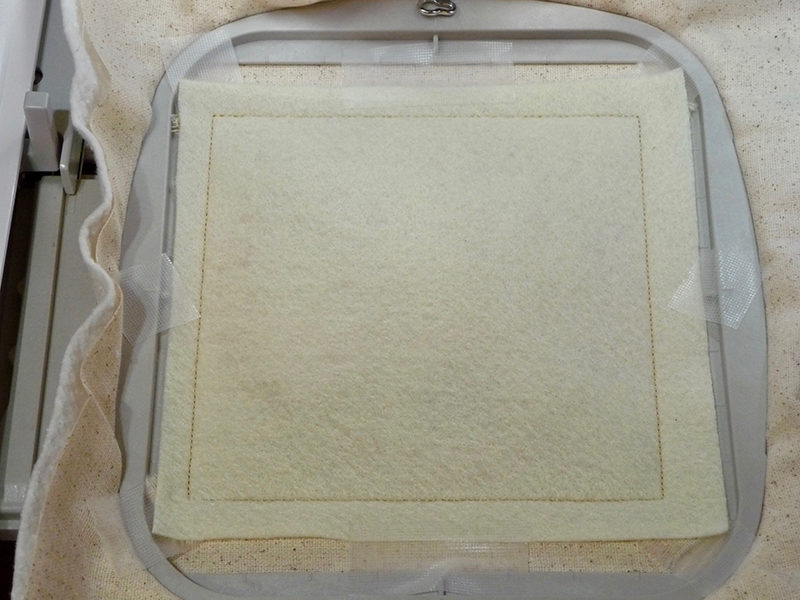 Figure #7[/caption]
- Remove from hoop. Trim excess and leave a small seam around the outside edge. Clip bulk of felt and batting away from corners. Carefully cut a slit through layer of felt. Turn right side out through slit and push out points. Press piece flat. Slip fusible web in opening and fuse shut. See Figure #8a to #8c.
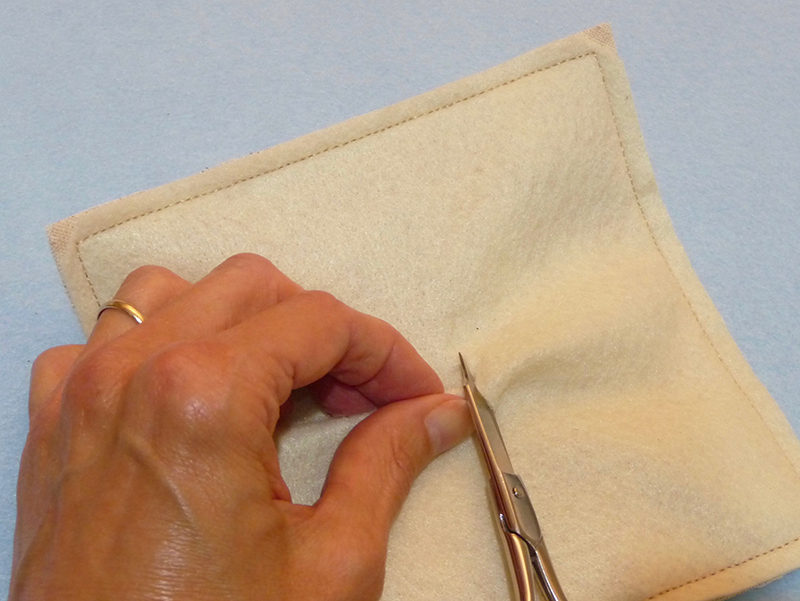 Figure #8a[/caption]
[caption id="attachment_17284" align="aligncenter" width="800"]
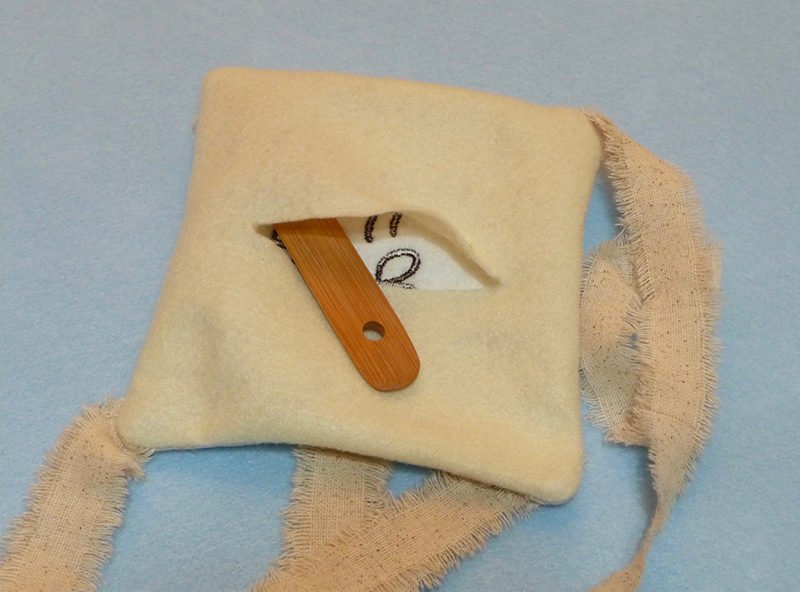 Figure #8b[/caption]
[caption id="attachment_17303" align="aligncenter" width="800"]
 Figure #8c[/caption]
Assemble pieces for wreath. See below:

- Finish wreath as follows: Use a T-pin or glue to secure beginning of strip and then proceed to wrap around wreath, overlapping strip as you move around the wreath. Trim excess when you reach the end and hand sew or glue end on the back side to secure. See Figure #9a to #9c.
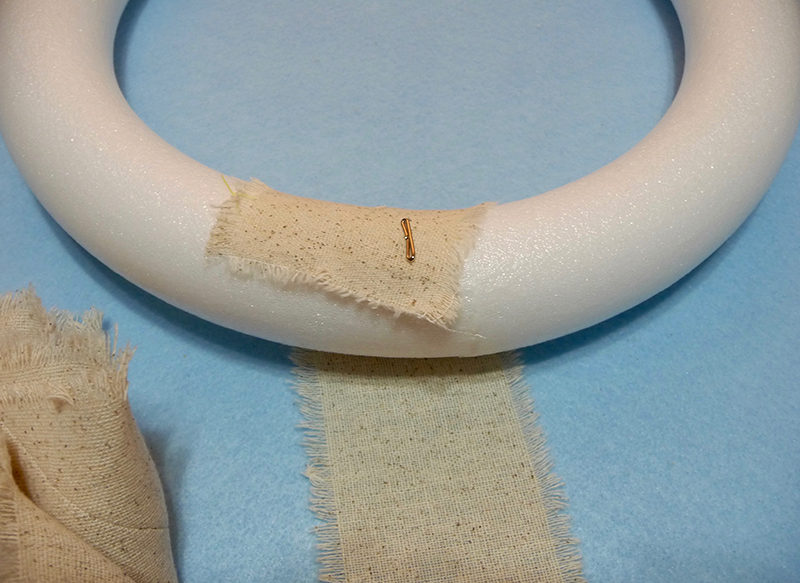 Figure #9a[/caption]
[caption id="attachment_17289" align="aligncenter" width="800"]
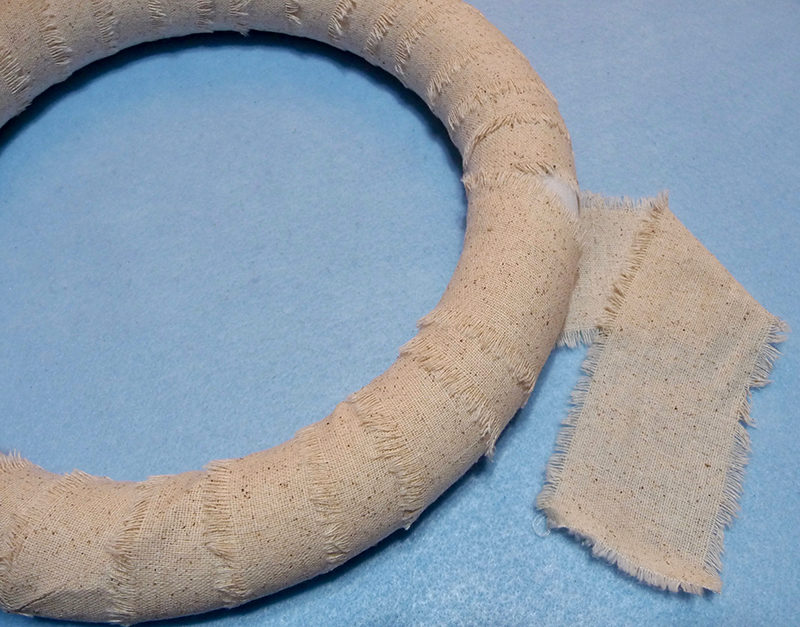 Figure #9b[/caption]
[caption id="attachment_17290" align="aligncenter" width="800"]
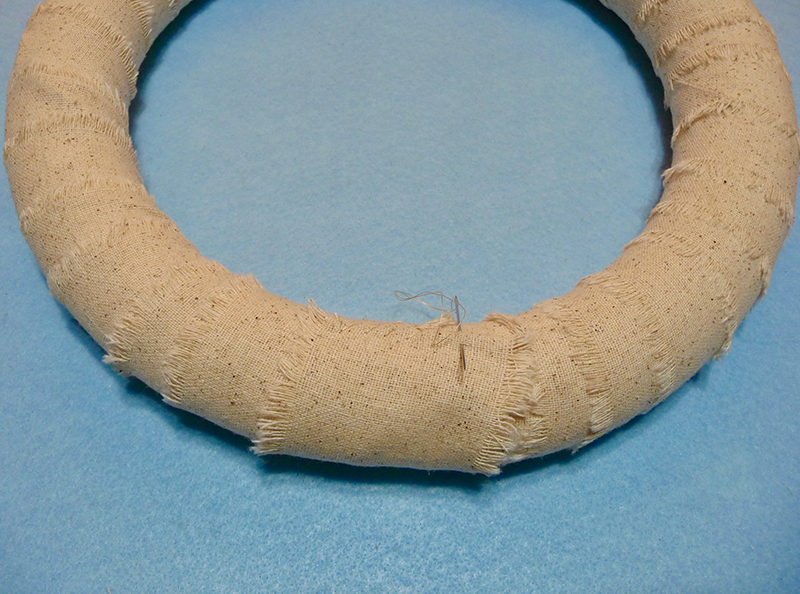 Figure #9c[/caption]
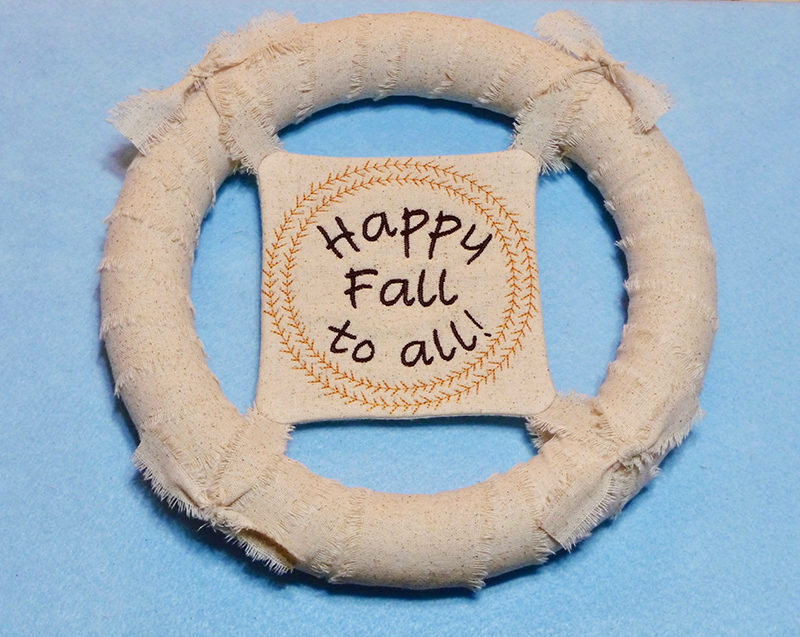
- Tie center piece to the wreath and trim excess tails. See below:
 Glue sunflowers to top, bottom, and sides. You are finished. Enjoy!
Options and ideas:
- Use an alternative hoop to create center square or embroider lettering on a piece of fabric and construct the square on the sewing side of the machine.
- Add trims or other decorations to the square.
- In place of fabric use 2-inch wide ribbon to cover wreath and 1-inch wide ribbon for ties.
- Create a more casual message with Happy Fall y’all!

