Holiday Candy Coasters, Made In The Hoop
Make these quick In-The-Hoop coasters to brighten up your home for the holidays or to give away as special gifts! Frame shapes built into Brother embroidery machines are a focal point on the coasters and allow for creating this project entirely in the hoop. Visit the Brother embroider design download site, www.ibroidery.com
for a multitude of mini border designs sized just right for stitching these coasters in the 4-inch hoop. Fast and easy, they make great last minute gifts for family and friends!
Be sure to select a design that fits within the coaster frame area. See Figure #1 for a few suggestions. Width: 0.67 Inches
Height: 2.10 Inches[/caption] [caption id="attachment_4331" align="aligncenter" width="199"] Width: 0.45 Inches
Height: 1.51 Inches[/caption] [caption id="attachment_4332" align="aligncenter" width="205"] Width: 0.80 Inches
Height: 3.11 Inches[/caption]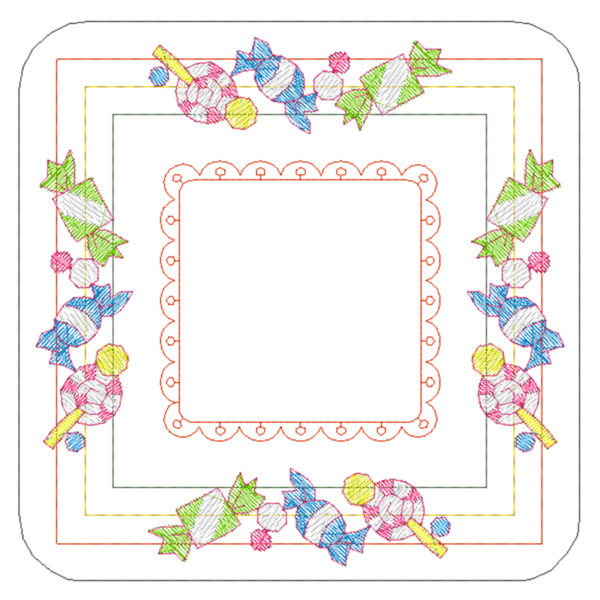 Note that your machine icons may look different from the pictures but the order of the steps will be the same. If your machine has edit capability you can create a combination design and stitch the design all at once. Otherwise, you will need to select, and then stitch each design in the order shown here. Here is the order for creating and then stitching the design:


for a multitude of mini border designs sized just right for stitching these coasters in the 4-inch hoop. Fast and easy, they make great last minute gifts for family and friends!
Machine:
Brother Sewing and Embroidery Machine with 4- inch hoop capabilityMaterials and Supplies
- Brother embroidery thread and bobbin thread
, including white to match fabric. - Low tack tape for securing fabric in the hoop
- Small, border style embroidery design for decorating coaster. Visit www.ibroidery.com, the Brother Machine Embroidery Design download site for design possibilities.
Be sure to select a design that fits within the coaster frame area. See Figure #1 for a few suggestions.
Figure #1
[caption id="attachment_4330" align="aligncenter" width="197"] Width: 0.67 Inches
Height: 2.10 Inches[/caption] [caption id="attachment_4331" align="aligncenter" width="199"]
 Width: 0.45 Inches
Height: 1.51 Inches[/caption] [caption id="attachment_4332" align="aligncenter" width="205"]
 Width: 0.80 Inches
Height: 3.11 Inches[/caption]
Fabrics for each coaster:
- White tone on tone quilter’s cotton for topside of coaster, one piece measuring 8-inches square to fit 4-inch hoop.
- White tone on tone quilter’s cotton for overlapped back pieces, two pieces measuring 8-inches wide X 6-inches long. Fold and press each piece with wrong sides together to measure 4-inches wide X 6-inches long.
- Thin cotton batting for interlining in each coaster, one piece measuring 8-inches square to fit 4-inch hoop.
Instructions for Creating Holiday Candy Coasters
- Step for creating these coasters are super simple. Start by setting up your machine for embroidery with the 4-inch hoop. To prepare for stitching each coaster, layer the 8-inch white fabric square with batting underneath and hoop with the right side of fabric facing up.
- Now let’s create an embroidery design by combining decorative frame patterns built-in to the machine along with a small border design rotated all around the four sides. In this example the shape is shown in black for better visibility. Follow the basic steps to create a combined design that looks like the one shown below:
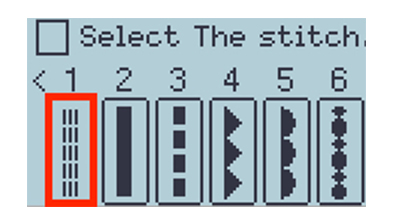
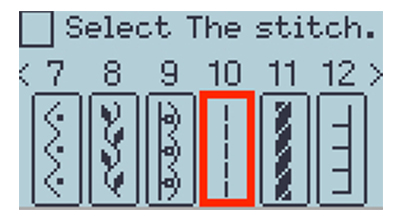
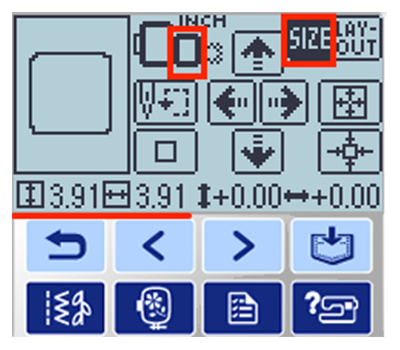
 Note that your machine icons may look different from the pictures but the order of the steps will be the same. If your machine has edit capability you can create a combination design and stitch the design all at once. Otherwise, you will need to select, and then stitch each design in the order shown here. Here is the order for creating and then stitching the design:
- Begin by selecting the frame shape menu.

- Choose a square shape and select the decorative open scallop stitch.

- Re-size decorative open scallop shape to equal approximately 2-inches.
- Next, select a series of square frame shapes using the triple straight stitch. Re-size each individual frame so they are evenly spaced.

- Add the small border design, rotating and moving each one so they are evenly placed around the square.
- Finish by selecting a square frame shape with the single straight stitch. Re-size this final frame to fit the 4-inch hoop. Notice that this shape has rounded corners, which are perfect for smooth edges on the coasters.


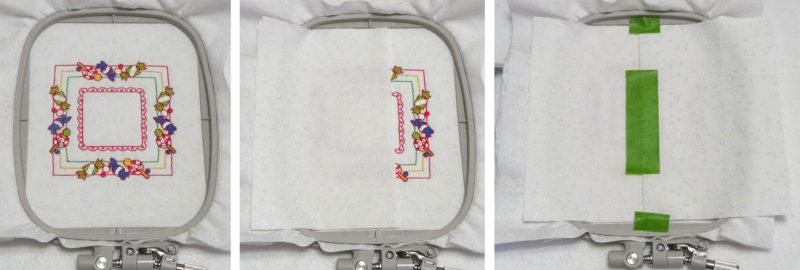
- Embroider each coaster with the design you created, stopping before the final rounded rectangle shape. Next, layer the two folded back pieces over coaster with folded edges overlapping near the center by ½-inch. Tape the overlapping edges to secure the pieces.

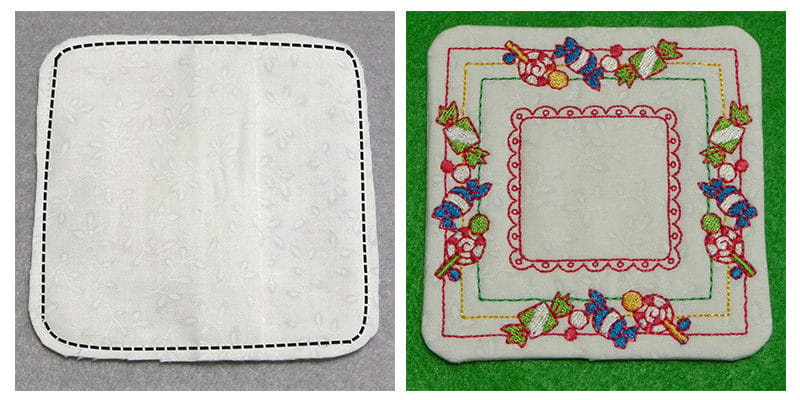
- Stitch the final rounded rectangle shape, watching to be sure the embroidery foot does not catch folded edges. Keep tape in place, re-select this final rounded rectangle and stitch it a second time for a more secure seam.
- To finish, carefully cut away excess fabric and batting outside the shape, trimming batting very close and leaving approximately 1/8-inch seam allowance for the coaster fabric. Carefully trim each corner to reduce bulk. Turn right side out and press flat. Repeat for each coaster. You are finished!

Ideas and Options:
- Add a piece of needle-punched insulated lining with the ability to reflect heat or cold to the inside of the coaster if desired. Simply cut the piece slightly smaller than the rounded rectangle and slip it inside for additional heat and cold resistance.
- Create larger coasters by increasing the hoop size and the fabrics cut for coaster pieces.
- Add a monogram letter to the center or personalize with names stitched in small lettering.
- Use a light colored holiday fabric print or fabric with metallic accents for a festive look.

