June Free Design: Embroidered Plant Stake
If you’re a gardening enthusiast, you may enjoy sharing cuttings and extra plants with family, friends, and neighbors too! Our Brother Free Design of the Month is a delightful design with a garden theme, perfect for this embroidered plant marker. Make one or more before putting on your garden gloves and heading out to the garden.
Materials and Supplies:
- Brother embroidery machine with 4-inch hoop.
The Innov-ís NS1750D
was used for this project. - Brother Embroidery Thread
and bobbin thread. - SA520 Brother Pacesetter lightweight water-soluble stabilizer.
- SA5810 Brother Pacesetter medium weight tear-away stabilizer.
- June Brother Free Design of the Month: Butterfly in Garden_FD_June 2018.pes
- Embroidery needle for embroidering.
- Two pieces of neutral colored craft felt cut to fit 4-inch hoop.
Note: You need one front and one back piece. Check iron temperature when pressing felt and use a press cloth if necessary.
- Wood or plastic stick, measuring approximately ¼-inch in diameter for attaching to embroidered marker.
- ¼-inch wide paper backed fusible web for fusing felt layers together.
- Fine sharp scissors.
- Rotary cutter and ruler, optional but helpful for trimming embroidered pieces.
Brother Free Design of the Month
 Design size:
- 2.70” High X 2.57” Wide (68.6mm High X 65.2mm Wide)
- Click here to download the Butterfly in Garden_FD_June 2018.pes
Steps to Create Plant Stake
- Transfer design to your machine. Create a design for the front as follows:
- Begin with a rectangular frame shape. This design features a triple straight stitch frame pattern with a finished size of 3.12 High X 3.89 Wide. See example in Figure #1.
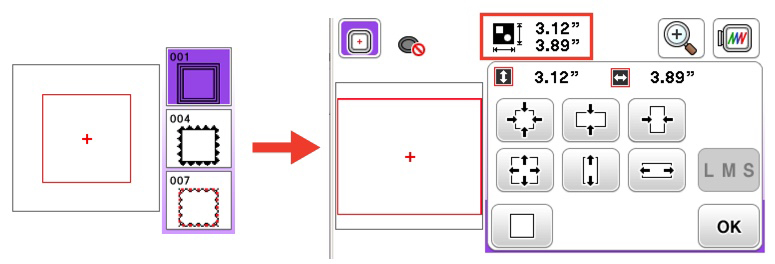 Figure #1[/caption]
- Add garden design.
- Add lettering to fit.
- Adjust elements to fit frame, changing size and moving individual pieces as needed.
Design Tips: You’ll likely need to select size small for your lettering, adjusting and moving it to fit within the space. Solid, block style fonts sew out best on soft felt.
- See example of combination design in Figure #2.
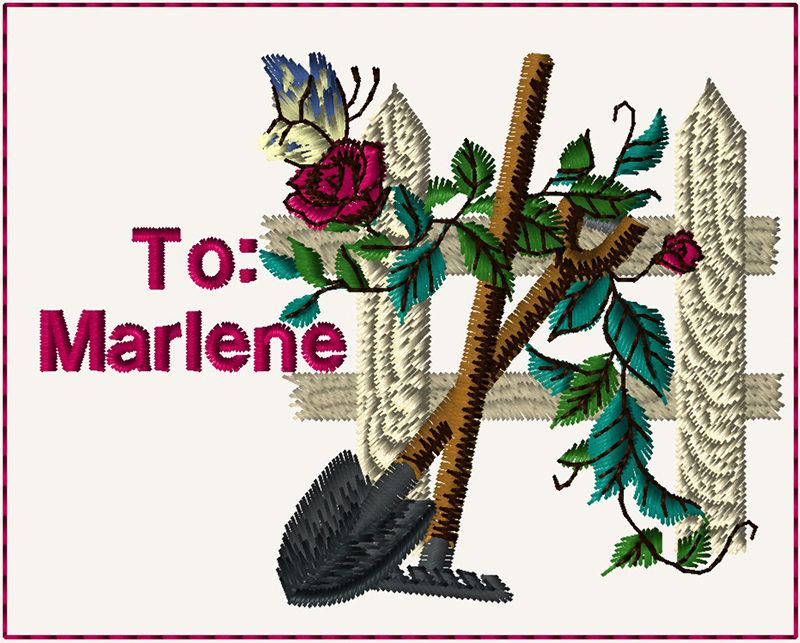 Figure #2[/caption]
- Hoop felt with water soluble on top and tear away on the bottom. Embroider the design, changing colors as desired. See Figure #3.
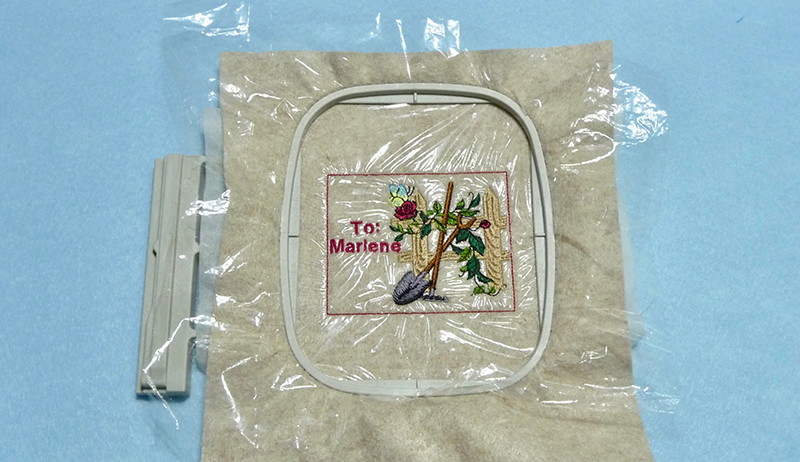 Figure #3[/caption]
- Prepare design for back of marker as follows:
- Begin with a rectangular frame shape identical to the one you used for the front side.
- To form holes for plant stake, select an upper case “D” in a medium size, rotate, and move near top left side. Select a matching “D” and then rotate and move to bottom left.
- Add desired lettering along with a small frame around plant name.
- Accent design with a small floral design from built-in menu or an outside source. See Figure #4.
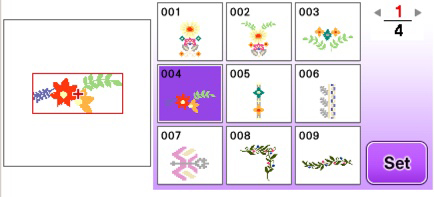 Figure #4[/caption]
- Complete combination design, rotating and adjusting position of motifs and lettering as needed. Change colors as desired. See example of combination design in Figure #5.
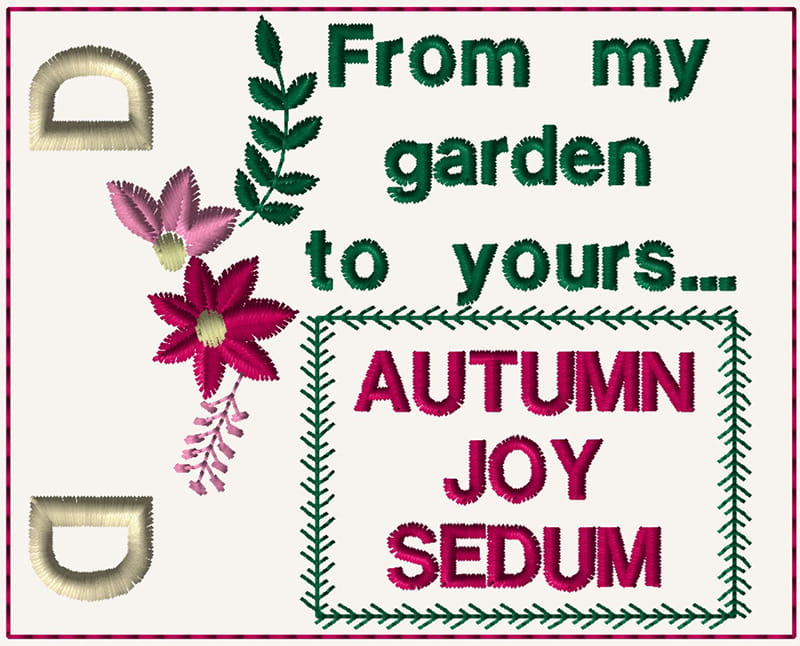 Figure #5[/caption]
- Hoop and embroider in same manner as you did for front side.
- Remove excess stabilizer from each piece, wash, dry, and press. Trim pieces so they match, with an additional margin of ¼-inch beyond frame. See Figure #6.
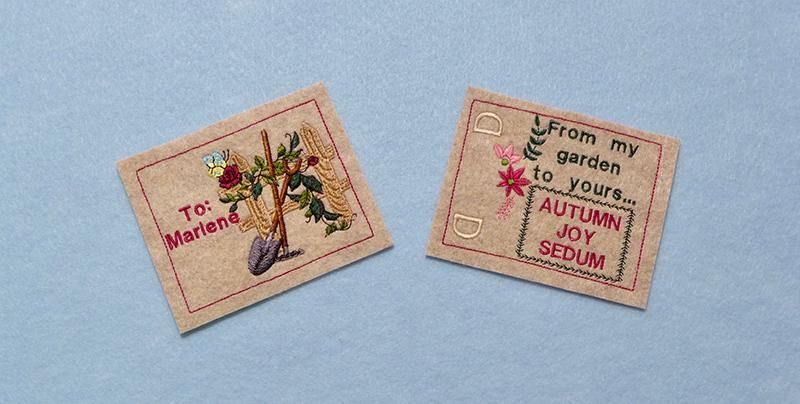 Figure #6[/caption]
- Snip through each “D” to form an opening to fit your stake. Attach fusible along outer edges on the wrong side of back piece. See Figure #7.
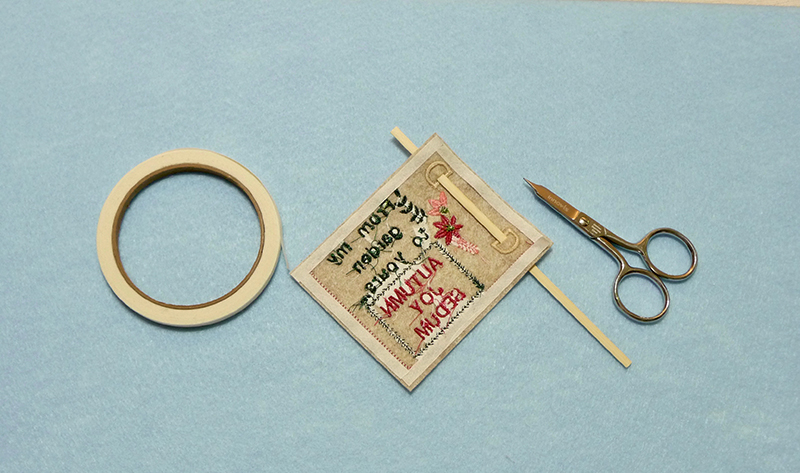 Figure #7[/caption]
- Place pieces wrong sides together and fuse following manufacturer’s directions. Trim any uneven edges if necessary and insert stake through slits. You are finished! Enjoy!

