Foot of the Month: Quilt in a Pillow for Little Ones
Practice your patchwork and quilting skills by making a small size quilt that stores in a pretty quilted pocket. Begin with bright colored patchwork squares decorated with embroidered accents, and then sew squares and strips together into a simple block for the pillow pocket. Next, create a small quilt to stuff inside the pocket for a completed piece that folds for self-storage. It’s an ideal size for babies and small children. This project features a variety of accessories that fit the Brother MuVit™ Dual Feed Foot, including the Dual Feed Quilting Guide for quilting evenly spaced lines from edge to edge on the quilt. Additional snap-on accessory feet for the MuVit™ Dual Feed Foot make piecing and quilting easy and accurate.
Featured Accessory
Dual Feed Quilting Guide for Dual Feed Foot– includes adapter for Dual Feed foot along with a right and left guide.

Materials and Supplies
- Brother Sewing and Embroidery Machine with 4-inch square hoop.
- Brother embroidery thread & bobbin thread.
- SA5810 medium weight tear-away stabilizer
- SA196 Brother MuVit Dual Feed Foot (compatible with machines XP1, XJ1, XV8550D, XV8500D, VM6200D, VM5200, VM5100,BQ2450, BQ3050, VQ2400 and VQ3000)
- SA206 Dual Feed Quilting Guide
- SA205 ¼-inch Guide Foot
- SA204 Stitch in the Ditch Foot
- Basic sewing and embroidery notions including thread for sewing and quilting, and a rotary cutter, ruler and mat for cutting and trimming.
- Cotton fabrics and batting for 12-inch finished pillow and a finished quilt measuring 30” wide X 40” long. See detailed list below.
- Bear Nursery
, Bunny Nursery
, Cat Nursery
, Dog Nursery
embroidery designs from iBroidery.com
Note: Animal designs featured in this project coordinate with the Brother Free Design of the Month project for March.
Project features the Brother MuVit™ Dual Feed Foot and optional accessories designed for this foot. This foot is included with some machine models and available separately for others. Use a walking foot such as SA188as a substitute if you do not have the MuVit™ option available for your machine model. Visit the BrotherSews website
for additional accessories for your specific machine model. Important: When using a standard walking foot it’s advisable to only use forward motion stitches such as straight and zigzag stitches.
Fabrics and Batting for Pillow Pocket:
- Bright colored cotton solids for Embroidered Squares: Four oversized pieces measuring 8” X 8.”
- Coordinating print for Center Sashing A: Two oversized strips measuring 1½” wide X 6” long.
- Coordinating print for Center Sashing B: One oversized strip measuring 1½” wide X 12” long.
- Coordinating print for Outside Border C: Two oversized strips measuring 2 ¼” wide X 12” long.
- Coordinating print for Outside Border D: Two oversized strips measuring 2 ¼” wide X 16” long.
- Coordinating print for Lining Pillow Pocket: One piece measuring 13” wide X 13” long.
- Medium loft bonded polyester quilt batting for Backing Pillow Pocket: One piece measuring 13” wide X 13” long.
 Use this graphic as a reference during piecing. Note that strip lengths are cut to size after sewing, making it easier to sew accurate blocks.
Grey represents pieces cut from coordinating print fabric. [/caption]
Fabrics and Batting for Quilt:
- Coordinating print for Top Side of Quilt: One piece measuring 31” long X 41” wide.
- Coordinating solid cotton for Back Side of Quilt: One piece measuring 31” long X 41” wide, or a mix of fabric strips pieced together to equal 31” long X 41” wide. Note: Be sure to add seam allowance if you are piecing strips together.
- Medium loft bonded polyester quilt batting for Filler: One piece measuring 31” long X 41” wide.
Instructions for Embroidered Squares
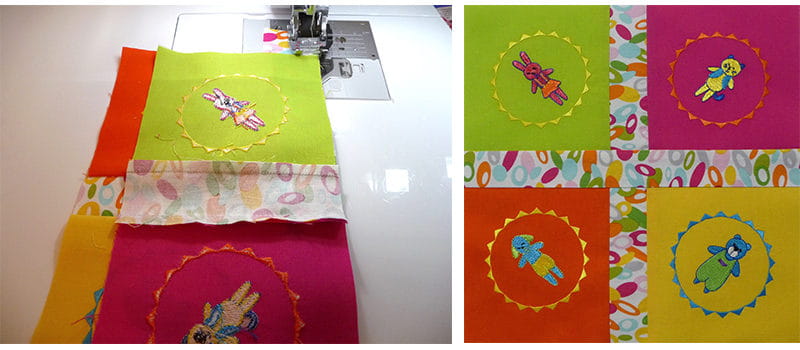
- Layer each 8-inch square with tear away stabilizer and embroider a design combination with an animal design. Featured designs are rotated 45 degrees left or right and combined with a small built in circular frame pattern. See examples and size shown in Figure #1.
 Figures 1a (left) and 1b (right)[/caption]
[caption id="attachment_5651" align="aligncenter" width="143"]
Figures 1a (left) and 1b (right)[/caption]
[caption id="attachment_5651" align="aligncenter" width="143"] Figure 1c[/caption]
- Trim each embroidered square to equal 4½” X 4½” with design centered on the square.
Instructions for Piecing Pillow Pocket
- Set machine for sewing a ¼” seam with Dual Feed Foot plugged into the machine and the ¼” Guide Foot attached.

- Determine layout for the four embroidered blocks. Sew sashing strips and piece blocks together to form one large square, following instructions below and pressing each seam to one side after stitching and trimming.
- Select one Sashing A strip and sew to the first block having excess strip extended at each end.
- Select another Sashing A strip and sew to the second block having blocks evenly aligned. Trim ends even with blocks. See Figure #2a and #2b.
 Figures 2a (left) and 2b (right)[/caption]
- Repeat the process for the next set of embroidered blocks.
- Select Sashing B strip and sew to each set of completed blocks having excess strip extended at each end and both sets of blocks evenly aligned. Trim ends even with the blocks. See Figure #3a and #3b.
 Figures 3a (left) and 3b (right)[/caption]
- Select strips cut for Outside Borders C. Sew to top and bottom of block. See Figure #4.
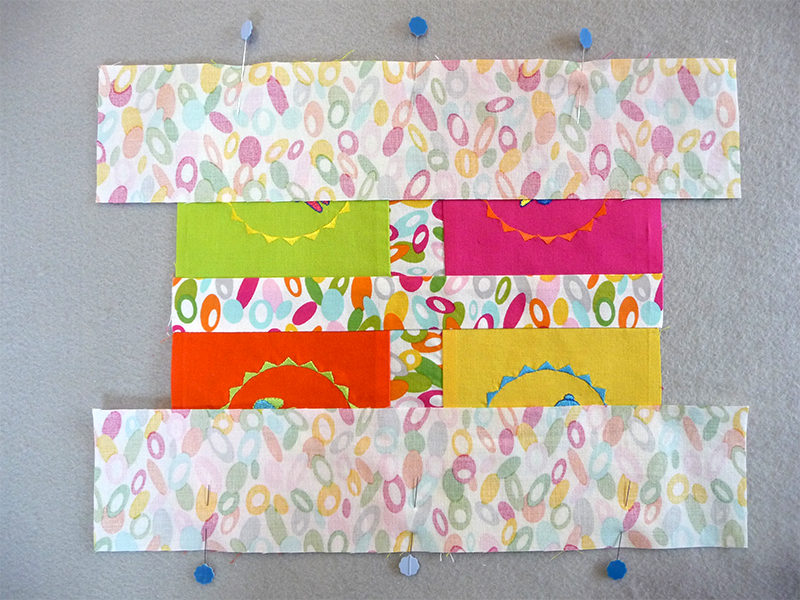 Figure 4[/caption]
- Trim excess strip as you did before.
- Select strips cut for Outside Borders D. Sew one to each remaining edge of the block. Once again, trim excess.
- Layer pieced block on top of 13” square of batting. Machine baste a scant ½-inch around outer edge of block defining area for seam allowance, then trim batting from seam allowance. See Figure #5.
 Figure 5[/caption]
- Quilt block as desired, keeping ½” seam allowance free of quilt stitches. See examples of quilting with various Dual Feed accessories in Figure #6a through Figure #6c.
 Figure 6a[/caption]
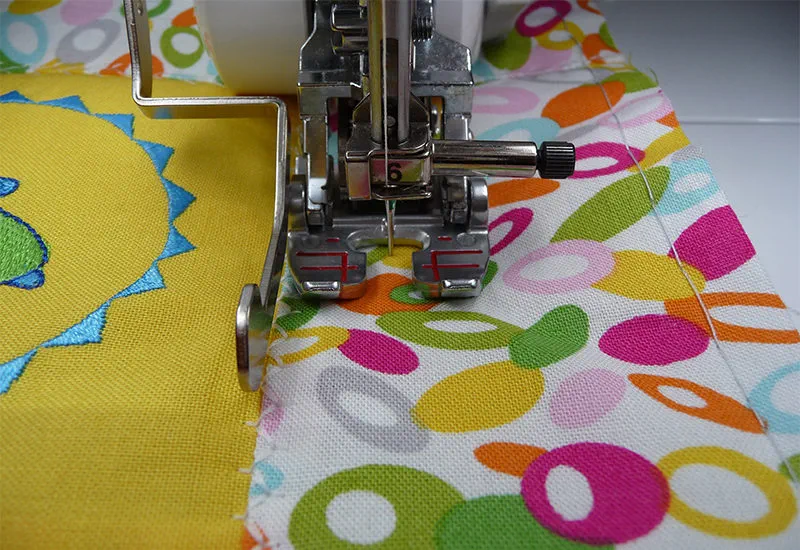
Attach Open toe and Quilting Guide accessory. Use quilt guide to evenly stitch along center sashing with guide following edge of pieced blocks. Serpentine stitch is featured in this section.
[caption id="attachment_5659" align="aligncenter" width="107"]
Figure 6a[/caption]
Attach Open toe and Quilting Guide accessory. Use quilt guide to evenly stitch along center sashing with guide following edge of pieced blocks. Serpentine stitch is featured in this section.
[caption id="attachment_5659" align="aligncenter" width="107"] Serpentine Stitch[/caption]
[caption id="attachment_5655" align="aligncenter" width="800"]
Serpentine Stitch[/caption]
[caption id="attachment_5655" align="aligncenter" width="800"]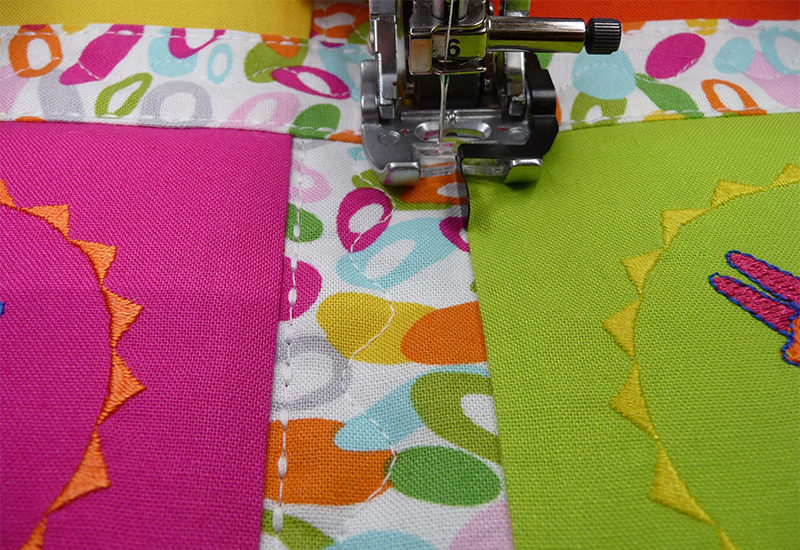 Figure 6b[/caption]
Use Stitch in the Ditch Dual Feed Foot to stitch along areas where blocks join sashing, using bridging style stitches shown below:
Figure 6b[/caption]
Use Stitch in the Ditch Dual Feed Foot to stitch along areas where blocks join sashing, using bridging style stitches shown below:


 Use quilt guide and open toe accessory to evenly stitch rows of special quilting stitch along outside border. See special quilting stitch below:

Tips for quilting and sewing with Dual Feed Foot:
-
- Most bonded battings will feed through the machine easily without any added under layer. However, if you find batting catching on feed dogs simply add a layer of fine cotton batiste or muslin on the bottom, and then quilt through all three layers.
- The MuVit™ Dual Feed Foot allows for use of many decorative stitches that are not suitable for use with a standard walking foot. Available stitches are accessible on the screen. You can adjust this foot in the setting mode using plus to ease the fabric or minus to stretch. Read more about this foot in your manual or in the packaging sold with the foot.
- When using the MuVit™ Dual Feed Foot at the beginning of a fabric edge it is a good idea to start stitching on a small piece of tear-away stabilizer to help move the fabric forward. Simply tear away when finished.

- Be sure to check that fabric is smoothly flowing behind the foot whenever you stitch with the MuVit™ Dual Feed Foot.
Instructions for Finishing
- Press quilted pillow pocket block.

- Layer 13” X 13” lining piece on top of block.

- Sew a ½” seam around three sides, leaving entire bottom edge open. Turn right side out and press.
- Layer the two 31” long X 41” wide pieces of fabric cut for top and back side of quilt with right sides together and all raw edges even. Slip pillow pocket piece between layers at the bottom edge of the quilt, with all raw edges matching. Center pocket at the bottom edge with patchwork side of pillow pocket facing the top side of the quilt. Place batting piece on top as a final layer. See Figure #7.
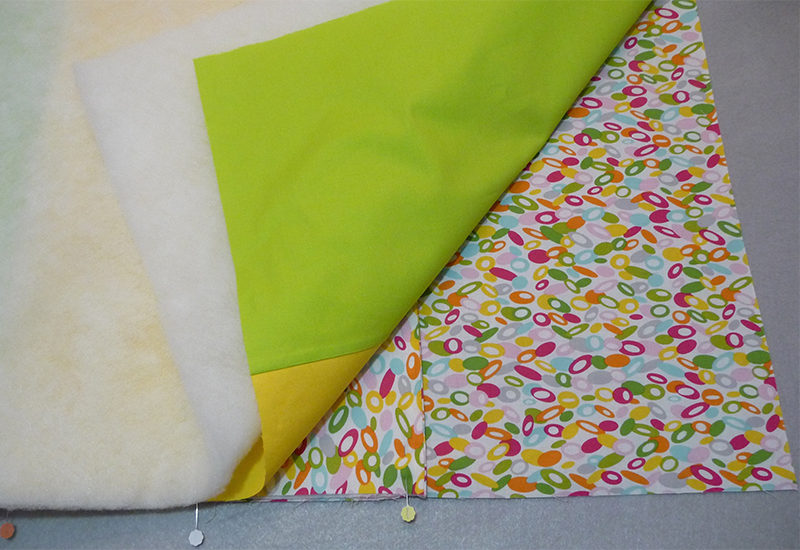 Figure 7[/caption]
- Pin all layers securely together. Measure and mark off 8” across the top edge of the quilt to leave as an opening for turning quilt right sides out.
- Attach the standard Dual Feed foot. Sew all around the quilt using a ½” seam allowance, beginning and ending at the marked opening and having the batting side facing up. See Figure #8.
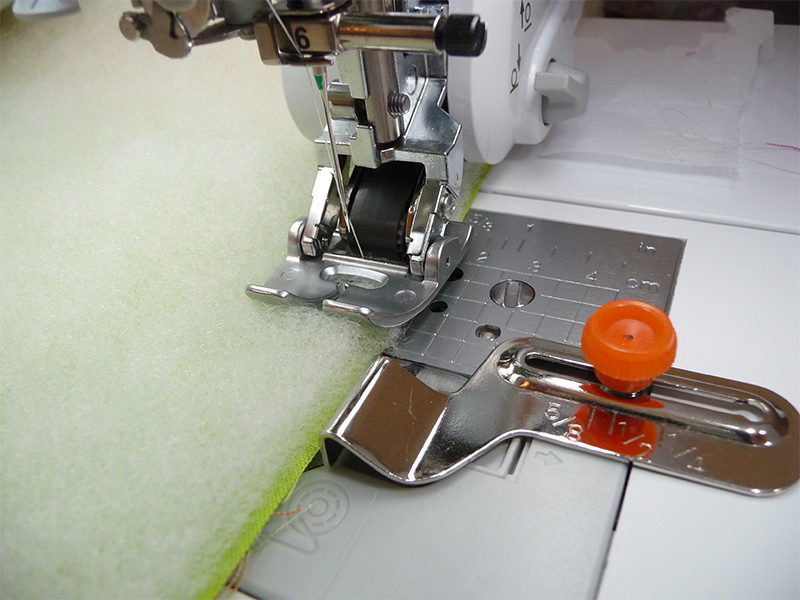 Figure 8[/caption]
- Carefully trim excess batting from seam allowance and clip corners to reduce bulk. Reach through opening to turn quilt right side out. See Figure #9.
 Figure 9[/caption]
- Press edges and close opening with small hand stitches.
- You are almost done! It’s time to quilt the layers together and then attach the pocket as the final step. Follow these steps to finish:
- Smooth the quilt out on a large flat surface with pillow pocket extended to keep it free from the body of the quilt.
- Stitch around each colored square on the pocket piece using a straight stitch to quilt patchwork and pillow pocket lining together.
- Use a removable marker to mark the lengthwise center of the quilt from top to bottom.

- Attach open toe accessory foot. Sew down the center from end to end.
Tip: If you have the Sew Straight™ Laser you can use it as a guide for stitching this center line. Make small dots instead of a full line and let the light guide you from dot to dot! Dots from a marking pen are easier to wash out.
-
- Use both left and right quilting guides to quilt evenly spaced lines from center toward each edge of the quilt. This project features lines stitched approximately 2-inches apart.

- Stitch around the entire outer edge of quilt, stitching close to the edge.

- Flip the pocket up and pin in place on the quilt, having the embroidered piece facing down. Stitch close to pocket edges with a straight stitch, stitching from end to end and back again. Re-enforce the upper edges with a short length of zigzag stitches. See stitching lines shown in Figure #10.
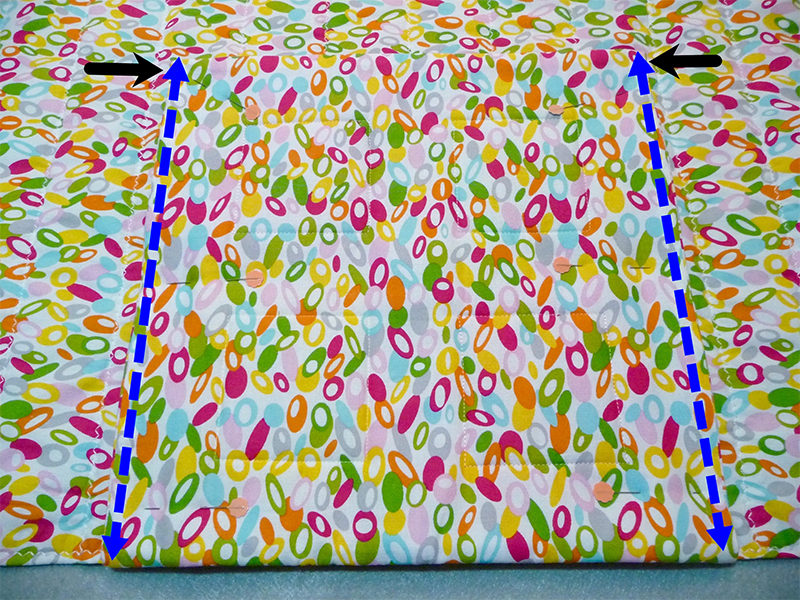 Figure 10[/caption]
- Fold quilt and stuff into pocket as shown in Figures #11a-11d.
- Fold quilt lengthwise, folding toward center, having fold lines even with edges of pocket.
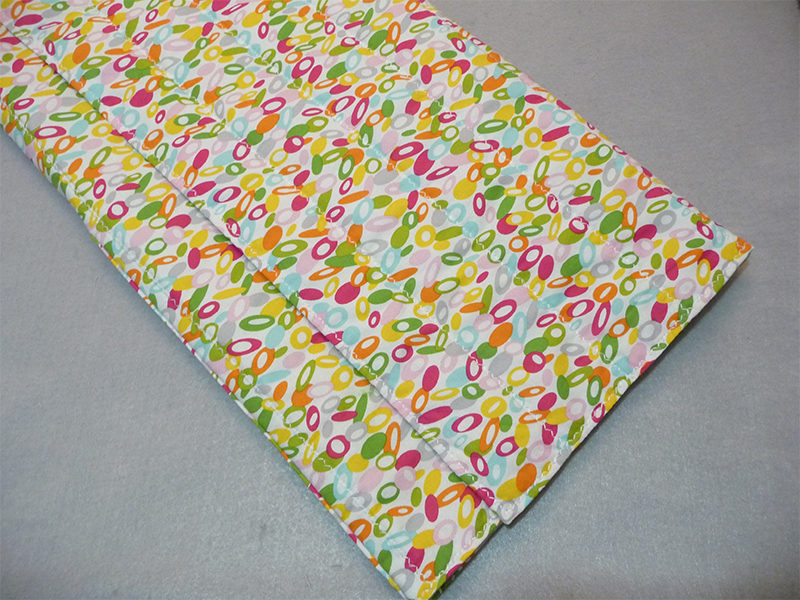 Figure 11a[/caption]
- Reach inside pocket and turn pocket so the right side faces out and bottom edge of folded quilt is inside pocket.
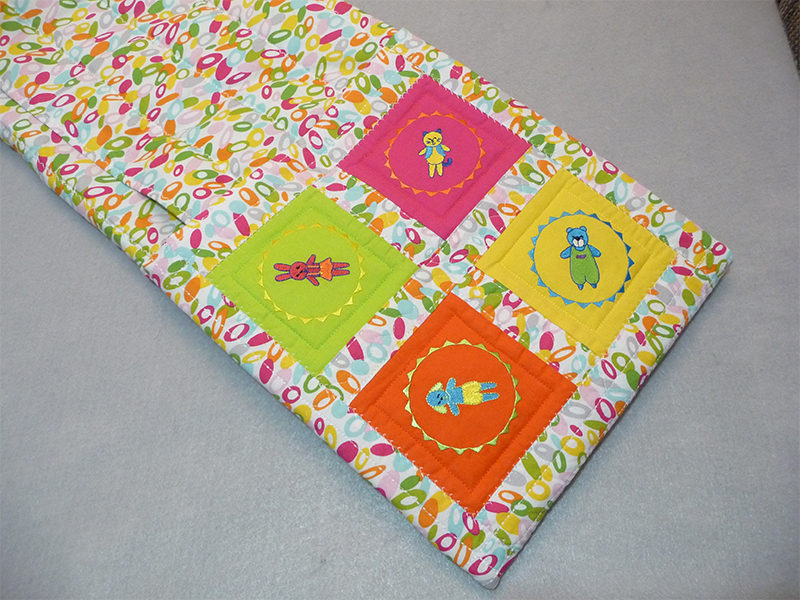 Figure 11b[/caption]
- Fold quilt into thirds, folding toward pocket. Push folded quilt into pocket and adjust quilt until it lays smooth inside the pocket.
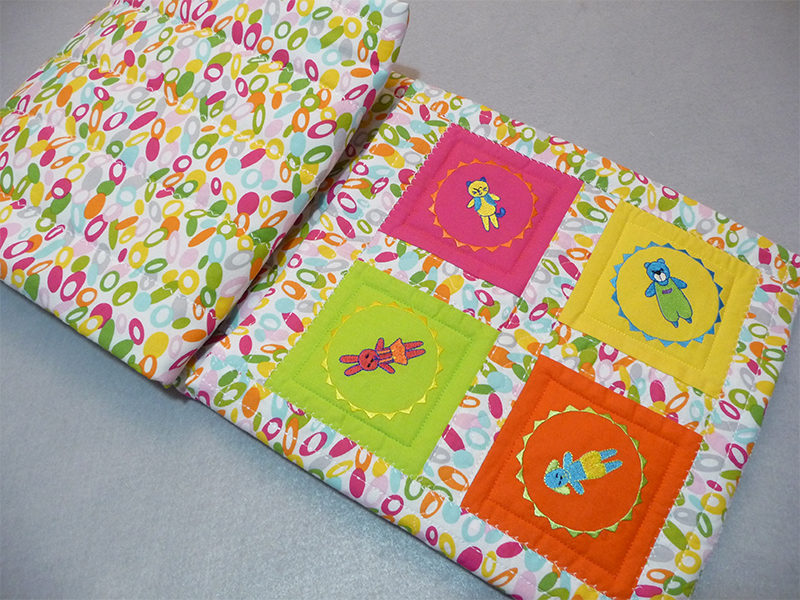 Figure 11c[/caption]
[caption id="attachment_5674" align="aligncenter" width="800"]
Figure 11c[/caption]
[caption id="attachment_5674" align="aligncenter" width="800"]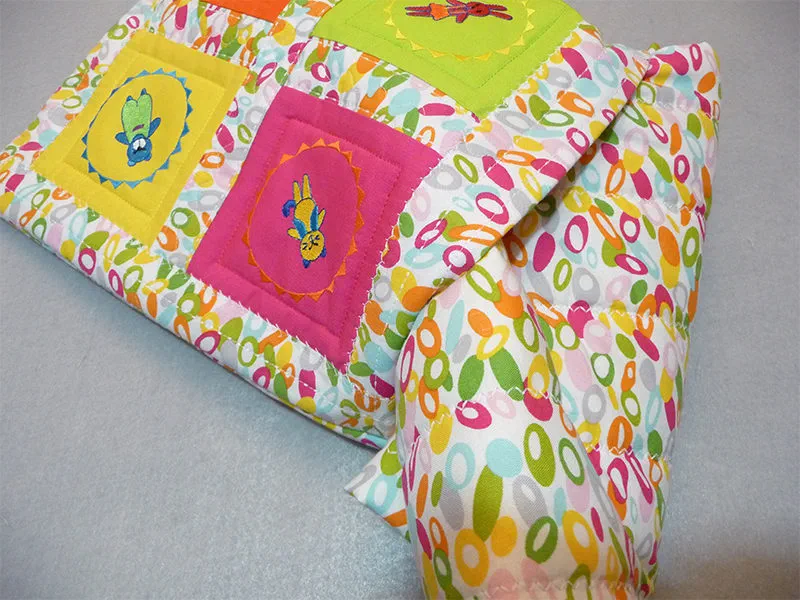 Figure 11d[/caption]
You are finished! Enjoy!
Figure 11d[/caption]
You are finished! Enjoy!
Options and Ideas:
The typical adult size for this type of quilt in a pillow features a pillow measuring 18” square and a quilt measuring approximately 45” wide X 72” long. Feel free to adjust the measurements and embroider another theme on the pillow for a project suitable for adults. Stay tuned for the Free Design of the Month that coordinates with this project coming next week!Related Projects
Stay Connected
* Required fields