Free Design of the Month for June – American Summer Napkin Holder & Napkins
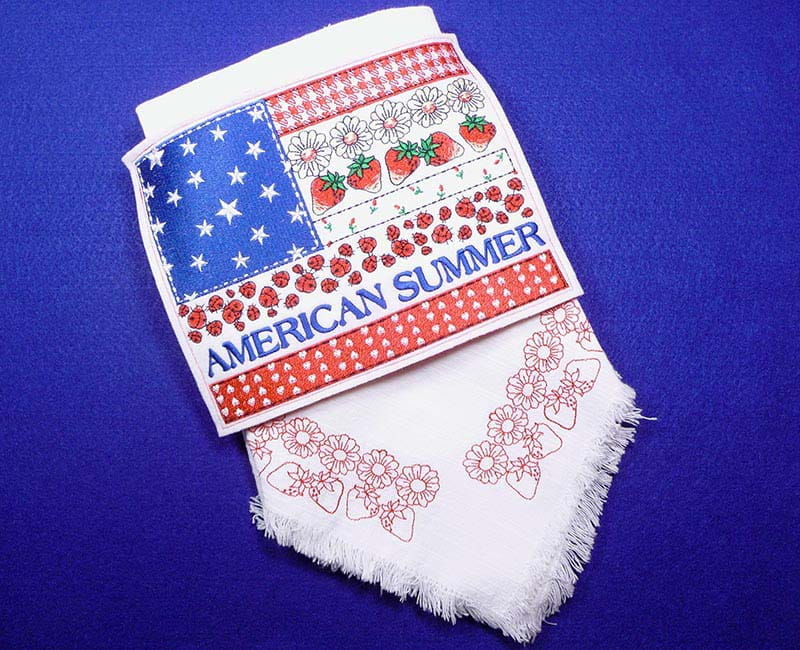
Celebrate summertime holidays and set the table in your best red, white, and blue with this colorful Brother Free Design of the Month. This napkin holder project is easy to make with craft felt as the base. It’s designed to wrap around your stack of napkins using elastic bands. This will keep your napkins from blowing away in the breeze if you’re setting up outdoors. As an extra bonus, you’ll learn how to create a redwork design to accent cloth napkins using special features in Brother PE Design 11 software. See how to use the split stitches tool to take apart the American Summer design and create a whole new coordinating design! Are you ready? Let’s go sew!
Note: This embroidery design fits a 6-inch X 10-inch or larger hoop.
Materials and Supplies for Organizer:
- Brothersewing and embroidery machine.
- SA580Brother medium-weight tear-away stabilizer for embroidering.
- SA5906Brother lightweight adhesive backed water soluble stabilizer for embroidering napkin corners.
- Embroidery threads and size 11 embroidery needle for embroidering.
- BrotherFree Design of the Month.See Figure #1 below.
- Two 10 ½-inch pieces of ¼-inch wide white elastic to create elastic bands on napkin holder.
- Sewing thread for sewing napkin holder and a wash-out marker.
- Optional but helpful, rotary cutting mat, ruler, and cutter for trimming felt.
- White cloth napkins.
- Materials for making napkin holder:
- White craft felt cut to fit hoop.
- Red craft felt to equal size of stitched and trimmed American Summer design.
- Embroider design on felt and trim to size.
- Add elastic bands and felt backing.
- Create redwork design in PE11 software and embroider on napkin corners.
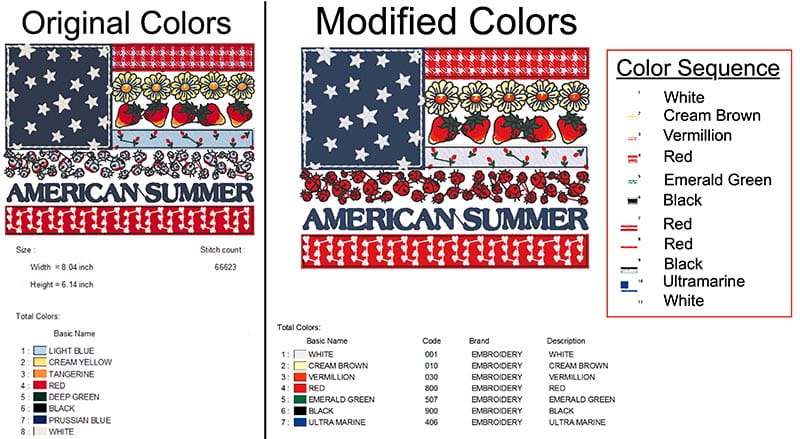
- Transfer American Summer design to your machine. Hoop white felt, slip a piece of tear way stabilizer under the hoop, and stitch the design. Note: I stitched the design using modified colors shown above, using an 8” X 12” hoop. See Figure #2. Feel free to stitch the design using a 6” X 10” hoop if you have one.
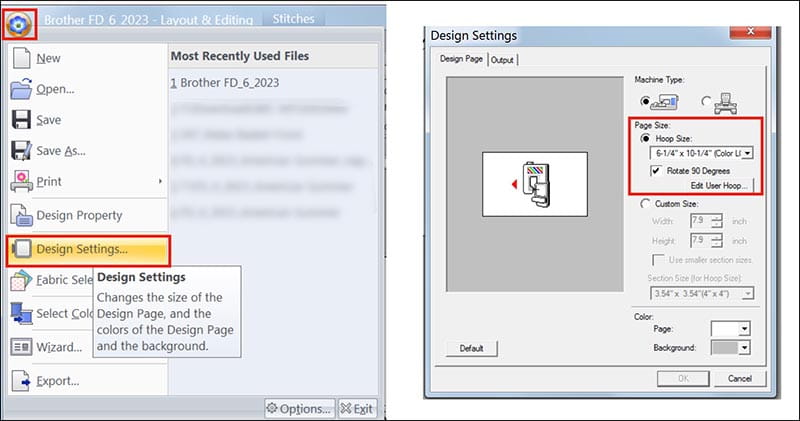
- Open design in PE11. Note that I am using the 6X10 hoop from the Design Settings Options. See Figure #9.
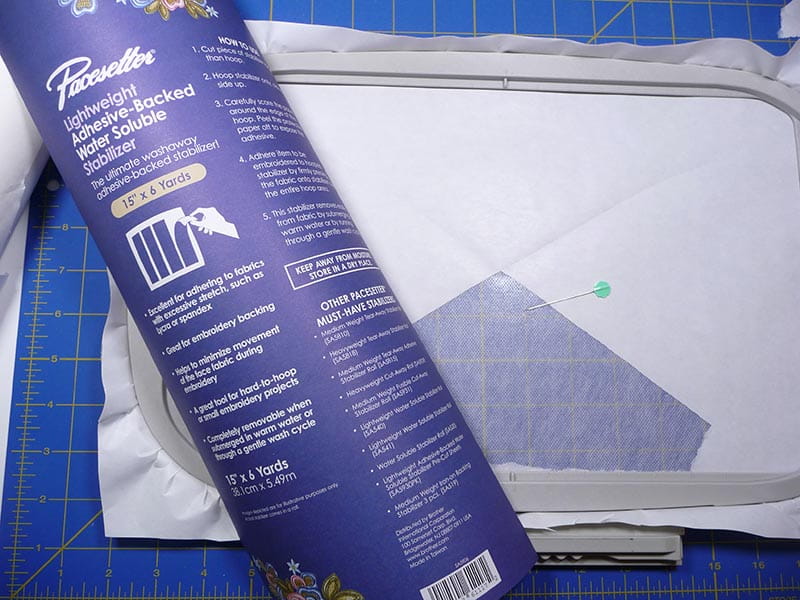
- Hoop adhesive backed water-soluble stabilizer, scoring paper to expose adhesive. See Figure #25.
Free Design of the Monthoriginal and modified colors. See Figure #1.
Figure #1
Please read through all instructions before beginning this project. Basic steps are as follows:
All Steps to Create Napkin Holder:
Figure #2

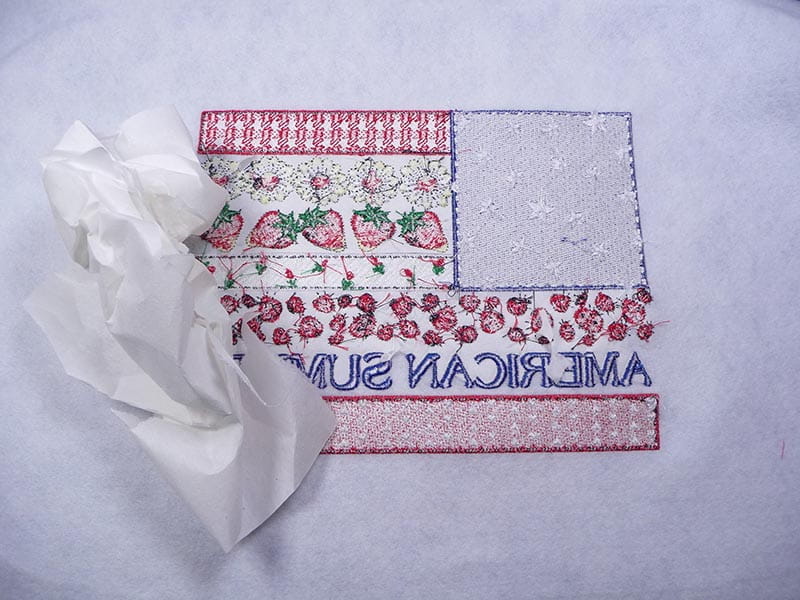
Remove material from hoop and tear away excess stabilizer. See Figure #3.
Figure #3
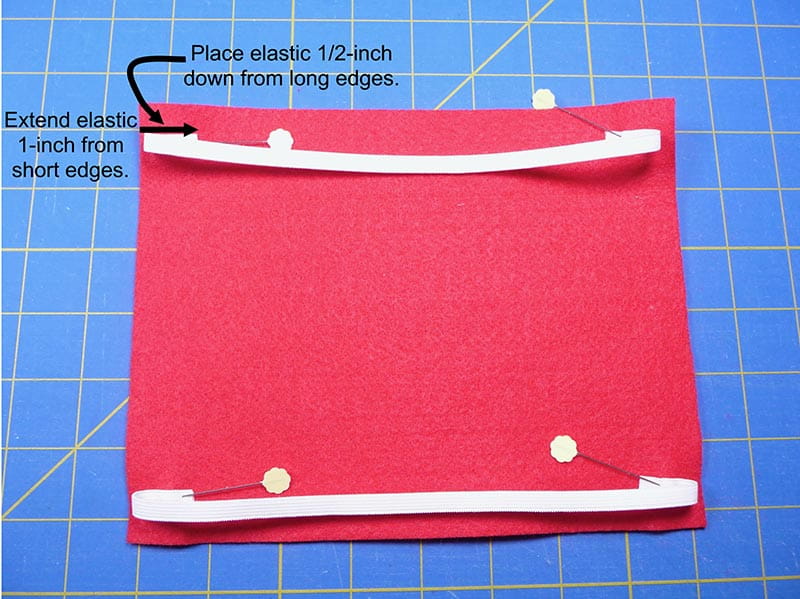
Trim embroidered piece, leaving ¼-inch beyond edge of design. Cut a matching piece of red felt. Tip: I used rotary cutting tools and a mat to evenly trim pieces. Pin elastic to red felt as shown in Figure #4.
Figure #4
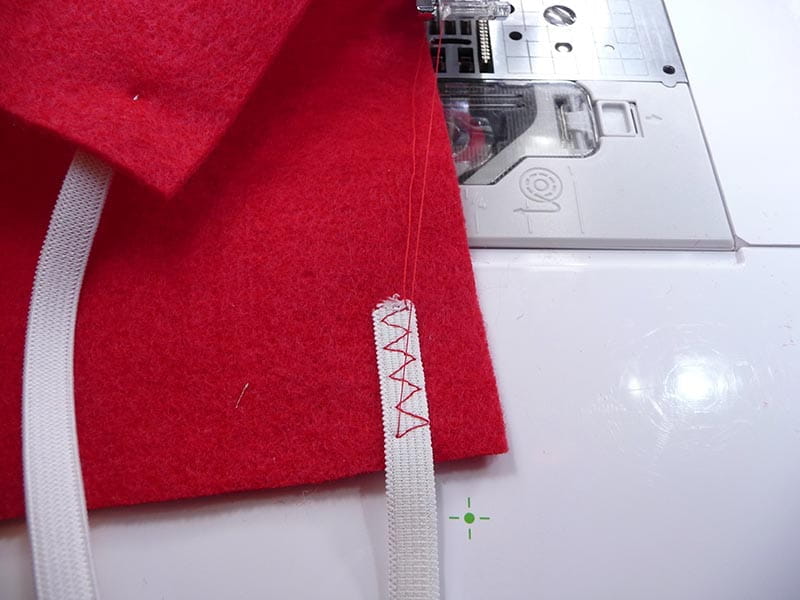
Set machine for sewing. Select a medium width 3-step elastic stitch and sew over elastic ends to hold them in place. See example in Figure #5.
Figure #5
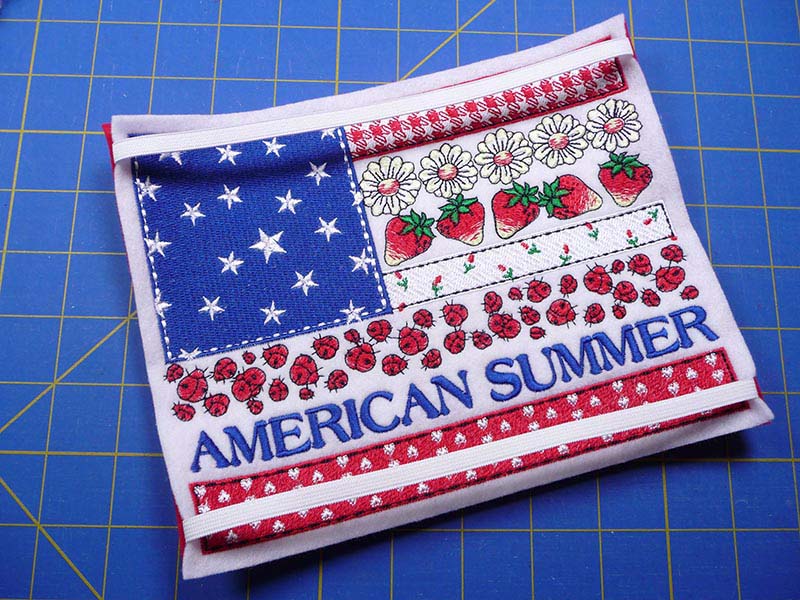
Layer embroidered piece over red felt, matching edges and sandwiching elastic in between. See Figure #6.
Figure #6
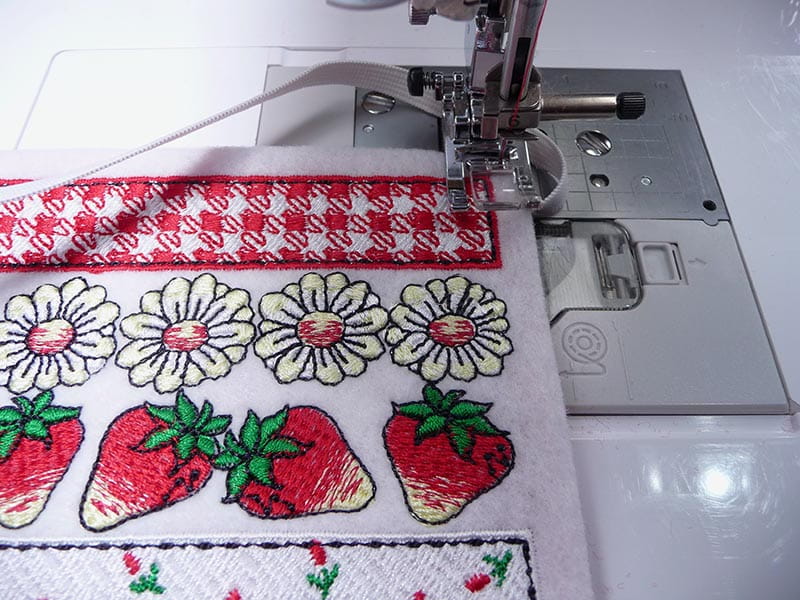
Topstitch close to edge of layered felt pieces, keep in elastic ends free from topstitching. See Figure #7.
Figure #7
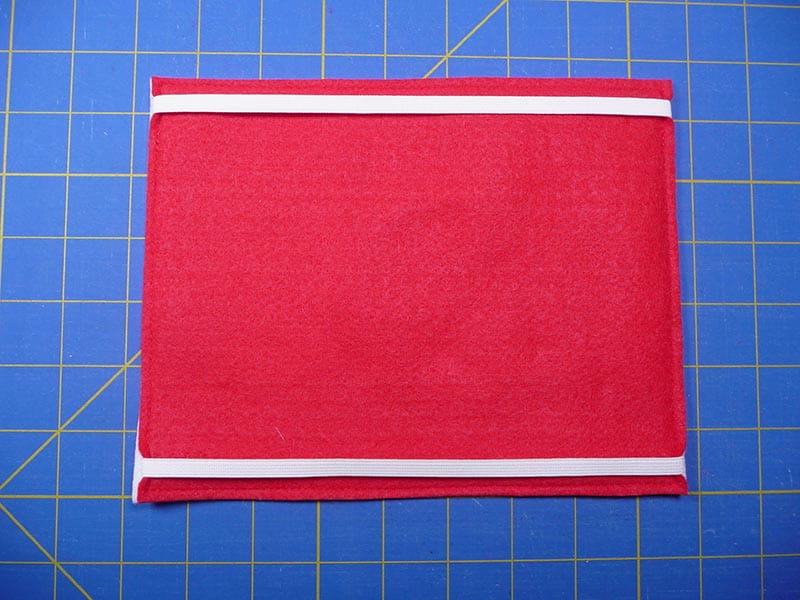
Wrap elastic bands to back side of napkin holder to finish. See Figure #8.
Figure #8
Now, let’s Create Napkins with a coordinating Redwork design!
Figure #9
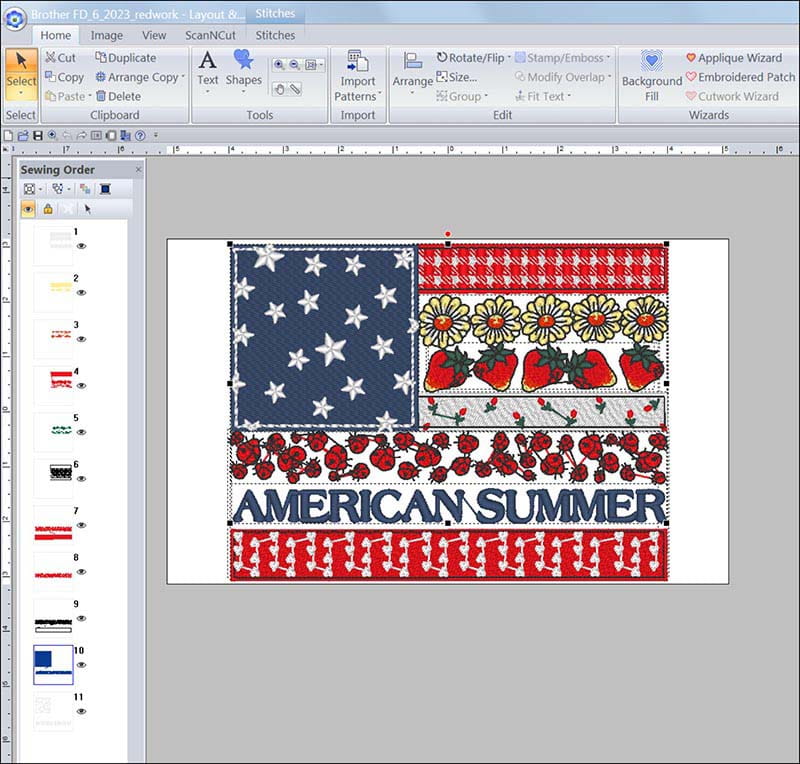
Click on design to select it. See Figure #10a.
Figure #10a
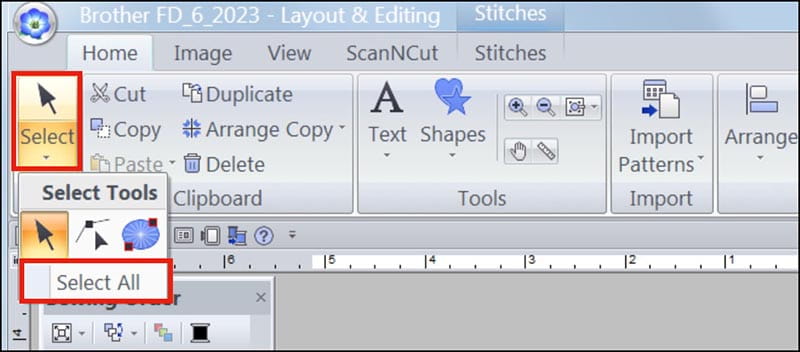
You can also click on Select>Select All to select the entire design. See Figure #10b.
Figure #10b
Note that I’ve changed the colors to match my modified colors. You can change the colors in PE Design or change them at your machine.
Let’s begin to delete colors so we can save a new design with just the outline of the strawberries and flowers. Follow the steps below:
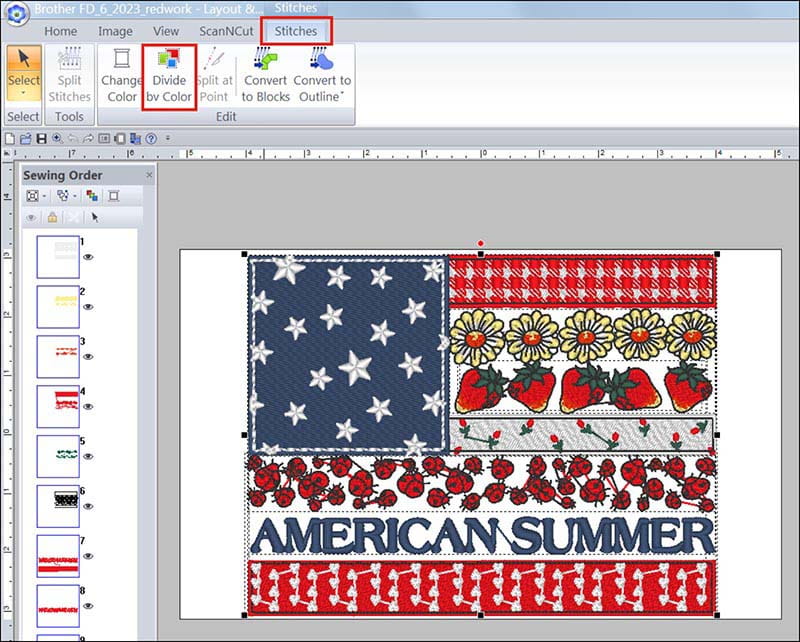
Select Stitches > Divide by Color. See Figure #11.
Figure #11
Next, click in a blank space to de-select the design. Click on the white thread box, then right click, and click on Select Objects to select just the first white block of stitches. See Figure #12.
Figure #12
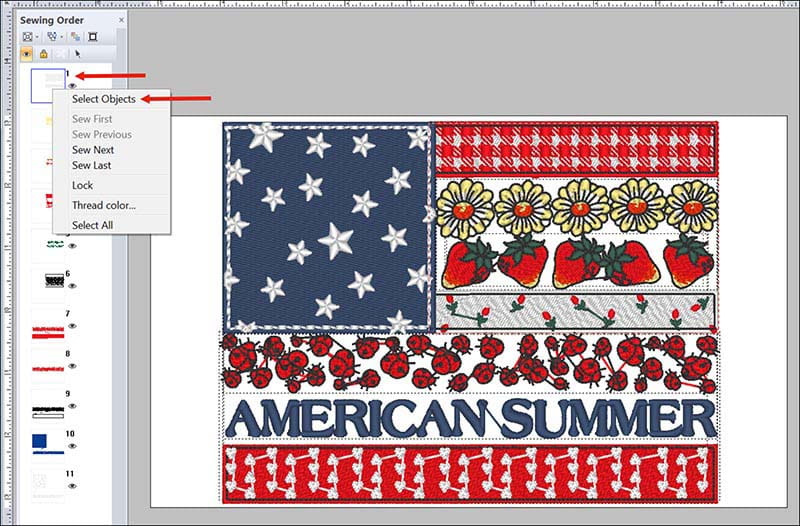
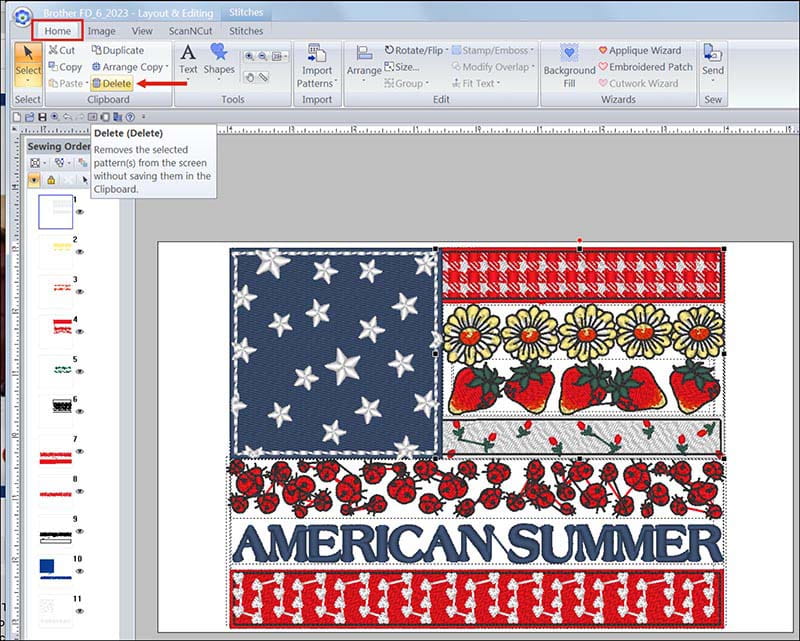
You’ll see a blue box around the stitches to show that they’re selected. Next, click on the Home tab, then click Delete to eliminate the stitches. See Figure #13.
Figure #13
Continue to follow the same process to delete all but the strawberries, flowers, and black sections around them. See Figure #14.
Figure #14
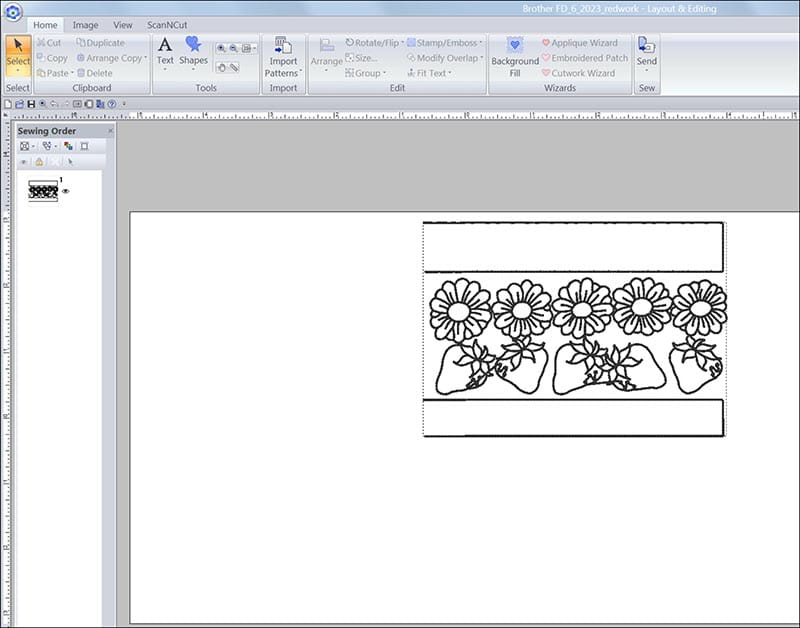
Tip: Use the undo option if you make a mistake and delete the wrong section.
Now, let’s finish up by making the new design with a corner feature to use on napkins. To select just the flowers and strawberries, we’ll use another feature in the software. Create the design as follows:
Click the design to select it. You’ll see black boxes all around the selected design. See Figure #15.
Figure #15
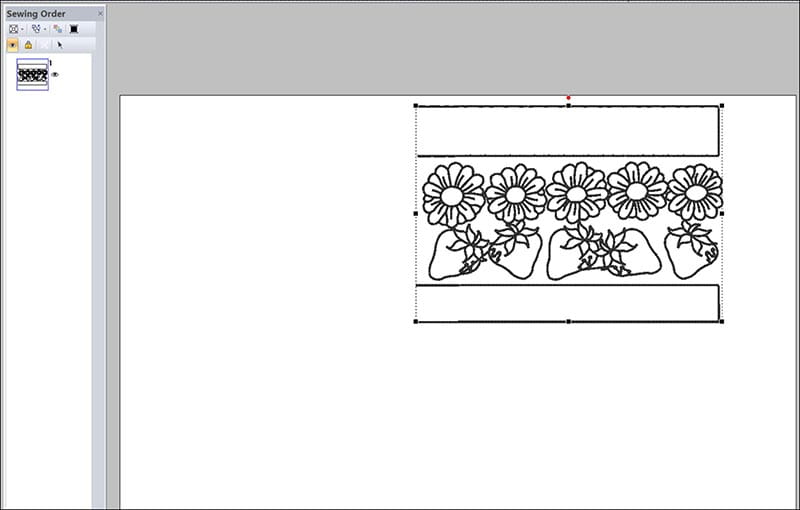
Click on Stitches, then Split Stitches. See Figure #16.
Figure #16
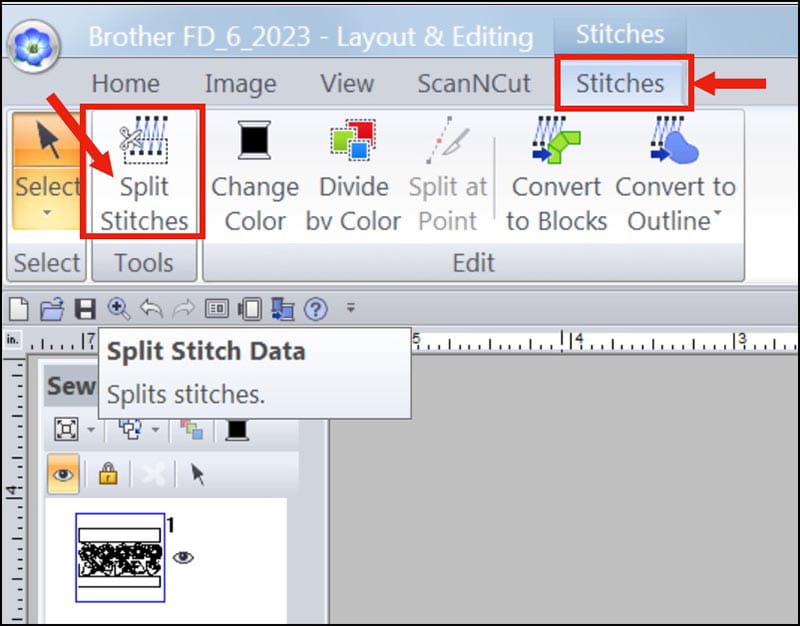
You’ll see an icon appear that looks like scissors. See Figure #17a.
Figure #17a
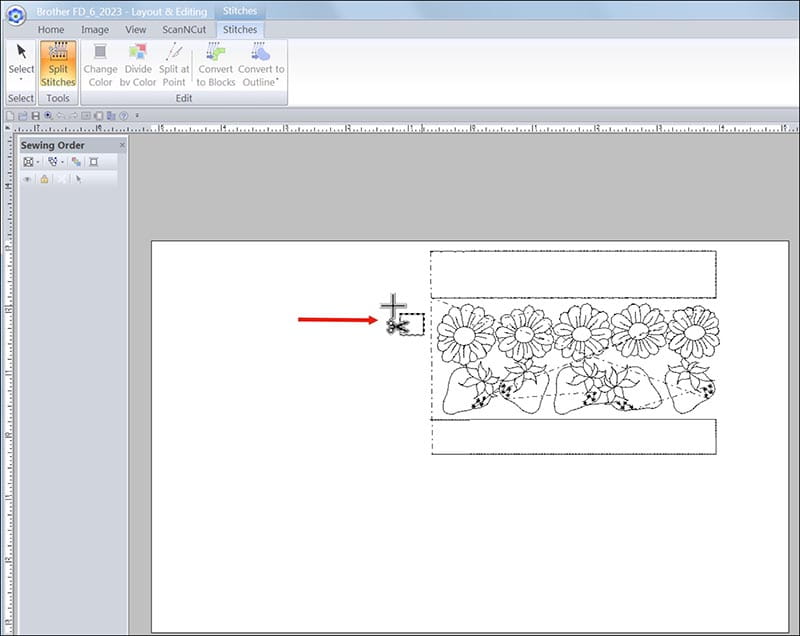
Click all around the upper rectangle to select it, surrounding the entire section you want to delete. Double click when you reach the point where you started clicking. This will end the outline, surrounding the part of the design you want to delete. See Figure #17b.
Figure #17b
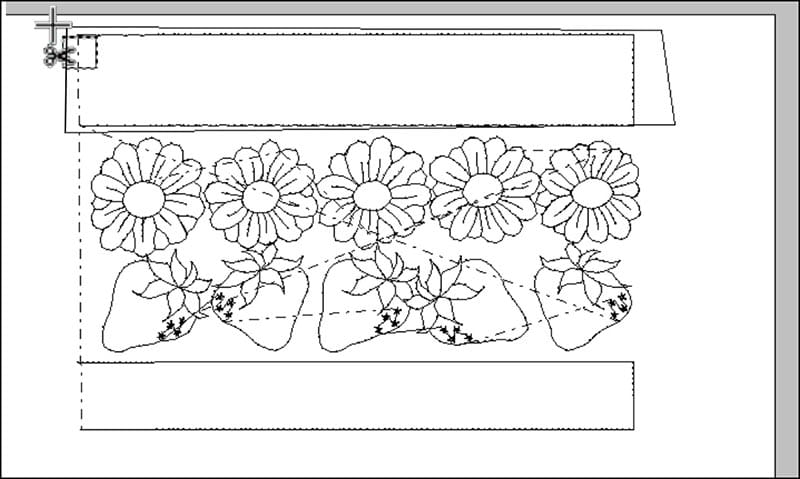
Note that the part you surrounded is now selected. See Figure #18.
Figure #18
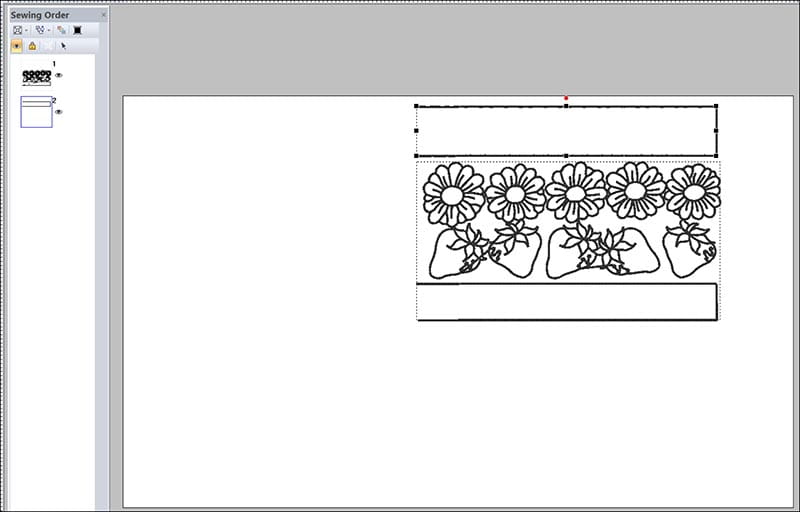
Click Home, then Delete to delete this section.
Click on the remaining design to select it once again, then use the same Spilt Stitches process to delete the lower rectangle. See Figure #19.
Figure #19
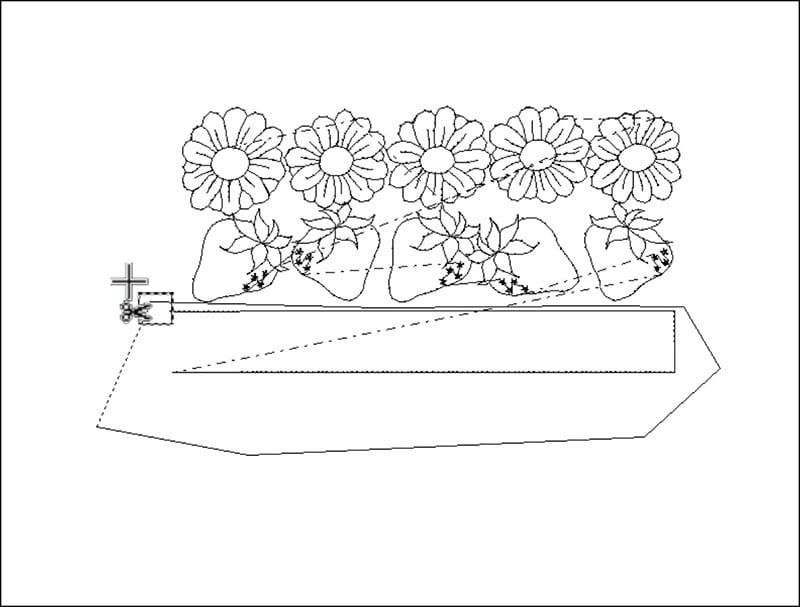
You are left with just strawberries and flowers. See Figure #20.
Figure #20
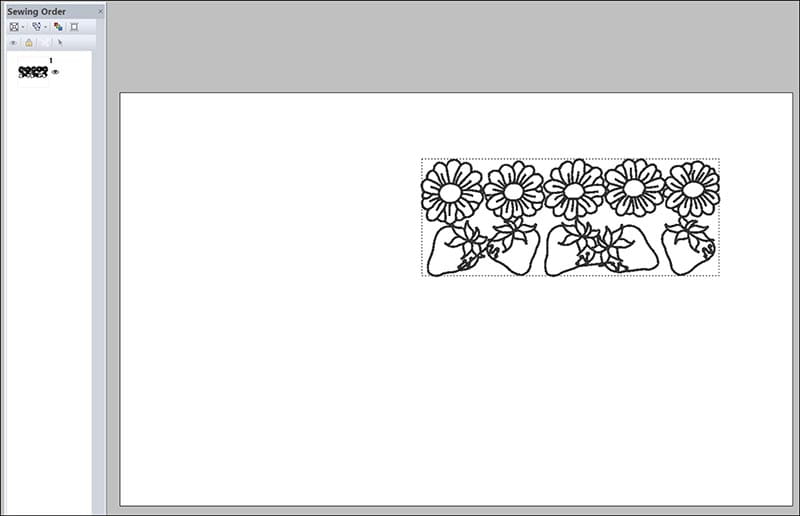
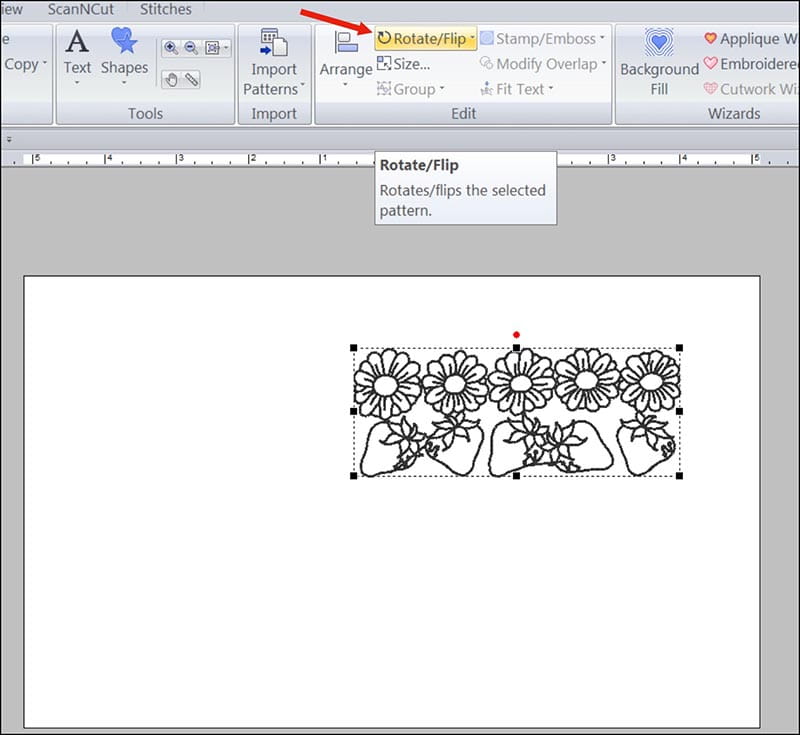
To create a corner design, begin by clicking on the design to select it. Next, click on Rotate/Flip, then Rotate. See Figure #21.
Figure #21
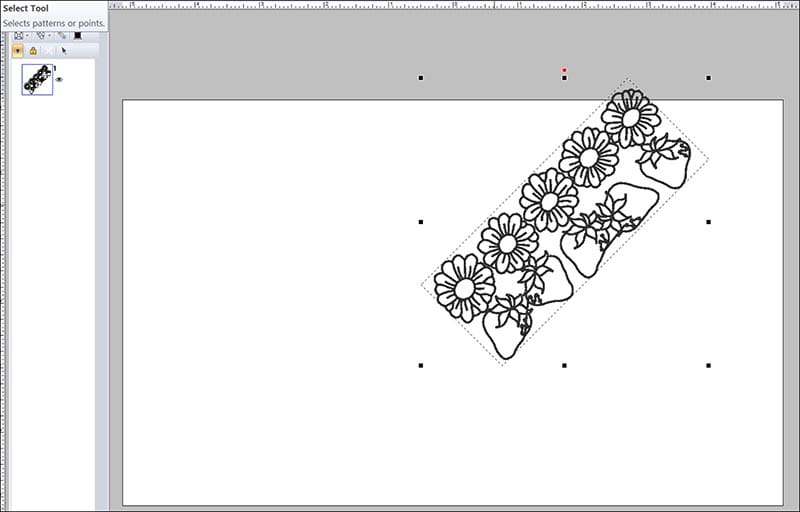
Use the rotate box to rotate the design 45 degrees and click OK. See Figure #22.
Figure #22
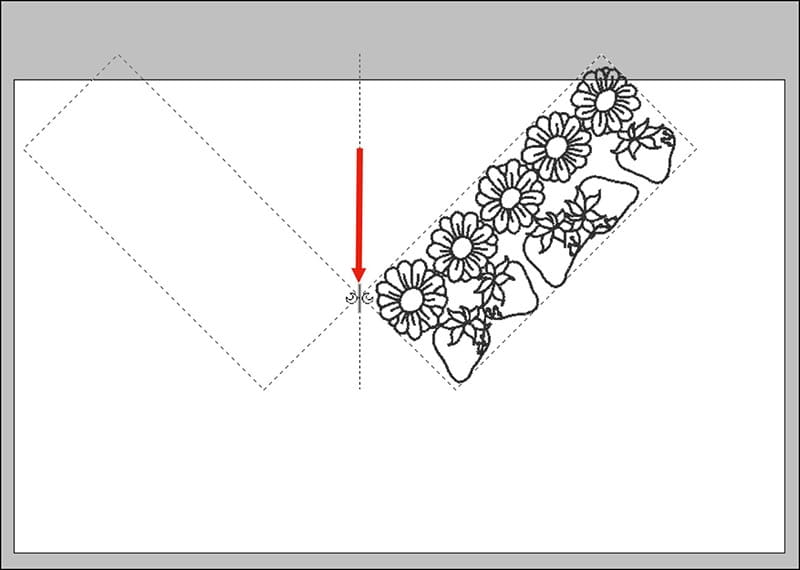
From the Home tab, click on Arrange Copy. Select Vertical Mirror Copy. Place the curser at the tip of the design. You’ll see and icon that looks like two moon crescents indicating the command for vertical mirror copy. Click once to make a mirror image copy of the design on the left. See Figure #23a and Figure #23b.
Figure #23a
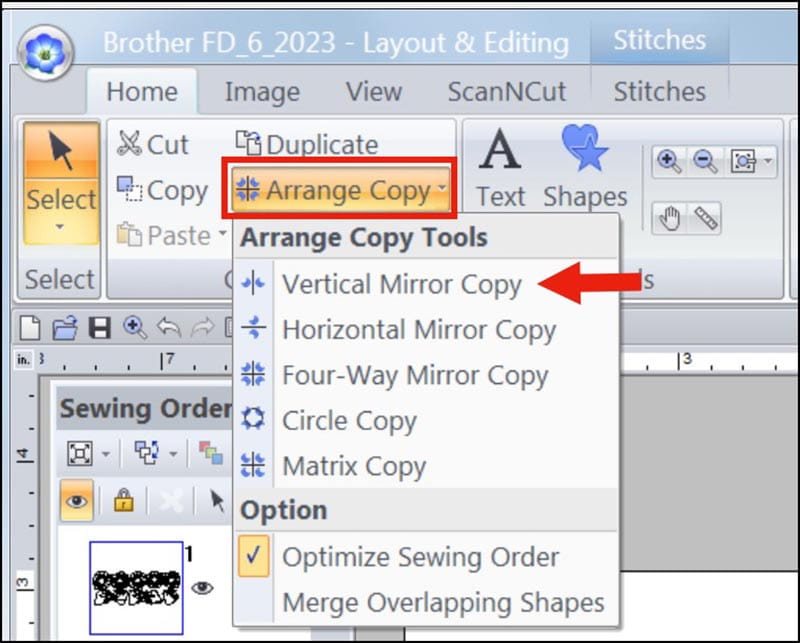
Figure #23b
Almost finished! Make sure entire design is selected, then click on Arrange and Move to Center. See Figure #24a and Figure #24b.
Figure #24a
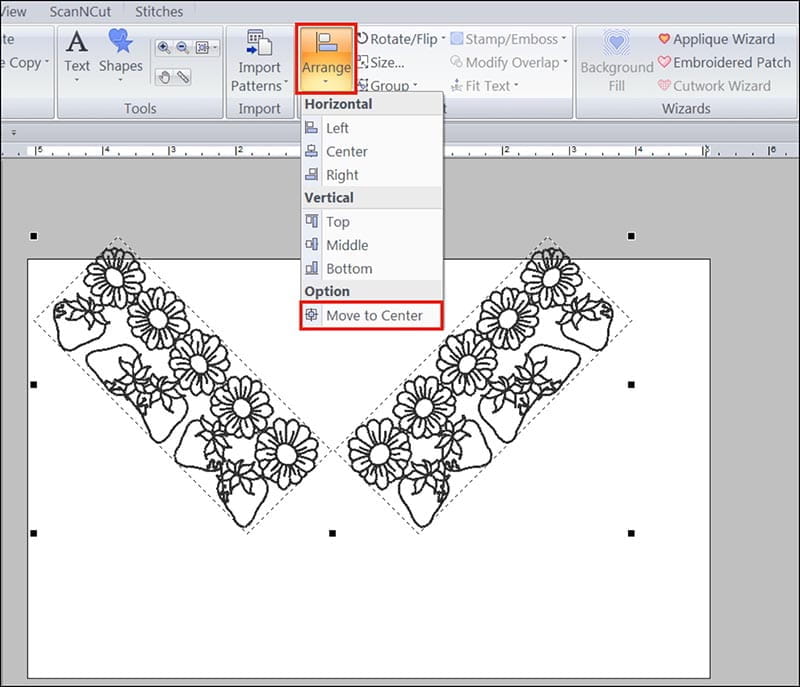
Figure #24b
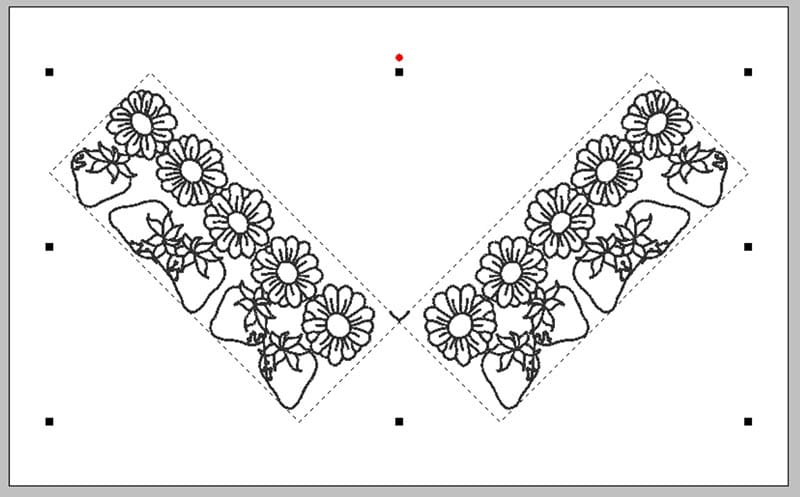
Save the design and take it to your machine to stitch a redwork style design on your napkin corners.
Figure #25
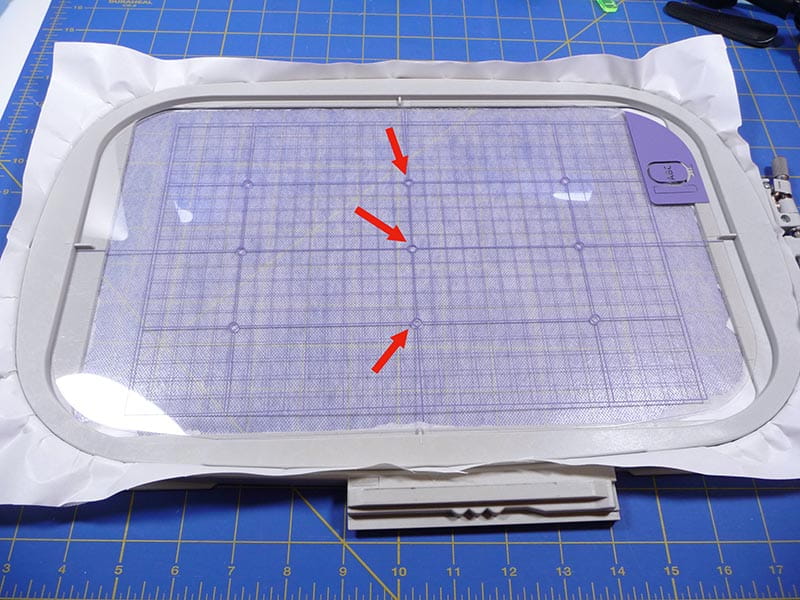
Place template on top to mark center of hoop on the stabilizer, marking dots as shown in enhanced photo in Figure #26.
Figure #26
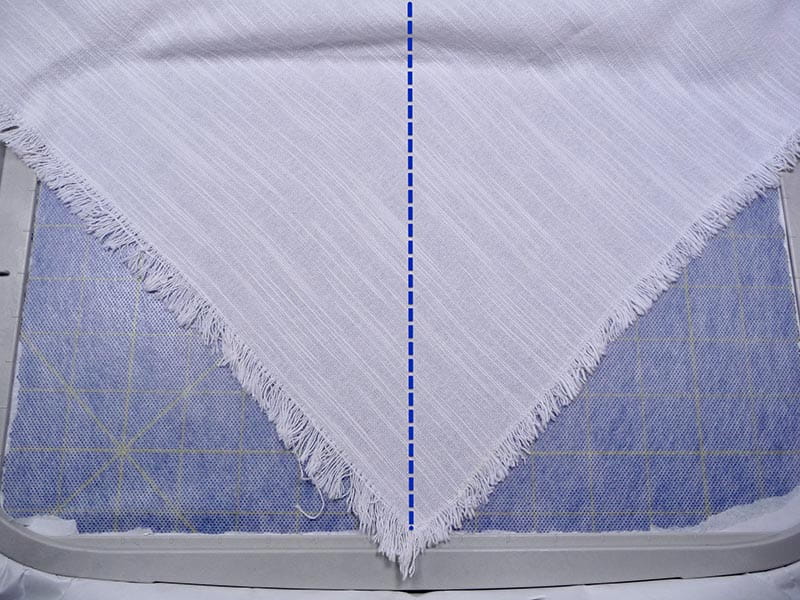
Mark center of napkin on right side, then fold napkin along the center, place along center markings on stabilizer, and unfold. See Figure #27a and Figure #27b.
Figure #27a
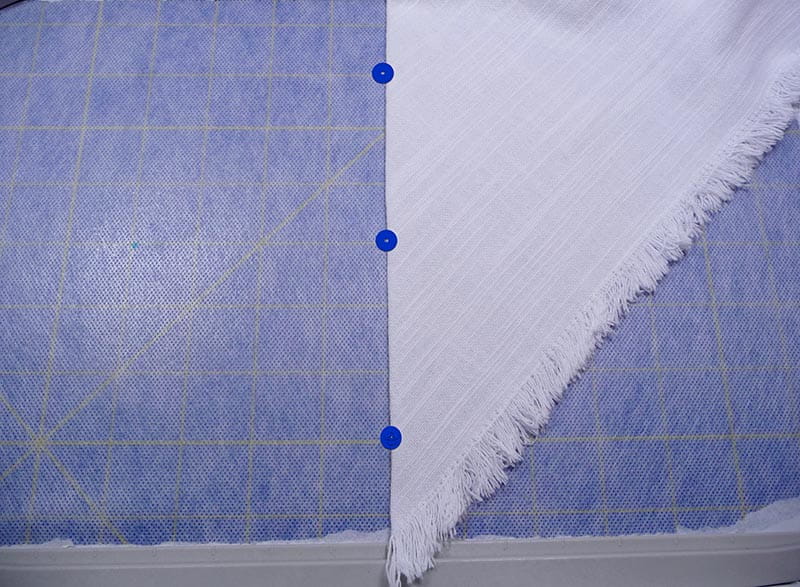
Figure #27b
Attach hoop to machine. Adjust to align for center using arrow keys if you need to perfect the center alignment. See Figure #28.
Figure #28
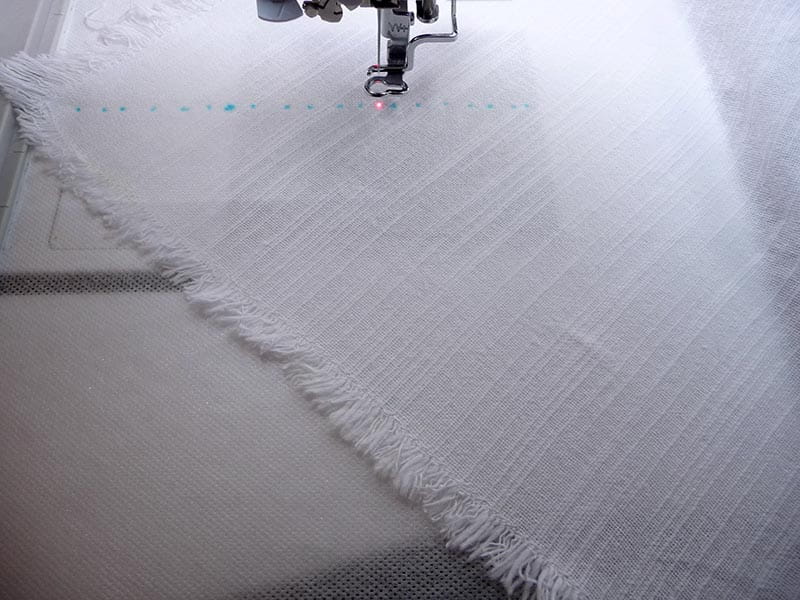
Embroider design on napkin corner and then repeat hooping and stitching steps for each napkin. See Figure #29.
Figure #29
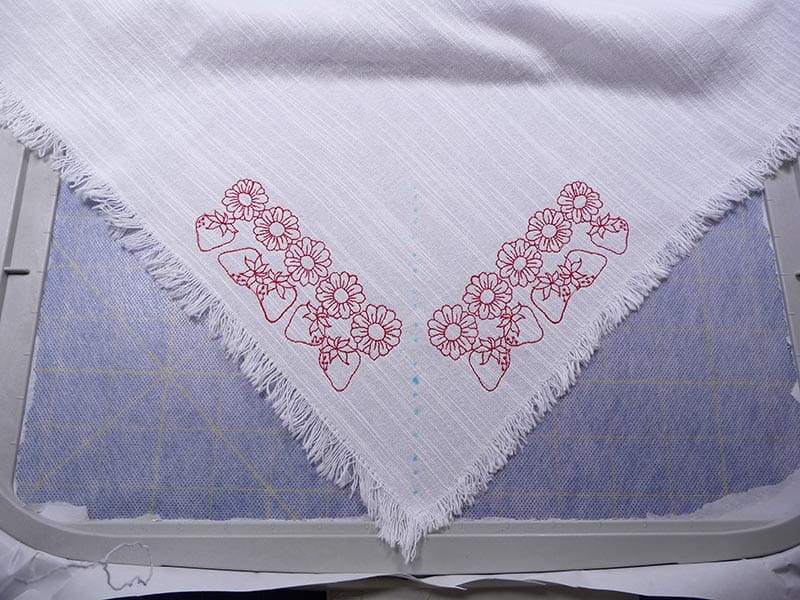
When finished, remove excess stabilizer, then wash out markings and rinse away all remaining stabilizer. Wash and press napkins. See Figure #30.
Figure #30
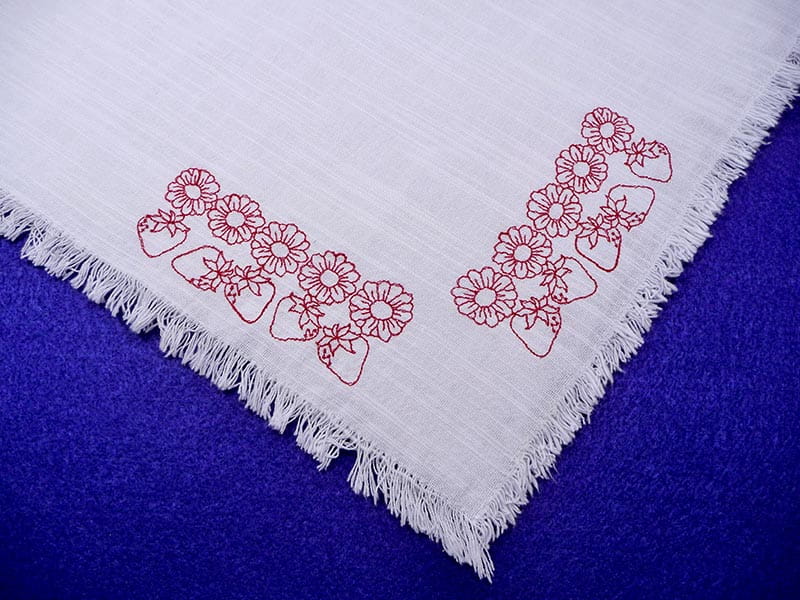
Stack folded napkins and wrap elastic bands around the bundle. Set the table and enjoy!


