Sewing With Faux Fur: Part 2
Now that we've gone over the proper steps to working with Faux Fur in Part 1,
let's dive right into a project! I've always wanted a faux fur jacket. I know it may not seem practical living in Georgia, but this winter has been a cold one for us. I picked a simple jacket pattern that doesn't have a lot of details like pockets, closures, and darts. I really wanted a basic pattern because the fluffy fur was already a dramatic detail. Below I share the full steps on how I made this faux fur jacket and video below.
Supplies:
- 1.5 yards faux fur (I went with Sable Fur in Ice Pink from Shannon Fabrics)
- Brother Strong N Tough Serger
- Brother Sewing Machine
- 1.5 yards faux fur
- 1.5 yards light weight material (satin)
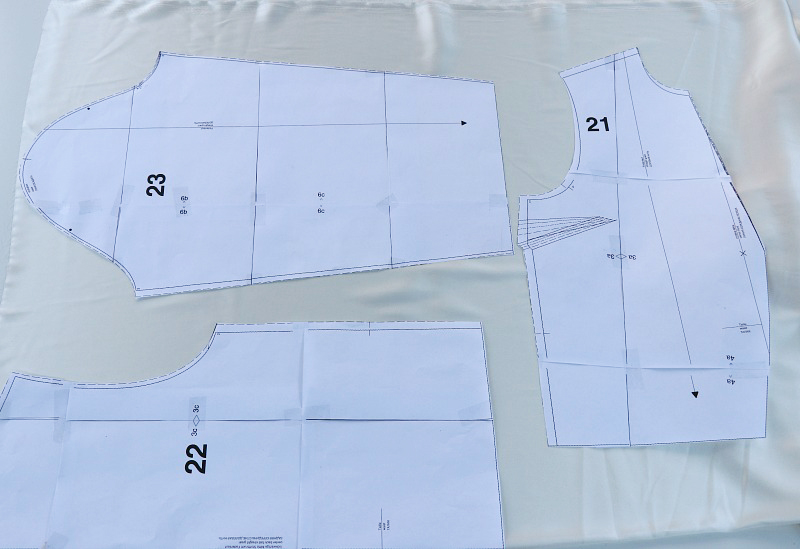
- Jacket sewing pattern or silhouette to trace (I went with the jacket image from the Burda Style pattern for pleated trousers, number #121)
- General sewing supplies
- Razor blade
- Permanent marker
Note: Sable Fur in Ice Pink is a product of Shannon Fabrics and Brother International Corporation makes no representations or warranties regarding such products.
Note: Jacket Image from Sewing Pattern is a product of Burda Style and Brother International Corporation makes no representations or warranties regarding such products.
DIY Instructions:
- You will want to first head over to Part 1 Sewing with Faux Fur.

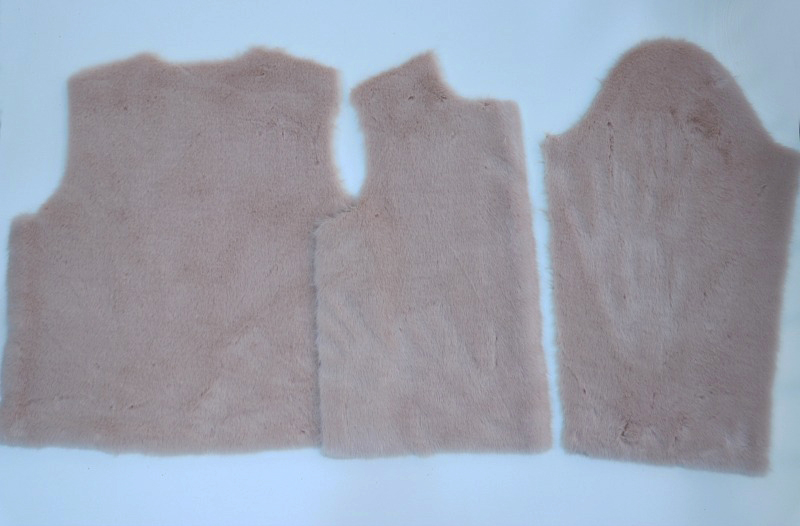
- Cut out your pattern for both the faux fur and the liner.
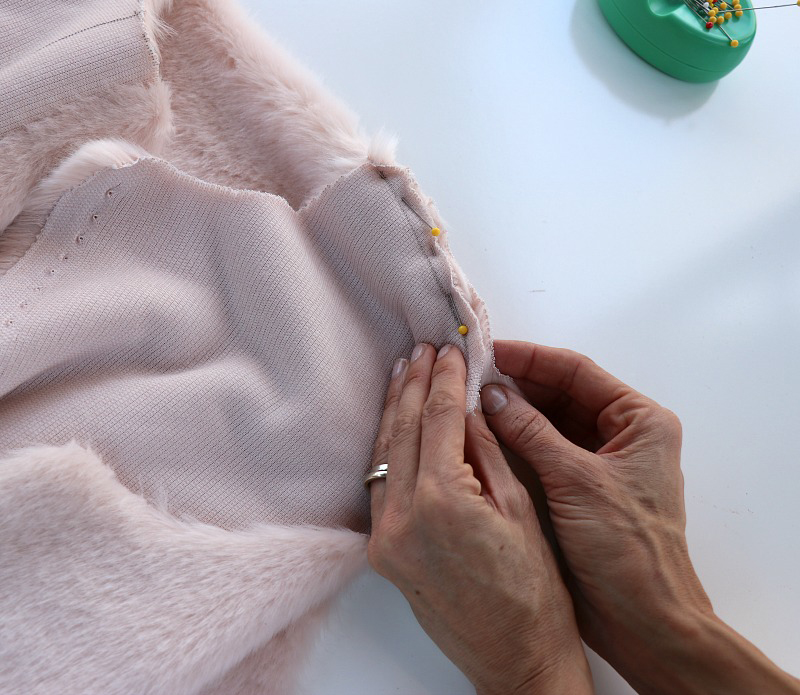
- Place front and back right sides together. Pin the shoulder seams, making sure to tuck the faux fur in as you pin.
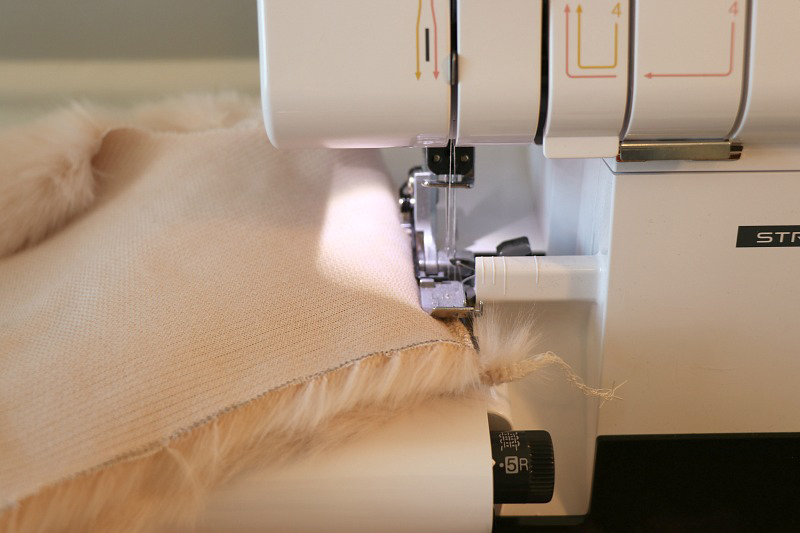
- Sew with at least ¼" seam allowance. I used a 3.0 stitch length. Then serge the seam allowance to clean up the edges.
- Place the sleeves inside the bodice right sides together. Pin generously making sure to tuck the fur in. Sew with at least ¼" seam allowance then serge.
- With right sides together pin the side seams and sleeve seams.
Tip: I like to pin at the underarm seams first and then go down the bodice and sleeve. That way I know the underarm seams will align up. I can always trim the bottom edges if need be.
- Sew and serge the seam allowance.
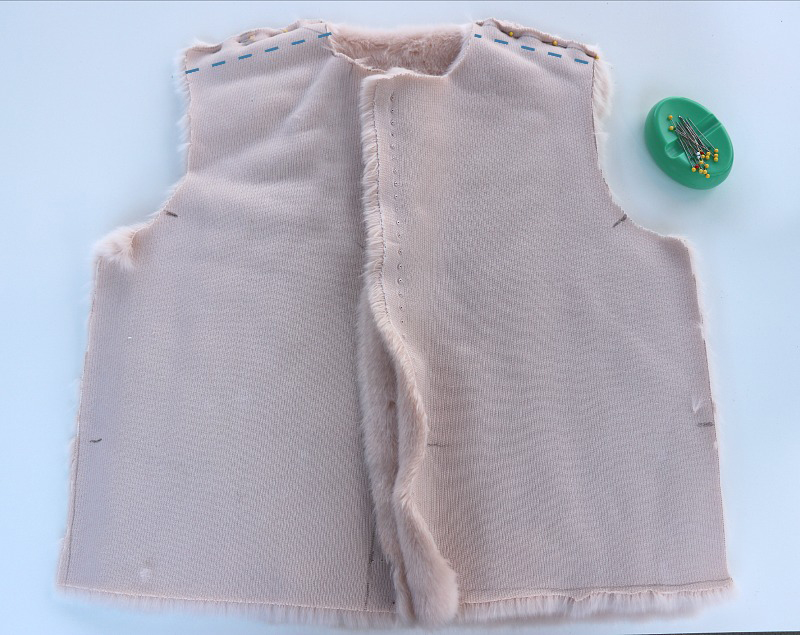
- You have now finished the shell of the faux fur jacket.


- Construct the liner using the directions above. You will want to use a light material like satin. The faux fur is already bulky, so you will not want more. Adjust your sewing machine back to 2.5 stitch length. Even though I used a light weight satin I still used my Strong N Tough serger on the seam allowance. That's what I love about the Strong N Tough Serger, it can be used on heavy weight materials like faux fur and lightweight materials like satin.

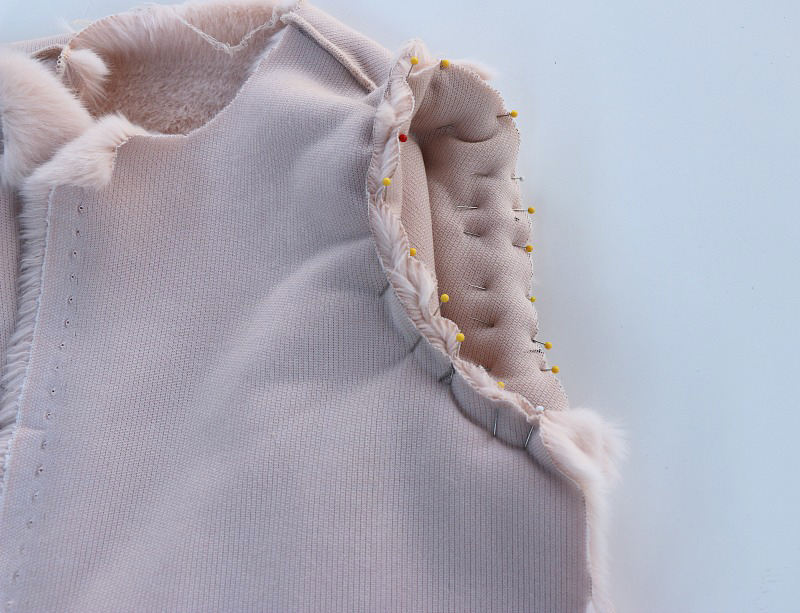
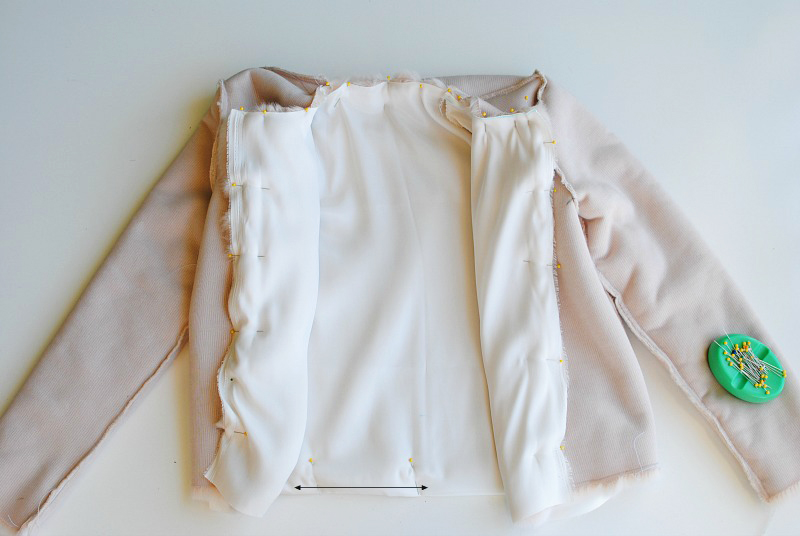
- Now that the liner is constructed we are ready for the final steps. Insert the liner into the jacket with right sides together. Pin along the collar/neck line making sure the seams line up, then proceeding down the center front, bottom edge and back up the center front. Tuck the sleeves in and we will work with that portion later. You will pin as usual making sure to tuck the faux fur in.
- Before sewing mark a 7" opening at the bottom edge. I choose a side portion of the back (marked as the arrow in the above photo). When you sew you will want to leave this portion open.
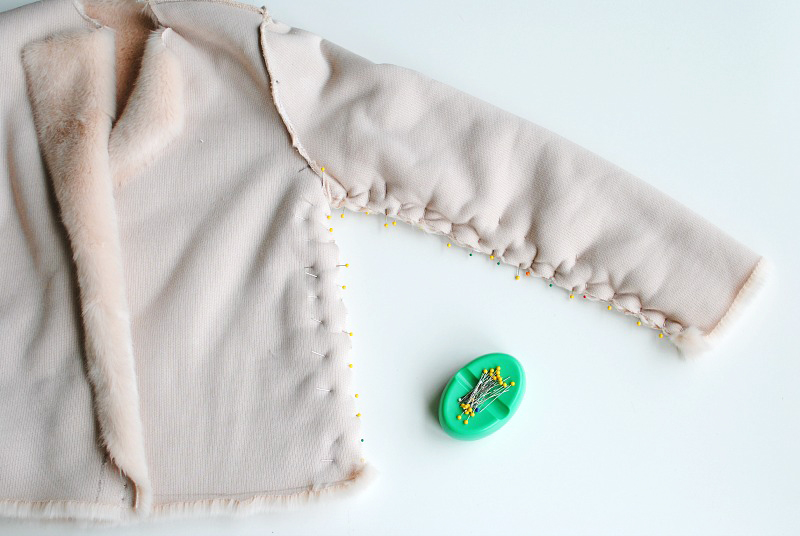
- Sew the liner and shell together. Start at the midpoint of the collar and sew around the collar, down the center front, bottom edge to our opening. Backstitch. Skip over the opening. Go back up to the midpoint of the collar and sew down the other side again backstitching once you get to the bottom opening.

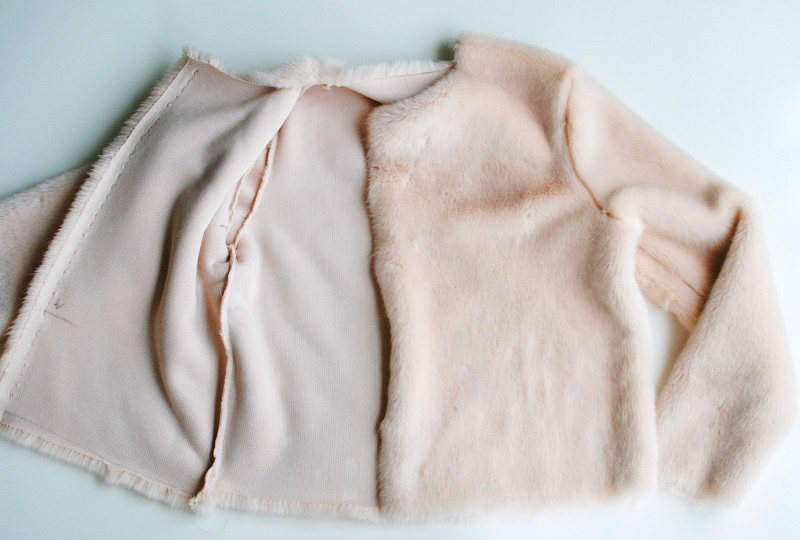
- Pull right sides out through the bottom opening.
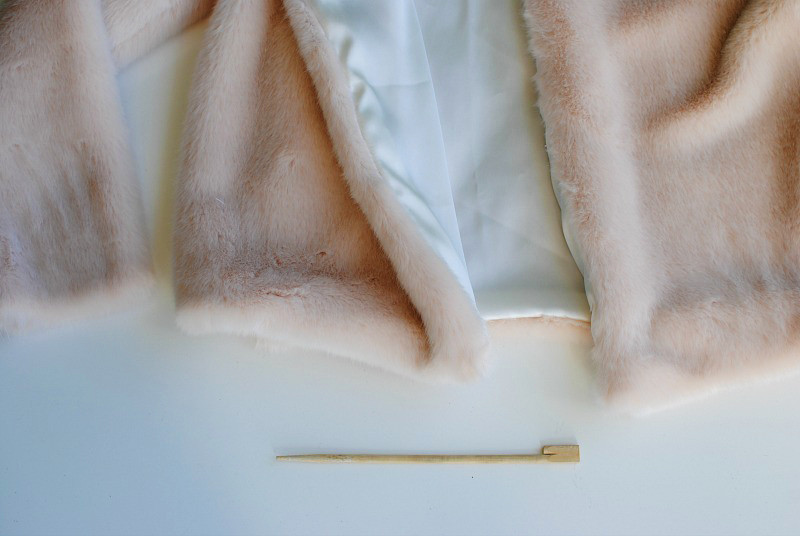
- Use something with a pointy edge to point out the edges like a chopstick.
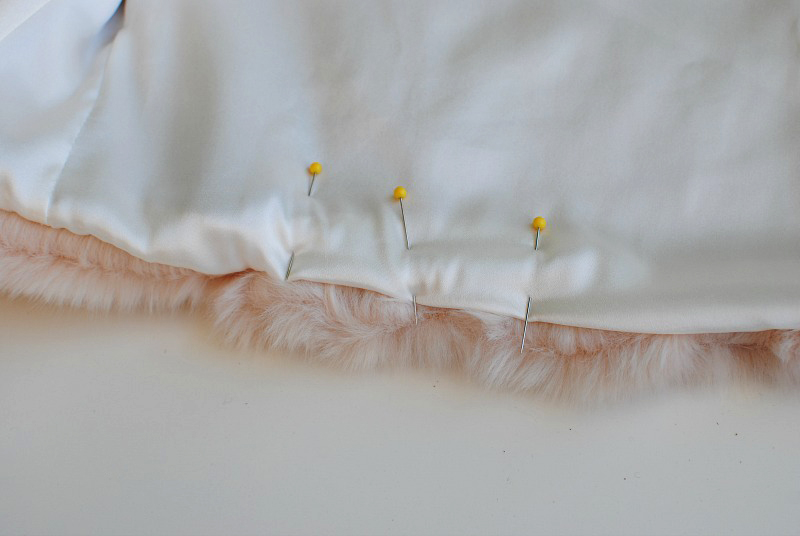
- Pin the bottom opening closed and hand stitch using a blind stitch.

- For the sleeves I tucked them under and hand-stitched them into place you can use a facing as well.
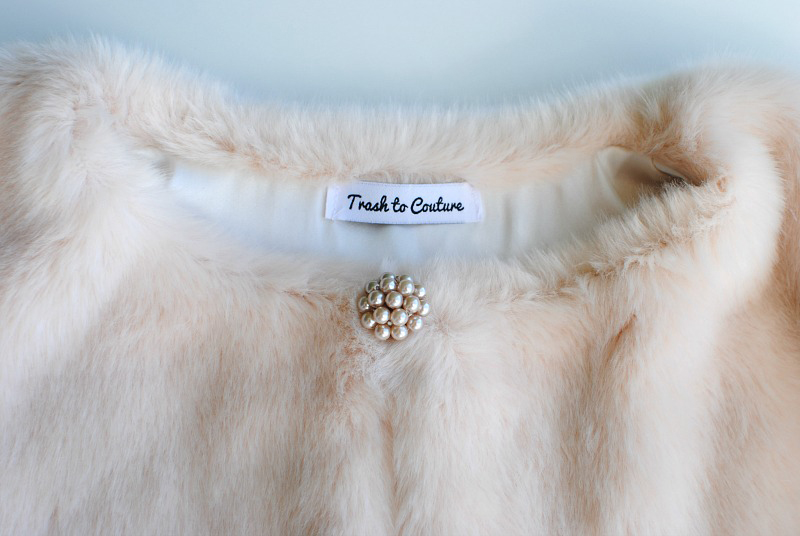
- Hand sew a closure like a hook and eye or even a brooch at the collar.
- This is a great time to clean out the sewing machine and serger once done.


 See more in the video below!
[youtube id="3K4-V8nCr-A"]
See more in the video below!
[youtube id="3K4-V8nCr-A"]
Related Projects
Stay Connected
* Required fields