How to add an Applique Patch to a Denim Shirt
There is a wonderful feature on THE Dream Machine
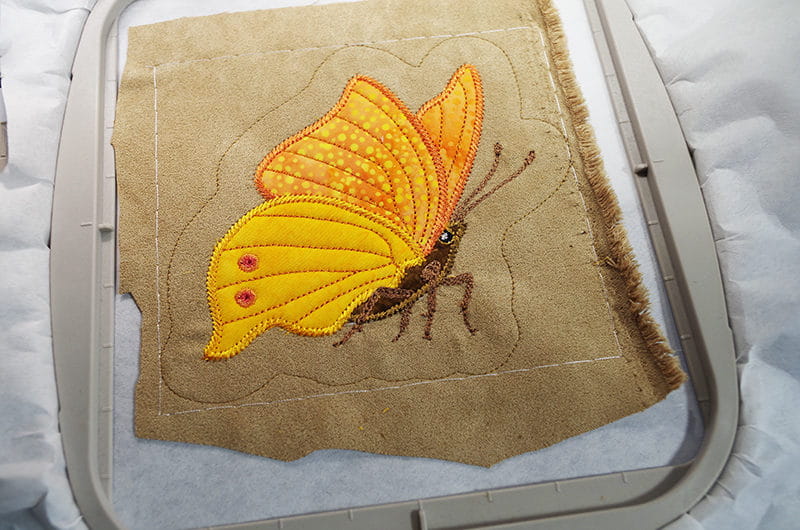
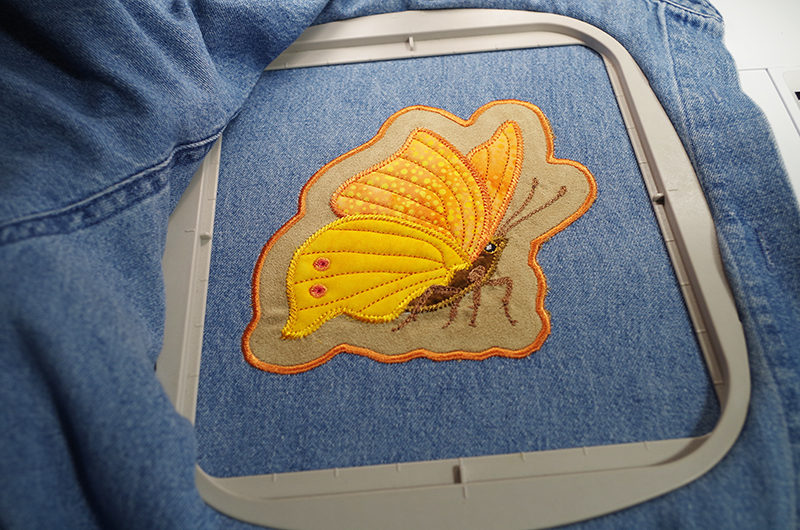
to create a “Patch” from either an Appliqué design or Thread only embroidery design. The great thing about this “Patch” function is that the back of the design is hidden once the patch is attached. On this shirt, you can see the Satin cover stitch around the outside of the butterfly that secures the Patch to the Shirt. Looking at the inside of the shirt, you only see the Satin Cover Stitch. Such a nice finish on both sides!
 Machine Used:
- THE Dream Machine XV8500
, also on the THE Dream Machine 2 XV8550
, however, I wanted to come up with a way to use this function with my appliqué designs. Once I started to play with the feature, I realized this is a great way to add an appliqué design with more than one appliqué fabric and have the back look great! Basically, you can take any embroidery design, apply the Appliqué Patch function, which will add 3 steps to the end of the design. These three steps are 1) Appliqué Material; 2) Appliqué Position; 3) Appliqué.
- The Appliqué Material is an outline stitch around the finished design and will be the “line” that is used to trim the design for the Patch.
- The Appliqué Position is the stitch that is used on the item that you want to sew the patch onto. It is the outline of where to place the trimmed patch.
- The Appliqué step is the Satin stitch that secures the design to the item.
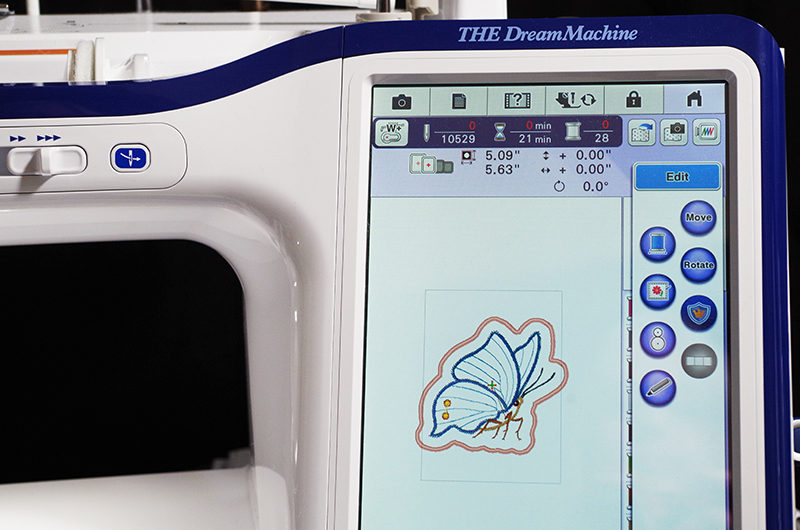
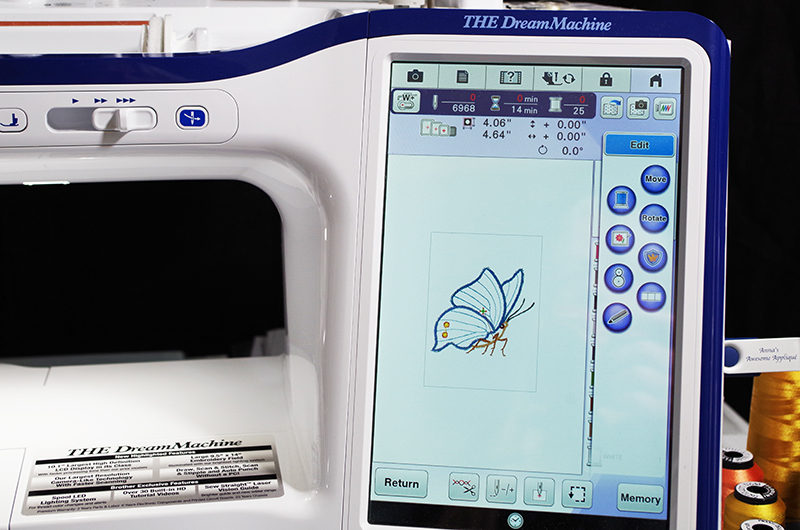 From the Edit menu, select the “Shield” icon. You will notice that your design on the screen now has a satin stitch around it. It uses the couture of the design to determine the outer edge of the Patch. The distance between the design and outer edge can be adjusted.
 Stitch out the design. The last 3 steps were added when the “Shield” icon was selected.
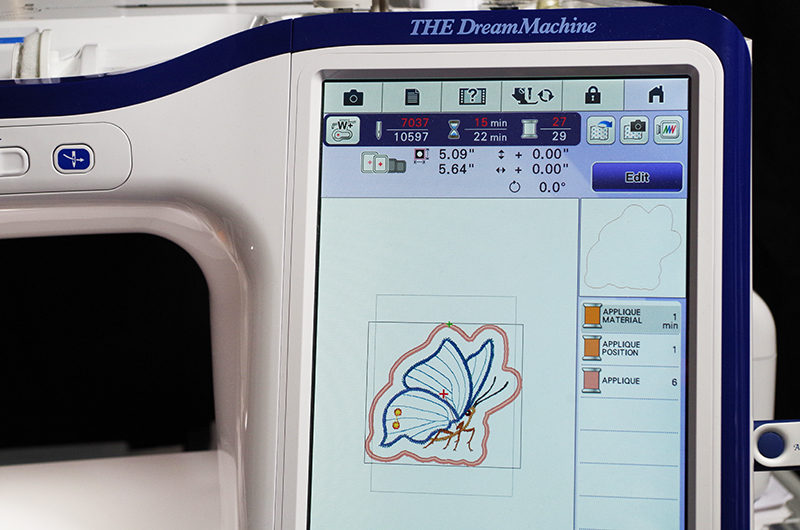 Stitch out the Appliqué Material step to get an outline around the patch.
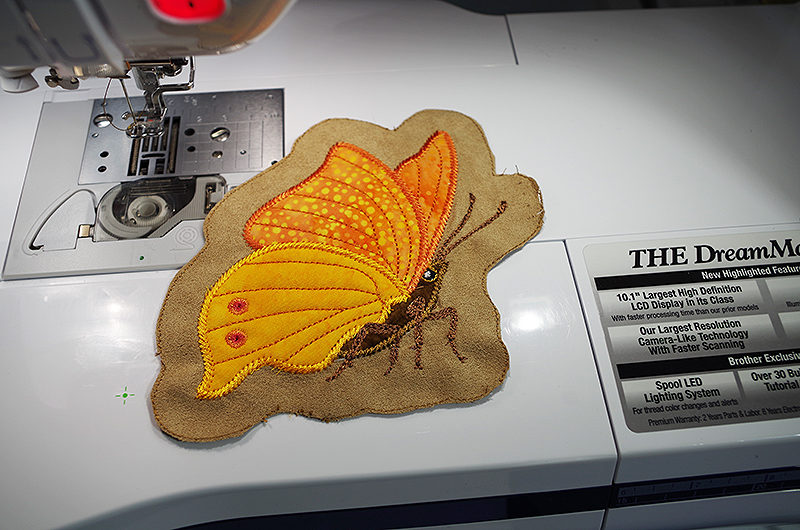
 Remove the design from the hoop and trim the design on the “Appliqué Material” stitch. Keep the design on your embroidery machine. Do not turn off your machine.
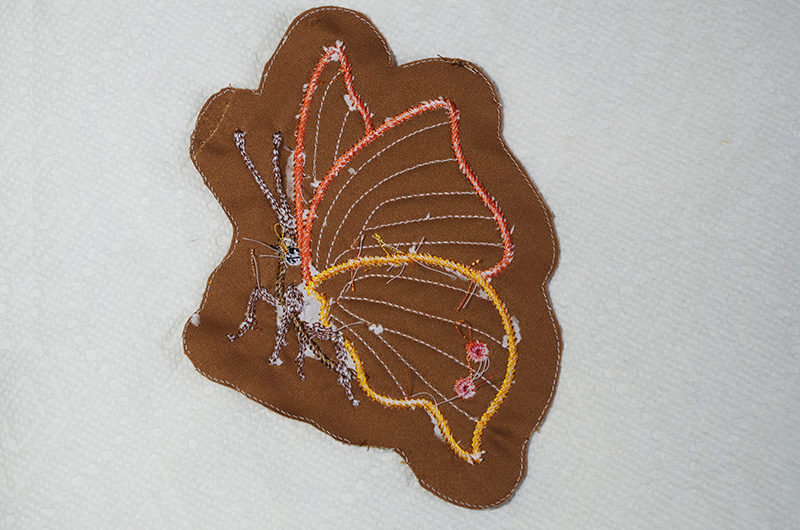
 Turn over the trimmed patch and apply a spray adhesive. This will help keep the appliqué within the “Appliqué Position” step.
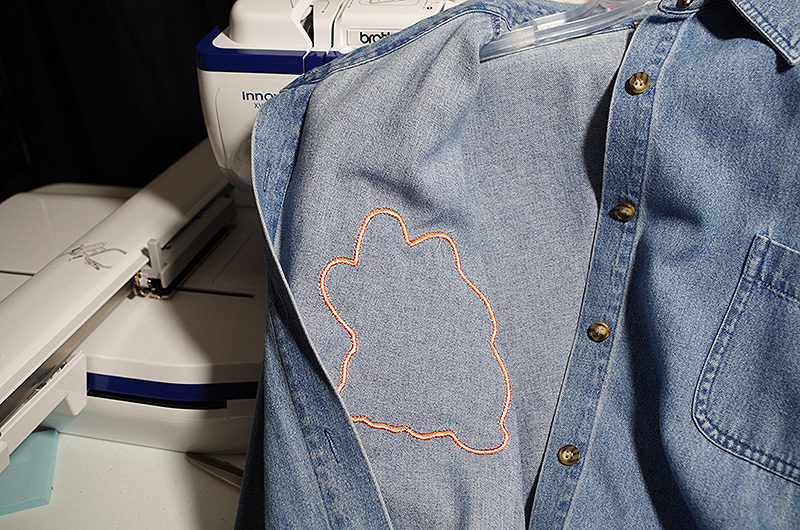
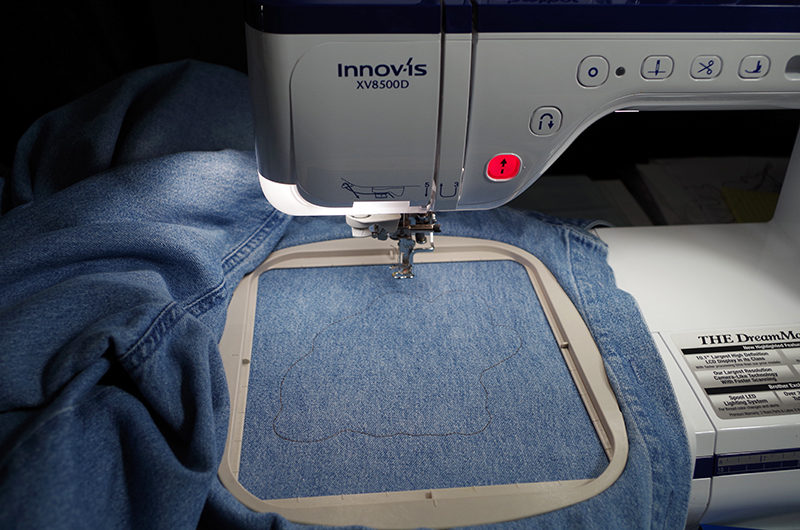
 Hoop the item that you are going to attached the patch to. I floated a tear away stabilizer underneath the Denim shirt. Stitch out the “Appliqué Position” step.
 Place the Appliqué Patch on top of the “Appliqué Position” stitches. Finger press in place.
 Stitch the “Appliqué” stitch to secure the Appliqué Patch. This will first do a zigzag underlay stitch, then stitch the satin stitch.
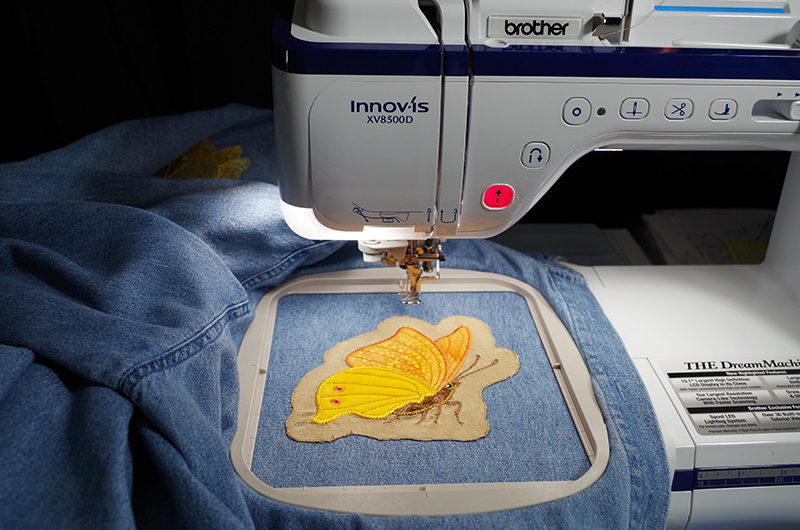 The Appliqué Patch is now attached to the Denim Shirt. Remove the hoop, remove the tear away stabilizer and you are all done!
-
The Butterfly Appliqué is part of the “Autumn Nuthatch” Block of the Month design by Anna’s Awesome Appliqué Designs and Brother International Corporation makes no representations or warranties regarding such products.
Related Projects
Stay Connected
* Required fields