Accessory Spotlight – The Wonders of the Ruffler Attachment – Pt 1
SA565 Brother Ruffler Attachment
This attachment has been around for a long time and in reality, the basic design has changed very little. SA565 fits Brother 7mm machines with snap on attachments. This foot is an updated model with improvements to keep the foot stable while stitching. It’s perfect for ruffling fabrics of many different weights. In my sewing space it is one of those “oh my, how can I ever be without it?” type of feet. I clearly remember one big baby project I was working on many years ago. I had committed to making a ruffled crib sheet and was struggling to gather it using my traditional method of sewing and pulling up basting stitches. I got frustrated with the tedious nature of pulling and pulling and going nowhere fast. So, I did what any smart stitcher does, I searched for a tool to conquer the task. It didn’t take long for me to remember the availability of a ruffler attachment, so I stopped what I was doing and picked one up from my favorite sewing shop. My ruffle adventure was complete in no time! I’ve never struggled to make a ruffle since that day.
I’d like to dive into the wonders of this ruffling attachment and help you make the most of it in your sewing space. We’ll start with a tour of the gizmos and gadgets that make up the working parts of this attachment, along with some tips for successful stitching.
This foot is indeed very versatile. You’ll find many working parts that control the settings and allow for a variety of techniques. The main parts and their functions are shown in Figure #1 below:
 Figure #1
 Figure #2
 Figure #3
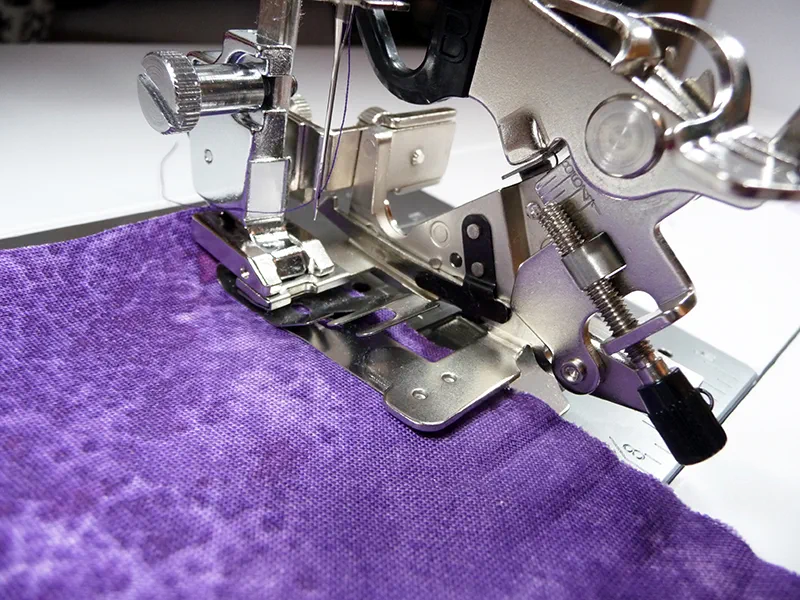
Figure #1 Figure #2 Figure #3- Basic machine set up – Start with a new needle appropriate for your fabric before attaching ruffler to machine. Snap on foot. Select a straight stitch with the center needle position, making sure that the needle goes precisely in the center of the hole on the attachment. Check all screws to make sure they are snug.
- Use good quality, strong polyester thread for ruffling.
- Always make a test piece before cutting ruffles for your actual project. Depending on your fabric and your settings you will need at least double the finished length of your desired ruffle. To test I like to cut a strip measuring 20-inches in length, set ruffler for approximate settings, ruffle, and then measure to determine the resulting ratio. In most cases you will want a bit of excess length for each finished ruffle strip. More length is better than less length as the excess can be trimmed away. Test, and then if necessary, select another strip and test again, adjusting the settings until you’re please with the results.
- Record your settings and keep a sample for future reference.
- Plan to include the raw edges of the ruffle ends in a seam or leave the ends loose so that you can fold one end inside another to finish.
- Never allow the ruffling blade to come in contact with the feed dogs or throat plate of the machine.
- For a double layer ruffle, baste or zig zag the raw edges together first. You can also use a serger to finish the raw edges and secure the layers together, so they don’t shift while ruffling.
- Set the machine for a slow speed if you have this feature. Otherwise, be sure to sew slowly when ruffling.
- Always release the fabric by pulling it from the back, never from the front.
- Directions included with the ruffler repeat the above cautions and show you the various parts outlined in this tip sheet.
Related Projects
Stay Connected
* Required fields