How to use a Stitch Guide Foot: Accessory spotlight
In this tutorial, I’ll explore the potential of the Brother SA160 Stitch Guide Foot, a multi-purpose sewing foot that comes with its own built-in ruler, and how to use a stitch guide foot for your sewing projects.
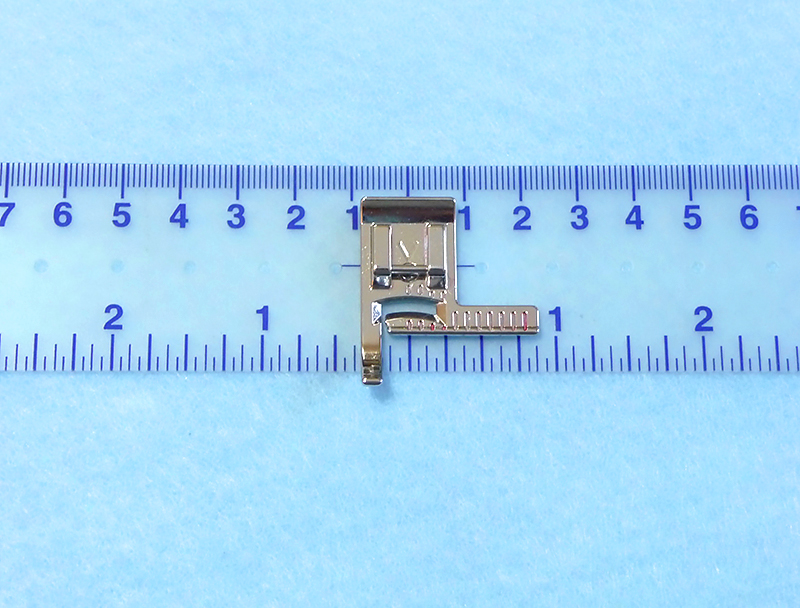
The SA160 Stitch Guide Foot features an un-numbered set of deep and grooved lines, which are spaced in 2mm increments along the front and extended side of the foot.
In addition to exploring the best ways you can use the stitch guide foot in your next sewing project, I also unpack exactly what this tool can help you accomplish and how it differs from an edge guide sewing foot.
Let’s first take a look at why the stitch guide foot is a must-have for just about anyone who sews.
6 reasons why you need this stitch guide foot
Below are some of the top reasons I find this stitch foot to be so helpful for many different sewing scenarios:
- It’s a genuine Brother product
- Incremental, evenly spaced marks
- It’s a snap to snap on
- Great for curved and straight edges
- Use stitches up to 7mm wide
- Potential replacement for your J foot
The Brother SA160 is a genuine Brother accessory! This means it’s made from quality materials and designed specifically for Brother sewing and embroidery, so you don’t have to worry about consistency issues.
The incrementally marked ruler includes evenly spaced lines with 2mm between each line.
It’s easy to snap on! This stitch foot is compatible with all Brother 7mm and most Brother 5mm machines.
Grooved guidelines are close to the front edge of the foot, making it suitable for both curved and straight edges.
The foot has a wide 7mm opening for use with stitches up to 7mm wide.
This width measurement also allows you to use the option of variable needle positions for the straight stitch, moving the needle from the far left, to the far right, and anywhere in between.
The sole of this foot is very flat. This allows for the best possible contact with the fabric, which then provides smooth feeding of fabric layers.
Designed for straight, zigzag, and other stitches normally meant for use with a J foot (the standard foot or zigzag sewing foot), the front area on the bottom of the stitch guide foot has space for stitches, like the zigzag stitch, to flow underneath.
What that means is you can use this foot in place of the J foot if it’s appropriate for your technique.
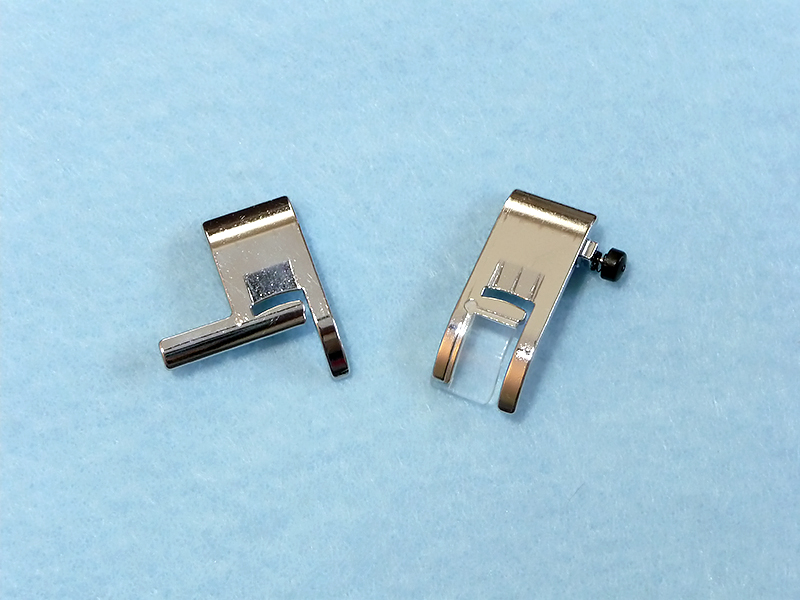
See a comparison of the bottom side in Figure #1, with the stitch guide foot on the left and the standard J foot on the right.
Tip: I’m using a Brother SA530.
Centering Ruler in the photo shown below:
Here’s how I get the most out of the stitch guide foot
I reach for this flexible ruler on a regular basis. It’s essential for marking the position for machine embroidery and the see-through design makes it easy to measure and mark placement on just about anything you’re creating!
You’ll find the unmarked ruler on the foot helpful for stitching accurate seam allowances and for topstitching so many different projects.
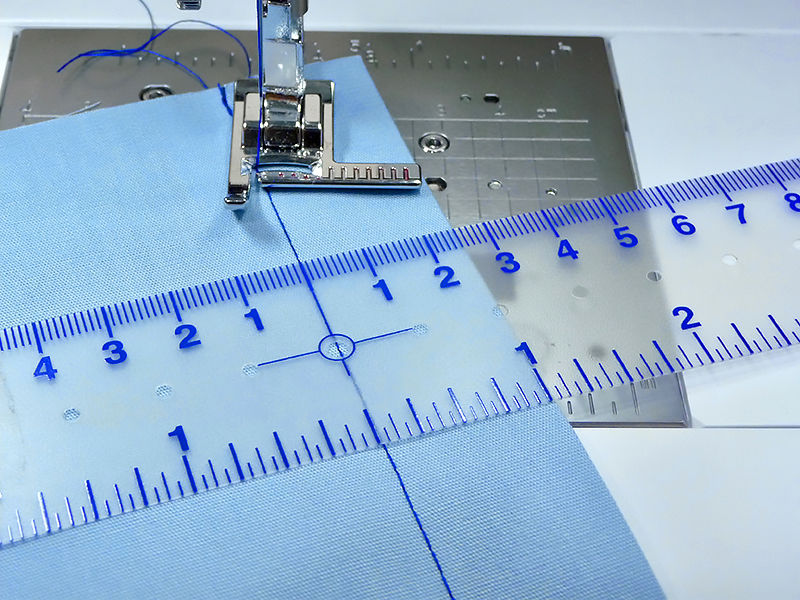
Measure the distance you need by using a ruler to calculate space between the position of the needle and the point where you want to align your fabric on the foot.
Then, line up the fabric with the marked line on the foot and follow that line as you stitch.
To stitch consistently and accurately, be sure to keep your eye following the edge of the fabric and the marked line as you sew.
How to use a stitch guide foot for accurate stitching
Here’s how you can use your stitch guide foot to stitch your next piece more accurately.
- Sew a ⅜-inch seam
- Top stitch a 1-inch hem
- Top stitch the last row of flat-felled seam
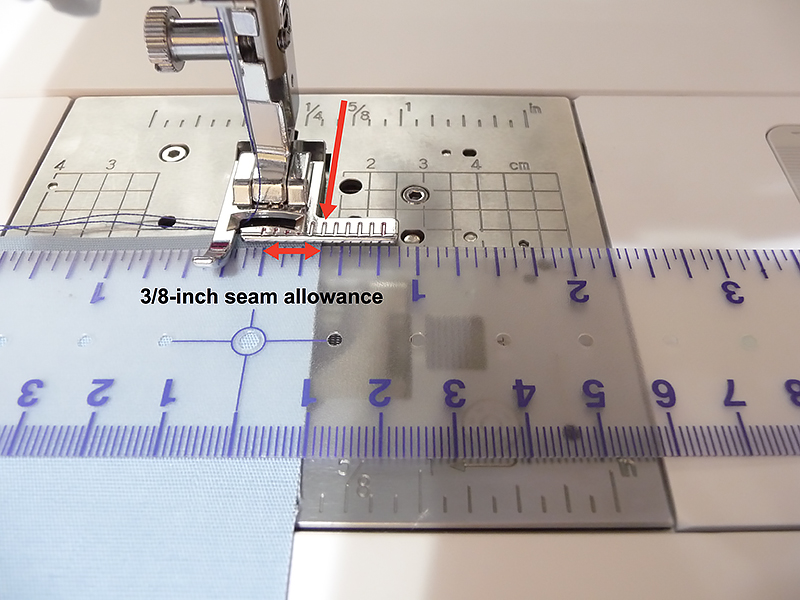
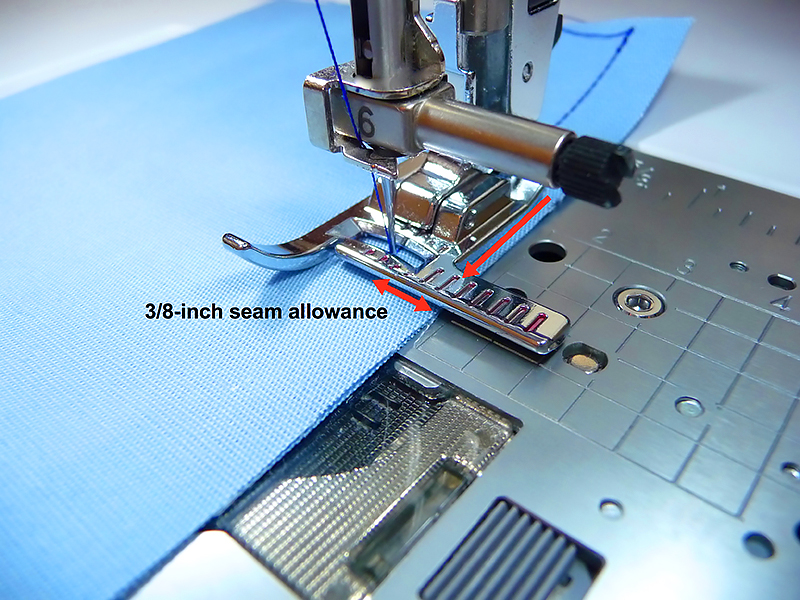
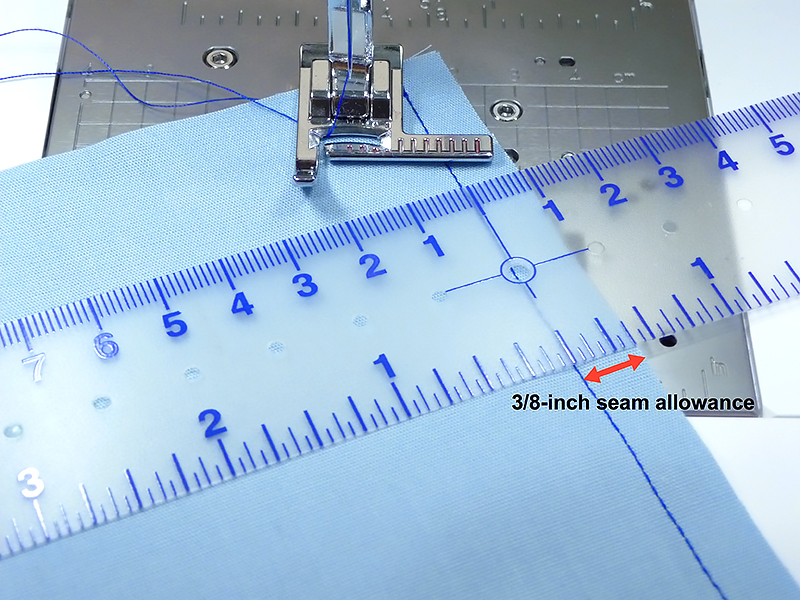
To sew an accurate 3/8-inch seam, use a ruler to measure the distance from the needle in the center position to the grooved line measuring 3/8-inch from the needle.
Line up the raw edge with the grooved line to sew. See Figure #2a, Figure #2b, and Figure #2c.
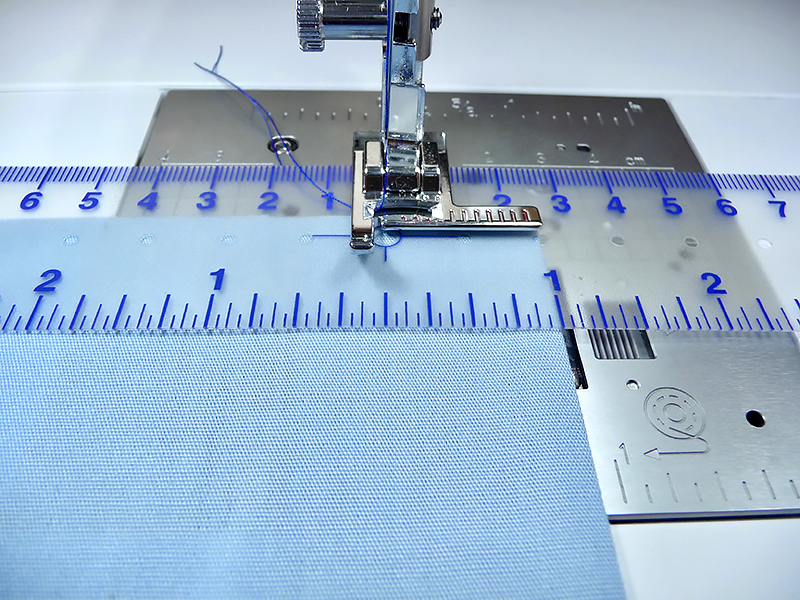
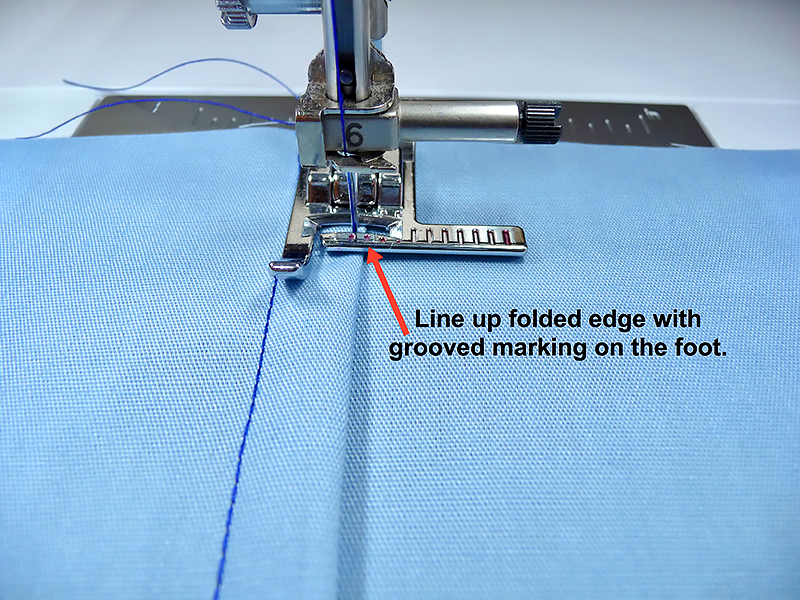
To top stitch a 1-inch hem, clean finish the raw edge of the hemline, then turn and press a 1 1/8-inch hem to the wrong side.
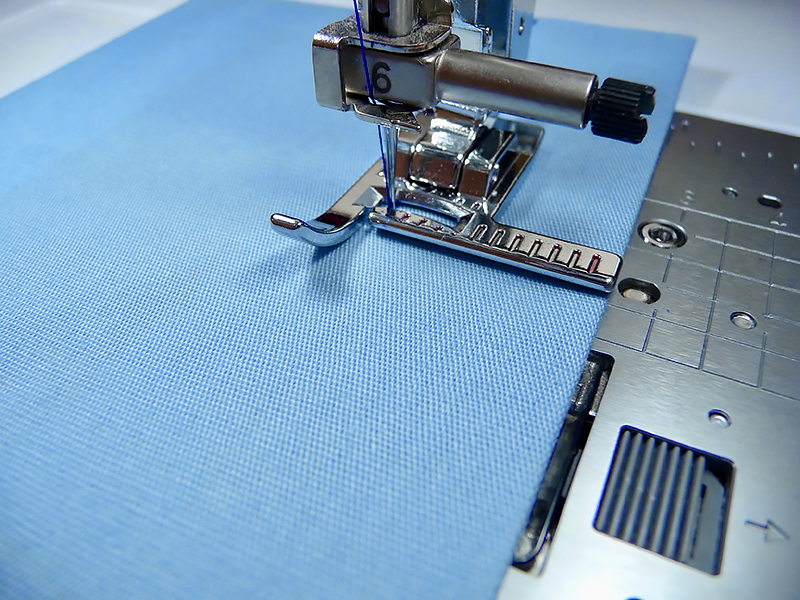
With the needle in the center position and the fold of the hem along the edge of the foot, you’ll see that it measures 1-inch.
Line up the folded edge of the fabric with the outside edge of the foot to stitch the hem. See Figure #3a, Figure #3b, and Figure #3c.
You can also use this foot for help with topstitching the final row of a flat-felled seam. Want to see how you can do it? Just see Figure #4.
What does a stitch guide foot do?
A stitch guide foot on a sewing machine is a screw-on accessory that allows you to sew fabrics with accuracy. It’s also sometimes referred to as a walking foot or a stitch presser foot.
The “foot” features an incrementally marked ruler to help you line up the edges of your fabrics, ensuring straight lines, even spacing, and consistent seams with one layer or multiple layers of fabric during your project, including quilting.
You can often buy the part individually, as with the Brother SA160 Stitch Guide Foot, or you can purchase one as part of a presser foot set for your sewing machine.
What is the difference between a stitch guide and an edge guide?
Stitch guides and edge guides are both types of sewing machine presser feet.
A stitch guide, such as a stitch guide presser foot, is generally used for topstitching.
An edge guide sewing foot (sometimes called a hem foot or an edge-joining foot), is used closer to the seams or along the edges of the fabric.
A top stitch is usually about a quarter inch from the edge, while an edge stitch is closer to an eighth of an inch away.
Your new favorite accessory: the Brother Stitch Guide Foot
The Brother Stitch Guide Foot deserves a spot in every sewer’s kit, whether you’re using it in place of a J foot or you want to stitch curved edges.
However you plan to use this accessory, you can rest assured that it will help you sew more accurately and smoothly when you take on your next project.


