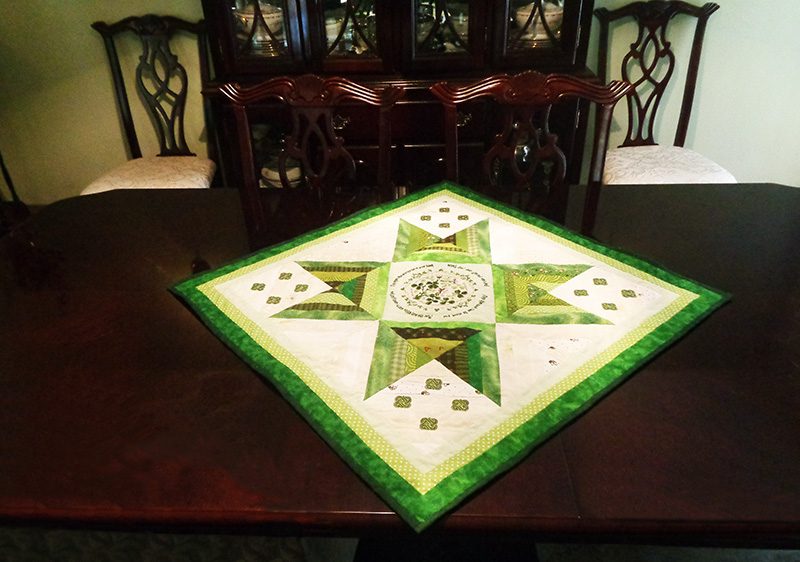
An Irish Blessing Quilt
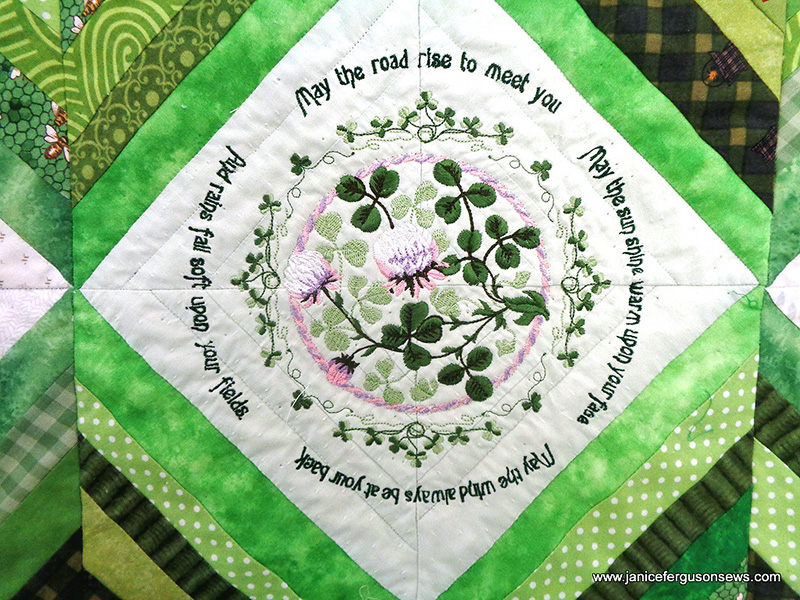 March is National Quilting Month! This string quilt is a perfect introduction to this classic needle art as well as a great project for veteran quilters ready to have some quick and easy fun. It will also make a dent in their scrap bag, always a worthy goal. March is also when St. Patrick’s Day is celebrated. With green strings and the Irish blessing, this counts as holiday quilt. Use your Brother embroidery machine to embellish the center with a St. Patty’s day design and the corner blocks with Celtic knots. Sláinte!
A string quilt may give the illusion of a complicated pattern, but by splitting the block between dark and light scrap strings of various widths, no matching is required. This offers limitless design options. Use your Brother walking foot or MuVit foot
March is National Quilting Month! This string quilt is a perfect introduction to this classic needle art as well as a great project for veteran quilters ready to have some quick and easy fun. It will also make a dent in their scrap bag, always a worthy goal. March is also when St. Patrick’s Day is celebrated. With green strings and the Irish blessing, this counts as holiday quilt. Use your Brother embroidery machine to embellish the center with a St. Patty’s day design and the corner blocks with Celtic knots. Sláinte!
A string quilt may give the illusion of a complicated pattern, but by splitting the block between dark and light scrap strings of various widths, no matching is required. This offers limitless design options. Use your Brother walking foot or MuVit footto quilt and bind it, and you will have an attention-grabbing seasonal table topper or wall quilt for your home.
Requirements
- Sturdy muslin or other firmly woven neutral scraps, 16 squares 7x7”, heavily starched and pressed
- Fabric for backing 36 x 36”
- Scrap Strings: 1.25” – 2” wide, solid light green for 4 center half blocks and 10” circle label, various light, bright and dark green for half blocks, neutrals for half blocks.
- Borders: Cut on lengthwise of grain (4) light green 27” x 1 ¼” (4) various green 1 ½ “, (4) dark green 2”
Note: See steps #8-10 below to determine length, but add a few extra inches for security and ease in handling.
- Binding Strips: Best cut on lengthwise of grain- 4 darkest green 2 ½” strips x approximately 35”
- Crib size light or medium weight cotton batting
- Brother sewing/embroidery machine
with 4x4 and 5x7 frame or larger - Notions: Painters masking tape (for taping backing fabric to surface), quilting thread, hand sewing needle (I had to resort to a curved needle as my backing was so taut), embroidery thread, cotton sewing thread, monofilament thread for machine quilting, water soluble marking pen, Brother SA540
Lightweight Water Soluble Stabilizer (use two layers), optional: basting spray - Thread: Sewing, embroidery, monofilament for machine quilting, hand quilting thread for basting
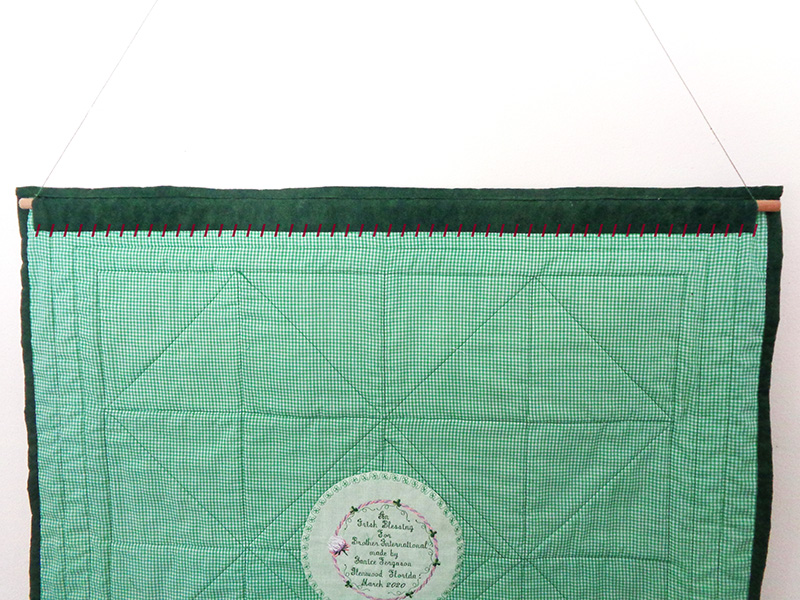
- Optional: (1) darkest green 4” x approximately 29” for sleeve, ½ dowel rod approximately 29” in length
- Irish Blessing Design and 4 Celtic Knot designs from San Francisco Stitch Company
Disclaimer: Irish Blessing and 4 Celtic Knot designs are from the San Francisco Stitch Company and Brother International Corporation makes no representation or warranties regarding this product.
Graphs:
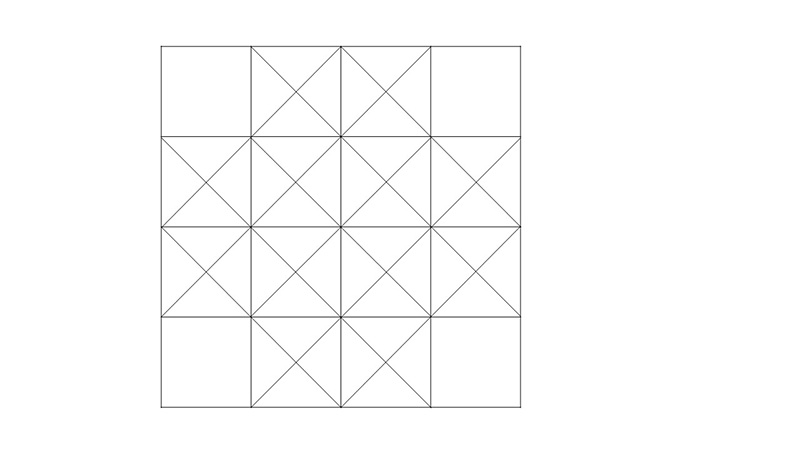
- Image 2: downloadable blank graph for your own designs
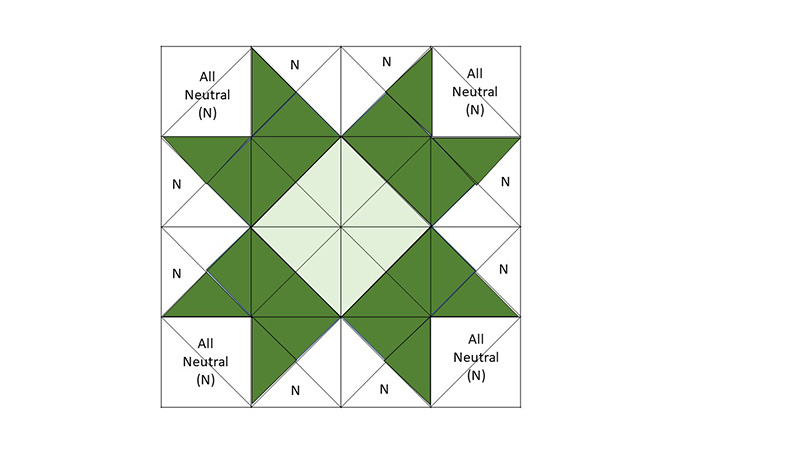
- Image 3: pictured quilt graph (see below)
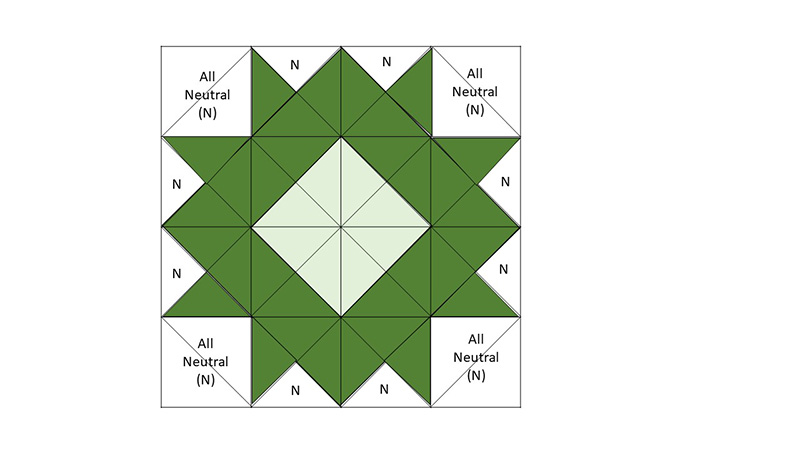
Suggestions before you begin:
A. Select a basic color palette. For the dark half of the blocks, I chose medium to dark greens. For the light side, I chose neutrals from white to ivory with touches of yellow. A single very light green was used for the center. B. Use a sturdy fabric for the foundation blocks, starched and pressed until quite stiff. The strips are sewn on the diagonal so the firmness will help prevent distortion of the foundation block. C. Cut or tear strips from 1-2” wide. Keep the strip width proportional to the size of the block. For larger blocks using this same technique, wider strips could be used. Press strips and hang on 3 no-slip hangars, 1 for dark green, 1 for very light green and 1 for neutral.Note: Strips needn’t be cut or torn on straight of grain. Even bias strips work but are easiest to handle if the scrap is starched and pressed before cutting.
D. Pay close attention to the layout diagram or make your own. See downloadable diagrams above.
E. Write the block number and the color layout on each block. Sew on the right side but rewrite the block number and info on the wrong side, as the sewn strips will cover the number.
F. Put a safety pin at the top of the quilt for ease in lining up the blocks, positioning the embroidery and placing the borders. This is very important.
G. Sew the first strip across the diagonal center with a ¼” seam allowance. Other piecing seam allowances can vary.
H. Use a wider strip for the last on the block. Otherwise, when sewing blocks together, you will have bulky seams against one another, especially where four blocks meet.
I. Vary the width of the strips. In my humble opinion, this makes for a more interesting quilt block. The width of the strip can be varied by using a wider or narrower seam allowance.
J. Use up those partially filled bobbins for both needle and bobbin thread. I enjoyed emptying many partial bobbins without wasting thread.
K. Use slip-free hangers to store and exhibit your strips. Previewing and selecting colors and widths is much easier when all are displayed.
L. Open the quilt batting and lay it flat to relax for as much as 24 hours.
Instructions
Seam Allowances are ¼” except when indicated otherwiseNote: The first two diagonal strips of each block are joined with ¼” seam allowance. Remaining strips may be joined with any seam allowance. All blocks are joined with ¼” seam allowance.
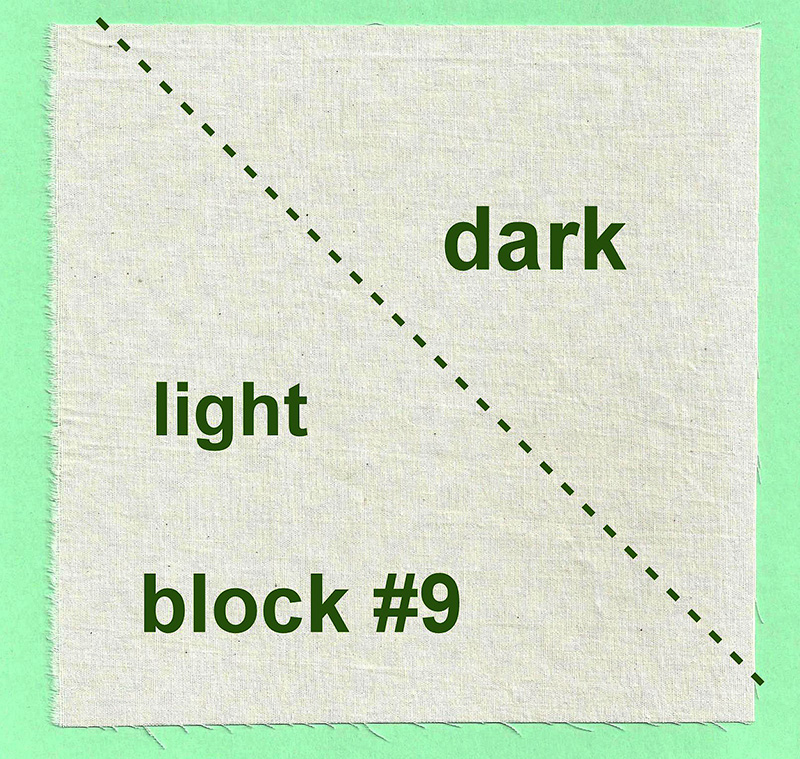
1. Draw a line ¼” from diagonal center on the first and each subsequent 7” square. With a pencil, lightly mark each side of the line as dark or light. Then record the block number on the right and wrong side.
 2. Stack the first two strips with raw edge against the drawn line. Stitch with ¼” seam. This puts the seam precisely at the center diagonal.
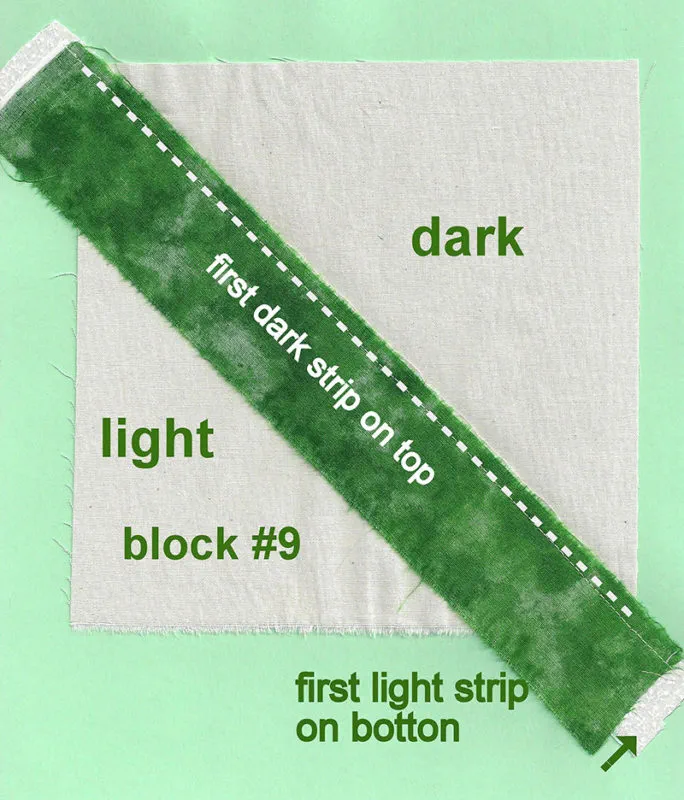 3. Press the seamed stacked strips as sewn then fold second strip open and press.
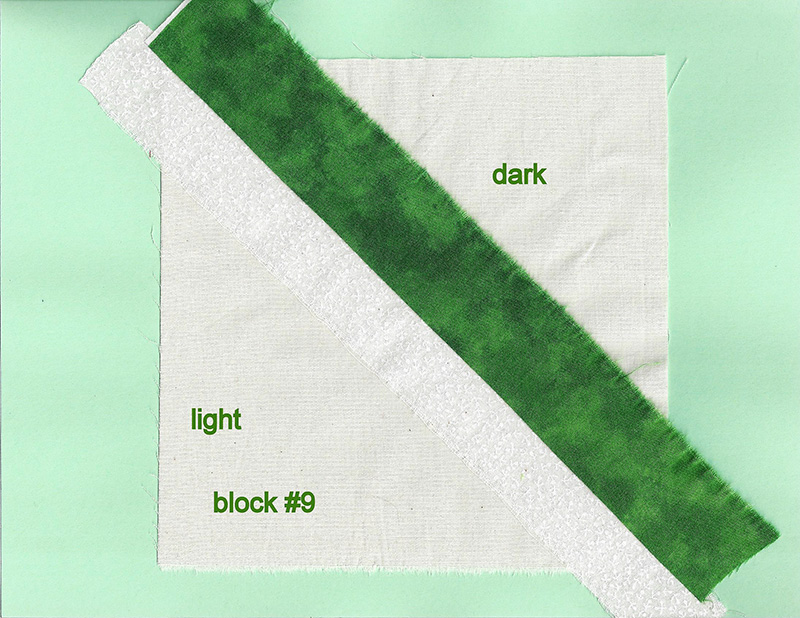 4. Continue adding strips to each side until the 7” square is covered, pressing each strip flat before adding another. Remember to make the corner strips wide, ideally 1 ½” to 2”.
Note: I chose to use the same green in the same size as the first string for 4 blocks to create a frame for the embroidery. Purely optional, as is almost everything with string quilts. What’s not to love about this block design?
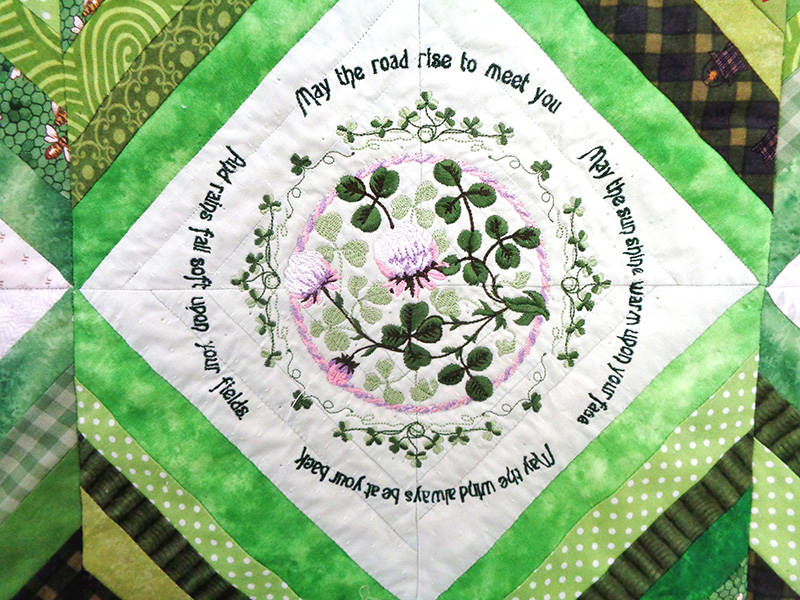 5. Square up blocks to 6 ½”, maintaining the corner-to-corner diagonal.
Note: It is helpful to press each block and then baste the outer edges within the ¼” seam allowance. This keeps the edges in place when joining the blocks together.
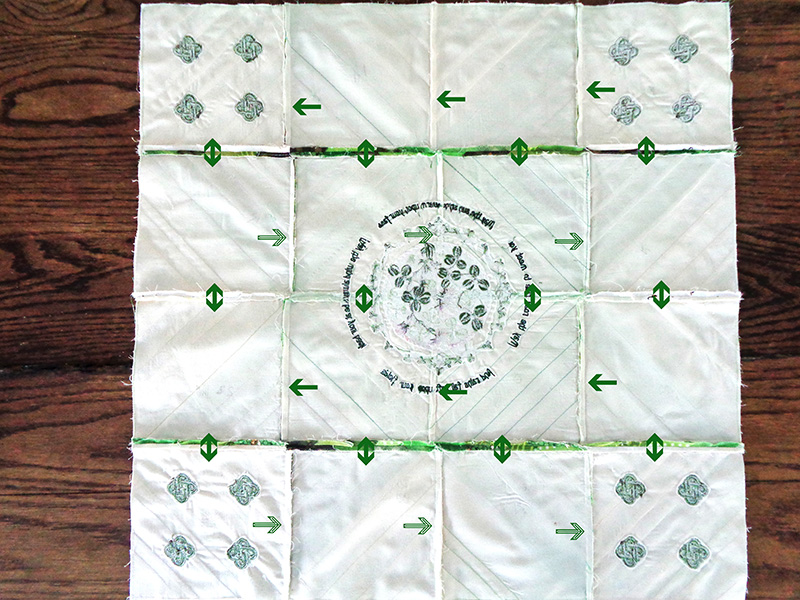
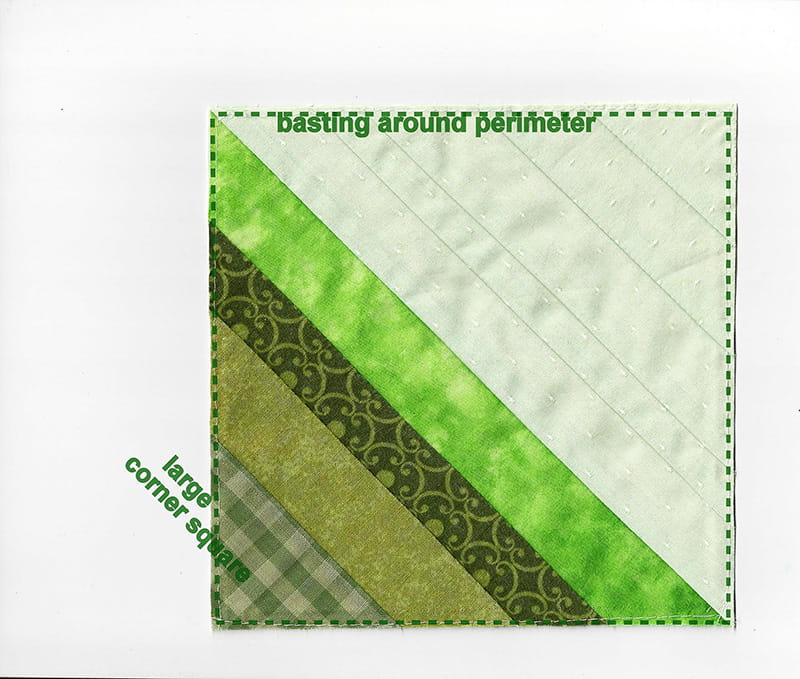 6. Join each row of blocks with ¼” seam allowance. Press seam allowances in rows 1 and 3 to right. Press seam allowances in rows 2 and 4 to left.
7. Join row 1 to row 2, then row 3 to 4. Finally, seam row 2 to row 3 creating the 16-block square. Press row seams open to reduce bulk.
Embroidery
8. Load the Irish Blessing design to machine. Hoop 2 layers of Brother 540 Lightweight Water-Soluble Stabilizer and embroider the design in the center solid light green area. It can be done in one hooping in THE Dream Machine. See image 8. 9. Load 4 Celtic Knots to machine. Hoop 2 layers of Brother 540 Lightweight Water-Soluble Stabilizer in the 4x4 frame and embroider the design in the center of the 4 solid neutral corner blocks.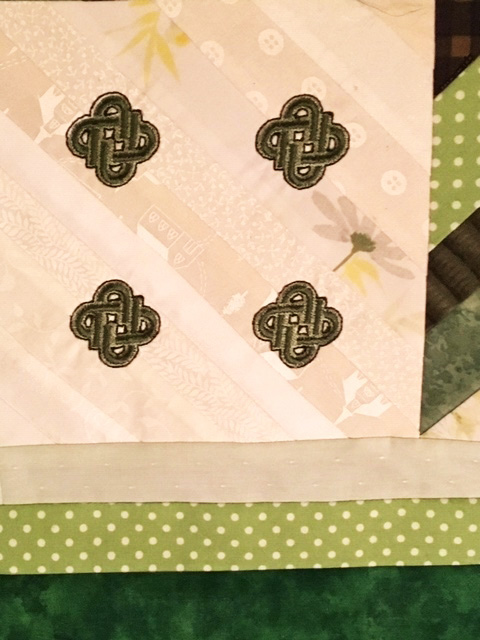 10. Remove as much stabilizer as possible.
Note: Soak if desired then let dry. I simply trimmed very closely and left the bits remaining in place.
11. Measure the quilt’s vertical center. Add the first narrow side borders matching that measurement. But DO NOT CUT THE BORDER STRIP TO THAT LENGTH.
Note: Add a mark ½” below the raw edge and match that to the top of the quilt. Measuring from there, make another mark at the bottom to the correct length, leaving any extra inches. Extra quilt or border length can usually be eased in between these marks. If the discrepancy is too great, you needn’t throw out your quilt or remake it! Just add a little more border as needed. Try to make the correction on the next border.
12. Press those borders away from the center of the quilt. Trim away excess border.
13. Measure across the horizontal quilt center including the newly added border. Add top and bottom borders matching that measurement in the same manner. Press border away from center.
14. Repeat this process adding 2 more borders to each side and to top and bottom.
15. Cut and press 36” square fabric for backing. Pull taut and tape to flat surface.
16. Smooth batting over backing then place quilt top over batting.
17. Spray baste spray or hand baste.
18. Attach walking foot or MuVit foot.
Note: The Irish Blessing was hand basted then machine quilted with the wonderful MuVit foot.
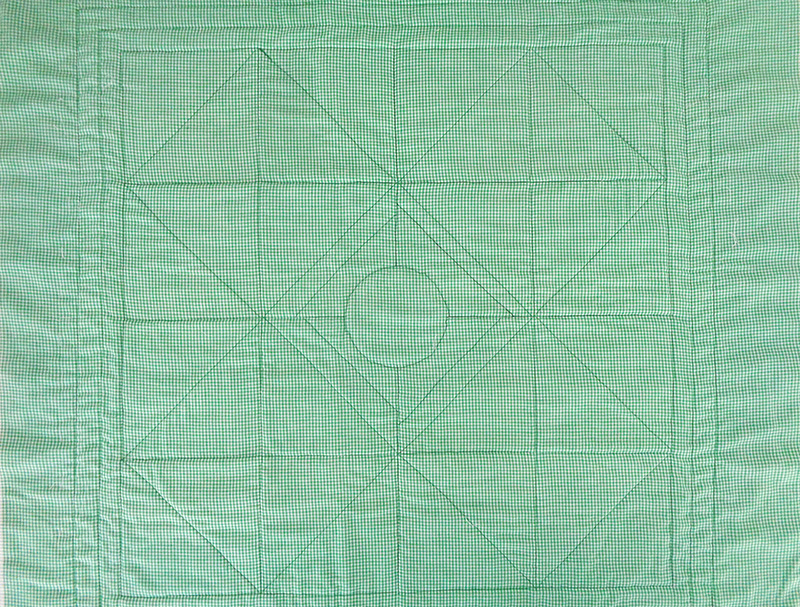
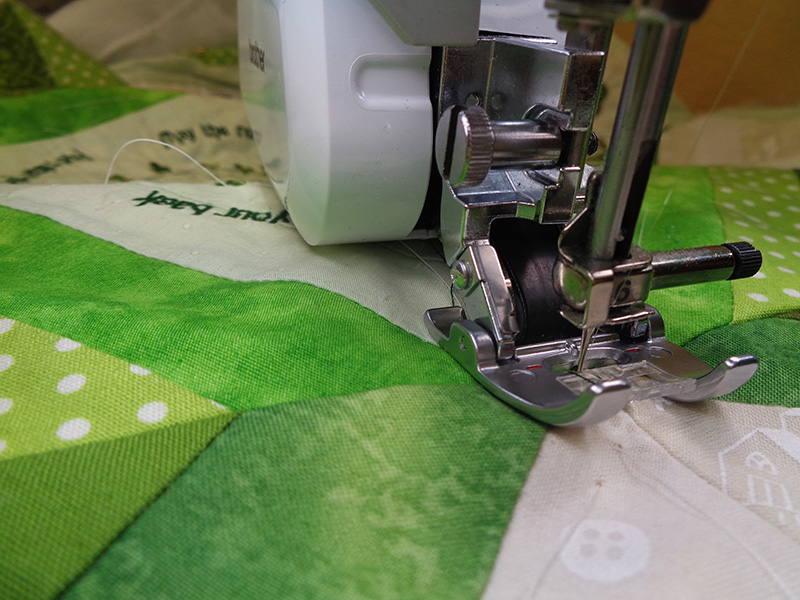 19. Quilt as desired. The Irish Blessing was quilted with monofilament in the needle and green cotton thread in the bobbin.
Label
Every quilt should have a label identifying its name, the maker, the recipient, the location where it was made, and the date. There are those who make it their life’s work to search for the origins and secrets of quilts. Yours might be one worthy of such an investigation! Give them a break and make a label. I wanted to use the circular design from the Irish Blessing. Here is how I went about it. The lavender and pink wreath were extracted, small clovers were inserted into the empty areas previously covered with large clovers, and my text was added. From here on out, this was a workaround. Just then I simply wasn’t up to thinking hard. You would probably prefer to do it your way because I know there is a much easier high-tech way. 20. Embroidered the design. Marked the center then drew cross hairs with a heat erasable marker. 21. Placed one of my dessert plates with a conveniently pointy design. It matched up perfectly to the N S E W marks on the stabilizer, so I drew a circle with a more visible blue marker. The plate was larger than I wanted the label to be, but I had a fix in mind.
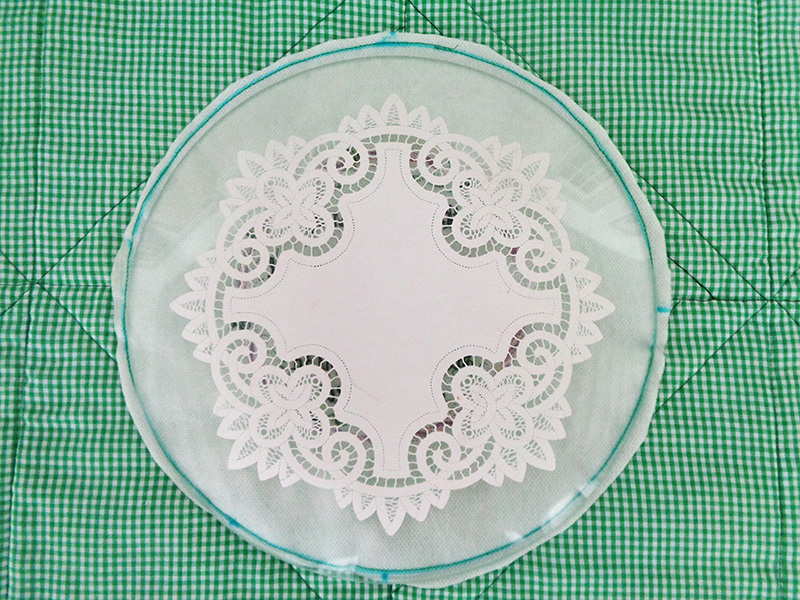 22. Stacked the embroidery face down on lining which matched the quilt backing. Pinned it in place.
23. Attached my Brother MuVit foot,
22. Stacked the embroidery face down on lining which matched the quilt backing. Pinned it in place.
23. Attached my Brother MuVit foot,a sizable foot for sure. I stitched with the edge of the foot on the line and the needle in far-left position, reducing the size of the circle considerably.
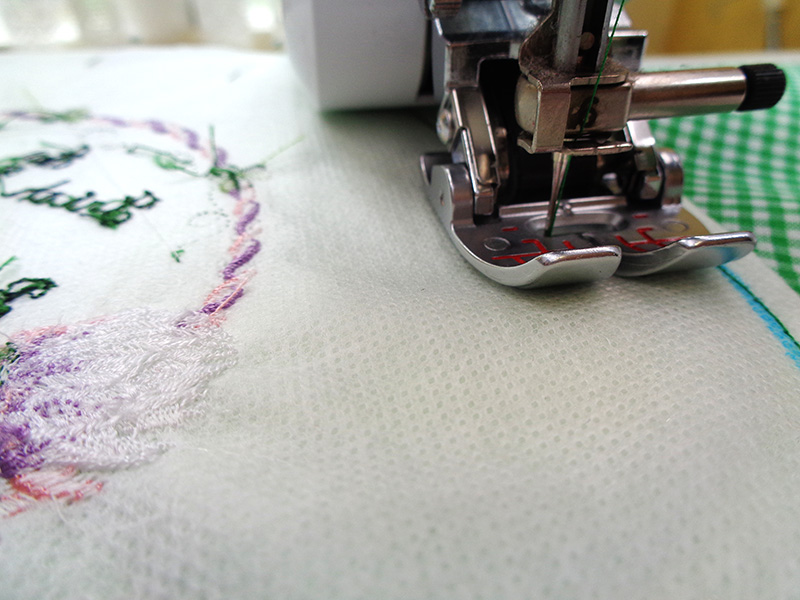 24. Trimmed the stabilizer and backing fabric close to the stitching line. Now I was closer to the size I wanted for the label.
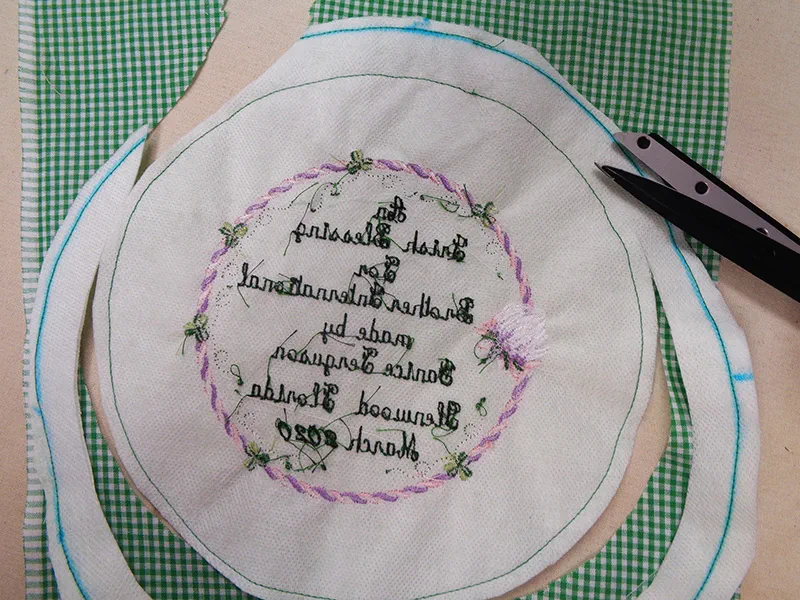 25. Trimmed away most of the stabilizer (more than shown here) and decided not to bother soaking it. There was very little left. Cut an X in the lining so it could be turned right side out.
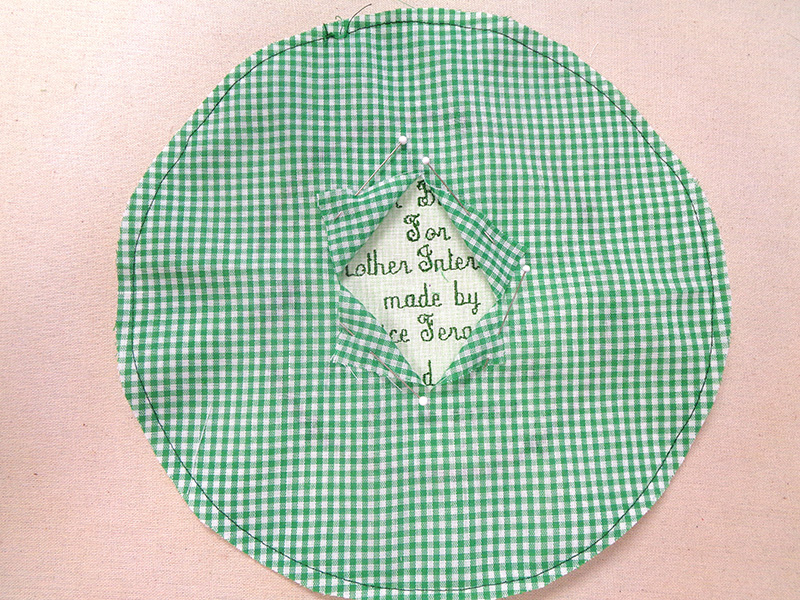 26. Selected character decorative stitch 7-090, a sweet little clover design, perfect for a border. Again, using the MuVit foot,
lining up the edge of the label with the mark nearest the needle opening, the clovers were stitched around the perimeter.
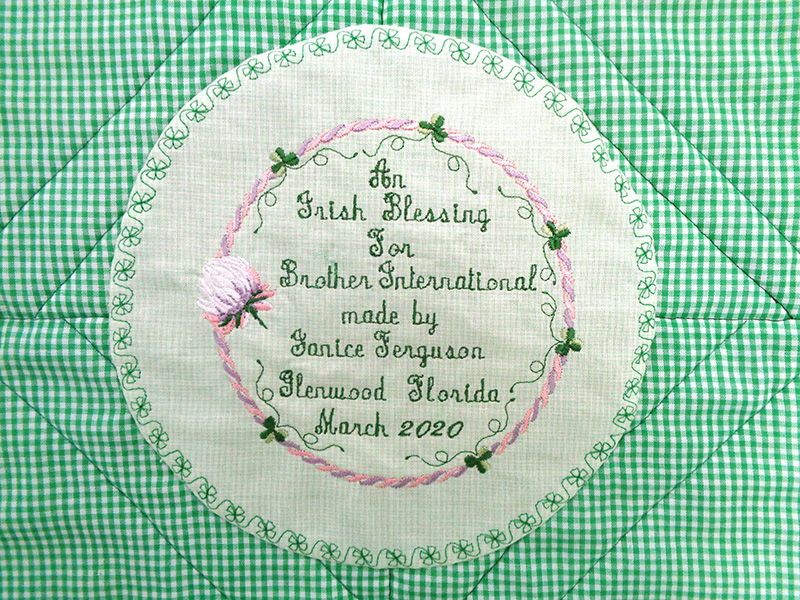 27. Hand stitch the label to the back of the quilt.
Binding
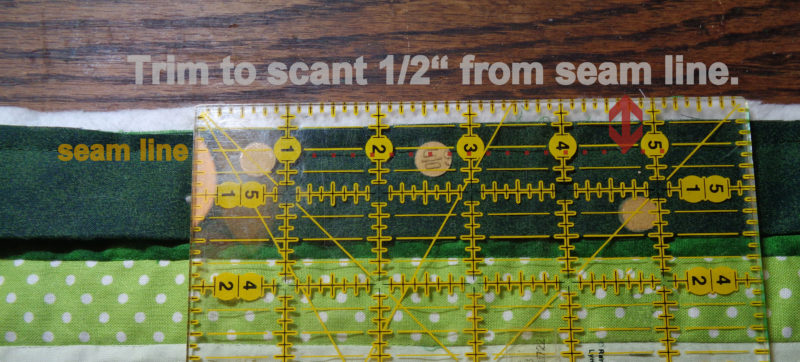
28. Measure the vertical center of the quilt. Press two binding strips in half vertically, rendering strips 1 ¼” by 35”. As was done with the border, mark ½” below the top of the strip and from that mark another at the exact measurement at the bottom. Pin generously with raw edges together and stitch binding in place with ¼” seam allowance. Repeat on opposite vertical side.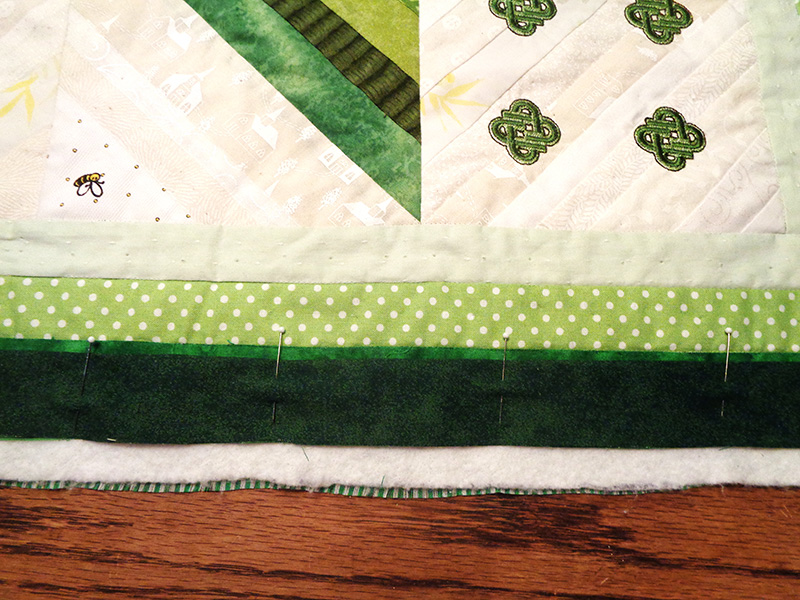 29. Trim vertical quilt edges to a scant ½” from the seam line. This allows for the ½” binding to wrap around. (Legal: I have photoshopped the brand name off the ruler below.)
 30. Press bindings away from quilt center. Trim tails even with top and bottom borders.
31. Wrap binding to back of quilt. Pin generously, making certain that the folded binding edge falls beyond the binding seam line.
32. Thread monofilament in needle. Stitch in the ditch of the binding seam line, catching the binding on the back in the stitching. Repeat on the opposite vertical side. If any binding was not caught in the stitching, just hand whip it in place.
33. Measure the horizontal center of the quilt, including the bound sides. Bind the bottom of the quilt first.
34. Add 1 ¼” to wrap around the raw edges on either side. Mark a generous 5/8” from the top of the folded binding piece. This should fall precisely where it will meet the edge of the side binding. Pin, stitch with ¼” seam as before.
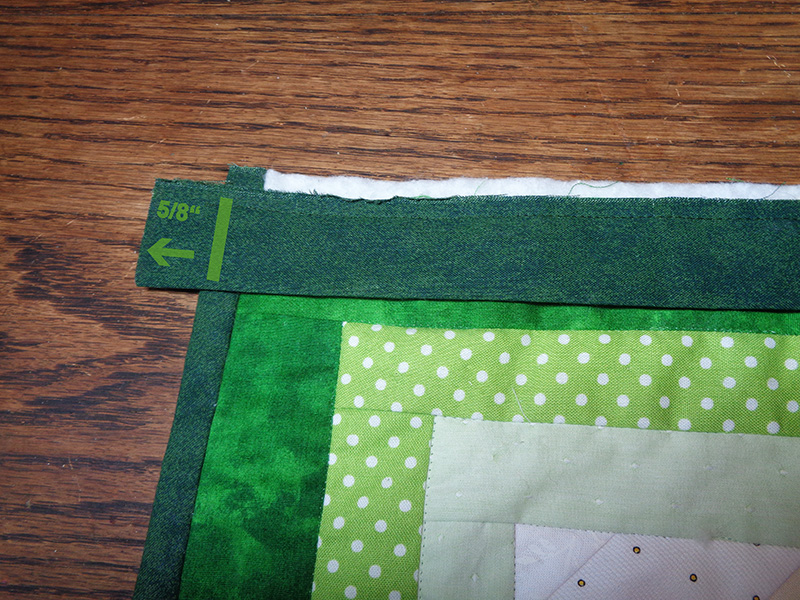 35. Trim horizontal quilt edge to a scant ½” from the seam line as was done on the sides.
36. Replace monofilament thread with cotton. Stitch the binding to the quilt with ¼” seam allowance. Wrap the tail ends around to the back, pinning then stitching them in place.
37. Trim each of the four corners to reduce bulk.
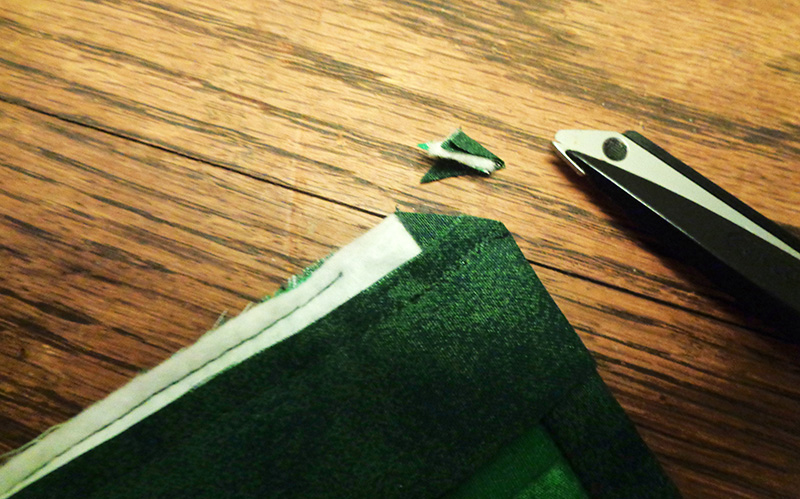 38. Pull binding up away from the quilt, press the seam, and wrap the binding to the back. Tuck the tail ends under and pin in place. Make certain that the folded binding edge overlaps the seam line.
39. Replace cotton thread with monofilament to stitch in the ditch, as was done on the sides.
Sleeve
Note: This is optional for the top of the quilt. It slips under the top binding, so it is included with these instructions.
40. Starch and press the 29” sleeve piece. Finish each end with a ¼” zig zag. Press a 3/8” hem in each end and stitch in place.
41. Apply the top binding as the bottom, using the same center horizontal measurement, pinning it to the top border, trimming the batting and backing a scant ½” from the binding seam line.
42. Join to quilt with ¼” seam. Wrap end tails around the back.
43. Center the sleeve and place it against the raw edge at the top of the quilt. Pin in place. Stitch above the binding’s ¼” seam line. Check the other side of the quilt to make certain that the stitching has not strayed below that line.
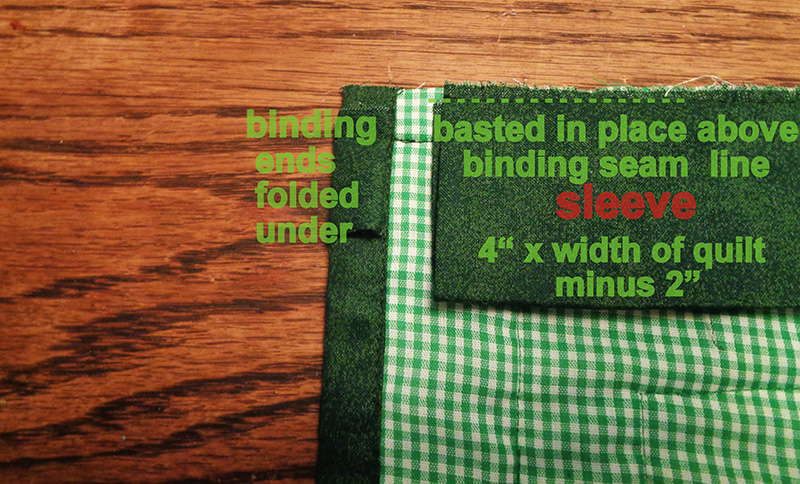 44. Wrap the binding around to the back, rethread with monofilament, stitch in the ditch, and the quilt is bound. Hurrah!
45. Hand whip the sleeve to the backing. A wooden dowel into the sleeve, tie ribbon or some decorative thread—I used dark green perle cotton because it’s what I had on hand—over the ends and hang the quilt.
 46. Or… you could use it as a table topper. Now why didn’t I think to pull my pretty green goblets out of the china cabinet to add a little interest to this image? I must have been thinking about cabbage and corned beef.
