Appliqué with Embroidery: New Baby Announcement
New babies are something to celebrate! Learn how to design a commemorative baby announcement using our Brother Free Design of the Month and the Brother Simply Appliqué software program. This combined design features an adorable font called Wishes, plus an easy to stitch appliqué shape included in the Simply Appliqué™ software program. You’ll learn a lot of basic commands in this software by working through this project. You may want to consider this idea for other special occasions such as weddings, anniversaries, graduations, etc., etc., etc.!
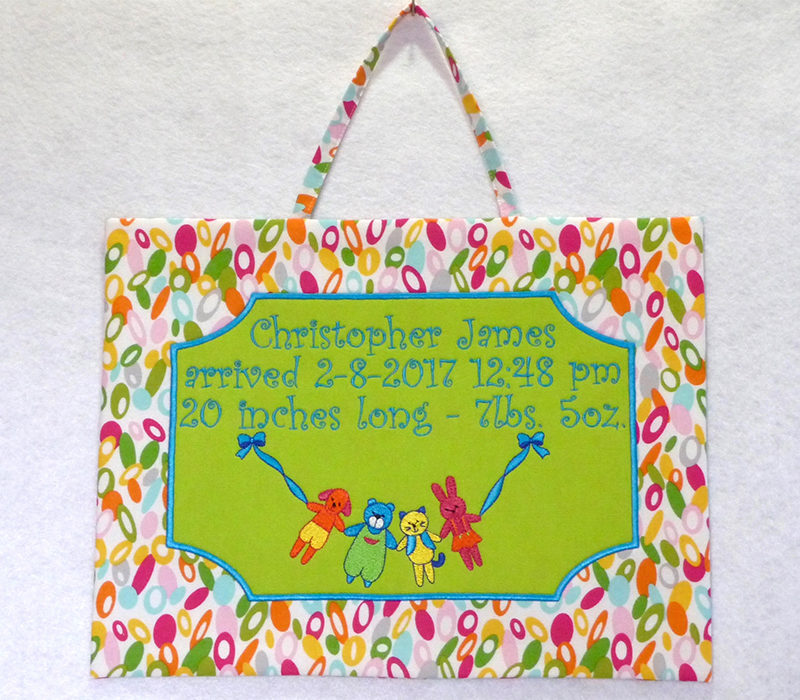
Materials and Supplies
- Brother Sewing and Embroidery Machine
- Brother embroidery thread and bobbin thread
- Brother Free Design of the Month: Animal Garland
(<--click here="" to=""> - Simply Appliqué software program
- Basic sewing notions, including good quality sewing thread and curved tip scissors for trimming appliqué.
- Temporary adhesive spray made specifically for embroidery, for securing fabric appliqué.
- One piece of cotton print 14” long X 20” wide for Front of Wall Hanging.
- Thin fusible fleece 14” long X 20” wide for stabilizing Front of Wall Hanging.
- Two pieces of cotton print 11” long X 7 ½” wide for Back of Wall Hanging.
- One piece of light colored coordinating cotton 8½” long X 12½” wide for embroidered appliqué.
- Lightweight fusible interfacing 8 ½” long X 10 ½” wide. Fuse the interfacing to the wrong side of appliqué piece.
- One strip of fabric 12” long X 1 ½” wide for hanging finished piece.
Note: The featured free design fits within a 5 –inch X 7-inch hoop size. An 8-inch X 12-inch hoop size is used for the design combination for a wall hanging finishing at 10” long X 13” wide. You can opt to create a design for a smaller sized hoop or consider multiple hoopings for a larger design size.
Steps to Create Your Wall Hanging
Setting up the Design in Simply Appliqué
- Take a look at the original colors for the design. Remember that embroidery is all about customizing so feel free to change the colors to coordinate with your fabrics and color scheme for the baby’s room. See Figure #1. [caption id="attachment_5758" align="aligncenter" width="800"]
- Download and save the free design. Open the Simply Appliqué software program. Create a design combining an appliqué, lettering, and the animal garland design following these steps:
- First set the background color to closely match your appliqué piece by clicking on the Background icon and selecting a basic color. Customize color as desired using tools in this window. See Figure #2. [caption id="attachment_5759" align="aligncenter" width="800"]
- Click on the Hoop icon and choose the 12” X 8” hoop. See Figure #3. [caption id="attachment_5761" align="aligncenter" width="400"]
- Click on icon shown below to view entire hoop in the available window. Take advantage of the zoom and pan icons to view areas of the design as needed.
- Click on the Add Design icon. Select the Applique shapes folder to add appliqué shape No. 131. Click and drag within the hoop to form shape, beginning at the center of the left side of the hoop, and then clicking and dragging until the line is straight and the shape is close to the hoop size. Release the curser and the shape will generate on the screen. If your shape is not satisfactory simply click un-do and repeat the process until you have a straight and even shape.
- You can re-size and move the shape later on. See Figure #4a and #4b. [caption id="attachment_5778" align="aligncenter" width="800"]
- To make more room for the lettering click on the second color in the sequence view, and then click delete to remove this outline. See Figure #5. [caption id="attachment_5762" align="aligncenter" width="400"]
- Click on the shape and re-size by dragging any of the handles shown as black boxes, adjusting until the shape is scaled to fit inside the hoop. Click on the Arrange Tab and click center. See Figure #6. [caption id="attachment_5765" align="aligncenter" width="800"]
- Click on the Normal Text tool from the Home tab. Click inside shape, near the area you want to add text. Select the Font style from the drop down menu in the Properties box, choose Wishes or another font and type your lines into the text box. Use the enter/return key on your keyboard to create each additional line of text. See Figure #7. [caption id="attachment_5766" align="aligncenter" width="800"]
- To move selected text, hover and slide curser over it until the hand appears, then click and drag to adjust the position. See Figure #8. [caption id="attachment_5767" align="aligncenter" width="800"]
- Finish the design combination by clicking on the Simply Appliqué™ program icon. Click Merge. Open the free design from your saved location. See Figure #9. [caption id="attachment_5768" align="aligncenter" width="800"]
- Click and drag as you did before, to position design inside the shape. Adjust design parts as necessary, change colors if desired, and then save the design to take it to your machine.
- Fuse fleece to wrong side of piece cut for front. Hoop fabric in 8” X 12” hoop.
- Stitch step one of the appliqué. This creates a placement outline.
- Cover the outline with your interfaced appliqué fabric, using a very light spray of adhesive to keep it in place. Stitch step two.
- Trim appliqué fabric close to the stitched line using curved tip scissors. See Figure #10. [caption id="attachment_5780" align="aligncenter" width="800"]
- Stitch step three to cover raw edges with satin stitching. See Figure #11. [caption id="attachment_5772" align="aligncenter" width="800"]
- Embroider remaining design parts. See Figure #12. [caption id="attachment_5775" align="aligncenter" width="800"]
- Remove piece from hoop and press lightly. Trim embroidered piece to equal 11” long X 14” wide. Set machine up for sewing.
- Fold and press 12” long X 1 ½” wide strip so long raw edges meet at the center of the strip and right sides show. Fold in half lengthwise and topstitch close to edge.
- To make a back piece that equals the front, select the two 11” long X 7 ½” wide back pieces. Place matching pieces right sides together. To create a center back seam sew along an 11” edge, leaving 5” open in the middle for turning the wall hanging right side out. See Figure #13. Press seam to one side.
- Pin narrow strip to top edge of back piece, spacing ends 2” from center seam. Layer embroidered piece on top with right sides and raw edges matching. Sew all around using a ½” seam. See Figure #14.
- Clip corners to reduce bulk and turn right side out through back opening. Press. Close back opening with small hand stitches. See Figure #15.
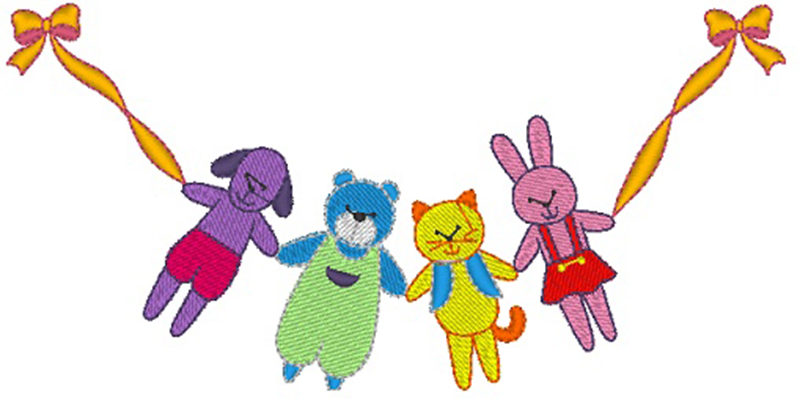 Figure #1: Brother Free Design of the Month Original Thread Colors[/caption]
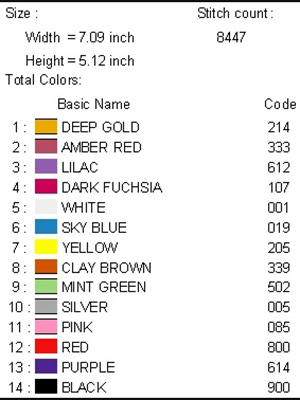
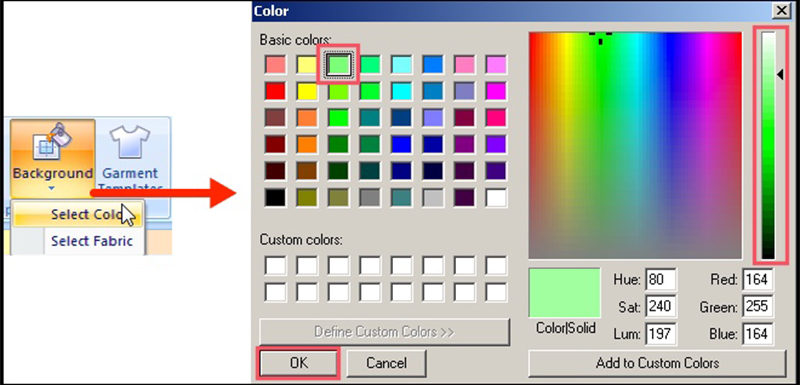 Figure #2[/caption]
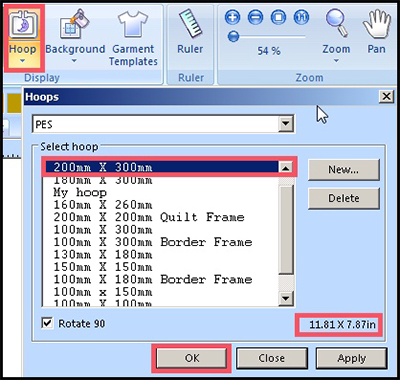 Figure #3[/caption]


 Figure #4a and Figure #4b[/caption]
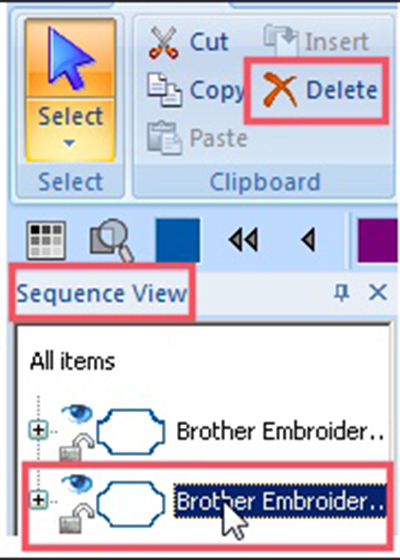 Figure #5[/caption]
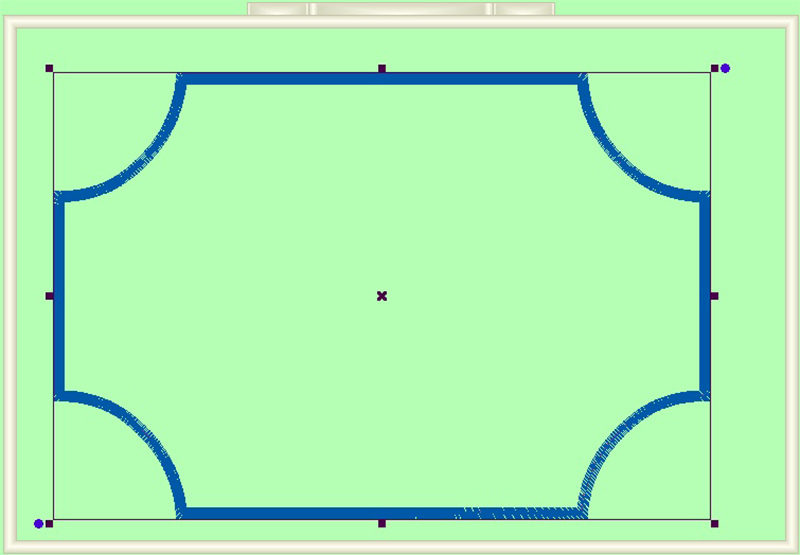 Figure #6[/caption]
Tip: You can also select Hoop> Fit hoop to make the shape as large as possible.
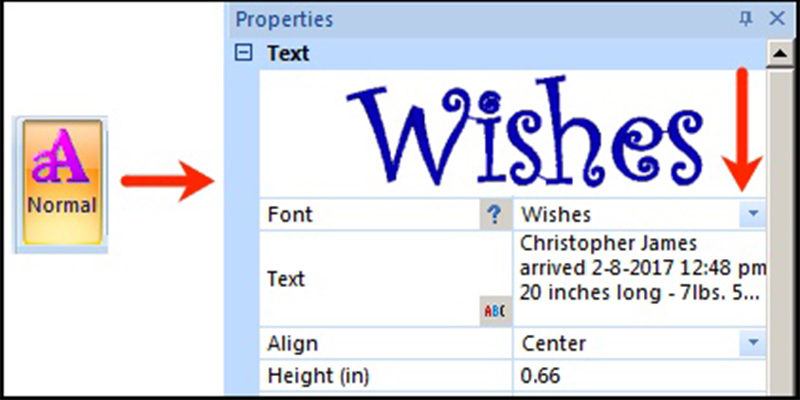 Figure #7[/caption]
Example of text typed into text box:
Christopher James
arrived 2-8-2017 12:48 pm
20 inches long – 7lbs. 5 oz.
Click Apply when finished. You can re-size the font to fit within the frame but be careful to stay within the guidelines set for each font style. If you hover over the font name you will see a box with recommended sizes. If you can’t reduce the size to fit, you need to choose a font that can be sized small enough to fit your frame.
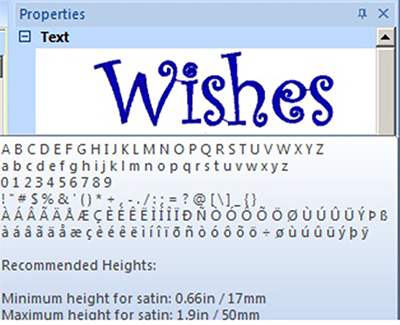
 Figure #8[/caption]
Tip: Read the online manual to learn many more ways you can adjust the text by changing size, spacing, etc. click on the Question mark at the top right corner to access Help. Learn about adjusting design size and changing thread colors as well.
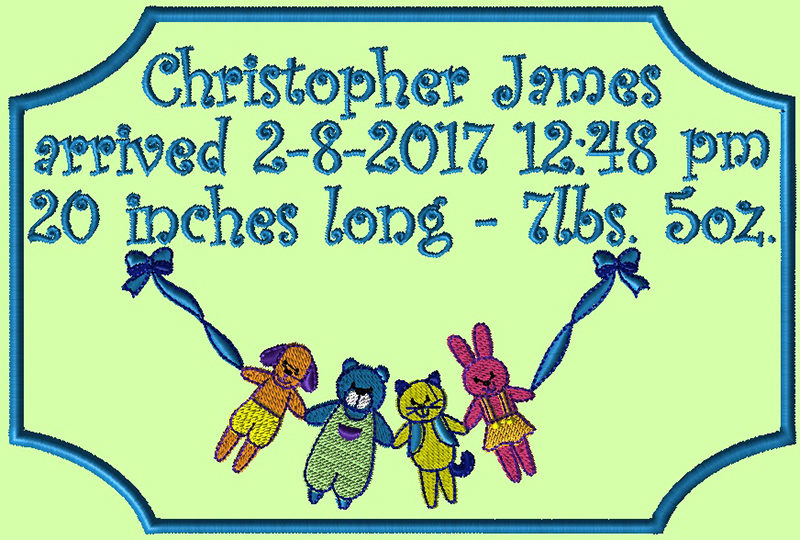 Figure #9[/caption]
Tip: Saving as a BRF allows for future editing of your design but you must also save as a PES format to transfer to your machine.
Embroidering the Appliqué
Embroider the appliqué and the design as follows: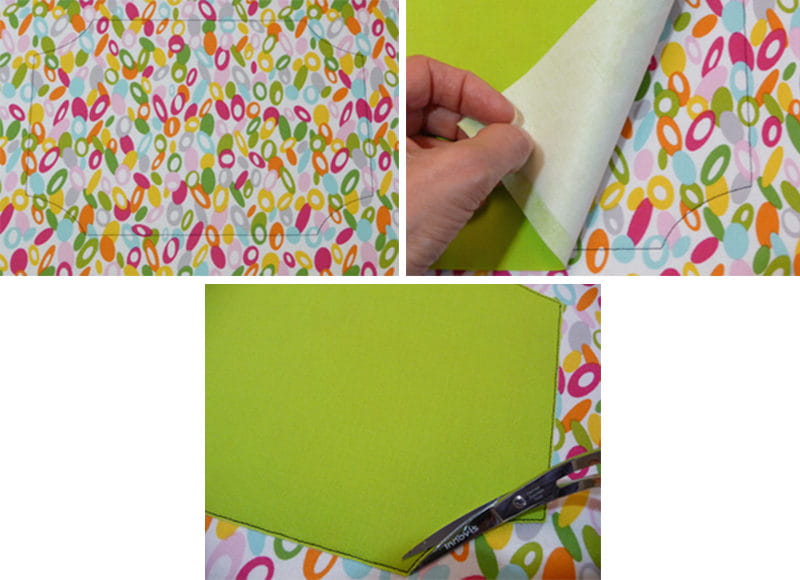 Figure #10[/caption]
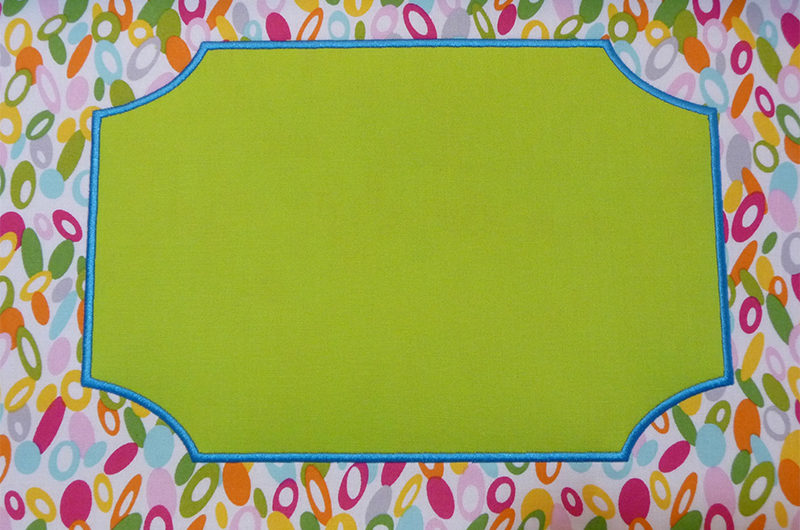 Figure #11[/caption]
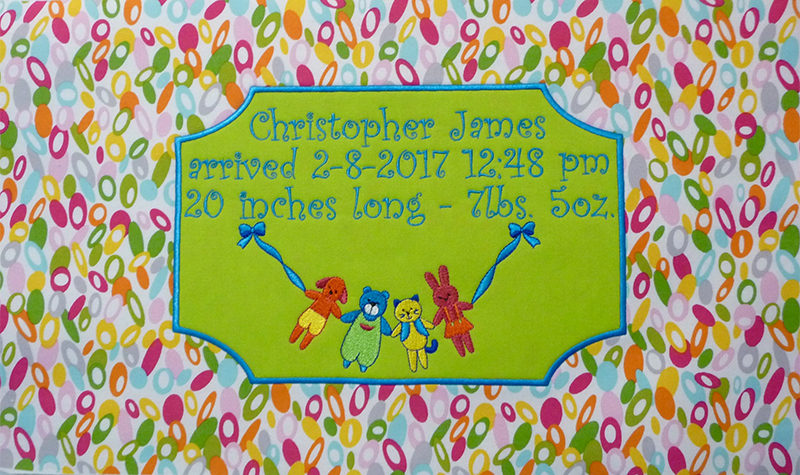 Figure #12[/caption]
Steps to Sew Wall Hanging
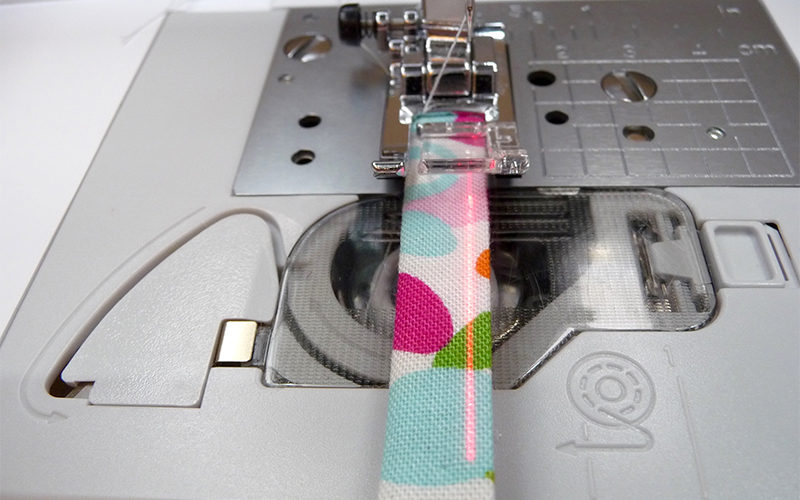
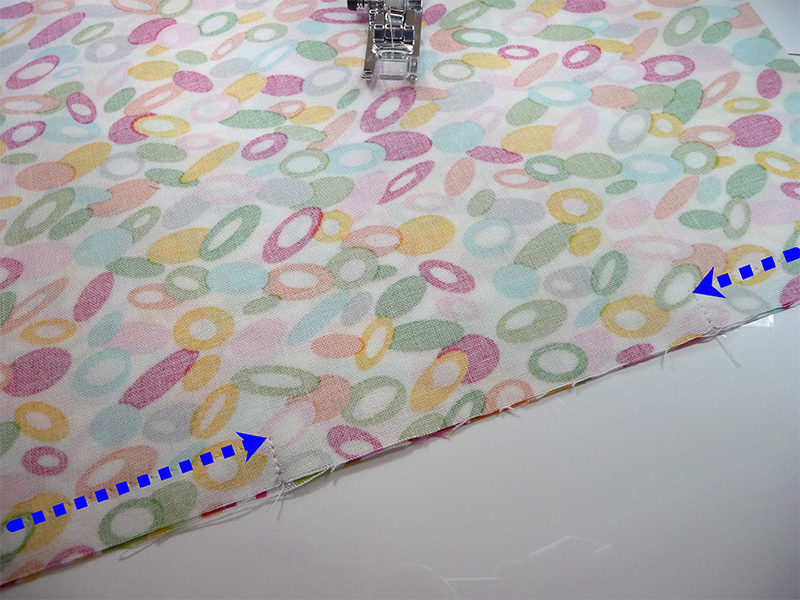 Figure #13[/caption]
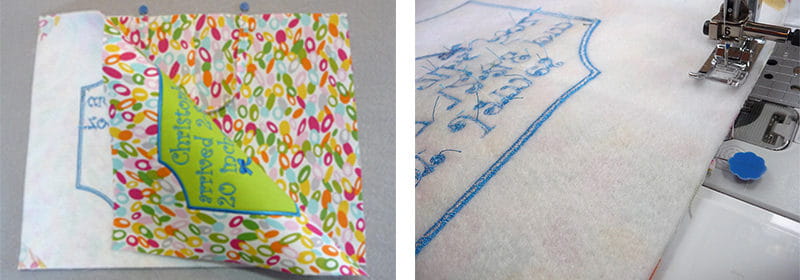 Figure #14[/caption]
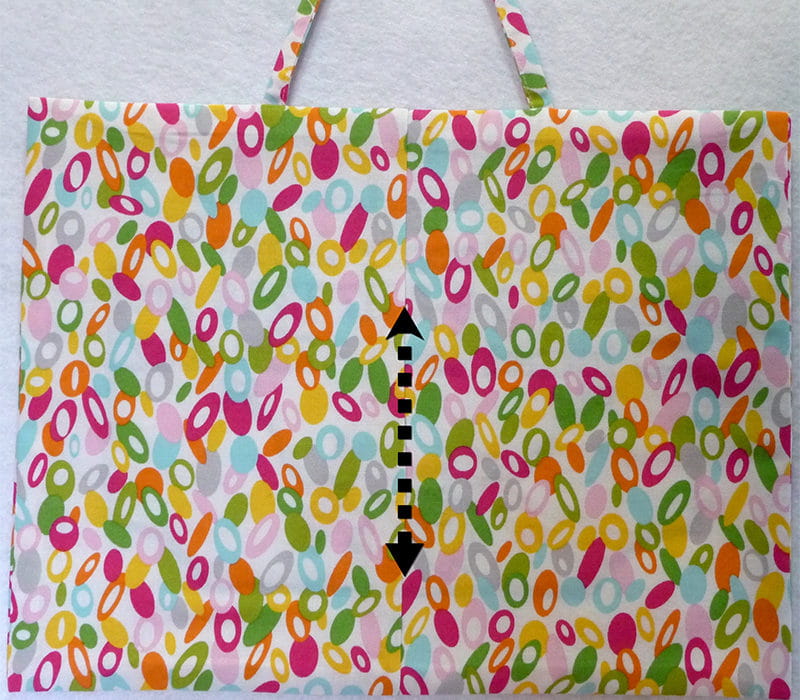 Figure #15[/caption]
You are finished! Enjoy!
