Cool Dad Emoji for Father’s Day
Make your own Cool Dad Emoji and keep Dad’s beverages cool with this quick and easy Can wrap. I love being able to add something made for a gift to make it more personal. A can holder is a fun usable gift that will keep dad’s drinks cool all summer. This is made from a blank foam can insulator that hasn’t been assembled and is usually very inexpensive. They even have sports themed ones now. I will be honest though, for me this was more about the techniques than the finished can cooler. I think you will learn a new few tricks in this post.
Materials needed:
- Purchased Blank Foam Can Insulator – search on the internet for “unsewn blank can coolers”
- 4x4 hoop
- Stabilizer Roll, medium-weight, adhesive tear away - SA5815
- Embroidery thread to match your project
- Embroidery Bobbin Thread
- BES4 Dream Edition Embroidery Software Program with Power Pack
Note: This project can be completed without the Power Pack if you choose a different embroidery design.
Note: There is a video tutorial for the software portion of this blog post. Here are the steps in a nutshell, but for more in depth instruction, follow the video tutorial.
Watch the video here:
[youtube id="3wYgYhN2oEM"]
- Open your BES 4 Dream Edition with Power Pack software.
- Click Create a New Design.
- Click on the Hoop down arrow and choose Select Hoop
- Choose the 100x100mm hoop- 3.94x3.94 inches. This is the 4x4 hoop.
- Click OK.
- At the top of the window, select Add Design.
- Choose Emoji Large from the Folder dropdown menu.
- Left mouse click on Emoji 008-2in.
- Move the cursor to the left side of the design page. Hold the left mouse button down and drag to draw the emoji the size you desire.
- Release the mouse when it is the size you want.
- In the sequence window, locate the outline segment and left mouse click on it.
- The properties for that segment will appear in the Properties window.
- I want this to be a thicker outline, so we need to adjust the width of the Steil Stitch.
- Highlight the current Steil Width and type in a new width. I selected 3.0mm.
- Click Apply at the bottom of the Properties window.
- The next thing we're going to do is remove the eyebrows and eyes from the Emoji.
- In the Sequence View window, click on the plus sign next to the Brown segment to expand that color. This is the color for the eyes and the mouth.
- Hold the control key down on the keyboard and left mouse click on the eye parts in the Sequence View Window. (The last 4 segments.)
- Right mouse click on one of those parts in the Sequence View window and choose Delete.
- You can also press Delete on your keyboard or press Delete in the Clipboard area.
- Now let's add our sunglass Emoji.
- Press Add Design.
- From the Folder dropdown menu, select Emoji.
- Scroll to the bottom of the Emojis.
- Left mouse click on Emoji 164, the sunglasses.
- We need the emoji to fit inside the first emoji, so hold the left mouse button down and drag it across the Emoji.
- Release the mouse when it is the desired size.
- To give my emoji a little more pizzazz, I drew my sunglasses in at an angle. You can draw straight if you prefer.
- Click on the Select tool.
- The sunglasses will automatically be selected.
- Place the cursor over the sunglasses, hold the left mouse button down and drag them into position.
- Release the mouse when they are in the desired location.
- Place your cursor over one of the circles at the side of the sunglasses.
- The circles allow you to rotate the design. Hold the left mouse button down and rotate the design into position.
- Repeat these steps until the sunglasses are in the position you desire.
- Choose the Zoom tool down arrow and then choose To Selection.
- This zooms the sunglasses right into the center of your window.
- If you want different colored lenses for your sunglasses, click on the lenses in the Sequence view.
- Click on a different color tile.
- Since we stacked two layers on top of each other, the yellow is under the gray of the sunglasses.
- This is normally something I would tell you to use the Remove Overlaps function to remove the layer.
- However, I tried it and it didn't work very well for this design.
- Since Remove Overlaps isn't going to work, I can show you a new feature. This technique can be used with built in designs.
Note: It can be used with designs merged or opened by using Convert to Outline, but you will have to choose the correct segment in the sequence window as the parts can get broken down into multiple segments for each color.
- In the Sequence window, select the yellow circle. This is where we need to remove the stitches.
- Click on the Tools tab at the top of the window.
- Click on the Edit Shape tool.
- Right mouse click on the shape outline and choose Add Hole.
- To add a hole in the shape of the sunglasses, we need to draw around the sunglasses just inside the design.
- Begin drawing around the sunglasses, don't worry about perfection. You are creating a hole that no one will see.
- Left mouse click all the way around the sunglass shape.
- When you finish drawing around the sunglasses, move your cursor outside of the design area and the right mouse click twice.
- The yellow will be removed from underneath the sunglasses.
- Click on the Select tool and then press the Home tab.
- On the Home tab there is a Zoom area with a square. Press the Square. This zooms to the hoop.
- Click on the Select tool down arrow and choose Select All.
- Right mouse click on the design and then choose Group. We can now move the entire design as one unit.
- Click on the Normal Text tool.
- Click on the design page beneath the Emoji to activate the text tool.
- Type in the text DAD.
- In the Properties window, click on the Font style dropdown menu and select a font. You can use the up and down arrow keys on your keyboard to see a preview of the fonts before selecting your font.
- I liked the Elmwood font, so I selected it and then clicked Apply at the bottom of the Properties window.
- In the Properties window, you'll see the word Envelope and next to it, the word Select.
- Click on the Select button.
- A window will appear with different Envelope styles that you can select.
- Select Bridge Concave Top.
- Your text shape will be adjusted.
- There are adjustment nodes that you can select. The top red circle allows you to adjust the amount of transformation that was applied.
- Place your cursor over the red circle at the top center of the text.
- Hold the left mouse button down and drag it downward to adjust the text.
- Click on the Select tool. The text will automatically be selected.
- Place your cursor over the center of the text.
- Hold the left mouse button down and drag the text into the approximate desired position beneath the Emoji. You are just trying to get the spacing beneath the Emoji that you would like.
- Place your cursor at the top left of the design page.
- Hold the left mouse button down and draw around the entire design to Select All.
- There are other ways to select all. This is just one of them. (You can hold down the Control key with the A key on the keyboard, you can click on the Select tool down arrow and then choose Select All, or you can click on the words All Items in the Sequence View window).
- Click on the Arrange Tab.
- Choose Horizontal Center and then Center to Center it to the hoop.
- Before we save the design, I want to show you something that will save you a step in the save process.
- Click on the View Tab.
- Press Preferences.
- In the Preferences window, you can select the default machine format.
- If you place a checkmark in front of Auto Save brf, when you save the design in your machine format, the brf will save at the same time. This will save you a step.
Tip: If you were in the room with me, you'd ask me, “Cindy, why is this brf format so important?” Saving a design in the brf format allows you to change the font style and text properties when you open the brf file. It also allows you to apply different fabric recipes to the design. When you use a design that is built into the software, you can add and remove elements from the design and add holes as we have done in this lesson. When you save only in the machine format, you would have had to delete the text instead of changing it and would have had to open the design in outline format to set any holes, which can sometime break color segments into parts. So, it saves time and makes editing easier if you save the brf file. It is the software programs Native format. When you open a brf file to edit a design, you will need to remember to ungroup the design before trying to make changes.
- Once you have your preferences setup, click OK.
- There is one last thing I would like to do and that is add underlay to DAD.
- Click off the design and then click on the DAD text.
- In the Properties window, scroll down to Underlay.
- Place a checkmark in front of Zig-Zag and Contour and then click Apply.
- This will provide more stability for the text.
- Click on the Pacesetter button (the b in the circle at the top left of the design window).
- Choose Save As, choose Save as again.
- Choose your machine format.
- Type in a name for the design and then press Save.
- Press Open on the quick access toolbar. You will see the design in the machine format and the brf format.
- You will see the design saved twice, once in the brf format and once in your machine format.
- Click on Details from the view to see the formats.
- To edit the design, you would open the brf file.
Embroidery Instructions
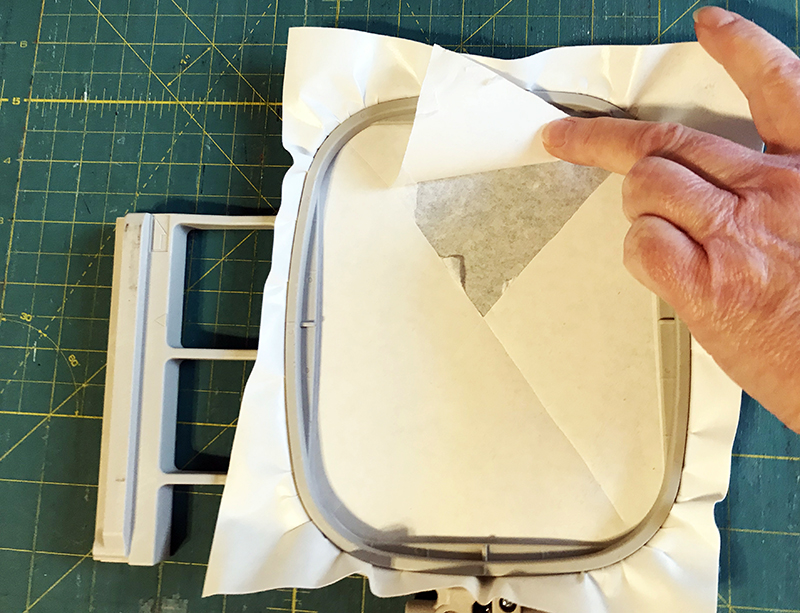
- Hoop a piece of adhesive tearaway (SA5815) in the 4x4 in hoop with the release paper facing up.
- Score the release paper in the hoop and remove from the stabilizer.
- Mark the center of the can cooler blank.
- Place the blank onto the adhesive stabilizer.
- Put the hoop into the machine and embroider the design.
Optional: If your blank is a dark color, you might want to put Cover Up under the Emoji part of the design. When the yellow is finished embroidering, you can remove the excess Dry Coverup.
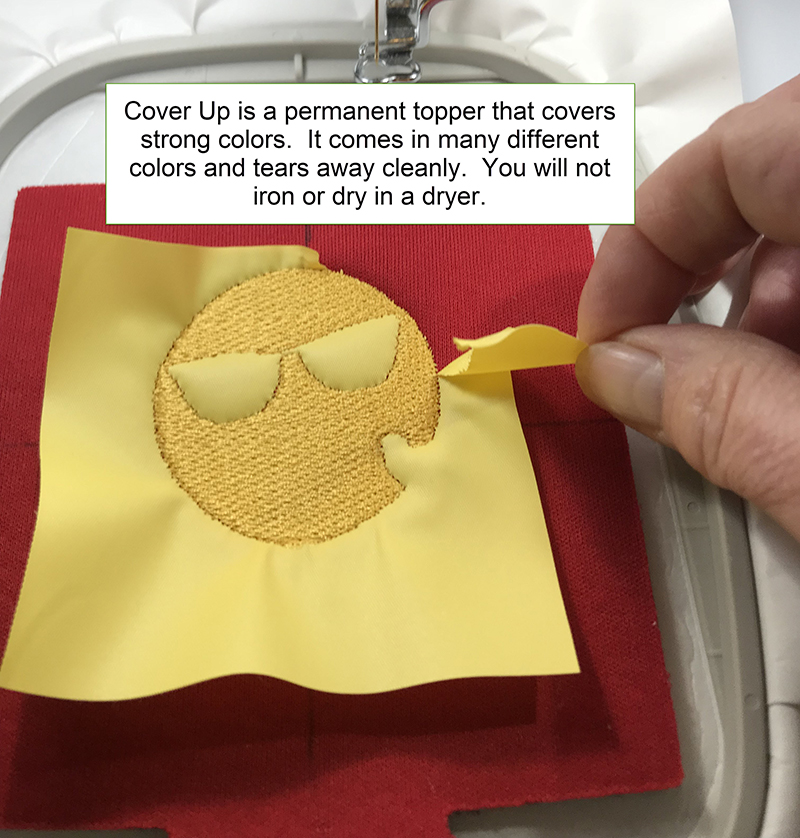
- After the design has embroidered, remove the excess stabilizer from the back.
- Place right sides together and pin or clip to keep from shifting.
- Place the J foot on the sewing machine.
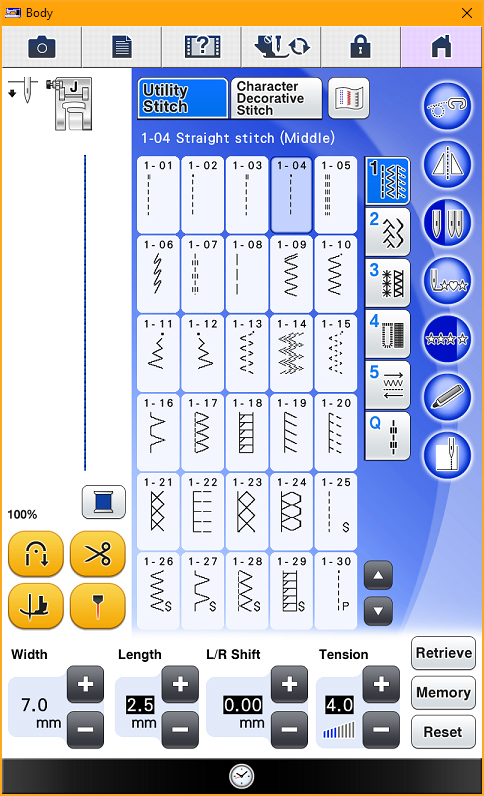
- Choose a Straight stitch. On my machine Dream Machine, I selected stitch 1-04 (straight stitch middle). I changed my stitch width to 7.0 and put the edge of the clear opening of the foot on the edge of the blank.
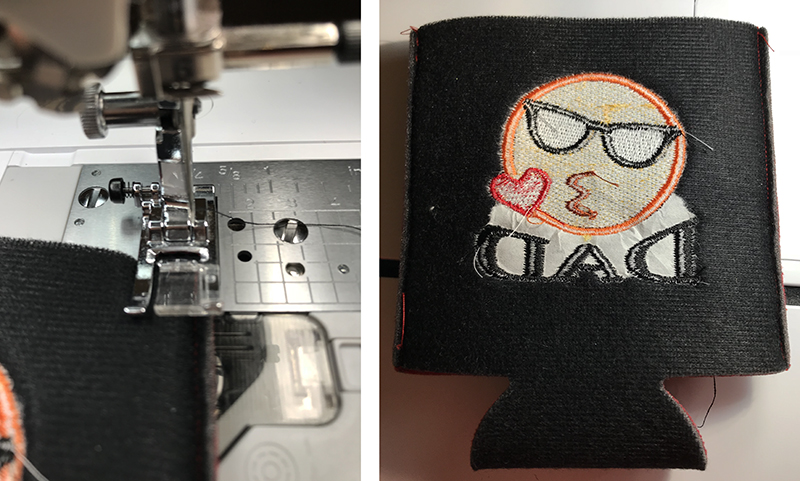
- Stitch both sides together.
- Turn the Can cooler right sides out and give to your Dad to enjoy!
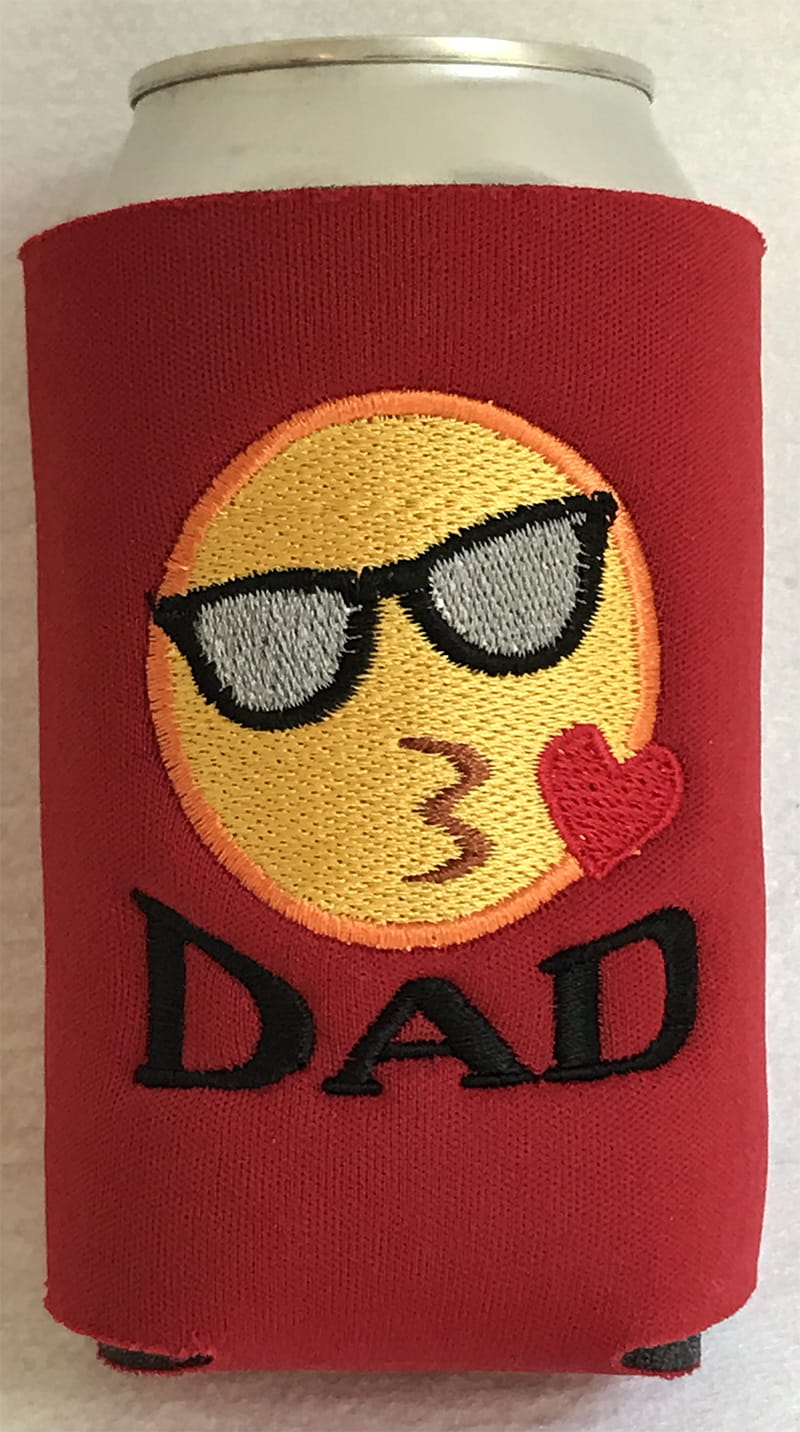 To keep this fun, take a picture of your emoji and share it on the Brother Sews Facebook page. I can’t wait to see what you come up with.
Embroider something fun today!
Cindy Hogan

