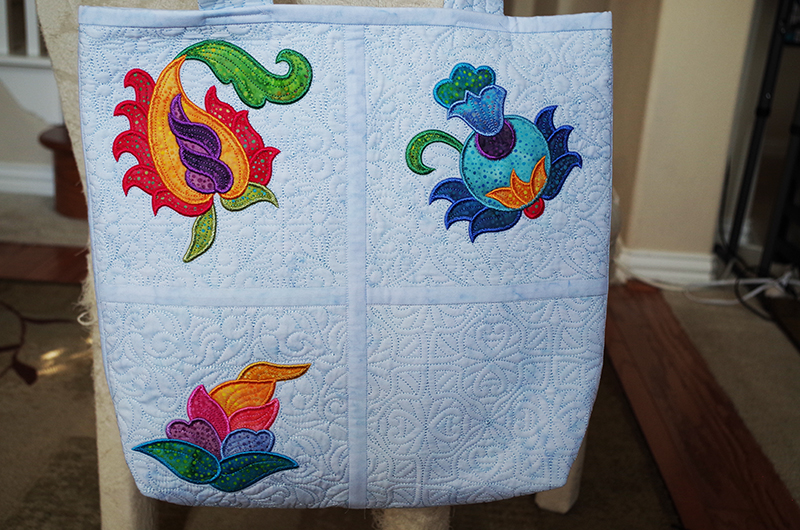
Create a Quilted Tote Bag with THE Dream Machine
I was so excited to hear about the additional fills that are part of THE Dream Machine 2.
To learn more about how to use these fills, I decided to make a tote bag. I used the appliqué blocks from my new design “Jacobean Tree of Life” and applied a different fill behind each one. I will show you step by step how to do this! What is cool is that you can take any appliqué block and transform it into a quilted block. I then used my joining strip technique to put together all the quilted blocks. Two of the blocks and the handles on the tote bag are created with the fills from THE Dream Machine 2.
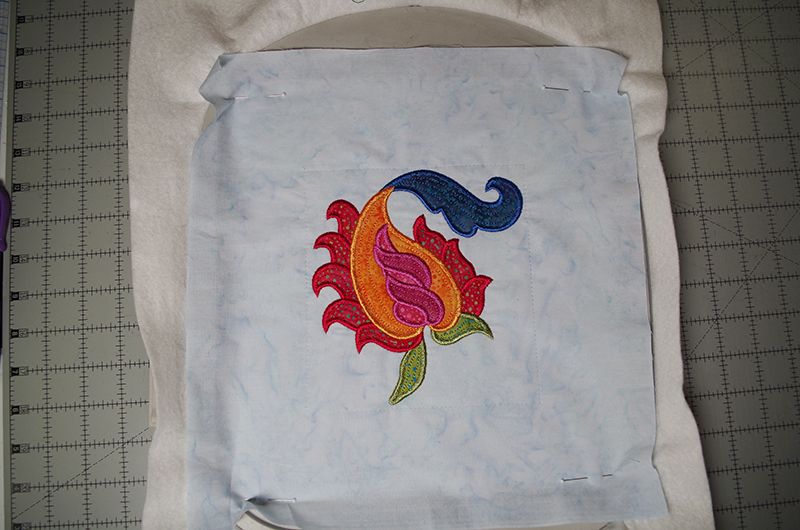
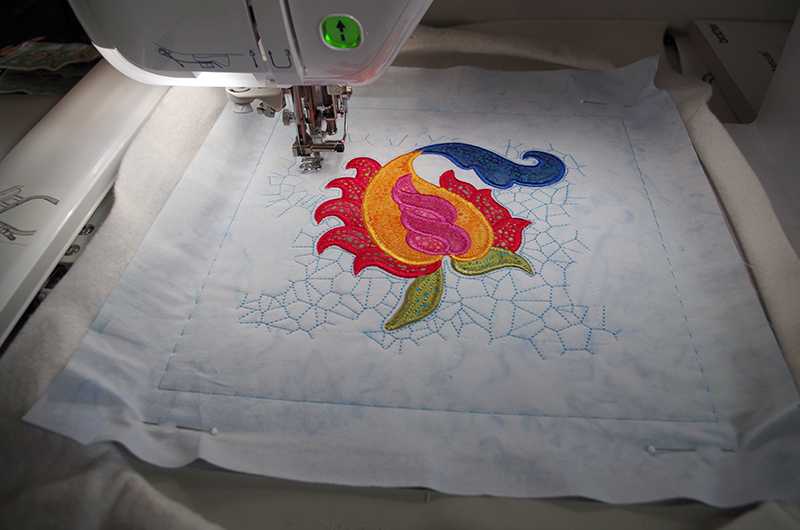
- The first part of this process is to select an appliqué design to stitch out. I am using one of the appliqué flowers from “Jacobean Tree of Life” design.
- I used an embroidery batting stabilizer in the hoop. This type of stabilizer has the qualities to manage the pull/push compensation that occurs when stitching out a design on an embroidery machine. Select a hoop size larger than the design for the quilting design to fill. The 9 ½” x 9 ½” hoop was used on this design.
- Select any appliqué design that will finish within an 8” x 8” stitch area and stitch it out with the embroidery batting stabilizer. Change the bobbin thread to match the top thread.
- With the appliqué design still in the hoop, remove the basting stitches. Turn over hoop and lay backing fabric on embroidery batting, turn hoop over to top, and secure the backing fabric by pinning it in place in all 4 corners.
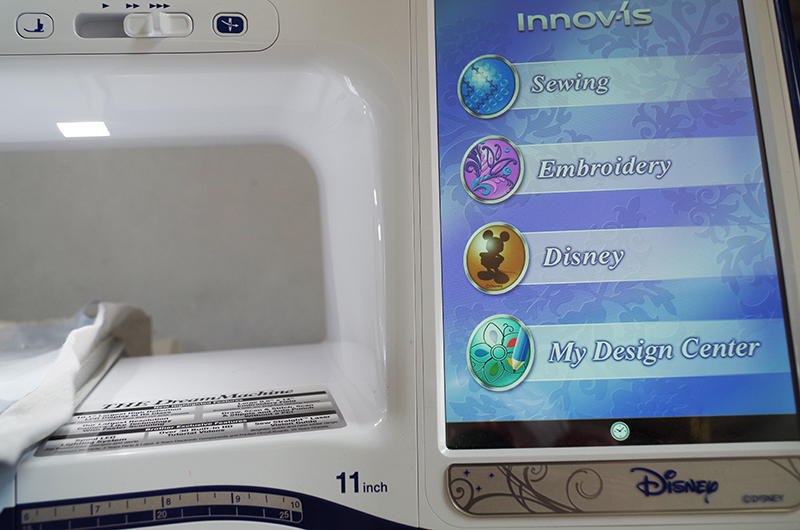
- Return hoop to embroidery unit, click on the home icon (upper right corner), then select “My Design Center”.
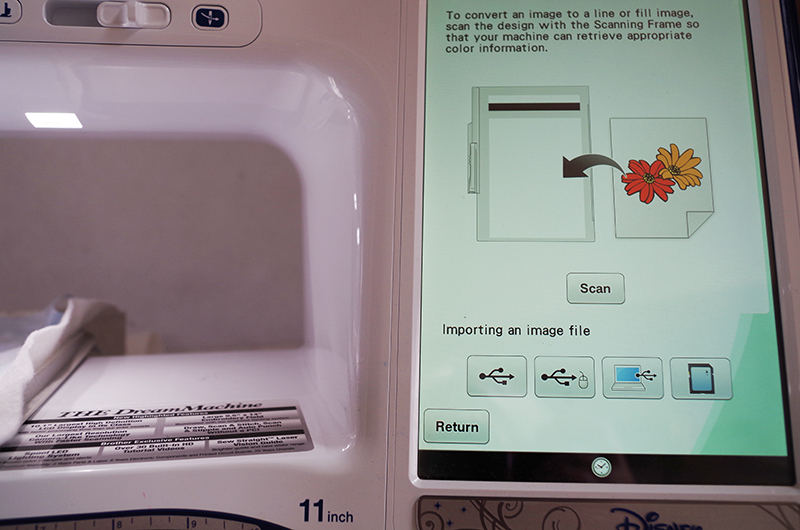
Scanning the applique design
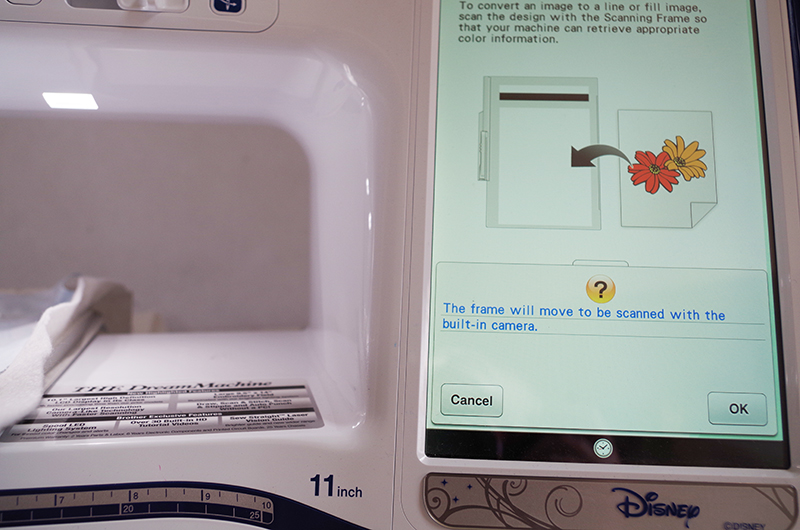
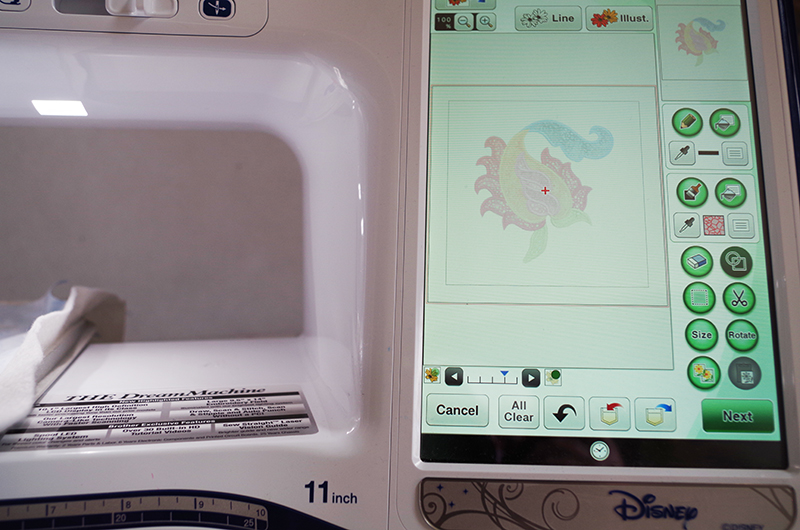
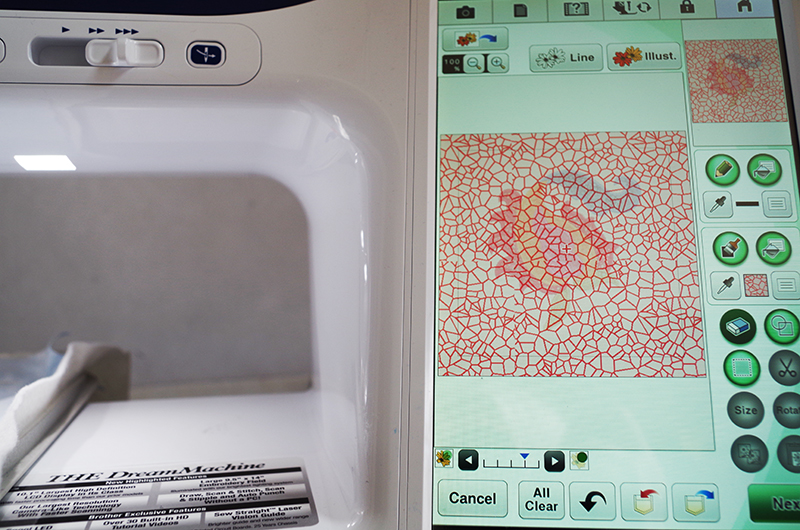
- The next step is to scan the appliqué design in the hoop. At the top of the screen, click on the icon with the orange and yellow flowers and blue arrow.
- Click on the Scan button. Follow the instructions on the screen. The camera will scan the appliqué design and display it on the screen.
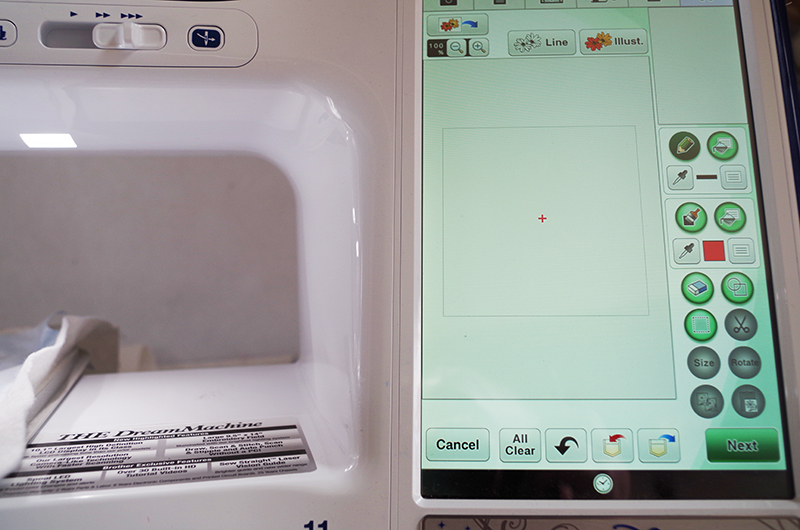
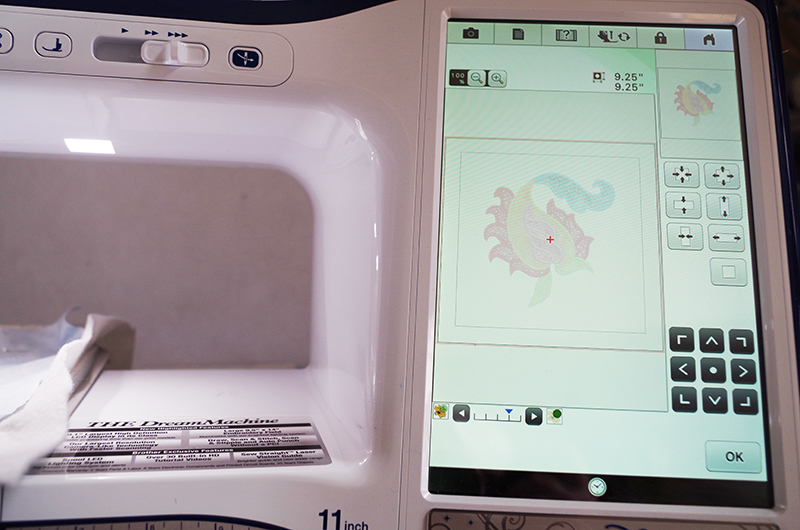
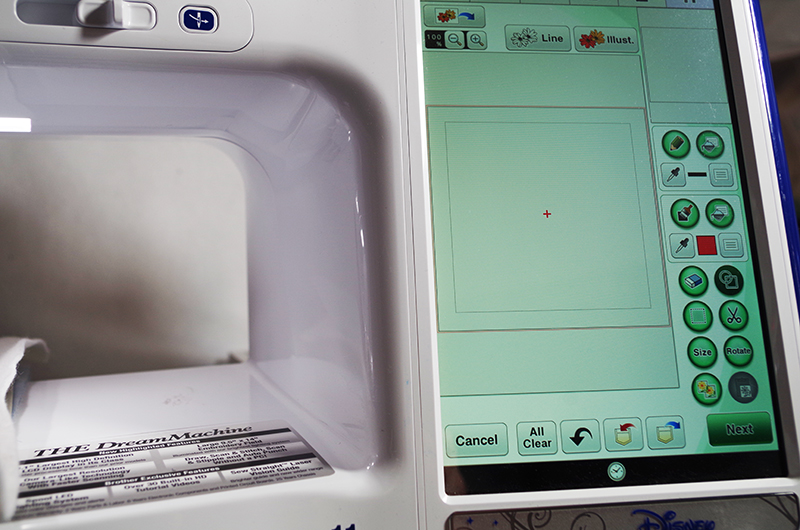
Define the size of the Stitch area
- Click on the Shape icon (Square and Circle)

- Select the Square and click on OK.

- Click on the Size icon. Use the upper right button to enlarge the square to 9.20” x 9.20”. Click OK.
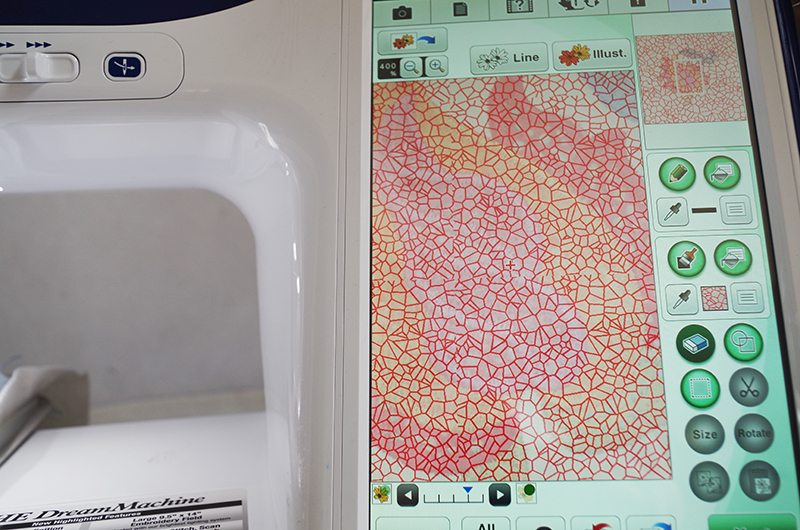
Add a stitch line value to the square
- To add a line value to the square, click on the paper icon in the group of 4 icons with the pencil icon.
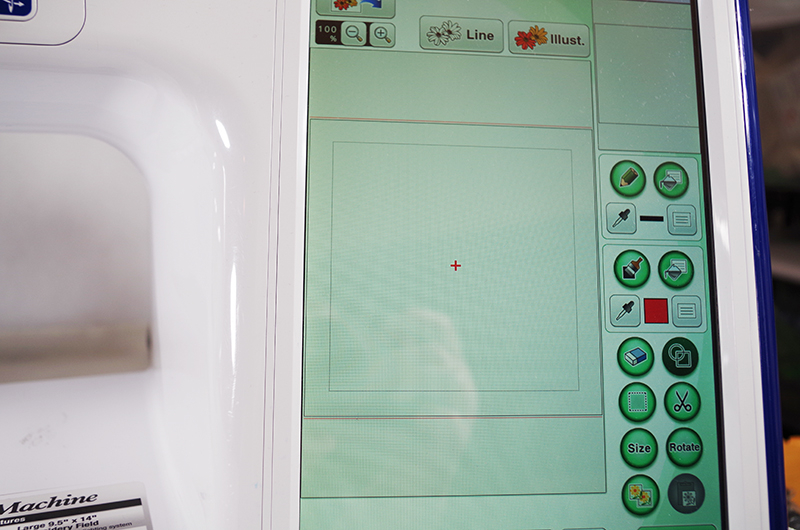
- Select the Tack Down button, then click on OK.
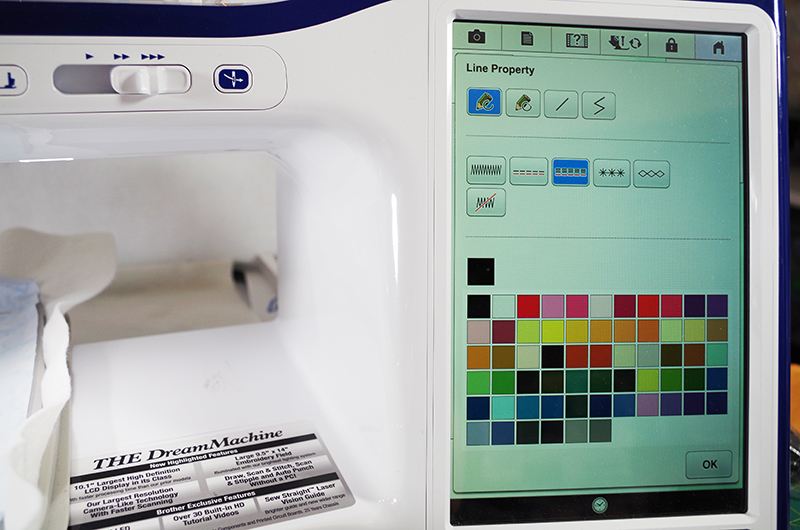
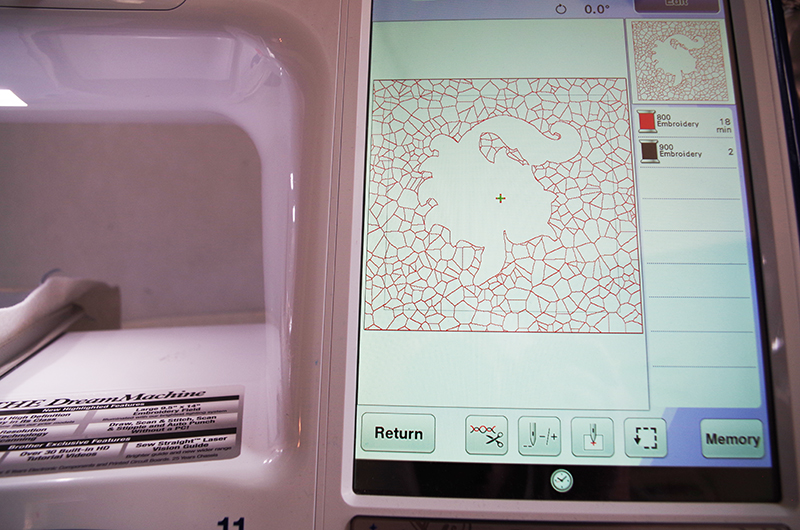
- Click on the fill icon (on the right side of the Pencil icon), then click inside the square to apply the line value to the square.
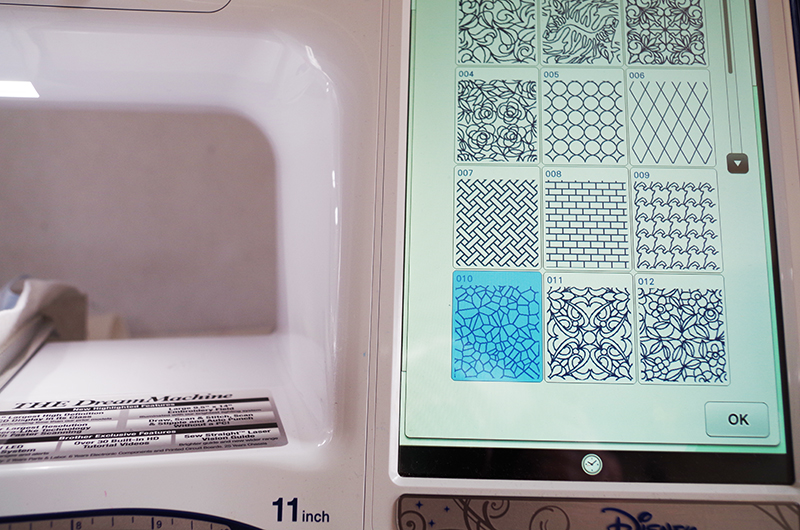
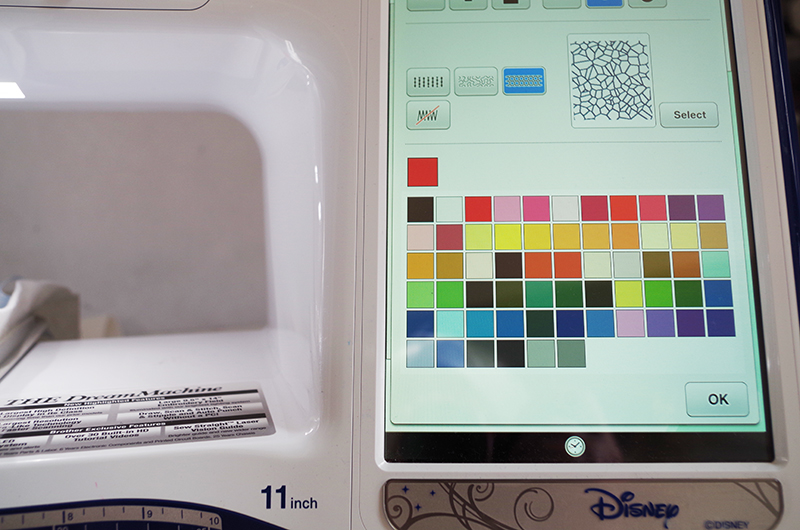
Add a fill value to the square
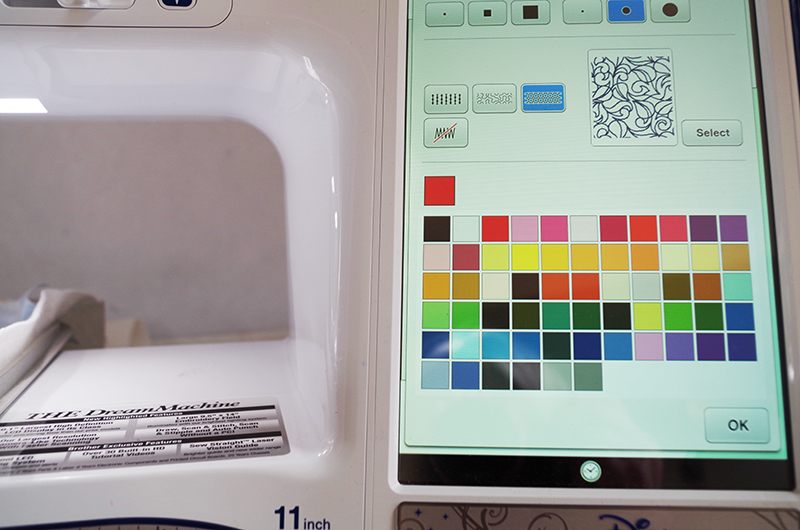
- To add a fill to the square, click on the Paper icon in the section on the right side of the screen.
- Click on the Select button to view the various fills. Click on the desired fill and click on OK. Then click OK again.
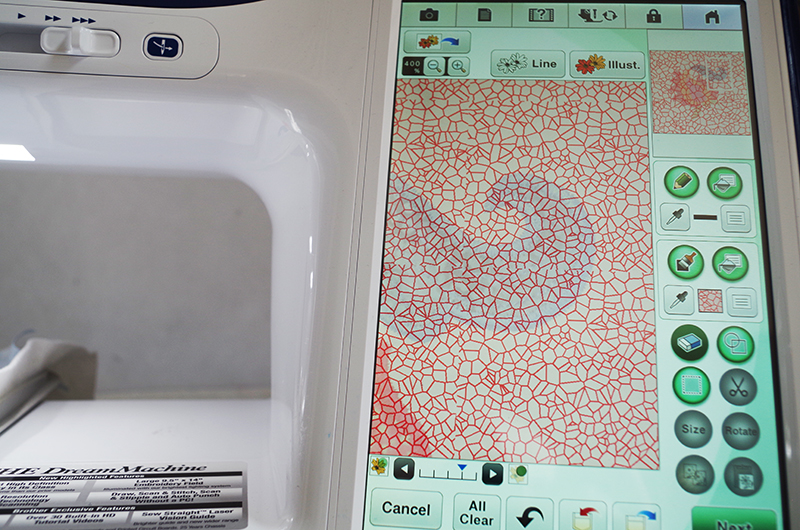
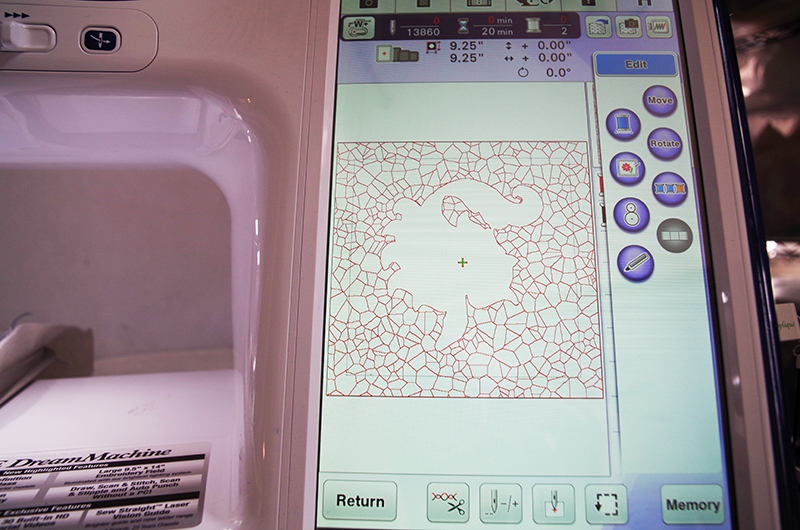
- The next set of steps is to remove the fill from the appliqué design. This is done using a variety of options on the screen. First is to click on the eraser icon. This will bring up a window to select the size and shape of eraser tool. Click on OK.
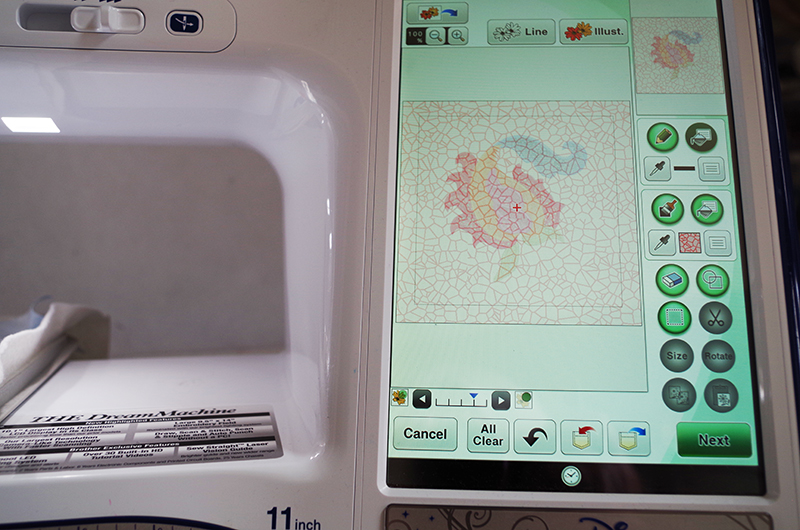
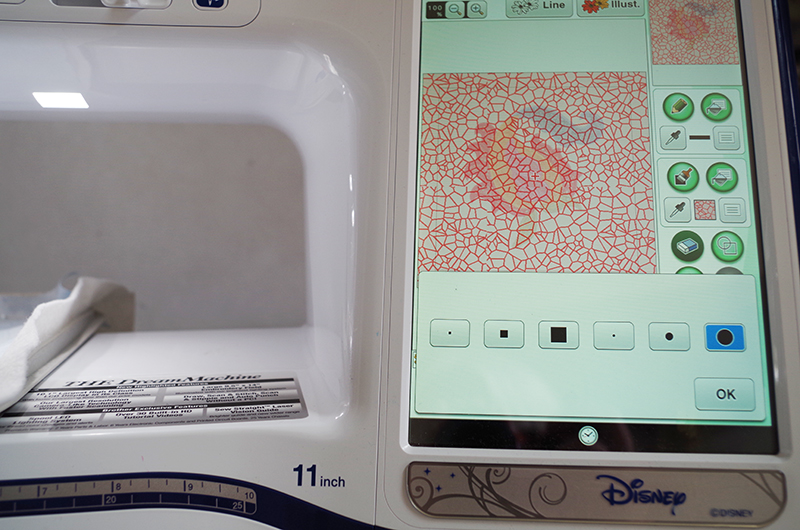
- To zoom in closer to erase the fill click on the + icon at the top left side of the screen. Zooming larger will allow you to see the applique design better. In the upper right corner of the screen is a smaller picture of the full design and a white box. Move the white box to see other parts of the design.
- Once you have an area that you can see a portion of the appliqué design and the fill design, using the stylist on the screen, start removing the fill from on top of the appliqué design. Lift the stylist from time to time. If you “erased” too much of the fill, click on the “back arrow” at the bottom of the screen.
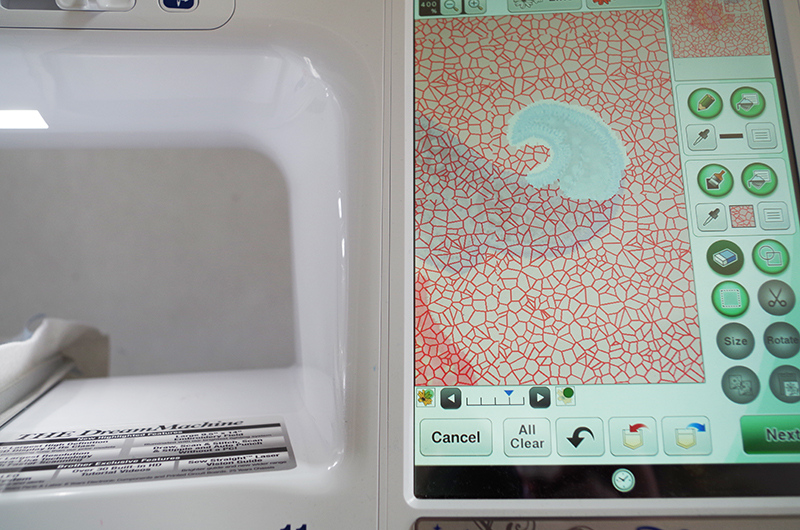
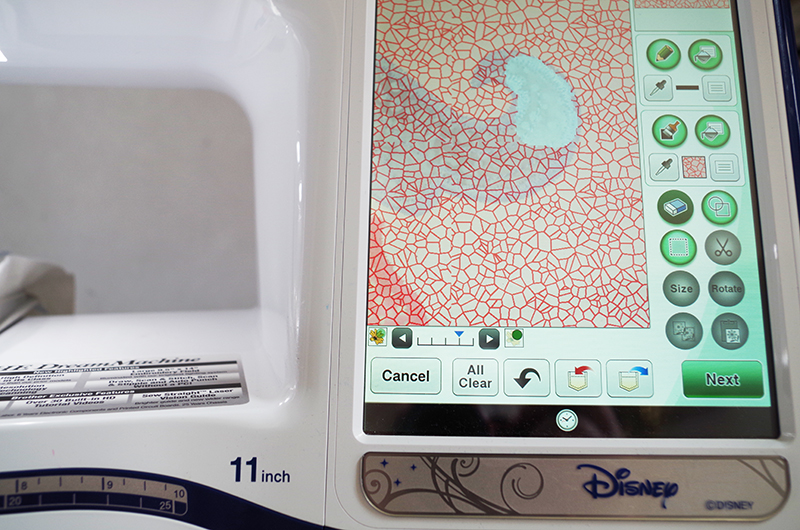
- Continue to remove the fill from the appliqué design.
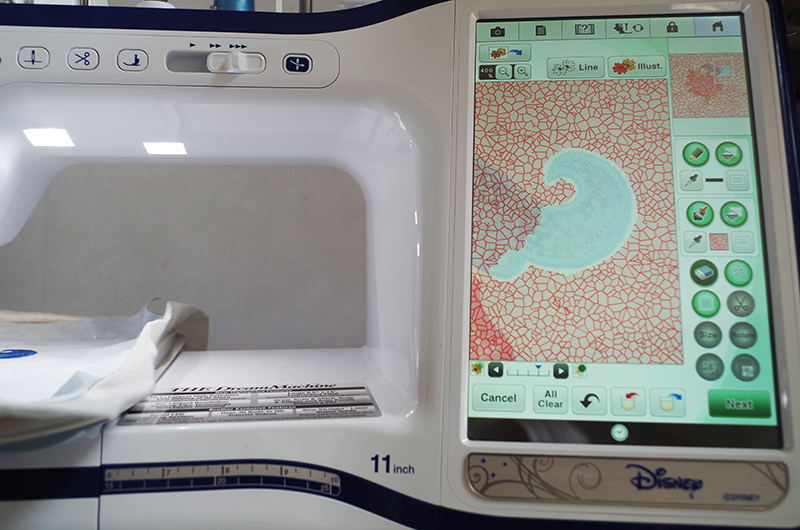
- Once the fill is erased from the appliqué design click on the Next button (lower right corner).

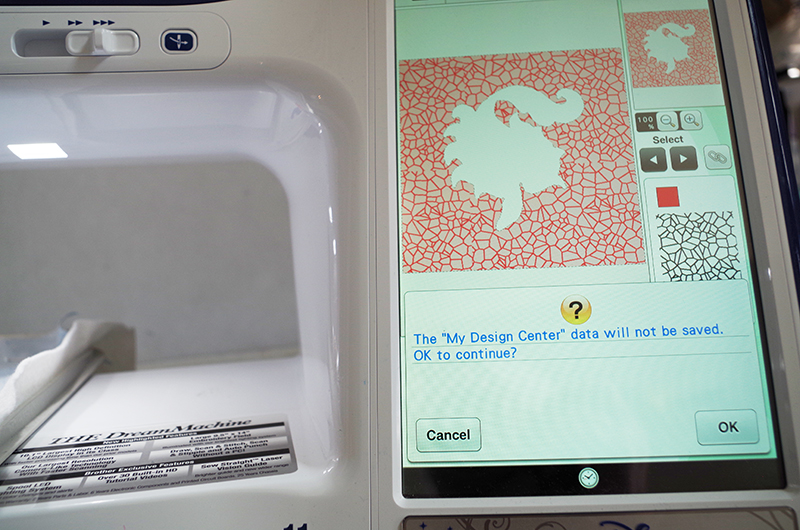
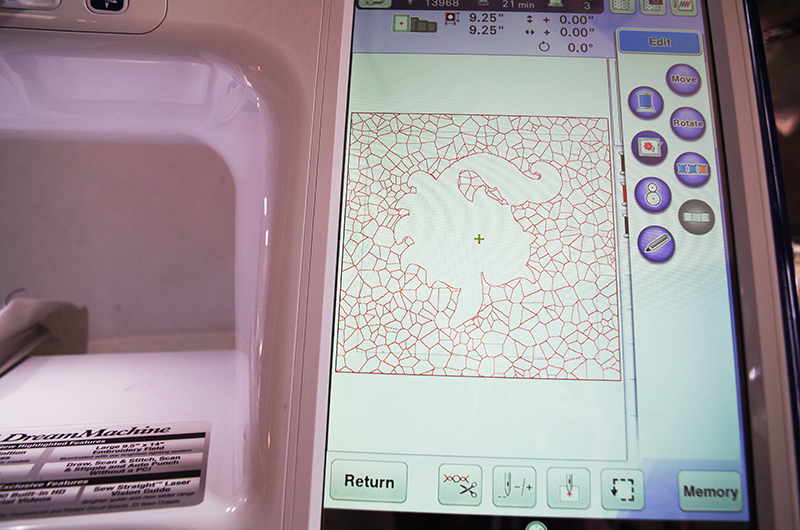
- Click on the Preview button.
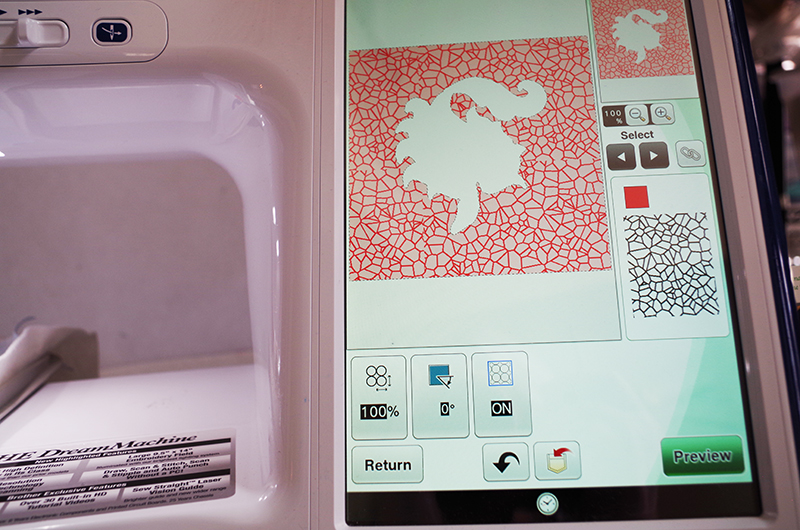
- Click on the OK button. THE Dream Machine
is making an embroidery file.
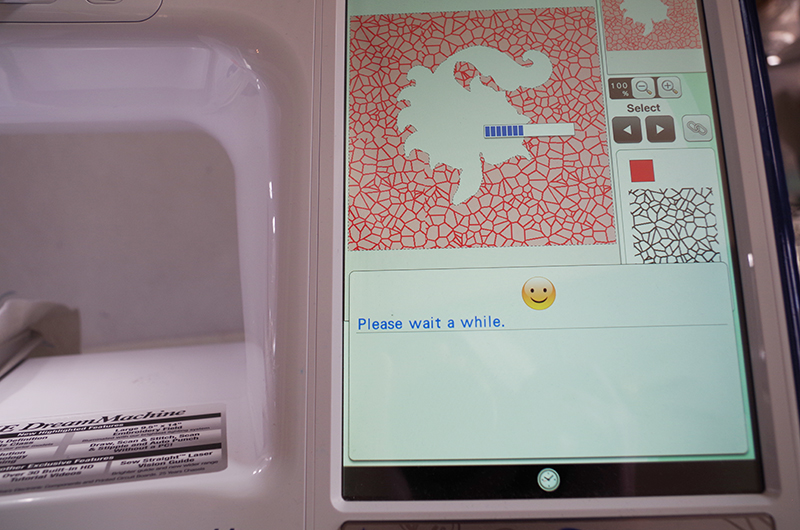
- Click on the Set button.
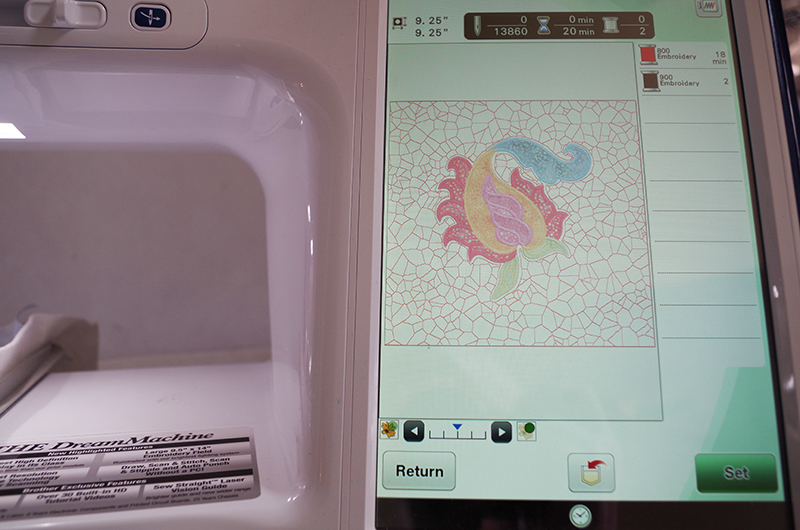
- Click on the OK button.
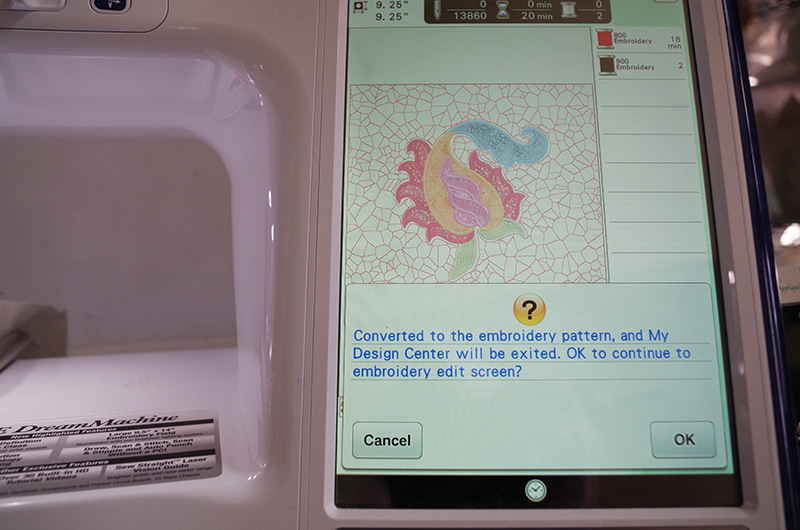
- Click on the Embroidery button at the bottom of the screen.
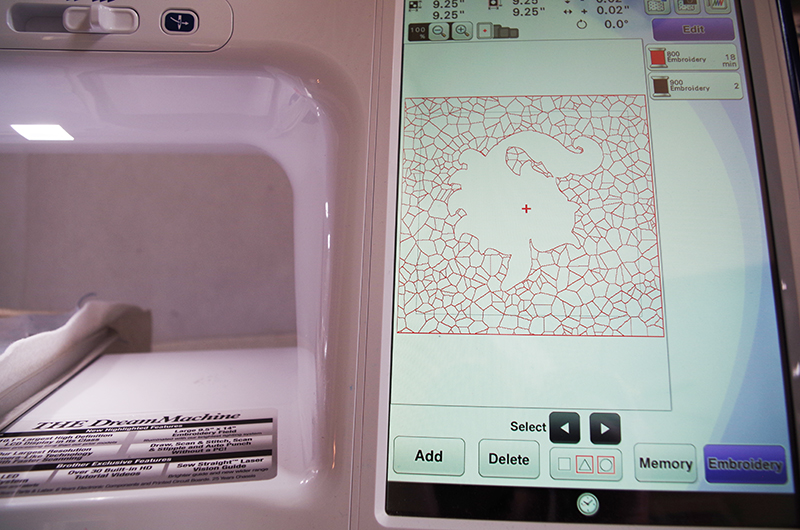
- Click on the Edit button at the top of the screen.
- Click on the Basting icon (the icon with flower and square around it) second one on left.
- Click on the icon, the needle and -/+ at the bottom of the screen.
- Stitch out the basting stitch to secure the backing fabric to the embroidery batting.

- Stitch out the fill.
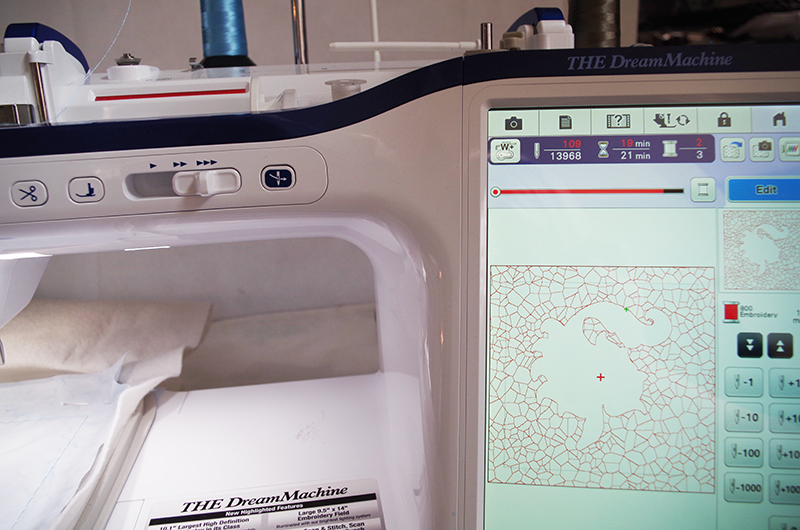
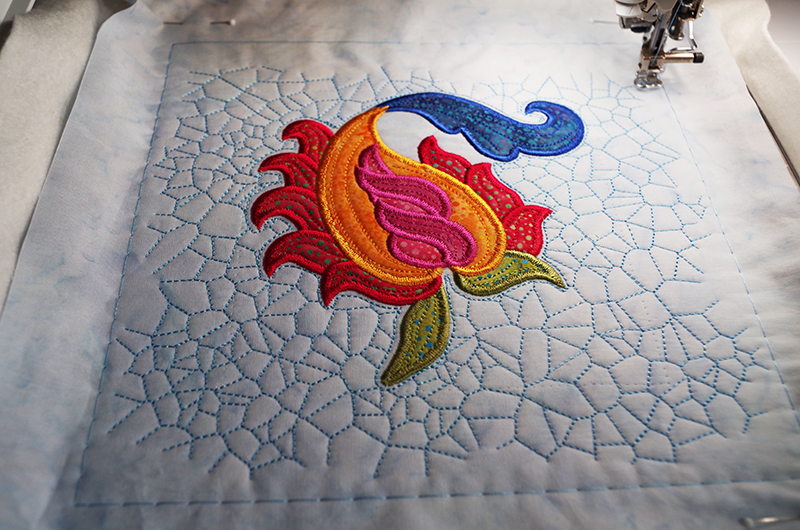
- Stitch out the Tack Down stitch to be used as a guide to trim the now fully quilted block.
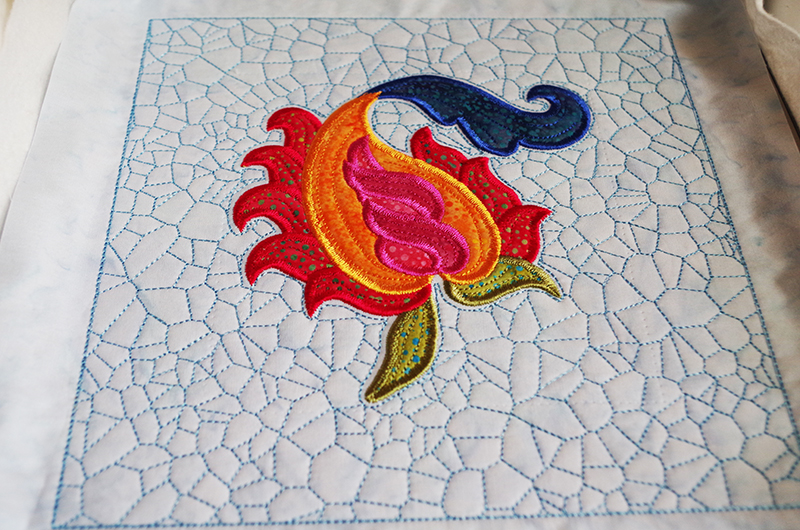 The applique designs are part of the “Jacobean Tree of Life”
design available from Anna’s Awesome Applique Designs. Also on the website, check on the “Joining Strip” video to put the blocks together, and instructions for the tote bag.
Related Projects
Stay Connected
* Required fields