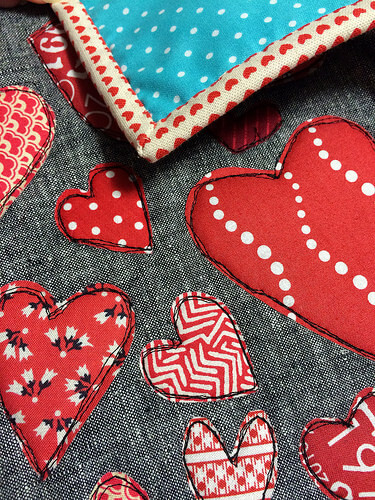
Creating a Heart of Hearts Mini Quilt
~Written by Brother Sews Blogger
I am so happy to share this project with you today! This Heart of Hearts mini quilt wall hanging is a quick but striking project to make. Mini quilts that I’ve created before and other heart arrangements I have seen inspired me to create this piece that was SEW much fun to work on using THE Dream Fabric Frame
by Brother. The size of the piece can be made to your own desire, but I began with a background piece that was 1/2 yard long.
Note From Brother
Embellish large and small quilts on THE Dream Fabric Frame!
Materials:
- Red scraps and a contrasting color scrap
- Double-sided paper-backed fusible
- Pen
- Scissors or ScanNCut2
- Batting and backing fabric
- Contrasting thread for free motion quilting
- Binding fabric
- Sewing & Quilting Machine Dream Creator: Innov-ís VQ2400
- Iron and ironing surface
- Dream Fabric Frame
(optional) - Disappearing marker (optional)
Technique:
Gather your available scraps and apply paper-backed fusible to each piece. Be sure to follow the manufacturer's instructions for applying the fusible to the fabric.

Fold the scrap in half and then draw half of a heart shape on the paper. Cut the heart out (while keeping the fabric folded). When you are comfortable drawing and creating the shape, try to cut the hearts "free hand." This helps you achieve a variety of shapes and sizes.

Continue cutting hearts. For an added touch, I recommend including one contrasting color heart. The more shapes and sizes you have – the more variety and room you will have to play with these shapes in the next step. Cut as many hearts as you think you'll need, but save fabric for pieces you might want later.
When your hearts are all cut out, remove the paper backing on each.

Next, you’ll need to have your iron and ironing surface prepared. Arrange the hearts in the shape of a single heart.
(You might find it helpful to draw a heart on the background fabric with a disappearing marker first. You can use the edges of the outline to guide the placement of the heart.)

I suggest placing the bottom heart tip and the top heart tip first. Then, fill in along the edges. Finally, place the hearts in the middle.
If you need alternate shaped hearts (or more of them in general), return to your paper-backed fabric scraps and cut the select few you need.
Carefully press the hearts down to iron the scraps in place. Try not to move them out of place!
Create a quilt sandwich with the heart top, batting and backing.

Now for the fun with THE Dream Fabric Frame
!
Clip your ironed piece onto your frame. Use a high-contrast thread for the stitching. (I chose black thread for my particular piece.)
Lower your presser foot and begin to quilt around each heart. I free motion quilted each heart about three times each for a "sketched" look.

Some of them can be quite tiny, so feel free to go slowly around these shapes. But remember, this is a deliberately sketch style look, so an "imperfect" look is all the better!
For additional texture, you can also quilt the background around the heart motif.
Trim all the excess threads around each heart on the front and back of the piece to the desired size. Finish with binding.

I love the fabric I had with tiny hearts on it! I think it really added to the overall theme of the piece.

And you are finished! Gift your beautiful custom heart wall hanging to a lucky person. This could be made for Mother's Day or as a special gift for someone you love, at any time.
I also ADORE the idea of making one in the colors that were used for a couple's wedding! You can personalize it for the couple by using special fabrics for them.
Another great idea is to use this for a signed "guest book." Just bring the fabric or precut hearts to the wedding reception, along with a fine permanent pen that is suitable for fabric, and let the guests sign away! Then, create a wall hanging later to serve as the perfect wedding gift.
The possibilities are virtually endless!

