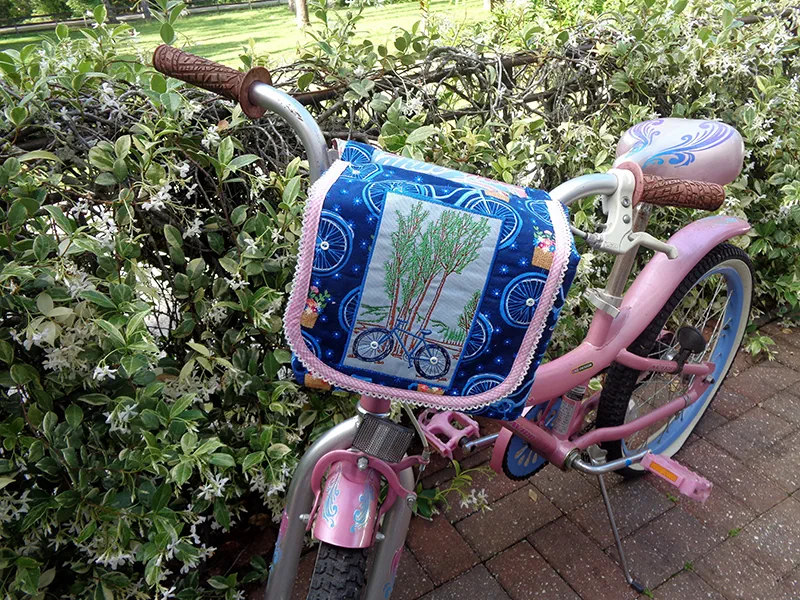
DIY Bicycle Bag
Let’s celebrate all that fun, healthy, outdoor cycling with this handy bike bag. Embellish it with a scenic bike design from iBroidery.com and learn to convert it to a traditional appliqué. Make one for yourself or a child or a friend. Any biker will appreciate this bag.
Requirements:
Fabric:
- ½ yd. blue fabric for outer bag, flap and straps—more if fussy cutting, more if making self-binding; ½ yd solid blue for lining, 3 pieces of batting cut same size as blue print fabric.
Note: If you chose not to quilt this, I suggest a sturdy fabric like denim or quilted fabric. On this project, the bicycle print was outline quilted to the batting. Tiny buttons were stitched on the bike axels before the bag was constructed. After the lining was in place, a few buttons were stitched through again to secure the lining.
Notions:
- Thread for embroidery, construction, and monofilament for quilting. Brother medium weight tear away stabilizer SA5810,
spray adhesive (to hold batting to bicycle fabric while quilting), one 12x18” sheet plastic canvas (to help the bag hold its shape), picot edged bias binding 3/4 yard, wash away, chalk or heat erasable marker, two 3/4” buttons, 8” hook and loop tape.
Directions:
- 5/8” seam allowance
Embroidery
- Cut print fabric 18 x 15” for the flap. This is larger than needed but gives some wiggle room if the design is not perfectly centered. Hoop the stabilizer and fabric placed as close to the bottom of the frame as possible, as this is the bottom of the bag.
- Load the bike design in the machine and move design to the lowest possible position.
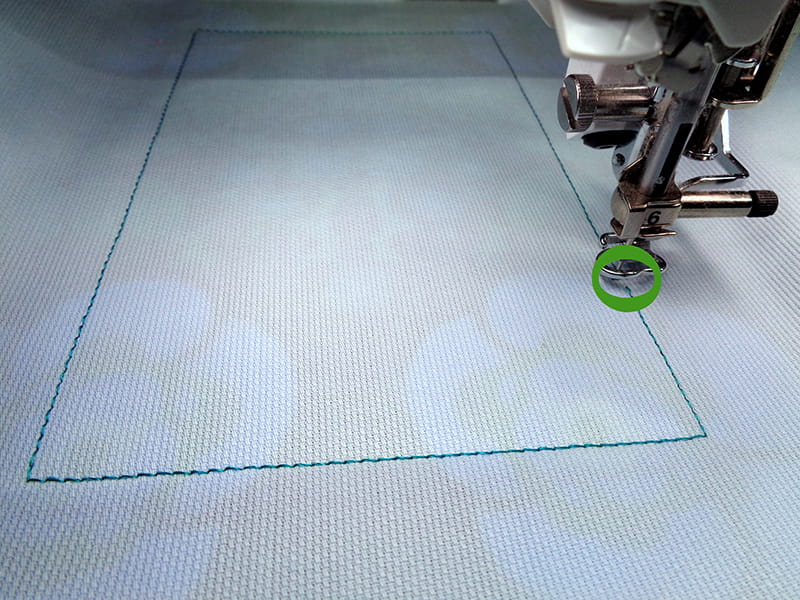
- Begin embroidering the first color but stop at stitch #219 or at whatever stitch # your machine completes the straight stitch frame.
Note: There are a few satin stitches before the straight stitches begin. Disregard them. The frame is missing a few stitches at the very end. Disregard again. See green circle on Image # 2.
- Cut one-piece blue lining fabric 6 x 9”. Apply spray adhesive and place over the straight stitched rectangle.
- Return to the beginning of color #1 to stitch the blue fabric to the print. Stop stitching color #1 again at stitch #219 or as before—when the rectangle is complete. Advance to color #2, the trees.
- Do not trim excess fabric beyond the straight stitched frame yet.
Note: Why? This frame does not include extra tack down stitches to secure the appliqué. Best to wait until the embroidery is finished to trim and add the satin stitch frame.
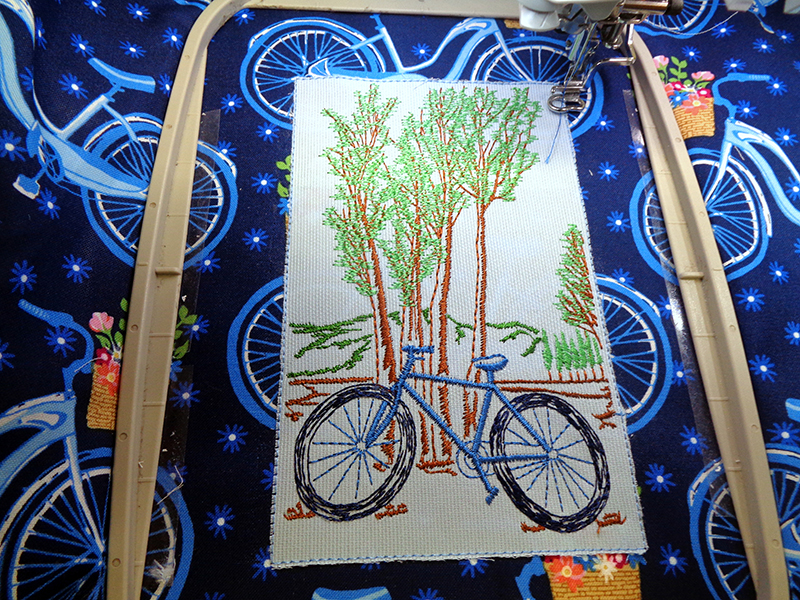
- Continue through the color sequence. After the last color, which stitches the leaves, then trim away the excess fabric up to the straight stitch frame.
- Return to color #1 and complete the frame. You will repeat the straight stitch rectangle and cover the raw edges with a satin stitch.
- Remove the embroidered flap from the hoop. Use spray adhesive to join the flap to batting.
- Outline stitch with monofilament around some elements of the print.
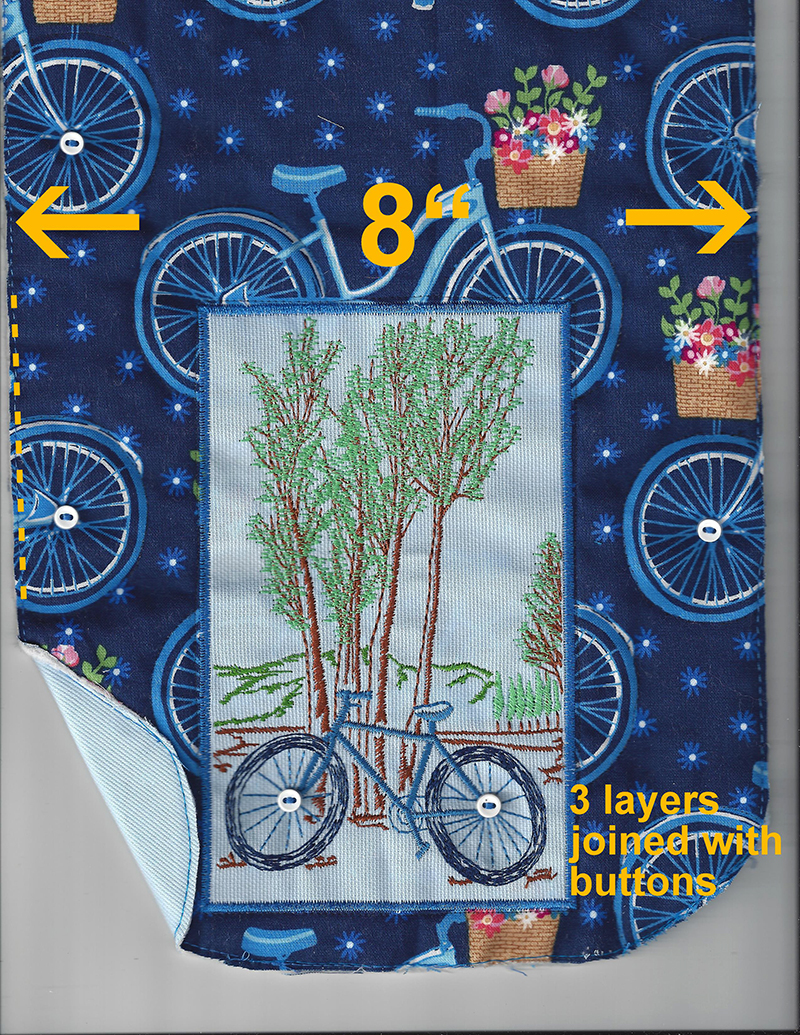
- Place flap with batting on lining piece. Secure with a few quilting stitches or added buttons, as shown.
- Cut flap to 8” w x 13” L, then join the 3 layers with straight stitch 1/8” from raw edges.
- Round the bottom corners near the embroidery using a saucer for a template. Straight stitch around the newly curved corners.
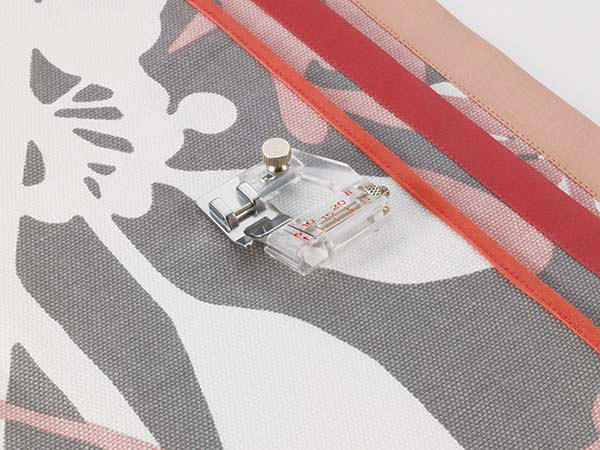
- Apply bias binding to three sides of flap. Use of the adjustable bias binder is very helpful with regular bias.
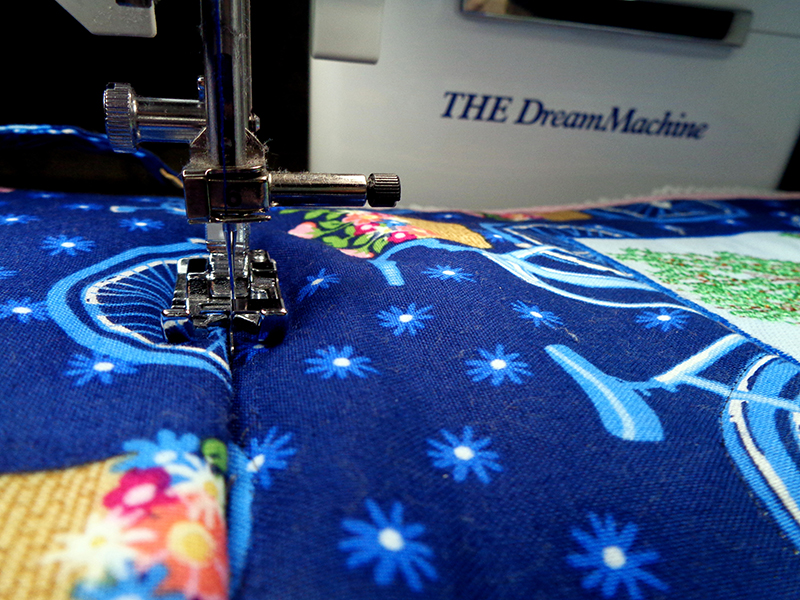
- It cannot be used with the picot edging. Instead, the stitch in the ditch foot (one of my most frequently used feet) attached the binding.
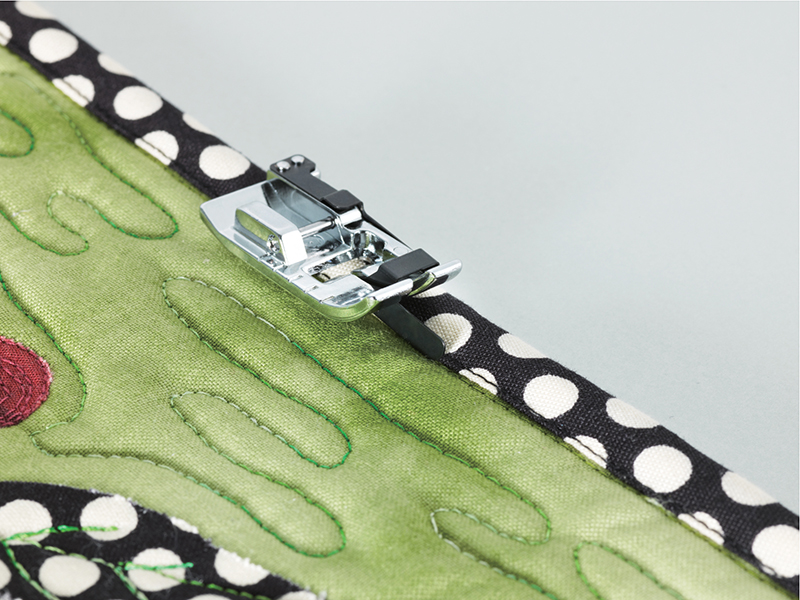
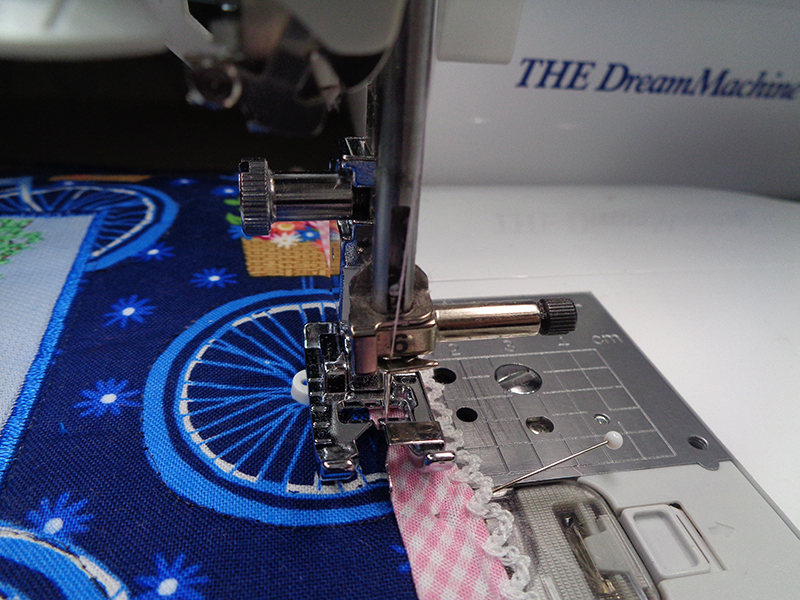
- Use a glue stick a to secure an 8” strip of ¾” hook and look tape to bottom edge of flap, butted against the bottom of the satin stitch frame. Stitch through the bias stitching and then in the ditch of the satin stitch frame.
Note: Use of the knee lift is very helpful.
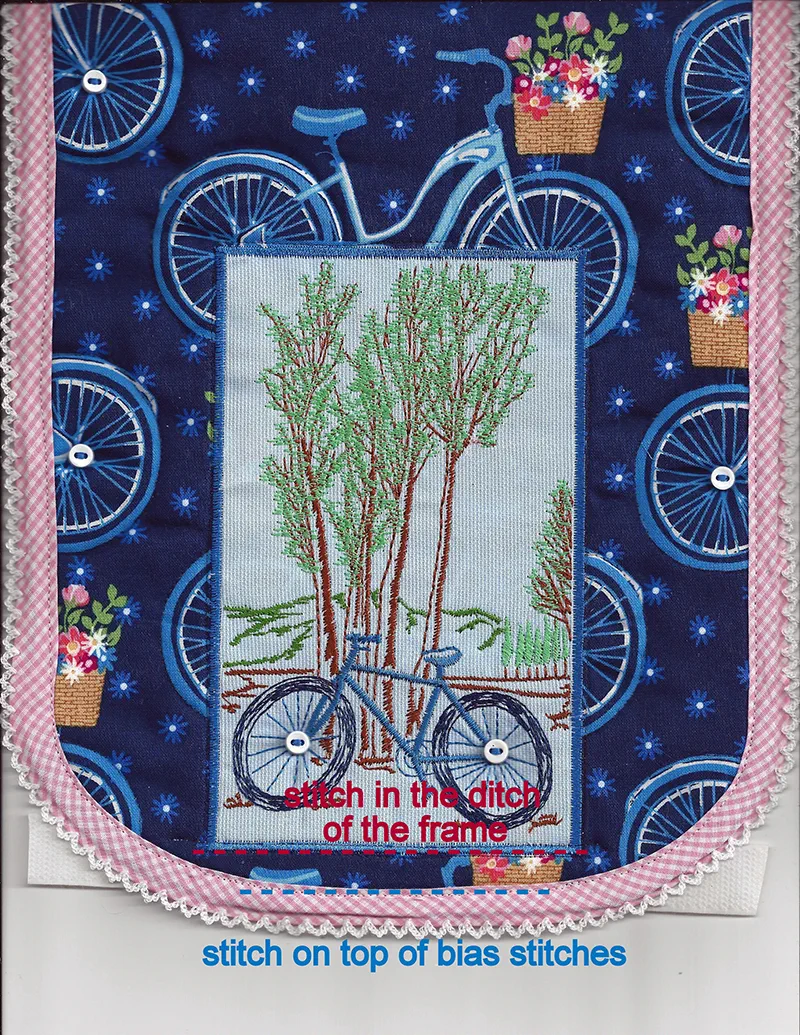
- Trim hook and loop tape to stitching line.
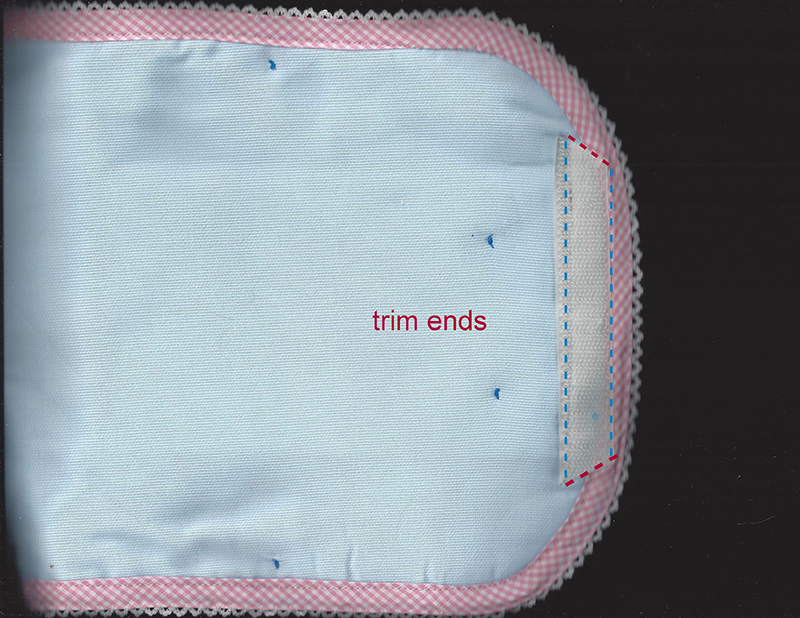
- Set the embroidered, bias bound, quilted flap aside.
Construction
- 5/8” seam allowances
Note: Press all seams during construction.
Outer Bag
- Cut from the outer fabric (shown as blue bike print): two 13.5” w x 10 tall for the bag front and back.
- Quilt both front and back as done on the flap—spray baste print to batting, quilt.
Note: Do not quilt 2” from the top of the bag. The flap will be inserted there, and the quilting will block the insertion.
- Stitch 13.5” bottom seam with right sides together. To reduce bulk, trim away batting in the seam allowance. Press seam open then press each seam allowance toward bag.
- Stitch side seams, again removing any batting in the seam. Press. Trim corners up to side seam stitches. Press bottom seam open
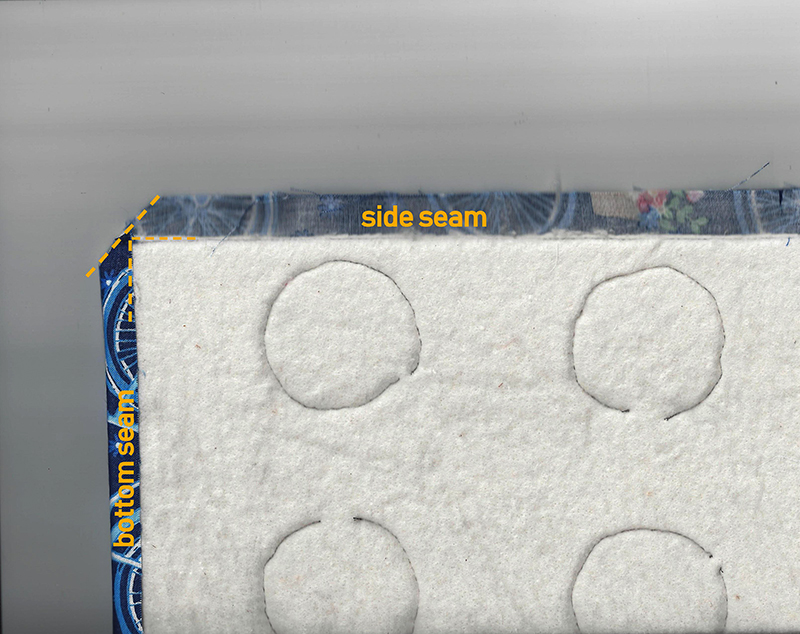 - - - - -[/caption]
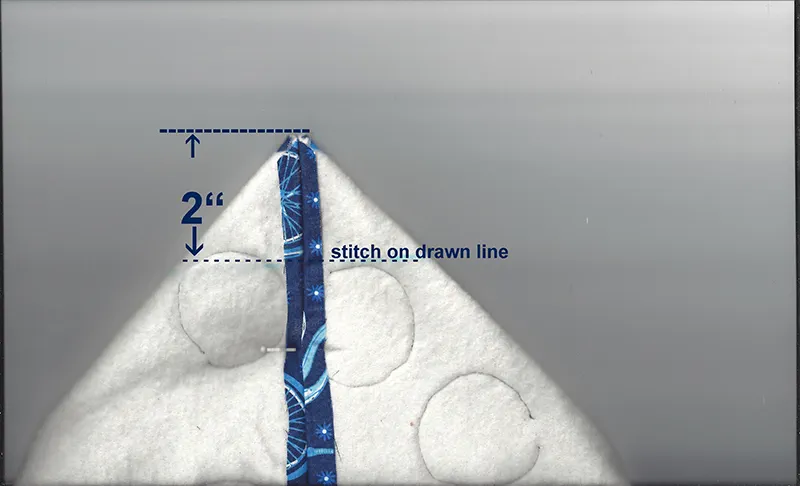
- Fold corner in alignment with bottom crease. This is most easily done by pinning the piece to a padded surface like the ironing board. Check to see that the pin penetrates the top and bottom seam lines.
- Draw line perpendicular to crease 2” from point of triangle. Stitch directly on that line, stay stitching at beginning and ending of seam. Repeat on second corner, creating two identical triangles.
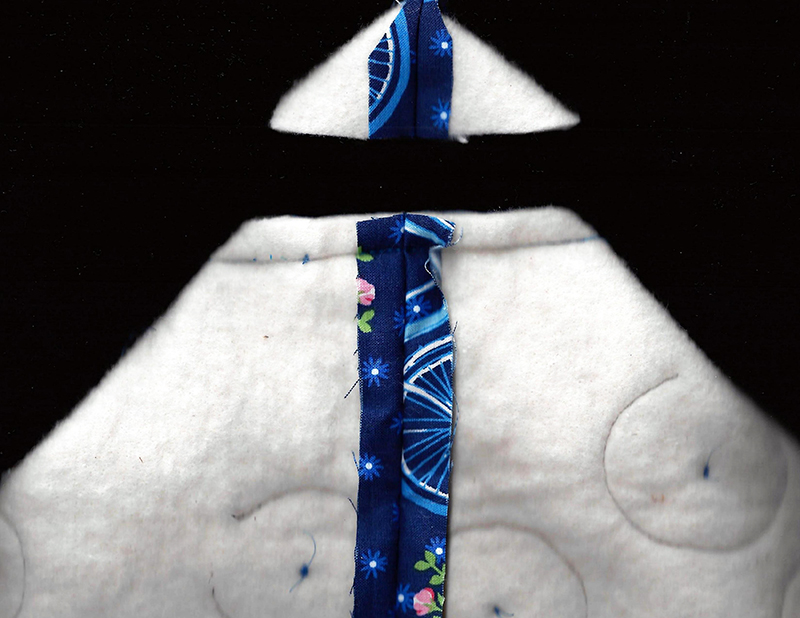
- Cut away the corner approximately ½” below the stitching. Lining—constructed in same manner as outer bag, minus the batting and quilting
- Cut lining fabric 12.75” x 10.
Note: It is smaller to accommodate the quilted lining. At the top opening, the lining will extend beyond the bag. That will be cut away later, amount to be determined by thickness of your batting.
- Stitch 13” bottom seam with right sides together. Press seam open then press each seam allowance toward bag.
- Stitch side seams and press open. Trim corners up to side seam stitches. Press bottom seam open.
- Fold corner in alignment with bottom crease, just as with outer bag. Draw line perpendicular to crease 2” from point of triangle. Continue as on outer bag, stitching on the line, cutting away close to the stitching, stay stitching at beginning and ending of seam.
Bag Assembly
- Cut a piece of plastic canvas 4x8” and place on floor of bag. Turn lining wrong side out and nest into floor of quilted outer bag.
- Hand tack lining to bag at each bottom corner.
Optional: If buttons are used as embellishments, as in the sample bag, re-stitch by hand or machine a few on the sides to hold the layers together a little more snugly.
- Cut 4 pieces of plastic canvas--two 7 ¾” x 6” and two 3 ¾” x 6”. Slip these pieces into the sides, front and back of the bag, between the batting and the lining.
Note: The blue lining will extend beyond the outer bag and batting.

- Pin layers together. Straight stitch on both sides and front, three layers together 1/8” from edge of bicycle print. One long side for the back remains unstitched. Trim lining fabric and batting even with bicycle print but leave back lining untrimmed. It will extend about 1” above the batting and bike fabric.
Straps
- Cut two pieces of print fabric 4 x 8”. Press in half lengthwise, open up and then press raw edges toward center crease. Bring folded edges together rendering a 1” x 8” strap piece. Repeat on second strap piece.
- Select stitch 1-07, the triple straight stitch, and. Set stitch width to .5. This was sewn with a stitch length of 2.5. 3.0 would be a better choice with heavier fabric.
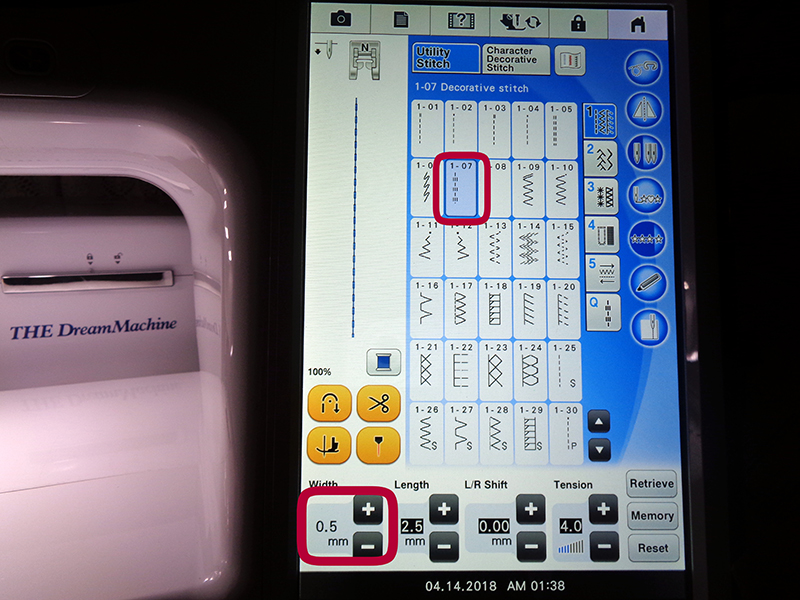
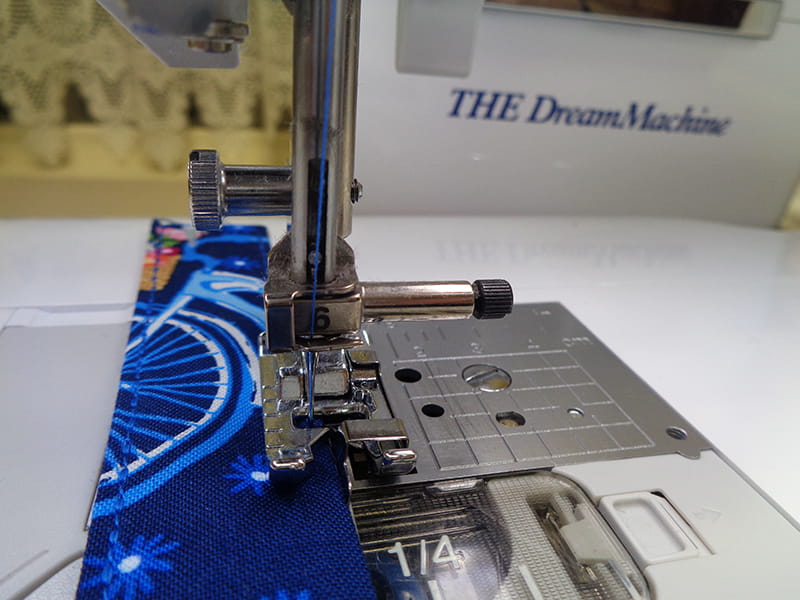
- Attach Stitch in the Ditch Foot SA191
and sew each side of both straps. Be sure to use the same thread in needle and bobbin. The Stitch in the Ditch foot and settings above will give a perfectly and evenly spaced stitching line. The triple straight stitch renders an attractive, strong seam.
- Finish one end of each strap with a wide zig zag. Fold that end up 1 ¼” and stitch across the end to hold in place.
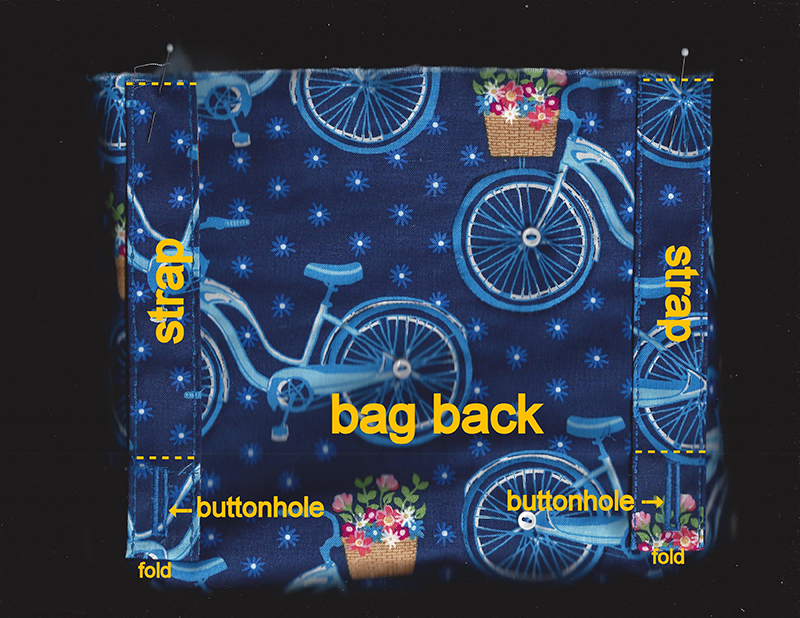
- Stitch vertical buttonhole to fit your button, close to folded edge.
- Pin straps to back, with strap long side even with side edge of bag, through bicycle print and batting, not lining. Take care that the plastic canvas is snug against the floor of the bag and away from the top edge. Stitch straps in place very close to raw edge of bicycle print but ONLY THROUGH THE OUTER BAG AND BATTING.
- Pin raw edge of flap to outer bag, 1” above raw edge of bicycle fabric. Place right sides together. Stitch close to edge of bicycle fabric.
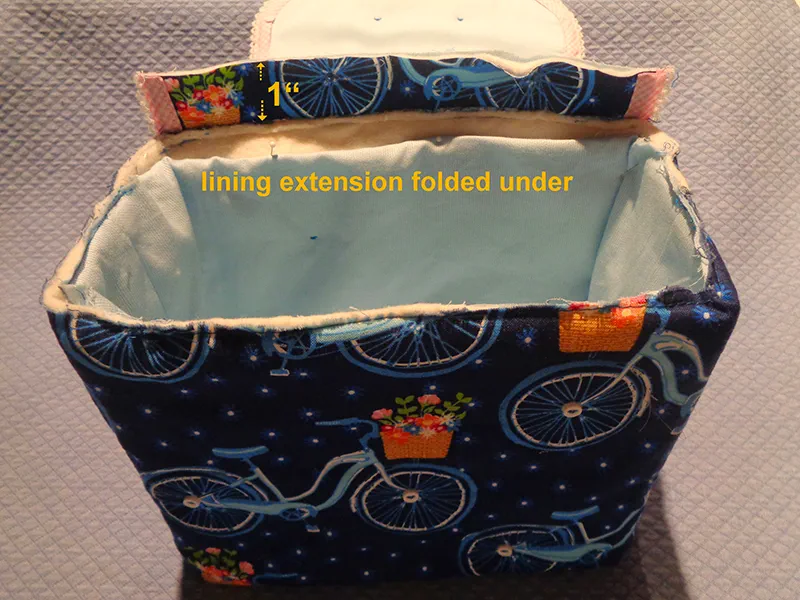
- Tuck 1” flap extension between lining and batting. Fold lining to inside, pin in place and straight stitch close to fold.
Note: For better results, hand baste the lining through the batting and bike fabric, penetrating the flap attachment seam line.
- Remove accessory box to access free arm. Attach stitch in the ditch foot and sew through all three layers with the lining against the bed of the machine.
- Prepare to bind top three edges of bag. Use commercial bias binding or cut your own binding 2” x 18”.
Note: It is not necessary to cut the binding strip on the bias, as there are no curves. Press in half lengthwise and then press raw edges to center. Fold in half, like regular bias, and press again.

- Bind top edge of remaining three raw edges. Use commercial bias binding or cut your own 2” wide. Take care to push plastic canvas to floor of the bag, leaving the top edge without canvas. Use your free arm for this step.
- Fold flap to front and mark placement for second strip of hook and loop tape. Stitch in place with #90 needle as you will be sewing through 2 layers of fabric, batting and the plastic canvas. Use free arm.
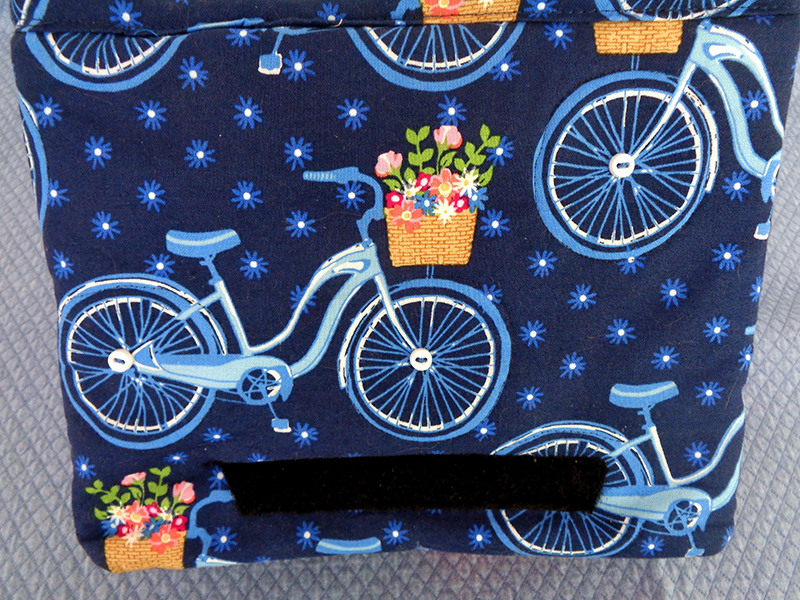
- Wrap straps around bike handlebars to back of bag. Mark placement for buttons. Sew buttons in place.
- Bag finished!
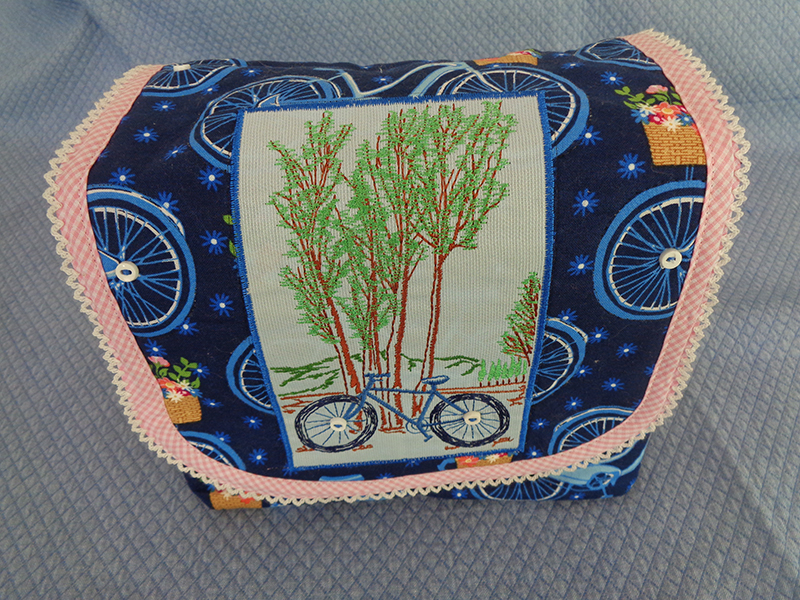
- Hang on a bicycle, load with snacks and go for a ride!
