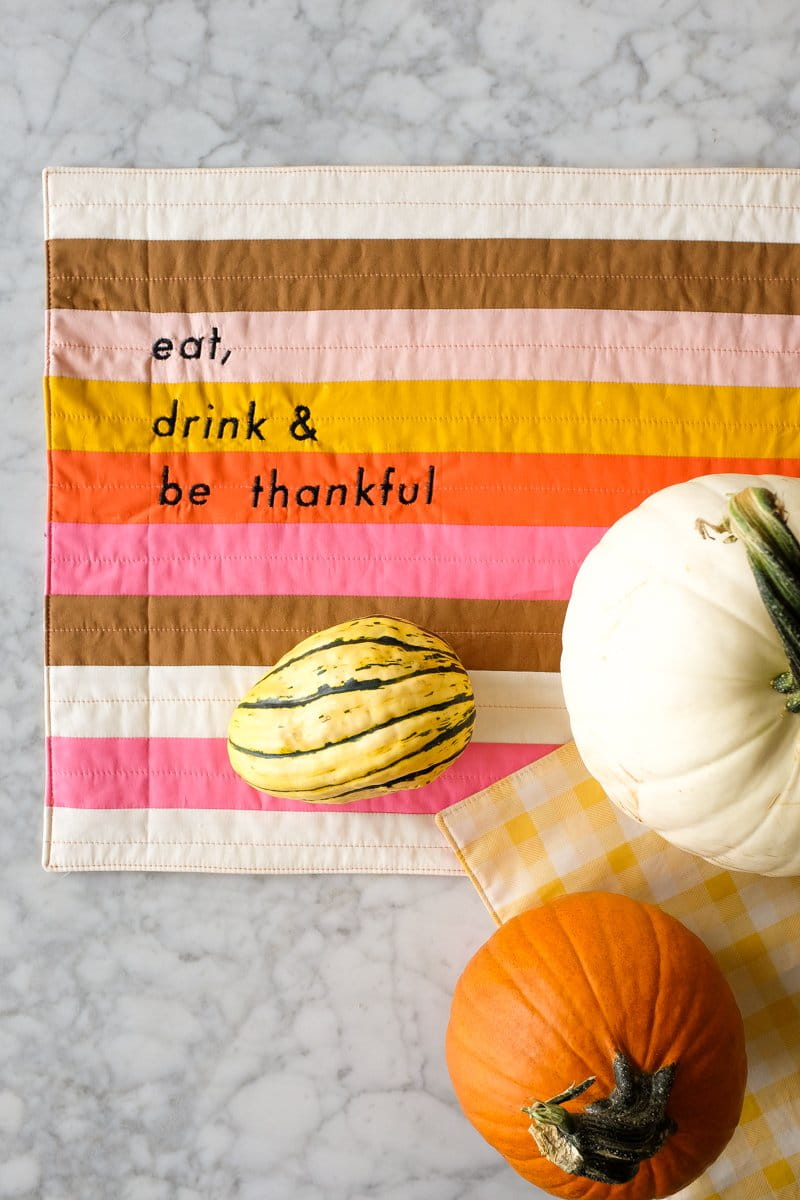
Modern Embroidered Quilted Fall/Thanksgiving Table Runner

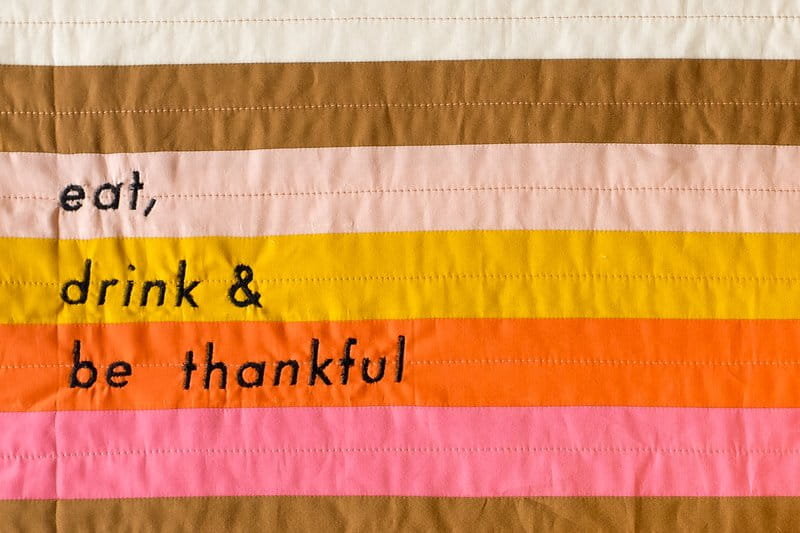
Add warmth and modern style to your fall tablescape with this quilted embroidered table runner. Perfect for last-minute projects, it comes together in just a few hours. Featuring clean, vibrant autumn stripes, this runner offers a great chance to practice straight piecing while adding a personal touch to your fall gatherings.
This blog post will not only show you how to sew and quilt this table runner together, but also how to use the Artspira app’s camera function to position the embroidered lettering perfectly, ensuring precise placement of your lettering.
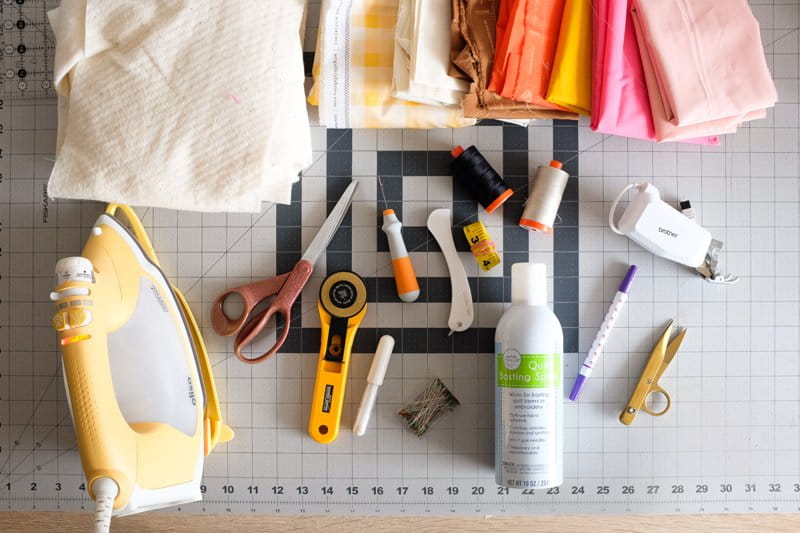
Supplies & Tools:
- Basic sewing machine – Brother Innovis BQ3100, Quilt Club Series* sewing machine was featured in this blog post.
- Basic embroidery machine – Brother Skitch PP1 embroidery machine* was featured in this blog post.
- Smartphone or tablet with Artspira app installed: Please note that the image I used is from my Artspira+ Subscription and is unavailable in the Free version of Artspira. Feel free to add your own design and keep following the steps.
- Download PNG files to embroider “eat, drink & be thankful” here. The PNG files for this project are designed for a smaller embroidery frame (4in x 4in) and bundled in a zip file. It's recommended to download and unzip the file on a desktop or laptop, then transfer the individual PNGs to your smartphone or tablet and upload them to the Artspira app for use. There are a total of four PNG files in the zip file: (1) eat, (2) drink &, (3) be, and (4) thankful.
- Rotary cutter
- Cutting mat
- Quilting ruler(s) – Preferably a long ruler, i.e., 6in x 24in
- Coordinating thread(s) – 50-weight for piecing, general construction, quilting, embroidery
- Hera marker
- Scissors for fabric
- Measuring tape
- Fabric pen or pencil
- Pins
- Seam ripper
- Snips (optional)
- Iron
- Basting spray (for spray basting) or safety pins (for pin basting)
- Point turner or similar tool
- Medium weight tear-away adhesive stabilizer – 6in x 9in rectangle
- Batting – 28in x 68in rectangle
- Walking foot (Brother Compact MuVit Digital Dual Feed Foot was used in this tutorial)
- Fabric, quilting cotton – Requirements are in bold text and based on 42in WOF (width of fabric) and cutting directions are in bullet points.
|
Table Runner Top |
|
|
Fabric A (white) |
⅜ yard (35 cm) · 5 strips, 2in x WOF, sub-cut: - 3 rectangles, 2in x 40½in - 3 rectangles, 2in x 20½in |
|
Fabric B (brown) |
⅛ yard (12 cm) · 2 strips, 2in x WOF, sub-cut: - 1 rectangle, 2in x 40½in - 2 rectangles, 2in x 20½in |
|
Fabric C (orange) |
⅛ yard (12 cm) · 2 strips, 2in x WOF, sub-cut: - 1 rectangle, 2in x 40½in - 1 rectangle, 2in x 20½in |
|
Fabric D (yellow) |
¼ yard (23 cm) · 3 strips, 2in x WOF, sub-cut: - 2 rectangles, 2in x 40½in - 1 rectangle, 2in x 20½in |
|
Fabric E (dark pink) |
¼ yard (23 cm) · 3 strips, 2in x WOF, sub-cut: - 2 rectangles, 2in x 40½in - 2 rectangle, 2in x 20½in |
|
Fabric F (light pink) |
⅛ yard (12 cm) · 2 strips, 2in x WOF, sub-cut: - 1 rectangle, 2in x 40½in - 1 rectangle, 2in x 20½in |
|
Table Runner Back |
|
|
Fabric G (backing fabric) |
1 yard (92 cm) · 2 strips, 15½in x WOF, sub-cut: - 1 rectangle, 15½in x 40½in - 1 rectangle, 15½in x 20½in |
Directions:
Read through all the directions before you start. Seam allowance throughout the project is ¼in, unless specified. The directions are broken down into four key parts: Piecing; Basting & Quilting; Embroidery; and Assembly.
Piecing
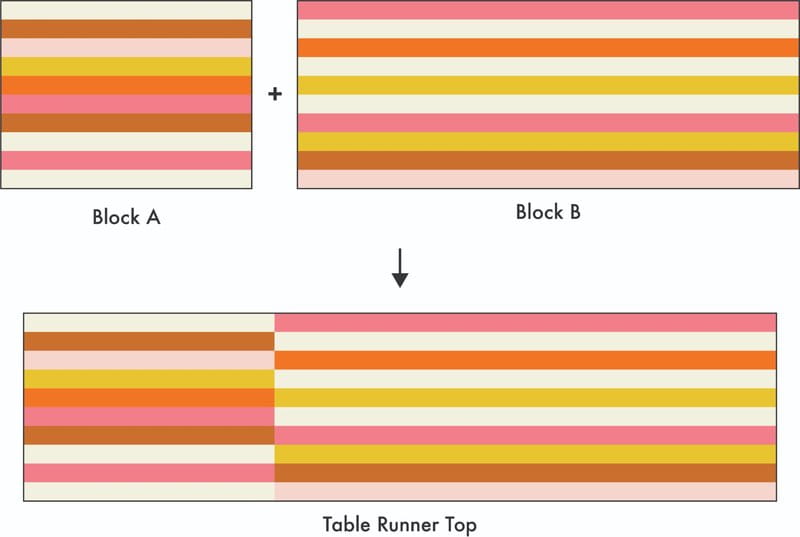
Step 1: Following the diagram, sew together three (3) Fabric A 2in x 20½in rectangles, two (2) Fabric B 2in x 20½in rectangles, one (1) Fabric C 2in x 20½in rectangle, one (1) Fabric D 2in x 20½in rectangle, two (2) Fabric E 2in x 20½in rectangles and one (1) Fabric F 2in x 20½in rectangle to create one (1) Block A. Press the seams as you go. Set Block aside for Piecing, Step 3.
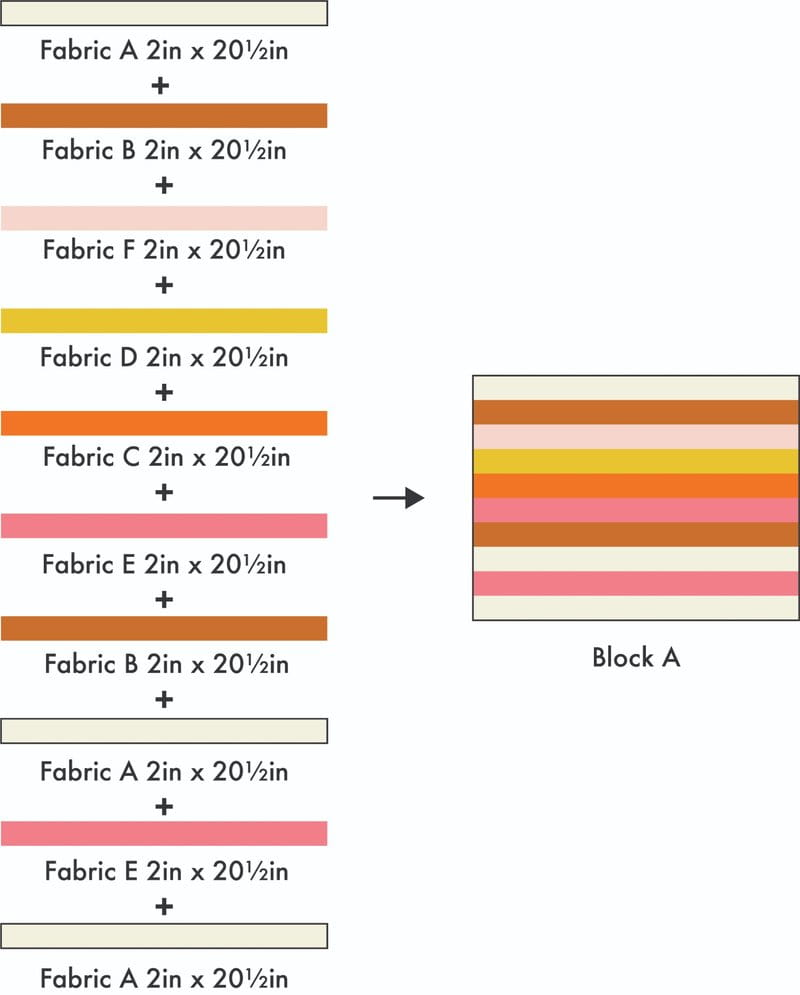
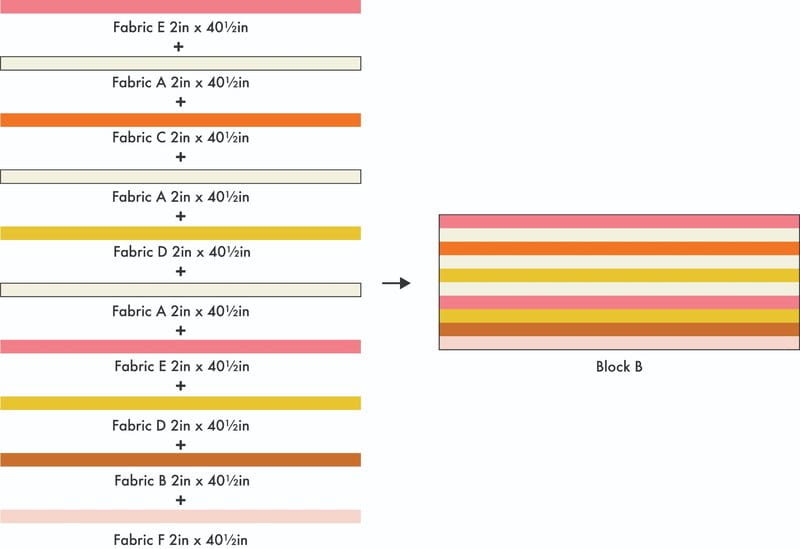
Step 2: As shown in the diagram below, create one (1) Block B unit by sewing together three (3) Fabric A 2in x 40½in rectangles, one (1) Fabric B 2in x 40½in rectangle, one (1) Fabric C 2in x 40½in rectangle, two (2) Fabric D 2in x 40½in rectangles, two (2) Fabric E 2in x 40½in rectangles and one (1) Fabric F 2in x 40½in rectangle. Press the seams as you go.
Step 3: Create Table Runner Top by combining one (1) Block A unit and one (1) Block B unit. Press the seam. Set aside for Basting, Quilting & Assembly, Step 1.
Step 4: Sew together at the shorter ends, one (1) Fabric G 15½in x 40½in rectangle and one (1) Fabric G 15½in x 20½in rectangle to create one (1) Table Runner Back. Press the seam. Set aside for Assembly, Step 1.
Basting and Quilting
A quilt sandwich, typically composed of three layers—quilt top (Table Runner Top), batting, and quilt back (Table Runner Back)—is slightly different for this project. Here, the sandwich consists of the Table Runner Top made in the previous section and a layer of batting. The {Table Runner) backing fabric is not included in this stage and will be added later in this section. In that step, the raw edges of the table runner will be enclosed, concealing raw edges and any embroidery threads on the back of the Table Runner Top.
Step 1: Lay batting down and place the Table Runner Top on top of the batting. The wrong side of the Table Runner Top should be touching the batting. Baste the layers together using your preferred method.
Step 2: Machine quilt on a domestic sewing machine to secure the layers to create one (1) Table Runner Sandwich. In the example, quilting lines were sewn in the middle of each row.
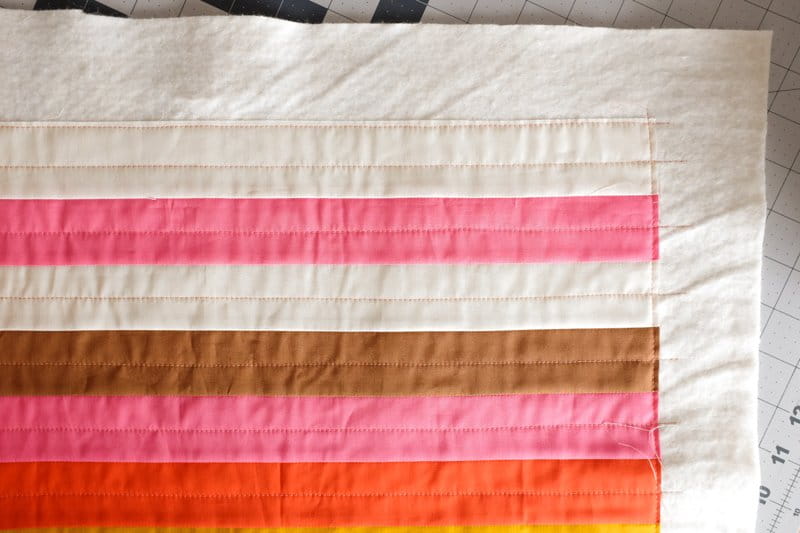
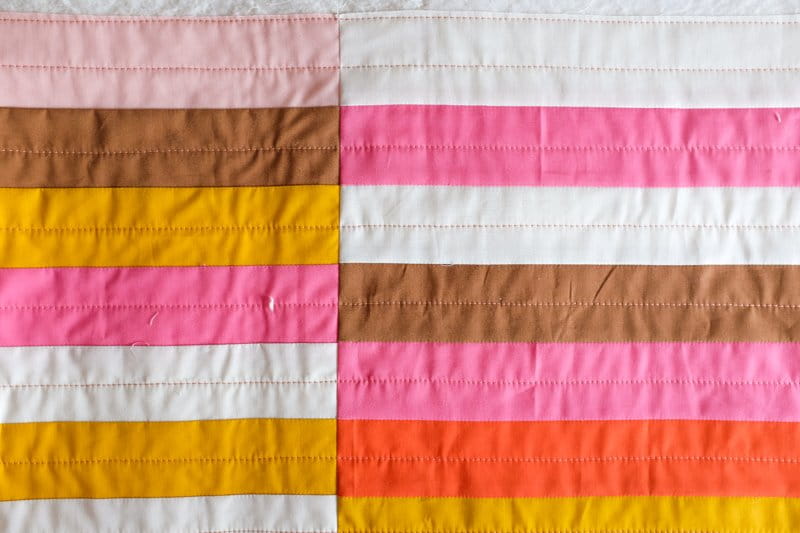
Step 3: Remove excess batting with a quilting ruler and rotary cutter.
Embroidery
Step 1: Using a Hera marker or fabric pencil / marker, measure and mark a vertical line, 2½in from the left edge of the Table Runner Sandwich. The purpose of this guide is to ensure each row of embroidered lettering is all lined up.
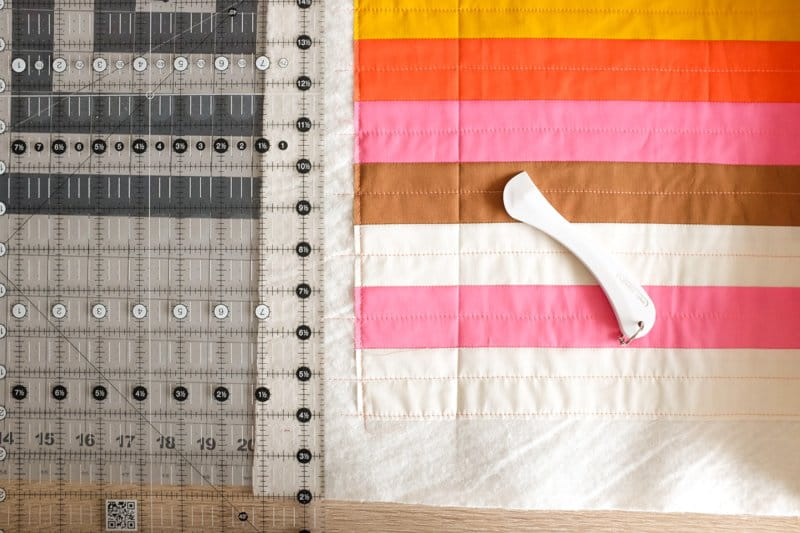
Step 2: Turn the Table Runner Sandwich around so the batting side is facing up and the 2½in guide from the previous step is on the right. Then place the medium weight tear-away adhesive stabilizer approx. 2½in from the top and 1½in from the right of the Table Runner Sandwich.
Step 3: Upload all PNG files to a smartphone or tablet with the Artspira app installed.
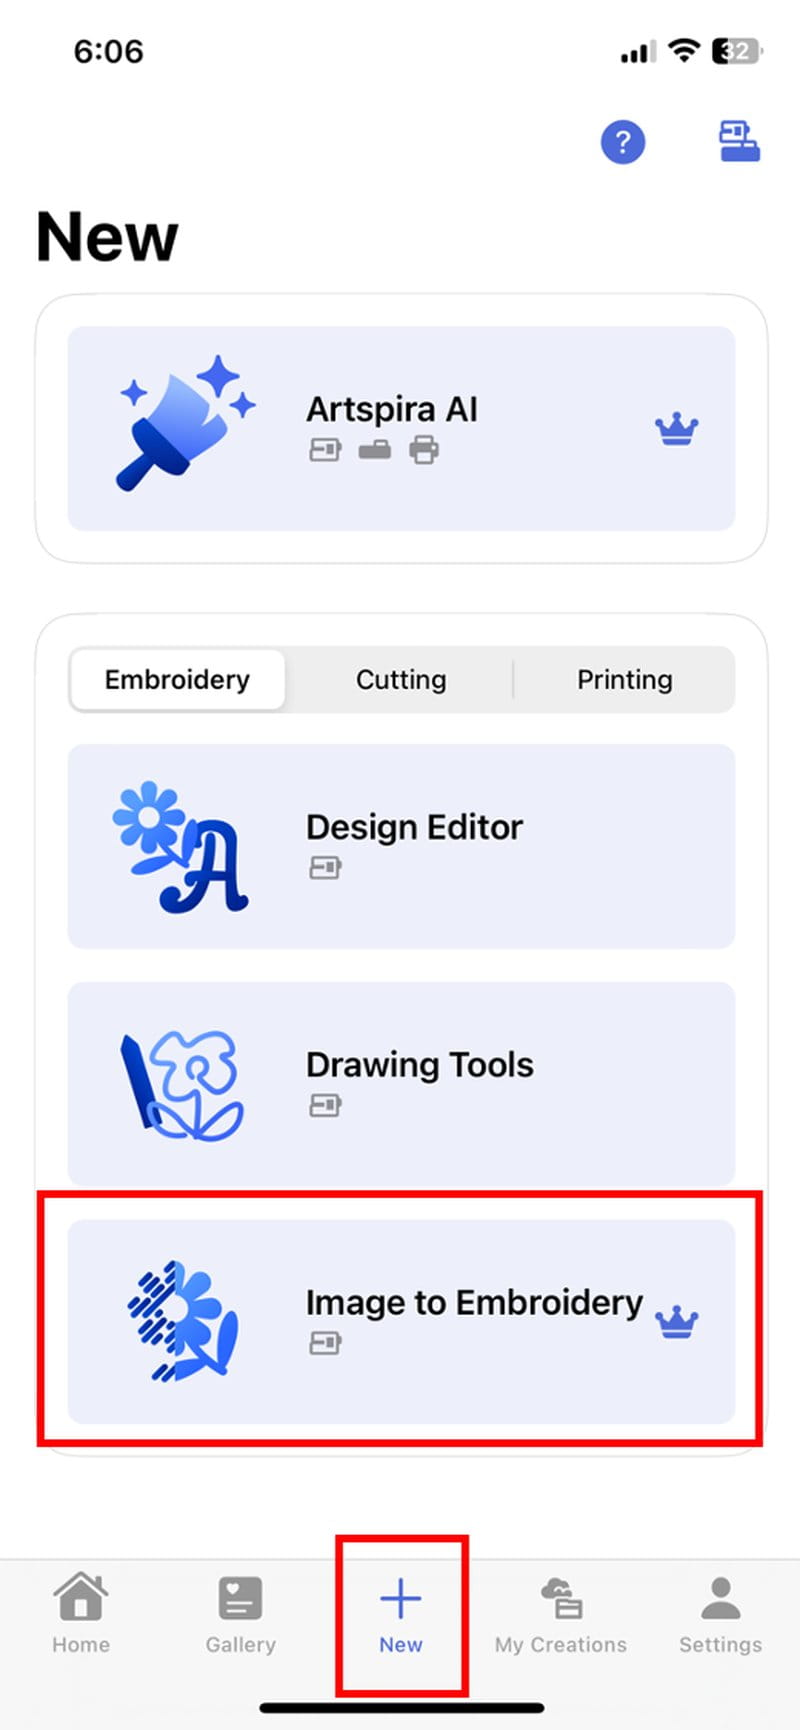
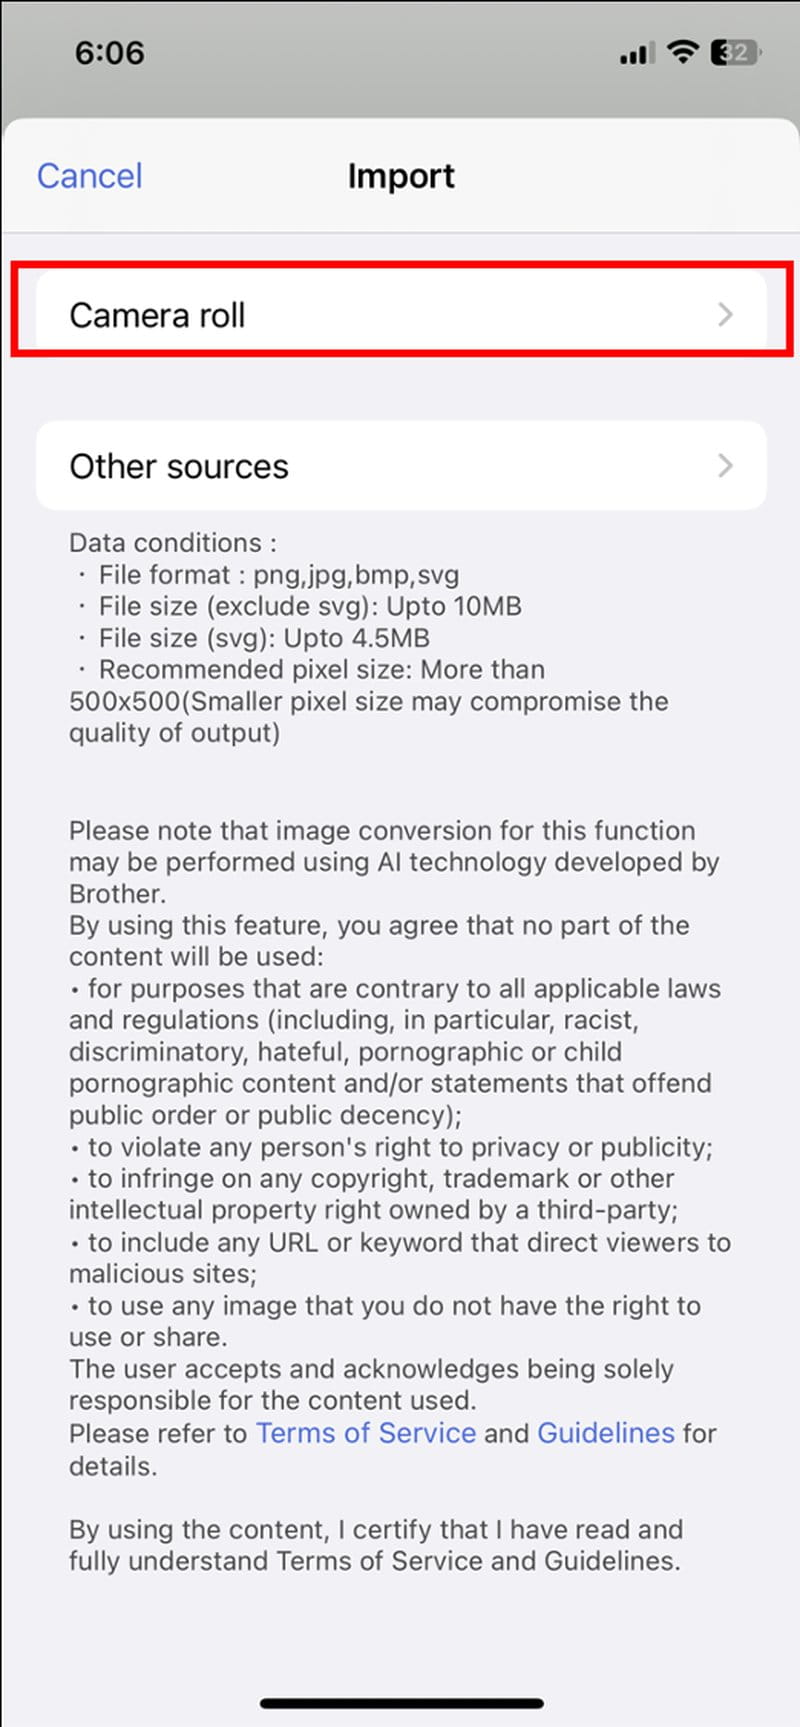
Step 4: Create a new ‘image to Embroidery’ by pressing the ‘new’ button on the bottom, middle taskbar. Then import PNG file that says “eat” from device photo library.
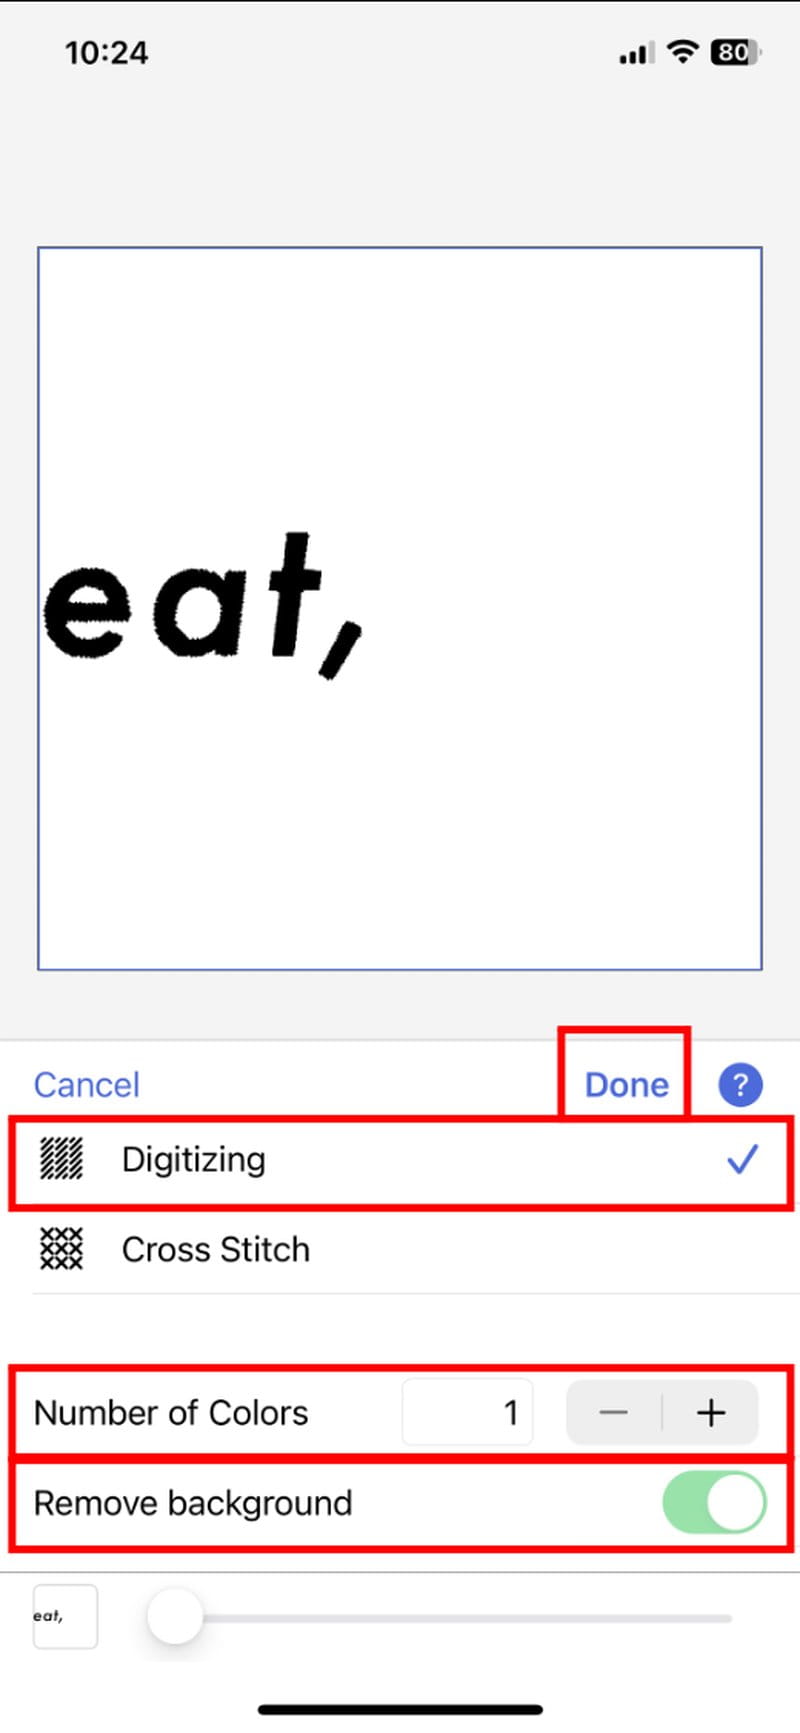
Step 5: Scroll to the bottom of the app, select ‘Digitizing,’ reduce the ‘number of colors’ from 10 to 1, activate ‘remove background’ option and tap ‘preview.’ Wait for the app to update the image. Then click ‘done’
Step 6: Press ‘create’ on the top right corner of the app. A new screen will appear, and the option to ‘save’ on the top right corner becomes available.
Step 7: The app will then prompt to name the embroidery file. Type in the name of the custom embroidery and click ‘save’. Wait for the app to process the action and then tap ‘done’ on the top right corner.
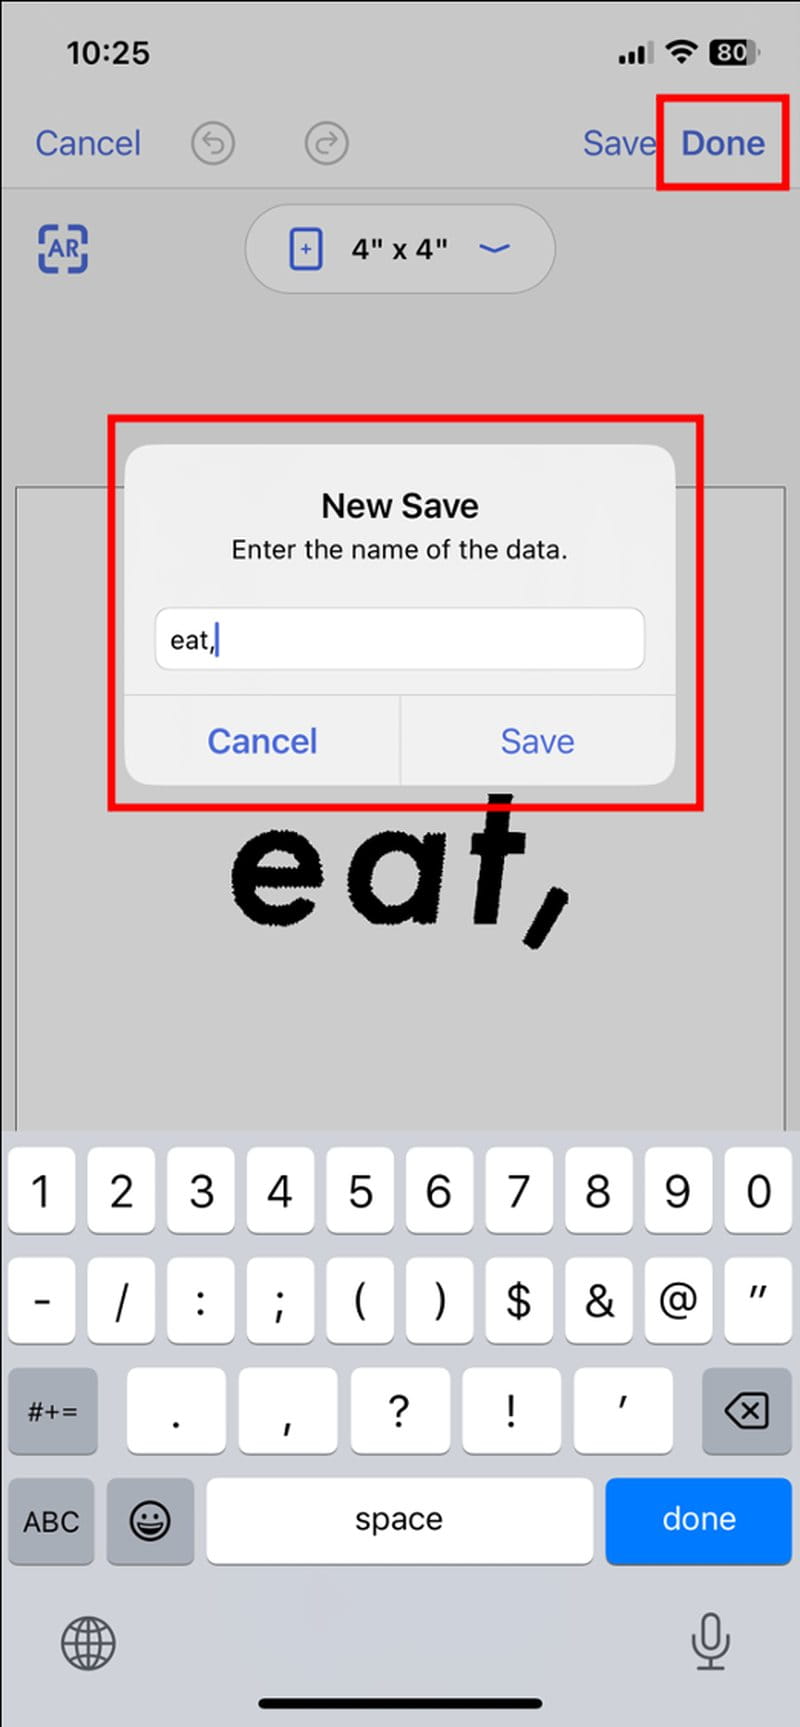
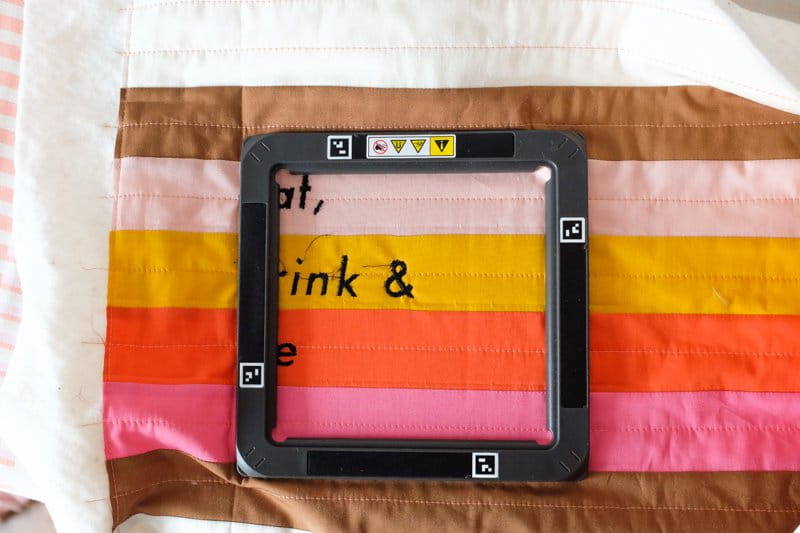
Step 8: Briefly set your device aside and attach embroidery hoop to project, ensuring where the embroidery is going to go on the project is within the hoop. The embroidery will be placed 2½in away from the left edge of the Table Runner Sandwich (as marked in Embroidery, Step 1) and the third, fourth, and fifth rows of the Table Runner Sandwich.
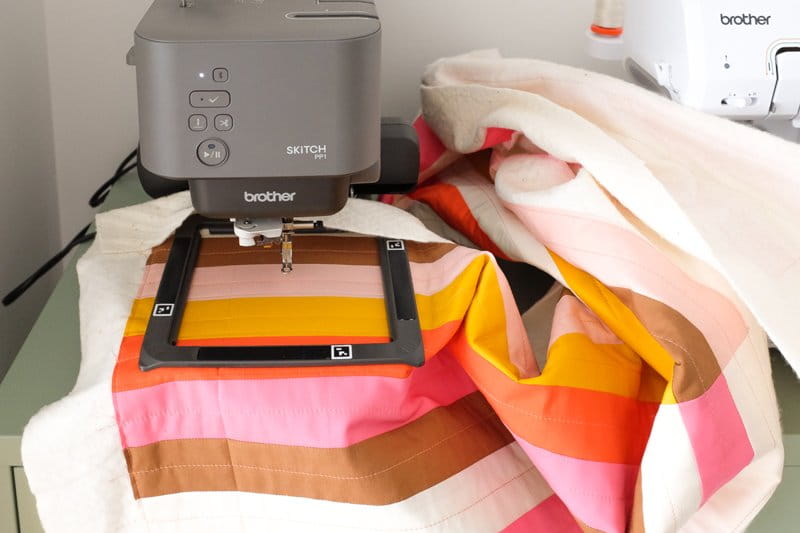
Step 9: Turn on the Skitch PP1 embroidery machine.
Step 10: Going back to the Artspira app. On the new screen, select ‘layout.’ Then the camera on the app will appear. Using the four markers around the embroidery hoop as a guide, hold device parallel to the embroidery frame.

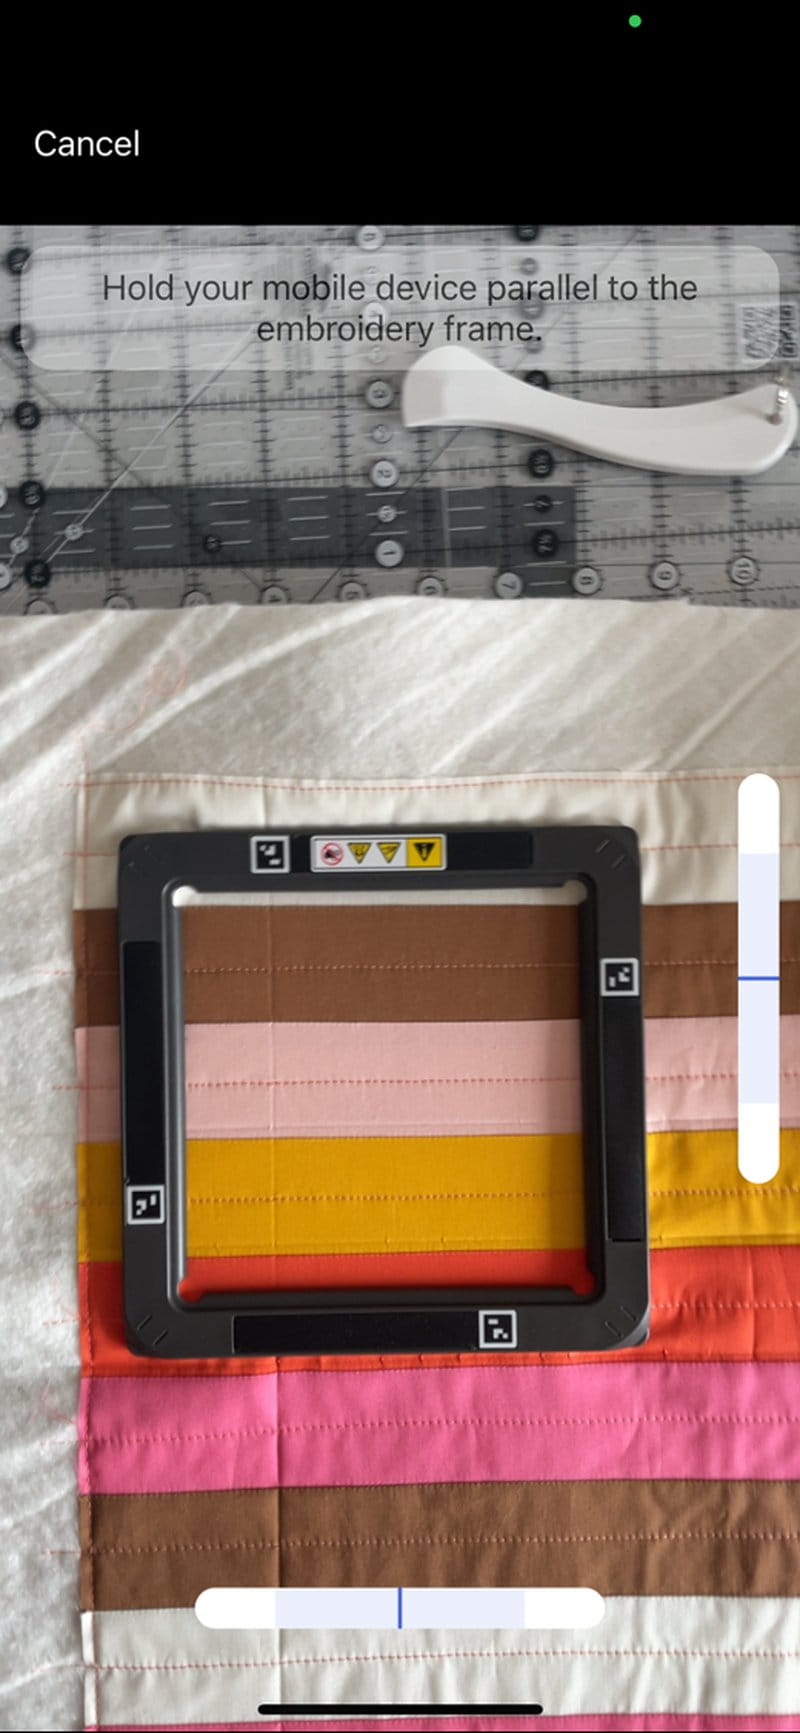
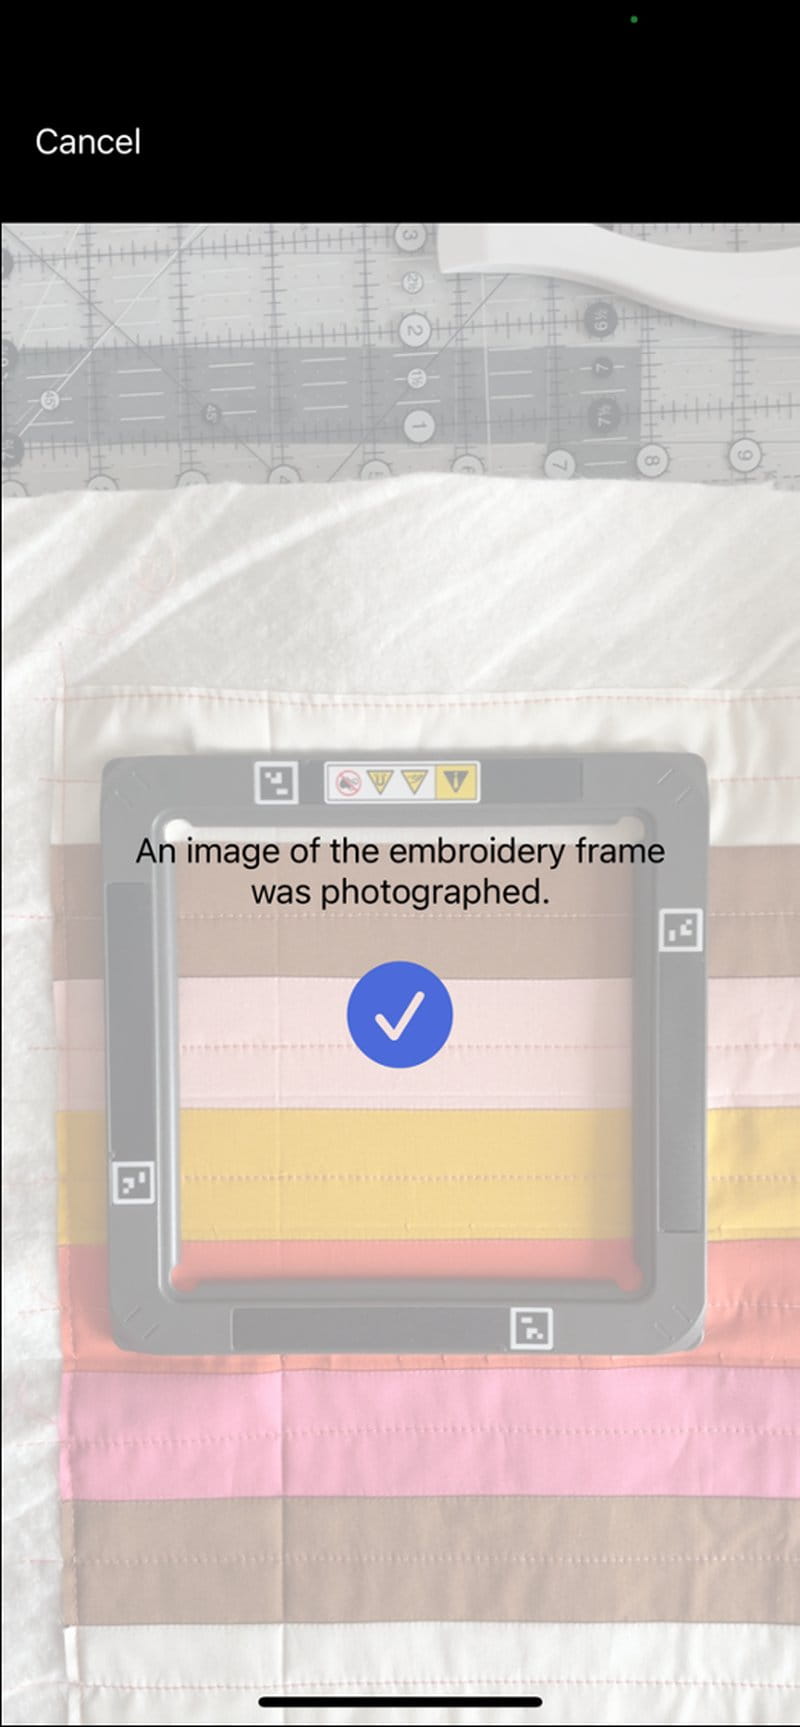
The app will automatically capture a picture of the embroidery hoop. Touch ‘ok’ at the bottom of the screen once it has captured a picture of the quilt sandwich in the hoop.
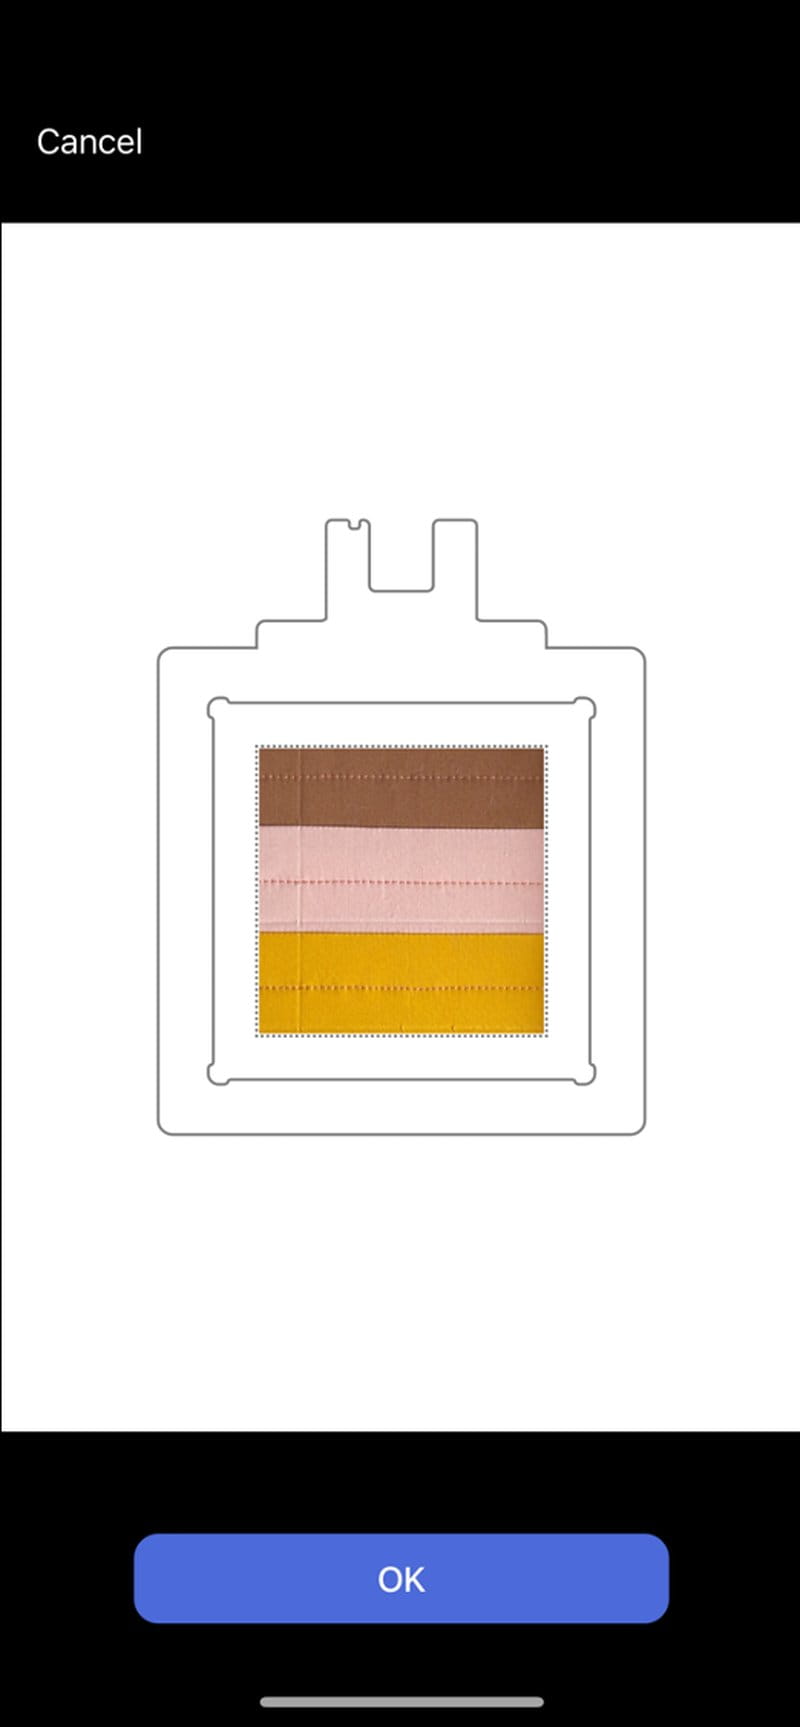
Step 11: With your finger, select the design on the screen and move it so that the left edge is aligned with the guide made in Embroidery, Step 1, and it is in the middle of the third row, vertically.
Press ‘done’ to confirm placement.
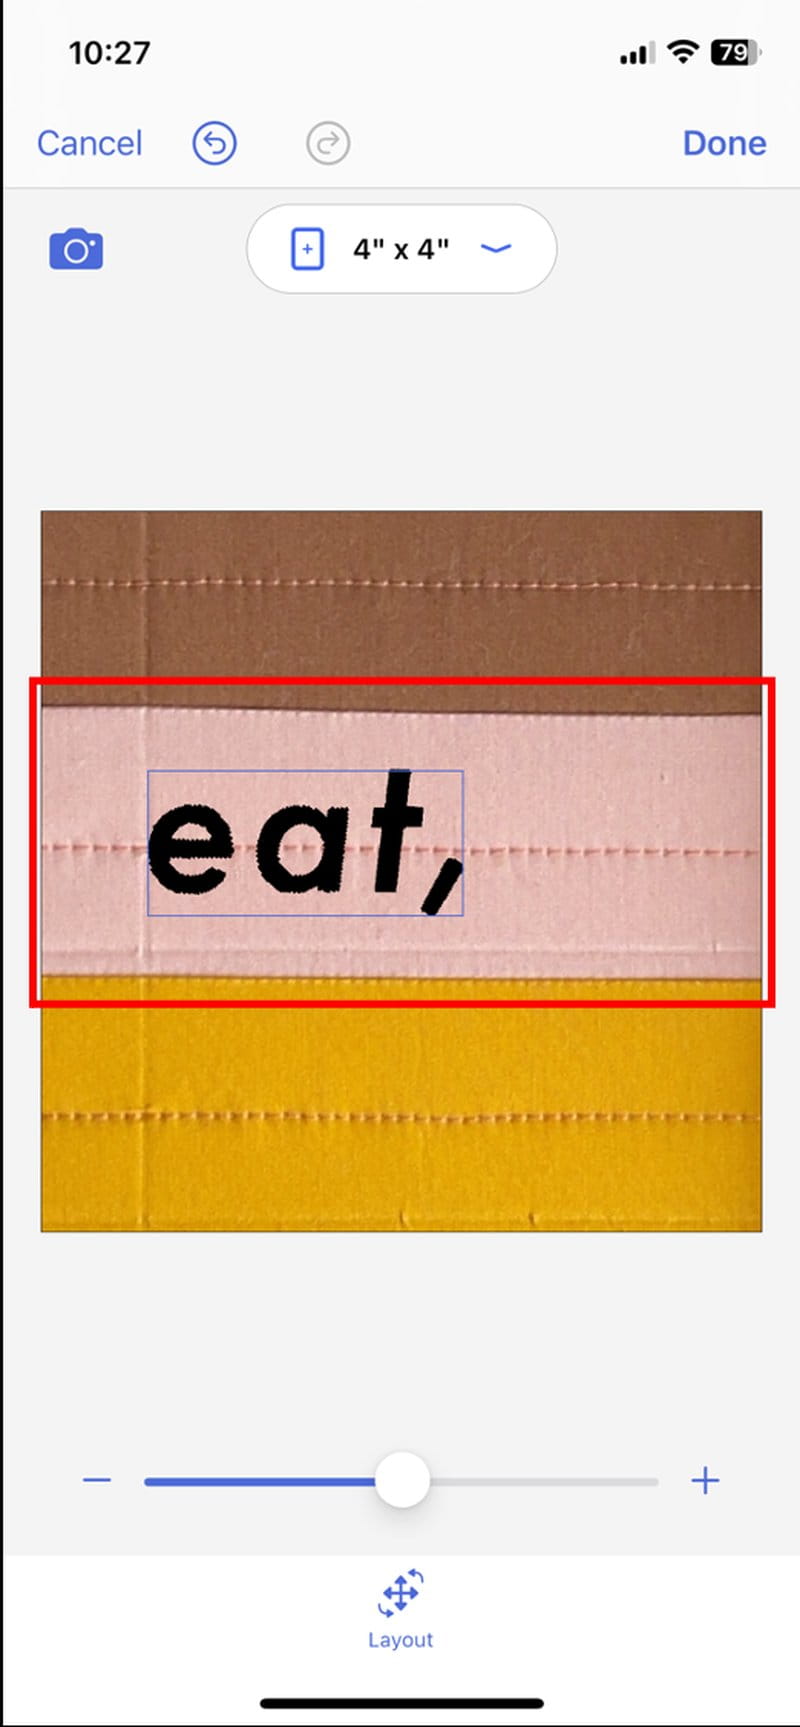
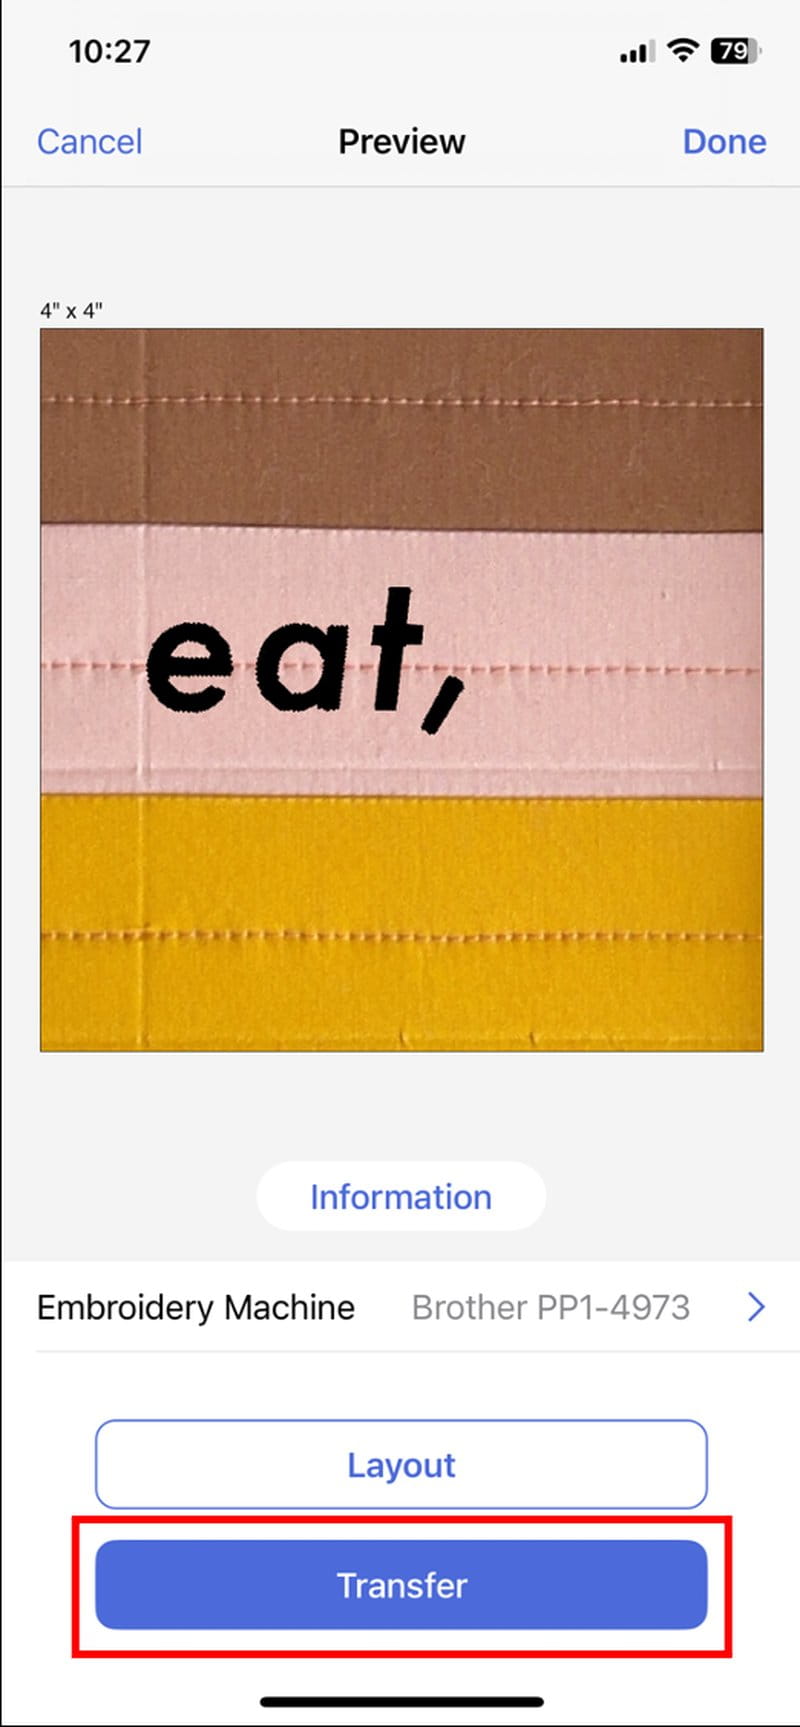
Step 11: Click ‘transfer’ to send the data from the app to the embroidery machine.
Step 12: The app will prompt to check the embroidery area. This is to ensure there are no obstructions whilst stitching. Attach embroidery frame to the machine if you haven’t done so yet, and then touch ‘do a trial run’ on the app. Press the ‘accept’ button on the machine to begin.
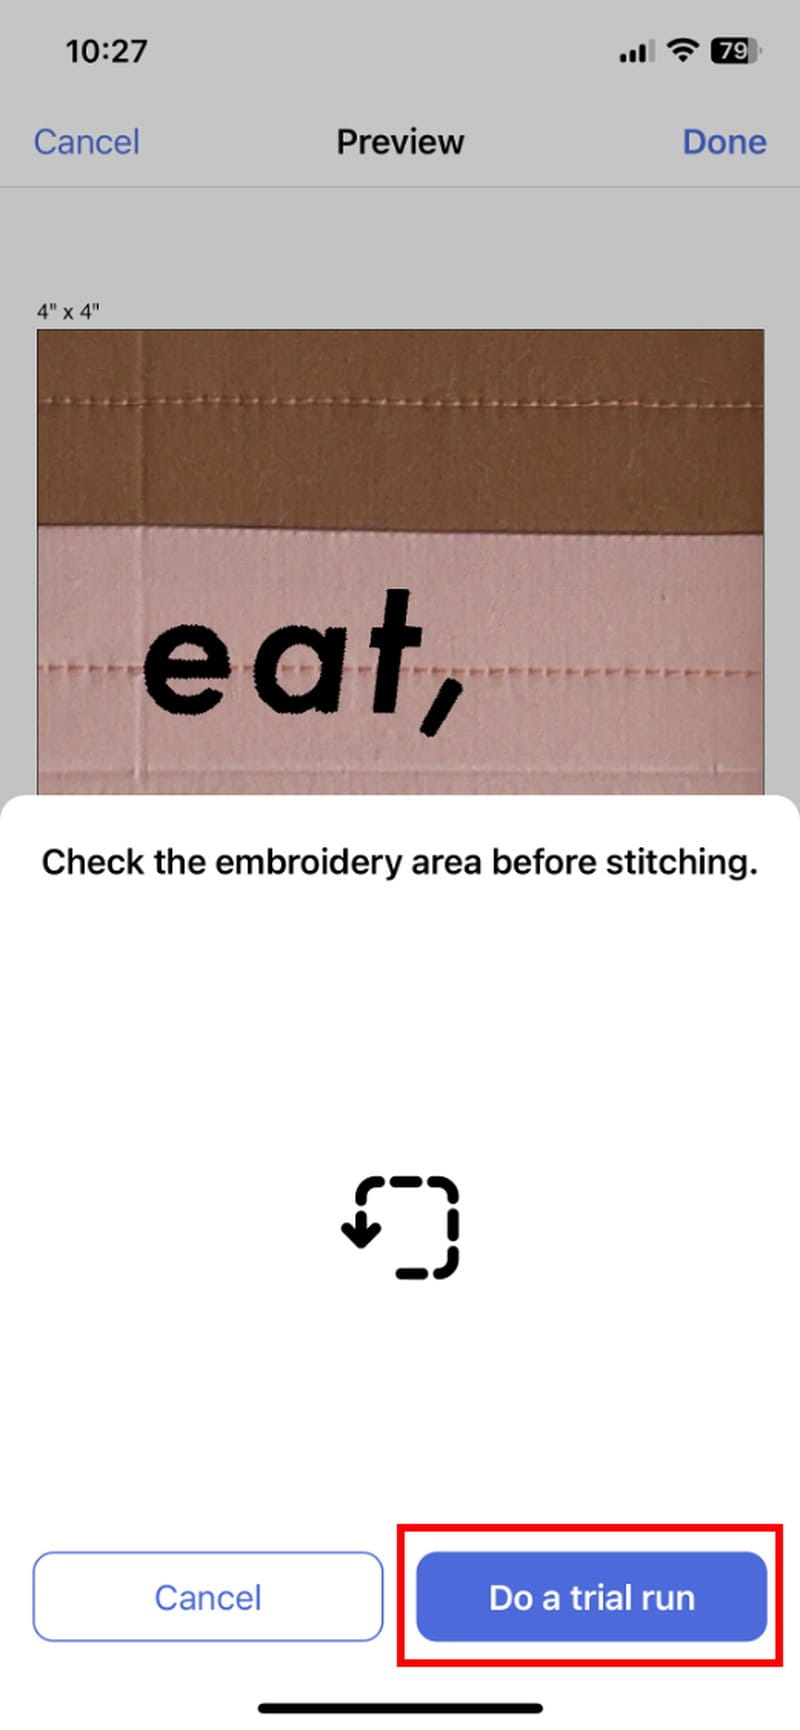
Step 13: A new screen on the app will appear outlining the embroidery time, the number of stitches and the thread color required. It will also prompt to press ‘start / stop’ button on the embroidery machine to commence stitching.

Step 14: Sit back and relax while the machine operates on its own.
Step 15: Repeat steps 3 to 14 to add ‘drink &’ to the fourth row and ‘be’ and ‘thankful’ on the fifth row of the table runner.
Assembly
Step 1: With right sides together, pin Table Runner Sandwich on top of Table Runner Back (created in Piecing, Step 4). Sew ¼in away from all four edges, leaving approximately 6-8in opening to turn the Table Runner right side out. Don’t forget to reverse stitch at the start and end of the seam.
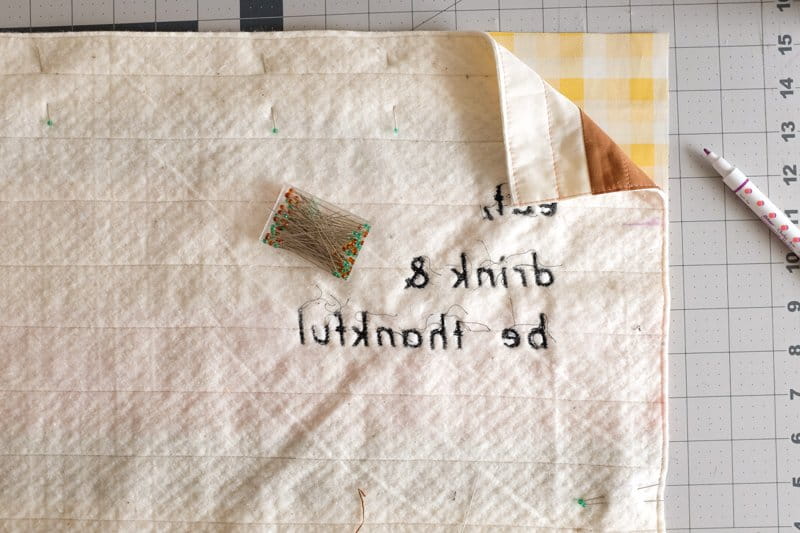
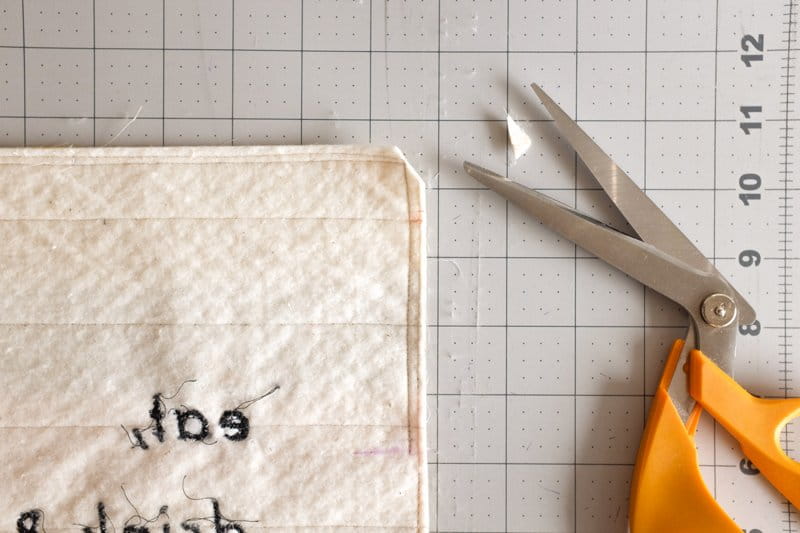
Step 2: With a pair of fabric scissors, carefully clip the corners, avoiding the seams. This will remove the seam bulk.
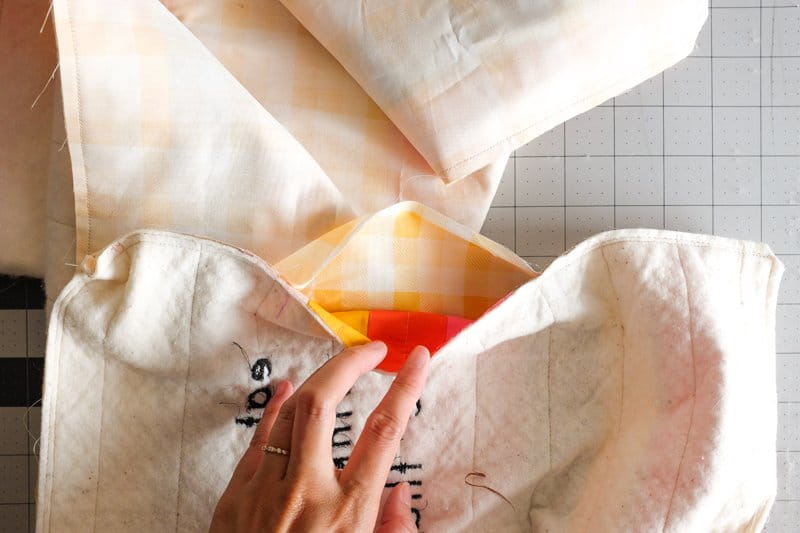
Step 3: Turn the Table Runner right side out. Use a point-turner or similar tool to get the corners looking crisp.
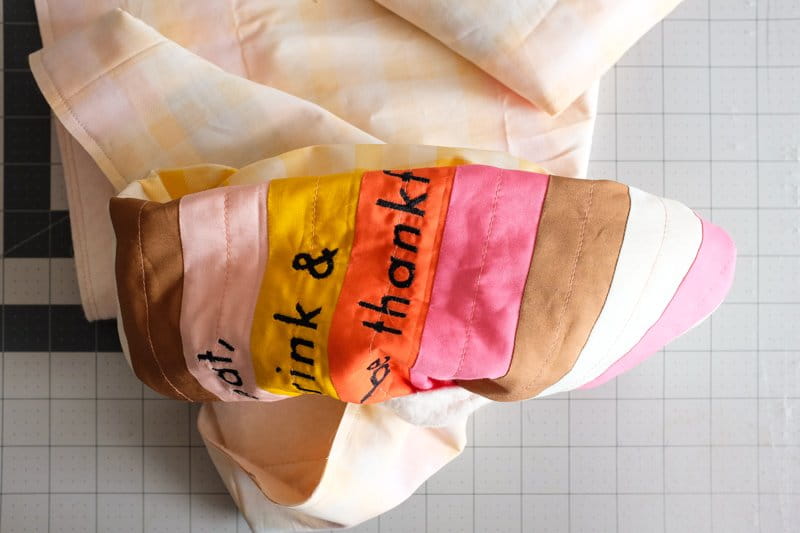
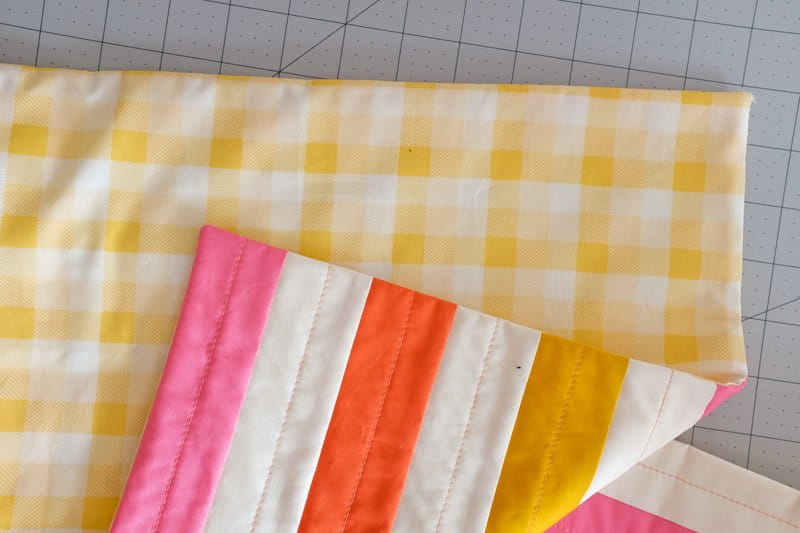
Step 4: With an iron, press the seams in place and topstitch ⅛ away from all four edges.
Topstitching will help the layers stay in place.
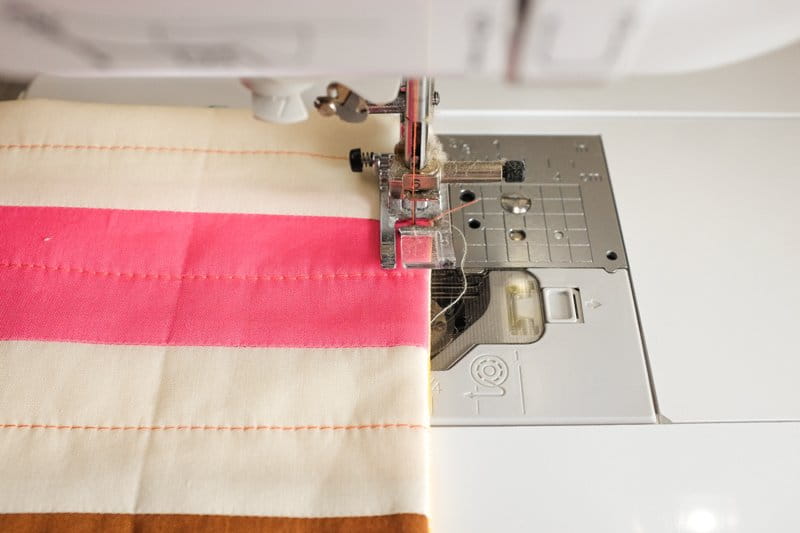
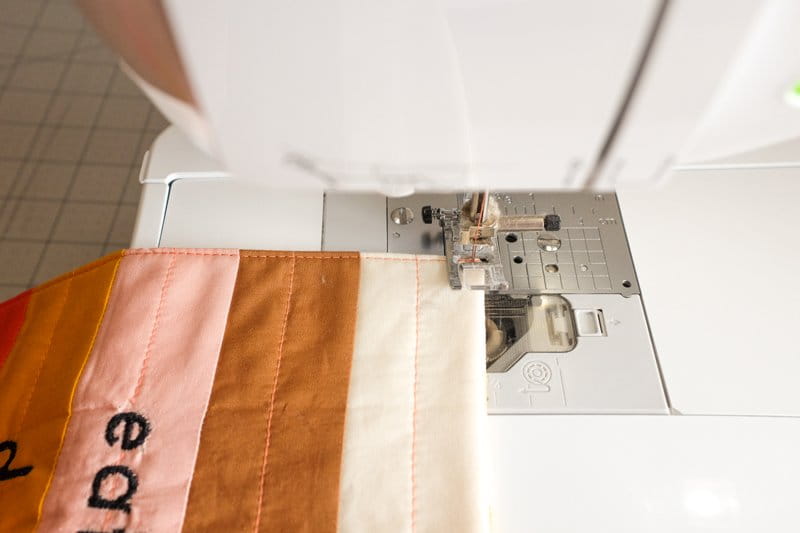
Step 5: Trim loose threads.
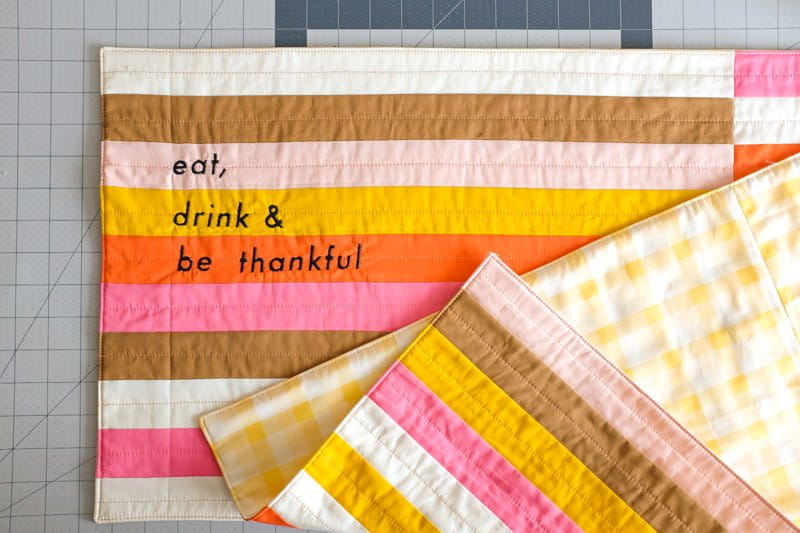
With the final touches in place, it’s time to show off your project! Add your favorite table napkins and placemats and get ready to share plenty of fun laughs and great food with family and friends. This tutorial is a quick and simple introduction to combining elements of quilting and embroidery to create a unique and beautiful piece.
As always, feel free to personalize the project with your own color choices, fabric combinations, or embroidery styles. Don't forget to share your finished piece with your community and tag me on social media so we can see how your version turned out! Happy quilting! @The.Weekendquilter @BrotherSews
