Geometric Jewels Sampler Quilt Along Week 2
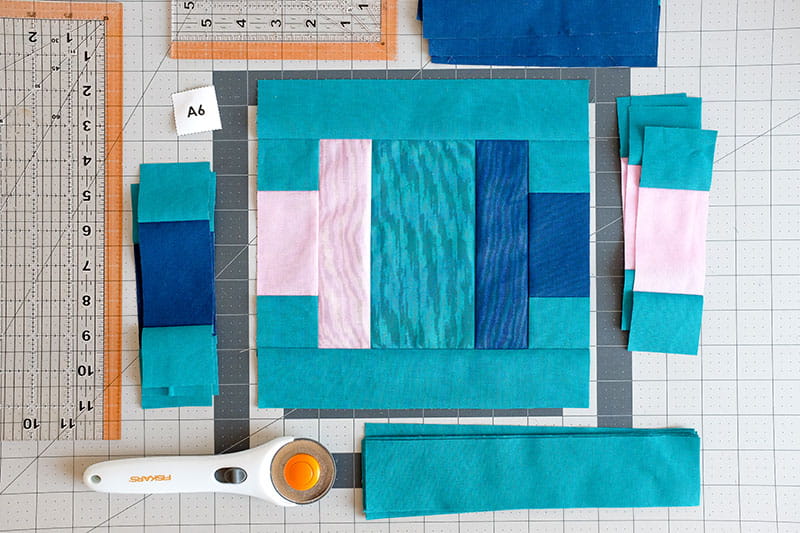
Hello! This is Wendy of The Weekend Quilter, and I’d like to welcome you all to the second week of the Geometric Jewels Sampler quilt along (QAL)! This week is all about strip piecing. One of my favourite quilt piecing techniques. After trying this for the first time, I’m sure it will not be your last!
Referring to the Geometric Jewels Sampler quilt pattern, we’re focusing on pages 4 and 5. The pattern is a FREE download from here, if you haven’t got yourself a copy yet.
In this blog post we will cover seam allowances in quilting – from what they are, how to set up your sewing machine to sew ¼in and scant ¼in seam allowances; and why they are important in quilting. And of course, there will be tips on the strip piecing method.
This blog post is the second out of six blog posts for the Geometric Jewels Sampler QAL. Each week of the QAL duration (began February 27, 2024), there will be a new blog post every Tuesday based around the tasks that will need to be completed for the QAL. Some of the tips are geared towards the Geometric Jewels Sampler quilt pattern. But with that said, you can take the fundamentals from that and apply it to other future quilt projects. To receive updates about the new blog posts as well as weekly QAL tasks, be sure to sign up for the weekly newsletter here. They will be sent via. The Weekend Quilter and only for the 6 weeks of the QAL*.
For more information on what the QAL entails (schedule, tools and supplies, etc.) please check out the previous Geometric Jewels Sampler QAL blog post here. The QAL officially started on February 27, 2024. You’re more than welcome to join at any point and work at your own pace. You could also follow the same schedule as outlined in the first blog post with all the QAL info at a later date.
We’ll be keeping all our weekly tips, tricks and recommendations at the one location for reference here. So you may want to bookmark this one.
*By signing up for the Geometric Jewels Sampler QAL updates, you also agree to sign up to be on The Weekend Quilter and Brother International email newsletter list. We will not sell your email or spam you.
Strip Piecing
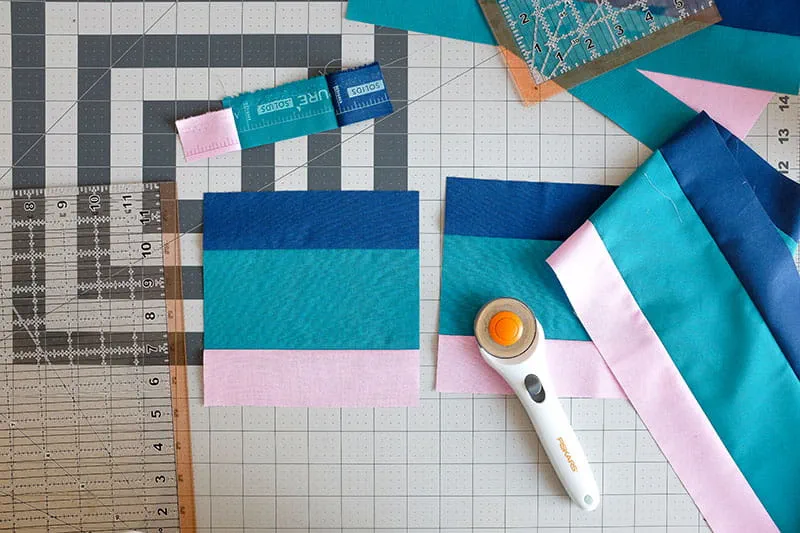
Before we dive further into seam allowances. Let’s briefly talk about strip piecing since that is this week’s piecing technique we’ll be focusing on. Strip piecing is one of my favourite piecing techniques because it is a quick and easy method to get multiple pieces of individual squares and rectangles sewn together at a time. How this is done is, multiple strips of fabric are sewn together to create a ‘strip set’. Then several vertical cuts are made on the strip set to create multiple segments or units. So essentially, you’re combining multiple rectangles and / or squares with fewer seams and pressing them all at once. This means you’re saving time and thread compared with sewing and pressing the pieces individually.
Supplies and Tools:
For this week’s task on making strip piecing blocks, you will need the following:
- Download the Geometric Jewels Sampler quilt pattern for FREE from The Weekend Quilter’s website here.
- Basic sewing machine – the Brother Innov-ís BQ3100 from the Quilt Club Series was used in this tutorial
- Coordinating thread, 50wt cotton for piecing
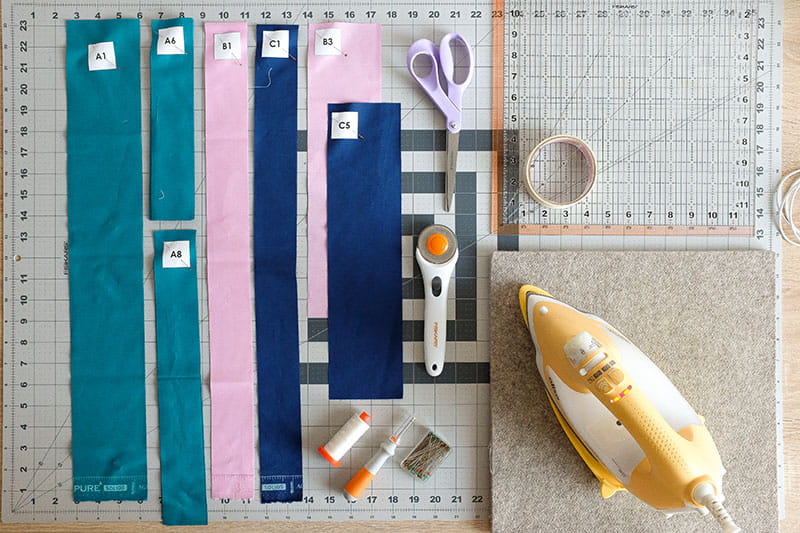
- Corresponding fabric pieces for strip piecing – referring to the Geometric Jewels Sampler quilt pattern on page 3, you’ll need the following fabric pieces labelled as: A1, A6, A8, B1, B3, C1 and C5.
- Pins
- Fabric scissors
- Seam ripper
- Iron and ironing board or wool pressing mat
- Rotary cutter
- Quilting rulers – a medium size ruler, one side at least 7in long to sub-cut strip sets.
- Cutting mat
- Painter’s tape (optional)
Seam Allowances in Quilting
Seam allowance is the distance between the sewn seam and the raw edge of the fabric. The standard seam allowance on quilting projects is ¼in, unless otherwise specified in the instructions. For garment sewing, the standard seam allowance is ⅝in or ½in. In the cutting directions for quilt patterns ¼in seam allowances are generally included in the measurement.
It is important to follow the seam allowance as outlined in the pattern, especially when it comes to quilt patterns. Sewing inaccurate and inconsistent seam allowances throughout a project could snowball into more problems down the track when trying to sew everything together. It may affect the sizing of the blocks and seams not lining up together. Pinning pieces of fabric together before sewing provides additional assurance pieces are lined up and stay together.
There are a few of ways in finding the ¼in seam allowance on your sewing machine:
- Some sewing machines come with a ¼in piecing foot. You could use that as a guide to achieve your seam allowance. Brother offers one. You can read up on how the additional accessory works and if it is compatible with your Brother sewing machine here .
The Brother BQ3100 also comes with an interchangeable bobbin cover with a ¼in guide. How this works when it comes to sewing is, the needle would need to be positioned centrally and the raw edge of the fabric touches the left side of the ¼in guide.
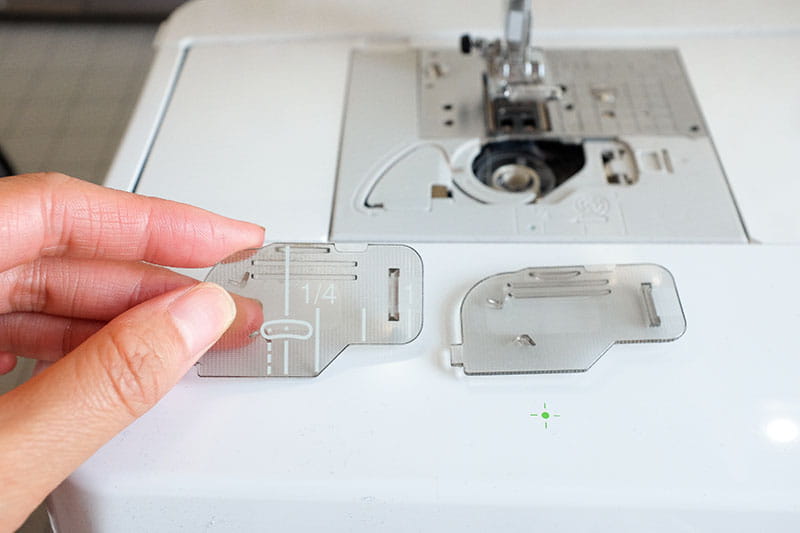
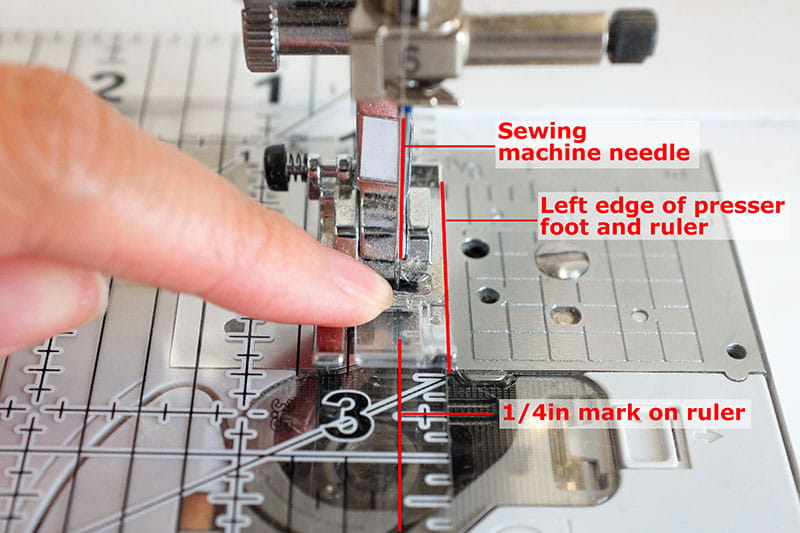
- If your sewing machine allows you to adjust your needle position, take a small quilt ruler. Place it under the presser foot of the sewing machine. Line up the right edge of the ruler with the right edge of the presser foot. Carefully lower the presser foot to hold the ruler in place as if it is a piece of fabric.
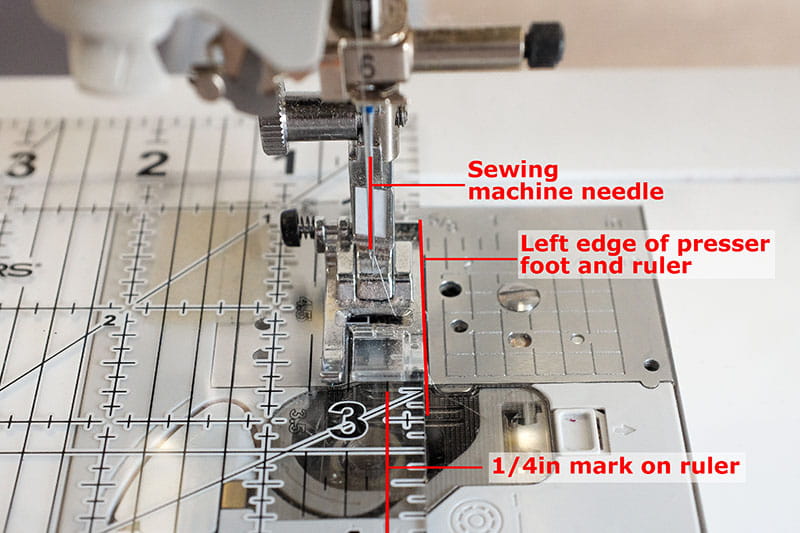
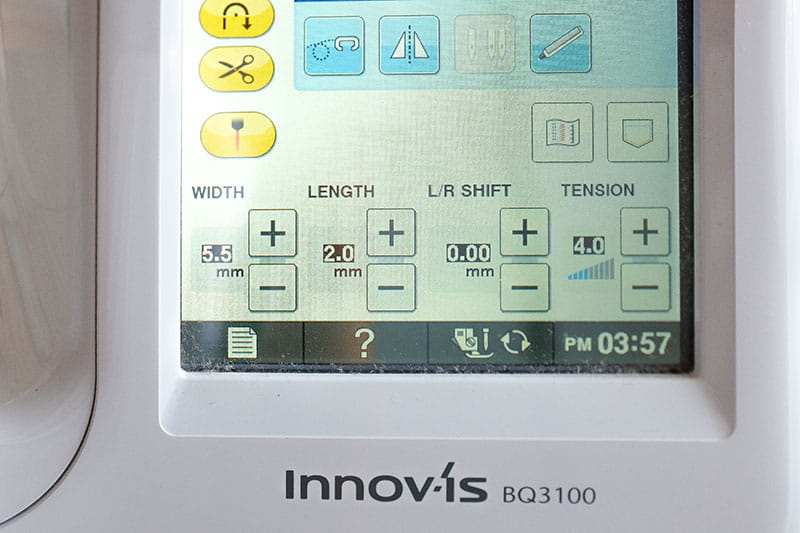
Then using the ¼in guide from the right of the ruler, reposition the needle to the left or right so it is above the ¼in guide on the ruler. Then using the hand wheel on the top right of the sewing machine, slowly and carefully lower the needle to touch the ruler to ensure the needle is actually hitting the ¼in guide. Adjust the needle position left or right as needed until it matches the ¼in mark on the ruler by adjusting the stitch width setting.
If it helps, you could make a note of the stitch width setting for future reference so you don’t need to repeat these steps to find the ¼in seam allowance. For example, I’m using the Brother Innov-ís BQ3100 sewing machine, and I’ve made a note of a stitch width of 5.5mm for ¼in seam allowance.
DO NOT press the ‘needle position’ button to lower the needle position! The force from the needle going down and hitting the acrylic ruler will snap the sewing machine needle and may damage the machine. - If your sewing machine doesn’t allow you to adjust your needle position from left to right, you could place a small quilting ruler between the sewing machine and presser foot. Then slowly lower the needle down with the hand wheel on the top right of the sewing machine until the needle meets the first ¼in mark from the right of the ruler. As previously mentioned, DO NOT press the ‘needle position’ button to lower the needle position! The force from the needle going down and hitting the acrylic ruler will snap the sewing machine needle and may damage the machine.
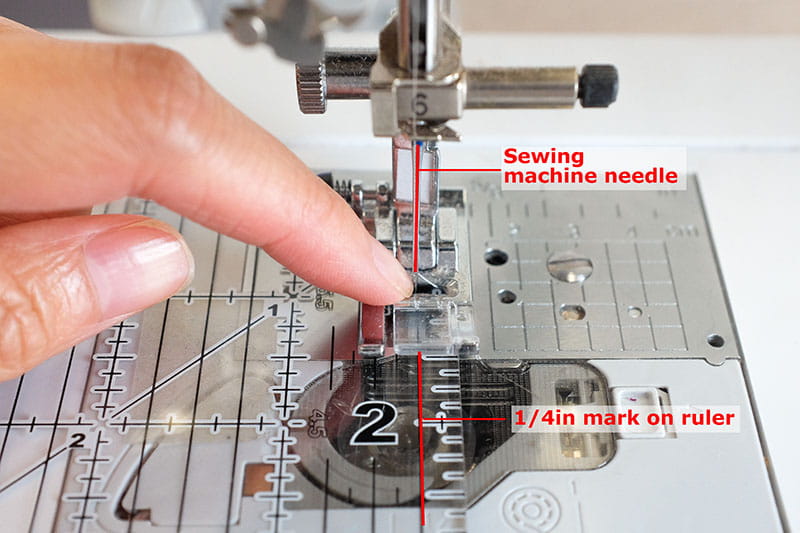
With the needle in position, gently lower the presser foot to prevent the quilting ruler from shifting. Then stick a 3-4in piece of painter’s tape on the throat plate with the left edge of the tape lined up with the right edge of the quilting ruler.
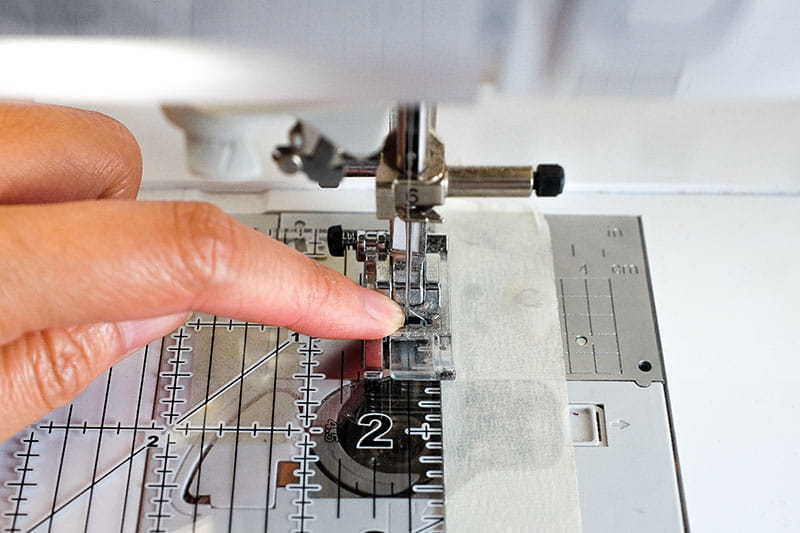
Essentially the quilting ruler is the piece of fabric. Thereby, when it comes to sewing your fabric pieces together, you line up the right, raw edge of the fabric pieces with the left edge of the painter’s tape. And of course, don’t forget to remove the ruler from the sewing machine before you start sewing!
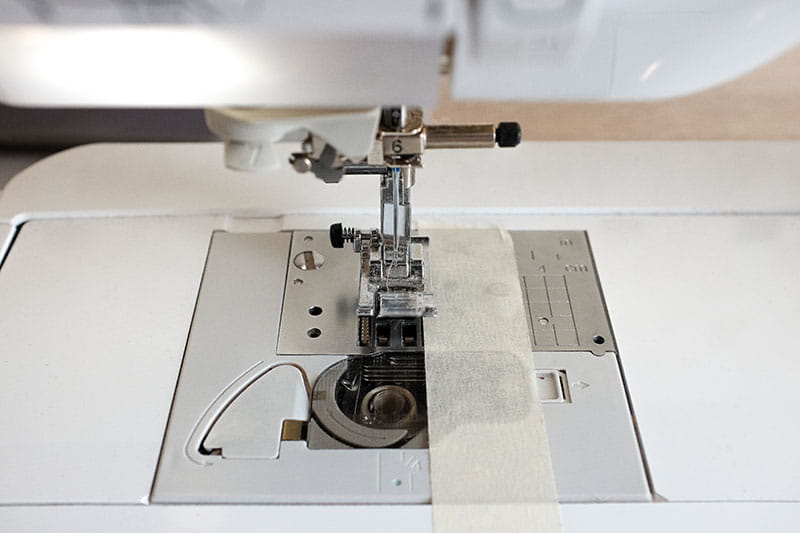
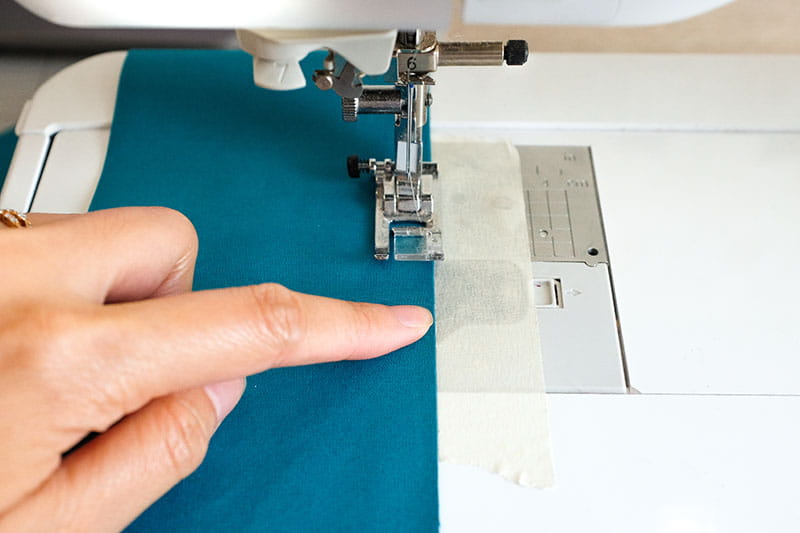
- The final method in finding the ¼in seam allowance is as simple as a touch of a button. Scrolling through the utility stitch menu on my Brother Innov-ís BQ3100 from the Quilt Club Series, there is an option for ‘piecing stitch (right)’. The stitch number is listed as 1-29. This may vary across different Brother sewing machines.
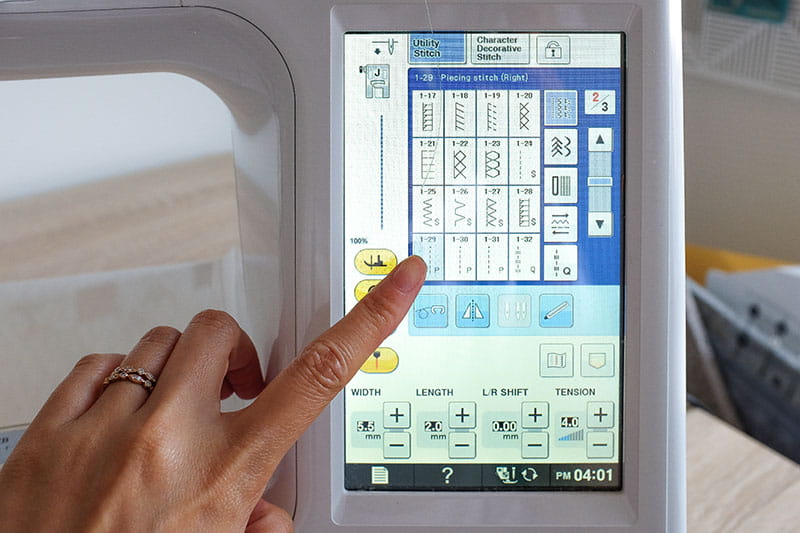
When I’m using this stitch setting, the needle position shifts to the right so that it is ¼in away from the right edge of the presser foot. Be sure to have the correct foot attached here. Otherwise, the seam allowance might not come out as ¼in. If you’re unsure of which presser foot to use, on the top left of the touch screen panel on the sewing machine, there’s a presser foot icon with a letter marked on top. For this particular stitch setting, it requires the J presser foot.
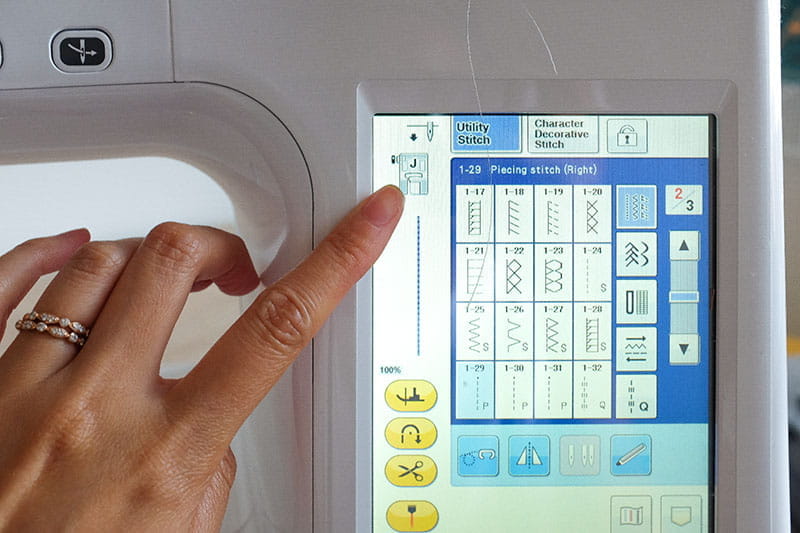
Since upgrading my sewing machine to the Brother Innov-ís BQ3100 from the Quilt Club Series I haven’t looked back at the methods above.
Sometimes a quilt pattern may ask you to sew with a scant ¼in seam allowance, for example the first three steps in the Strip Piecing section of the Geometric Jewels Sampler quilt pattern (page 3). A scant ¼in seam allowance is ever so slightly narrower than the standard ¼in seam allowance used in quilt projects. Adjusting and scanting your seam allowance takes into consideration fabric loss after the seam is pressed open or to the side. Once you have identified the ¼in seam allowance on your sewing machine, finding the scant ¼in seam allowance is easy. Here's a couple of different ways:
- If your sewing machine allows you to adjust your needle position, move the needle a hair to the right to make the seam allowance a little smaller. Depending on your sewing machine, you could increase the stitch width up one notch by either a touch of a button or turning the needle position dial slightly. For example, the stitch width setting for ¼in seam allowance on my Brother Innov-ís BQ3100 is 5.5mm and to get a scant ¼in seam allowance, I press the ‘+’ button under the stitch width option once to move the needle position slightly to the right. Therefore, the stitch width is set as 6.0mm. These settings may vary from machine to machine. You may also want to make a note of the machine settings once you have found the scant ¼in seam allowance for consistency when it comes to sewing scant seam allowances again.
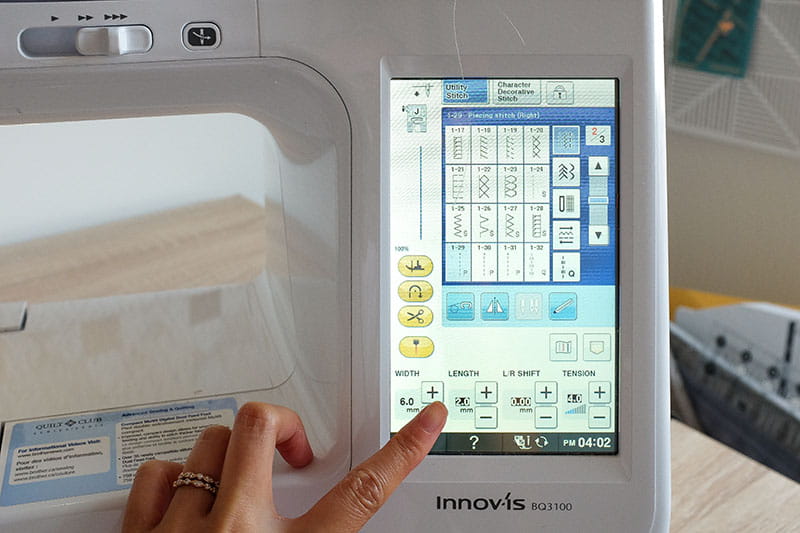
When it comes to sewing, continue to use the right edge of the presser foot as a guide and line that up with the raw edge of the fabrics. Adjust one notch back to the left if the pattern calls for a ¼in seam allowance. - If you used tape to mark your ¼in seam allowance on your machine (method 3 under finding ¼in seam allowance), eyeball approximately 1 millimetre from the left edge of the ¼in seam allowance guide tape (think about a string of a sewing thread). Then lay a new piece of tape on top to create your scant ¼in seam allowance guide.
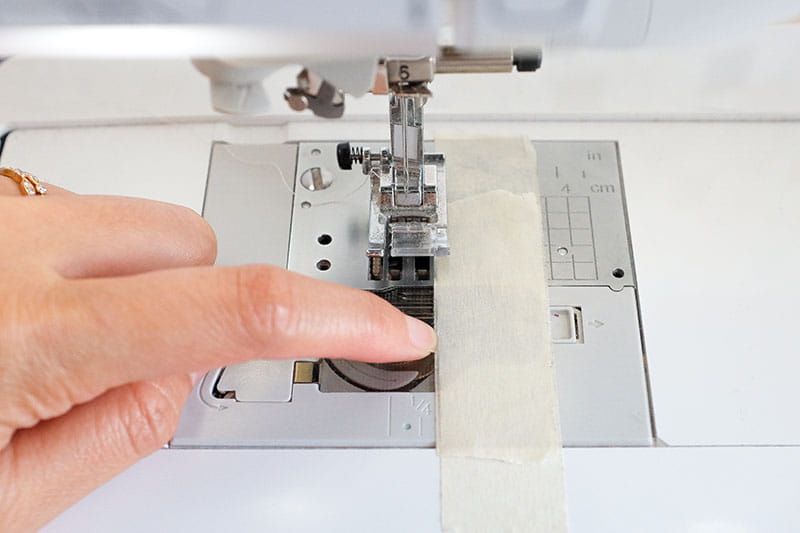
When it comes to sewing, you’ll just use the left edge of the new tape to line up with the raw edge of your fabrics. To revert back to using a ¼in seam allowance, carefully peel the top layer of tape. If you accidentally ruin the tape that indicates where the ¼in seam allowance is, it is not the end of the world. Just spend a minute or two setting it up again.
Strip Piecing Tips
Now that you have a better understanding of seam allowances in quilting, let’s talk more about strip piecing. Here’s a few tips for successful outcomes:
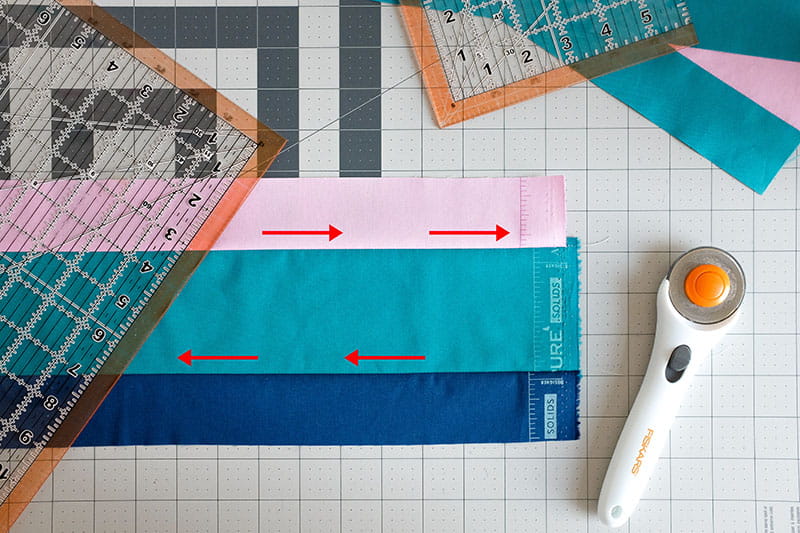
- When sewing the strips together (referring to steps 1 to 3 on page 3 in Geometric Jewels Sampler quilt pattern), to avoid any bowing or distorting of the strip sets shape, alternate the directions the seams of each strip are sewn.
For example, using step 1 in the strip piecing section of the pattern (page 3), it asks you to sew together one B1 strip to one A1 strip. Followed by one C1 strip. When sewing the first strip to the second strip I start at one end. Then when it comes to sewing the third strip to the first and second strip, I start at the end where I ended my first seam. Here’s a diagram below with arrows highlighting the directions in which the seams should be sewn:
- Referring to steps 1 to 3 of the strip piecing section, it asks to press the seams as you go. You can press it open or to the dark side. It’s entirely up to you. One thing to note is to use a hot, dry iron and press. Do not iron the sewn strip sets in a back-and-forth motion as if you’re ironing a shirt. This vigorous motion, as well as the steam generated from the iron can also play a role in distorting or bowing the strip sets.
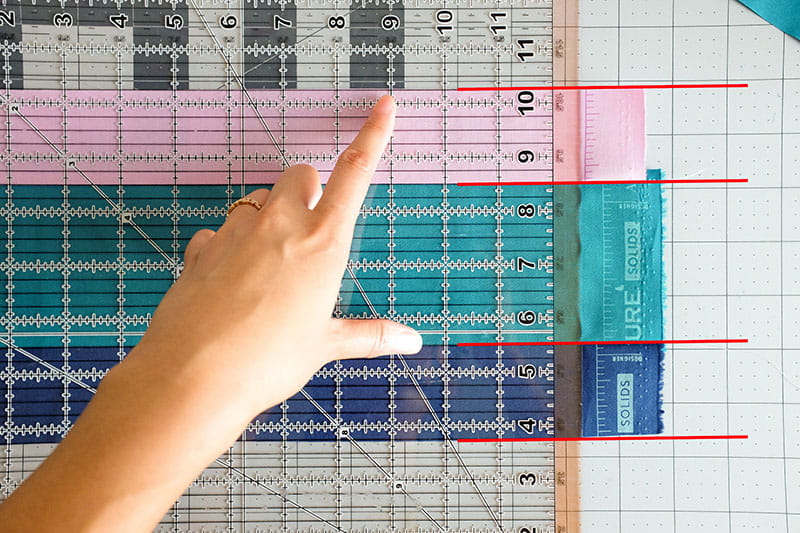
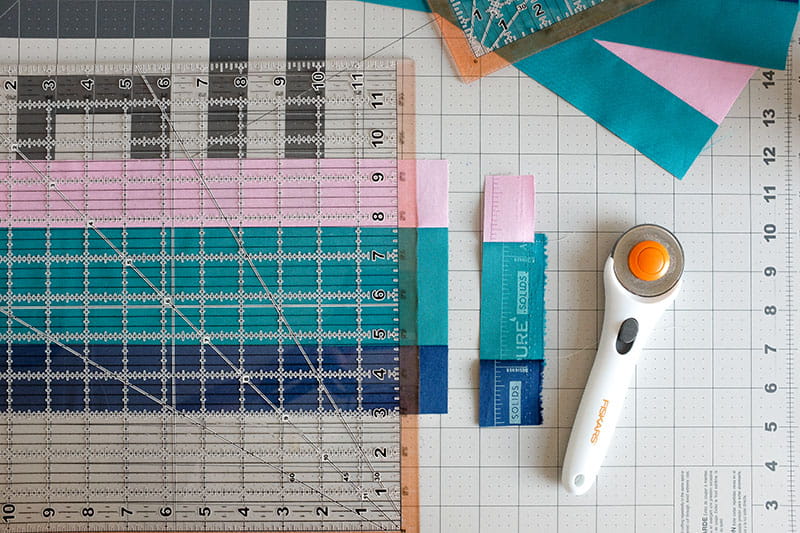
- When it comes to removing the jagged or uneven edge of the strip set (step 4) and cutting set units (step 5), use the top and bottom edges and / or the seams of the strip set units, and the horizontal lines and marks on the quilting ruler to align the strips for more accurate cutting and piecing.

Hope these little tips make a big difference in how your strip piecing sets and blocks turn out in this week’s task and future projects that have strip piecing!
Seeing your work brings us so much joy. Be sure to also share your works-in-progress on social media by tagging Wendy @The.WeekendQuilter and @BrotherSews and using the #GeometricJewelsSampler #BrotherSews hashtags.
Till next time, happy sewing!

