DIY Monogrammed Quilt Potholder: A Quick, Handmade Gift Idea
Project Summary:
Gift-giving season is fast approaching, bringing with it the joy of handmade presents! If you're looking for a quick, thoughtful, and beginner-friendly project to spread a little cheer, a circular quilted potholder with monogram embroidery is the perfect choice. It is both a functional kitchen essential and a personal touch that’s sure to delight friends and family. Whether you're new to quilting or simply short on time, this easy-to-follow tutorial will guide you through creating a beautiful, customized gift that’s both practical and heartfelt.
Supplies & Tools:
- Basic sewing machine – Brother Innovis BQ3100, Quilt Club Series sewing machine was featured in this blog post.
- Basic embroidery machine – Brother Skitch PP1 embroidery machine was featured in this blog post.
- Smartphone or tablet with Artspira appinstalled and login
- Download potholder templates here
- Printer paper
- Printer to print potholder templates
- Rotary cutter
- Quilting ruler(s)
- Cutting mat
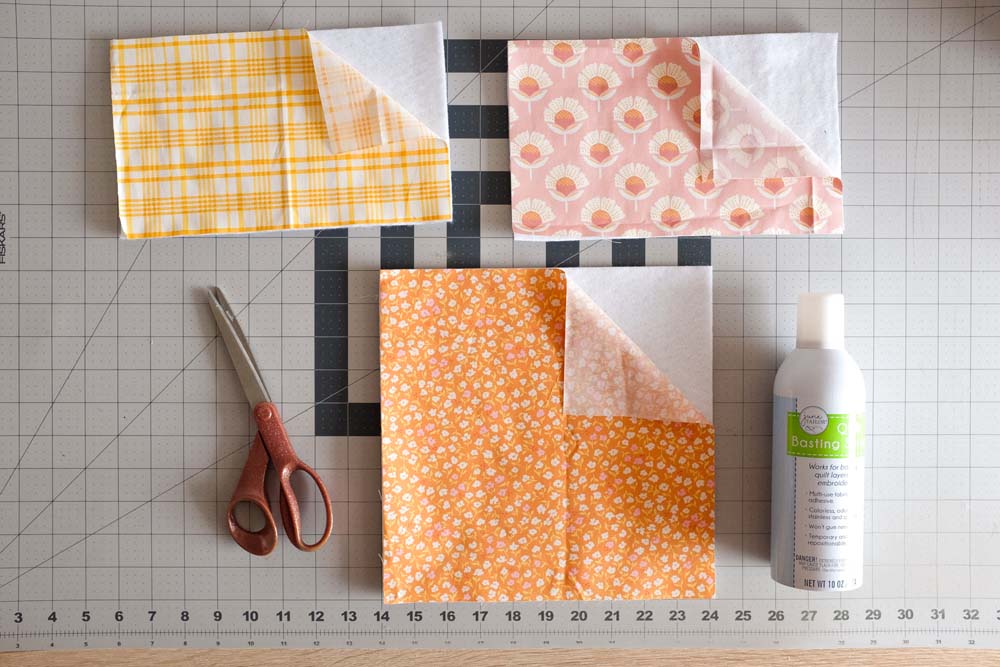
- Fabrics, quilting cotton – Fabric requirements are based on 42in WOF. Cut:
- Fabric A (Exterior): one (1) 10in square, two (2) 6in x 10in rectangles. Note: you can get creative here and use more than one colored fabric. In this example, I used two different floral prints and a plaid.
- Fabric B (Lining): one (1) 10in square, two (2) 6in x 10in rectangles
- Fabric C (Binding): Bias binding tape, approx. 70in; or ¼ yard, cut into 2½in strips and sewn together to make approx. 70in of bias binding.
- Medium-weight tear-away adhesive stabilizer – one (1) 6in square
- Insulated batting – Use insulated batting for this project because it provides heat resistance, protecting hands from high temperatures. Cut:
- One (1) 12in square
- Two (2) 8in x 12in rectangles
- Coordinating thread(s) – 50-weight for piecing, general construction, quilting, embroidery
- Hera marker
- Scissors for fabric
- Scissors for paper
- Measuring tape
- Fabric pen or pencil
- Pins
- Seam ripper
- Snips (optional)
- Pattern weights (optional)
- Quilting gloves
- Iron
- Basting spray (for spray basting) or safety pins (for pin basting)
- Walking foot (Brother MuVit Dual Feed Foot was used in this tutorial)
*This blog post contains affiliate links. If you use these links to buy something, the author and designer may earn a commission.
Directions:
Read through all the directions before you start. Seam allowance throughout the project is ¼in unless specified. The directions are broken down into four key parts:
- Template Preparation & Printing
- Basting & Quilting
- Embroidery
- Assembly & Binding.
Template Preparation & Printing
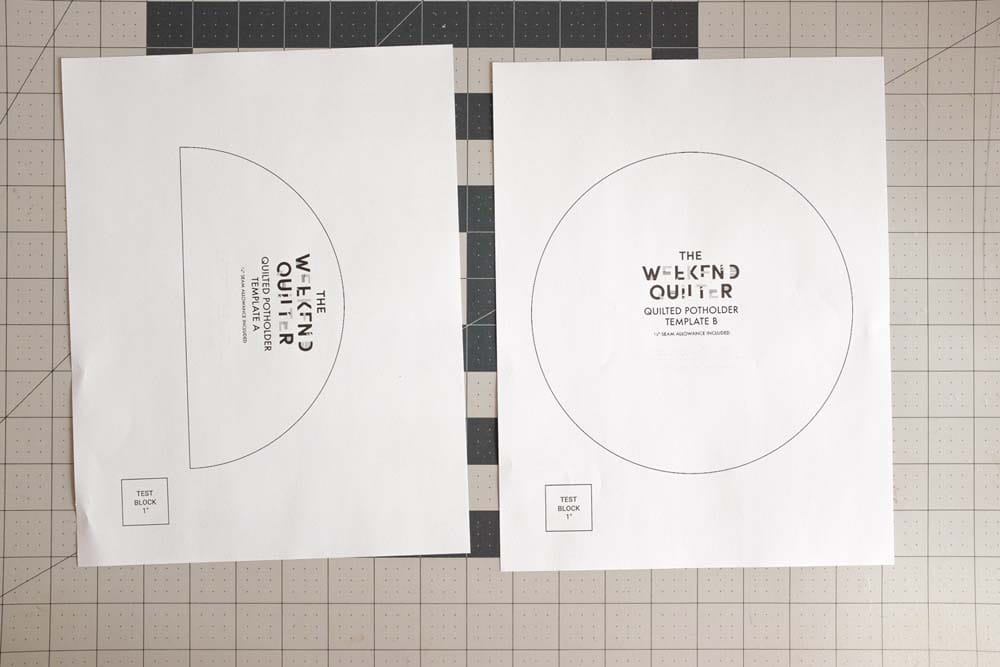
Step 1: If you haven’t done so yet, download the potholder template here
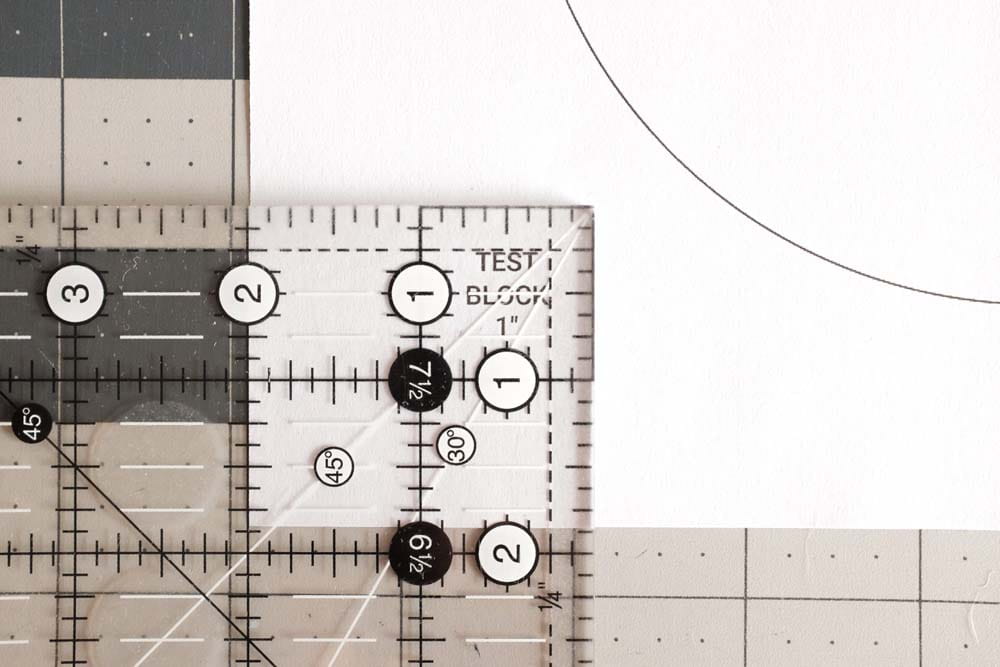
Step 2: Before printing the templates, ensure your printer settings are set to ‘do not scale’ and print one-sided. Start with printing one page of each type of template used to create your potholder project. Once the templates are printed, use a quilting ruler to make sure the grey ‘Test Block’ on each page measures exactly 1in square.
Step 3: If all pages pass the test, cut out the templates in preparation for basting and quilting. Cut on the solid line of each template.
Basting & Quilting
Step 1: Lay one (1) Fabric A 6in x 10in rectangle on top of one (1) Batting 8in x 12in rectangle. Ensure the wrong side of Fabric A is touching Batting. Baste as desired to create one (1) Quilt Sandwich A.
Repeat this step to create a total of two (2) Quilt Sandwich A’s and one (1) Quilt Sandwich B with one (1) Fabric A 10in square and one (1) Batting 12in square.
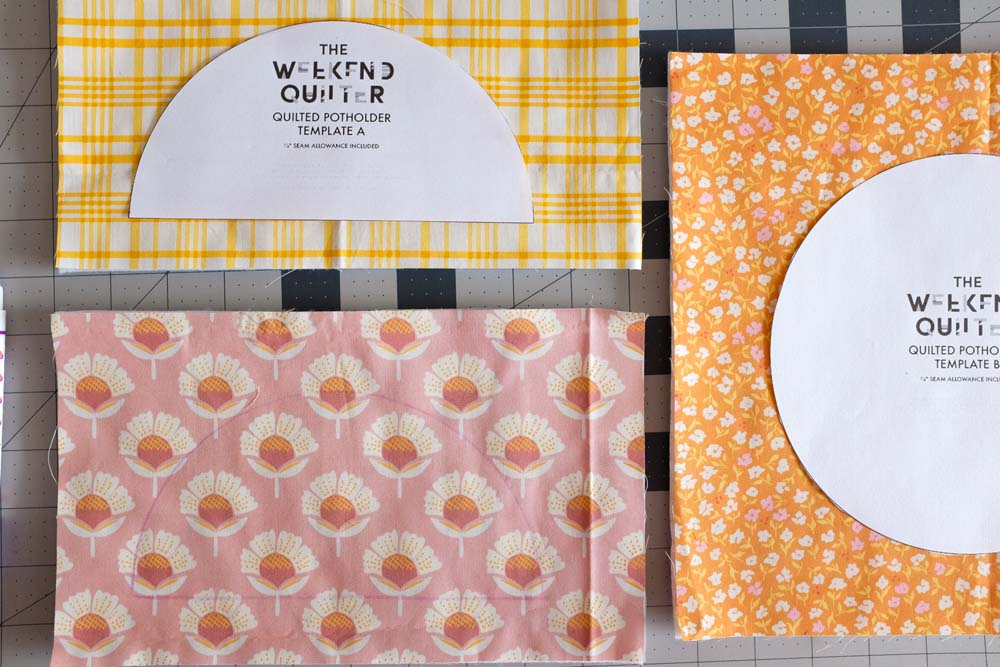
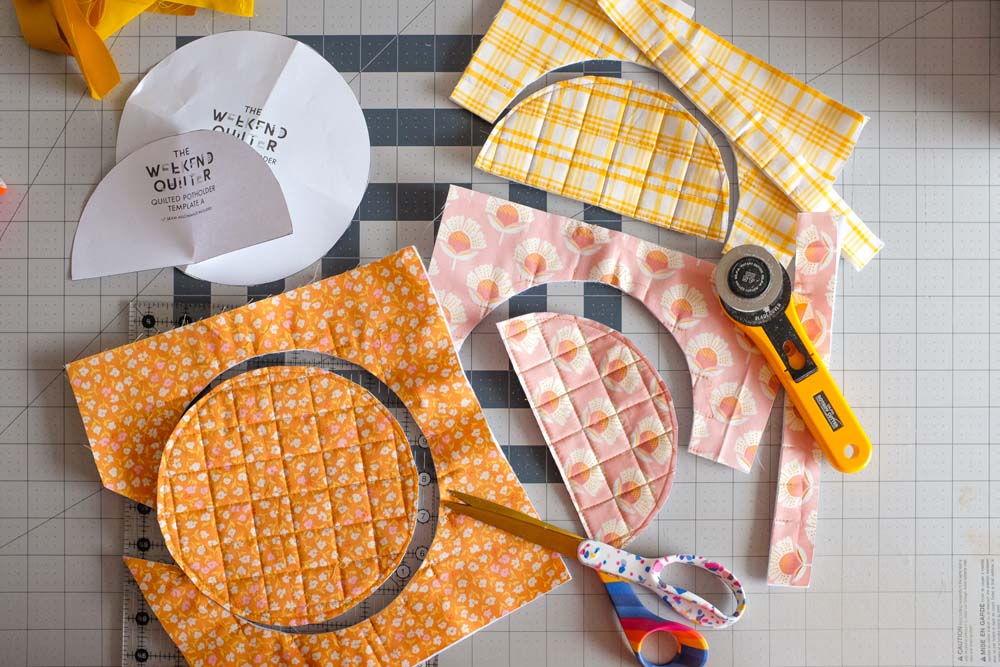
Step 2: Place Template A on top of one (1) Quilt Sandwich A – Template A touching the right side of Fabric A. Pin or place pattern weights on top of the Template to secure it in place. Then, with a fabric pen or pencil, trace the outline onto the Quilt Sandwich.
This step shows where to mark the quilting guidelines, which will make the quilting process more efficient and faster.
Repeat with second Quilt Sandwich A and Template A; and Quilt Sandwich B and Template B.
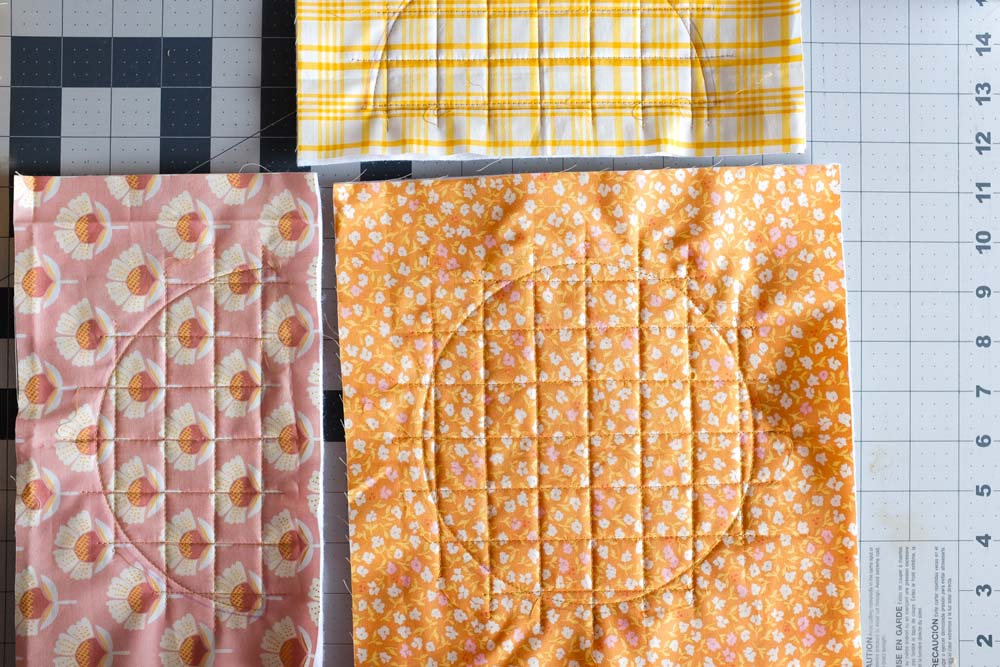
Step 3: Mark quilting guidelines as desired. For this tutorial, I marked a 1in grid on each of the Quilt Sandwiches.

Step 4: Quilt all Quilt Sandwich layers together.
Tip: Following the marked guide from Basting & Quilting, Step 2, stitch approx. ⅛in away from it. That way, the layers stay intact when cutting the Quilt Sandwiches in the next step.
Step 5: On two (2) Quilt Sandwich A’s and one (1) Quilt Sandwich B, cut on the marked guideline (from Basting & Quilting, Step 2). Set aside one (1) Quilt Sandwich A and one (1) Quilt Sandwich B for Assembly & Binding, Step 1.
Embroidery
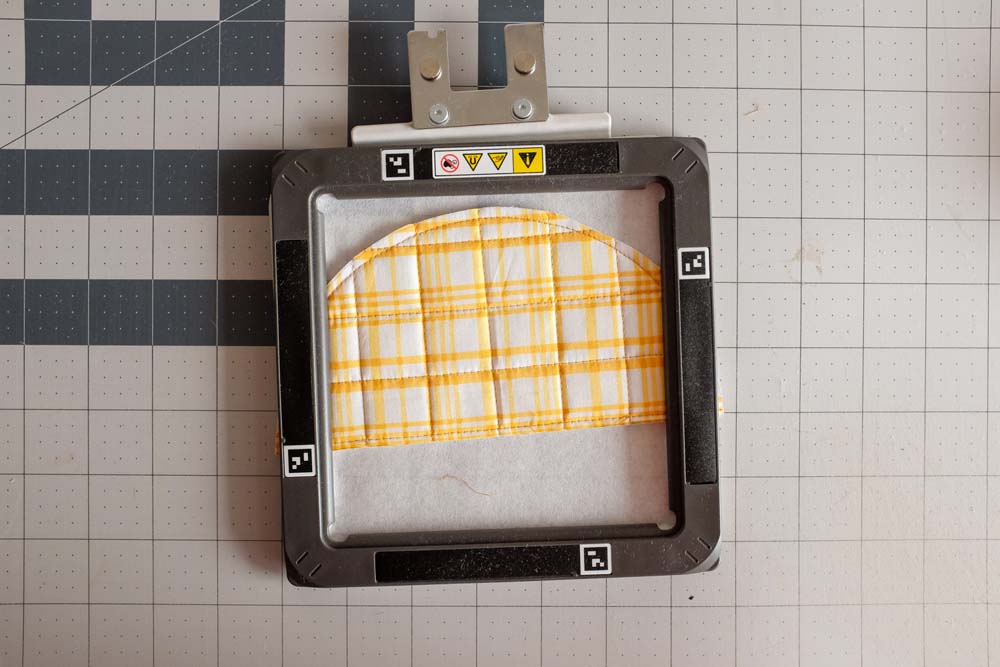
Step 1: Following the directions of the medium-weight tear-away adhesive stabilizer, stick one (1) 6in stabilizer square to one (1) Quilt Sandwich A, with the stabilizer touching the batting side of Quilt Sandwich A. The stabilizer helps prevent the fabric from puckering or the embroidery from distorting during stitching.
It’s okay if the stabilizer has some overhang. It is intentional, as you’ll need that slack to attach it to the embroidery frame. The excess stabilizer will be removed after the embroidery is complete.


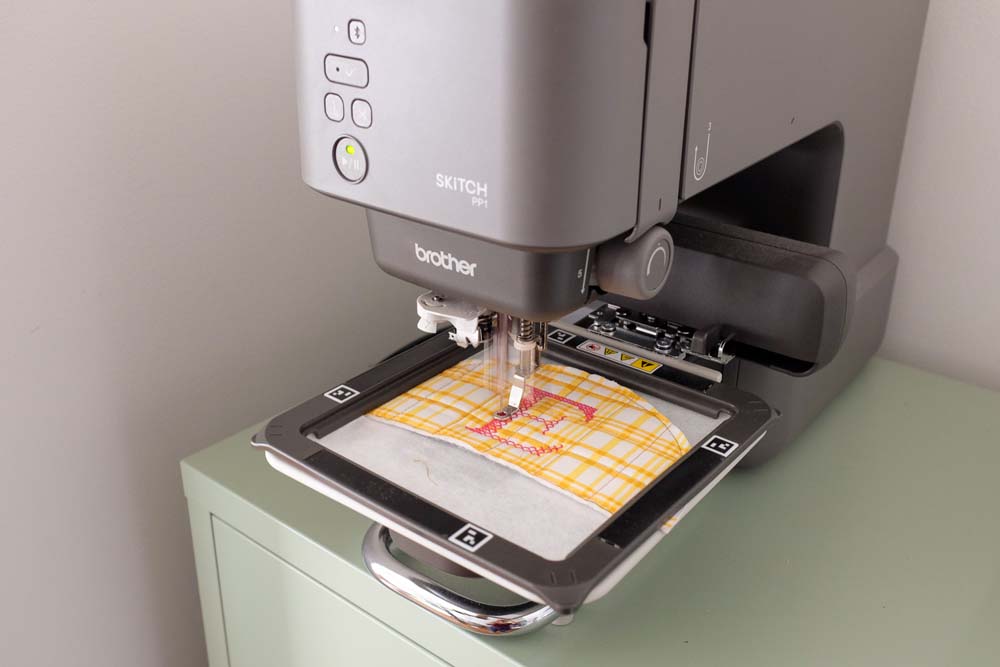
Step 2: Turn the stabilized Quilt Sandwich A from the previous step around so the batting side is facing down and attach embroidery hoop. This project utilizes the 4in square hoop that comes with the Brother Skitch PP1 embroidery machine.
Step 3: Load the Artspira app on your device, browse from the thousands of designs, and select one that you prefer. For this particular project, I typed in ‘E’ in the search bar and selected the letter E with a cross-stitch look.
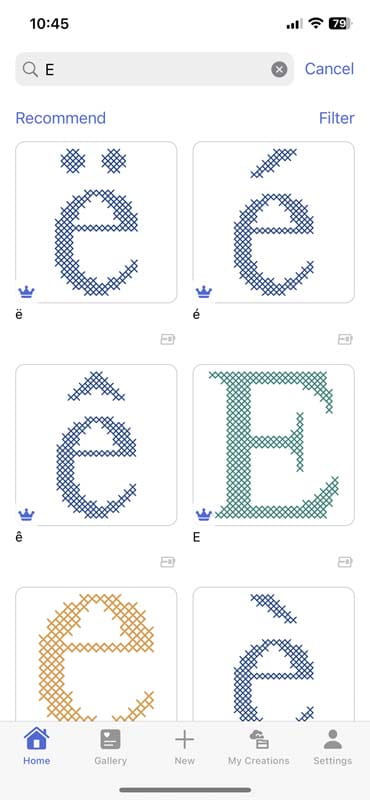
Step 4: Create the design and follow the prompts on the app to transfer and stitch out the design onto Quilt Sandwich A.

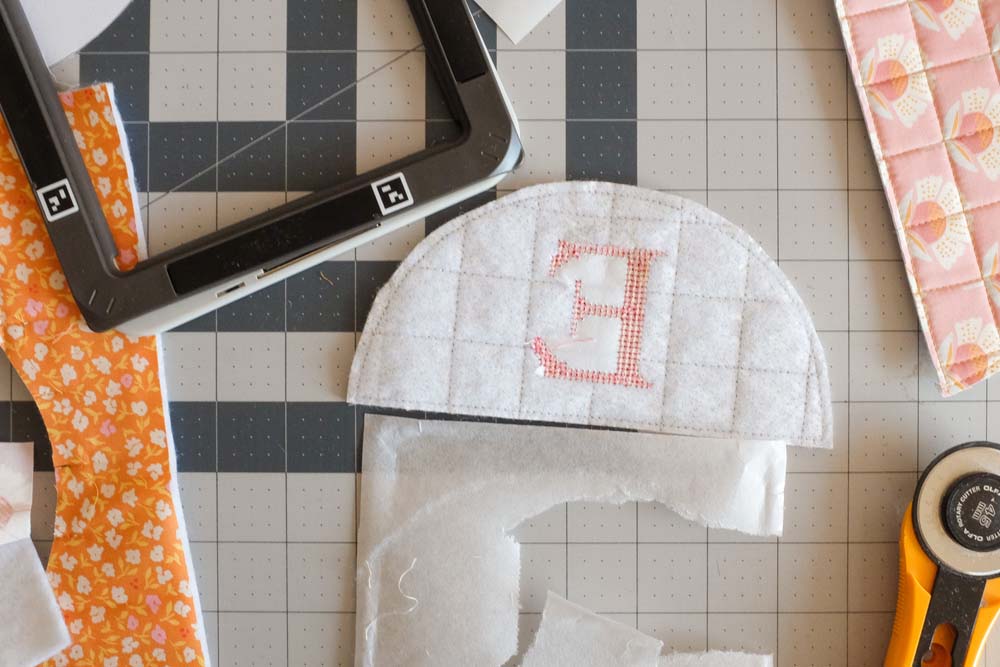
Step 6: Tear away excess stabilizer on embroidered Quilt Sandwich A.
Assembly & Binding
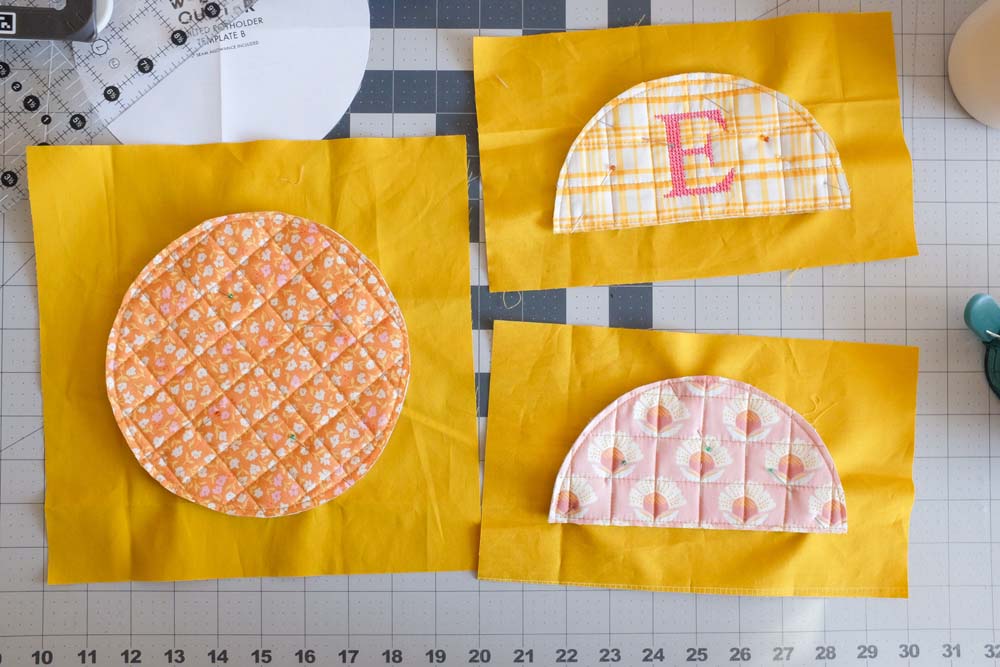
Step 1: With wrong sides touching each other, place embroidered Quilt Sandwich A from the previous step on top of one (1) Fabric B 6in x 10in rectangle. Pin or spray baste to temporarily hold the layers in place. Then stitch approx. ⅛ in away from the edge of Quilt Sandwich A to permanently hold the layers in place.
Repeat this step with the second Quilt Sandwich A and Fabric B 6in x 10in rectangle; and Quilt Sandwich B and Fabric B 10in square that were set aside from Basting & Quilting, Step 5.

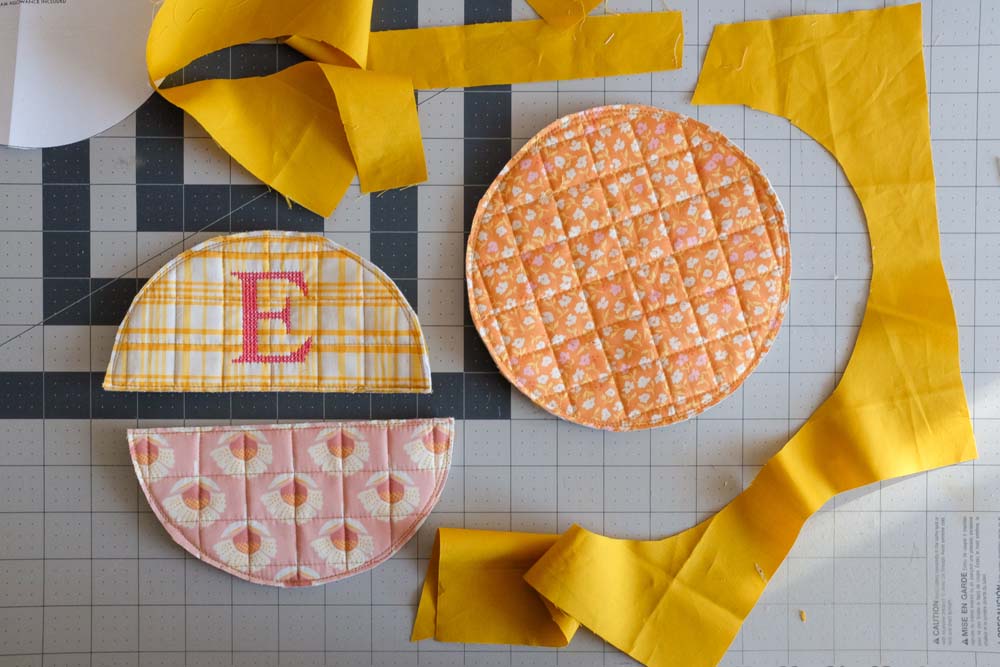
Step 2: With a pair of fabric scissors and using Quilt Sandwich as guide, cut excess Fabric B from ALL Quilt Sandwiches.
Set all Quilt Sandwiches aside for Assembly & Binding, Step 5.
Step 3: Take Fabric C 2½in x 70in binding strip, cut into two (2) 2½in x 10in binding strips for both Quilt Sandwich As and one (1) 2½in x 4in binding strip for the potholder loop.
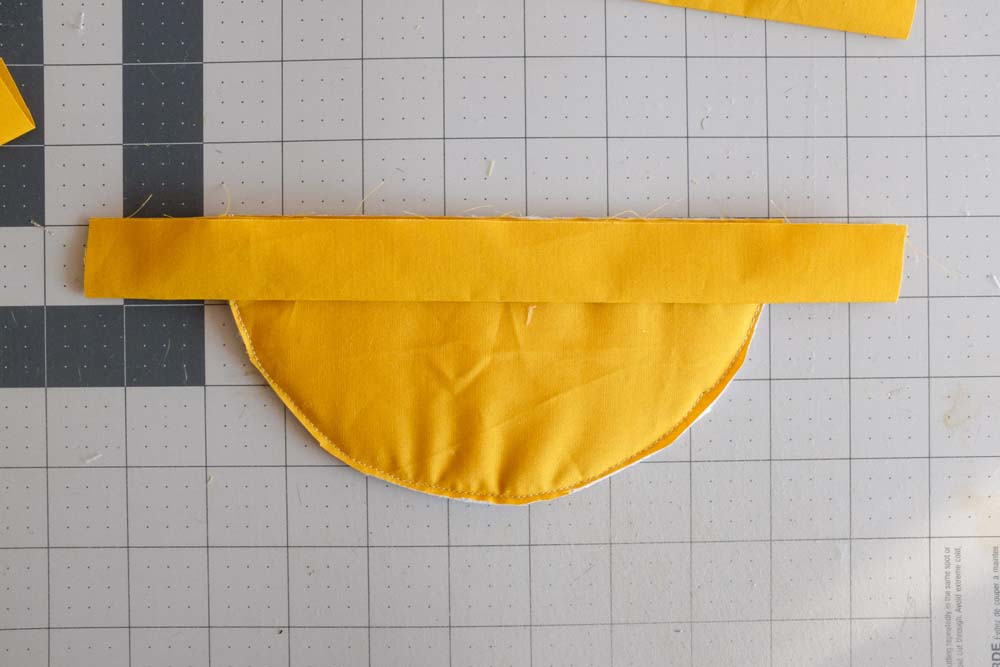
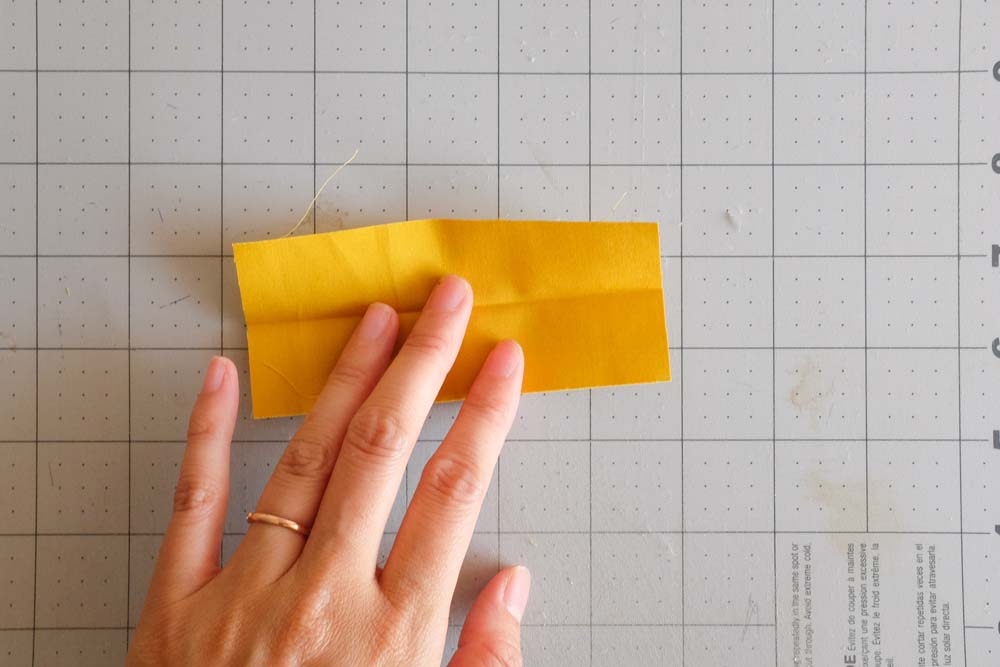
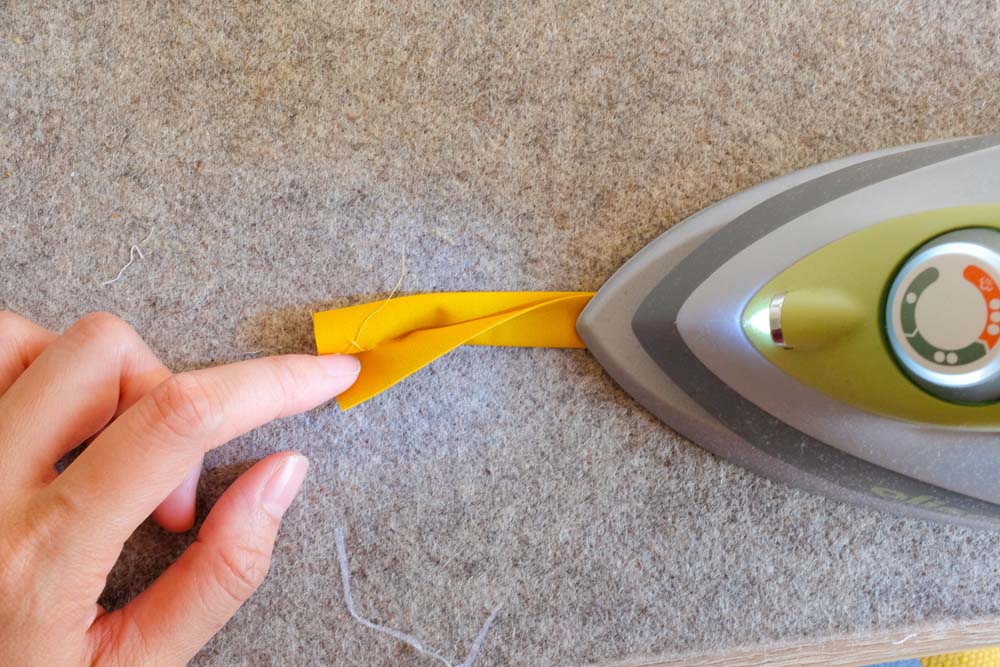
Step 4: With wrong sides facing each other, fold two (2) Fabric C 2½in x 10in binding strips and one (1) Fabric C 2½in x 4in binding strip in half lengthwise. Press fold with iron. Set the shorter strip aside for Assembly & Binding, Step 10. Fabric C 2½in x 10in binding strip shown in the photo example below.

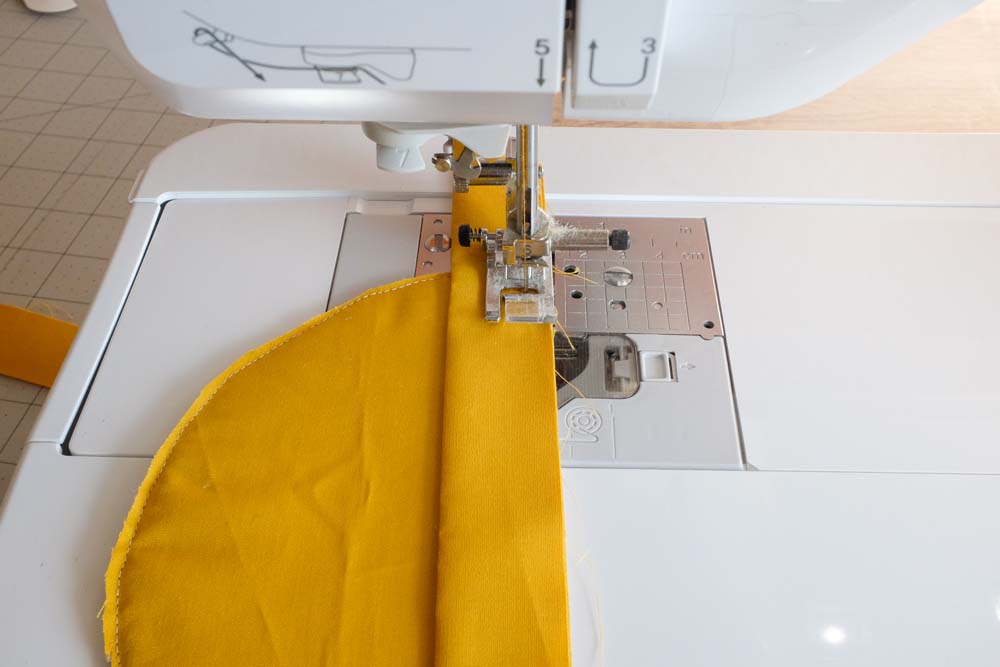
Step 5: Take one (1) Quilt Sandwich A from Assembly & Binding, Step 5, turn it around so Fabric B is facing up. Take one (1) folded Fabric C 2½in x 10in binding strip from the previous step, match up the raw edge of the binding strip with the straight raw edge of Quilt Sandwich A. Then sew approx. ¼in away from the raw edge. Don’t forget to reverse stitch the start and end of the seam.
Repeat this step with the second Fabric C 2½in x 10in binding strip and Quilt Sandwich A.
Step 6: Fold Fabric C binding strip over to the right side of Quilt Sandwich A and machine sew to secure it.
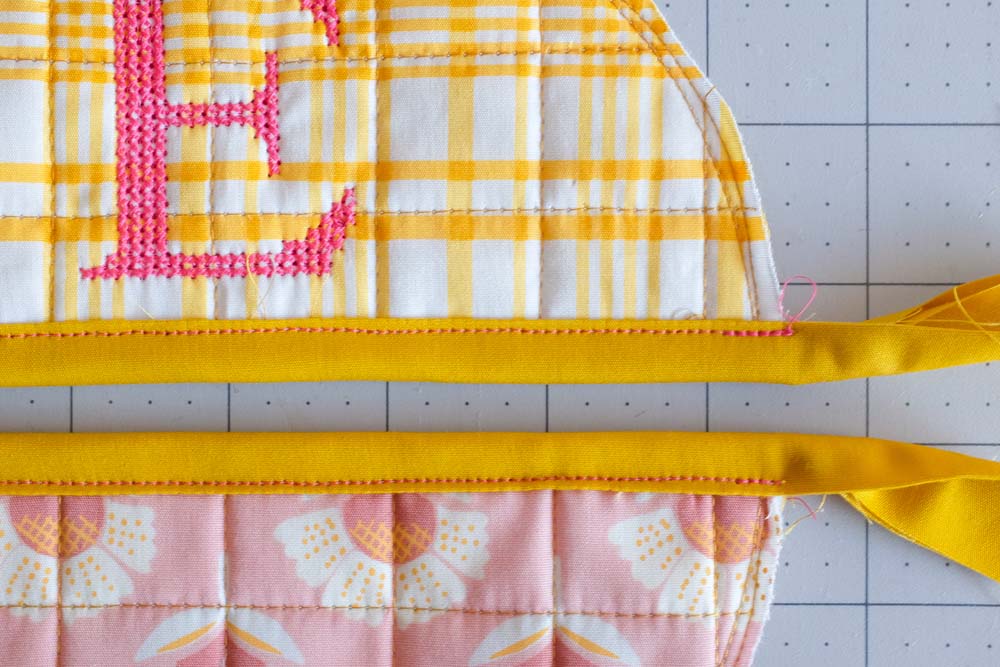
Step 7: Remove excess Fabric C binding strips from both Quilt Sandwich A’s.

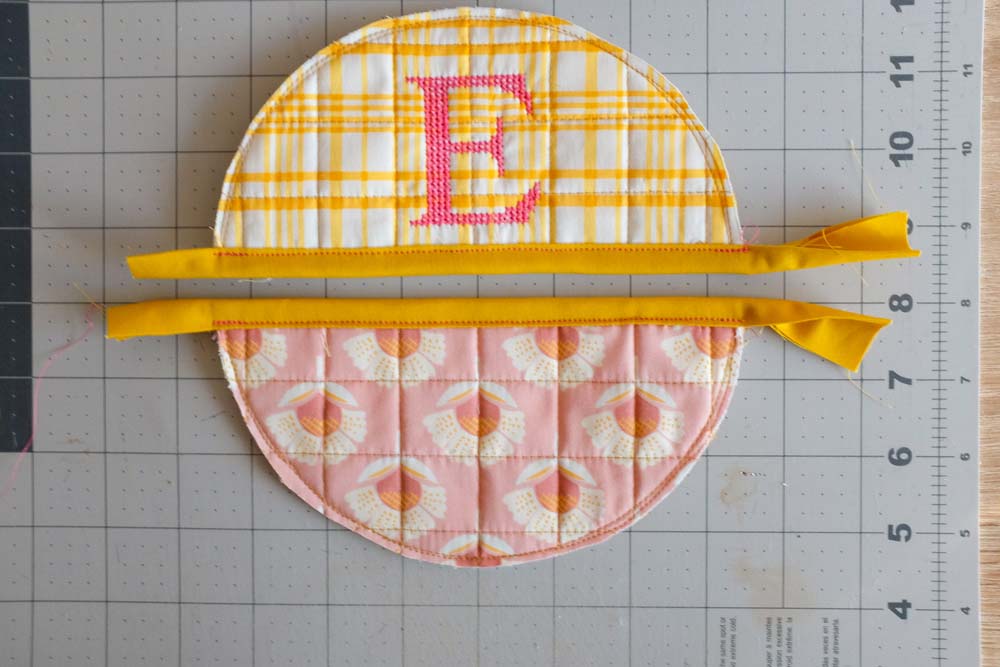
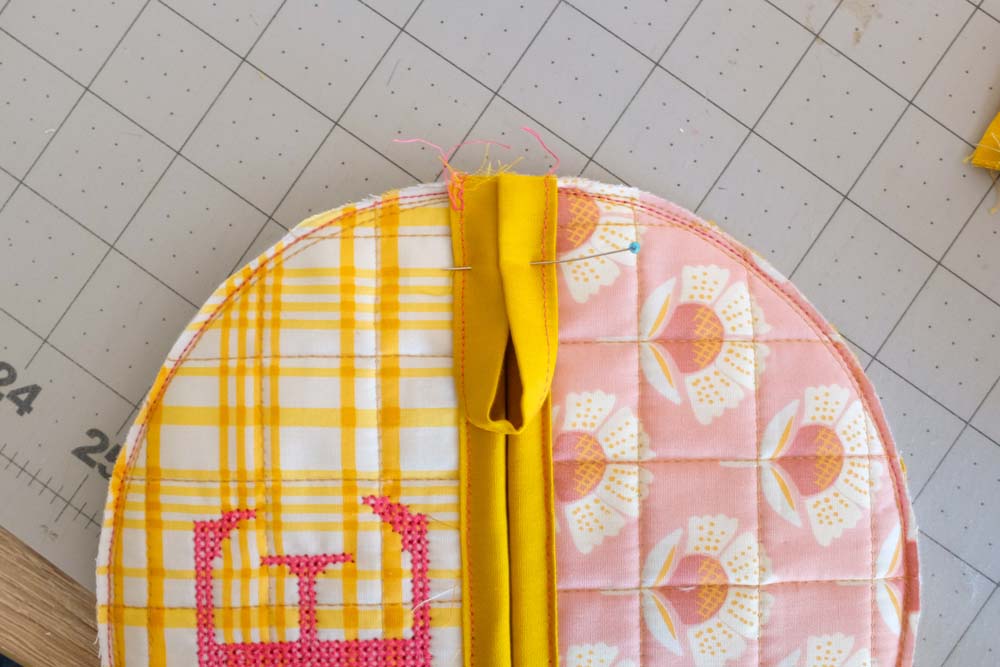
Step 8: Following the image below, aligning the raw edges, place two (2) Quilt Sandwich A’s on top of one (1) Quilt Sandwich B, with the wrong sides touching each other. Then pin to hold in place.


Step 9: Stitch approximately ⅛in away from the raw edge to create a Potholder Sandwich. This step keeps the Quilt Sandwiches together in preparation for binding in the following steps.
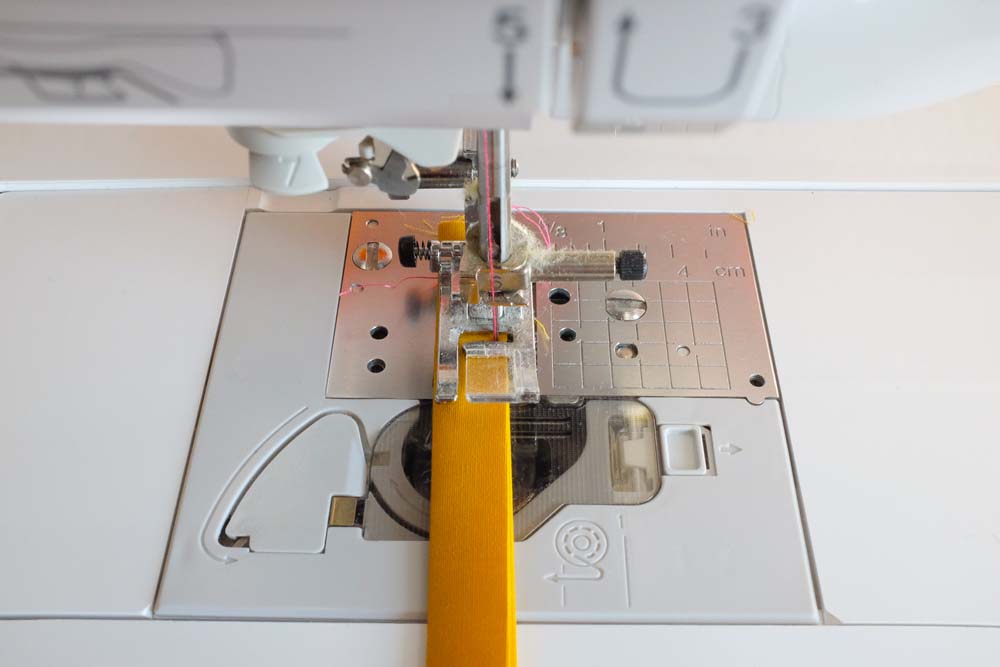
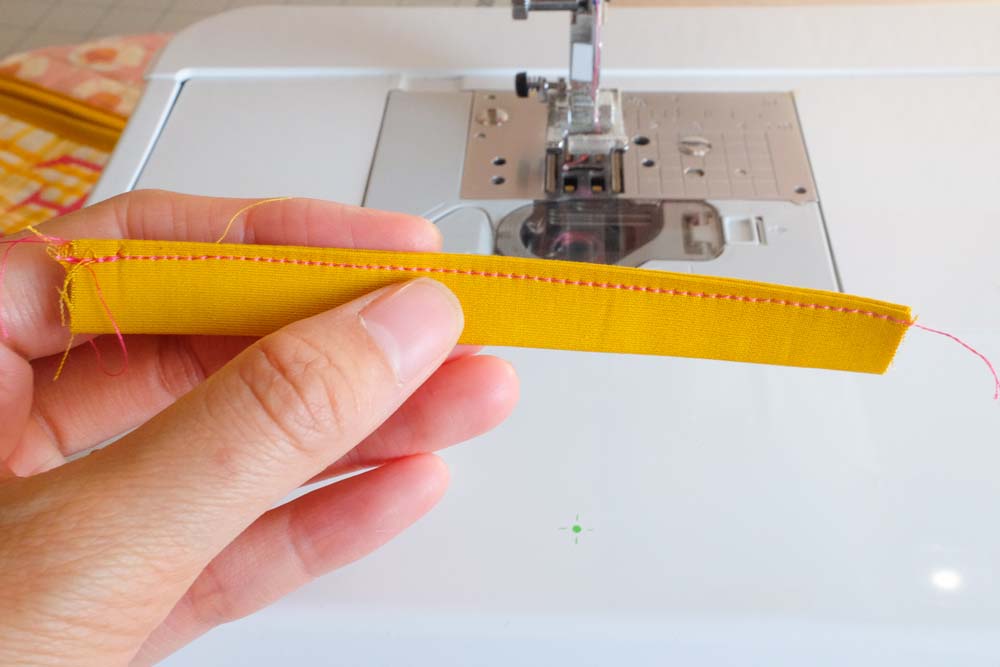
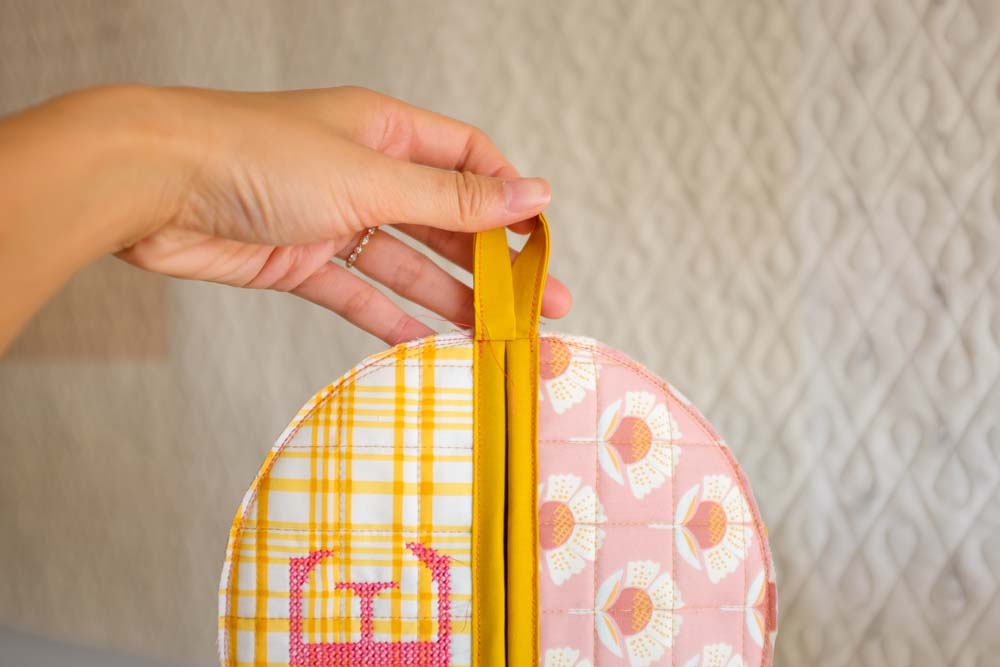
Step 10:Take the folded Fabric C 2½in x 4in binding strip from Assembly & Binding, Step 4, unfold the strip. Using the center crease as a guide, fold the raw edges of the binding strip towards the center and press, Then, using the center crease as a guide again, fold the loop in half again. Therefore, there should be four layers stacked on top of each other.Sew approx. ⅛" from the edge to secure the four layers of fabric.

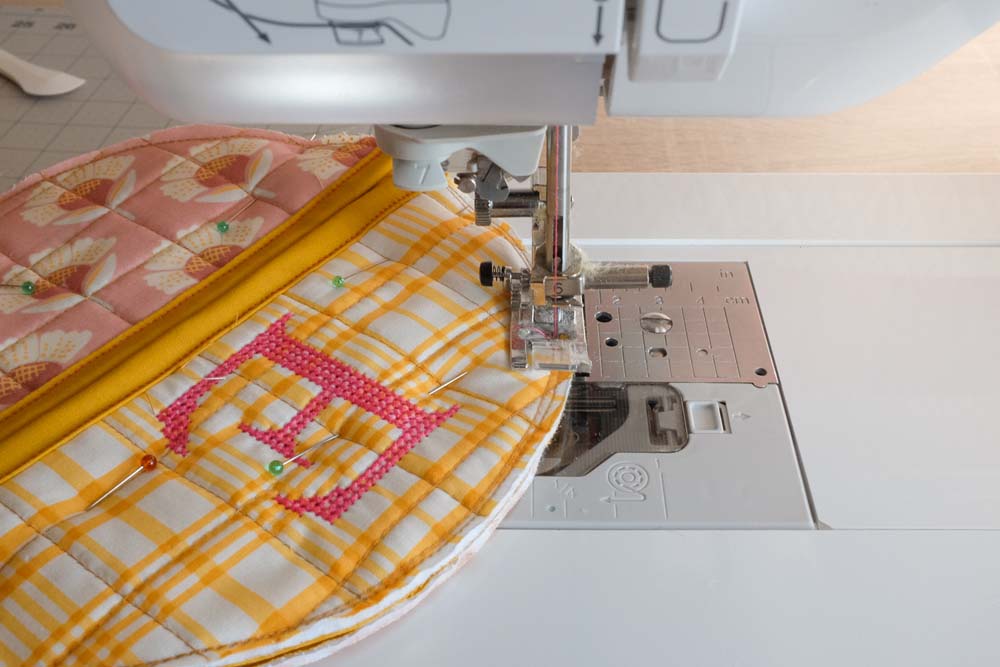
Step 11: Following the photo below, take the folded binding strip from the previous step. Attach the binding strip to create a loop to hang the potholder up by lining up the raw edges of the binding strip and the raw edge of the Potholder Sandwich. Sew ⅛" from the edge to secure loop in place. Don’t forget to reverse stitch the start and end of the seam.

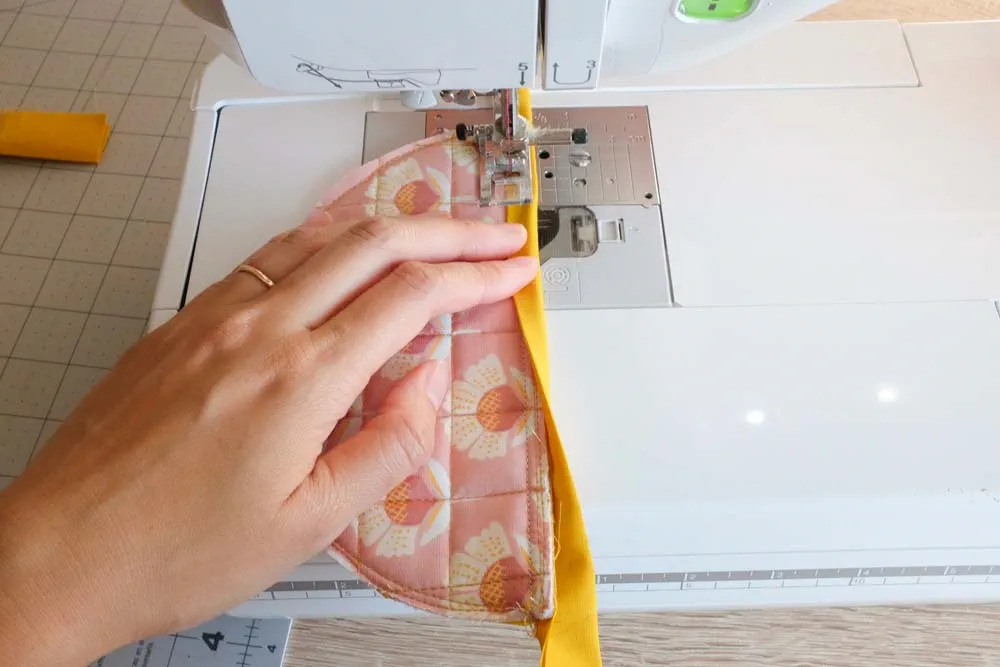
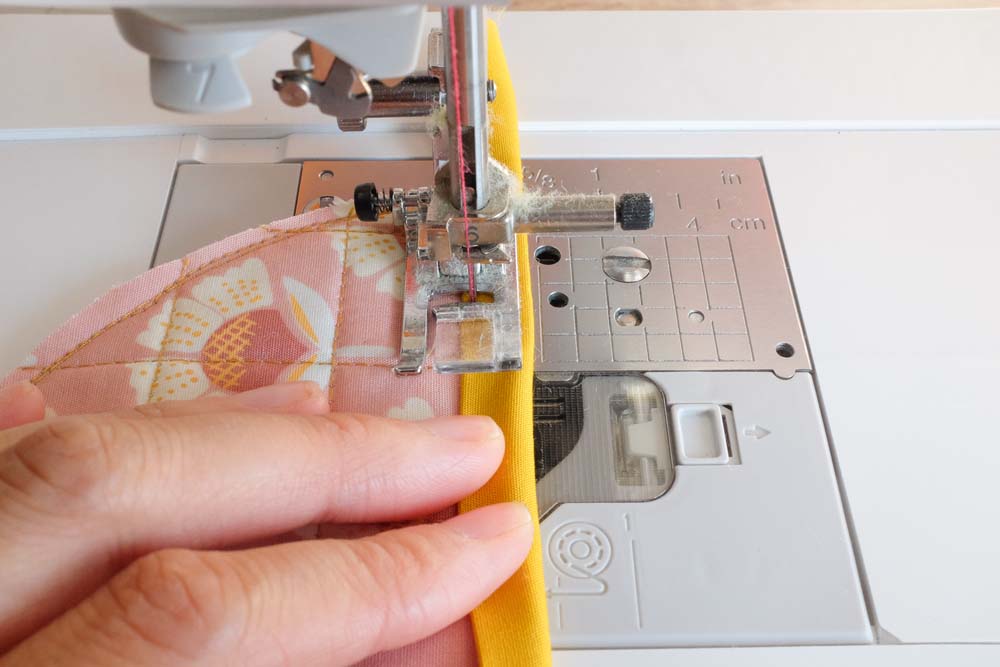
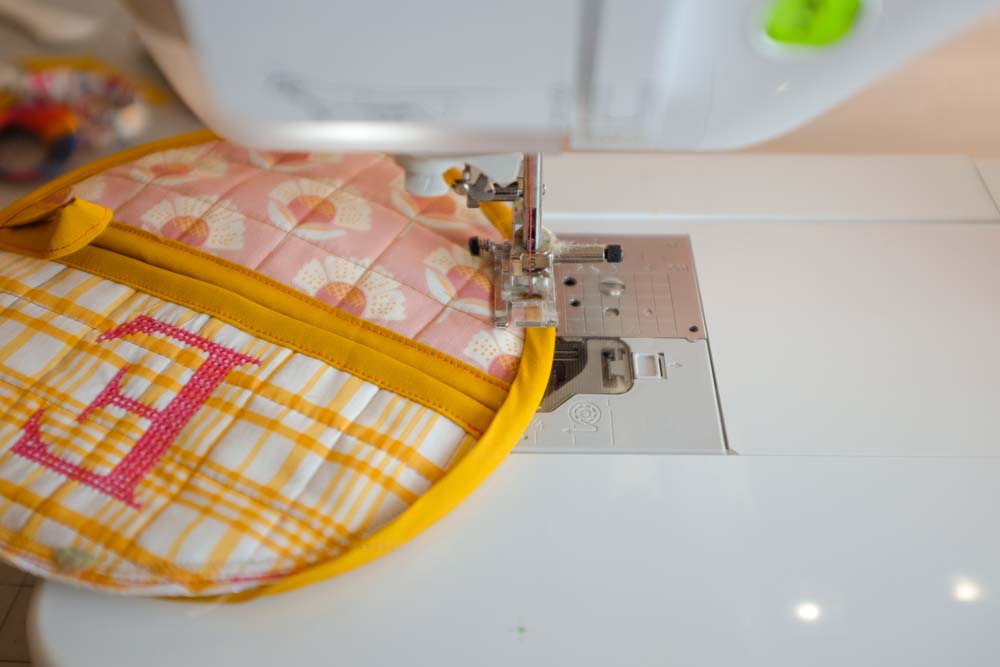
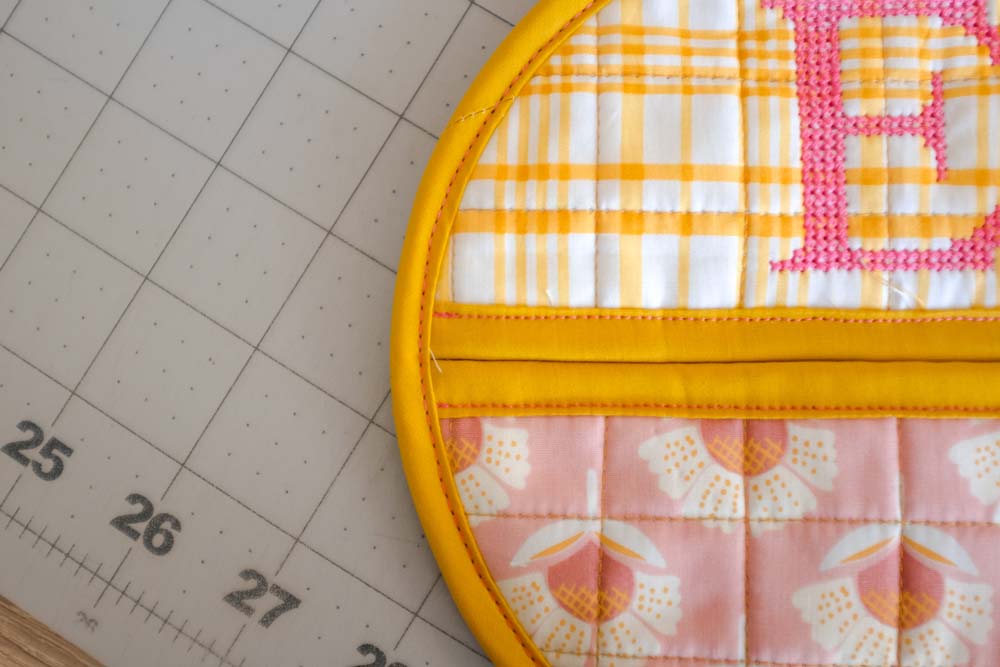
Step 12: Finally, enclose the raw edge of the Potholder Sandwich with the remaining Fabric C binding strip using your preferred binding method. If you’re not sure how to attach the binding, be sure to check out my previous guest blog post on Brother Stitching Sewcial, or if you’d like to add a little flare to your finish, there’s a second blog post on using decorative stitches on your sewing machine to machine bind. And if you need additional visual support, be sure to watch my Facebook recording on how to machine bind on Brother's YouTube channel.
The following photos show how binding is attached by machine. Again, these steps are broken down in more detail in the blog posts and YouTube video listed in the paragraph above.


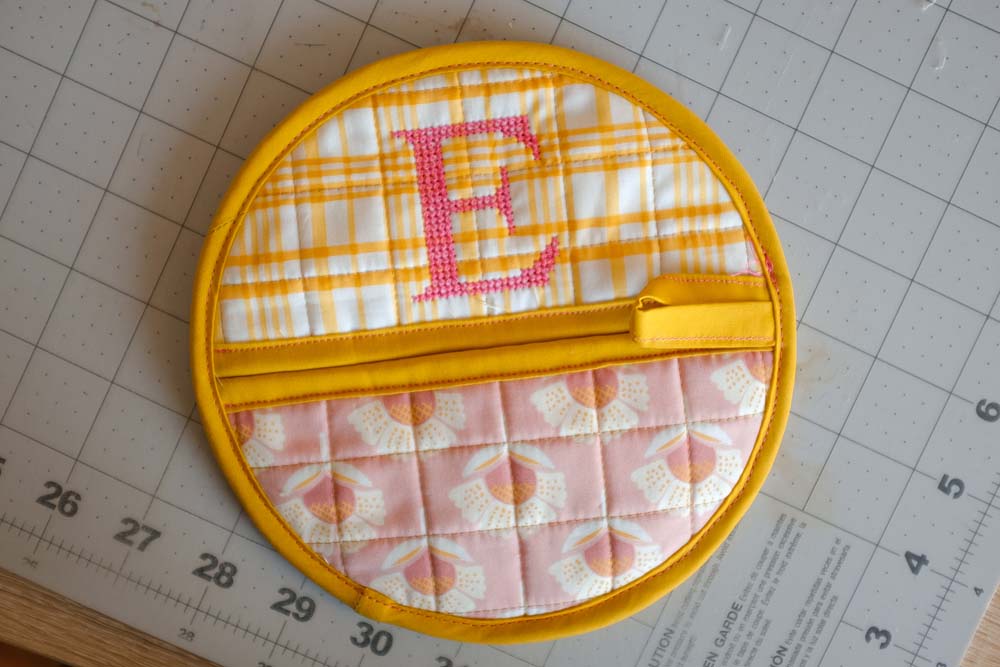
And there you have it—a charming circular quilted potholder with a monogram that’s perfect for holiday gifting! This project is a wonderful way to add a handmade, personal touch to your presents, while still keeping things simple and beginner-friendly. Whether you make one or a whole set, these potholders are sure to be appreciated for both their style and utility. Plus, with the gifting season in full swing, it’s a quick and rewarding way to create something special for your loved ones!

Don't forget to share your finished piece with your community and tag me on social media so we can see how your version turned out! Happy quilting!
@The.Weekendquilter
FAQs
What is the potholder quilt method?
Potholder quilt method involves creating individual quilted squares and rectangles, tracing the templates onto them, cutting along the outlines, stitching the pieces together, and finishing the edges to complete the project.
What do you put inside a potholder?
Insulated batting should be used while making a potholder. Regular batting isn’t sufficient to protect against heat.
Related Projects
Stay Connected
* Required fields