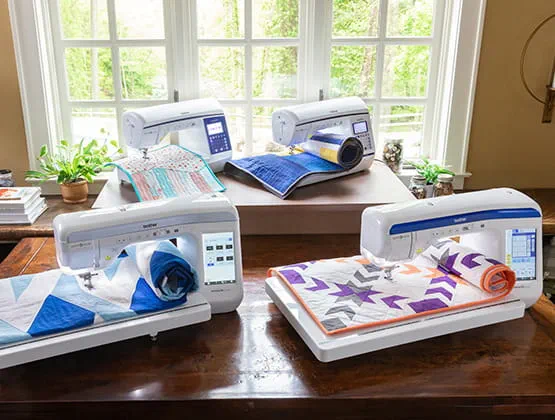
Easy Scrappy Quilt: Dutchman’s Puzzle Block Quilt

Supplies and Tools:
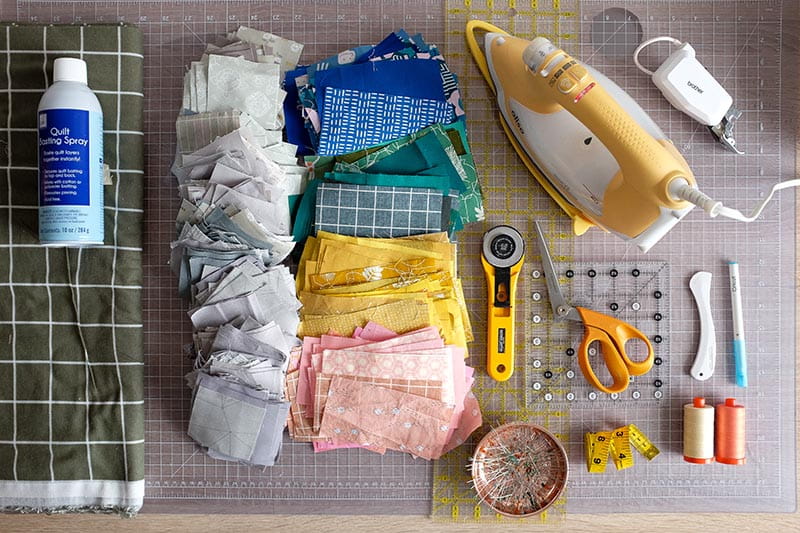
- Brother Innovis BQ3100from the Quilt Club Series was used in this tutorial.
- Rotary cutter
- Quilting rulers
- Measuring tape
- Cutting mat
- Fabric scissors
- Batting – There needs to be at least 4" overhang on each side of the quilt top. For example, minimum batting requirement for the baby quilt is 48" x 48" (40" x 40" finished quilt size), minimum batting requirement for throw quilt is 68" x 78" (60" x 70" finished quilt size).
- Sewing pins
- Iron
- Coordinating thread, 50wt cotton – for piecing squares together and decorative quilting stitches.
- Basting spray (if spray basting) or safety pins (if pin basting).
- Hera marker or blunt butter knife.
- Brother Compact MuVit Digital Dual Feed Foot or walking foot attachment.
- Machine-washable fabric pen or pencil – optional if sewing machine has the Sew Straight™ Laser Vision Sewing Guide.
- Fabric requirements: Fabric quantities are based on 42" WOF (width of fabric).
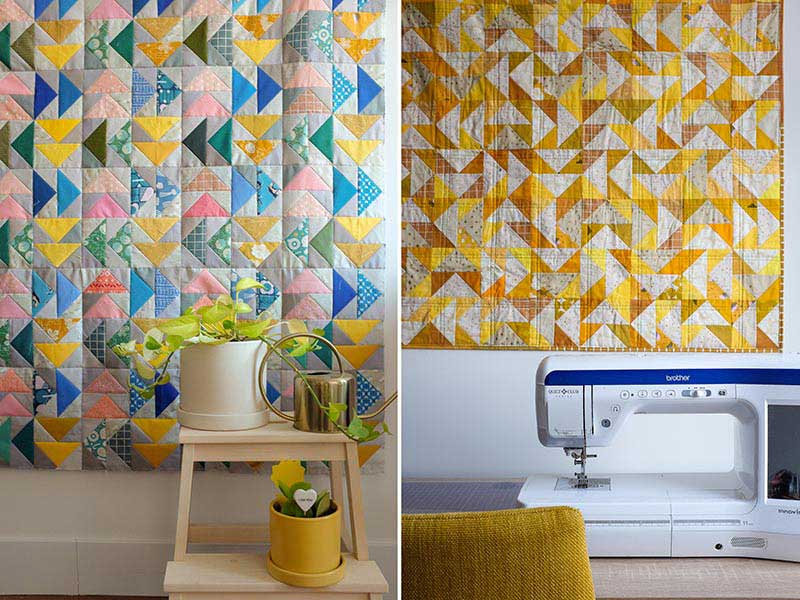
Fabrics used in this tutorial are scraps from my personal stash. Try to create your Dutchman’s Puzzle quilt with scraps from your stash too. With that said, the fabric requirements below show how much you’ll need if you wish to create this project with yardage, as well as two different design options:
Option 1: Multi-colored (left) and Option 2: Duo-toned (right).
| Quilt Size (finished size) |
Background Fabric (Fabric A) |
Geese Fabric (Each Fabrics, B, C, D and E) |
Backing fabric | Binding fabric |
| Baby (40" x 40") |
Scrappy: At least 1⅝ yards (149 cm) Yardage: 1⅝ yards (149 cm) |
Scrappy: At least ½ yard (46 cm) Yardage: ½ yard (46cm) |
2⅝ yards (241 cm) | ½ yard (46 cm) |
| Throw (60" x 70") |
Scrappy: At least 4⅛ yards (378 cm) Yardage: 4⅛ yards (378 cm) |
Scrappy: At least 1⅛ yards (103 cm) Yardage: 1⅛ yards (103 cm) |
3⅞ yards (355 cm) | ⅝ yard (58 cm) |
Tip: Before gathering and cutting into fabrics, rummage through or turn over your container, bag, box or wherever you store your scraps, and roughly sort it by color. This is going to help you estimate and plan the colors or theme of your scrappy project.
Option 1: Multi-colored – This is a fantastidoption if you have an abundance of different colors in your scrap stash. The fabrics collectively can bring a pop of fun and color into your space.
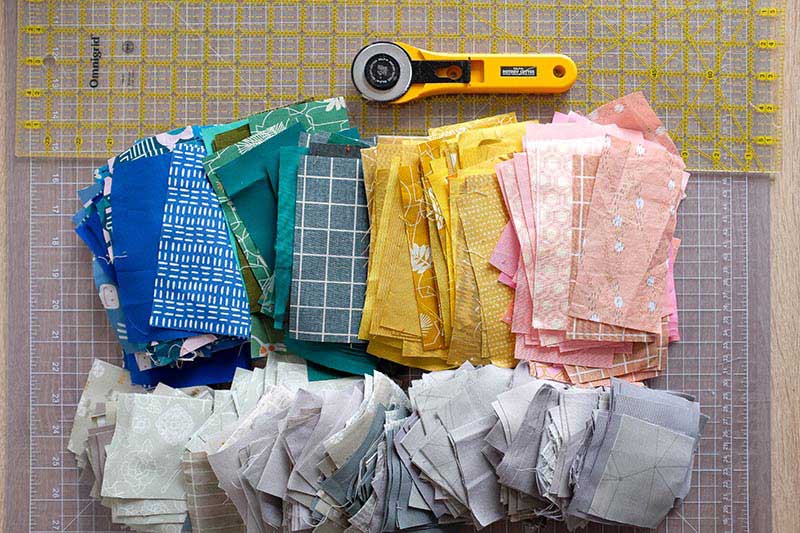
For my multi-colored version, I picked five distinctive color groups – grey for the background; and pink, green blue and yellow for the geese.
Option 2: Duo-toned – If there is a ton of one or two types of colors in your scrap stash you want to get rid of, this is the perfect option to go with. This is also another great option if you would like to create something to go with a specific color scheme in the room.
For my duo-toned version, I used a variety of yellow colors for the background, and off-whites for the geese.
| Quilt Size (finished size) |
Background Fabric (Fabric A) |
Geese Fabric (Fabric B) |
Backing fabric | Binding fabric |
| Baby (40" x 40") |
Scrappy: At least 1⅝ yards (149 cm) Yardage: 1⅝ yards (149 cm) |
Scrappy: At least 1⅝ yards (149 cm) Yardage: 1⅝ yards (149 cm) |
2⅝ yards (241 cm) | ½ yard (46 cm) |
| Throw (60" x 70") |
Scrappy: At least 4⅛ yards (378 cm) Yardage: 4⅛ yards (378 cm) |
Scrappy: At least 4⅛ yards (378 cm) Yardage: 4⅛ yards (378 cm) |
3⅞ yards (355 cm) | ⅝ yard (58 cm) |
Flying geese units are made up of three right-angled triangles: a larger triangle (the goose) is surrounded by two smaller triangles (the background or sky). The classic versatile design has been around for hundreds of years and continues to be widely used in modern quilt designs.
More specifically, the Dutchman’s Puzzle quilt block is made up of eight flying geese units. The eight units are paired to create four square patches. These square patches are then rotated differently and sewed together. Hence its other names, Dutchman’s Wheel, Spinning Windmill or Windmill. The arrangement of the triangles looks reminiscent of the iconic Dutch windmills.
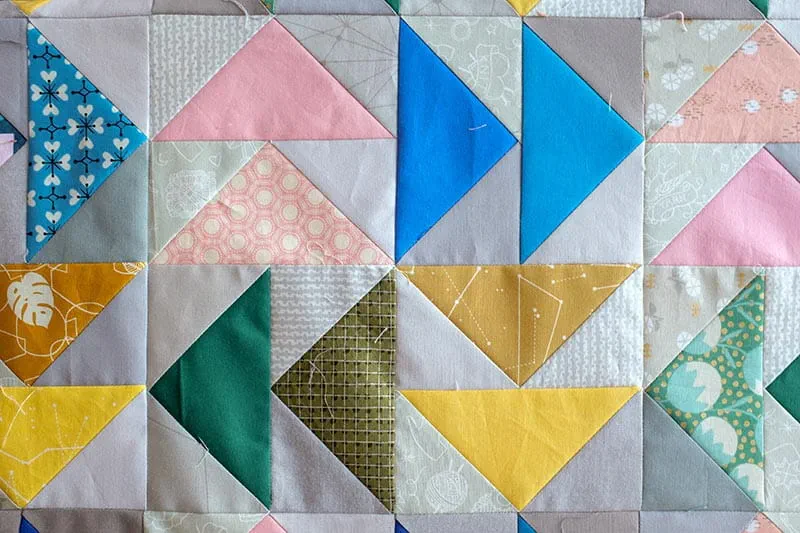
When I found out the Sew Straight Laser Vision Guide was going to be included in the Brother Quilt Club Series machine (Innovis BQ3100), I was so excited! It’s something that I’ve always dreamt of having as a feature on my sewing machine. I knew with the laser guide feature; I was going to cut out so much time and effort in drawing out my guidelines for piecing and quilting.
To get used to the Sew Straight Laser Vision Guide and to tackle one of my 2022 quilting goals (use up the scraps in my stash) were what sparked this tutorial. I hope you too get inspired and motivated to use what’s in your scrap stash and get just as excited about the Sew Straight Laser Vision Guide.
Directions:
Similar to a cooking recipe, read through all the instructions before you start. This will help you both identify what supplies you need and give you an understanding of what to expect throughout the project.
Instructions
Sew all right sides together with ¼'' seam allowances, unless specified.
- Cutting
- Piecing
- With a fabric marker or pencil, on the wrong side of all 3'' squares, draw a diagonal guideline from one corner to the other.
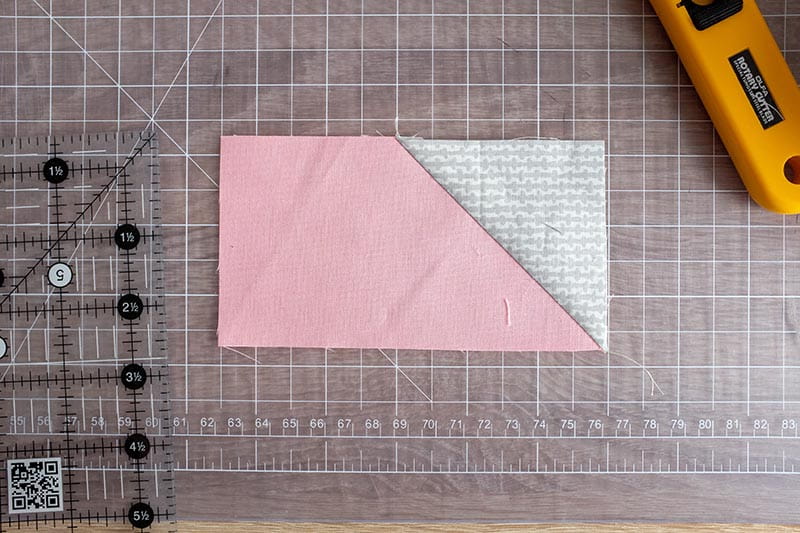
- Noting the orientation of the marked diagonal guideline on one 3'' square, place it on the right side of one 3'' x 5½'' rectangle, and sew on the guideline.
- Trim ¼'' seam allowance to the outside of the sewn line. Press the seams open or to the dark side to create a Half-Flying Geese unit
- Similar to Step 2b, noting the orientation of the marked diagonal guideline on the second 3'' square, place it on the left side of the Half-Flying Geese unit.
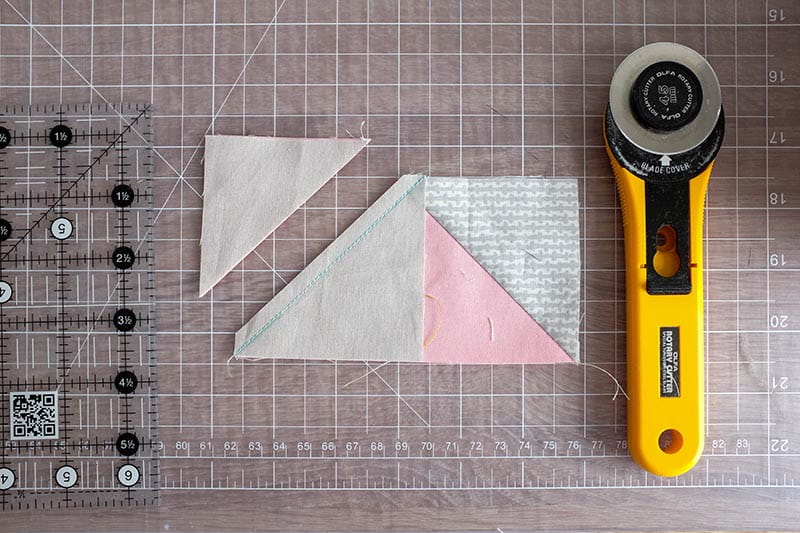
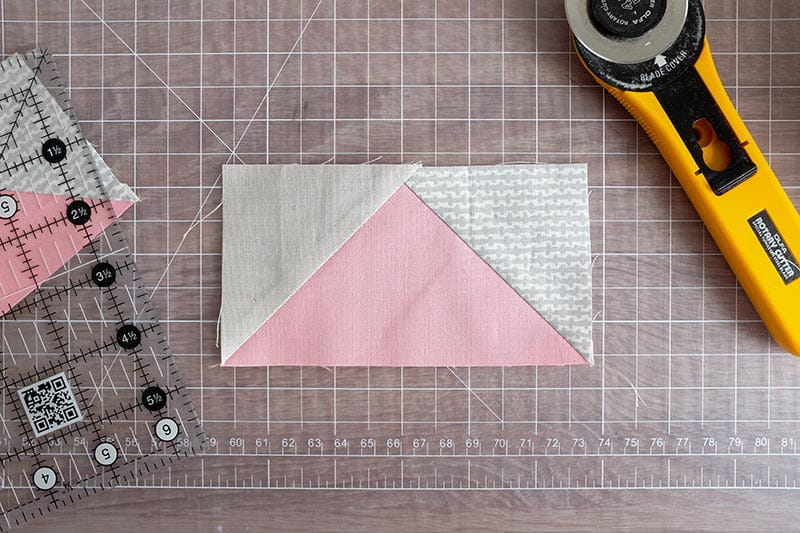
- Trim ¼'' seam allowance to the outside of all the sewn lines. Press the seams open or to the dark side to create a Flying Geese unit.
- Repeat Step 2a to 2e to create a total of 128 Flying Geese units for baby size quilt, and 336 Flying Geese units for throw size quilt.
- Pair 2 Flying Geese units as shown in the photo below to create 1 Square Patch unit. Press the seams open or to the dark side.
- Sew together 4 Square Patch units together to create 1 Block as shown in the photo below (option 1: multi-colored option used in the example below). Press the seams open or to the dark side as you go.
- Imagine the quilt top as a grid. Here are the number of blocks required across and down the quilt, by quilt size. Sew Blocks together and press the seams open or to the dark side as you go to create Quilt Top.
- Basting and Quilting
- Before any of the basting happens, prepare the quilt back. For the baby and throw size quilts, fold the backing fabric in half lengthwise and use a pair of fabric scissors to cut.
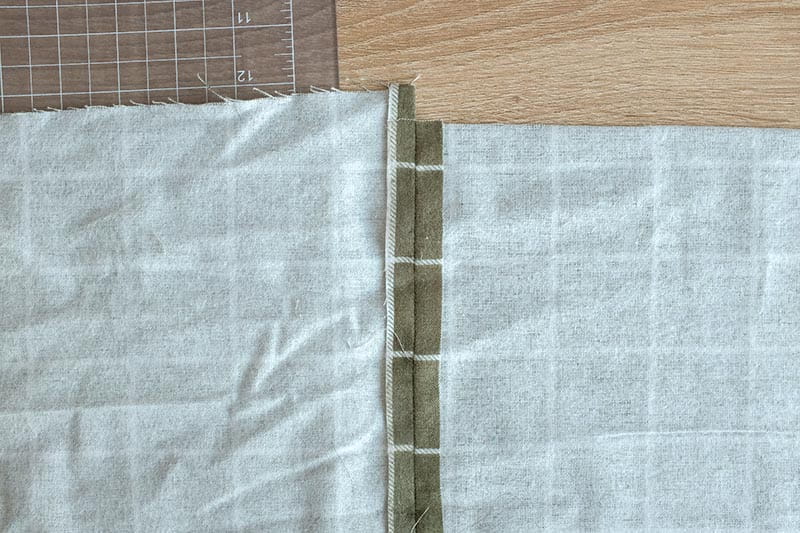
- Adjust seam allowance from allowance from ¼'' to ½'' and sew together quilt back. The adjustment to the seam allowance will help to strengthen the quilt long-term. And press the seams open to reduce seam bulk.
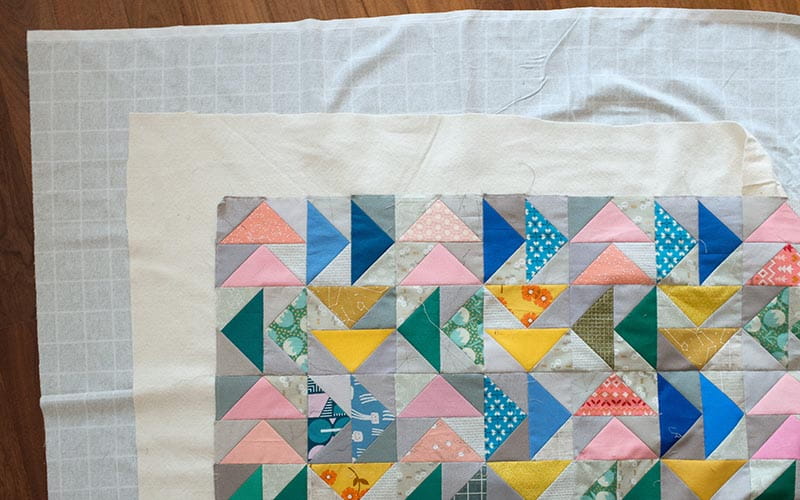
- Place quilt back right side down on your basting surface, followed by batting and the quilt top wrong side touching the batting, Spray or pin baste the three payers, and quilt as desired.
- Once all quilting is complete, with a long quilting ruler and rotary cutter, square and trim off excess fabric and batting. Quilt should measure approx.: baby size (40" x 40") and throw size (60" x 70").
- Binding and Finishing:
- From the binding fabric, cut the following number of 2½" x WOF strips for binding:
- Join each of the strips at the shorter ends to create one long continuous strip to wrap around the edge of the quilt. At each joint, press the seams open to reduce seam bulk.
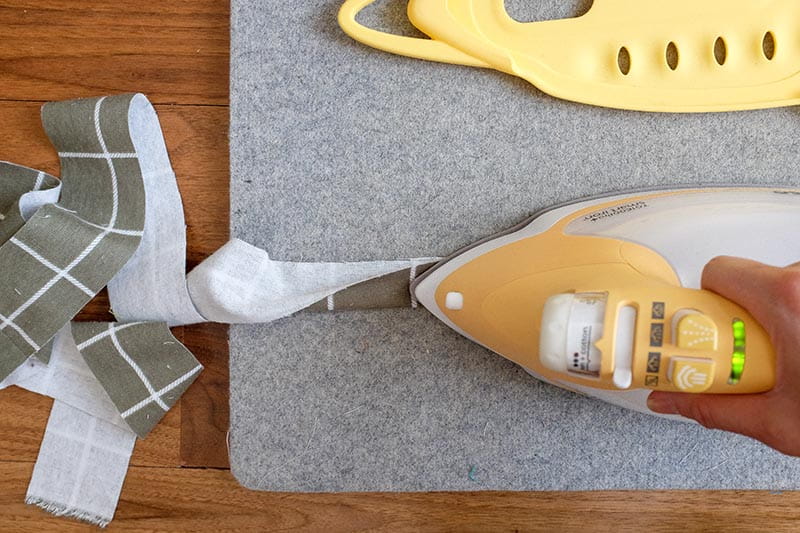
- Then fold and press the strip lengthwise to create binding strip.
- Line up raw edges of binding with quilt. Sew ¼" away from the raw edge.
- Fold binding over to the other side of the quilt, Machine or whipstitch the binding to complete the quilt. For this example, I have machine binded the binding on the front of the quilt.
Iron all fabrics before cutting and remove selvedges. Cutting dimensions include ¼'' seam allowances.
For the cutting directions I have included two options for each colorway on how you could go about with cutting the fabrics and it comes down to whether you choose to use yardage or scraps to supplement the project.
| Quilt Size (finished size) |
Background Fabric (Fabric A) |
Geese Fabric (Each Fabrics, B, C, D and E) |
Background Fabric(Fabric A) | Geese Fabric(Fabric B) |
| Baby (40" x 40") |
Scrappy: • 256 squares, 3'' Yardage: 19 strips, 3'' x WOF. Sub-cut: • 256 squares, 3'' |
Scrappy: • 32 rectangles, 3'' x 5½'' Yardage: 5 strips, 3'' x WOF. Sub-cut: • 32 rectangles, 3'' x 5½'' |
Scrappy: • 256 squares, 3'' Yardage: 19 strips, 3'' x WOF. Sub-cut: • 256 squares, 3'' |
Scrappy: • 128 rectangles, 3'' x 5½'' Yardage: 19 strips, 3'' x WOF. Sub-cut: • 128 rectangles, 3'' x 5½'' |
| Throw (60" x 70") |
Scrappy: • 672 squares, 3'' Yardage: 48 strips, 3'' x WOF. Sub-cut: • 672 squares, 3'' |
Scrappy: • 84 rectangles, 3'' x 5½'' Yardage: 12 strips, 3'' x WOF. Sub-cut: • 84 rectangles, 3'' x 5½'' |
Scrappy: • 672 squares, 3'' Yardage: 48 strips, 3'' x WOF. Sub-cut: • 672 squares, 3'' |
Scrappy: • 336 rectangles, 3'' x 5½'' Yardage: 48 strips, 3'' x WOF. Sub-cut: • 336 rectangles, 3'' x 5½'' |
As previously mentioned, the Flying Geese units in this tutorial are pieced using the flip and stitch method. It is a more traditional approach in creating flying geese units. This method makes one flying geese at a time and requires two squares to be sewn on each end of a rectangle. It is useful if you want to use specific colors or two different colors for the squares that make up the flying geese unit’s background, or a scrappy look.
The following steps applies to both options and sizes, unless specified.
Piecing Flying Geese Units
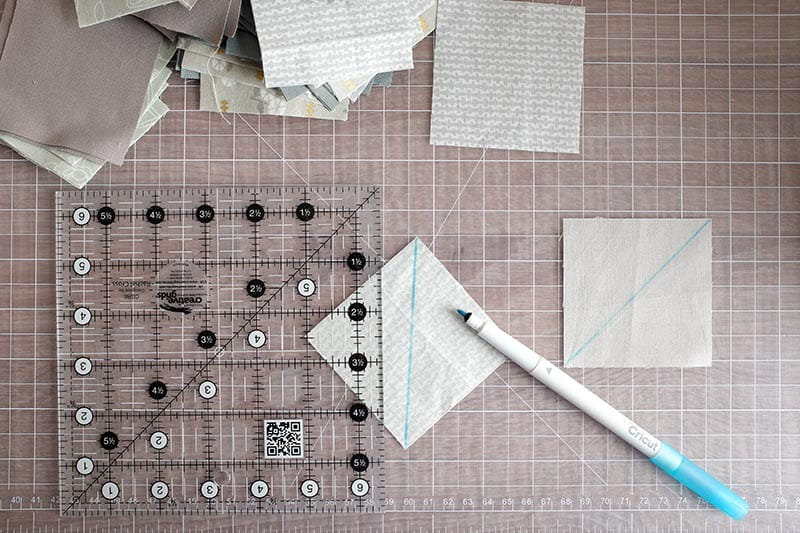
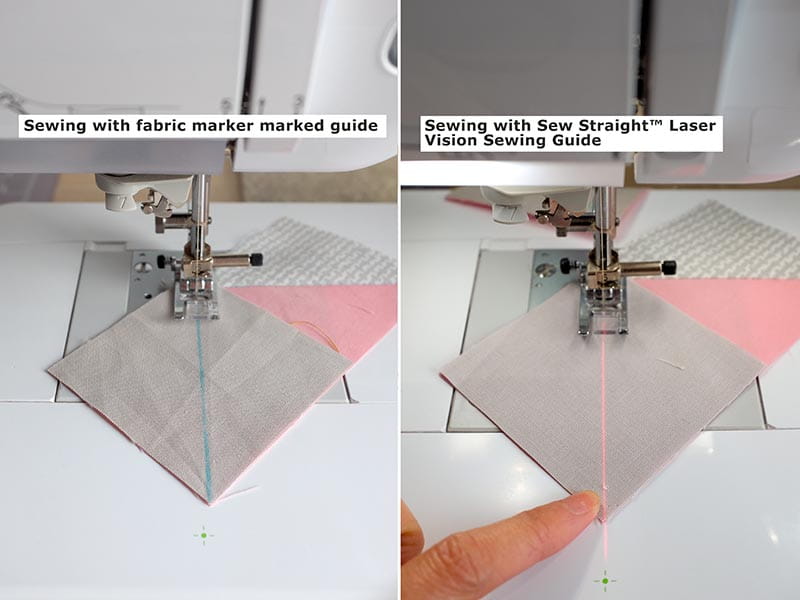
I skipped this step because my Brother Innovis BQ3100 sewing machine has the Sew Straight™ Laser Vision Sewing Guide.
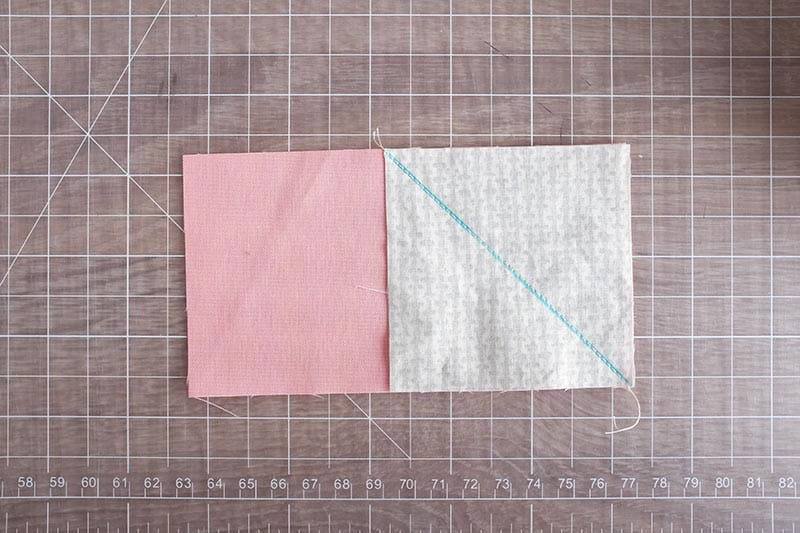
If using the Sew Straight™ Laser Vision Sewing Guide, place one 3'' square on the right side of one 3'' x 5½'' rectangle. Referring to the photo below, use the laser guide to identify diagonal line sewn on the 3'' square.

Tip: When piecing, it is natural to focus on the sewing machine needle. If you’re new to piecing with the laser guide, you need to retrain your brain to focus on where the laser guide is pointing at. If not, you may end up with wonky lines and inaccurate piecing. Thereby, my tip is don’t let the laser guide leave the point you want to end at (refer to where the finger is pointing in the photo above, on the right).
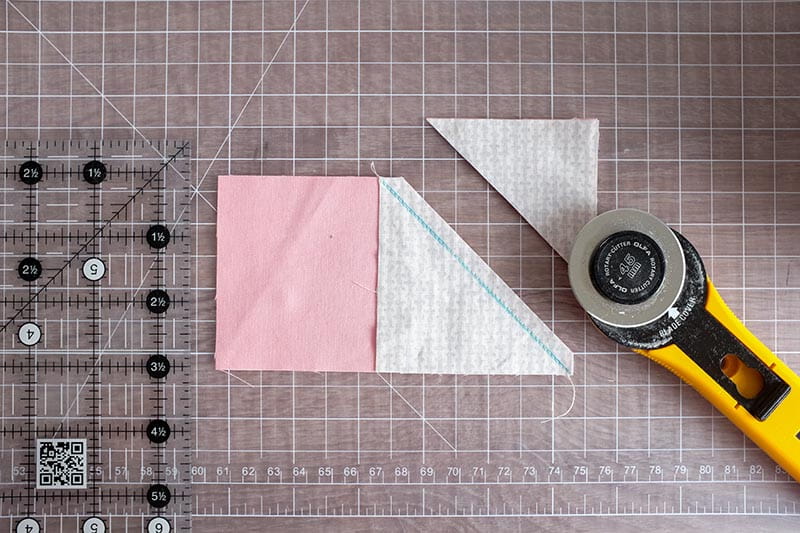
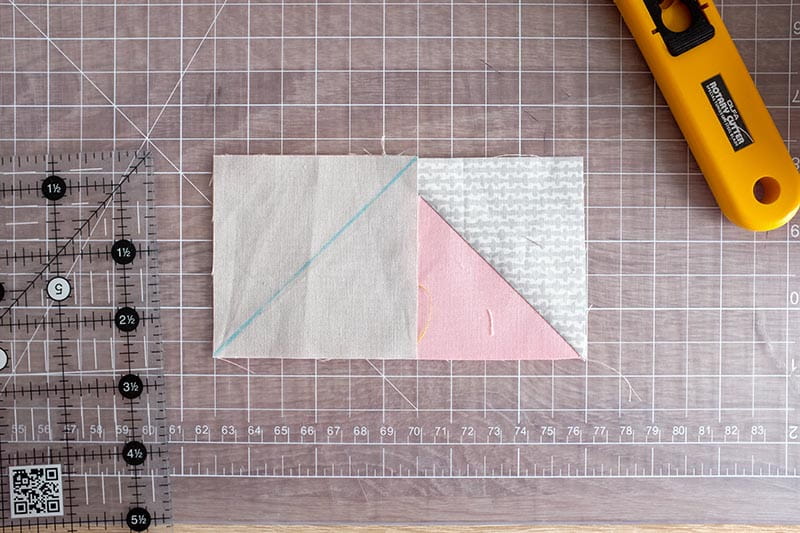
If using the Sew Straight™ Laser Vision Sewing Guide, place one 3'' square on the left side of the Half-Flying Geese unit. Referring to the photo above, use the laser guide to identify diagonal line sewn on the 3'' square.

Piecing Dutchman’s Puzzle Blocks
If you’re creating Option 1: Multi-colored, there are a few ways to arrange the Flying Geese units by color. See below the various layouts as this would affect the Flying Geese pairs.
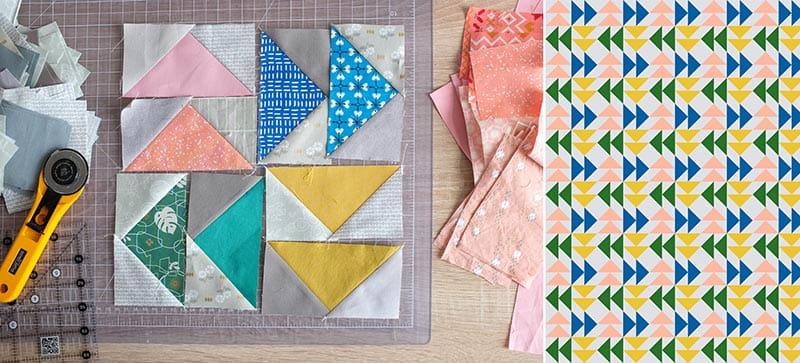
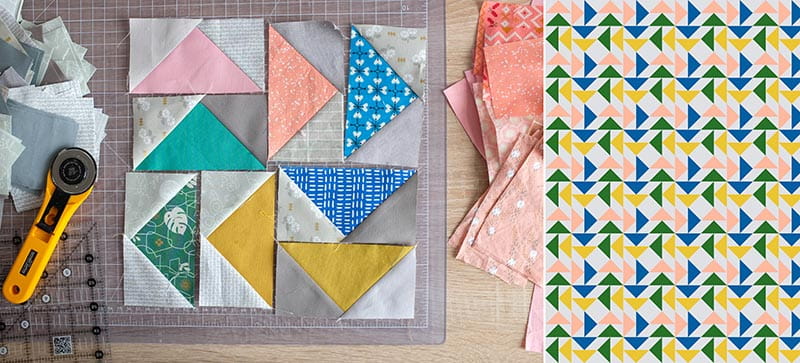

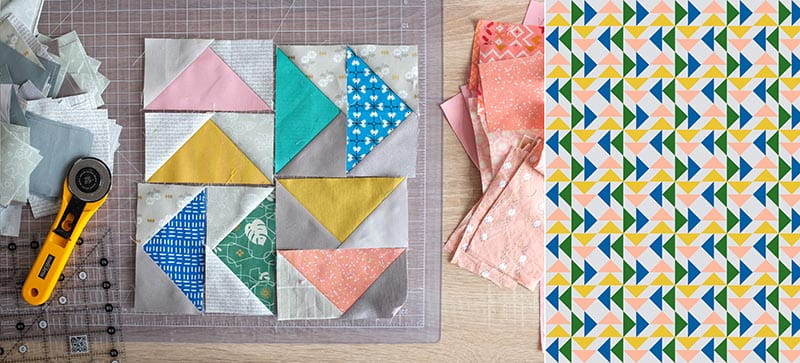
Repeat this step to create a total of 64 Square Patch units for baby sized quilt and 168 Square Patch units for throw sized quilt.
Repeat this step to create a total of 16 Blocks for baby sized quilt and 42 Blocks for throw sized quilt.
Piecing Quilt Top
| Number of Blocks going across the quilt | Number of Blocks going down the quilt | |
| Baby | 4 | 4 |
| Throw | 6 | 7 |
Tip: For ease and organization, tackle the Blocks in rows. Then sew the rows together.

Basting in quilting means to temporarily secure the three layers of the quilt – top, batting and back – while permanent decorative stitches are incorporated.
Another alternative option is to completely skip this section and send your quilt to a longarm quilter. Choosing the longarm quilter route is the easiest, especially for larger quilts like the throw size. However, this service is an additional cost and depending on the longarm quilter’s workload, it requires additional time to complete the project.
A quilt back needs to be large enough to cover the quilt top with approximately 4" overhang on each side (see photo in step c for example).
There are a couple of ways to attach binding on to a quilt – machine and hand bind. For this particular tutorial, machine binding will be shown. This is the fastest method when it comes to binding.
| Baby | 5 |
| Throw | 7 |
Alternatively, if you want to continue the scrappy look into the binding, ensure joined binding strips (this will be carried out in the following step) are 2½" wide and measures at least 172" long for baby quilt and at least 272" long for throw size quilt.


About the Author:


