Easy Halloween Leggings Costume
How to make Halloween costume leggings in no time!
If you're looking for an easy, stylish costume idea this Halloween or a new addition to your wardrobe, you're in the right place! These comfy DIY leggings make the perfect base for countless costumes—from witches to superheroes—but you can easily wear them long after spooky season is over. With your sewing machine, a serger, and stretchy fabric, you can whip up a pair in no time. This step-by-step sewing tutorial will show you how to create leggings using your favorite stretchy fabrics and a few helpful sewing techniques. Whether you're a beginner or a seasoned sewing enthusiast, this guide will walk you through the process. Let's get sewing!
Here’s what you’ll need to get started sewing your Halloween leggings
Supplies:
- I used my Brother Simplicity SB3764T but you could also use the Brother 1034D 3/4 Thread Serger
- I used my Brother Cover Stitch CV3440, but you can also use the Brother 2340CV Single Sided Cover Stitch machine
- Brother Sewing Machine
- Stretchy knit fabric with a Halloween print (approximately ½ yard but adjust based on size)
- A favorite leggings pattern
- Elastic (1” wide, cut to your waistband size)
- Scissors
- Pins
- Measuring tape
5 steps to create your Halloween costume leggings
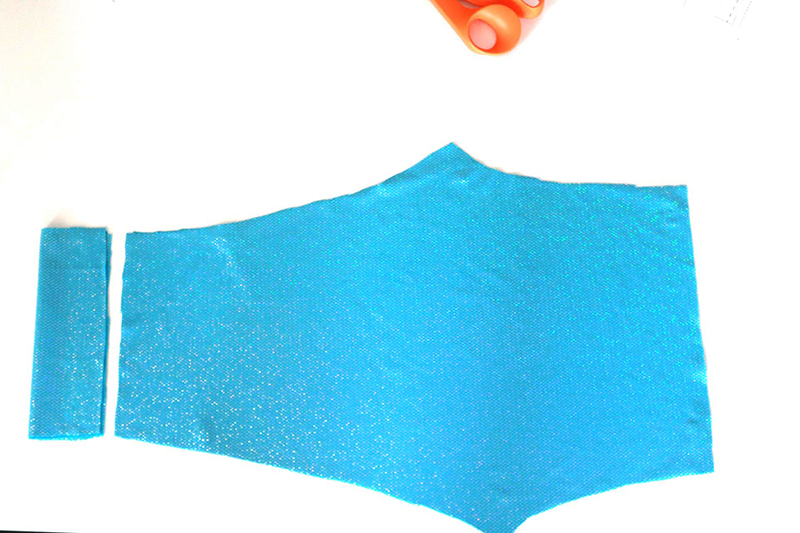
1. Prepare your pattern
Choose your pattern size and make any adjustments if needed (e.g., adjust for high or low rise depending on your preference).
Lay your chosen fabric flat and place your pattern pieces on top. Use pins or pattern weights to secure the pattern in place. Cut out the fabric following the guidelines on your pattern, being mindful of adding any necessary seam allowances.
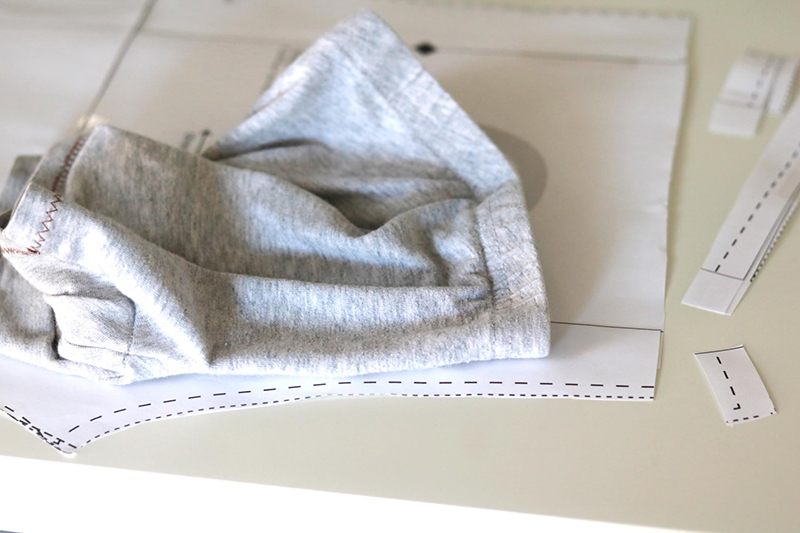
Pro Tip: If your fabric is a little short in length, no problem! You can add cuffs to the bottom of the leggings to make up for the missing length. Simply cut cuff pieces that are double the desired length.
2. Add cuffs (optional)
If you’re adding cuffs to save fabric or for extra style:
- Cut cuff pieces twice the length of how tall you’d like the cuff to be. The width should match the bottom of the leg opening.
- Fold the cuffs in half (wrong sides together) and sew the raw edge to the bottom of each leg opening using a serger or stretch stitch.
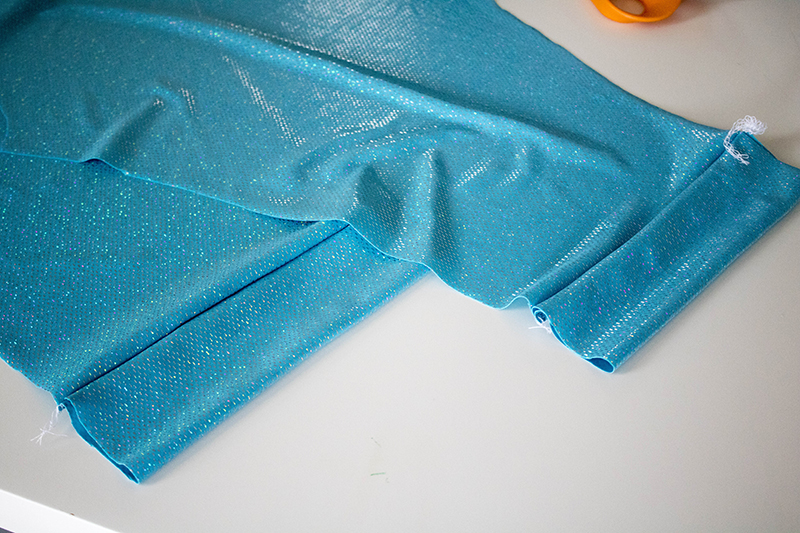
- This step is a great way to showcase contrasting colors or patterns for a fun touch!
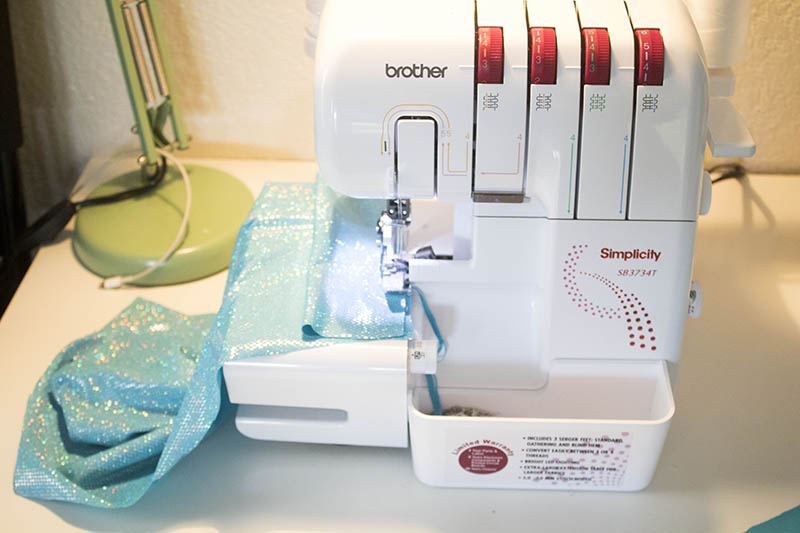
3. Assemble the leggings
Place the legging pieces right sides together. Use your serger or sewing machine to sew along the front and back crotch seams. Lay the legging pieces on top of each other with right sides together and sew the front and back crotch seam.
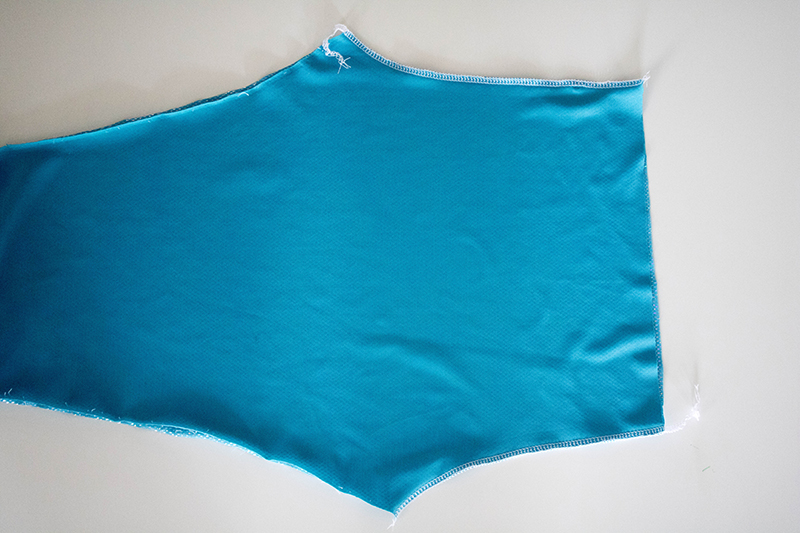
Open up the legging pieces and match the long inner seams of each leg. Sew from the bottom of one leg through to the other.
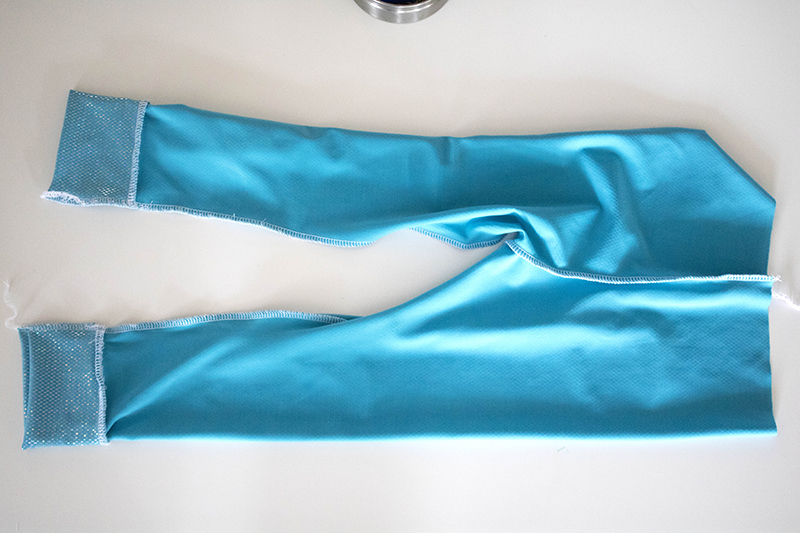
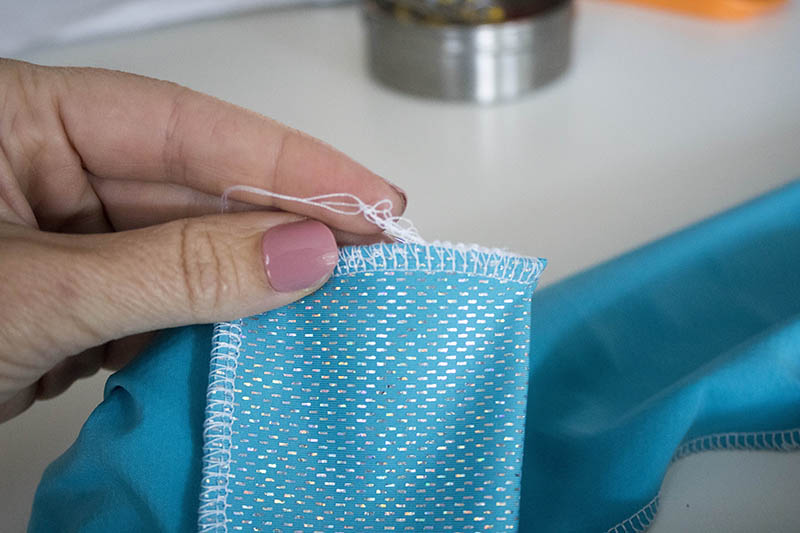
Because of the cuff, you will have an unfinished serger seam on the bottoms of the cuffs. I like to finish by using a needle to pull the threads back through the other stitches. Trim and add a drop of fray stopping glue if you want.

4. Attach the elastic waistband
Measure your child’s waist (or your own) and cut elastic to the same length. Overlap the ends by ½ inch and sew them together to form a loop. Divide the elastic into quarters and do the same with the waistband of the leggings. Pin the elastic to the waistband, aligning quarter marks.
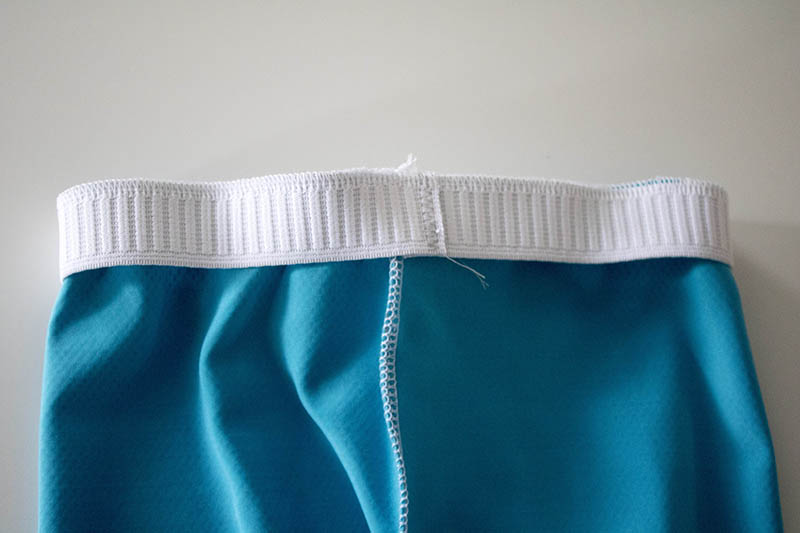
Sew the elastic to the fabric using a zigzag or stretch stitch, keeping the elastic slightly stretched as you sew.
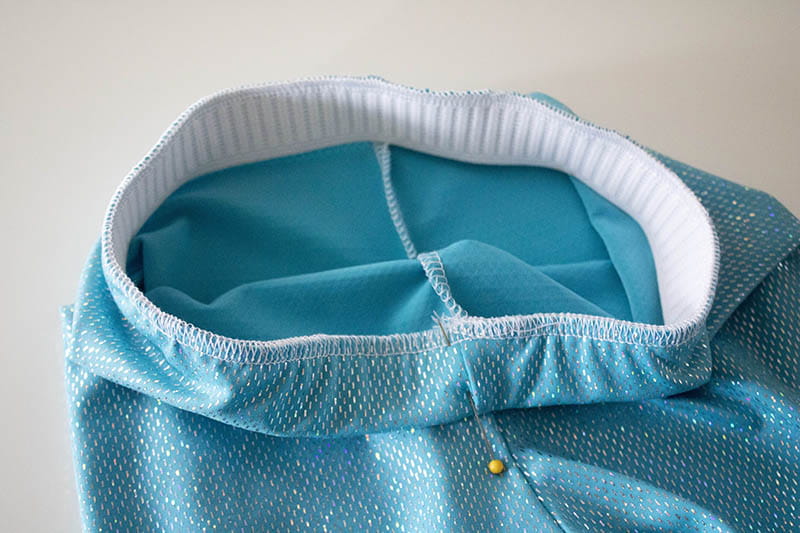
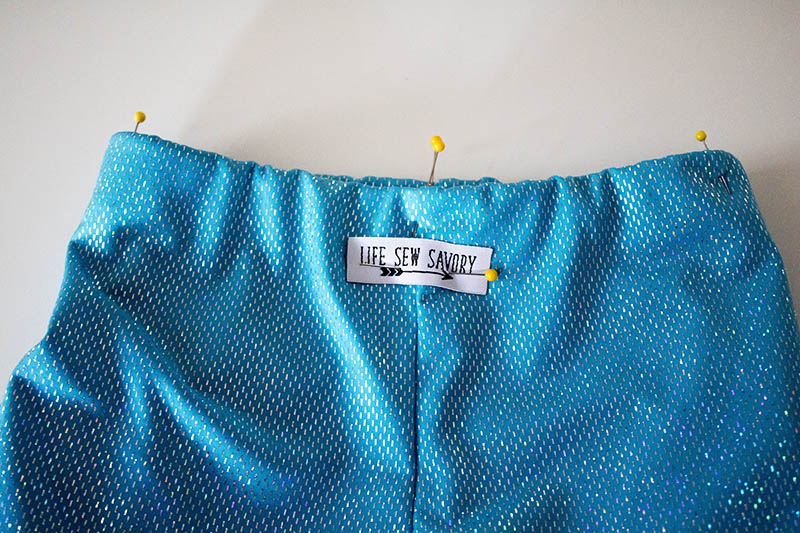
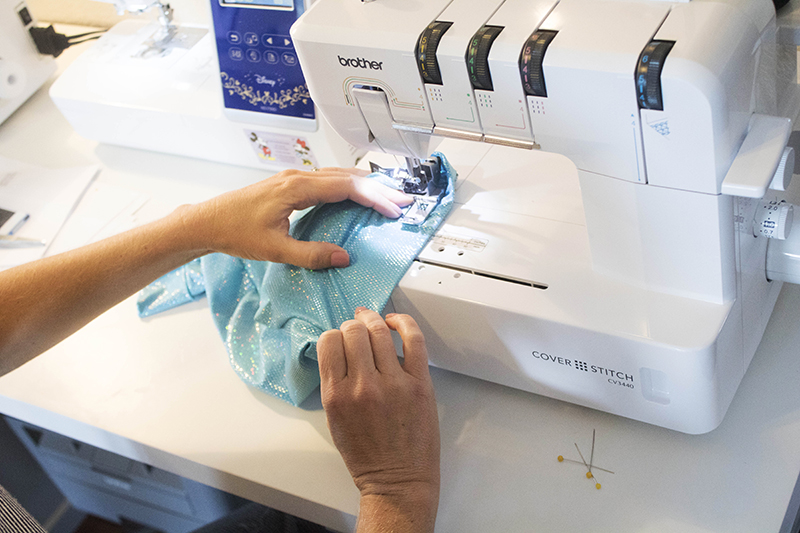
Then fold the elastic inward, hiding it within the waistband, and sew again with a cover stitch for a clean finish. You can add your tag before you sew and catch it in the seam.
I used my Brother Cover Stitch to sew around the right side of the leggings, enclosing the elastic. You will have to stretch the fabric slightly to avoid puckers.
5. Hem the legs (if skipping cuffs)
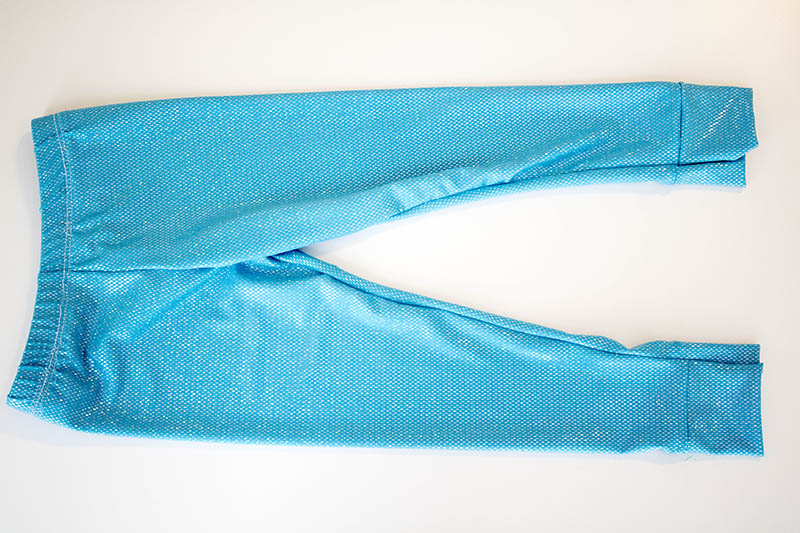
If you didn't hem the leggings, do it now with your cover stitch machine. So cute, right?
A simple, stylish Halloween sewing project
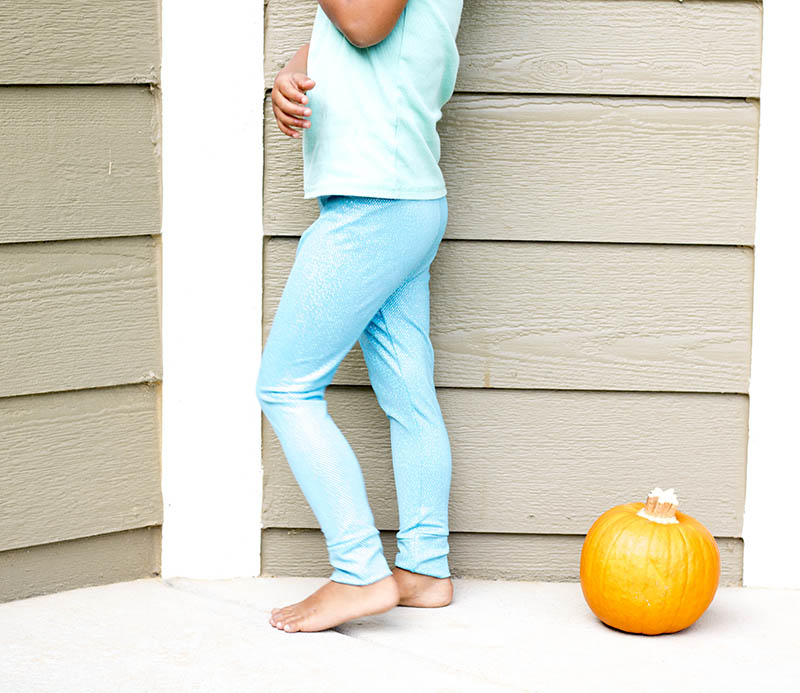
DIY Halloween leggings are a fun, easy-to-make project that combines creativity with practicality. Whether you’re crafting them as part of a costume or designing unforgettable fall fashion, sewing your own leggings puts a unique twist on your wardrobe while letting your sewing skills shine. My daughter is going to be a butterfly this Halloween (or a fairy, whatever she feels like on the day! We picked up a cheap pair of wings and paired them with a colorful tank.
If you’re ready to get started, pull out your Brother sewing machine and fabric of choice, and give this project a go. If you’re in the Halloween spirit, check out these DIY Halloween masks or learn how to make this butterfly Halloween costume. Don’t forget to share your creations @BrotherSews—we’d love to see your spooky and stylish designs!
Happy Halloween sewing! 🎃

FAQs
Q: Can I make these leggings without using a serger?
A: Absolutely! A standard sewing machine equipped with a zigzag stitch or stretch stitch works well with knit fabrics.
Q: What type of fabric should I use?
A: A stretchy knit fabric with at least 4-way stretch is ideal. Look for fun Halloween-themed prints like bats, pumpkins, or spiderwebs!
Q: How long does this project take?
A: For beginner sewists, this project takes about 2 to 3 hours, including setup and preparation. If you’re interested in more beginner-friendly Halloween sewing tutorials, check out this DIY Halloween trick-or-treat basket or learn how to make this custom candy bag.
Related Projects
Stay Connected
* Required fields