DIY Halloween Trick or Treat Bag

How to make a Halloween trick-or-treat bag for all your goodies
Celebrate Halloween with more flair than just your costume this year by creating a trick-or-treat bag that screams creativity! This ghoulish embroidery and sewing project is perfect for adding some personality to your Halloween collection of goodies. Whether you’re crafting it for your little ones or just want to have the best bag on the block, this embroidery and sewing tutorial will show you exactly how to bring spooky, stylish joy to your trick-or-treating adventure.
Here’s what you need to get started
Supplies:
- Brother sewing machine (I am using the Dream Machine but you can use the Stellaire, Luminaire, or Aveneer sewing and embroidery machines)
- Black felt for outer bag
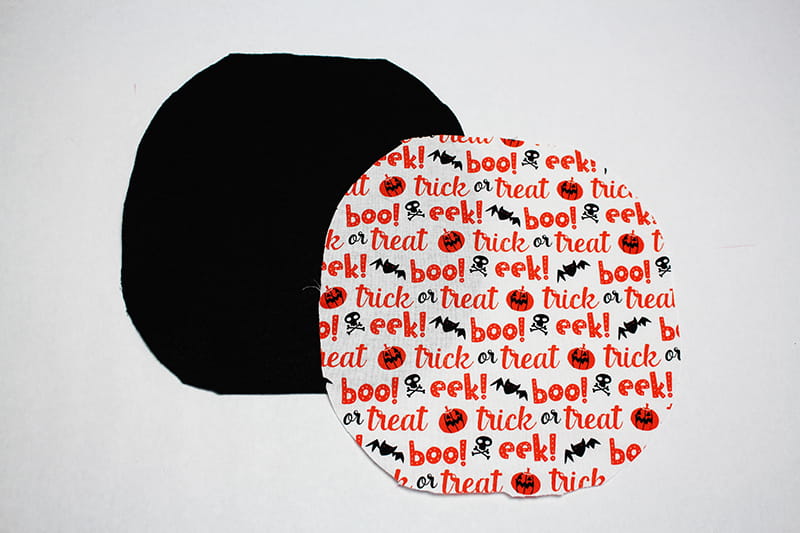
- One piece 14” L x 27” W
- One 9” circle
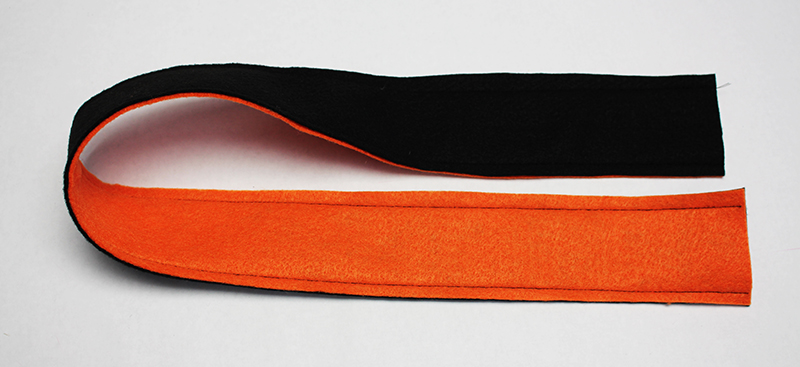
- One piece 19” L x 2½" W for strap
- Orange felt
- One piece 9” L x 9” W for applique letters
- One piece 19” L x 2½" W for strap
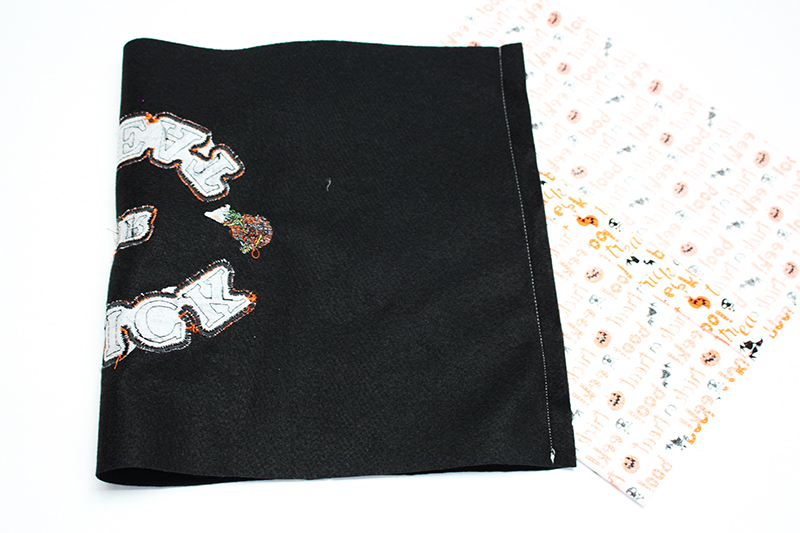
- Medium weight cotton fabric for lining
- One piece 14” L x 27” W
- One 9” circle
- Water-soluble embroidery stabilizer
- One piece 10” L x 10” W
- Medium weight Tear-away adhesive embroidery stabilizer
- Halloween embroidery designs from iBroidery
- Sewing, embroidery, and bobbin thread
- Faux fur or feather trim (optional)
Here are the step-by-step instructions to sewing and embroidering your Halloween bag
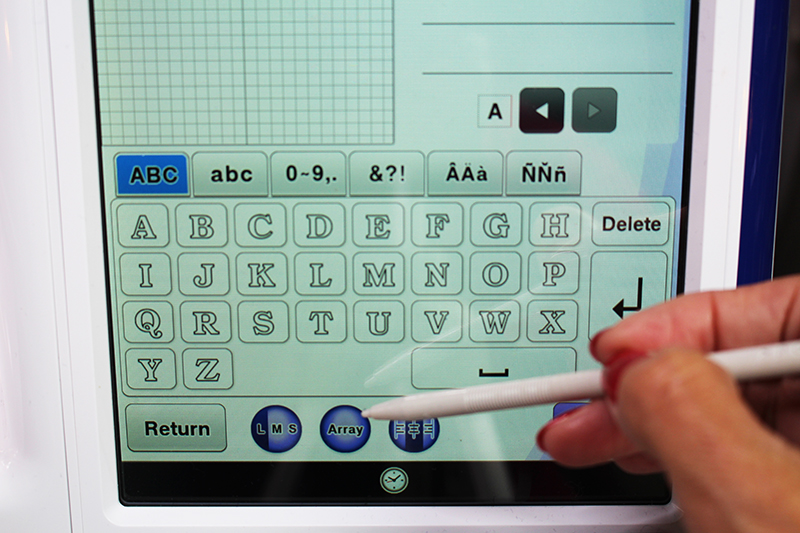
1. Set up embroidery
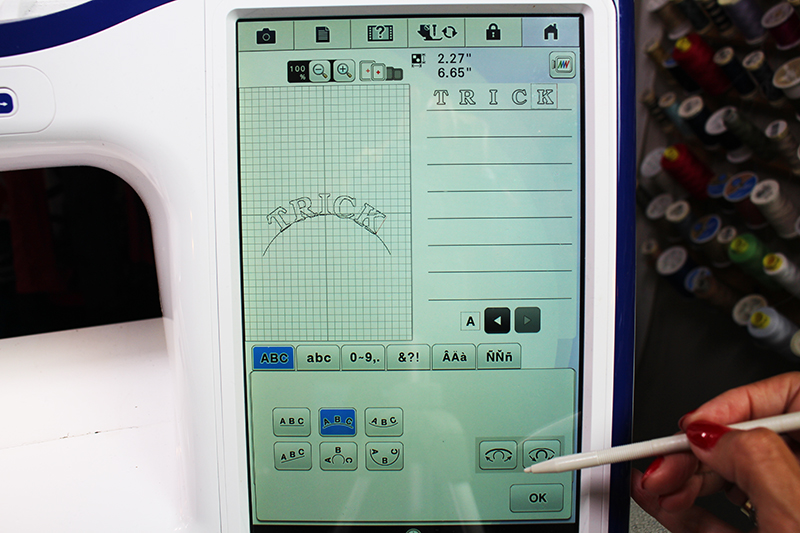
Go to the embroidery screen and type in the letters “TRICK”. Click ARRAY.
Arc the text by selecting the convex curve.
Move the letters into the upper section of the embroidery screen.
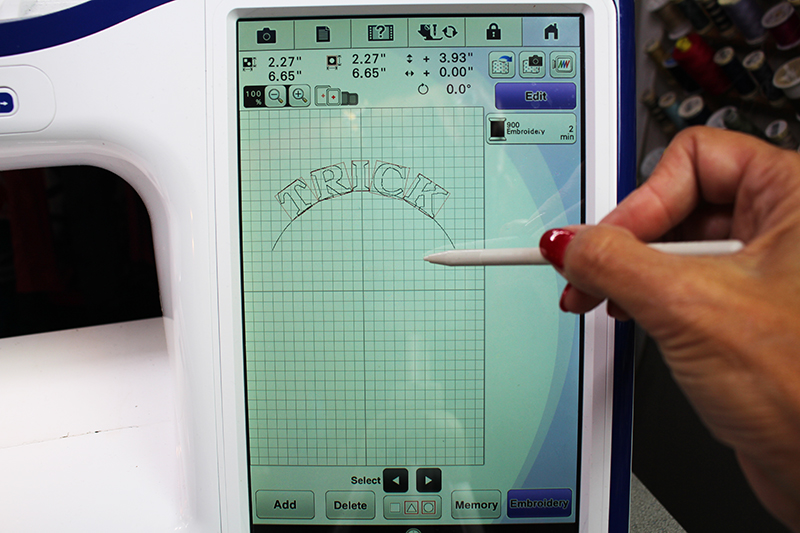
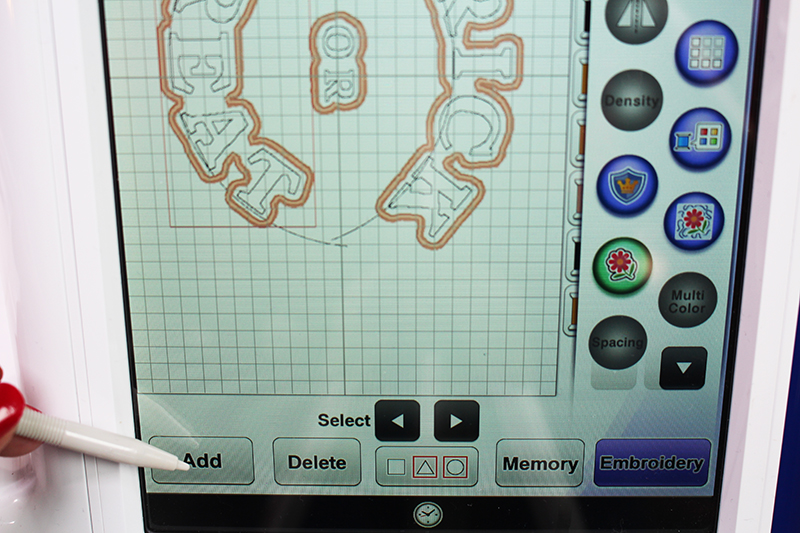
2. Edit the letters
Edit the letters a little more by spreading them out. This will give us a little more room for the appliqué.
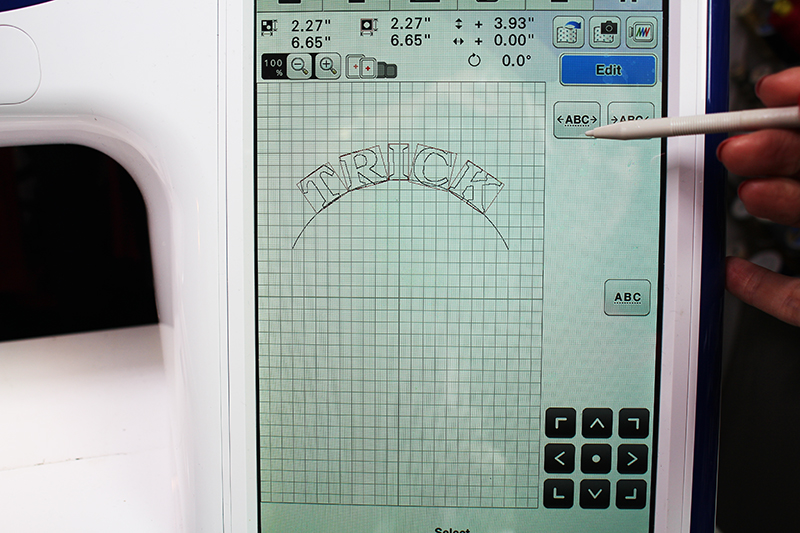
ADD the letters “OR”.
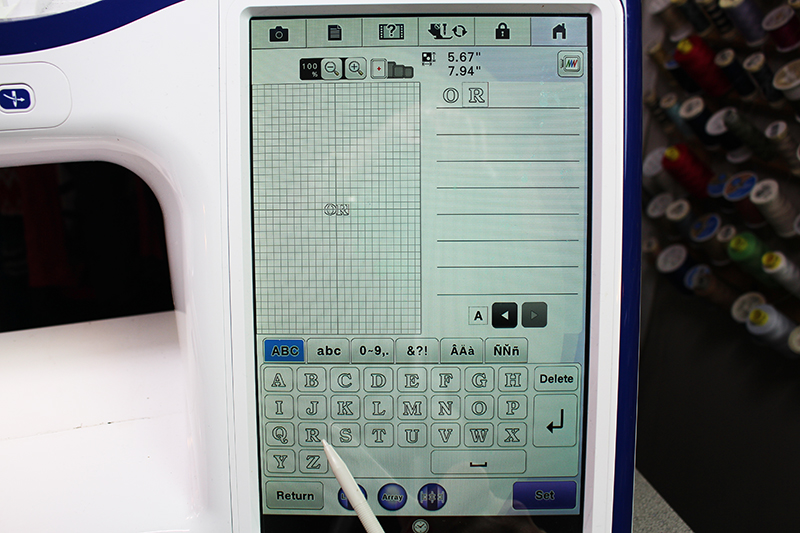
ADD the letters “TREAT”. Click on ARRAY and choose the concave curve. Adjust the spacing of the letters to spread them out.
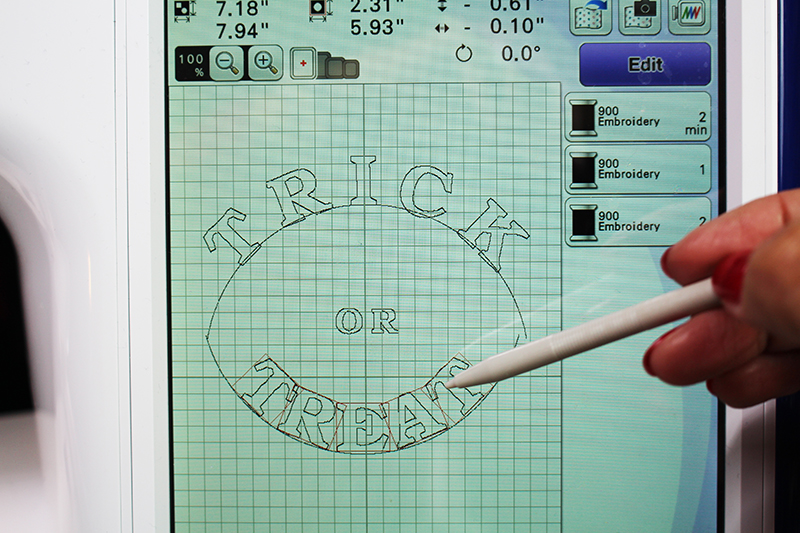
3. Create an appliqué
Click on each word and click the appliqué icon. This will create an appliqué design around the entire word.
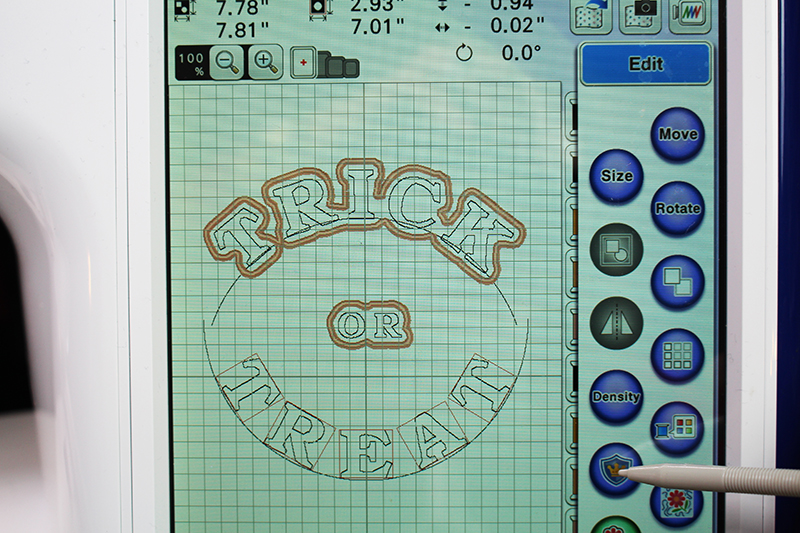
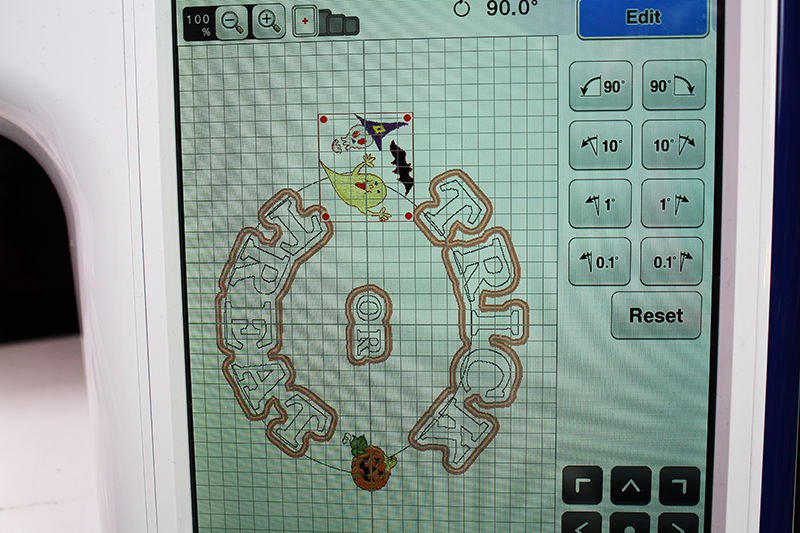
Click on EMBROIDERY. Rotate the entire design as shown.
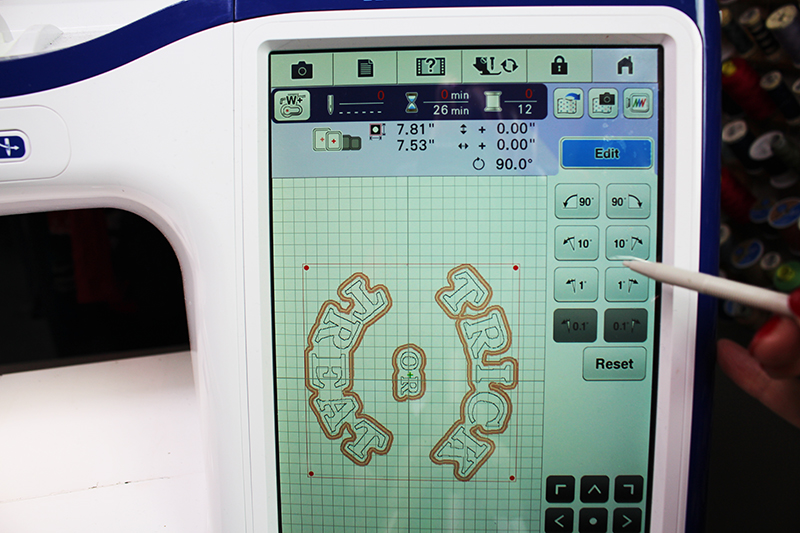
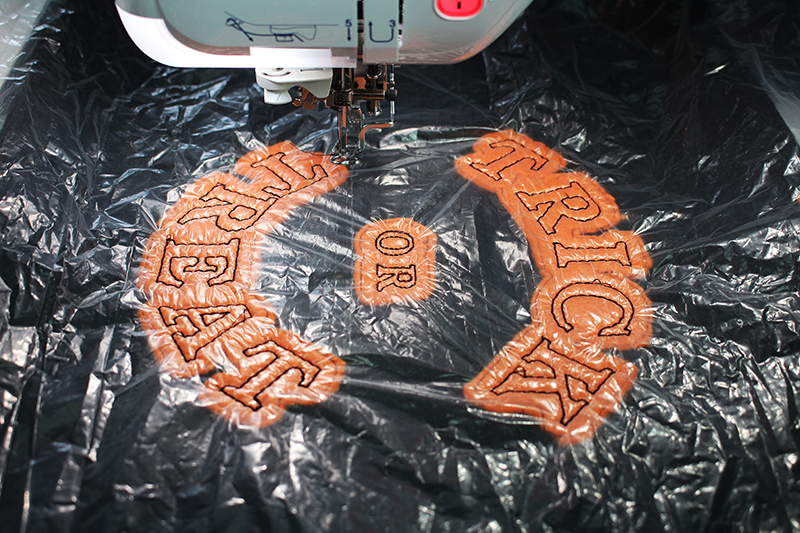
4. Add a Halloween embroidery design
Add a Halloween embroidery design from the machine or one you downloaded from iBroidery.com.
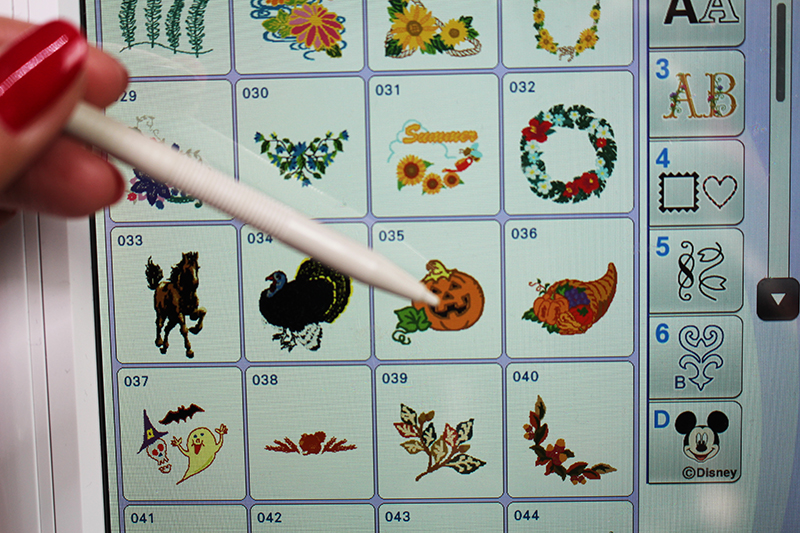
Continue to add designs. Rotate and move them to position as desired outside of the lettering.
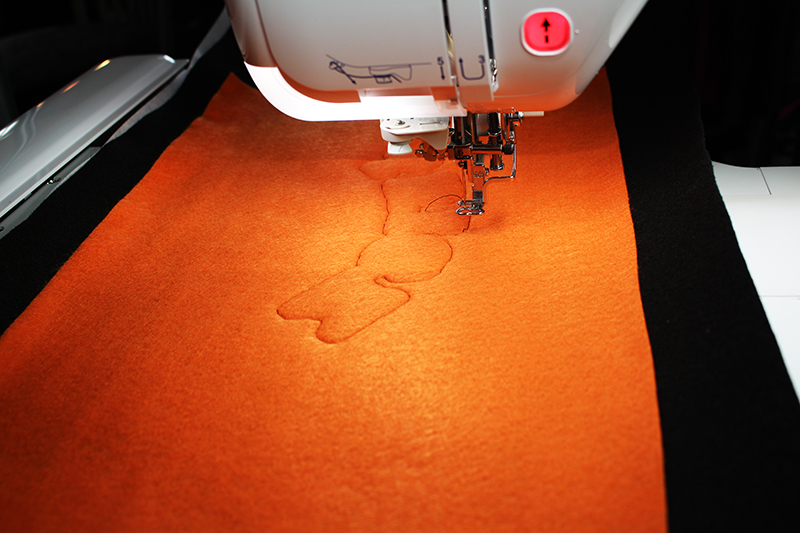
5. Hoop the medium-weight Tear-away adhesive embroidery stabilizer
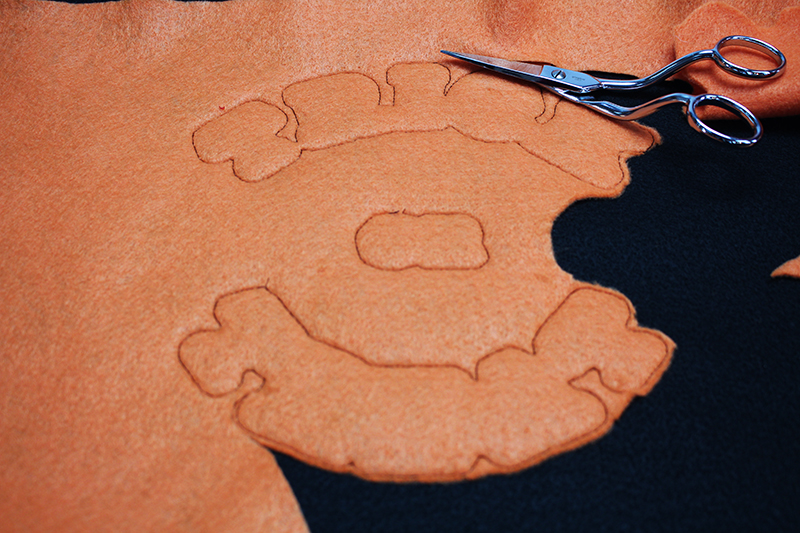
Hoop the medium-weight Tear-away adhesive embroidery stabilizer. Score the paper. Mark the center of the 27” by 14” black fleece fabric piece and place it on top of the hoop as shown. Scan the hoop. An image of the fabric in the hoop will be displayed on the screen of your embroidery machine. Use the image to finalize the placement of the design, making sure it aligns with the center marking. Place the orange felt over the hoop in the embroidery area. Skip ahead in the embroidery order and embroider only the placement lines for the appliqués.

Remove the frame and trim around the stitching.
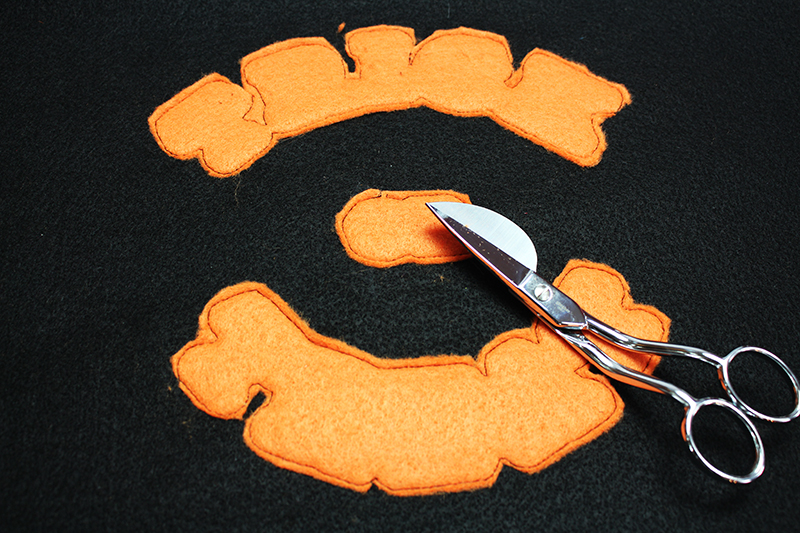
Replace the hoop. Layer a piece of water-soluble stabilizer on top of the hoop to prevent the stitches from sinking into the fluffy felt fabric. Skip through the color blocks in the design to find the letters and embroider them.
Next, skip through the color blocks to find and embroider the outside finishing stitches for each of the appliques. Continue to embroider any extra designs you might have added. Remove the hoop, tear away the stabilizer on the back side and the water-soluble stabilizer on the front side.
6. Start sewing the bag
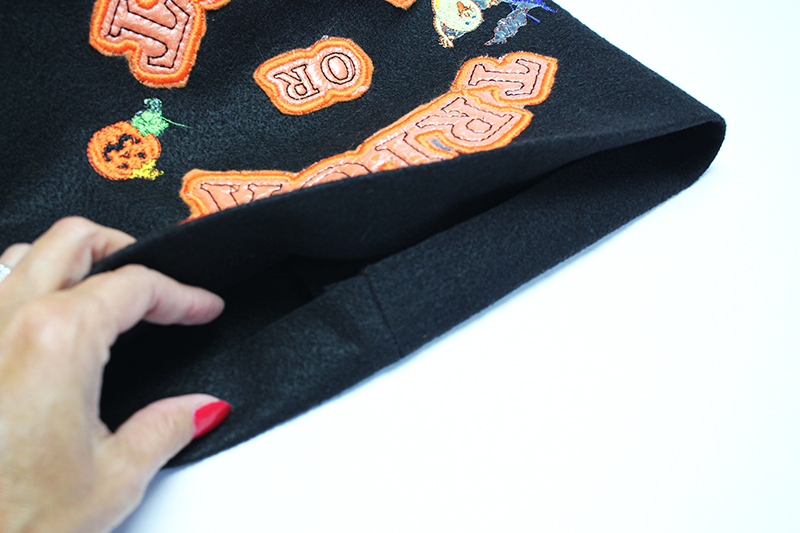
Take the felt piece and fold it in half lengthwise. With the right sides together, stitch along the 14” side and press the seam open. Do the same with the lining piece.
Pin the felt circle to the bottom edge of the tube you created in the previous step. Stitch with 1/2” seam allowance.
Repeat to pin and then sew the remaining circle to the bag lining. Turn the felt bag right side out.
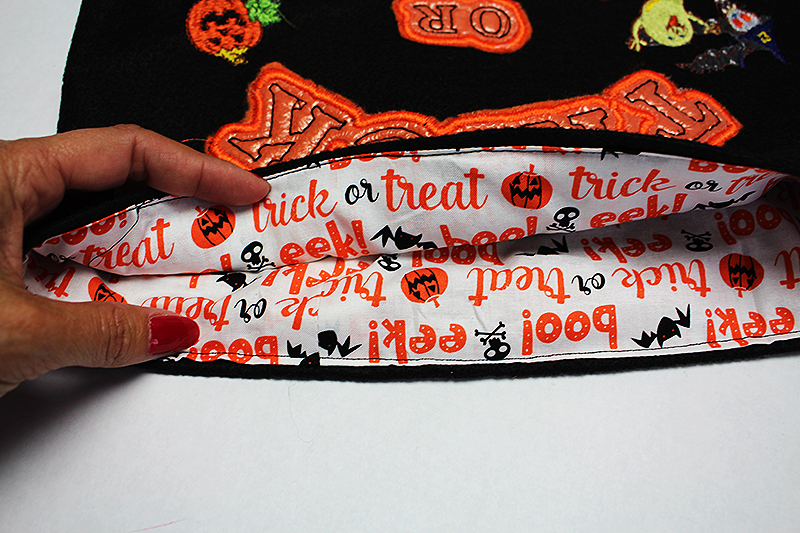
Turn the top edge of the felt bag down 1” (toward the wrong side of the fabric) and press. Do the same thing for the lining. Slide the lining inside the bag and pin the top folded edges together.
Topstitch along the edge, attaching the lining to the bag.
7. Sew the straps
Layer the orange and black strap fabric pieces. Felt fabric doesn’t fray, so there’s no need to finish the edges. Instead, stitch ½ inch from each edge.
Locate the sides of the bag and pin each end of the strap inside the bag. Stitch along the top edge of the bag to secure the strap.
That’s it! 😊 Make sure to remove any remaining bits of water-soluble stabilizer from inside the lettering. If you have faux fur or feathers, attach them to the top edge of the bag. My faux fur boa is really thick, so I will either hand stitch or use a glue gun to attach it.
Now, fill the basket with your favorite treat, and you are all ready for Halloween!
Put the boo in your Halloween bag this year
This Halloween trick-or-treat bag is the perfect way to bring personality, sustainability, and festive fun to your adventure. Plus, there’s nothing like showing up with a bag custom designed to match your style! Whether you’re collecting candy or just joining the festivities, this DIY project will make your Halloween unforgettable.
Interested in more Halloween sewing projects? Learn how to sew this Halloween candy bag or create a DIY butterfly costume.
FAQs
Q: How can I wash my bag after Halloween?
A: Since felt fabric is not machine washable, spot clean your bag with a damp cloth and allow it to air dry fully before storing.
Q: Can I use alternative materials like canvas or denim?
A: Certainly! Canvas or denim can provide extra durability for heavier candy loads but might lack the traditional Halloween look.
Q: How long will this project take?
A: Expect the entire project to take about 2–3 hours, depending on your level of experience and whether the embroidery designs require extra time for customization.

Related Projects
Stay Connected
* Required fields