Embellishing Baby Clothes with Ruffles
My sister’s twin girls have arrived, and I am so excited to start sewing for these little one’s! I don’t have a lot of time to sew from scratch, but I came up with a cute embellishment to add to little outfits I already purchase. In this tutorial I will show you how to add ruffles to the back of a baby outfit. Of course, this technique would work on adult garments too, you just might want to add to sleeves or a neckline instead of the tush 😊
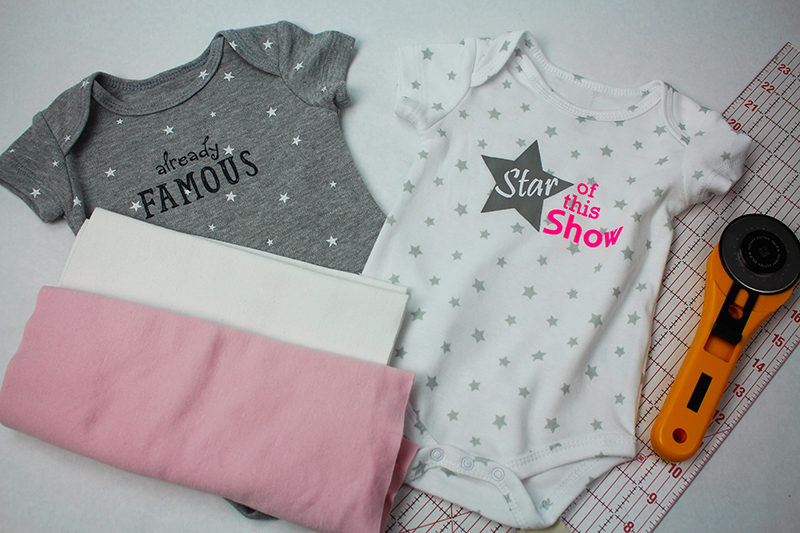
Supplies:
- Ribbed Knit Fabric
- Rotary Cutter
- Quilters Ruler
- Pins
- Universal Polyester Thread
- Tailors Chalk or Fabric Marking Pen
- Baby One Piece Outfit
Machines Used:

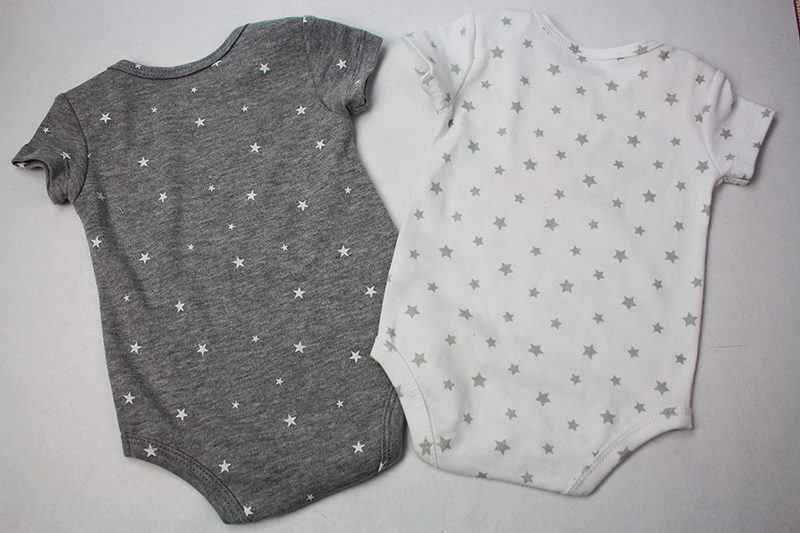
- Start by pre-shrinking the outfit and fabric by washing and drying both. Lay the outfit with the backside facing up.
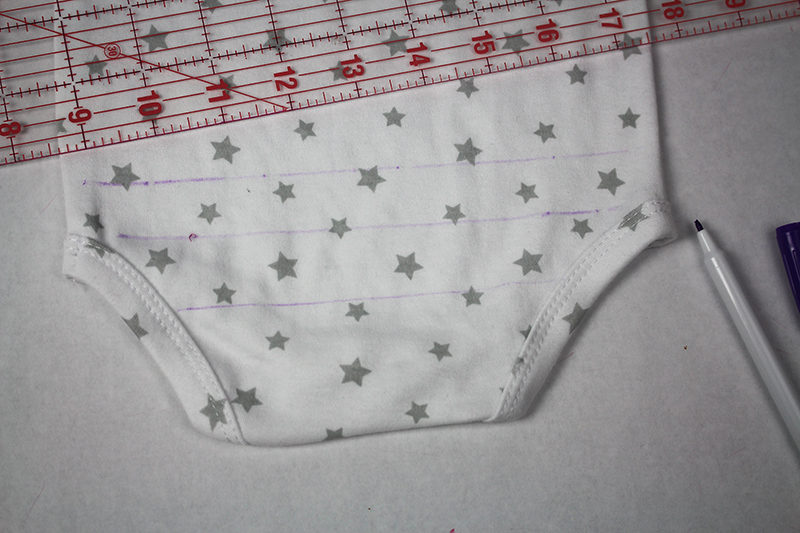
- Draw 3 lines 1” apart as shown below.
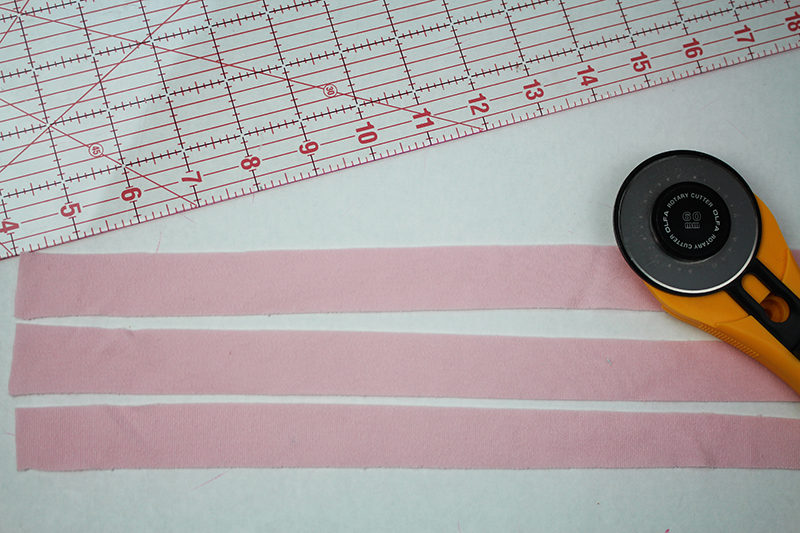
- Cut strips of fabric 1” wide from selvage to selvage.
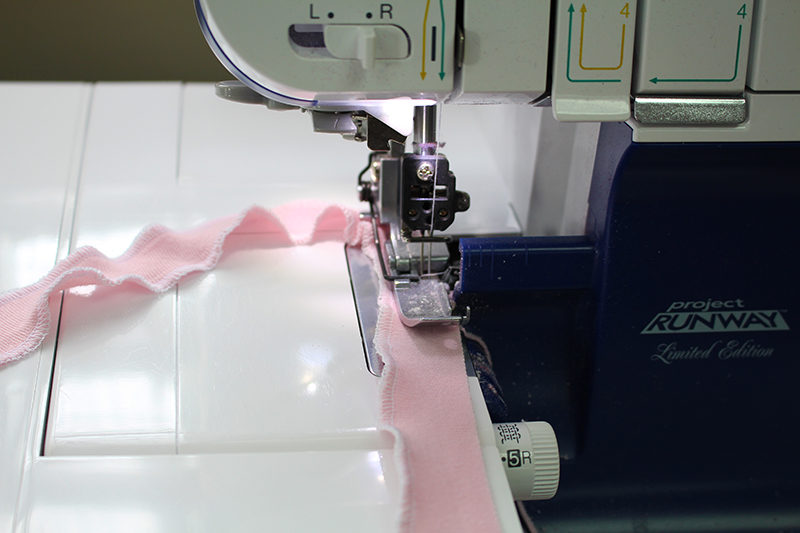
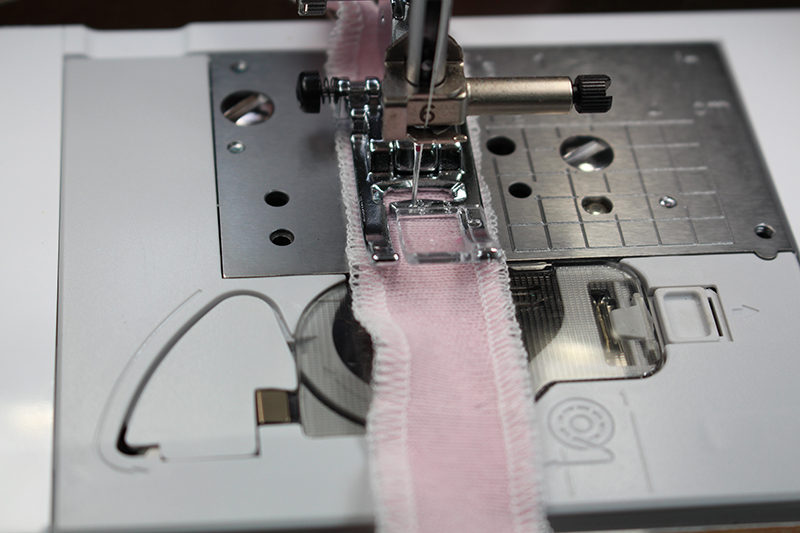
- Set up the serger for a NARROW OVERLOCK STITCH. For the Brother Serger,
remove the stitch finger and the tension settings are as follows (check your manual for your specific serger):
- Right Needle Tension: 4 (3-5)
- Upper Looper Tension: 4 (3-5)
- Lower Looper Tension 4 (3-5)
- Stitch Length: R
- Serge along the edge of the strips of fabric. Adjust the differential feed so the fabric stretches as its stitched to create a wave or ruffle look. You can also lightly stretch the fabric as its fed into the serger, just be careful not to stretch the fabric too much as you can damage the needles.

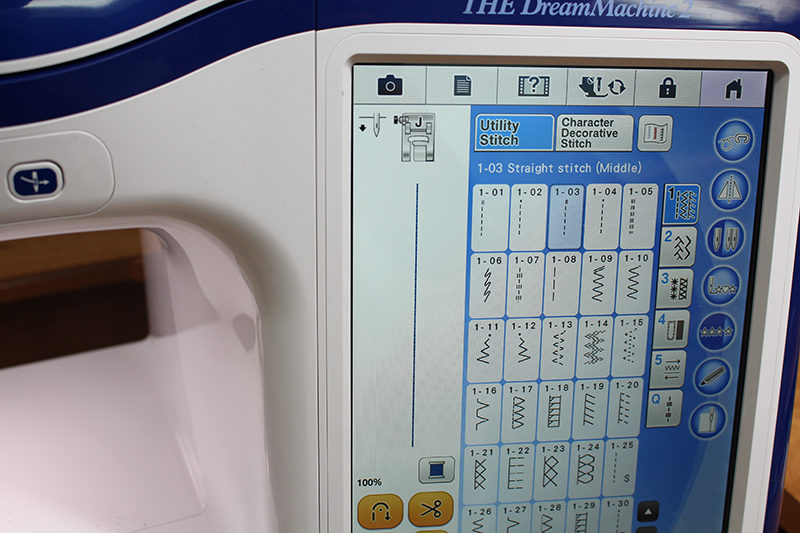
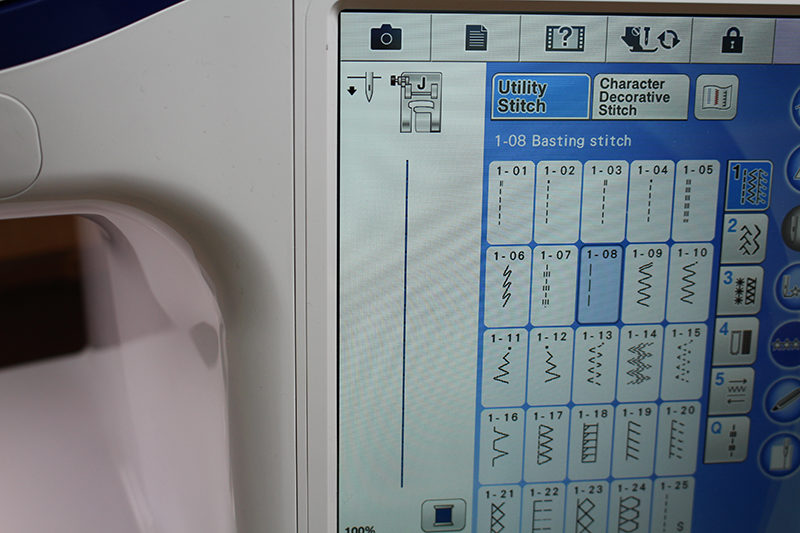
- After all of the fabric strips are serged along the edges, go to the sewing machine. You can either select the basting stitch (STITCH 1-08) or and choose a straight stitch (1-03) and set it to the longest stitch length.
- Stitch in the middle of the fabric strip. Start by back stitching at the beginning of the fabric and stitch. When you get to the end of the strip, do not back stitch and do no use the automatic thread cutter; instead pull the fabric out and leave a long thread tail.
- Gently pull the bobbin thread to scrunch up the fabric. Starting at one end of the marked line on the outfit, fold under the end of the fabric strip about ½” and pin.
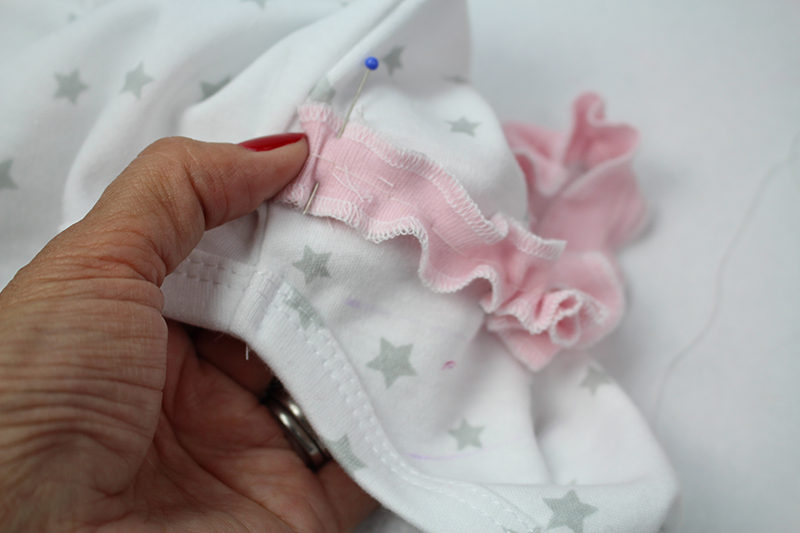
- Continue to pull the thread to create a ruffle and pin the fabric to the outfit. When you get to the end of the marked line, fold the fabric strip under ½” and pin.
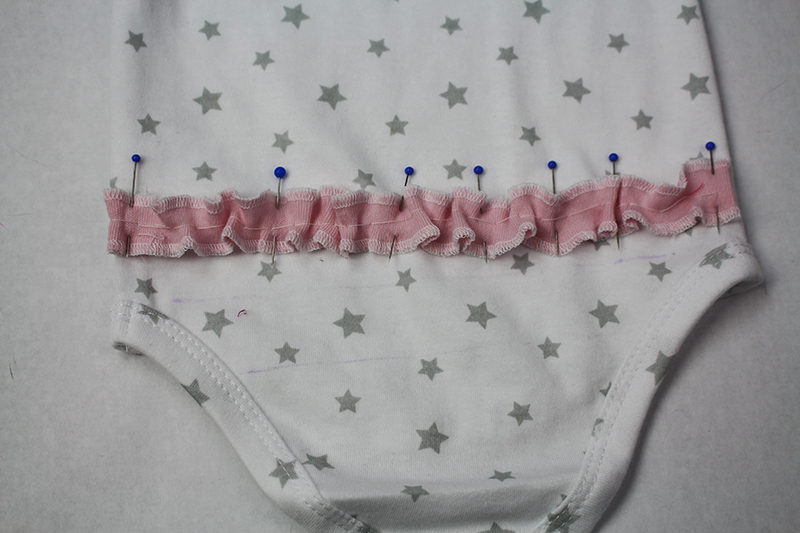
- Follow the same process for all the fabric strips. Set the sewing machine up for a straight stitch (1-03) with a stitch length of 2.5 or 3.0. Stitch along the center of the ruffle, attaching the ruffled fabric to the outfit.
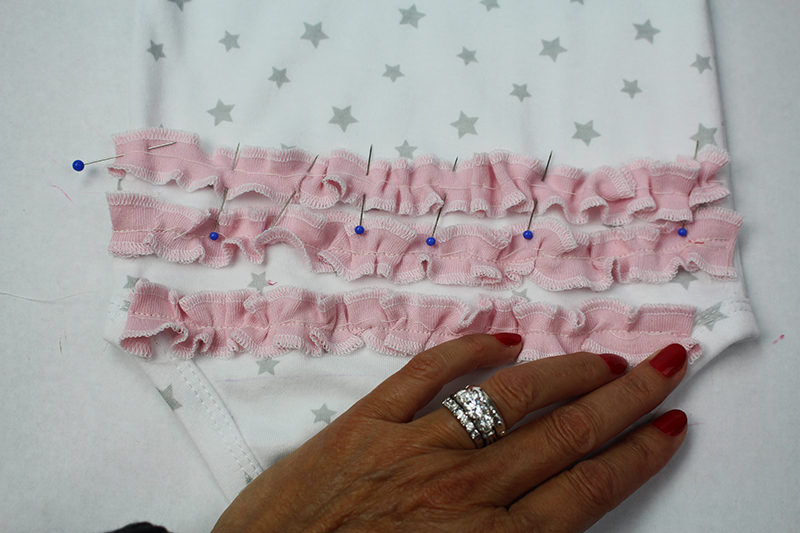
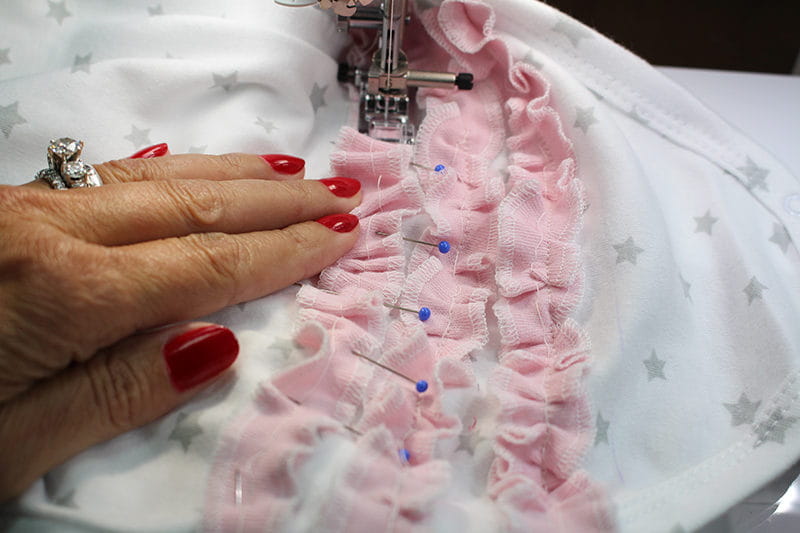
- After all the fabric pieces are stitched to the outfit, pull out the basting stitch. That’s it 😊

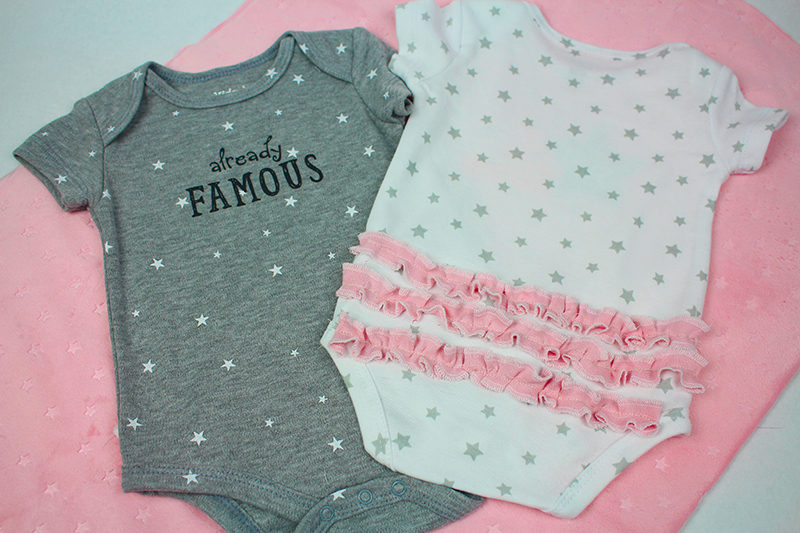
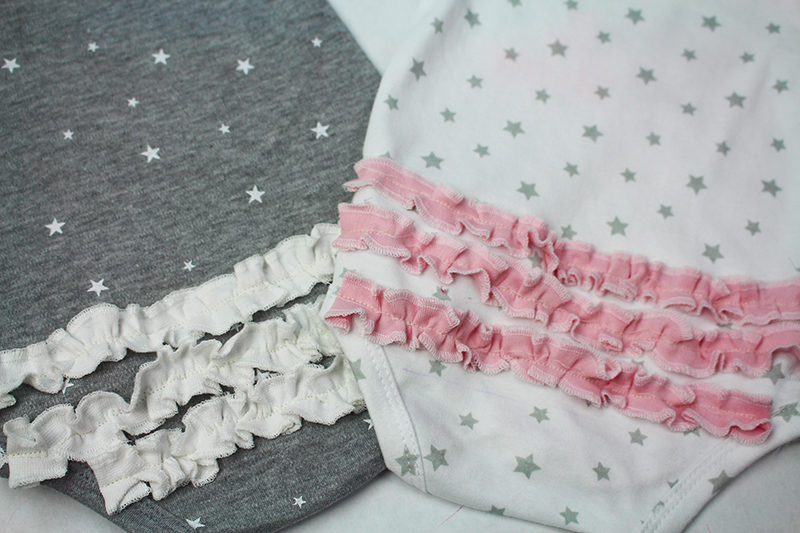 This is such an easy project! Now I plan on serging quite a few strips of fabric and having them ready to go with new outfits I might purchase or sew. I brought these adorable outfits to my sister and can you believe they are too big! These are size 0 – 3 months and those little girls are smaller than newborn size! No worries, these will be waiting in the closet when they are big enough.
Cheers,
Angela
This is such an easy project! Now I plan on serging quite a few strips of fabric and having them ready to go with new outfits I might purchase or sew. I brought these adorable outfits to my sister and can you believe they are too big! These are size 0 – 3 months and those little girls are smaller than newborn size! No worries, these will be waiting in the closet when they are big enough.
Cheers,
Angela

Related Projects
Stay Connected
* Required fields