Embroidered Baby Bottle Cover
Recently I was in a popular store strolling down the baby aisle. Seeing so many little baby things inspired me! I decided to create something that could be included in a special gift set for a new baby. Along with a lot of other must have baby items, I saw some very boring baby bottles and envisioned dressing up plain baby bottles with embroidery. I hope you enjoy this bottle cover project. It would be great included in a basket full of additional baby basics! Gather up a few simple supplies, pick an adorable baby design, and you can create a cute, quick cover for a basic baby bottle in no time at all. Are you ready? Let's go sew!
Materials and Supplies
- Brother Sewing & Embroidery Machine
- Brother Embroidery Thread
- Brother Bobbin Thread
- SA5810 Brother Pacesetter medium weight tear-away stabilizer
- Embroidery design of your choice for front of bottle cover
- Purchased baby bottle
- Pre-quilted fabric for bottle cover. See instructions below for specific measurements
- Several inches of narrow braided elastic
- Basic sewing supplies, including a tape measure for measuring bottle, and a small safety pin or bodkin for inserting elastic through casing
- All-purpose sewing thread to match fabric
Note: Choose a design that will easily fit on the front area of the bottle. The design featured on this baby bottle is part of an adorable collection of Morango Designs in a category called Button Babies.
You'll find this design and many other coordinating Button Baby motifs available from the Brother iBroidery.com download center.
Below are examples of both baby girl and baby boy designs. Either of these is ideal for decorating the front of a bottle cover.
You'll find this design and many other coordinating Button Baby motifs available from the Brother iBroidery.com download center.
Below are examples of both baby girl and baby boy designs. Either of these is ideal for decorating the front of a bottle cover.
Happy Baby Girl:
- Size 2.94 inches X 3.90-inches
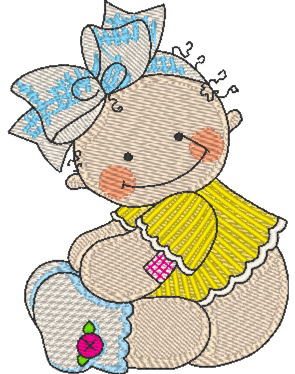 Happy Girl[/caption]
Happy Baby Boy:
- Size 3.09 inches X 3.90-inches
[caption id="attachment_14712" align="aligncenter" width="295"]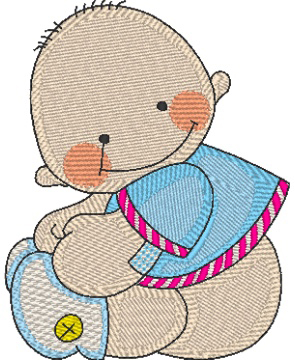 Happy Boy [/caption]
Steps to Create Bottle Cover
- Prepare fabric piece for bottle cover as follows:
- Measure bottle height beginning at the bottom and continuing to the point where bottle tapers inward. Add 1-inch hem allowance to this measurement and record as HEIGHT.
- Measure the width by loosely wrapping tape measure around bottle. Add 1-inch seam allowance to this measurement and record as WIDTH. See example in Figure #1a and Figure #1b.
[caption id="attachment_14700" align="aligncenter" width="800"] Figure #1a[/caption]
[caption id="attachment_14701" align="aligncenter" width="800"]
Figure #1a[/caption]
[caption id="attachment_14701" align="aligncenter" width="800"] Figure #1b[/caption]
- Using guidelines above, in this example the bottle cover piece will measure 7-inches HIGH X 8 1/2-inches WIDE.
- Once you determine your bottle cover size you'll need to add a few extra inches so the hoop is fully filled with fabric prior to embroidering. Measure to make sure you have enough fabric and then cut an oversized piece to prepare for embroidering. Layer fabric with tear-away stabilizer and embroider design in center of fabric piece using desired thread colors.
Tip: If you're including other gifts with a particular color scheme you may want to alter the original thread colors to coordinate with your additional items. See Figure #2.
[caption id="attachment_14702" align="aligncenter" width="800"] Figure #2[/caption]
- With embroidery design in the center, trim piece to bottle cover size and remove excess stabilizer.
- Set up machine for sewing. Finish all four raw edges of the pre-quilted fabric piece. I used the 'G" foot and a basic overcast stitch for a clean finish. You could also use your serger to finish edges. See Figure #3a and Figure #3b.
[caption id="attachment_14723" align="aligncenter" width="214"] Figure #3a[/caption]
[caption id="attachment_14703" align="aligncenter" width="800"]
Figure #3a[/caption]
[caption id="attachment_14703" align="aligncenter" width="800"] Figure #3b[/caption]
- Turn and press under a ½” hem for the bottom and a ½” casing for the elastic at the top of the cover. Attach pin or bodkin to one end of elastic. See Figure #4.
[caption id="attachment_14704" align="aligncenter" width="800"] Figure #4[/caption]
- Wrap elastic around the neck of the bottle to determine size. Pin, leaving an extra inch or so at each end. Mark location of the pin at each end and cut excess elastic. See Figure #5.
[caption id="attachment_14705" align="aligncenter" width="800"] Figure #5[/caption]
- Insert elastic through top casing, pulling until you reach the markings. Pin to temporarily hold elastic in place. See Figure #6.
[caption id="attachment_14706" align="aligncenter" width="800"]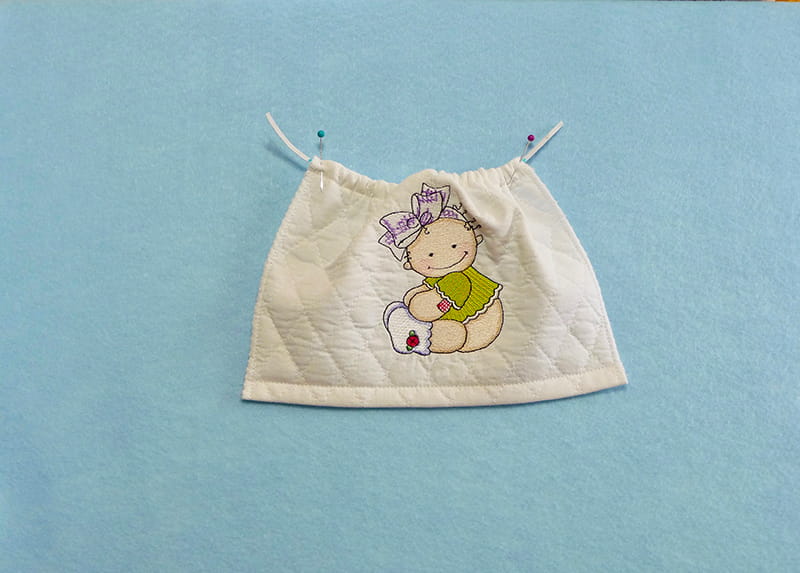 Figure #6[/caption]
- Next, sew the center back seam of the cover, backstitching at each end and stitching a second time over elastic to make sure it is secure. See Figure #7.
[caption id="attachment_14707" align="aligncenter" width="800"]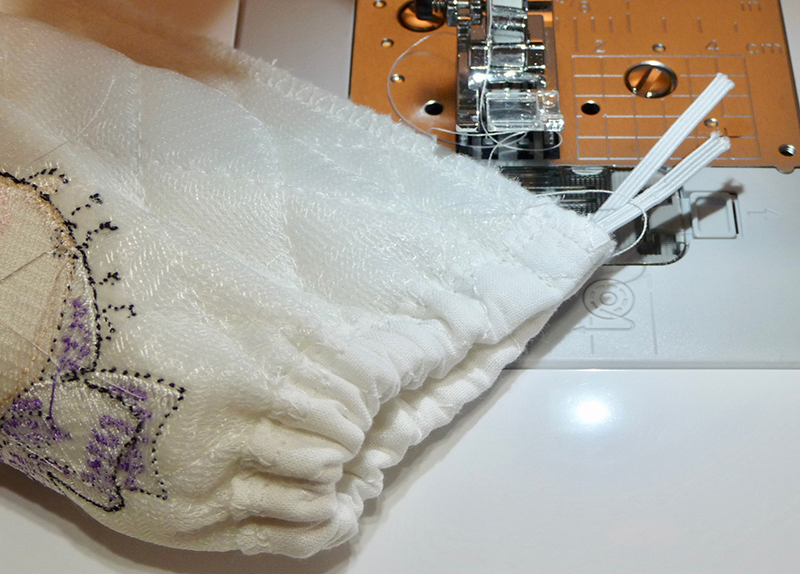 Figure #7[/caption]
- Trim away excess elastic. Press seam allowance open. Tack seam allowances down at top and bottom with hand or machine stitches. Turn cover right side out and slip over bottle. See front and back of cover in Figure #8a and Figure #8b.
You are finished! Enjoy!
[caption id="attachment_14708" align="aligncenter" width="800"]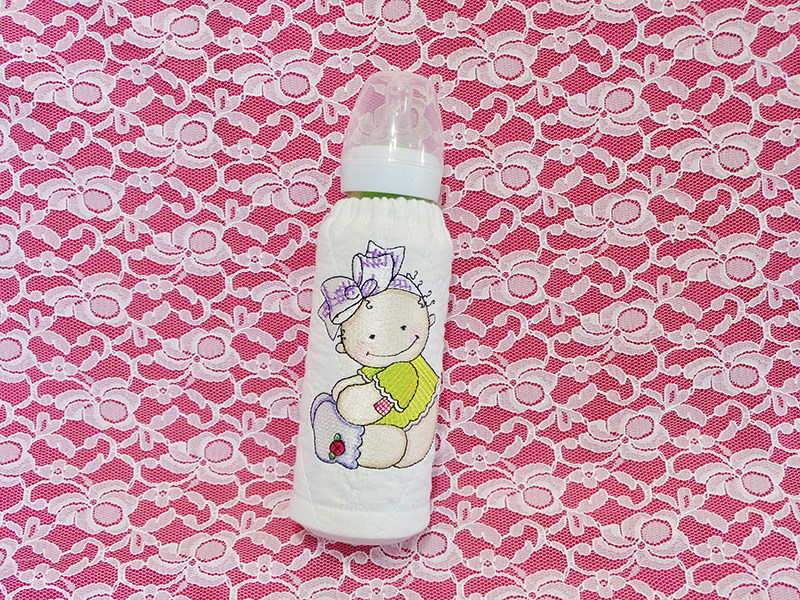 Figure #8a[/caption]
[caption id="attachment_14709" align="aligncenter" width="800"]
Figure #8a[/caption]
[caption id="attachment_14709" align="aligncenter" width="800"]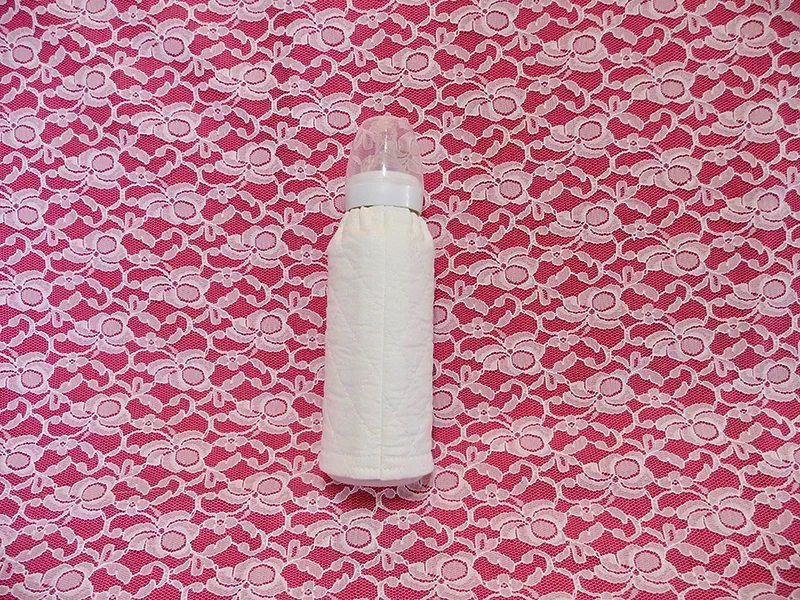 Figure #8b[/caption]
Options and ideas:
- Embroider “It’s a Boy”, “It’s a Girl”, another short saying, or add the baby’s name to customize the cover.
- Add washable trims or ribbons to further decorate the cover.
- Decorate burp cloths or bibs with coordinating Button Baby motifs. Consider bundling all items together and tie with a pretty bow for a great gift presentation!
Related Projects
Stay Connected
* Required fields