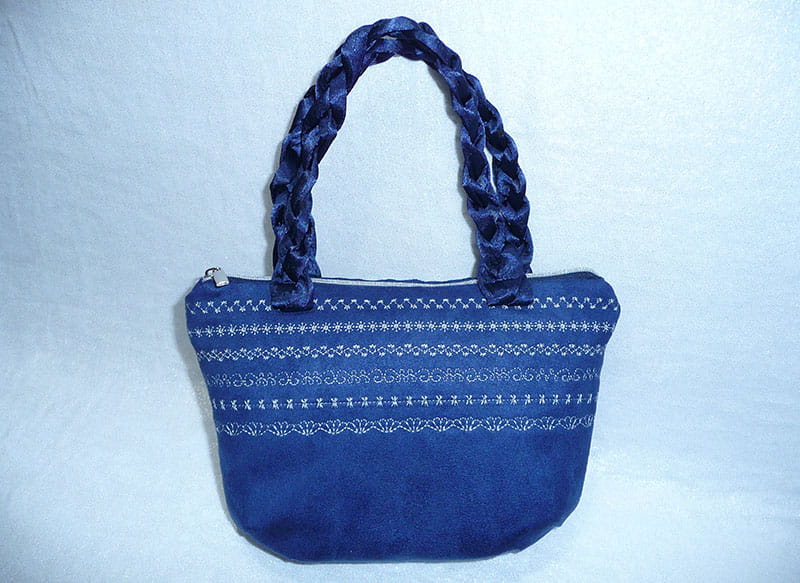
Foot of the Month: Satin & Suede Purse with Decorative Stitches
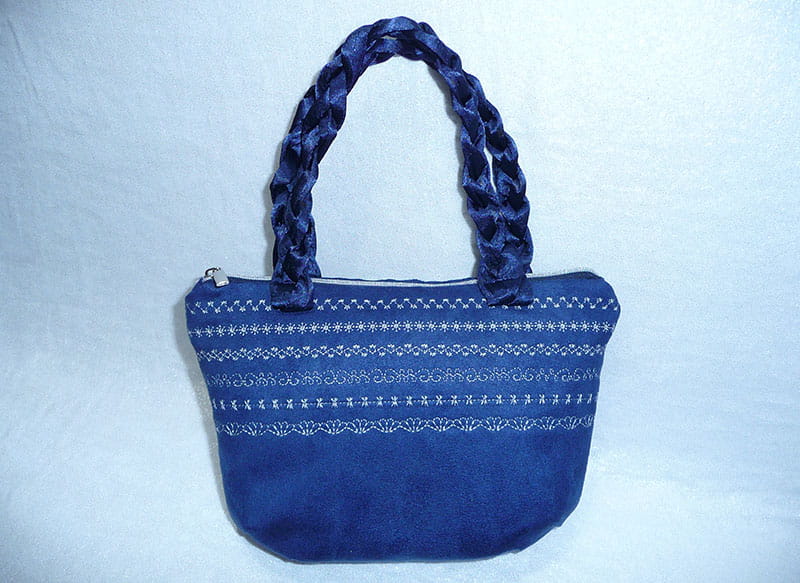
Brother is here to help you make creative use of the accessories available for your machine!
This project features SA216, the Enhanced N+ Foot, commonly called a Monogramming Foot. It is the necessary foot for stitches known as alpha-numeric, meaning letters and numbers, and for most of the decorative stitches on the machine. While many Brother machines come with an included standard N Foot, this enhanced foot has many added benefits and will fit machines that use the standard N Foot.
The enhanced N+ Foot has extra stability with two plastic guides on each side of the foot. These guides are designed to minimize misalignment of stitches. This enhancement is great for all decorative stitching and especially helpful when you’re sewing with multi-motion stitches that are wider than the opening on the throat plate. The foot also features sachilite plating on bottom of foot to reduce drag and friction on materials such as vinyl, leather, and suede, and provides smooth feeding of fabric. It’s the perfect addition to your collection of accessories and ideal for the decorative stitching on this satin & suede purse! Follow along and make a fancy little purse that’s perfect for upcoming holidays or any time you want to add some style to your outfit!
Are you ready? Let’s go sew!
Materials and Supplies for Purse
- Brother sewing machine with decorative stitches.
- SA216 Brother N+ Monogramming Foot
- SA208 Brother Snap-on Narrow Base Zipper Foot, or SA161 Brother Adjustable Zipper Foot. SA208 is my preferred foot and my favorite zipper foot for this type of zipper application. The narrow toe and stable flat bottom on the foot makes it especially easy to sew zippers for purses, pouches, and bags.
- SA580 Brother medium-weight tear-away for added stabilizer during decorative stitching.
- SA538 Brother Seam Guide, optional but very helpful for sewing a precise distance from the fabric edge.
- Embroidery thread for top and bobbin in your choice of color for sewing decorative stitches.
- PDF Patterns for purse. Print the following files: Satin & Suede Purse Pattern_L and Satin & Suede Purse Pattern_R, printing at 100 percent size.
- Basic notions including sewing thread, pins, optional clips, chalk or tracing wheel and tracing paper for marking darts on fabric, and a tool for turning tubes right side out.
- Seam sealant for treating ends of purse straps. • Size 11 embroidery needle for embroidering and jeans needle size 14 for final construction of purse.
- Zipper to match fabric: Standard 12-inch nylon or polyester zipper or zipper by the yard for purse closure. I chose to use a specialty zipper by the yard product with size #3 nylon coils that have a faux metal look.
- Fabric for Purse, Purse Lining, and Straps:
- Medium weight faux suede for front and back, and matching polyester satin for lining and braided purse straps. Cut two oversized rectangles of faux suede measuring approximately 9-inches long X 12-inches wide for front and back purse pieces. Note: Suede looks darker in one direction than the other. Mark the two pieces so the nap is running the same direction on both pieces. Suede should be pressed carefully, pressing from the wrong side when possible or lightly pressing with a press cloth. It’s best to test the heat and pressure of your iron on a piece of scrap fabric.
- Cut two 2-inch squares of faux suede for end tabs on zipper.
- You’ll need two pieces of satin approximately 9-inches long X 12-inches wide for front and back purse lining.
- Cut six strips of satin measuring 1 ¾-inches wide X 18-inches long for braided purse handles.
- Medium weight interfacing to stabilize purse front and back, and satin purse straps. Note: Fuse interfacing to the wrong side of each of these pieces.
Please read through all instructions before starting. Basic steps to create purse are as follows:
- Embellish front and back pieces for purse.
- Use pattern to cut front, back, and lining, then cut additional pieces for purse handles and tabs.
- Create purse handles.
- Sew darts, insert zipper, and construct purse, adding straps as a final step.
Note: Finished purse measures 9 ½-inches wide at the top and 7-inches tall.
1. Print purse patterns, then cut and tape together. Use pattern to cut one front and one back lining piece. Fuse interfacing to wrong side of strips cut for straps. Mark darts using your favorite method for transferring lines. See Figure #1. Set pieces aside temporarily.
Figure #1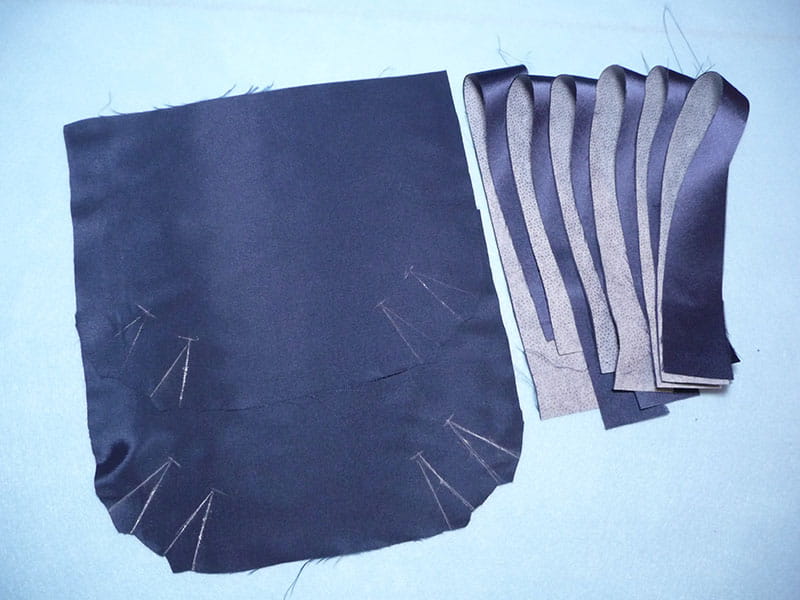
2. Attach N+ Foot to machine. See top and bottom side of the foot in Figure #2a and Figure #2b.
Figure #2a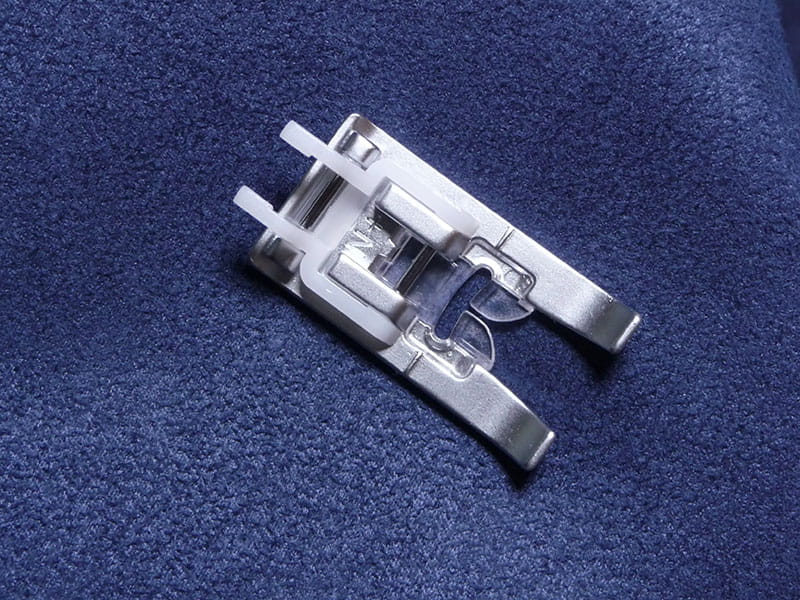
Figure #2b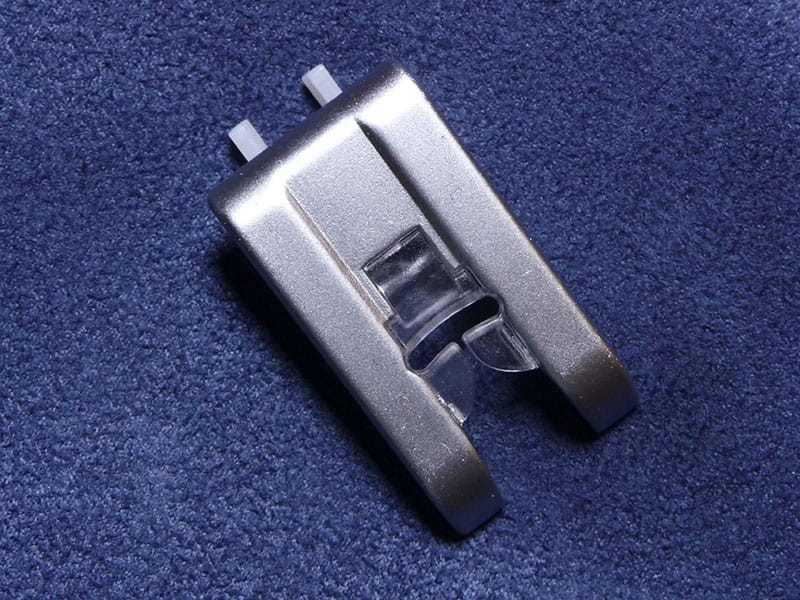
Layer each piece of interfaced suede with a piece of tear-away stabilizer on the wrong side. Select your favorite decorative stitches and embellish the front and back of purse with several evenly spaced rows. See Figure #3.
Figure #3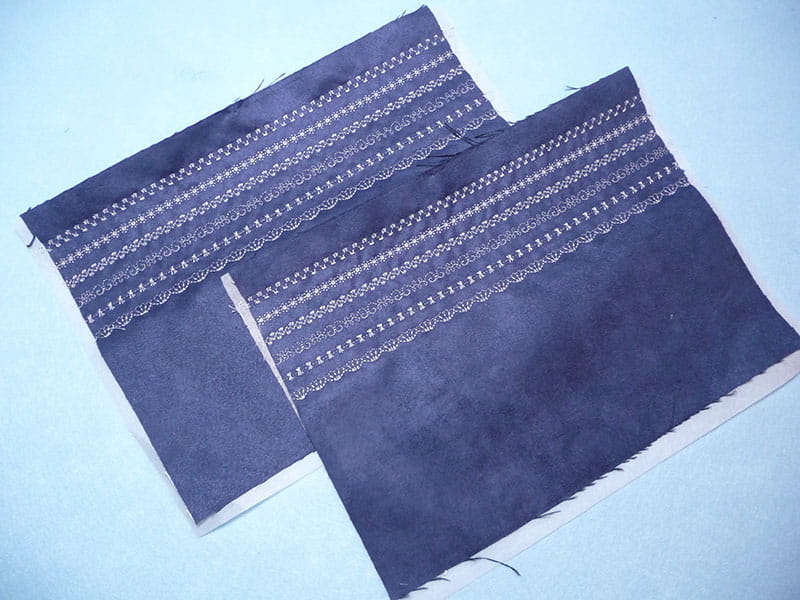
Tips: I chose stitches with a 7mm width and lengthened some of them slightly. Practice your stitches on a stabilized scrap of suede and don’t be shy about changing width and length to suit your preference. Stitch the first line of decorative stitching approximately 1-inch from the upper raw edge. Make sure each additional row is evenly spaced from the previous one. With 7mm stitches this is easy to do by using the edge of the presser foot as a guide. Depending on your machine model you may have other options including the Sew Straight Laser Guide.
Remove excess tear-away when finished and then press pieces from wrong side. Place pattern on embellished suede and cut two matching front and back pieces. Transfer markings for darts. See pieces ready for sewing darts in Figure #4.
Figure #4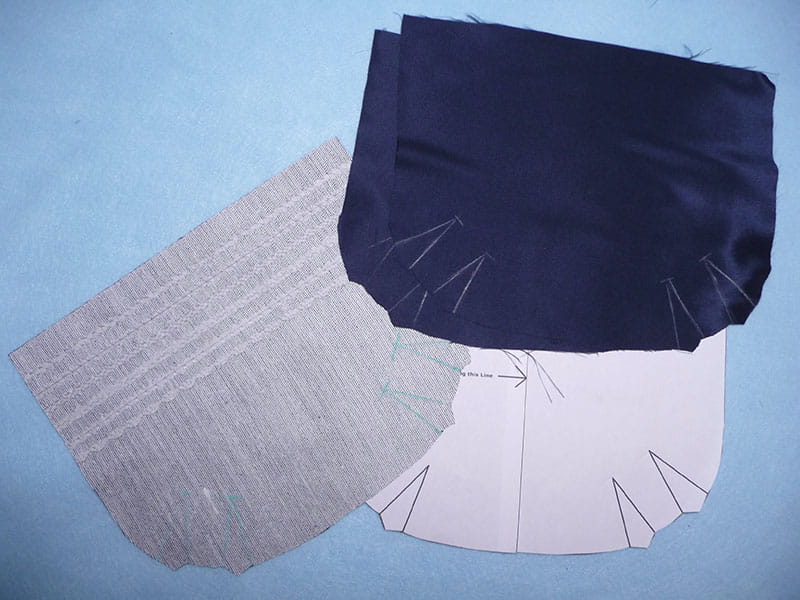
Sew darts on purse pieces and lining pieces, then carefully press darts toward side seams. Trim fabric that extends beyond the raw edge, smoothing out lower edges. See Figure #5.
Figure #5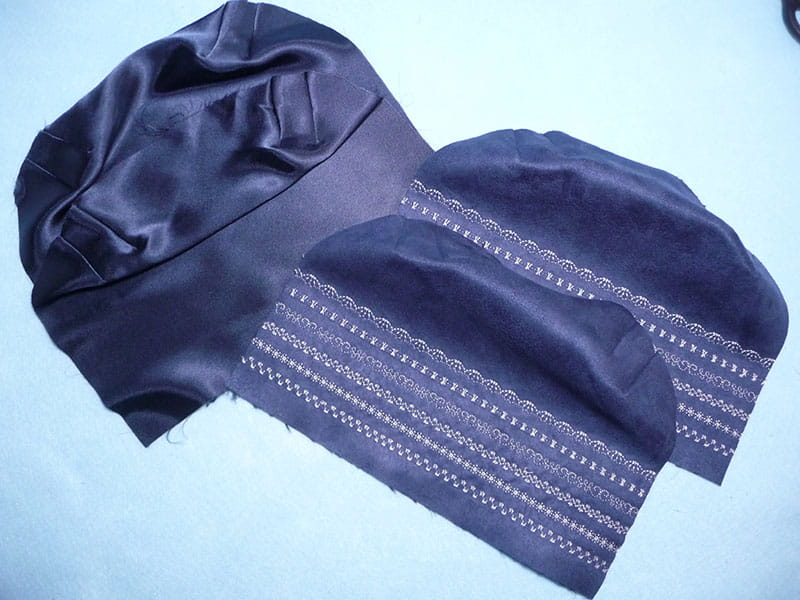
3. Fold 2-inch suede squares in half with wrong sides together and press. Prepare a zipper to match the length at the top of purse using zipper by the yard product following manufacturer’s instructions or select your standard zipper. Note that a 12-inch zipper measures about 13-inches with extra tape on each end. If you’re using a standard zipper, you’ll want to center it when measuring, in order to fit the top edge of the purse and avoid sewing over the stopper at either end. Measure partially open zipper against the top edge of suede purse piece and cut any excess at each end. Be careful not to pull the zipper tab off the open zipper at this point. Sew suede end tabs at each end of zipper with folded edge facing toward center of zipper, pinching the open coils together, sewing over synthetic zipper coils and taking care to backstitch. Trim excess suede so it is even with zipper tape. See example of finished zipper with end tabs in Figure #6.
Figure #6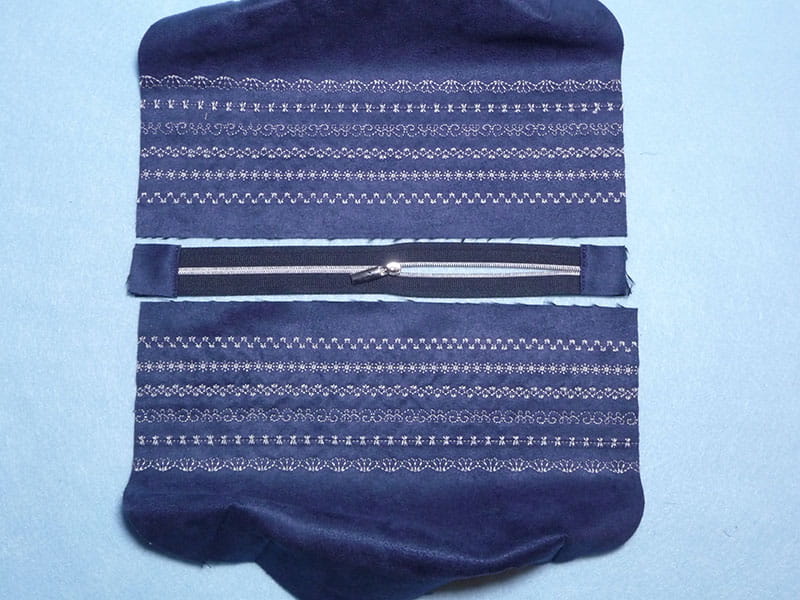
4. We’re ready to insert the zipper, add lining, and finish the purse. Snap on Zipper Foot.
Important: When using SA208, you need to make sure you use just two needle positions, either far-left straight stitch or far-right straight stitch. Add zipper as follows:
Place the zippers face down on bag front with right sides together, having zipper pull at tab end and zipper halfway open so you can stitch without hitting zipper pull. See Figure #7.
Figure #7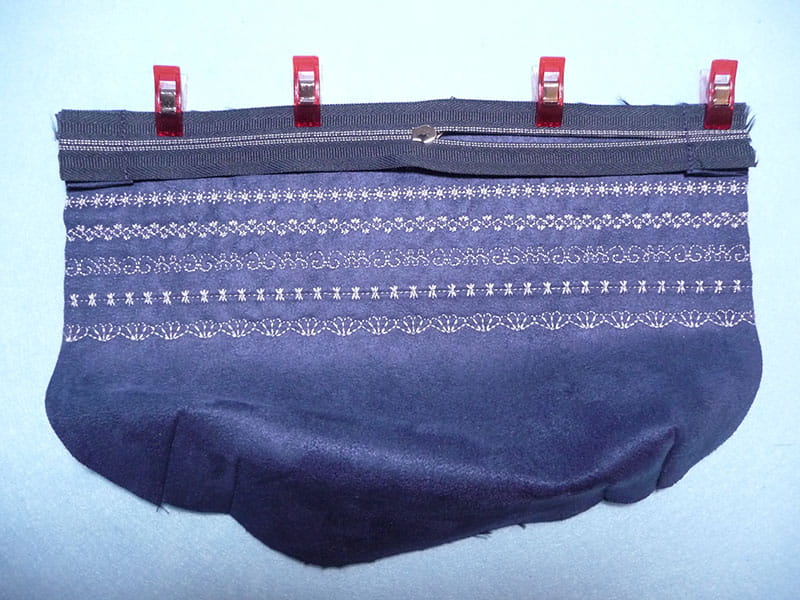
Prepare to sew the first side of zipper. With needle in the far-left position, sew zipper in place, stitching ¼-inch from zipper coils, stopping as needed with the needle down to raise the presser foot, and move zipper pull to finish stitching. See Figure #8.
Figure #8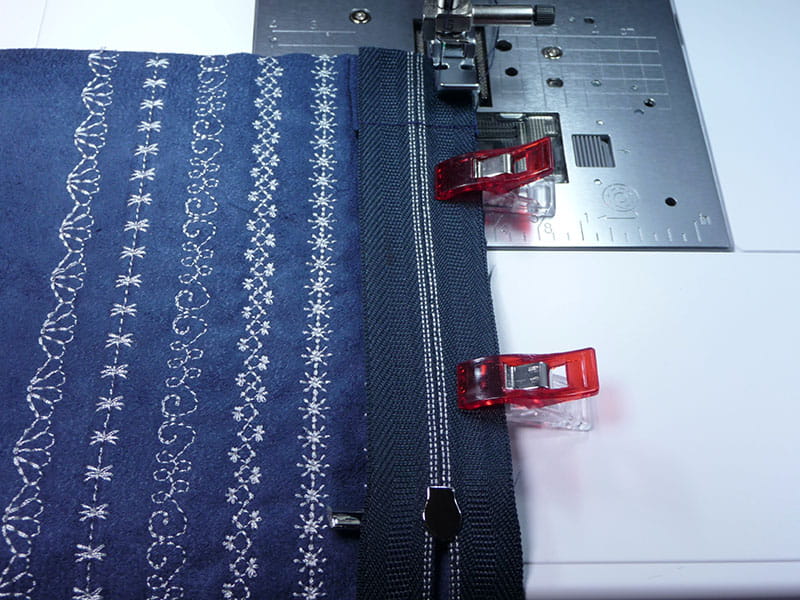
Layer first lining piece over bag front and zipper with right sides together and raw edges even. See Figure #9.
Figure #9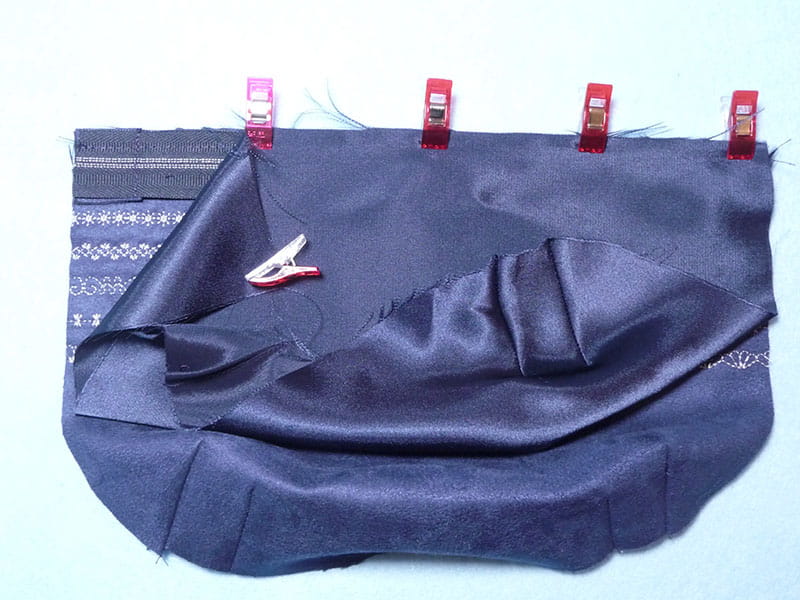
Sew lining with previous stitching line facing up, sewing directly on top of previous stitching. See Figure #10.
Figure #10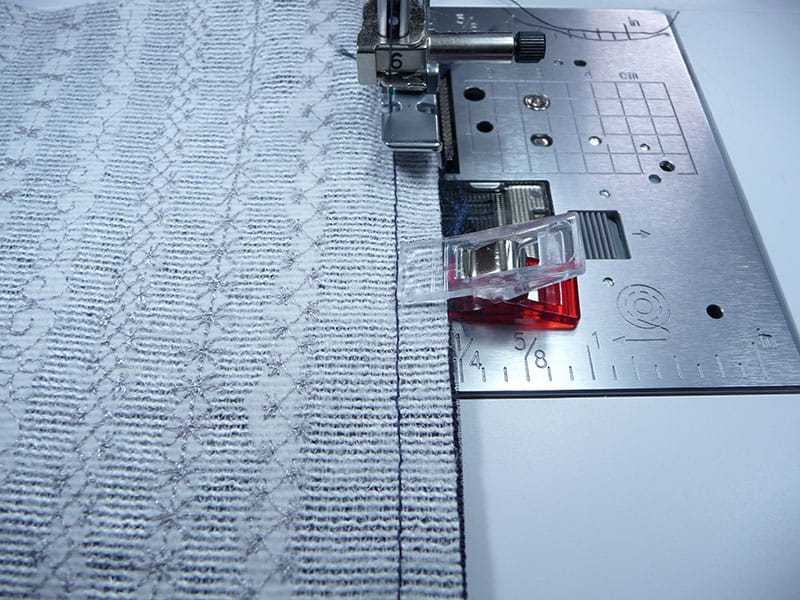
Repeat sewing process for opposite side of zipper.
Tip: If you are familiar with this process, feel free to sandwich zipper between both purse fabric and lining and sew layers for each side of zipper all in one step.
Open out purse so that lining and suede pieces are flat. See inside and outside of this stage of purse construction in Figure #11a and Figure #11b.
Figure #11a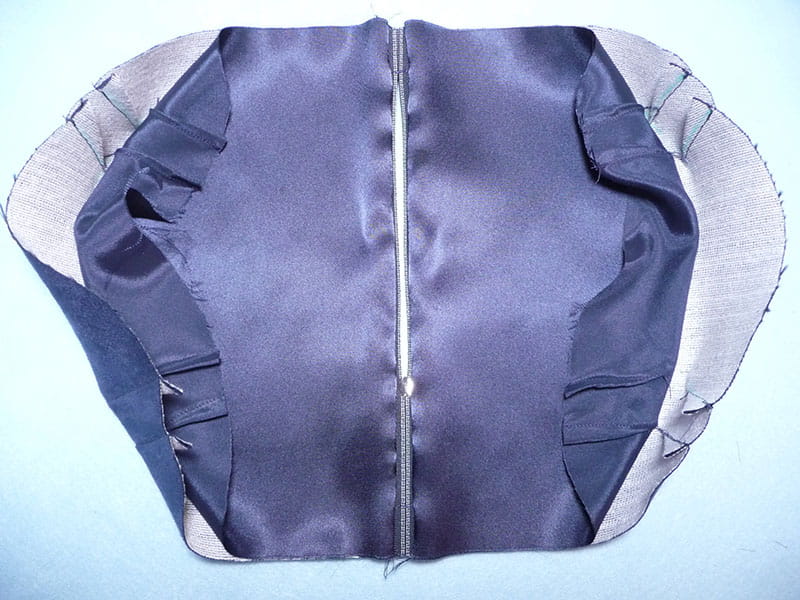
Figure #11b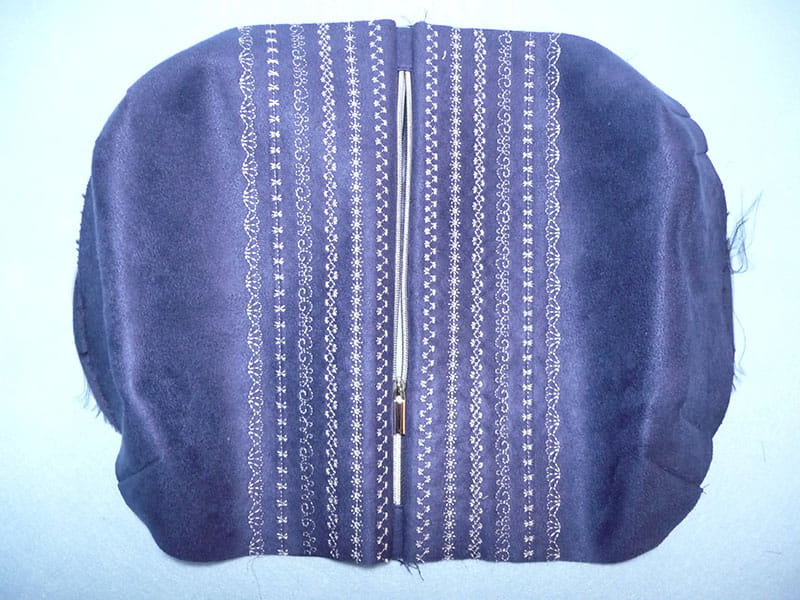
Carefully press with lining and purse fabric smoothed away from zipper coils.
Switch to standard foot and insert jeans needle. Leave zipper open halfway. Next, lay bag flat, with right sides together, having lining facing lining, and bag front and back facing together. Make sure zipper tape and tab ends are pushed toward the lining side. Pin or clip fabrics together with specific pins on the lining marking off a 3-inch opening along bottom edge. See enhanced photo in Figure #12 with arrows showing space to leave open.
Figure #12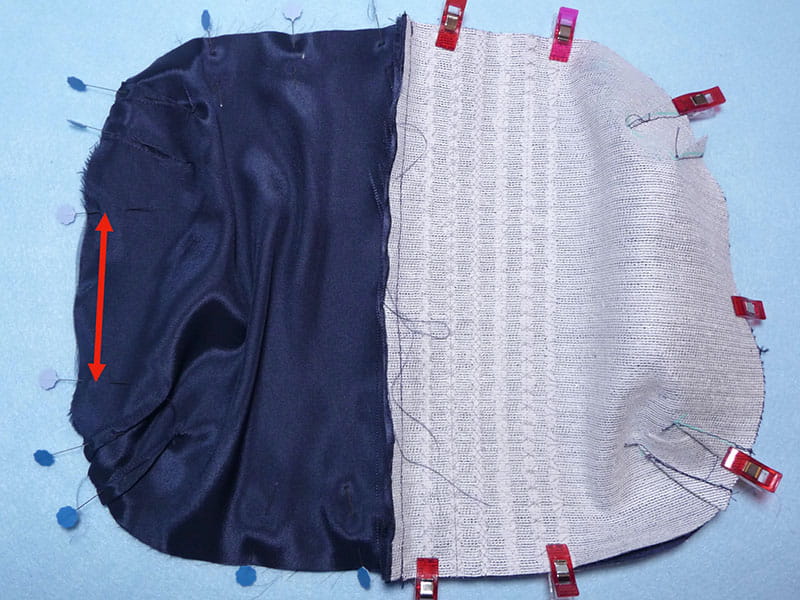
5. Sew seam using a ½-inch seam allowance, sewing slowly over area with zipper tab ends. Slightly trim curved seam allowance on suede. Turn purse right side out through open zipper and opening in lining. Fold in raw edges at bottom opening of lining and sew closed. See Figure #13.
Figure #13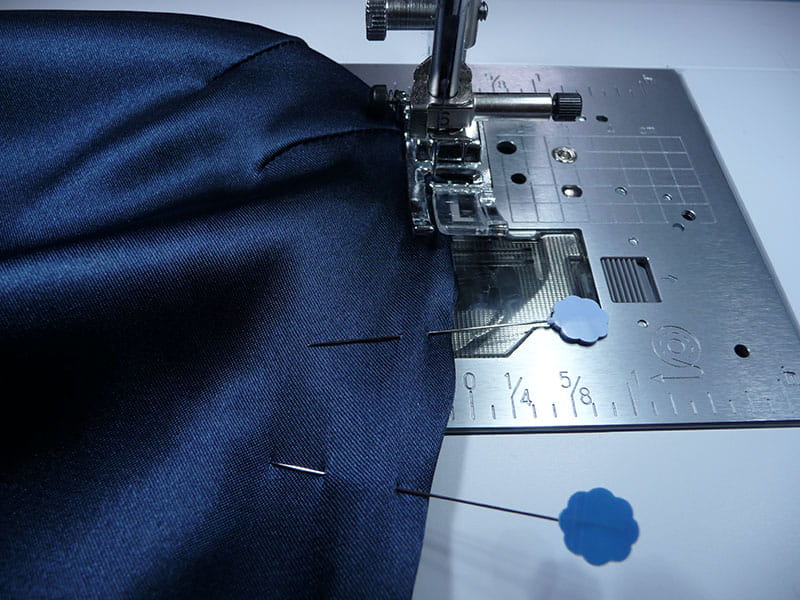
6. Sew straps as follows: Fold each strip in half lengthwise and sew along raw edge using a ¼-inch seam allowance. See Figure #14.
Figure #14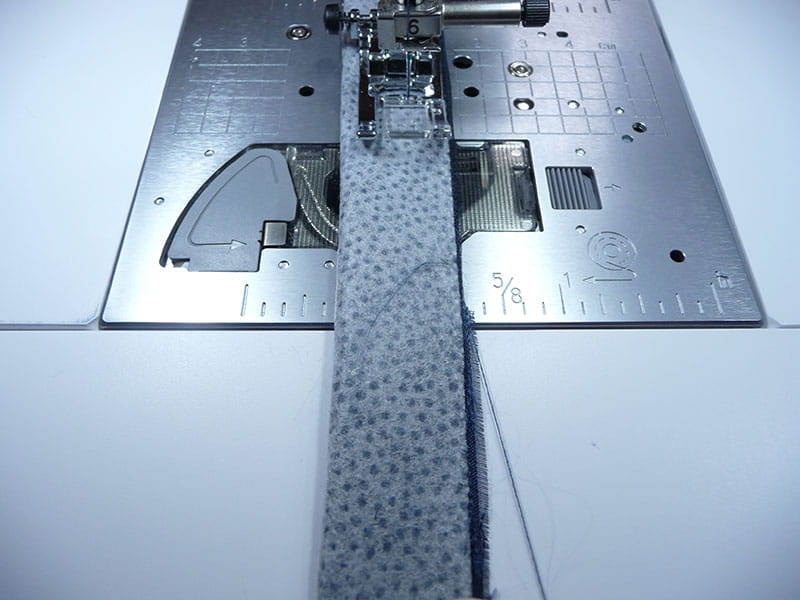
Turn the right side out and press with seam in the center of the back. Clip three strips together and pin end to a stable surface. Tightly braid strips together, then stitch across ends. Press lightly. See Figure #15a, Figure 15b, and Figure #15c.
Figure #15a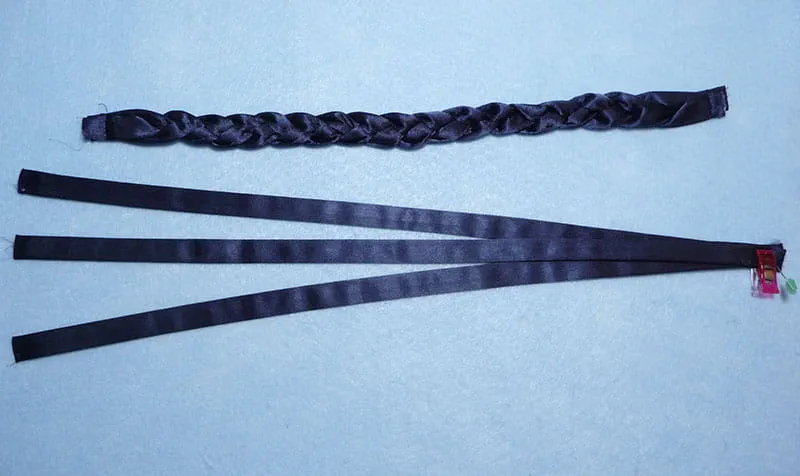
Figure #15b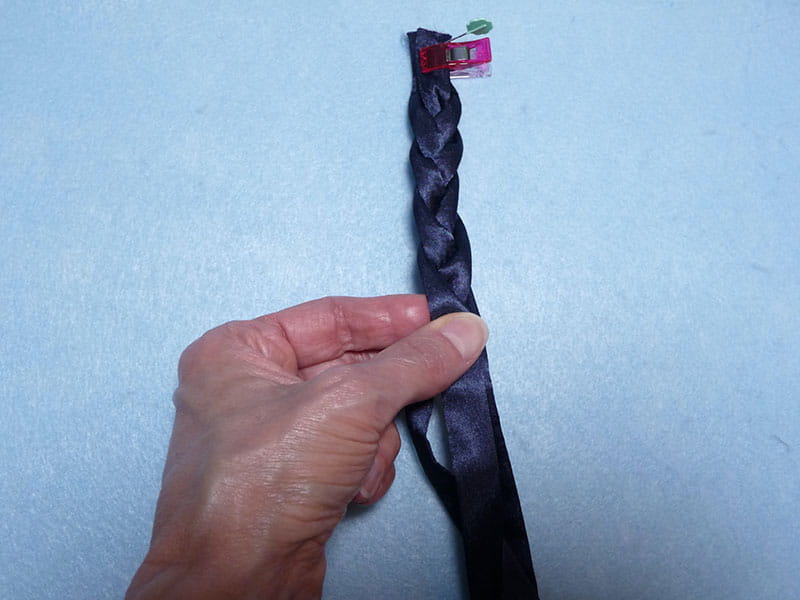
Figure #15c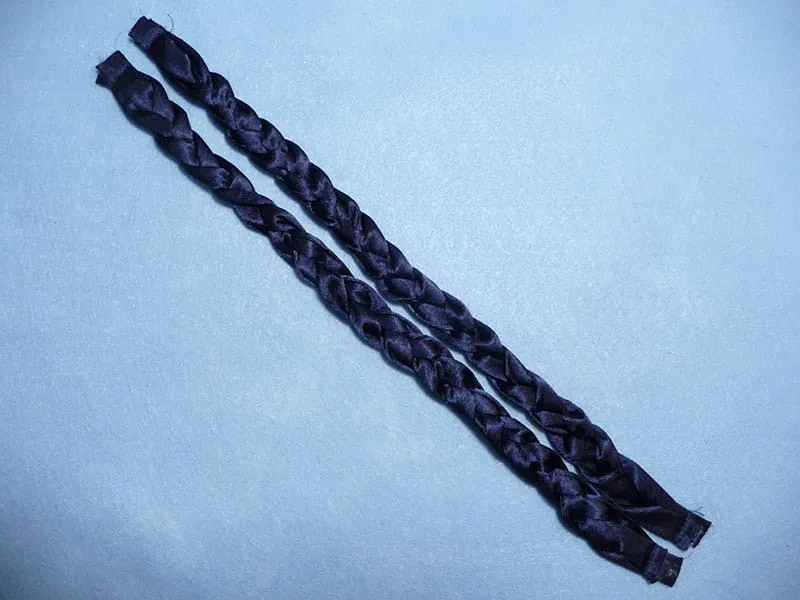
Trim each braided end so it is even, with both straps measuring the same finished length, then apply a light coat of seam sealant to keep ends from fraying. Position braided straps along top edge of purse, with straps aligned 2-inches from the center and raw ends ¼-inch from edge of suede. See Figure #16.
Figure #16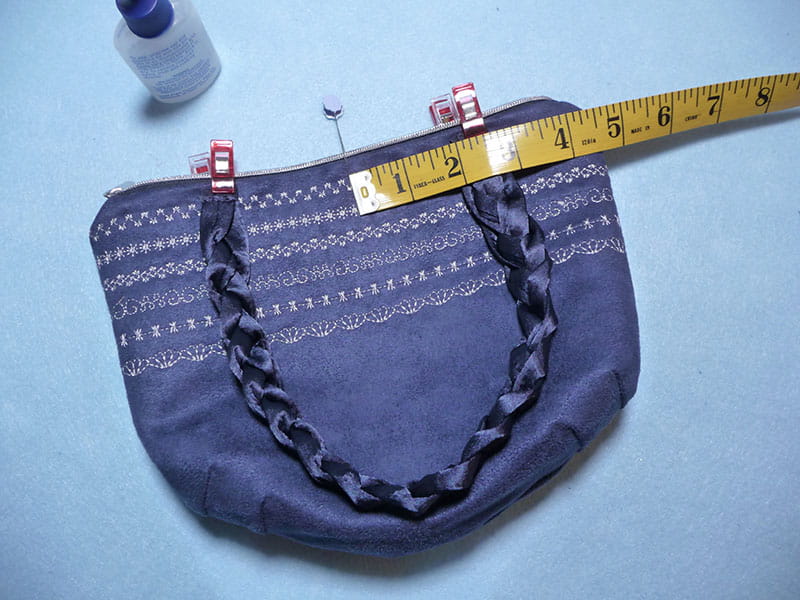
Attach each strap to top edge stitching ½-inch from raw ends of strap, stitching through both purse fabric and lining. Take care to make sure the lining is pressed so it is away from zipper coils.
Tips: Prepare machine for free arm sewing and slip purse over free arm for easier stitching. Sew slowly through this thick area using a stitch length of 3.5 and backstitching at each end. Flip straps up and stitch near the center to anchor them close to the edge of the top. See Figure #17a, Figure #17b, and Figure #17c.
Figure #17a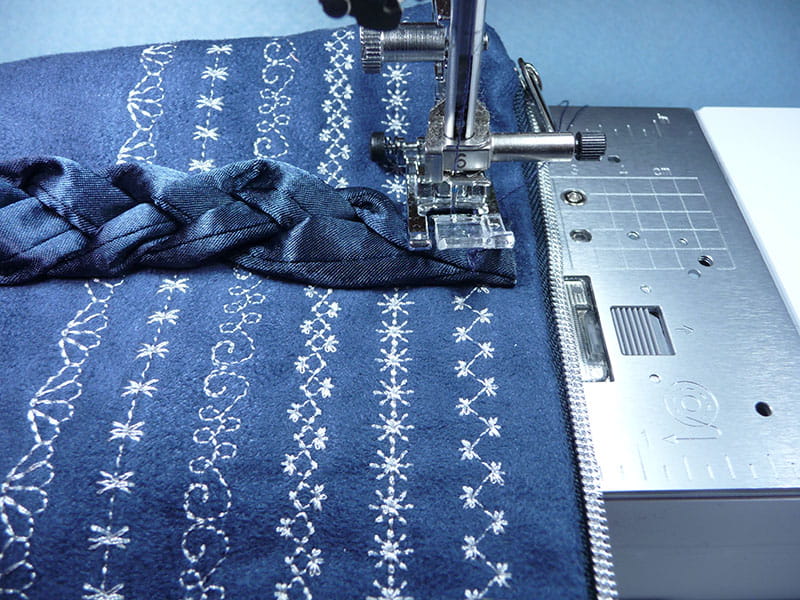
Figure #17b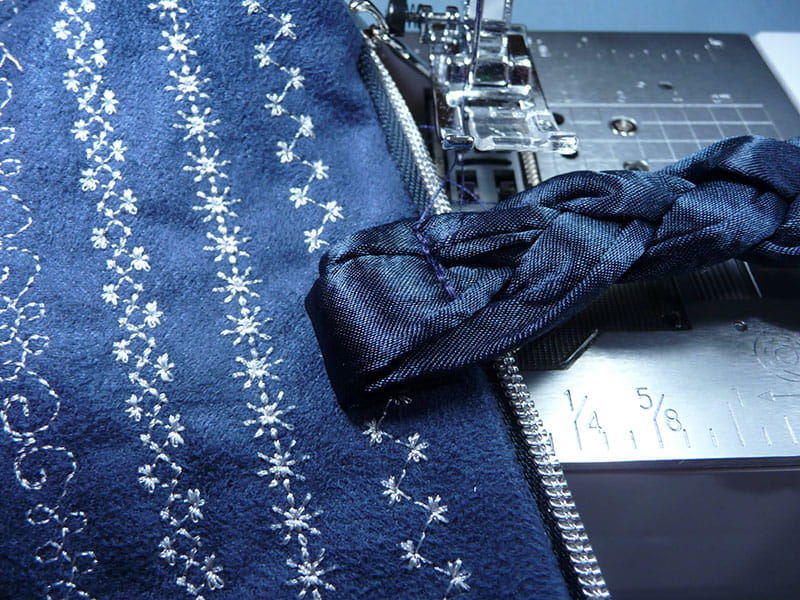
Figure #17c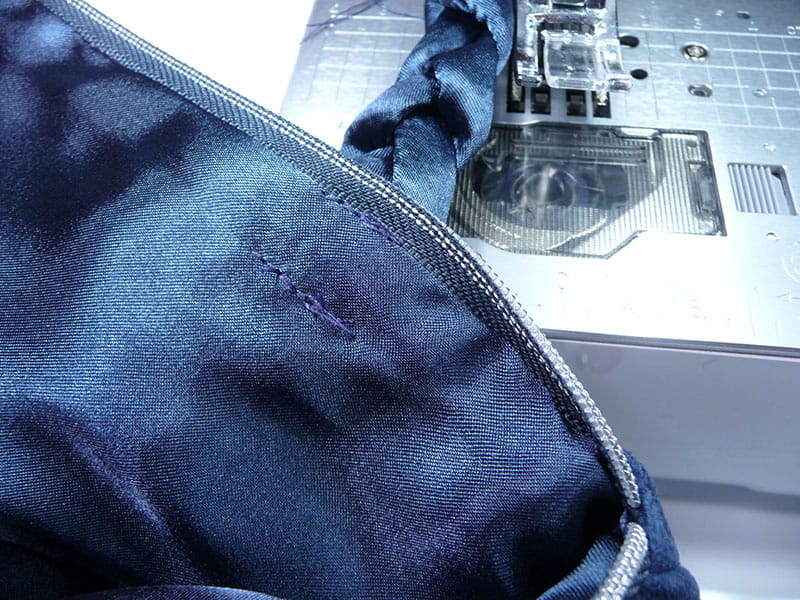
You are finished! Enjoy your pretty new purse!
Options and ideas:
- Sew this purse with any other medium weight fabric and use the lining of your choice for an entirely different look.
- Eliminate straps and use purse as a small clutch.
- Sew a single strap measuring a finished width of 1-inch using suede or satin according to your preference.
- Enlarge purse pattern by adding to the top edge and adding inches between left and right pieces. Note that you’ll need a zipper to fit your new length at the top and you may want longer purse straps for a larger purse.
