Foot of the Month: Garden Apron with Zippered Pocket
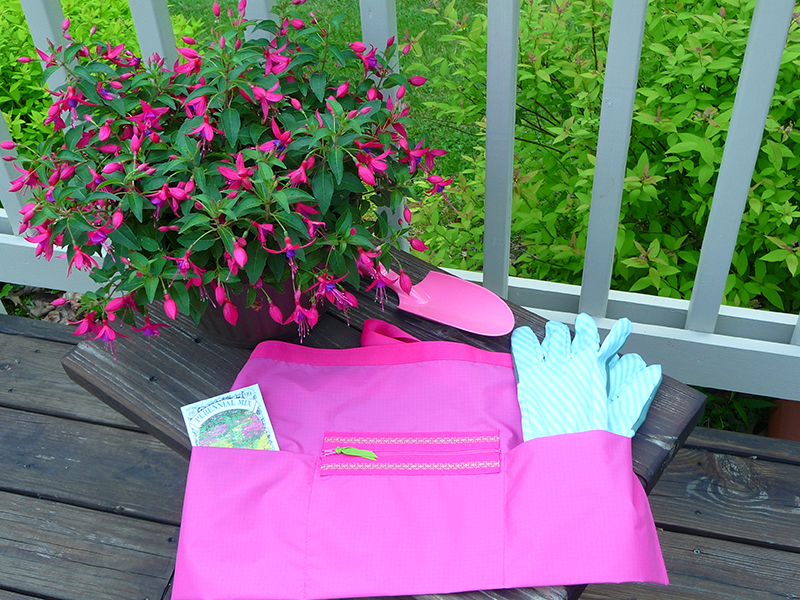
Celebrate green thumb season with a colorful apron featuring a practical zippered pocket. Use it to hold your cell phone, keys, seed packets, or whatever you wish. The added ribbon is decoratively stitched and then sewn to the zipper using the Brother narrow zipper foot. Designed for many zipper applications, this special foot allows for sewing very close to zipper teeth. Our quick to stitch apron is self-lined, giving it a neat finish and durability too! Make this pretty and practical apron for yourself or create one as a thoughtful gift for a gardening friend. [caption id="attachment_15942" align="aligncenter" width="800"]
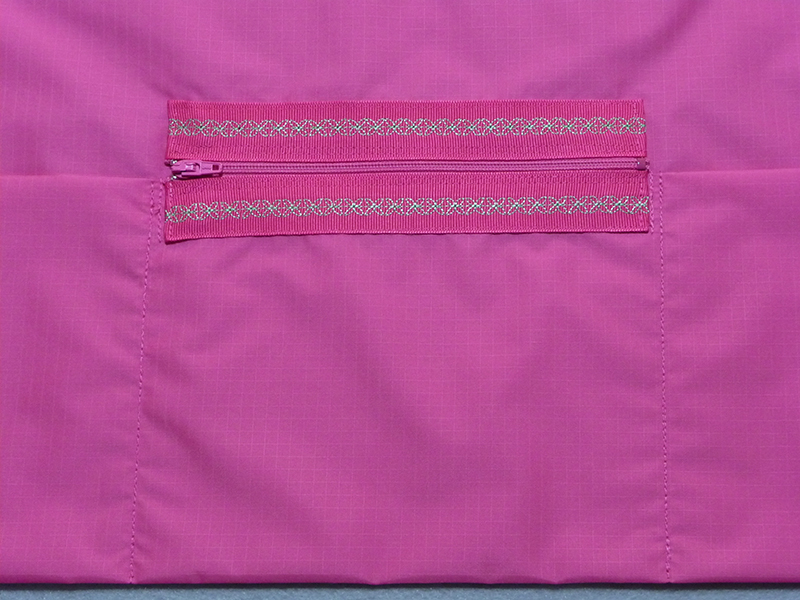 Close up of finished zipper[/caption]
Materials and Supplies:
- Brother Sewing and Embroidery machine.
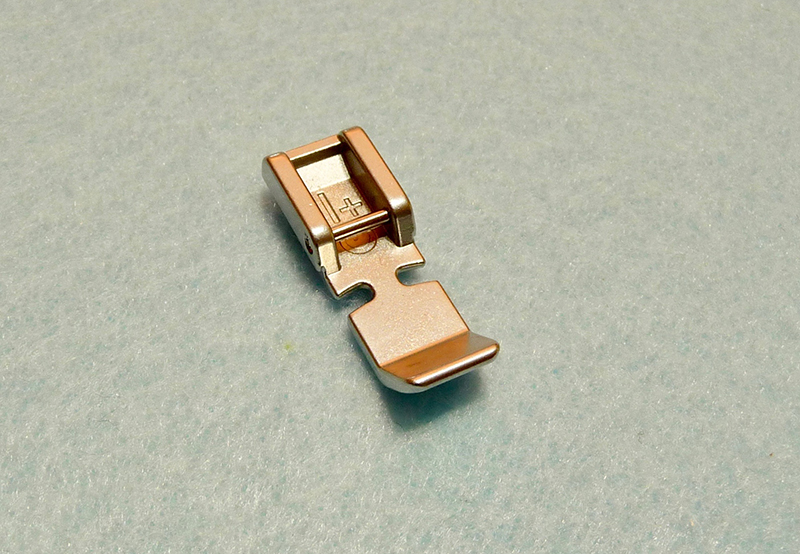
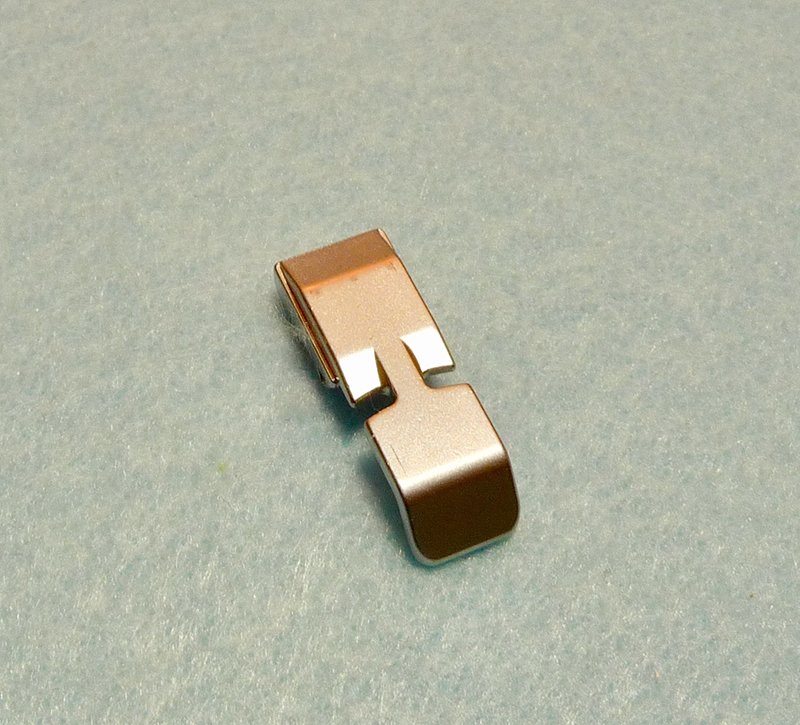
- Brother SA208 Narrow Zipper foot. As an alternative, use SA191 Adjustable Zipper foot.
- Brother Embroidery Threads and medium weight tear-away stabilizer for decorative stitching on ribbons.
- Basic sewing notions including good quality polyester thread to match fabric, fine sharp pins, wash away fabric glue or glue stick for temporarily securing ribbon, and seam sealant for finishing ends of ribbon.
- Sharp, new machine needle for sewing.
- 7-inch all-purpose polyester coil zipper.
- One piece of ribbon measuring ¼-inch wide X 4-inches long for zipper pull.
Coordinating color of grosgrain ribbon for apron:
- Two pieces measuring 7/8-inch wide X 9-inches long for trimming zipper.
- One piece measuring 7/8-inch wide X 72-inches long for waistband and ties.
Fabric for apron:
- One piece of fabric measuring 36-inches long X 22 ½-inches wide.
More about the fabric and tips for sewing:
- Example features apron made from lightweight ripstop nylon, generally sold in a 60-inch width. 5/8 yard will work for this project and provide a bit of leftover for making stuff sacks or other garden organizing bags.
- Fabric has the advantage of being water and dirt resistant.
- Cut all selvedges away and make sure lines woven into fabric are straight when you cut. You’ll need to carefully iron this fabric using low heat. It’s a good idea to mark right side with low tack tape before sewing.
- Sew seams and top-stitch pockets using a 3.0 stitch length and a sharp, size 12 needle designed for sewing microfibers and tightly woven fabrics. Remove pins as you stitch.
Note: Substitute standard cotton fabric as an alternative if desired.
Instructions for Creating Apron with Zippered Pocket
- Gather fabric and notions. See Figure #1.
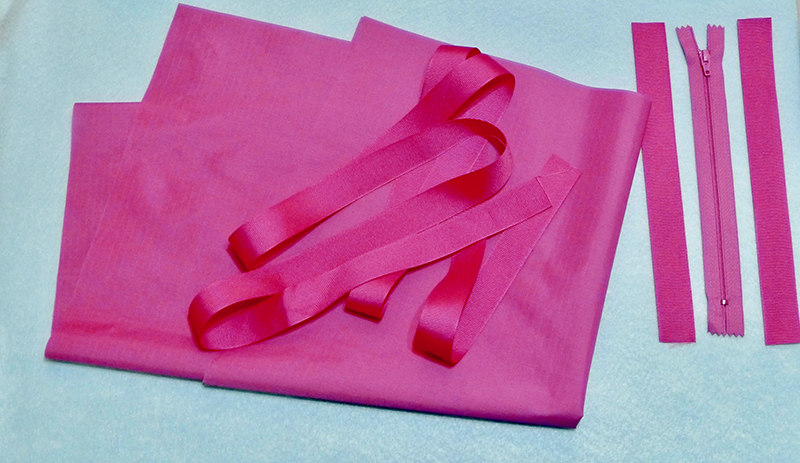 Figure #1[/caption]
- Set machine for decorative stitching with foot “N.” Select an open style decorative stitch. Decorate one edge of each 9-inch piece of ribbon. See Figure #2.
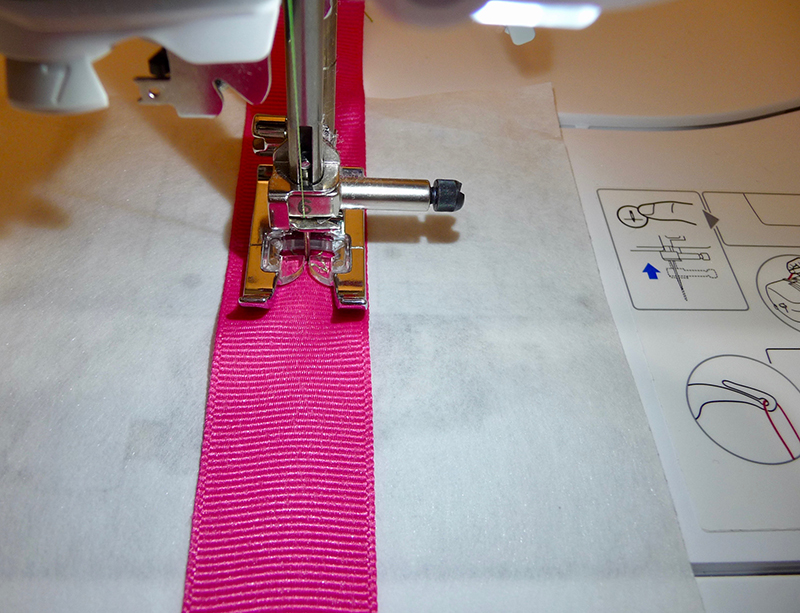 Figure #2[/caption]
- Remove stabilizer. Press and trim ribbon to neaten ends if necessary. Secure ribbon to each zipper edge with wash out glue. Let dry. See Figure #3.
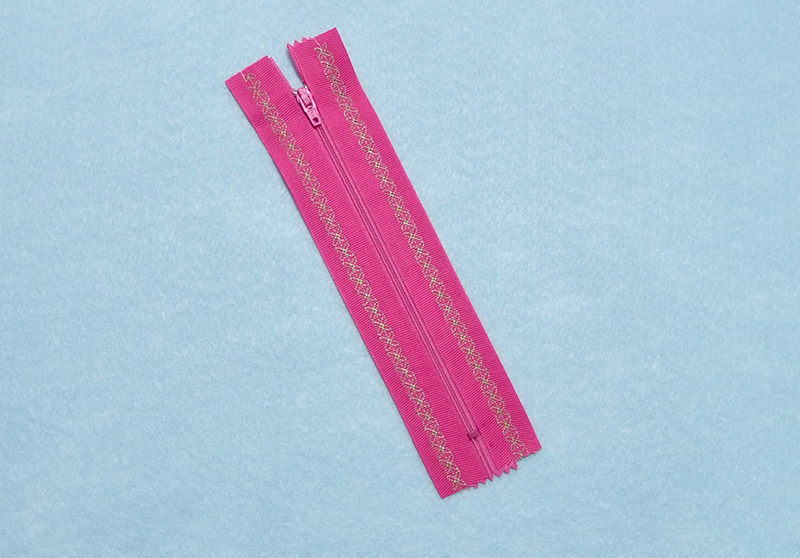 Figure #3[/caption]
- Attach zipper foot and use a straight stitch to sew ribbon close to teeth on each side, turning under each end of ribbon and zipper tape to meet top and bottom of zipper stops. See Figure #4a and #4b.
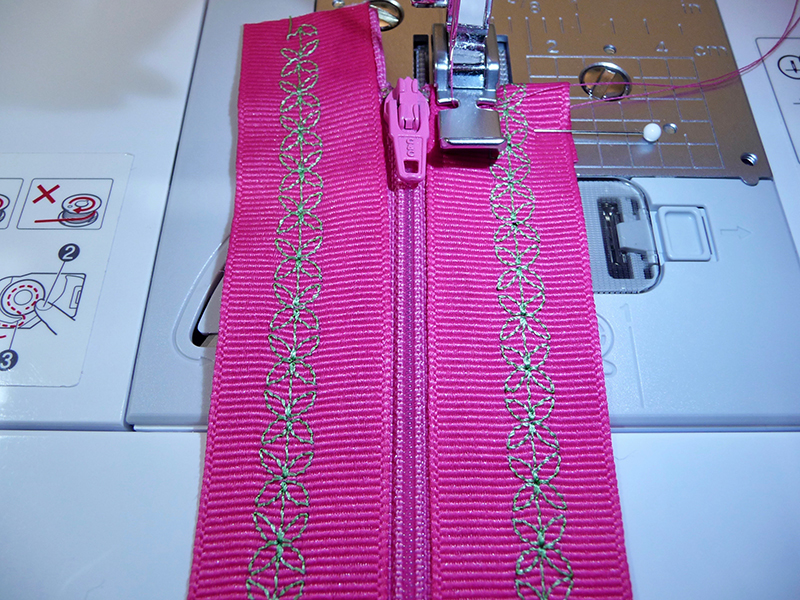 Figure #4a[/caption]
[caption id="attachment_15947" align="aligncenter" width="800"]
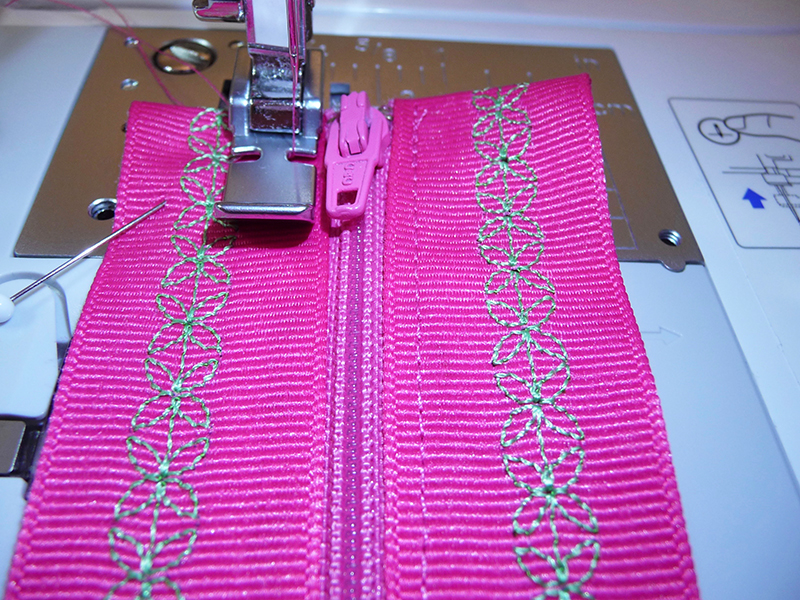 Figure #4b[/caption]
Important Tip: If you are using the SA208 narrow zipper foot, you’ll need to set your straight stitch for left needle position using width 0.00 when sewing on the left, and then set the stitch width to 7.00 when sewing on the right. The flat style of this foot makes it ideal for sewing many zippers and is particularly nice when you need to sew close to zipper teeth. See below:
- Wash out glue and let zipper dry. Change to standard foot. Fold apron piece in half, with right sides together and raw edges matching, so folded piece measures 18-inches long X 22 ½-inches wide at the top.
- Sew a ½-inch seam allowance along top, leaving a 5-inch opening near the center for turning apron right side out. Sew sides using a ½-inch seam allowance. Clip corners to trim away bulk. See Figure #5.
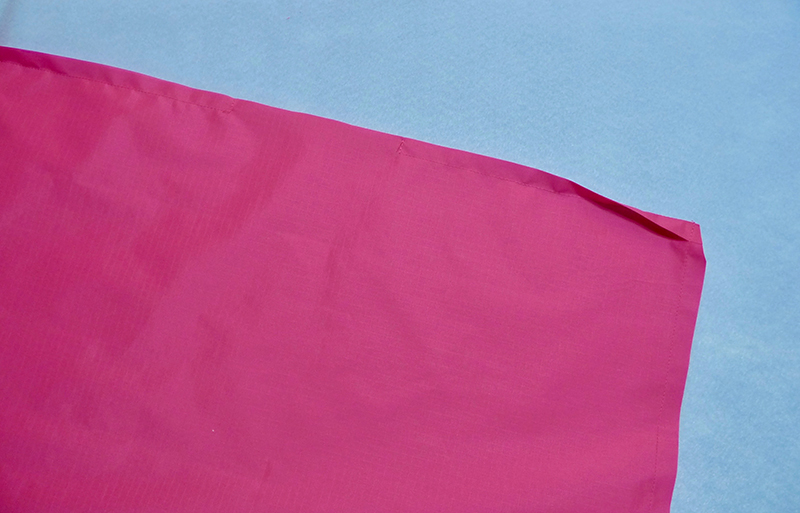 Figure #5[/caption]
- Turn right side out and press carefully, pressing opening closed at the top. To form pockets, begin by measuring 6-inches from bottom fold, turning and pressing a 6-inch deep pocket toward top edge. Select decorative zipper piece and center zipper teeth at top of pocket. Pin close to fold, pinning ribbon through just the pocket layer. See Figure #6.
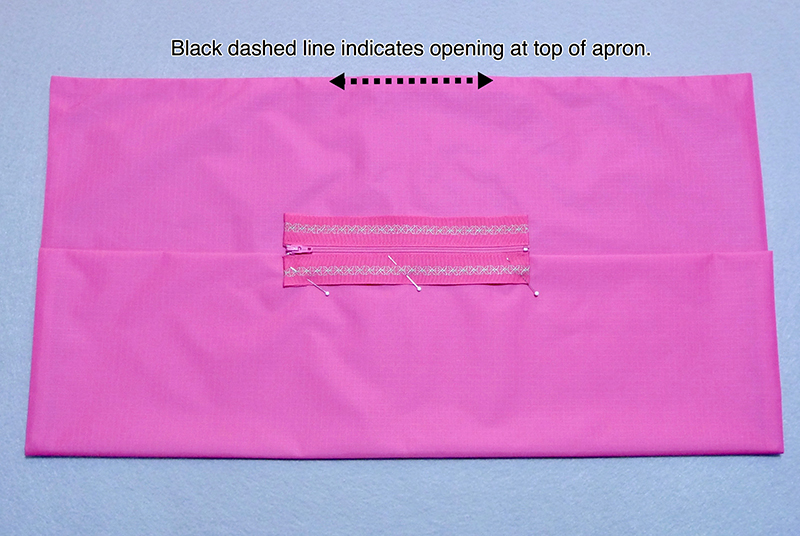 Figure #6[/caption]
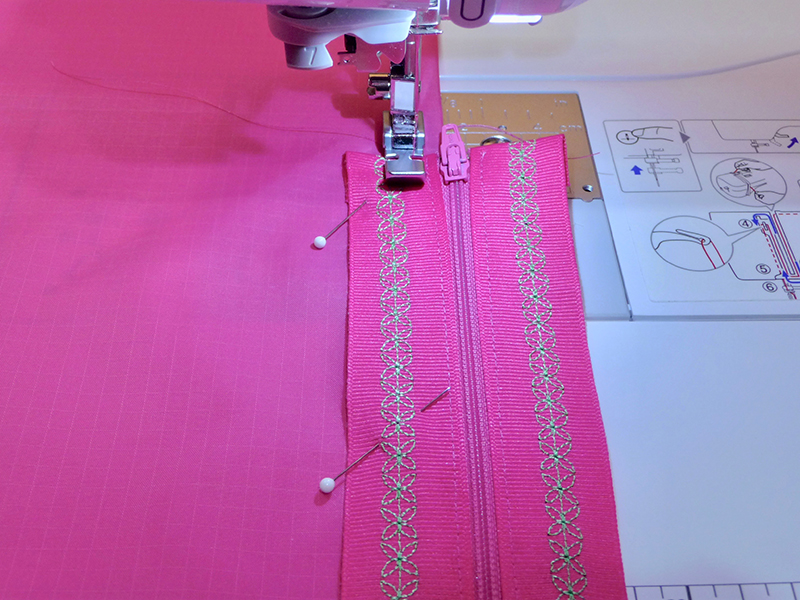
- Attach zipper foot. Unfold pocket and stitch first side of ribbon to pocket, stitching close to edge of zipper teeth, and then continue stitching around ribbon in a box formation, anchoring ribbon to the folded edge. See below:
- Next, fold pocket back up and stitch opposite side of ribbon to double apron layer, stitching in a box formation as you did before. Re-enforce the zippered pocket at each end, sewing close with the zipper foot. To create three complete pockets, change to standard sewing foot and finish pockets by stitching two lines through all folded layers, and then stitching close to the two loose outer edges. Center long length of ribbon at the top to form waistband and ties. Stitch ribbon to waistline, closing center opening in the process. Cut tie ends at an angle and treat with seam sealant. See pocket and waistband stitching lines in Figure #7.
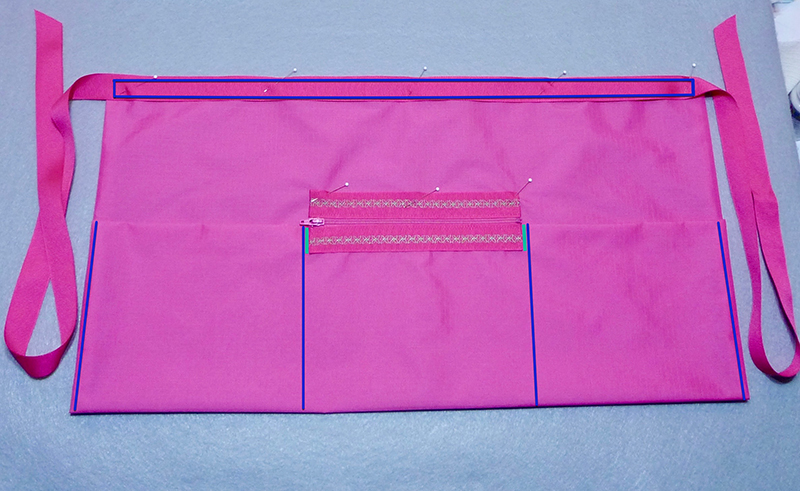 Figure #7[/caption]
Note: Pins show position for stitching second side ribbon. Blue lines indicate pocket and waistband stitching lines. Short green lines indicate re-enforcement stitches for each end of zippered pocket.
- Add ribbon for zipper pull. You are finished! Enjoy!
