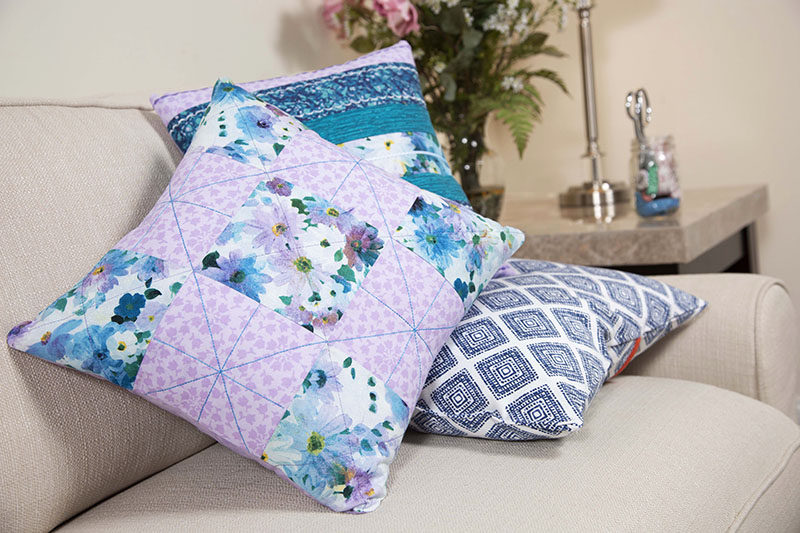
Foot of the Month: Quilted Nine Patch Pillow
This nine-patch pillow project is an easy introduction into the world of piecing and quilting. The front features neat quilted blocks and the back is closed with buttons and buttonholes. Complete this project and learn how to piece, quilt, and finish a pretty pillow. Are you ready? Let’s go sew!
Materials and Supplies:
- Brother Sewing Machine. Machine featured in this project is the Brother Pacesetter PS200T.
- SA140 Brother Walking foot. This accessory is included with the PS200T.
- Extension table. This is included with the PS200T.
- Basic sewing notions including thread to match or blend with fabric, a wash out marker or chalk pencil, and long sharp pins.
Tip: Low tack tape such as painter’s type tape is good for marking quilt lines in place of marking pens and pencils. A medium grey color thread blends easily with many colors.
- Standard sewing thread or decorative thread for quilting the patchwork.
- Straight edge for measuring and marking lines on fabric
- Two strips of medium weight fusible interfacing measuring 1 ½-inches wide X 15 ½-inches long for stabilizing overlap on pillow back.
- Five ¾-inch buttons for back closure.
- 16-inch pillow form to create a fully stuffed finished pillow.
Materials for Pillow:
- Fabric #1 for patchwork pillow top: Cut five 5 ½-inch squares
- Fabric #2 for patchwork pillow top: Cut four 5 ½-inch squares
- Fabric #3 for pillow back: Cut two pieces measuring 10 ¼-inches wide X 15 ½-inches long.
Tip: Fat quarters work perfect for this project. A quilter’s fat quarter is a half yard of fabric that is cut on along the foldline of the yardage to equal a piece measuring 18-inches X 22-inches. One piece of craft fleece or quilt batting measuring 16-inches square for pillow top.
Instructions for Creating Pillow
1. Begin by arranging squares as they will be sewn together. Play with the position of the printed piece for the center. This will be a focal point on the pillow. See Figure #1. [caption id="attachment_21391" align="aligncenter" width="800"] Figure #1[/caption]
2. Prepare to sew each of the three squares together to create three rows. Tips: To sew an accurate ¼-inch seam you can use a genuine Brother ¼-inch foot such as SA125 or SA185. As an alternative, move your needle position using the stitch width key until the stitch forms ¼-inch from the raw edge while sewing with the raw edge of the fabric along the outside edge of the presser foot. See below:
Figure #1[/caption]
2. Prepare to sew each of the three squares together to create three rows. Tips: To sew an accurate ¼-inch seam you can use a genuine Brother ¼-inch foot such as SA125 or SA185. As an alternative, move your needle position using the stitch width key until the stitch forms ¼-inch from the raw edge while sewing with the raw edge of the fabric along the outside edge of the presser foot. See below:


Note: It’s important that each seam is a consistent ¼-inch. See Figure #2.
[caption id="attachment_21392" align="aligncenter" width="800"] Figure #2[/caption]
3. Press each seam toward the darker fabric. With a nine patch like this one the seams will be staggered. Next, lay out the three rows to form a nine-patch block. See Figure #3.
[caption id="attachment_21393" align="aligncenter" width="800"]
Figure #2[/caption]
3. Press each seam toward the darker fabric. With a nine patch like this one the seams will be staggered. Next, lay out the three rows to form a nine-patch block. See Figure #3.
[caption id="attachment_21393" align="aligncenter" width="800"] Figure #3[/caption]
4. Pin layers together placing a pin at each seam. Note how the seams lay flat and smooth when they are pressed in opposite directions. In quilter’s terminology this is called “nesting” the seams. See Figure #4.
[caption id="attachment_21394" align="aligncenter" width="800"]
Figure #3[/caption]
4. Pin layers together placing a pin at each seam. Note how the seams lay flat and smooth when they are pressed in opposite directions. In quilter’s terminology this is called “nesting” the seams. See Figure #4.
[caption id="attachment_21394" align="aligncenter" width="800"] Figure #4[/caption]
Tip: Pinning diagonally will help keep the layers from shifting.
Sew the three rows together to form a block. See Figure #5.
[caption id="attachment_21395" align="aligncenter" width="800"] Figure #5[/caption]
5. Press seams away from center strip. Center block on top of oversized piece of fleece.
6. Prepare for quilting the patchwork top as follows: Remove presser foot. Loosen the screw on the machine to remove presser foot holder. Attach the walking foot. Note that the foot screws onto the machine and the arm on the attachment fits over the needle bar. See Figure #6.
[caption id="attachment_21396" align="aligncenter" width="800"]
Figure #5[/caption]
5. Press seams away from center strip. Center block on top of oversized piece of fleece.
6. Prepare for quilting the patchwork top as follows: Remove presser foot. Loosen the screw on the machine to remove presser foot holder. Attach the walking foot. Note that the foot screws onto the machine and the arm on the attachment fits over the needle bar. See Figure #6.
[caption id="attachment_21396" align="aligncenter" width="800"] Figure #6[/caption]
Tip: It’s easiest to put this foot on by slipping it on from the back, lining up the slot on the foot over the screw and using your right hand to position the arm over the needle bar.
Mark the patchwork piece for the first lines of quilting. You can choose to quilt any area you like. See below for an example of quilting lines in this project.

Tip: Use a marking tool, low tack tape, or a combination of both for making lines on the fabric. See below:
 Quilt all marked lines using the walking foot. See Figure #7a and #7b.
[caption id="attachment_21397" align="aligncenter" width="800"]
Quilt all marked lines using the walking foot. See Figure #7a and #7b.
[caption id="attachment_21397" align="aligncenter" width="800"] Figure #7a[/caption]
[caption id="attachment_21398" align="aligncenter" width="800"]
Figure #7a[/caption]
[caption id="attachment_21398" align="aligncenter" width="800"] Figure #7b[/caption]
Tip: A standard straight stitch works fine for all lines, but the stretch straight stitch is an attractive accent for the small blocks.
7. Be sure to thoroughly remove marks before pressing. With many wash out markers this means you will need to wash the quilted piece after stitching the quilting lines. Trim the quilted piece so it measures 15 ½-inches square.
8. Prepare back pieces by fusing strips of interfacing to two of the 15 ½-in edges. Select a triple zigzag stitch set for width 7.0, length 1.0 and finish raw edges to prevent raveling. See Figure #8a and #8b.
[caption id="attachment_21399" align="aligncenter" width="800"] Figure #8a[/caption]
[caption id="attachment_21400" align="aligncenter" width="800"]
Figure #8a[/caption]
[caption id="attachment_21400" align="aligncenter" width="800"] Figure #8b[/caption]
9. Fold and press under the interfaced edges. Sew five evenly spaced buttonholes down the center of one strip. Use button sewing foot to sew corresponding buttons to the opposite side. Button up the back.
Figure #8b[/caption]
9. Fold and press under the interfaced edges. Sew five evenly spaced buttonholes down the center of one strip. Use button sewing foot to sew corresponding buttons to the opposite side. Button up the back.
Tip: Check your machine manual for specific buttonhole and button sewing instructions. You’ll find instructions for model PS200T on pages 38 to 41.
10. Layer finished front and back pillow pieces with right sides together. See Figure #9.
[caption id="attachment_21401" align="aligncenter" width="800"] Figure #9[/caption]
Trim back piece to fit the 15 ½-inch square front.
11. Sew pieces together using a ½-inch seam allowance.
Figure #9[/caption]
Trim back piece to fit the 15 ½-inch square front.
11. Sew pieces together using a ½-inch seam allowance.
Tip: Rounding the corners slightly makes for a neat finished pillow. See enhanced photo in Figure #10.
[caption id="attachment_21402" align="aligncenter" width="800"] Figure #10[/caption]
Trim seam allowance to ¼-inch, then turn pillow right side out and press. See Pillow front and back below:
Figure #10[/caption]
Trim seam allowance to ¼-inch, then turn pillow right side out and press. See Pillow front and back below:

 Open back and insert pillow form to finish. Enjoy!
Related Projects
Stay Connected
* Required fields