Foot of the Month: Take it Anywhere Tote
This roomy tote is perfect for farm market shopping, collecting souvenirs on your next vacation, or to use as your grab and go bag next time you head to the beach. You’ll probably think of many other places to take along this tote! Completely lined and made from a commercial pattern it includes a small pouch attached with a clip. We used this project to feature the Brother Adjustable Blind Hem Foot, using it as a guide for topstitching close to the finished edges. Follow along and you’ll find lots of tips you can use for sewing this tote and many more like it.
Materials and Supplies:
- Brother Sewing Machine
- SA133
or SA134
Brother Adjustable Blind Hem Foot to use for topstitching - Sharp size 14 needle for construction and topstitching
- 6-inch sliding seam gauge
- Optional but helpful – pinking shears
- Fabric and notions as per pattern requirements
- Commercial pattern for bag - Simplicity pattern 8149, view B is featured in this project. See Figure #1.
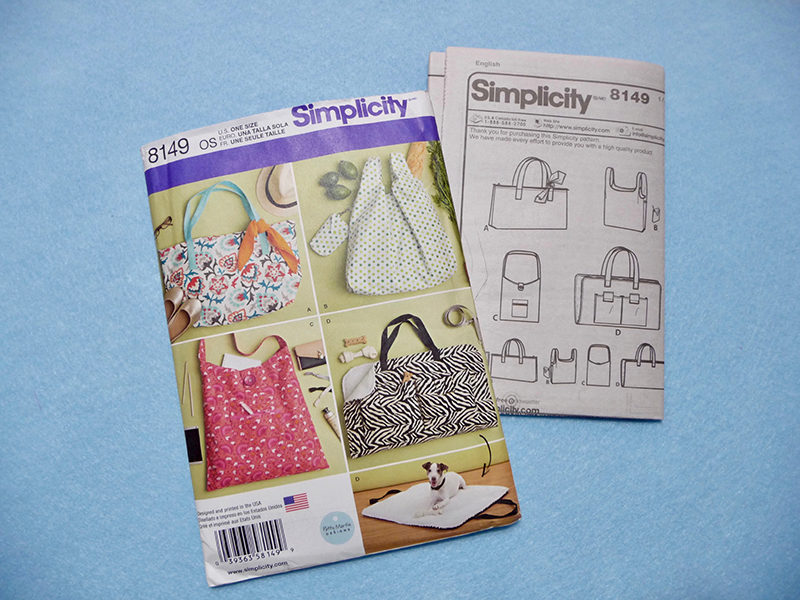 Figure #1[/caption]
Disclaimer: The featured pattern, Simplicity pattern 8149 is a product of Simplicity Pattern Company Inc. Brother International Corporation makes no representations or warranties regarding such products.
Instructions for Making Tote
- You’ll find complete instructions for cutting and sewing this tote in the pattern envelope. However, in this project we are going to deviate a little from the basic guidelines, streamline the construction, and sprinkle in a few helpful tips you can use for making future totes.
- Trim pattern pieces to prepare for cutting. Pattern calls for interfacing all of the pieces. Cut and interface a fabric piece large enough to cut all tote pieces.
Tip: It’s easier to interface a large section of fabric and cut both fabric and interfacing at once than it is to cut each piece twice. You’ll have very little waste when you use this method for this tote. See Figure #2.
[caption id="attachment_16527" align="aligncenter" width="800"]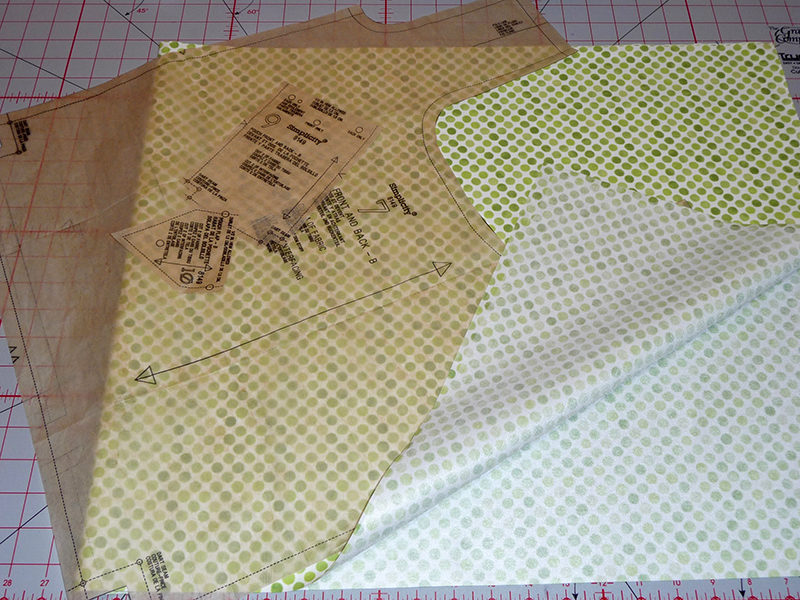 Figure #2[/caption]
- Cut all pieces after you have applied the interfacing. Set aside a small fabric remnant for testing your topstitching.
- Prepare machine for sewing.
Tip: This pattern calls for two different widths of seam allowance, ½-inch and ¼-inch. If your Brother machine is computerized, you can change the position of the needle using the stitch width key and set a straight stitch to sew a ¼-inch seam using the right-hand edge of the “J” foot. Simply set the stitch width key to 5.5 and guide the raw edge of the fabric along the edge of the foot. For a ½-inch seam allowance you can set the width key to 2.5 and use the first groove on the throat plate as a guide for the edge of your fabric. See Figure #3a and Figure #3b.
[caption id="attachment_16528" align="aligncenter" width="800"]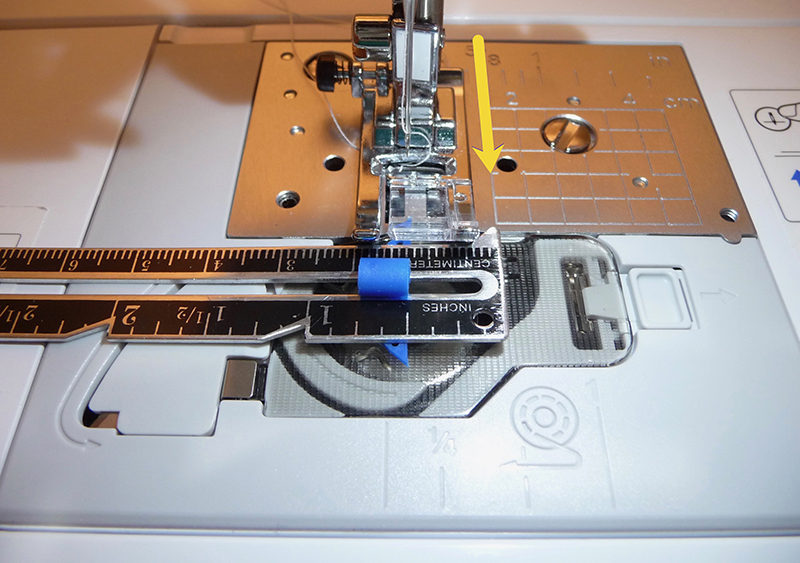 Figure #3a[/caption]
[caption id="attachment_16529" align="aligncenter" width="800"]
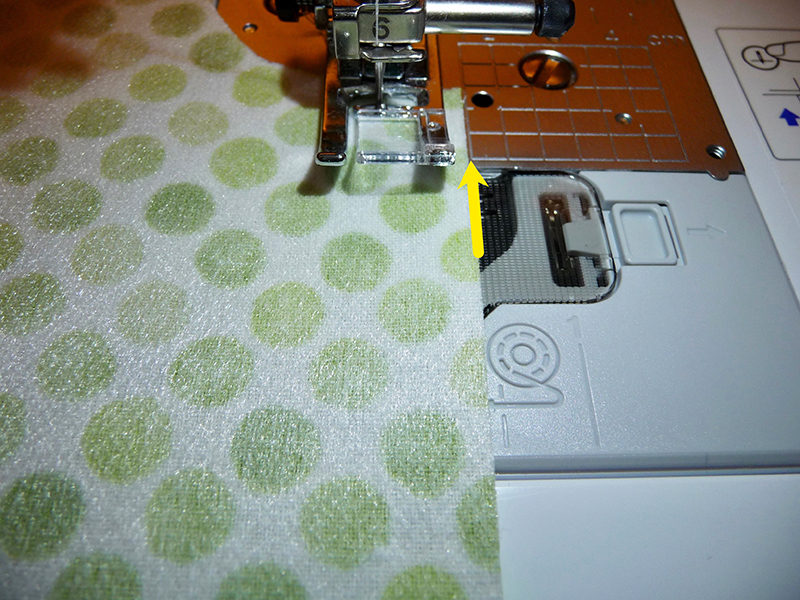 Figure #3b[/caption]
- A bag like this will likely get a lot of use. For sturdy seams we recommend using the triple straight stitch for the main seams of the large bag. The stitch number will vary on different machine models. However, you can readily tell the difference between a standard straight stitch and the triple straight stitch. Figure #4 shows the standard straight stitch highlighted in grey and the triple straight stitch highlighted in green.
 Figure #4[/caption]
- Increase the stitch length to 3.0 when sewing all bag seams.
- To sew the main bag and small pouch, you can follow the pattern instructions or follow the alternative construction order below. This is a method to streamline making the bag, and possibly finish more quickly. This particular process speeds up construction by completing as many small details as possible so you’re ready to put the tote together without being distracted by all the small pieces. Before sewing, please read the tips below for sewing the seams and topstitching with the blind hem foot.
Tip: Reference illustrations in the instructions for a guide and follow these steps to construct the bags:
- Sew tabs.
- Construct the small pouch.
- Add tab to outer front bag.
- Sew bag and lining seams and then sew bag and lining together as shown in the instructions.
Tips for Sewing and Topstitching:
- When it’s time to topstitch the outer edges of the big bag and small pouch, switch to the adjustable blind hem foot. This optional foot will help you achieve even topstitching by using the guide built in to the foot. Use a standard straight stitch for top-stitching and select the needle down setting if it’s available on your machine. Adjust the guide on the foot so the needle falls close to the finished edge when you are topstitching.
Tip: Once again, if your machine is computerized you can move the needle position adjusting it in combination with the guide on the foot to allow for stitching very close to the edge. Practice this stitching on a piece of fabric you have sewn and turned right side out. See Figure #5.
[caption id="attachment_16532" align="aligncenter" width="800"]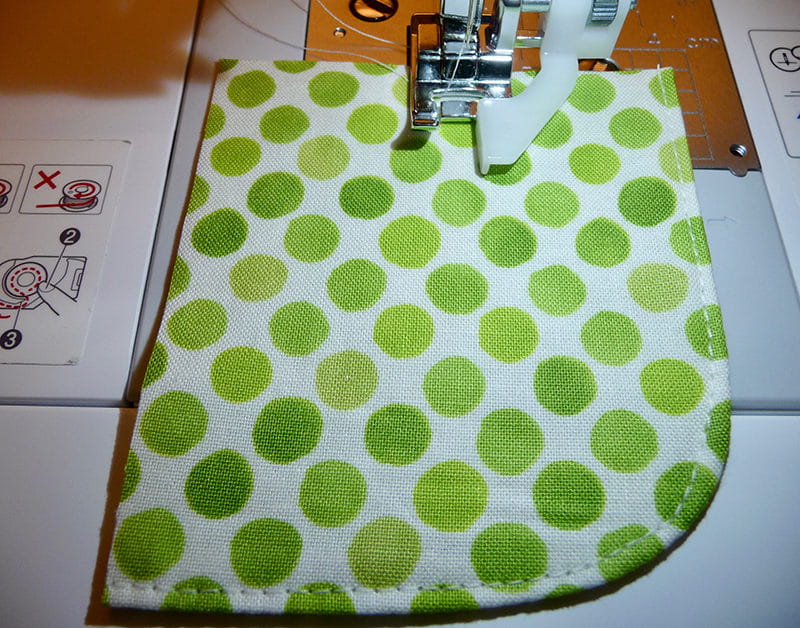 Figure #5[/caption]
- When stitching the edges of the bag start stitching along straight edges and be sure to maneuver the fabric so topstitching stays even along the curves. To do this you need to pivot the fabric frequently, stopping with the needle down. Concentrate on matching the edge of the fabric to the area of the foot shown in Figure #6.
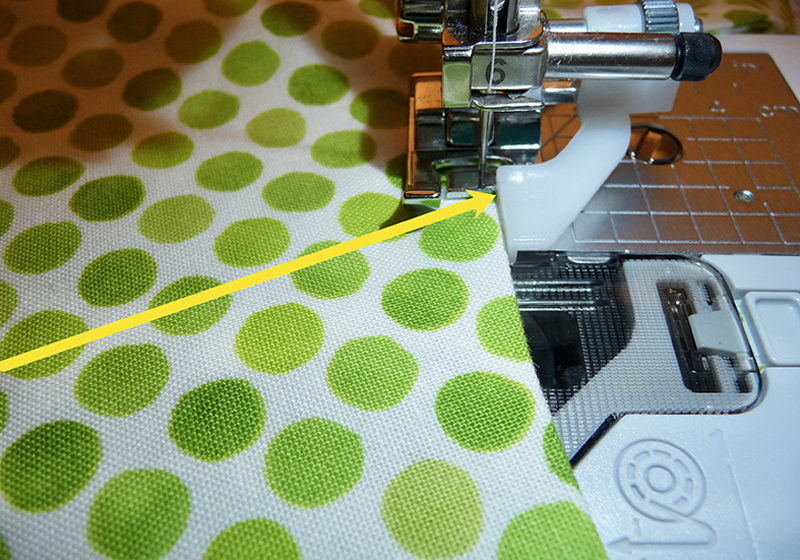 Figure #6[/caption]
- You’ll achieve beautiful topstitching with this handy foot. See Figure #7.
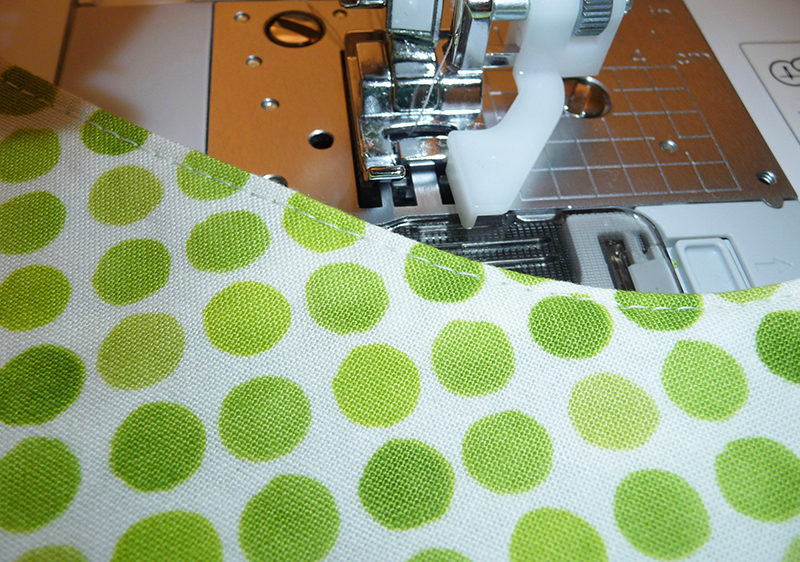 Figure #7[/caption]
Enjoy using your new tote!

