Free Design: Fancy Hearts Embroidered Fabric Basket
Today we start celebrating National Embroidery Month! The Brother Free Design this month is a beautiful Fancy Heart motif. It’s perfect for decorating this easy to make Embroidered Fabric Basket. Add lettering to the design to fit a spa theme or personalize with a name or other thoughtful saying. This pretty pink basket is filled with spa themed items for a special gift. Look closely and you’ll see an Eye Mask
to match. This custom crafted Eye Mask is made using the coordinating Foot of the Month project for February.
Combine the two projects and make a thoughtful gift for someone who could use a little pampering. By the way...that “someone” could be you! Brother Free Design of the Month - Fancy Hearts [caption id="attachment_5136" align="aligncenter" width="293"]
 Original Design Colors[/caption]
Materials and Supplies
- Brother Sewing and Embroidery Machine
- Brother 4-inch square hoop
- SA519 Brother medium weight iron-on backing
- Brother Embroidery thread, Bobbin thread, & Embroidery needle
for embroidering design - Brother FREE DESIGN of the Month - Fancy Hearts
- Basic sewing notions including a hand needle or optional fusible webbing to close basket opening
Note: Finished basket size is approximately 8-inches wide X 6-inches high X 6-inches deep. Please read all instructions before beginning.
Steps for Cutting Fabrics
Cut the following fabric and interfacing pieces: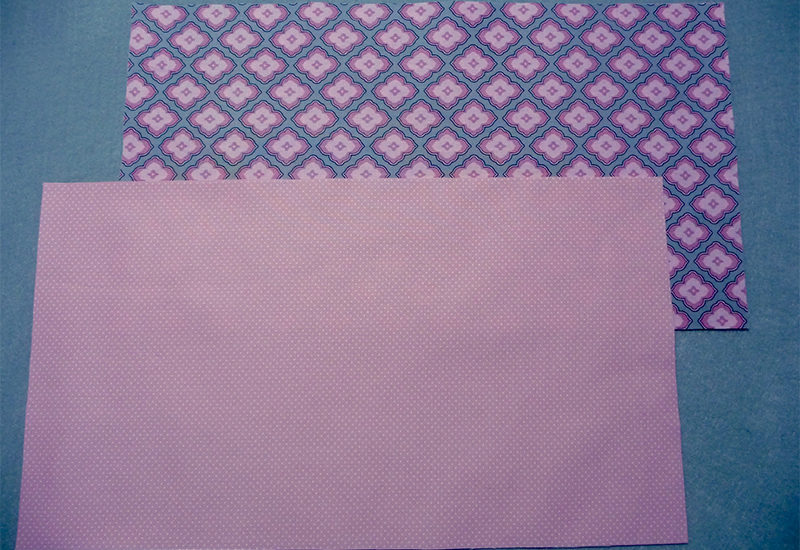 Figure #1[/caption]
Note: This interfacing is a firm iron-on backing with extra crispness and is designed for craft and home décor projects such as this.
Steps to Create Embroidered Basket Front
- To prepare for embroidery, cut a piece of stabilizer 7” wide X 9” long. Center stabilizer on the wrong side of one outer basket piece and lightly fuse in place. Hoop fabric in the four-inch hoop, with fabric centered and positioned as close to the top edge as possible. See Figure #2.
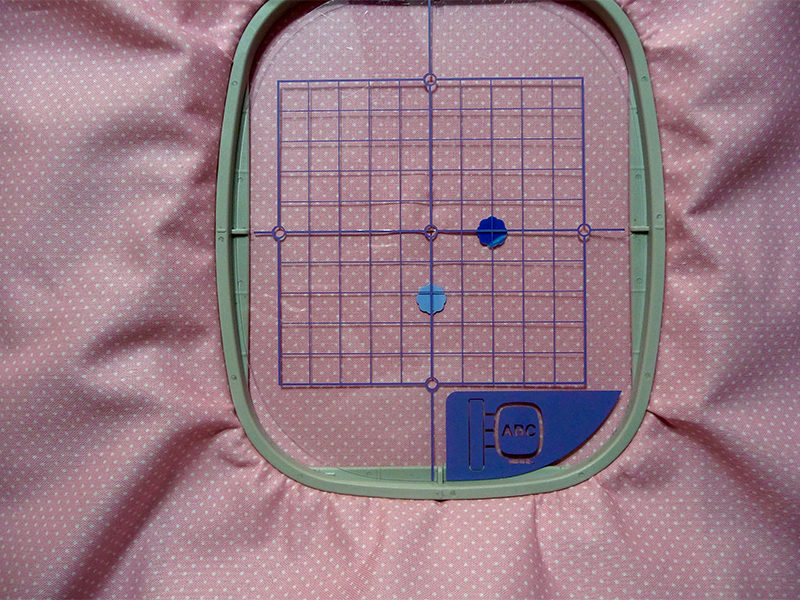 Figure #2[/caption]
Tip: To avoid making marks on fabric you can mark the fabric with long flat pins intersecting at the center. It’s important to remove pins before you begin embroidering.
- Transfer design to your machine. Combine the design with lettering as desired, keeping design within the 4-inch hoop area. Experiment with different fonts in your machine until you find one you like. It’s a good idea to begin with small lettering and then select the size option, adjusting the lettering to fit along with the heart design. See Figure #3.
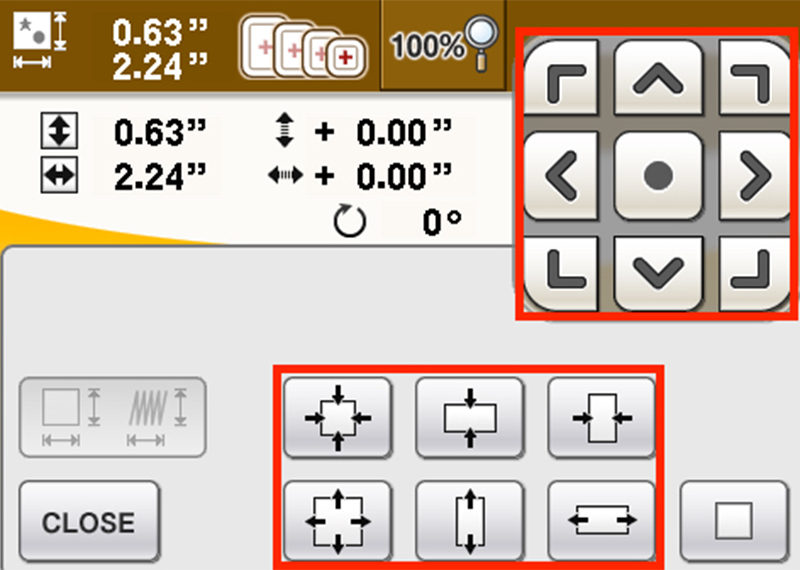 Figure #3[/caption]
Use the Array feature if you have this option to shape the lettering and create a perfect curved layout above the heart. See Figure #4.
[caption id="attachment_5147" align="aligncenter" width="800"]
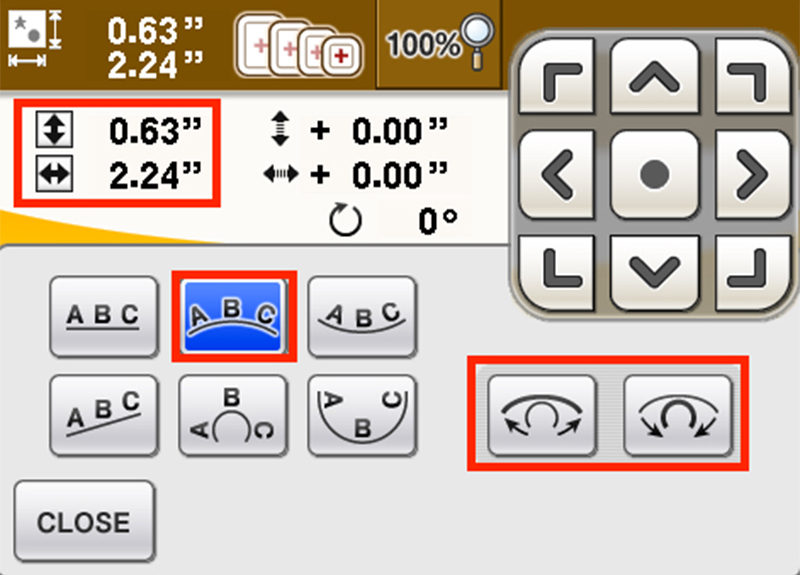 See Figure #4[/caption]
- Change thread colors to fit your fabric scheme, using color change tools within the machine, or simply pick alternative threads while you are embroidering.
- When you are happy with your layout embroider the design. Carefully remove excess stabilizer and press fabric lightly.
- Fuse interfacing to the wrong side of each basket piece, having it centered on the fabric.
- Set up machine for sewing. To sew side handles begin by pressing under ¼” along each long edge. Next, fold strip in half with wrong sides together. Stitch close to each long edge to finish handles. See Figures #5a and #5b.
- Layer outside basket pieces with right sides together and pin along the long bottom edge. See Figure #6a.
- Sew bottom seam using a ½” seam allowance.
- Press bottom seam toward one side and then sew side seams using a ½-inch seam allowance. See Figure #6b.
- Repeat steps 2, 3, and 4 for the lining, taking care to leave a 4-inch opening in the middle of the bottom seam to allow for turning later.
- To box the corners on both basket pieces begin by folding the bottom of the basket so the side seam is positioned directly on top of the bottom seam forming a point. Use a ruler to measure 3” up from the point and mark a line. You can use a very faint pencil line but note that this line will not be removed. Stitch along the line from end to end. See Figure #7a and #7b.
- Trim points, leaving a ½” seam. See Figure #8.
- Just a few more steps to finish. You need to sew the handles in place before attaching the lining. Pin handles to top edge of the embroidered basket, having them spaced 1¼” from the side seam. See Figure #9.
- Insert lining into embroidered basket with right sides together and adjust so side seams and top raw edges match. Pin layers, and then sew all around the top edge using a ½” seam allowance.
- It’s time to turn the basket right sides out. Be patient with this step, it will look a bit messy at first. To start, reach inside the opening and pull a little at a time until the right sides of both pieces show. See Figure #10.
- Now insert the lining into the basket and smooth into place. Close the bottom seam with small hand stiches or fuse shut with fusible webbing. Carefully press the top edge flat and then press remaining basket to shape it. See Figure #11.
- For a softer and slightly padded look you could use thin fusible fleece instead of interfacing. For yet another option, use pre-quilted fabric for the outside.
- Make this basket from two layers of firm fabric such as duck cloth and eliminate the interfacing altogether.
- Dress up the basket with additional trims or decorative stitches.
- Use novelty fabrics for an unembroidered version.
- If you would like your handles to stand upright, shorten the length a bit and add stiff fusible interfacing.
- For a basket that is more rigid, cut and cover a piece of cardboard or plastic to use as an insert for the bottom.
- This basket style is perfect for anyone and everyone and could easily be customized with an embroidery design that’s suitable for any room in the house! Think sewing theme for sewing room, children’s motifs for the playroom, baby design for a new baby, masculine fabrics for tool storage, etc., your imagination is the only limitation!
- Visit iBroidery.com
for a multitude of special embroidery designs. This basket is sure to become your “go to” gift basket for many different occasions!
-
[caption id="attachment_5148" align="aligncenter" width="298"]
 Modified colors with added lettering[/caption]
Tip: Be sure to clip threads as you go, especially if you are adding to the design and do not have the jump cut option on your machine. It’s easier to trim jump threads before they are trapped by other stitches and you also want to avoid having the foot catch on a long jump thread.
Tip: This interfacing is stiff so it’s best to keep it out of the seam allowance.
Steps to Sew and Finish Basket
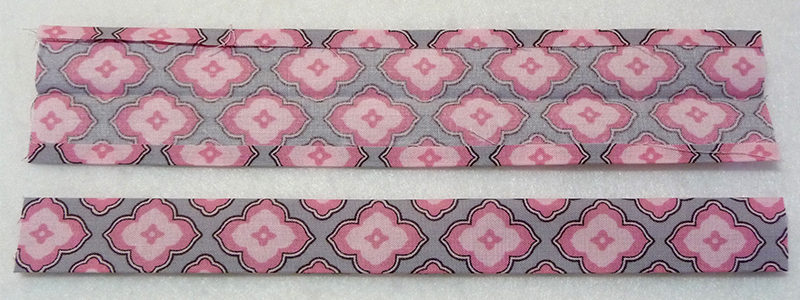 Figure #5a[/caption]
[caption id="attachment_5150" align="aligncenter" width="800"]
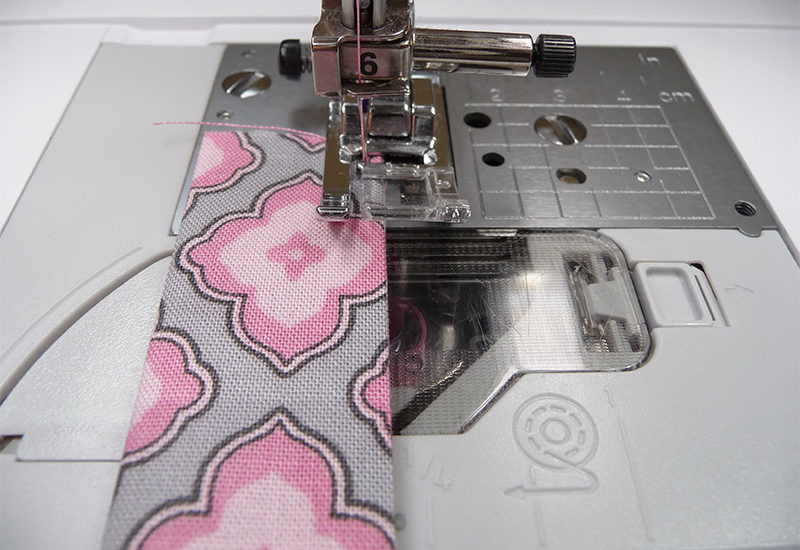 Figure #5b[/caption]
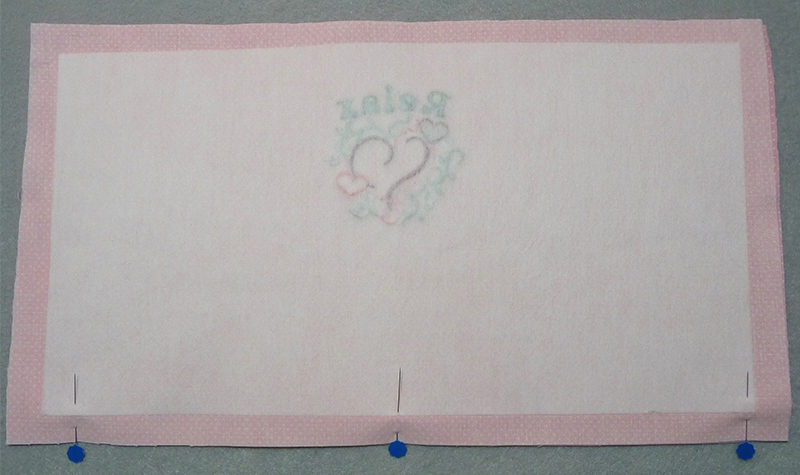 Figure #6a[/caption]
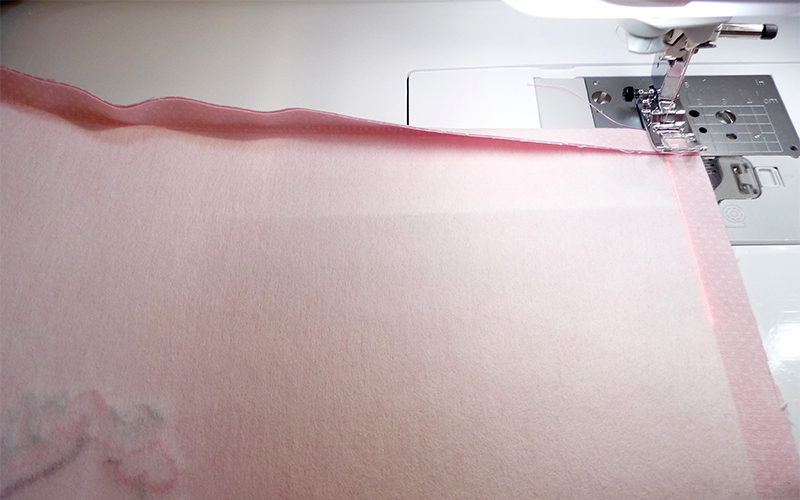 Figure #6b[/caption]
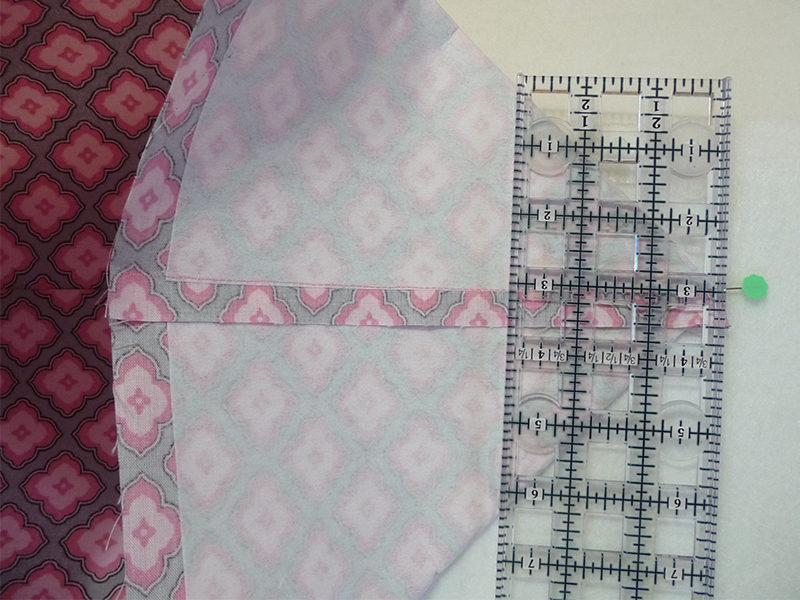 Figure #7a[/caption]
[caption id="attachment_5153" align="aligncenter" width="800"]
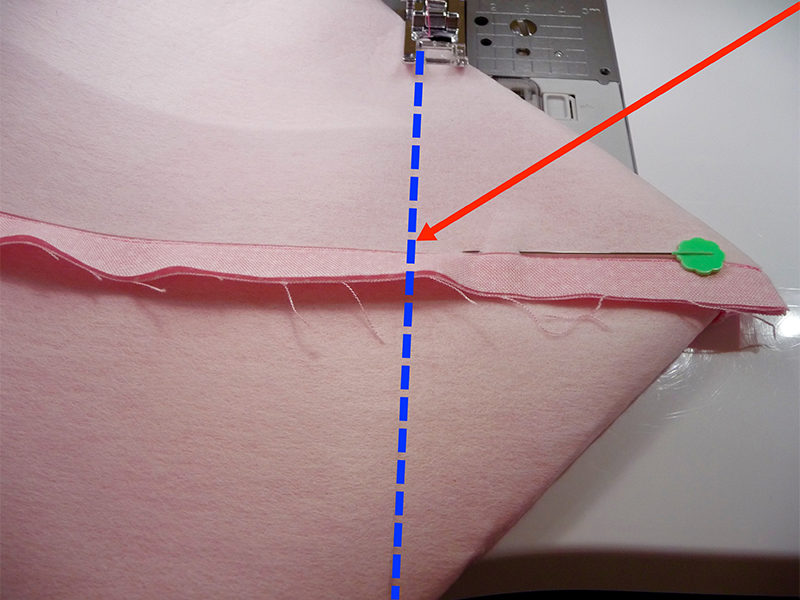 Figure #7b[/caption]
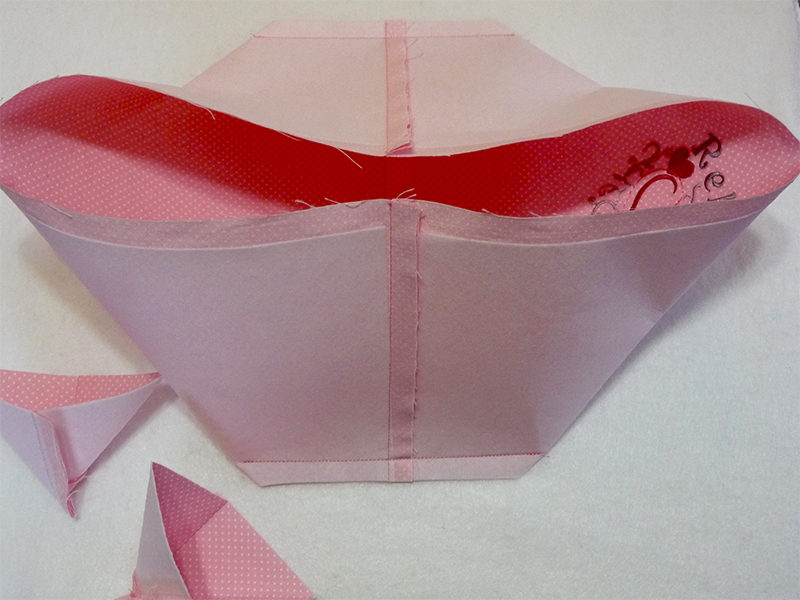 Figure #8[/caption]
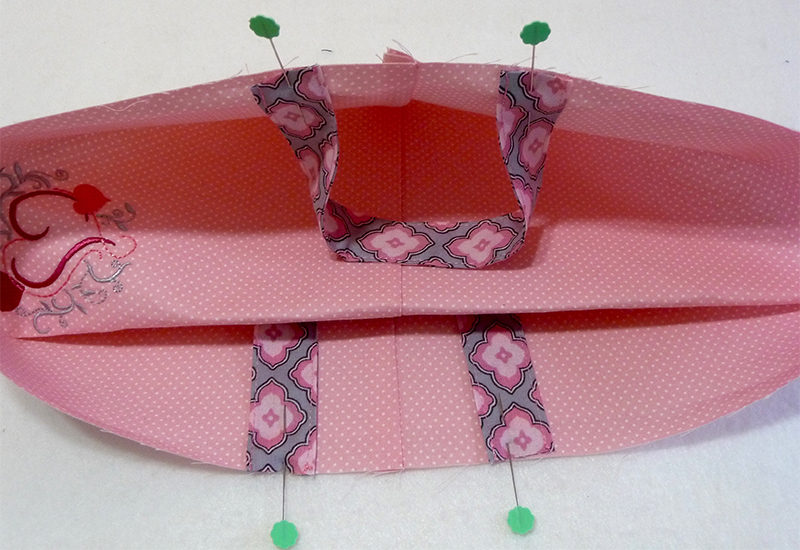 Figure #9[/caption]
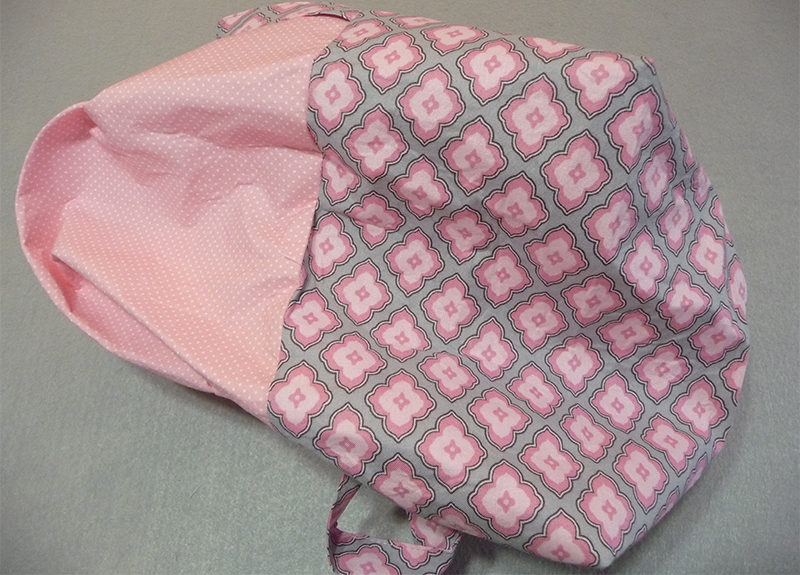 Figure #10[/caption]
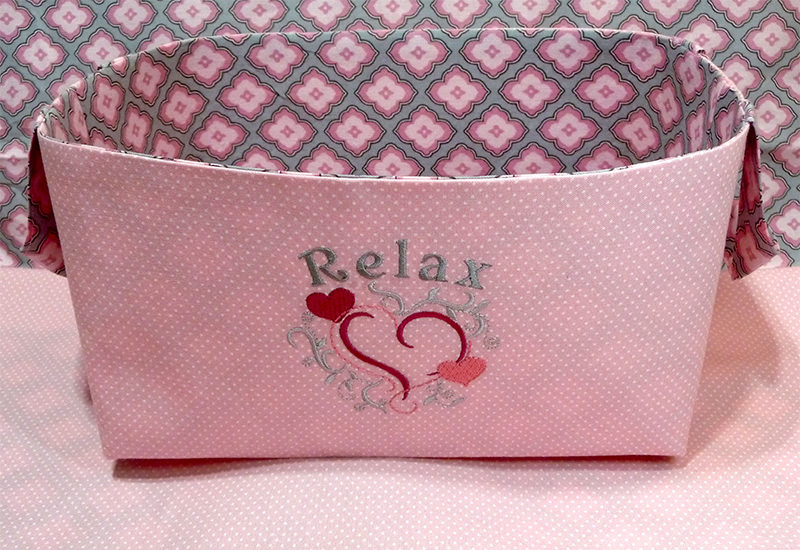 Figure #11[/caption]
You are finished! Enjoy!

