Free Design of the Month: How to Embroider A Tea Towel with Serger Style Ruffled Trim
- Brother Sews blogger
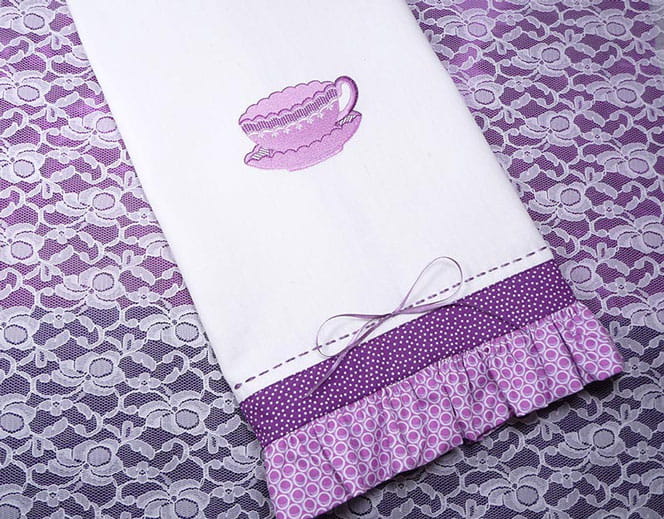
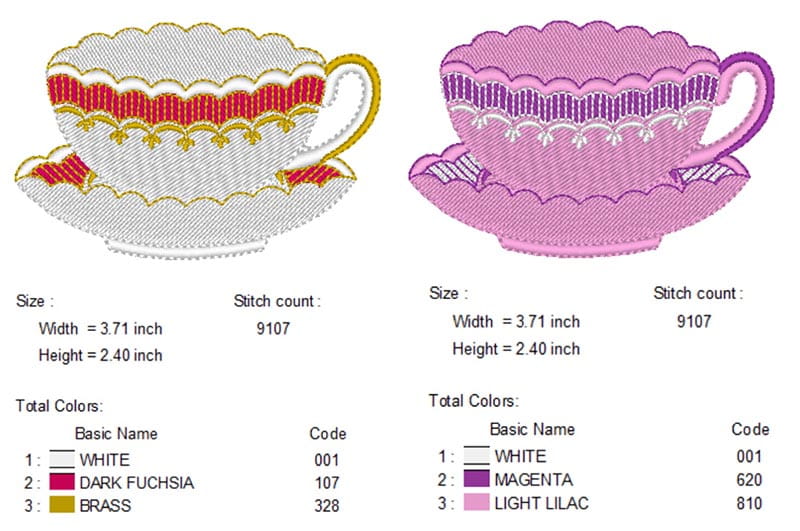
Time to make a tea towel! The free Brother embroidery design this month is a sweet little teacup design. This free embroidery design is perfectly sized to decorate a tea towel. To maintain a clean look on the backside of the towel, I opted to do what I like to call “offsite” embroidery. Offsite embroidery involves turning the finished design into an appliqué piece. You’ll see that the original design had a totally different color scheme. I changed it up to match my passion for the purple fabric trim. Isn’t that one of the best things about embroidery, the ability to change thread colors and create a whole new look?
This towel had a hemstitched lower hem, ideal for added embellishment with narrow ribbon. Below that you’ll see yet another embroidery embellishment! I added a strip of fabric with a ruffle, stitched with my Brother serger and the amazing serger gathering foot. This sewing technique makes quick work of making a ruffle and attaching it to a fabric strip all in one quick and easy step. Are you ready? Let’s go sew!
Note: Project created with the Brother NS1750D and Brother 5234PRW Serger. You can use any Brother machine with 4-inch or larger hoop capability to embroider the design, and a Brother 4-thread serger with differential feed to create the ruffle.
Materials and Supplies for Tea Towel:
- Brother embroidery machine with 4-inch or larger hoop capability.
- Brother Serger
- SA580 Brother medium-weight tear-away stabilizer.
- SA145 Brother Clear View Presser foot for attaching embroidered appliqué.
- SA213 Gathering foot for serger style ruffle. Note: This foot may be included with your serger but it is also sold separately.
- Embroidery threads and embroidery needle.
- Curved tip scissors for trimming embroidered piece.
- 4 cones of serger thread to match or blend with fabric.
- Thread for attaching embroidered appliqué piece to towel: Good quality fine, clear (monofilament) type thread for an invisible look, or use thread that matches the prominent color in your embroidery design. Note that some thread manufacturers recommend using a topstitch needle for sewing with monofilament thread. Check with thread manufacturer for details. As a bonus, the topstitch needle is also ideal for sewing through the dense stitching on the teacup.
- Seam sealant for preventing raveling on cut edge of embroidered piece.
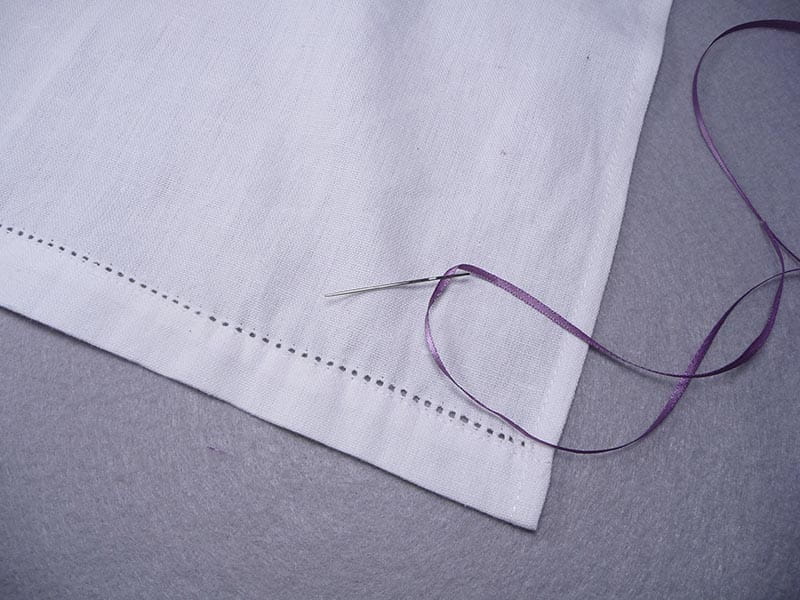
- Large eyed needle for weaving ribbon through hemstitched holes.
- Blank tea towel. Note: My tea towel measured 18-inches wide X 26-inches long and included a hemstitched accent at the bottom edge.
- Lightweight cotton fabric strips for ruffled trim: Strip size varies according to towel size. You will need two strips as described below:
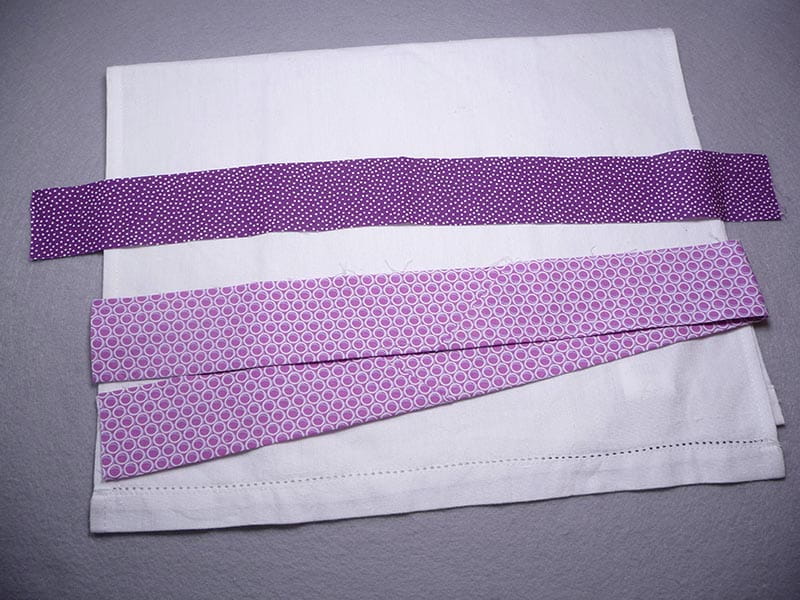
- Fabric #1 for top edge of ruffle - Measure across bottom edge of towel and add 6 extra inches. Using this measurement for the length, cut a 2-inch wide strip of fabric.
- Fabric #2 for ruffle piece – Measure across bottom edge of towel and double the measurement. Using this measurement for the length, cut a strip of fabric measuring 4 ½-inches wide. Note: Piece fabric as needed if you don’t have a piece long enough for one continuous strip.
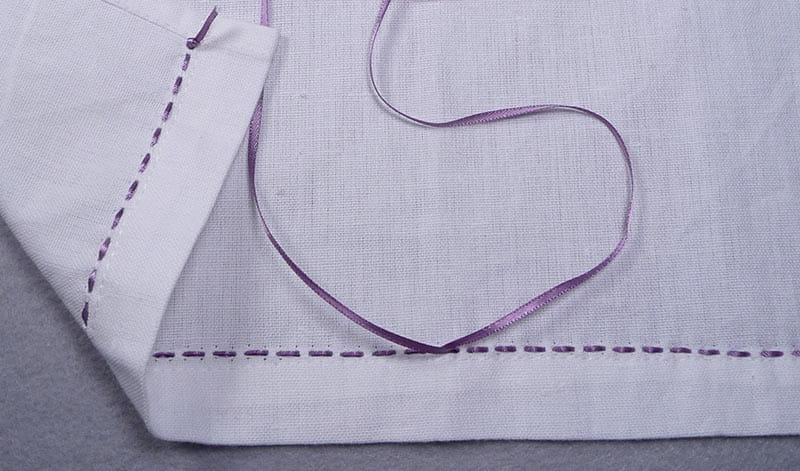
- Optional: 1/8-inch wide ribbon to weave through hemstitching on towel. You’ll need the width of the towel plus approximately 16 extra inches for the bow at the center.
- Cut additional fabric strips for testing the gathering process. See instructions for more details.
- Fabric for teacup embroidery: One piece of light to medium weight cotton in a color that matches towel. Cut a piece large enough to fill your hoop and add lightweight fusible interfacing to the wrong side.
- Brother Free Design of the month FD_4_2022 (available free for a limited time).
Please read through all instructions before beginning this project. Basic steps are as follows:
- Embroider tea-cup design, treat with seam sealant, and trim to form appliqué.
- Create ruffled trim with serger.
- Attach appliqué and ruffled trim to towel.
All Steps to Create Embroidered and Embellished Tea Towel:
1. Hoop fabric prepared for embroidery, adding a layer of the tear-away stabilizer underneath. Embroider design in desired colors.
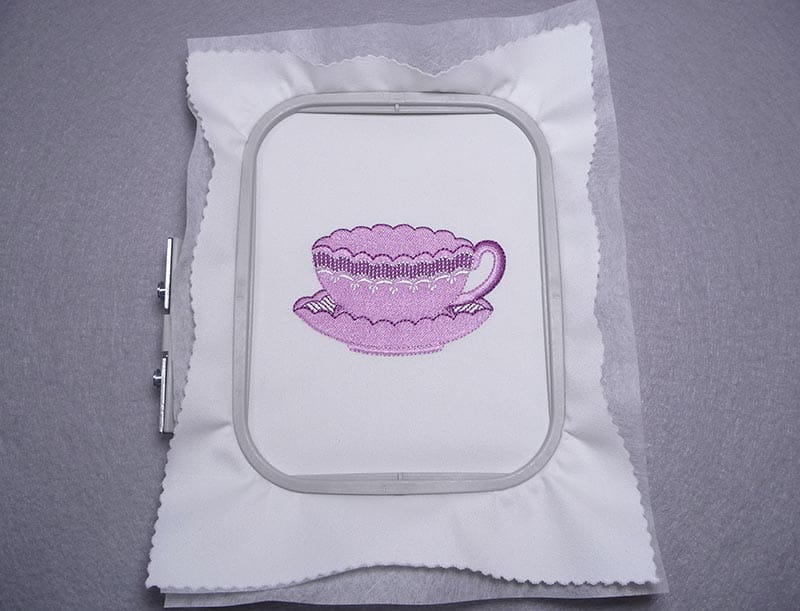
2. Remove fabric from hoop and remove stabilizer.
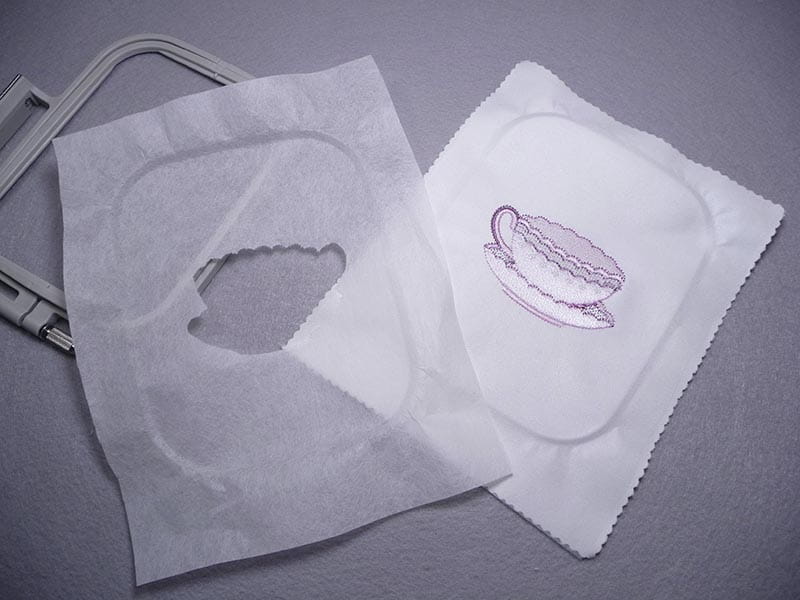
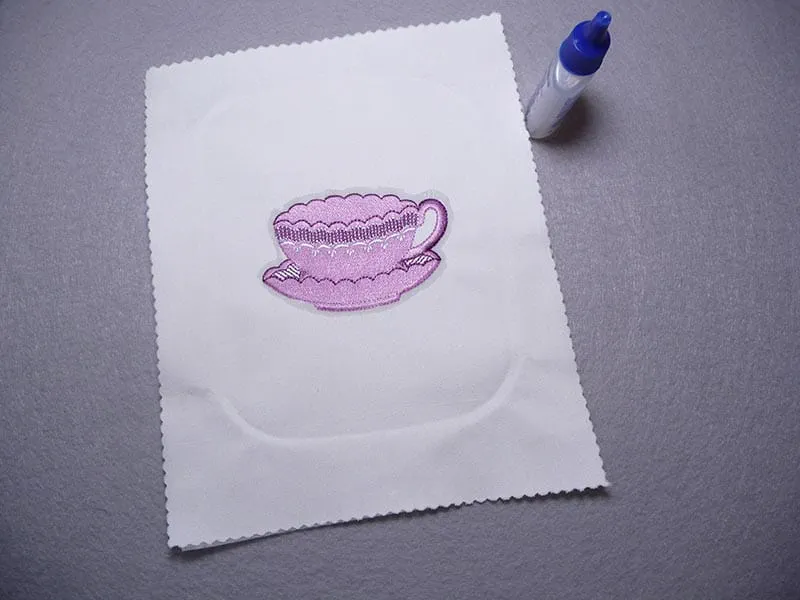
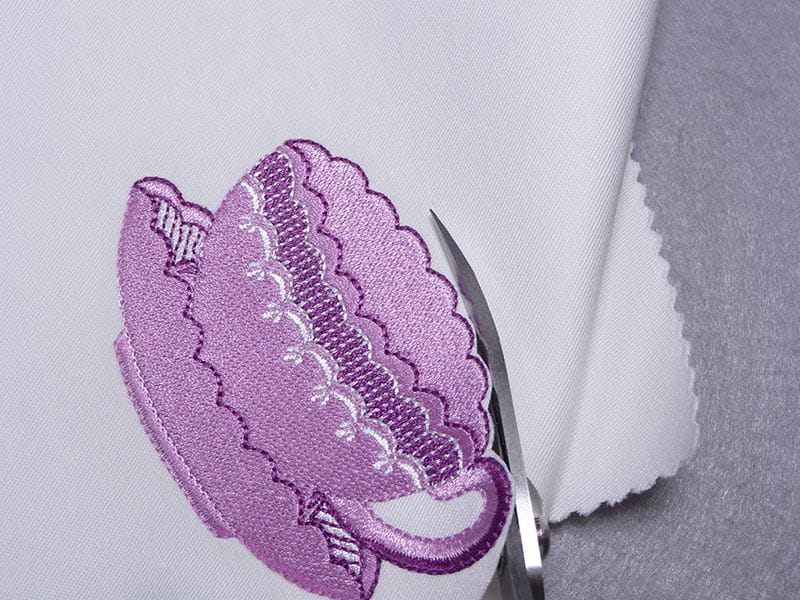
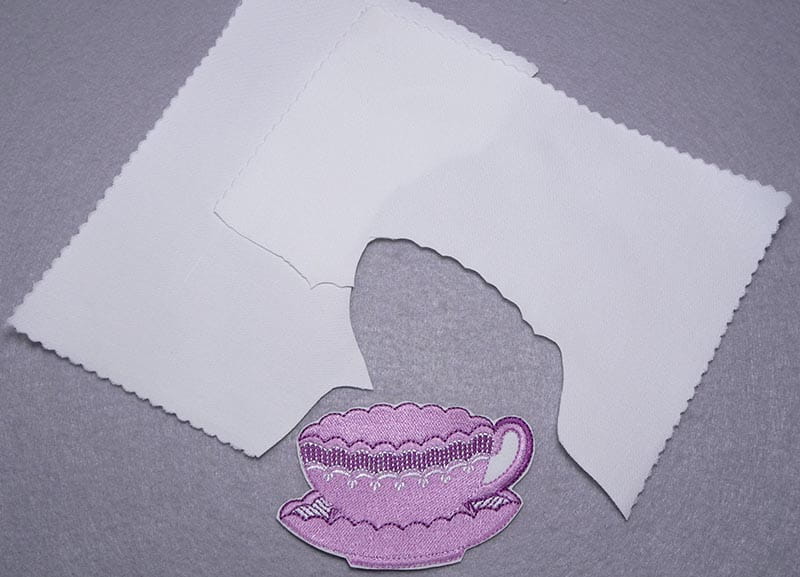
3. Press embroidered piece. Next, apply seam sealant all around the edge of the embroidery design and let dry. Trim piece close to embroidered edge, using sharp curved tip scissors, and taking care that you don’t cut the embroidered threads. Set aside temporarily.
4. Set up serger for gathering as follows:
- Begin by setting up serger for a 4-thread balanced stitch by stitching a sample on two layers of your cotton fabric.
To set up for gathering, you’ll need to change the following settings:
- Set differential feed to the highest number.
- Set stitch length to the highest number.
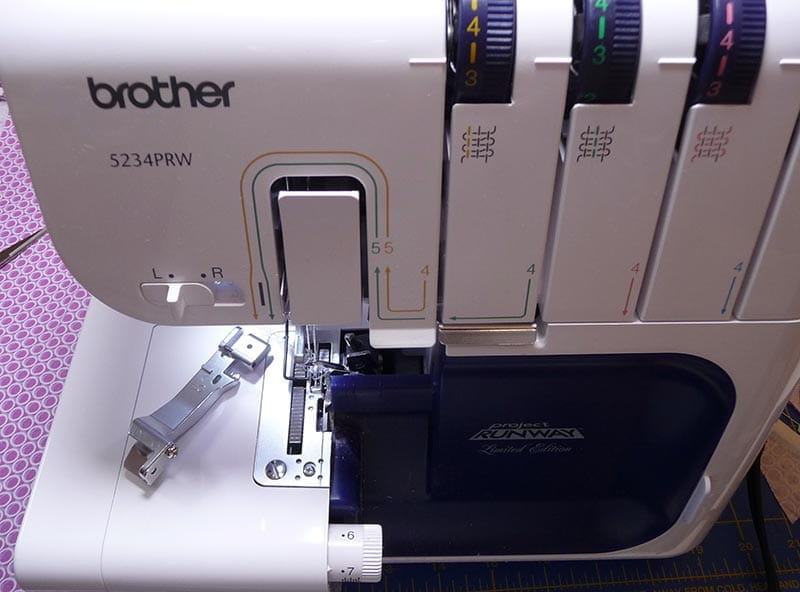
- Increase needle tension to a tight tension. Note: A numeric setting of approximately 6-7 is a good place to start.
- Cut a 4-inch x 12-inch-long strip of the fabric you plan to gather. Test gathering using the standard serger presser foot. If your fabric gathers nicely and gathers to almost half the original length of the strip, you are good to go! See Figure #5. If you need more gathers, increase both needle tensions slightly until you get nice gathers.
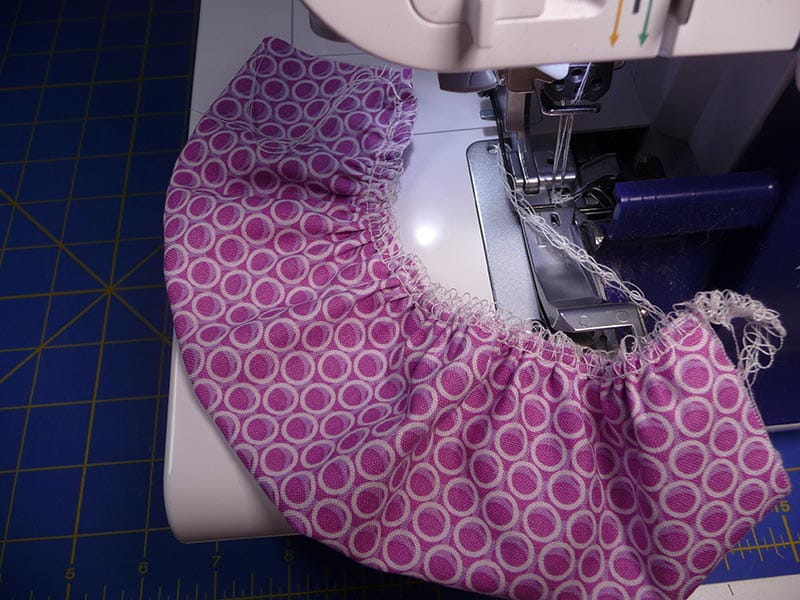
5. Prepare to create the ruffle as follows:
- Select fabric #1 and #2 for creating ruffle. Fold strip cut for fabric #2 in half lengthwise and press
- Replace your standard foot with the special gathering foot. Notice that this foot has a separator plate along the bottom of the foot.
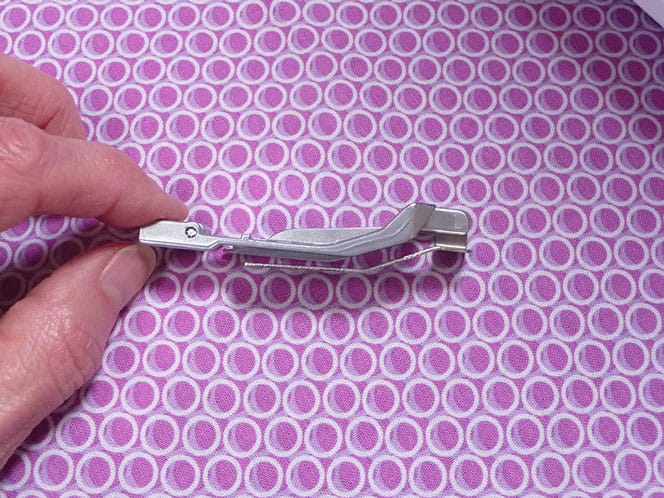
Here’s how the foot is designed to work: Place the fabric you want gathered against the feed dogs, having the fabric right side facing up, and positioned under the plate. This fabric can be a single or double layer. In this project we’re using a double layer folded strip of fabric for the ruffle. This bottom fabric piece comes in contact with the feed dogs and is gathered due to the settings put in place in step 3.
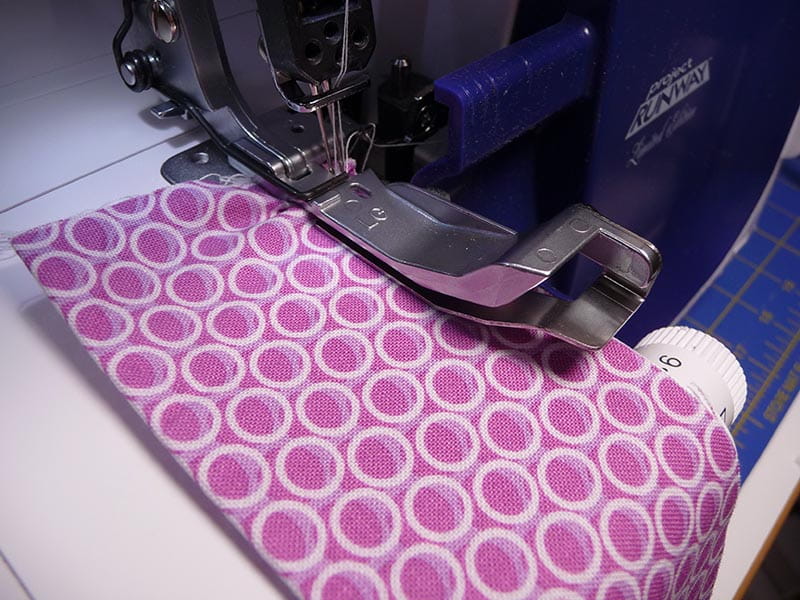
Next, slip the base fabric, fabric #1 into the open slot of the foot, between the separator plate and the bottom of the foot. The plate keeps the fabric from coming into contact with the feed dogs, so this piece is kept smooth and not gathered.
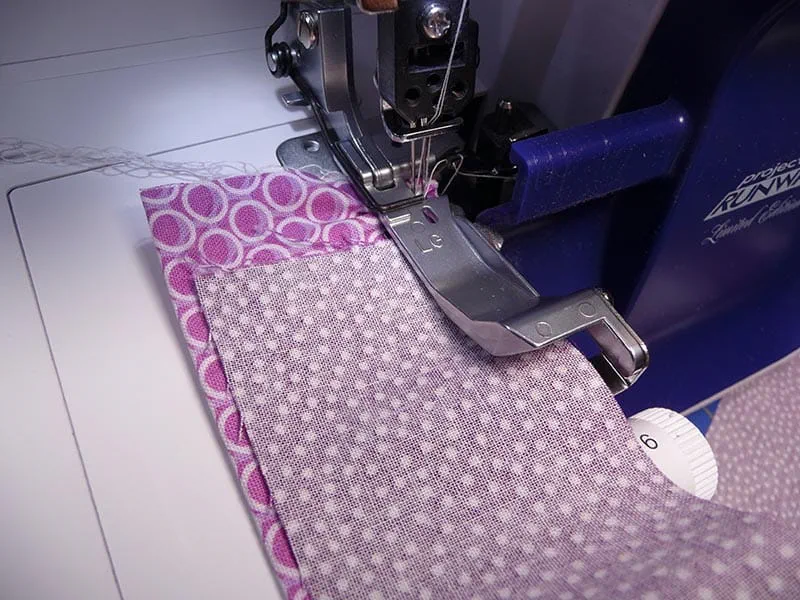
With these two fabrics placed properly in the foot, bottom layer will gather at the same time it’s stitched to top layer. In addition, all layers are edge finished and stitched together in one quick step.
Important Tips: It’s a good idea to practice this technique if this process is new to you. Begin stitching by taking a few stitches on the fabric under the foot, then add the second layer of fabric placed between the foot and the separator plate. Align both edges with the guide at the front right-hand edge of the foot. When stitching, allow fabric to gather and keep the top piece smooth and taught. It’s important to make sure gathers are not pulled out as you stitch. I like to keep my finger against the back of the foot to help gathers form properly. You can stop every few inches to release the fabric and reposition your finger.
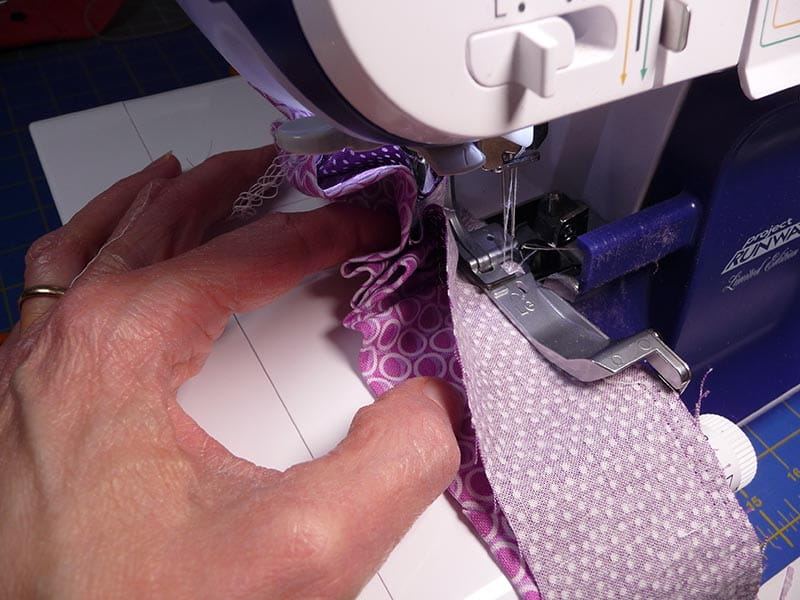
You want to always allow extra lengths of fabric for this technique, creating an oversized ruffle and trimming to size when finished.
6. Trim ruffled piece to equal width of towel plus two inches for hemming each short end.
7. Re-set serger for standard 4 thread balanced stitch. Serge finish top raw edge of ruffled piece. Gather supplies to finish towel.
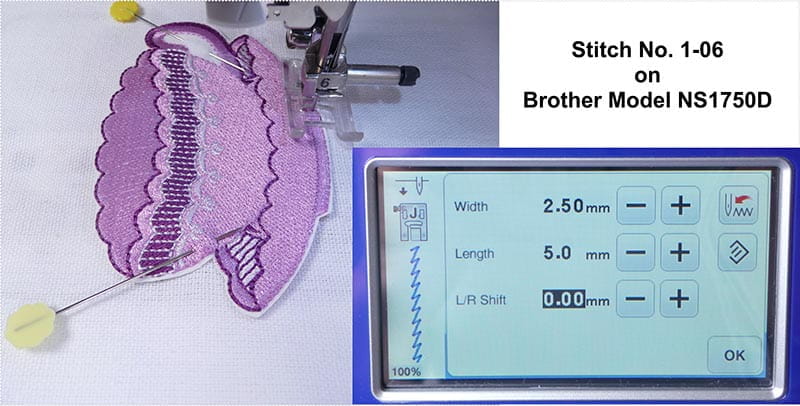
8. Place teacup on towel, pinning or using temporary fabric glue to hold piece in place. Thread machine with monofilament thread or matching thread. Stitch all around the edges of the appliqué using a narrow zig zag stitch or the stem stitch shown in Figure #12.
9. If using the optional ribbon, weave ribbon through holes, pulling a loop at the center to form a bow, and knotting cut ends to keep ribbon in place.
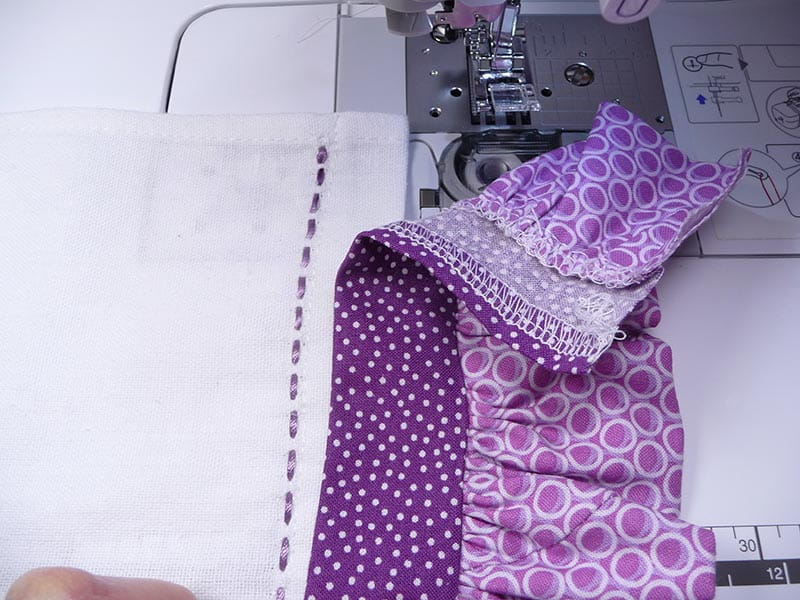
10.Turn and press under long serged edge of ruffle piece. Place ruffle along bottom of towel and sew in place using a standard straight stitch on your sewing machine. Turn a double folded 1/2-inch hem on each short end, wrap to back siide of towel and stitch ends to finish towel ruffle.
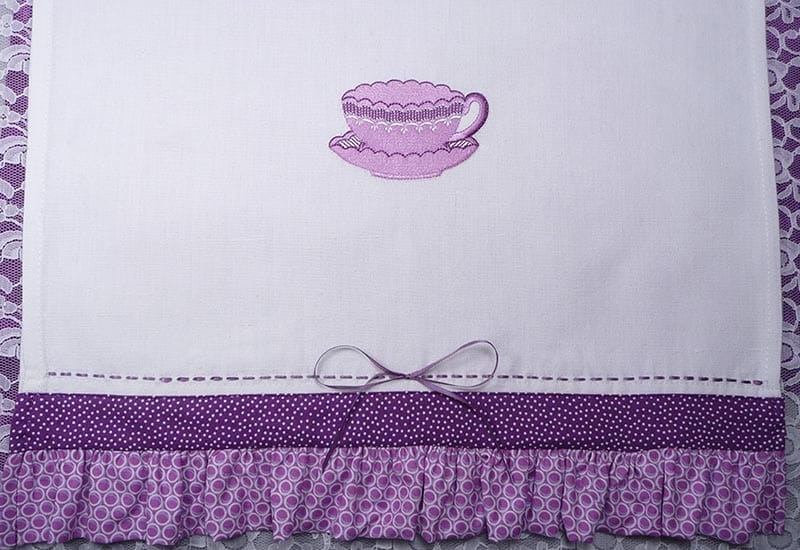
You are finished! Enjoy your beautiful new towel!


