Free Design of the Month: Embroidered Needle Case
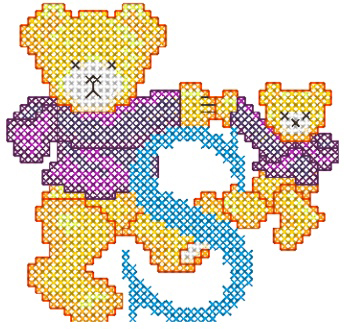
This little needle case will help keep your sewing machine needles organized, close by, and ready for your next project. You can decorate the front with our Brother free design of the month. Top it off by adding some additional lettering for a fun phrase that inspires you to get going and start sewing!
Materials and Supplies:
- Brother Sewing and Embroidery Machine with 4-inch by 4-inch hoop
- SA190 Brother Non-Stick Roller foot
- Brother Polyester Embroidery Threads
- Brother Bobbin Thread for Embroidery
- SA5810 Brother Pacesetter® Medium Weight Tear-Away Stabilizer
- Brother Free Design of the Month
- Embroidery needle for embroidering
- Basic sewing notions including thread and a removable marker, plus low tack tape and several paper clips or small sewing clips.
Fabrics and supplies for needle case:
- One piece of linen or other firm, even weave fabric measuring 8-inches wide X 16-inches long for outside of needle case
- Note: Fuse medium weight interfacing to the wrong side of this piece
- One piece of cotton fabric such as batik measuring 6-inches wide X 12-inches long for inside of needle case
- Four pieces of clear vinyl with each piece measuring 8-inches wide X 2-inches long for inner pockets
- Double fold bias tape, two pieces measuring 6-inches long for trimming top and bottom of case, and two pieces measuring 13-inches long for trimming sides of case
- Snap for closure at top of case
Download the February Free Design of the Month:
Design size:
- 3.62" High X 3.46" Wide
- (92.00mm High X 87.9mm Wide)
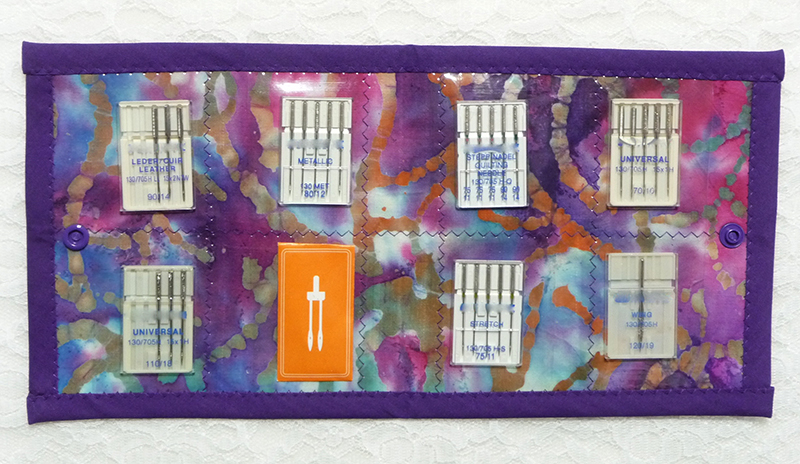
Inside of needle case:
Steps to Create Needle Case
- Transfer design to your machine. Add lettering to complete the phrase using built in fonts. See example in Figure #1.
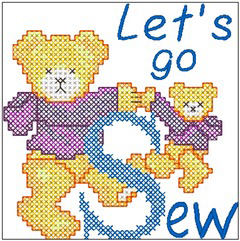 Figure #1[/caption]
- Hoop the oversized piece of linen with a layer of tear-away underneath. Embroider entire design leaving a margin of fabric above the motif. See Figure #2.
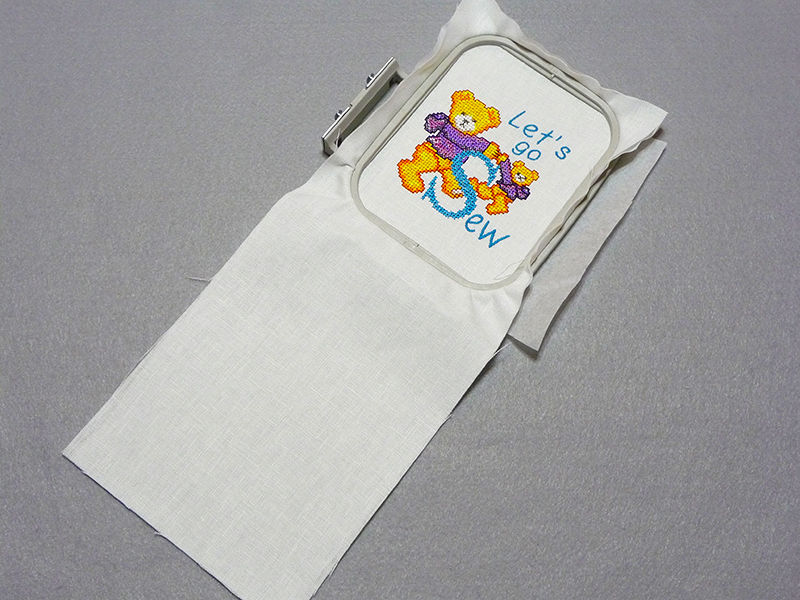 Figure #2[/caption]
- Un-hoop and remove excess tear away. Press, and then trim to equal 6-inches wide x 12-inches long, leaving 1 ¼-inch of space above the design, with motif centered near the top edge.
- Attach the Non-Stick roller foot to the machine. Assemble pieces to complete the needle case. See Figure #3.
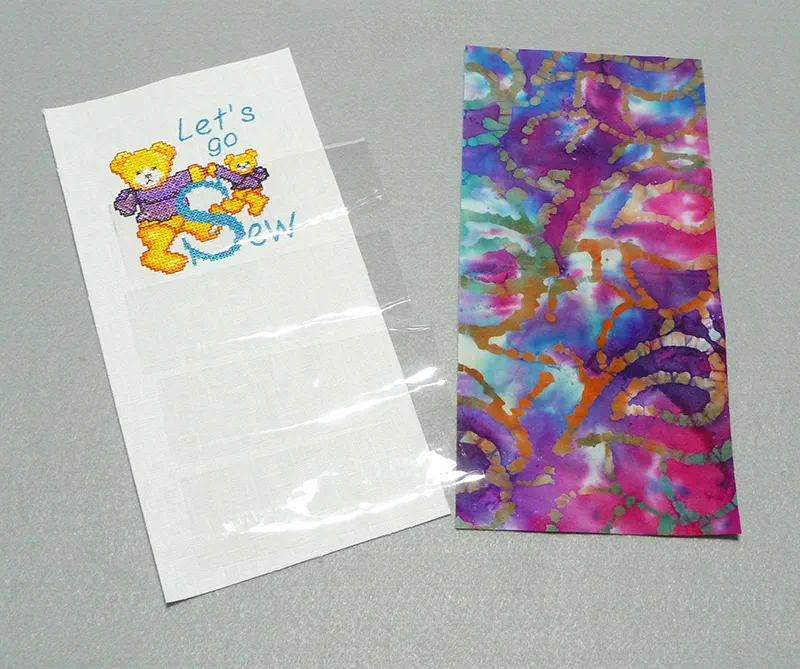 Figure #3[/caption]
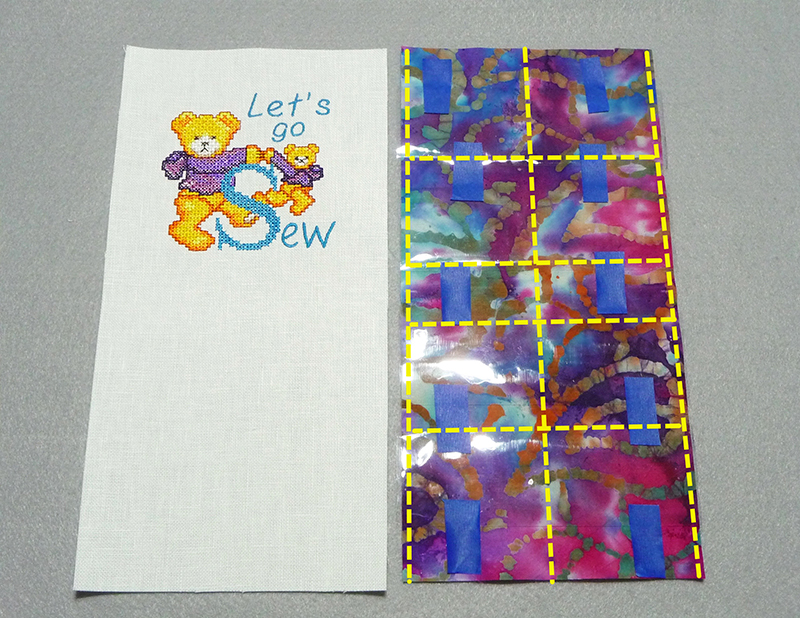
- Both pieces for the needle case should be the same size. When needle case is folded in half and completely stitched you will have four small pockets on each side of the case. Prepare batik piece for adding the four clear pockets by positioning the pockets and securing them with small pieces of tape as follows:
- Begin by positioning the top of each pocket 1 ¼-inch from the short edge at each end.
- Space the next pocket ½-inch below the first at each end. There will be a space of approximately 1-inch between the pockets at the center of the long strip. Begin by using a straight stitch to anchor the pieces along each long edge. Next, select a zigzag stitch (width 2.5) (length 3.0). Stitch the bottom edge of each pocket next, and end by stitching a line down the center to divide the pockets in half.
Note: Use the image below as a guide for placement and stitching lines. Yellow dashed lines indicate all stitching lines. Each short yellow line represents stitching line for bottom of pockets. Top of each pocket is left open for inserting packs of needles.
Tip: It's important to use very low tack tape so it doesn't leave a residue on the vinyl. Test first on a small piece of vinyl. Remove the tape as quickly as possible after using it to avoid residue. You can also consider using clips to secure each pocket in place temporarily.
See Figure #4 for an example of stitching with the roller foot.
[caption id="attachment_13070" align="aligncenter" width="800"]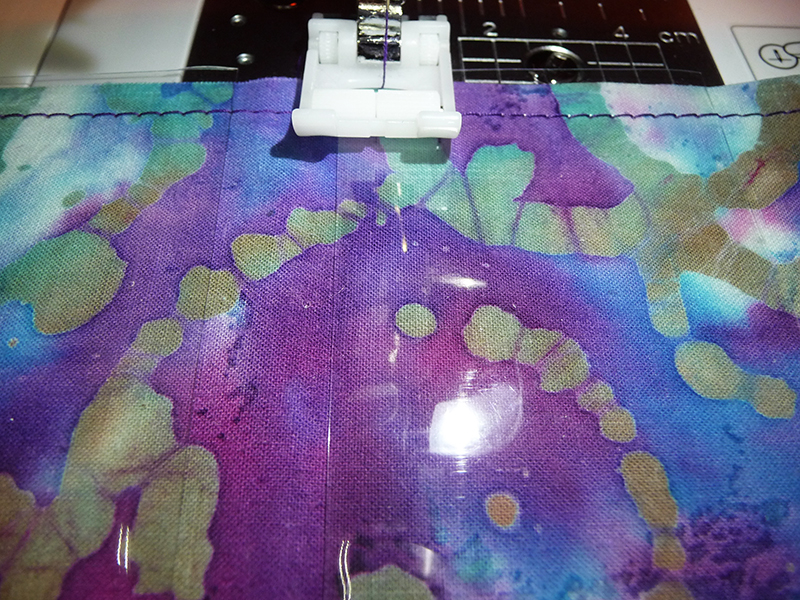 Figure #4[/caption]
See Figure #5 for an example of completed pocket stitching with red arrows showing beginning and ending for each line of zigzag stitching.
[caption id="attachment_13071" align="aligncenter" width="800"]
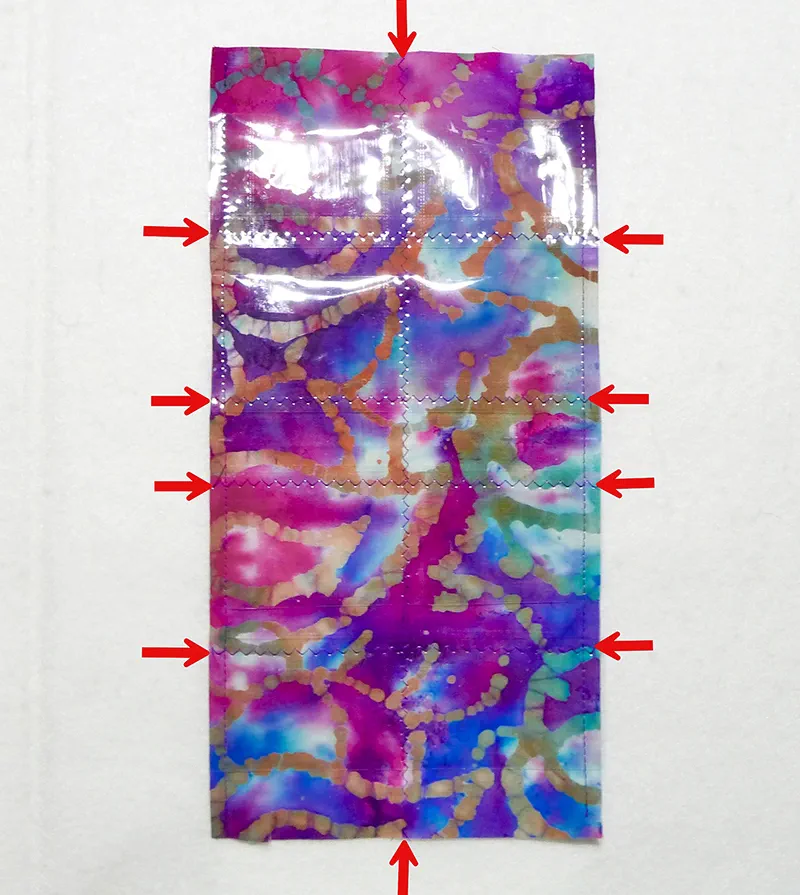 Figure #5[/caption]
- To finish case, first sew bias trim to short ends, using clips to keep bias in place and leaving raw edges at each side edge. See Figure #6.
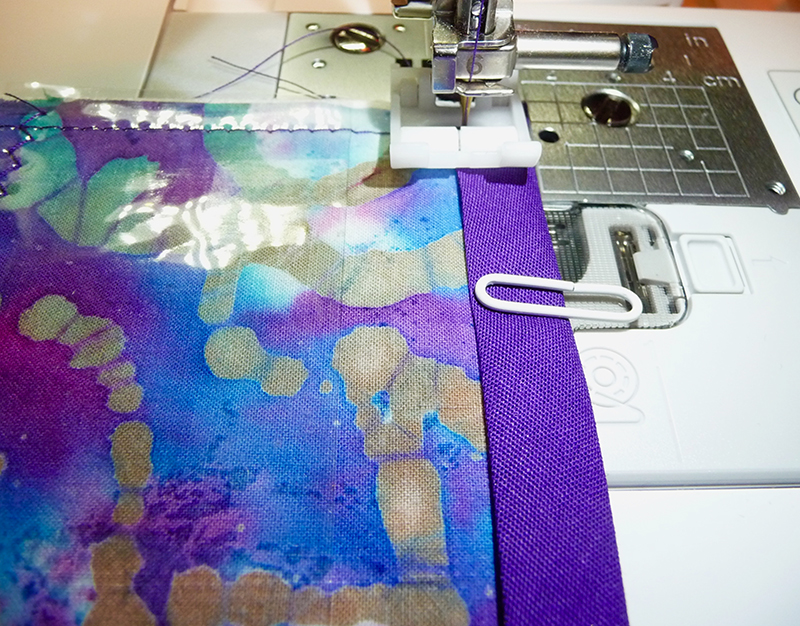 Figure #6[/caption]
Trim the two long sides with bias, turning under and enclosing 1/2-inch of bias at each end.
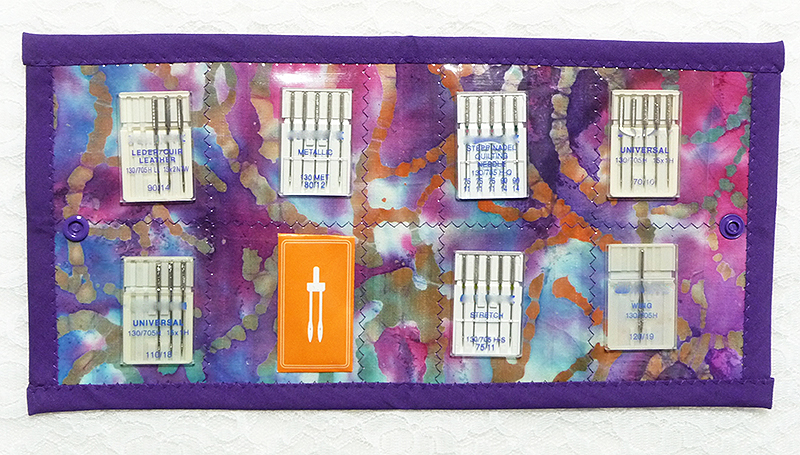
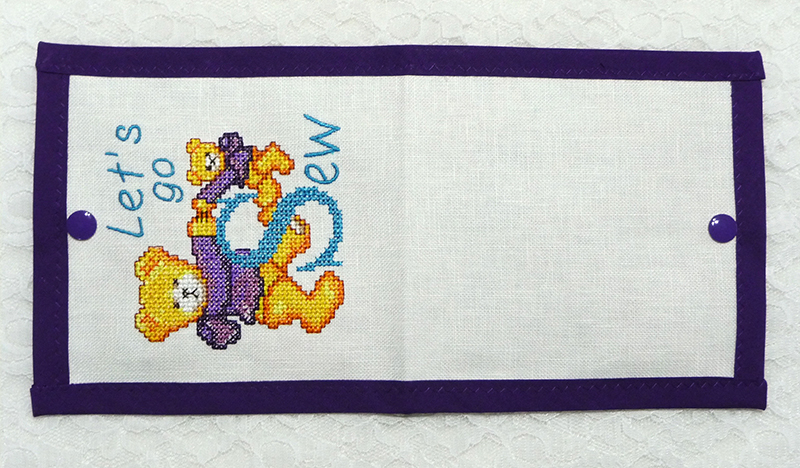
- Attach snap parts in the center of each short end. You are finished! Please see the inside and the outside of the completed, unfolded case below:
 Additional ideas:
- If you plan to carry your needle case to sewing classes and retreats you may want to consider putting your contact information inside, or better yet, embroider the info on the opposite end of the case.
- To fully secure needles inside a case that will be tossed to and fro, you may want to add additional snaps at the sides or sew on small tabs of hook and loop tape for extra security.
- Be sure to take a look at the remaining Cross Stitch Bear alphabet designs found on the Brother iBroidery.com design download site.
These designs are very versatile and would certainly be ideal for Quilt blocks, wall hangings, decorator items, and more!

