Tee Time Golf Pouch
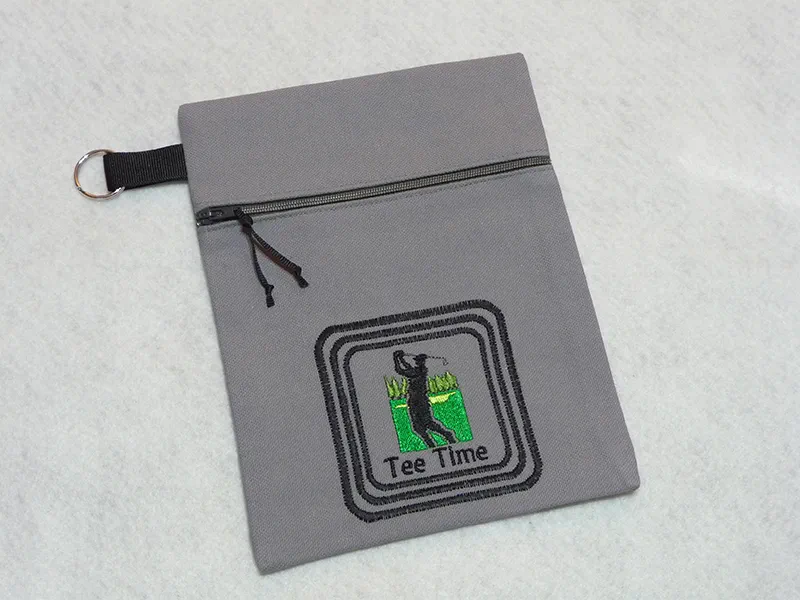
August is National Golf Month so we thought it would be fun to acknowledge it with our golf themed project featuring the Brother iBroidery Golf Design. This design is small so you can use it on shirts, hats, bags, and more. It is featured here on a neat little pouch that’s perfect for small golf essentials like ball markers, divot fixers, and or course, golf tees! This pouch can be easily decorated with other designs and used as a catch-all for lots of items. Follow along and you’ll see step by step how to make a fully lined bag with all raw edges enclosed. I’ll also show you how to cut some corners and make a super simple unlined version. Are you ready? Let’s go sew!
Supplies:
- Brother sewing and embroidery machine
- Brother Embroidery Threads and Bobbin Thread for embroidering.
- Brother zipper foot
- SA5810 Pacesetter Medium Weight Tear-Away Stabilizer
- Size 11 embroidery needle for embroidery.
- Size 14 jeans needle for constructing pouch.
- Basic sewing notions including thread to match or blend with fabrics.
- Nylon zipper measuring 7-inches or longer. Note: The longer the zipper, the easier it will be to stitch. Excess zipper gets trimmed away during construction.
- One piece of grosgrain ribbon measuring 5/8-inch wide X 4-inches long for side loop.
- One piece of grosgrain ribbon measuring 1/8-inch wide X 6-inches long for zipper pull.
- Optional: A 1-inch jump ring for attaching to clip or carabiner. Clip or carabiner for attaching pouch to golf bag.
- Fabrics for pouch: Select a firm, medium weight woven fabric such as duck cloth for the outside of the pouch. Choose quilt weight cotton for the inside lining. See instructions in Step #1 and Step #2 for cutting information and size of pieces.
- Paper or pattern tracing cloth to make a pattern for the pouch.
- Brother iBroidery Golf Design
Note: The machine featured in this project is the Brother XP1 Luminaire but you can create this project using any machine with a 4-inch hoop.
Note: Finished size of pouch featured in the above photo is approximately 5-inches wide X 7 1/2-inches long.
See Figure #1.
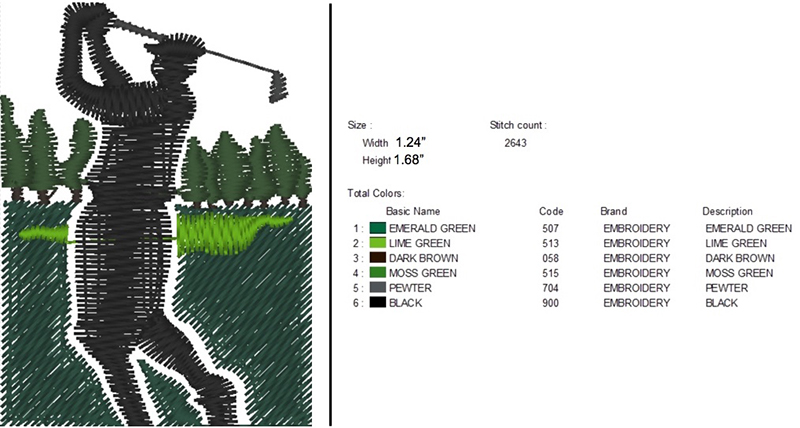 Figure #1
Steps to Create Pouch
To make pouch patterns, create two rectangular pattern pieces using measurements in Figure #2 as a guide. Label as piece A and piece B as shown. Mark the center of pattern A to indicate center position of embroidery design. Cutting instructions will follow in Step #4.
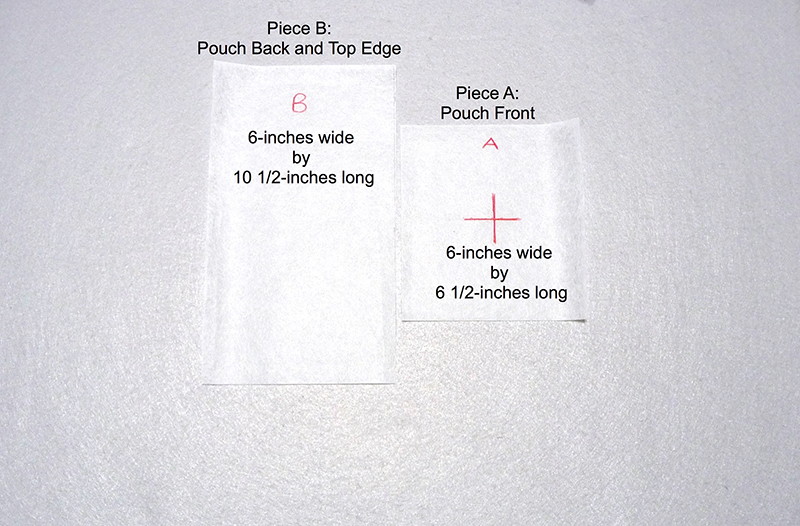 Figure #2
Cut an oversized piece measuring 9-inches square from the fabric you selected for the front of the pouch. Create a combination design using a built-in font and three repeats of a square frame shape from the built-in embroidery design menu. My finished design measures about 3 ¼-inches square. See Figure #3.
 Figure #3
Set up machine for embroidery. Hoop oversized fabric with a layer of the medium weight tear away stabilizer, centering it in the 4-inch hoop. Embroider your design. When embroidery is finished remove tear-away and press piece flat. Put pattern A on top, with center marking over center of embroidery design. Cut piece A and set aside to use for front of pouch. See Figure #4.
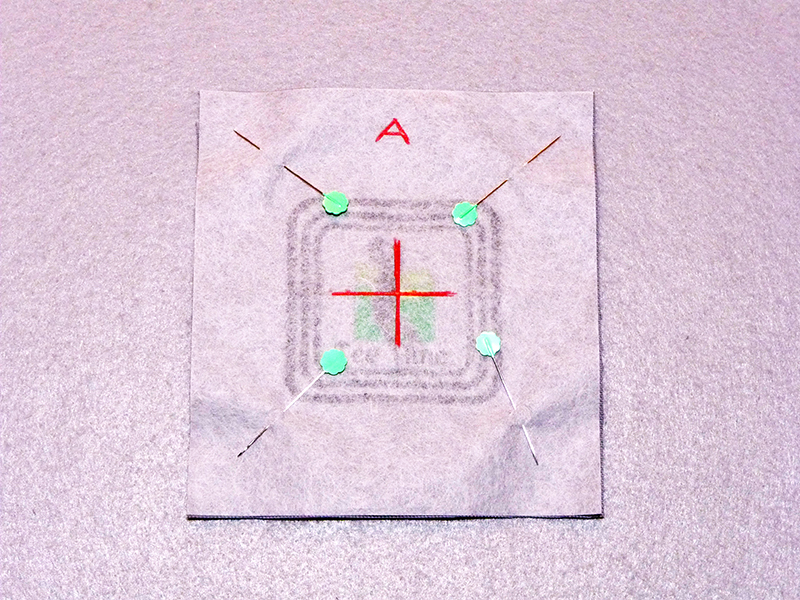 Figure #4
Use pattern A to cut a matching piece from lining fabric. Use pattern B to cut one piece from outer fabric and one piece from lining fabric. Gather pieces to prepare for assembly. See Figure #5.
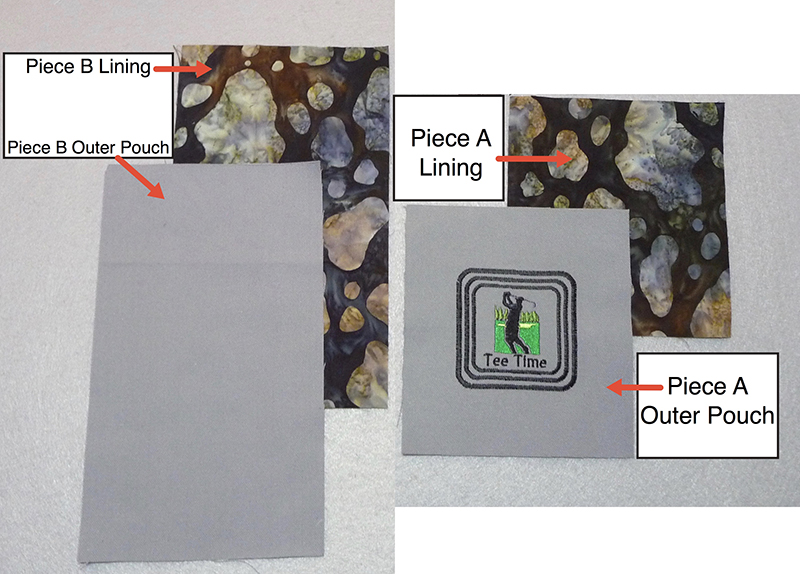 Figure #5
It's time to add the zipper. Follow steps in the order described here:
Layer side one of zipper as follows: Place embroidered piece A right side up. Layer zipper along the upper edge with right side down and excess zipper extending at each end. Place lining on top with right side down. See Figure #6a.
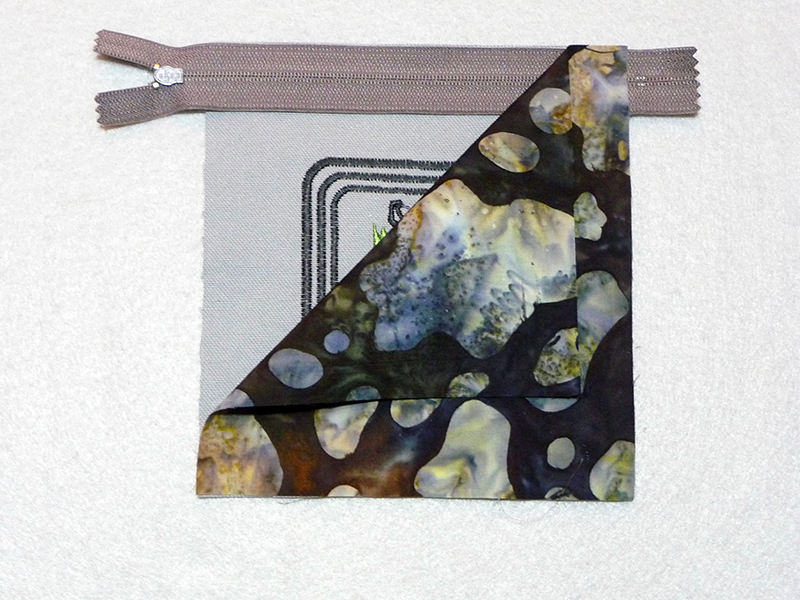 Figure #6a
Snap zipper foot on machine and select a center needle straight stitch. Tip: If your zipper is only slightly longer than your piece, you’ll want to reach under the lining and open zipper part way to avoid getting in the way of the zipper tab while sewing. See Figure #6b.
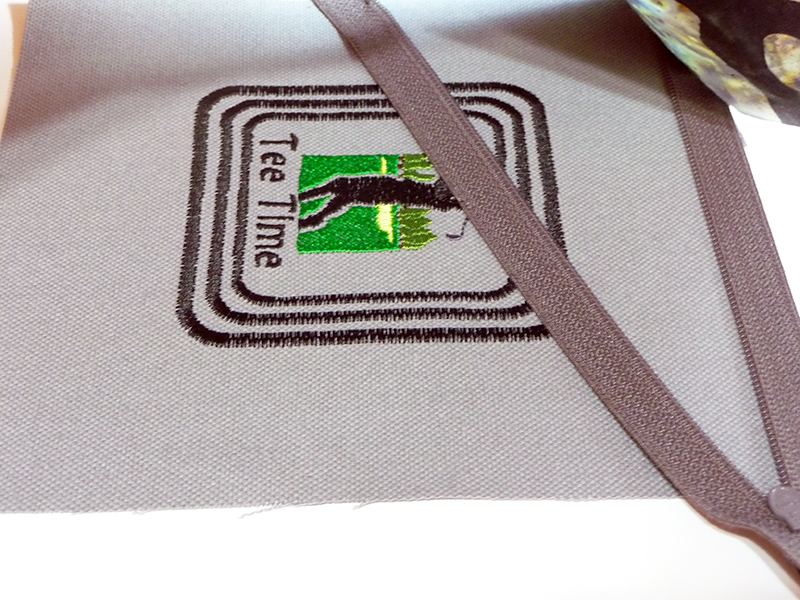 Figure #6b.
Sewing through all layers, sew zipper along top edge, stitching approximately 3/8-inch from the edge. See Figure #6c.
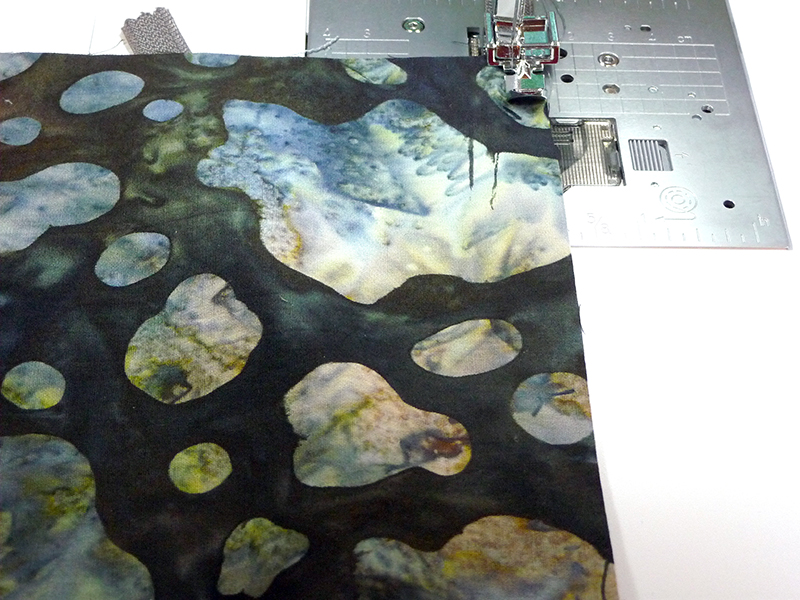 Figure #6c.
Flip layers so zipper faces right side up and both fabrics are pushed to one side. Stitch along the top edge to secure zipper. See Figure #7.
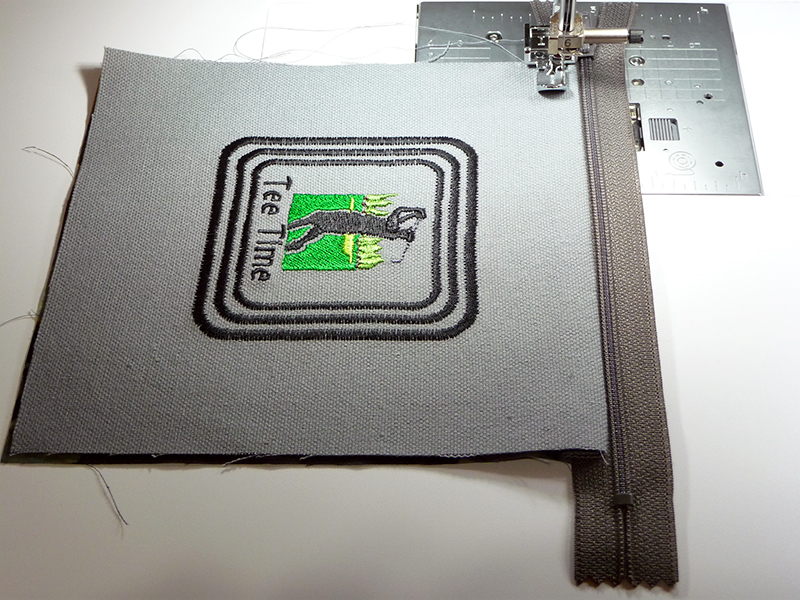 Figure #7.
Layer side two of zipper as follows: Place lining piece B right side up. Note that the pin shown below indicates the right side of the lining fabric. See Figure #8.
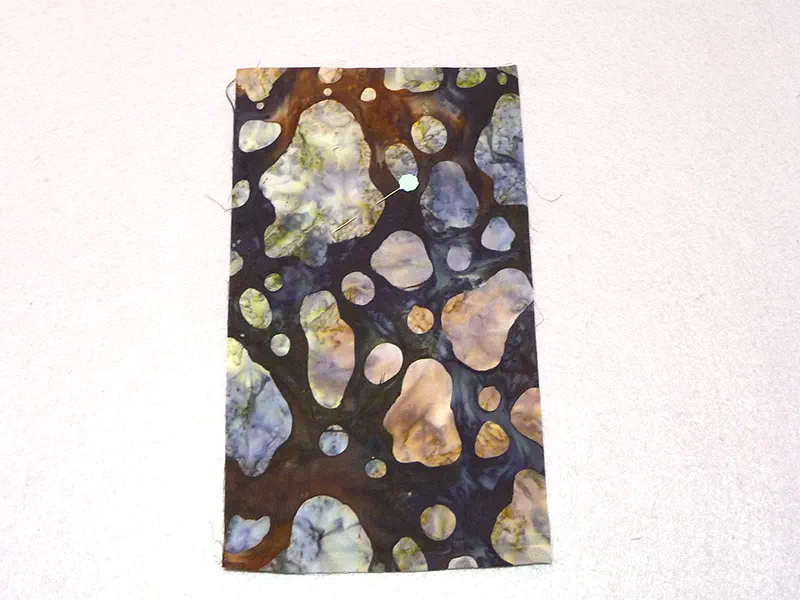 Figure #8.
Select layers with previously sewn zipper. With zipper facing right side up, layer zipper on top, having edge of zipper tape even with raw edge of lining. Note that embroidered layer and lining layer extend below the zipper. See Figure #9.
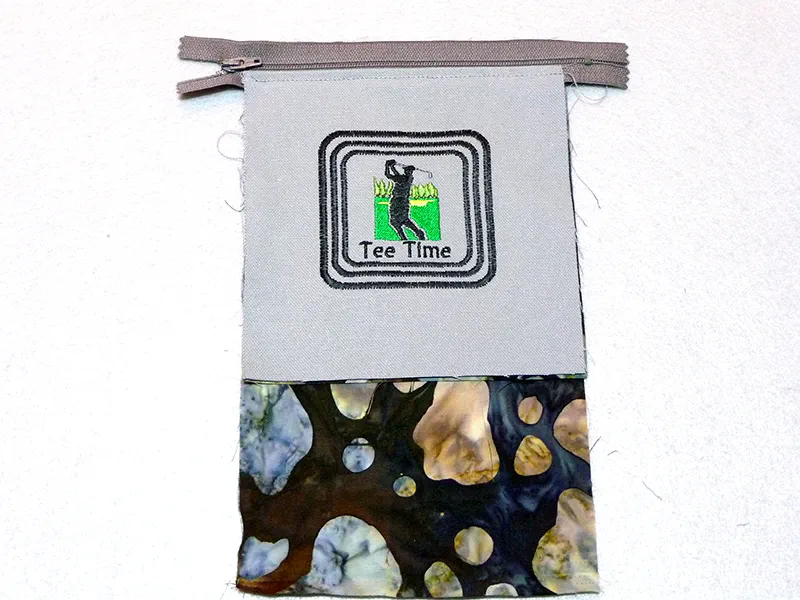 Figure #9
Finally, layer outer piece B on top, with right side facing down. See Figure #10.
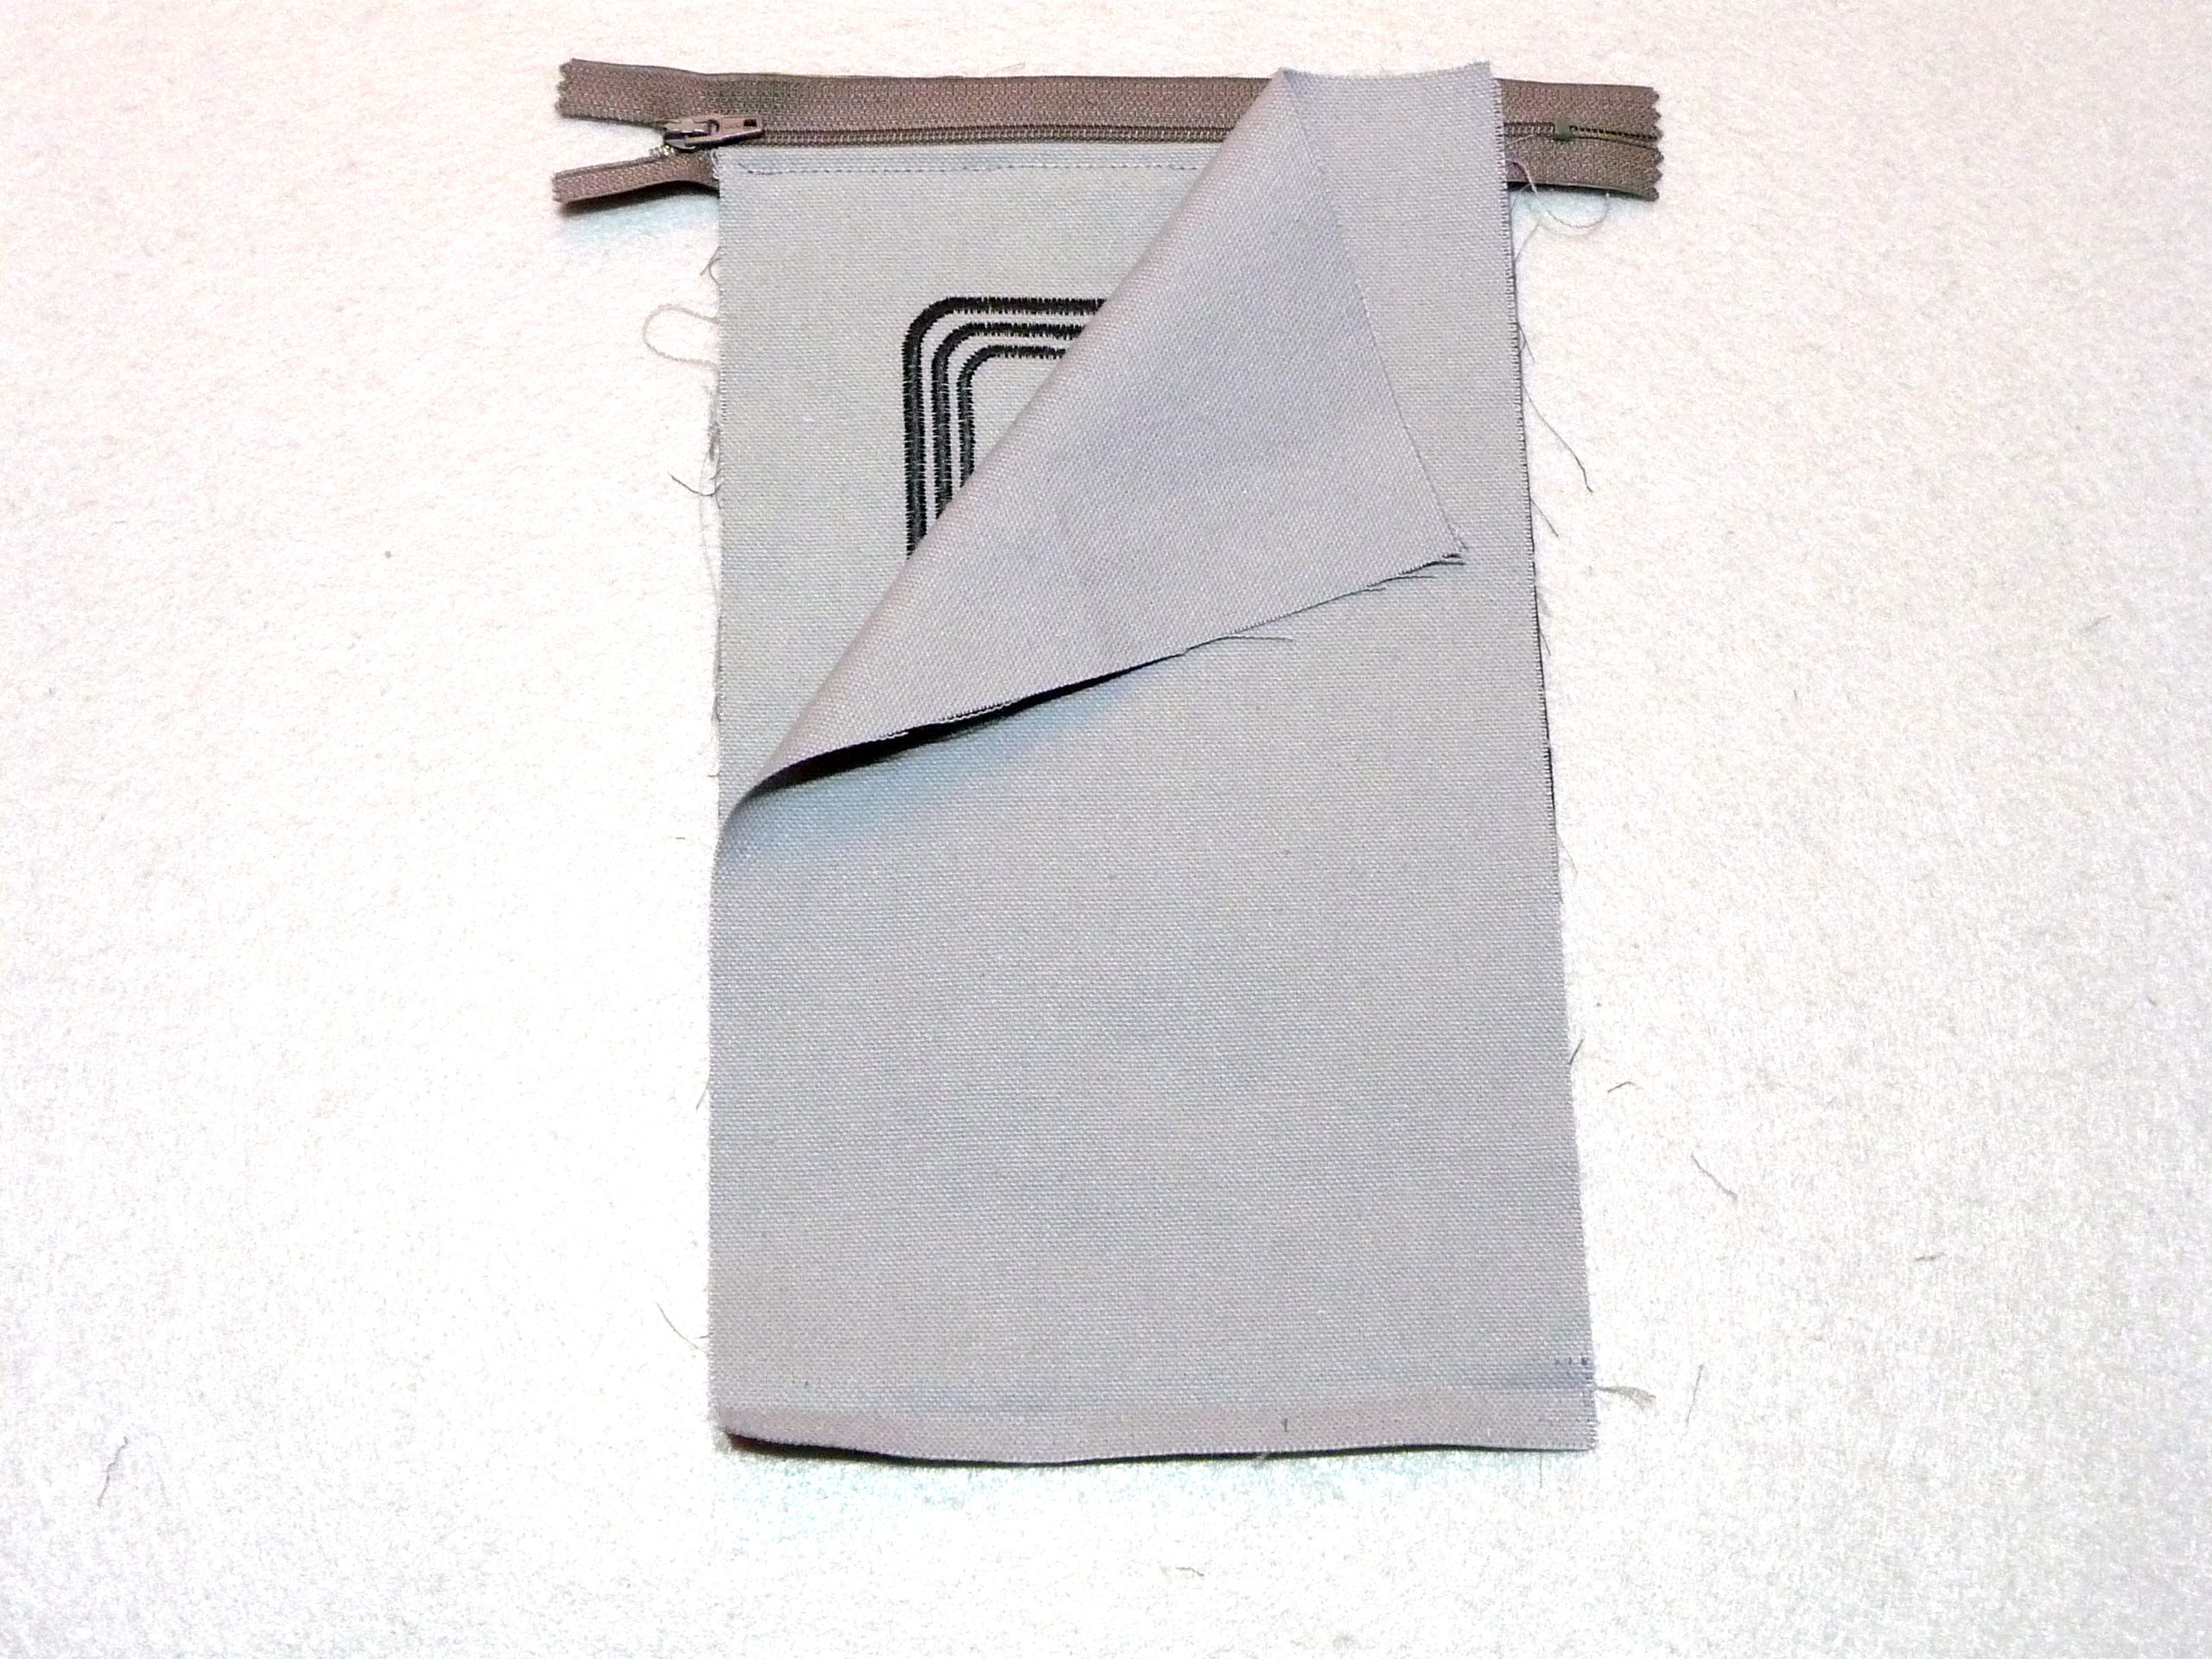 Figure #10
Sew approximately 3/8-inch from the edge as you did before, opening the zipper part way if necessary. See Figure #11a and Figure #11b.
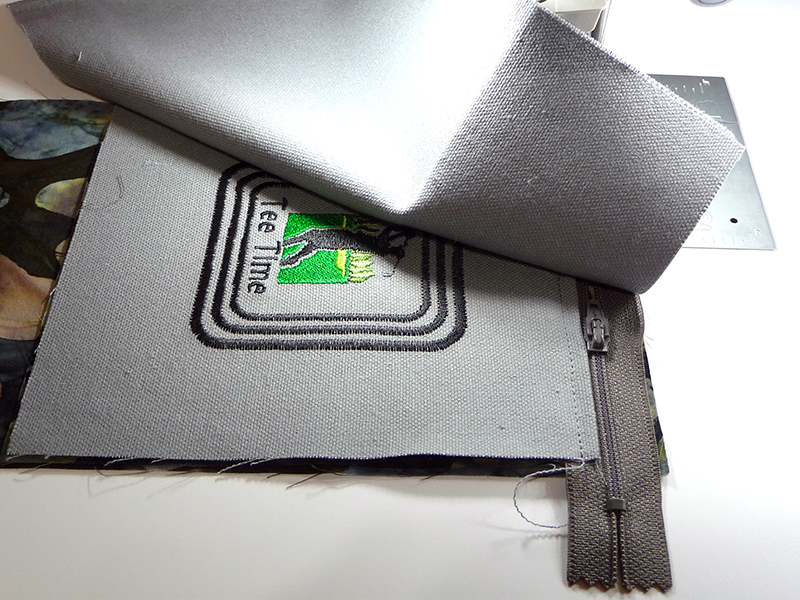 Figure #11a
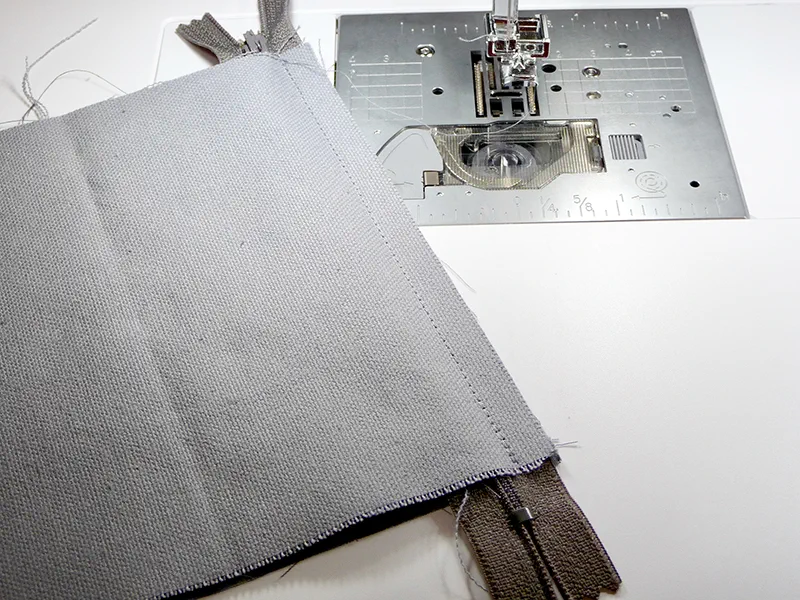 Figure #11b
Open out pieces on each side of the zipper and press. Important: Do not trim excess zipper yet. Stitch close to zipper to match the opposite side. See Figure #12.
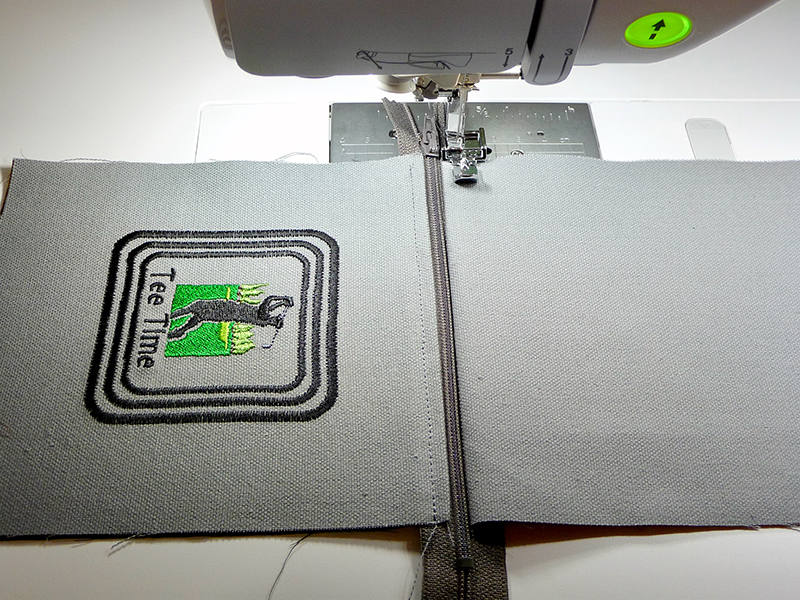 Figure #12
You now have one long piece. See both sides in Figure #13.
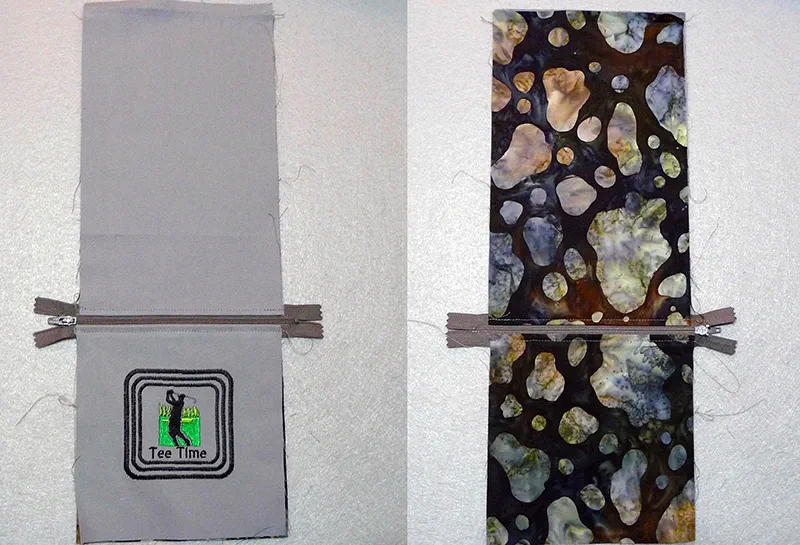 Figure #13
You're almost finished! It's time to sew bottom seams and side seams. Begin by placing outer fabric pieces right sides together with the short edges matching. See Figure #14a.
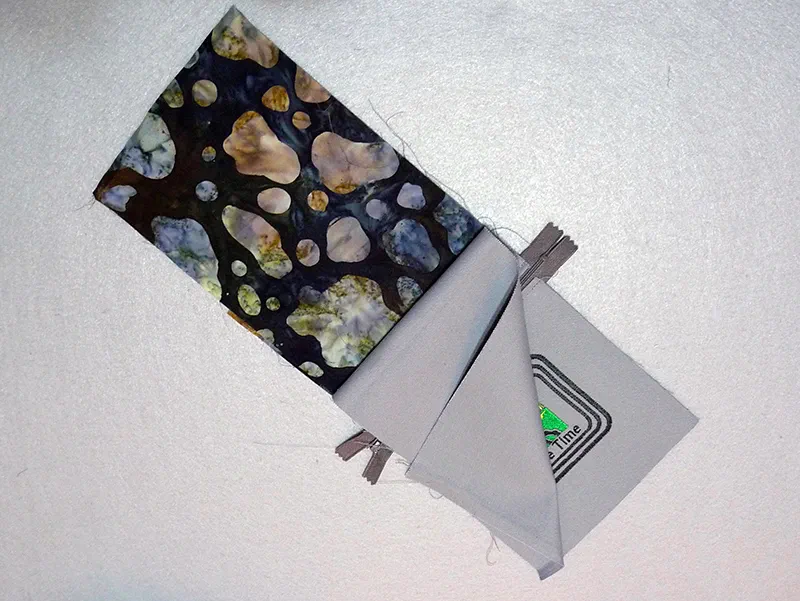 Figure #14a
Sew bottom seam using a ½-inch seam allowance. See Figure #14b.
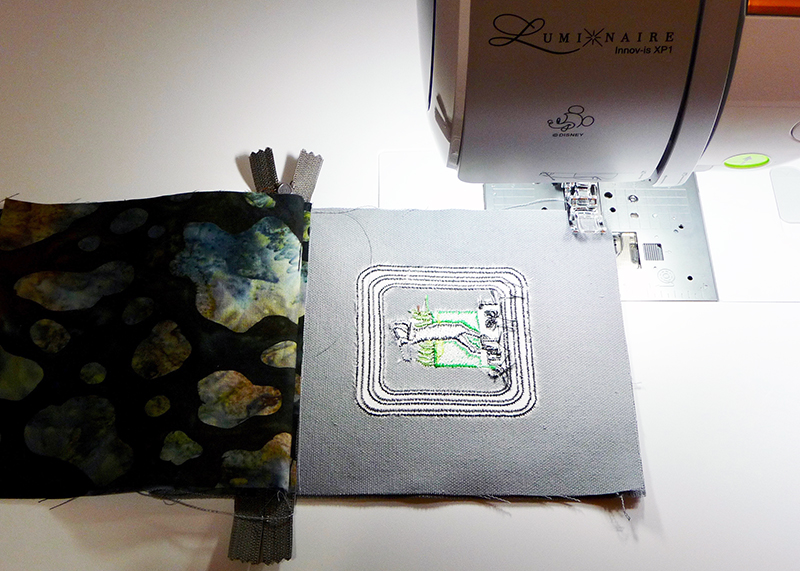 Figure #14b
Now place short ends of lining right sides together, placing pins 1 ½-inch from each side edge. Sew bottom seam using a 5/8-inch seam allowance, leaving seam open between pins. Note: Red dashed lines indicate opening for turning. See Figure #15.
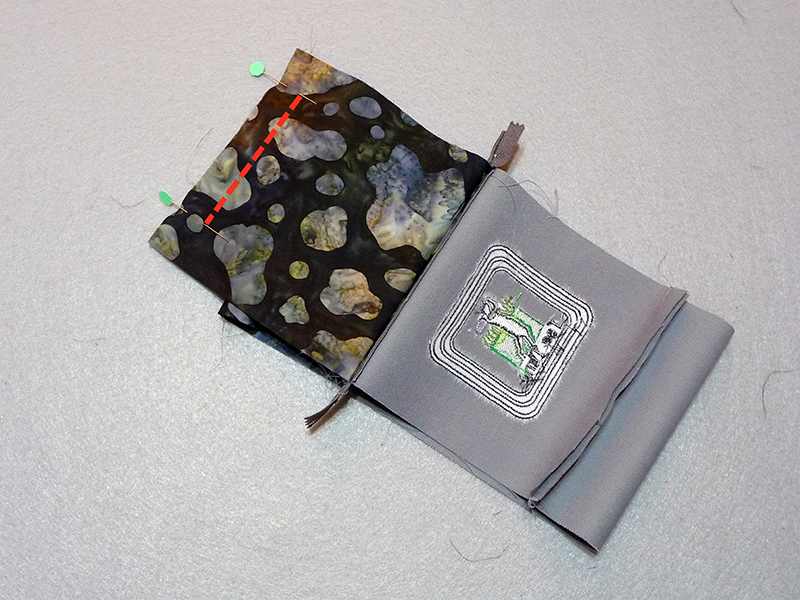 Figure #15
Before sewing side seams fold ribbon in half and place near top edge. Open zipper halfway. See Figure #16.
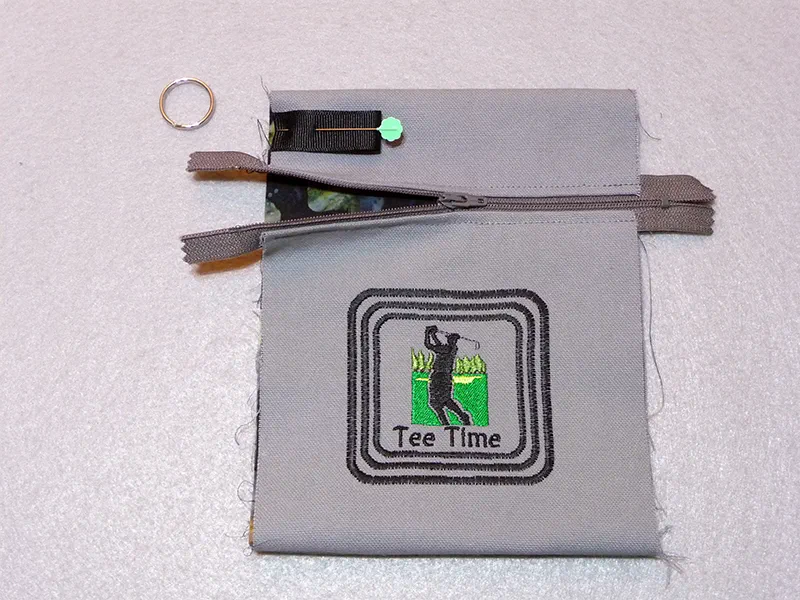 Figure #16
Turn so that the wrong sides face out. Press bottom seam to one side on each piece. Layer pieces so bottom seams and top fold lines are matching. See Figure #17.
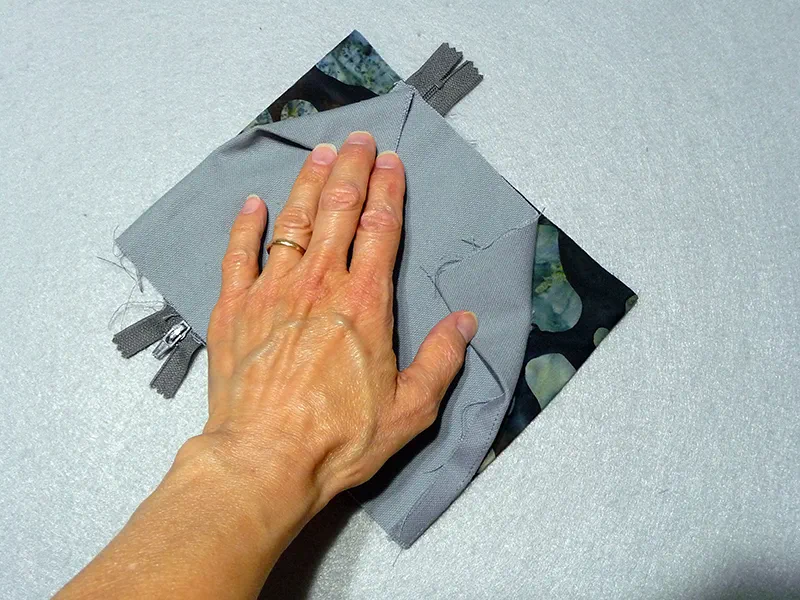 Figure #17
Pin layers together. See Figure #18.
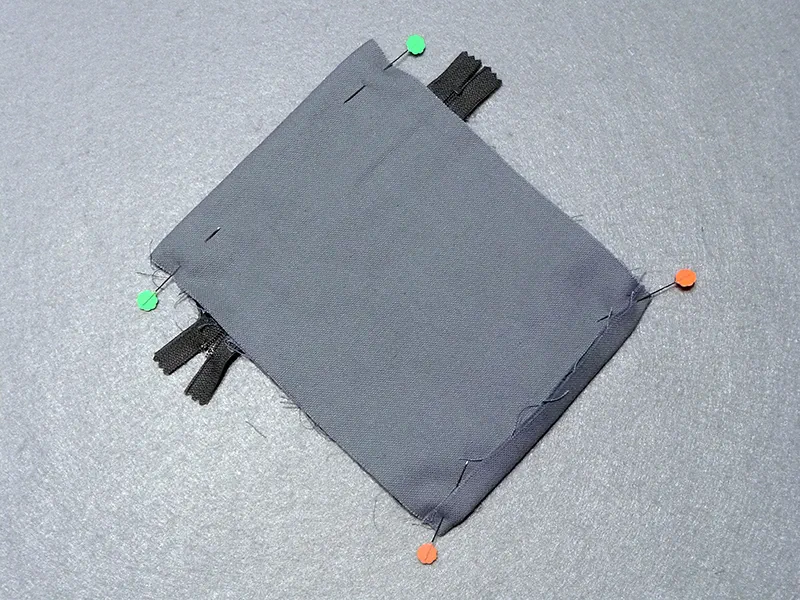 Figure #18
Sew side seams using ½-inch seam allowance. Reinforce seam at each end and double stitch along zipper teeth. See Figure #19.
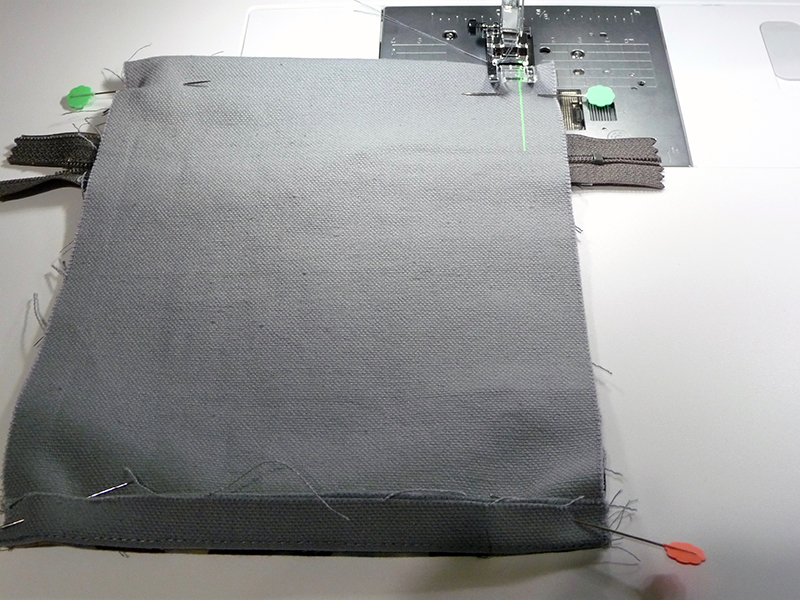 Figure #19
Remove all pins. Trim corners to eliminate bulk. Now you can trim away excess zipper. See Figure #20.
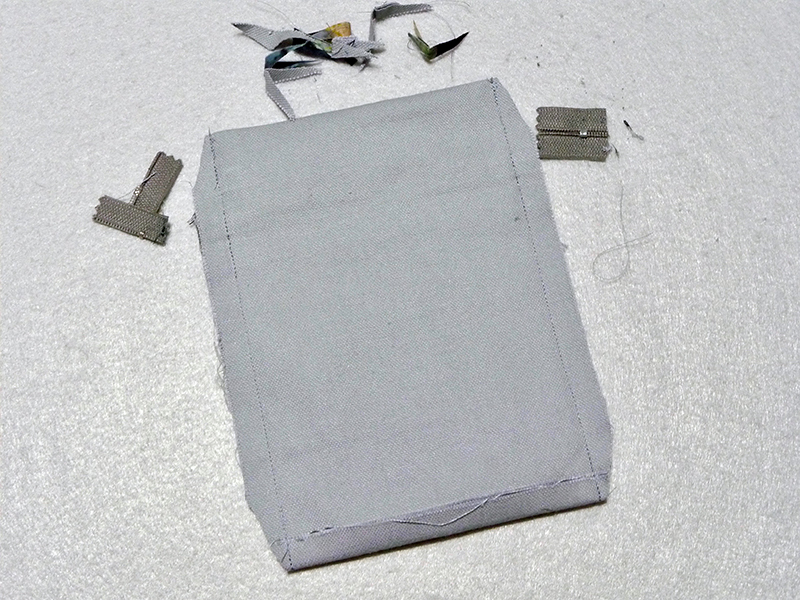 Figure #20
Finish lined version as follows:
Reach through bottom seam opening and pull lining to the outside. See Figure #21.
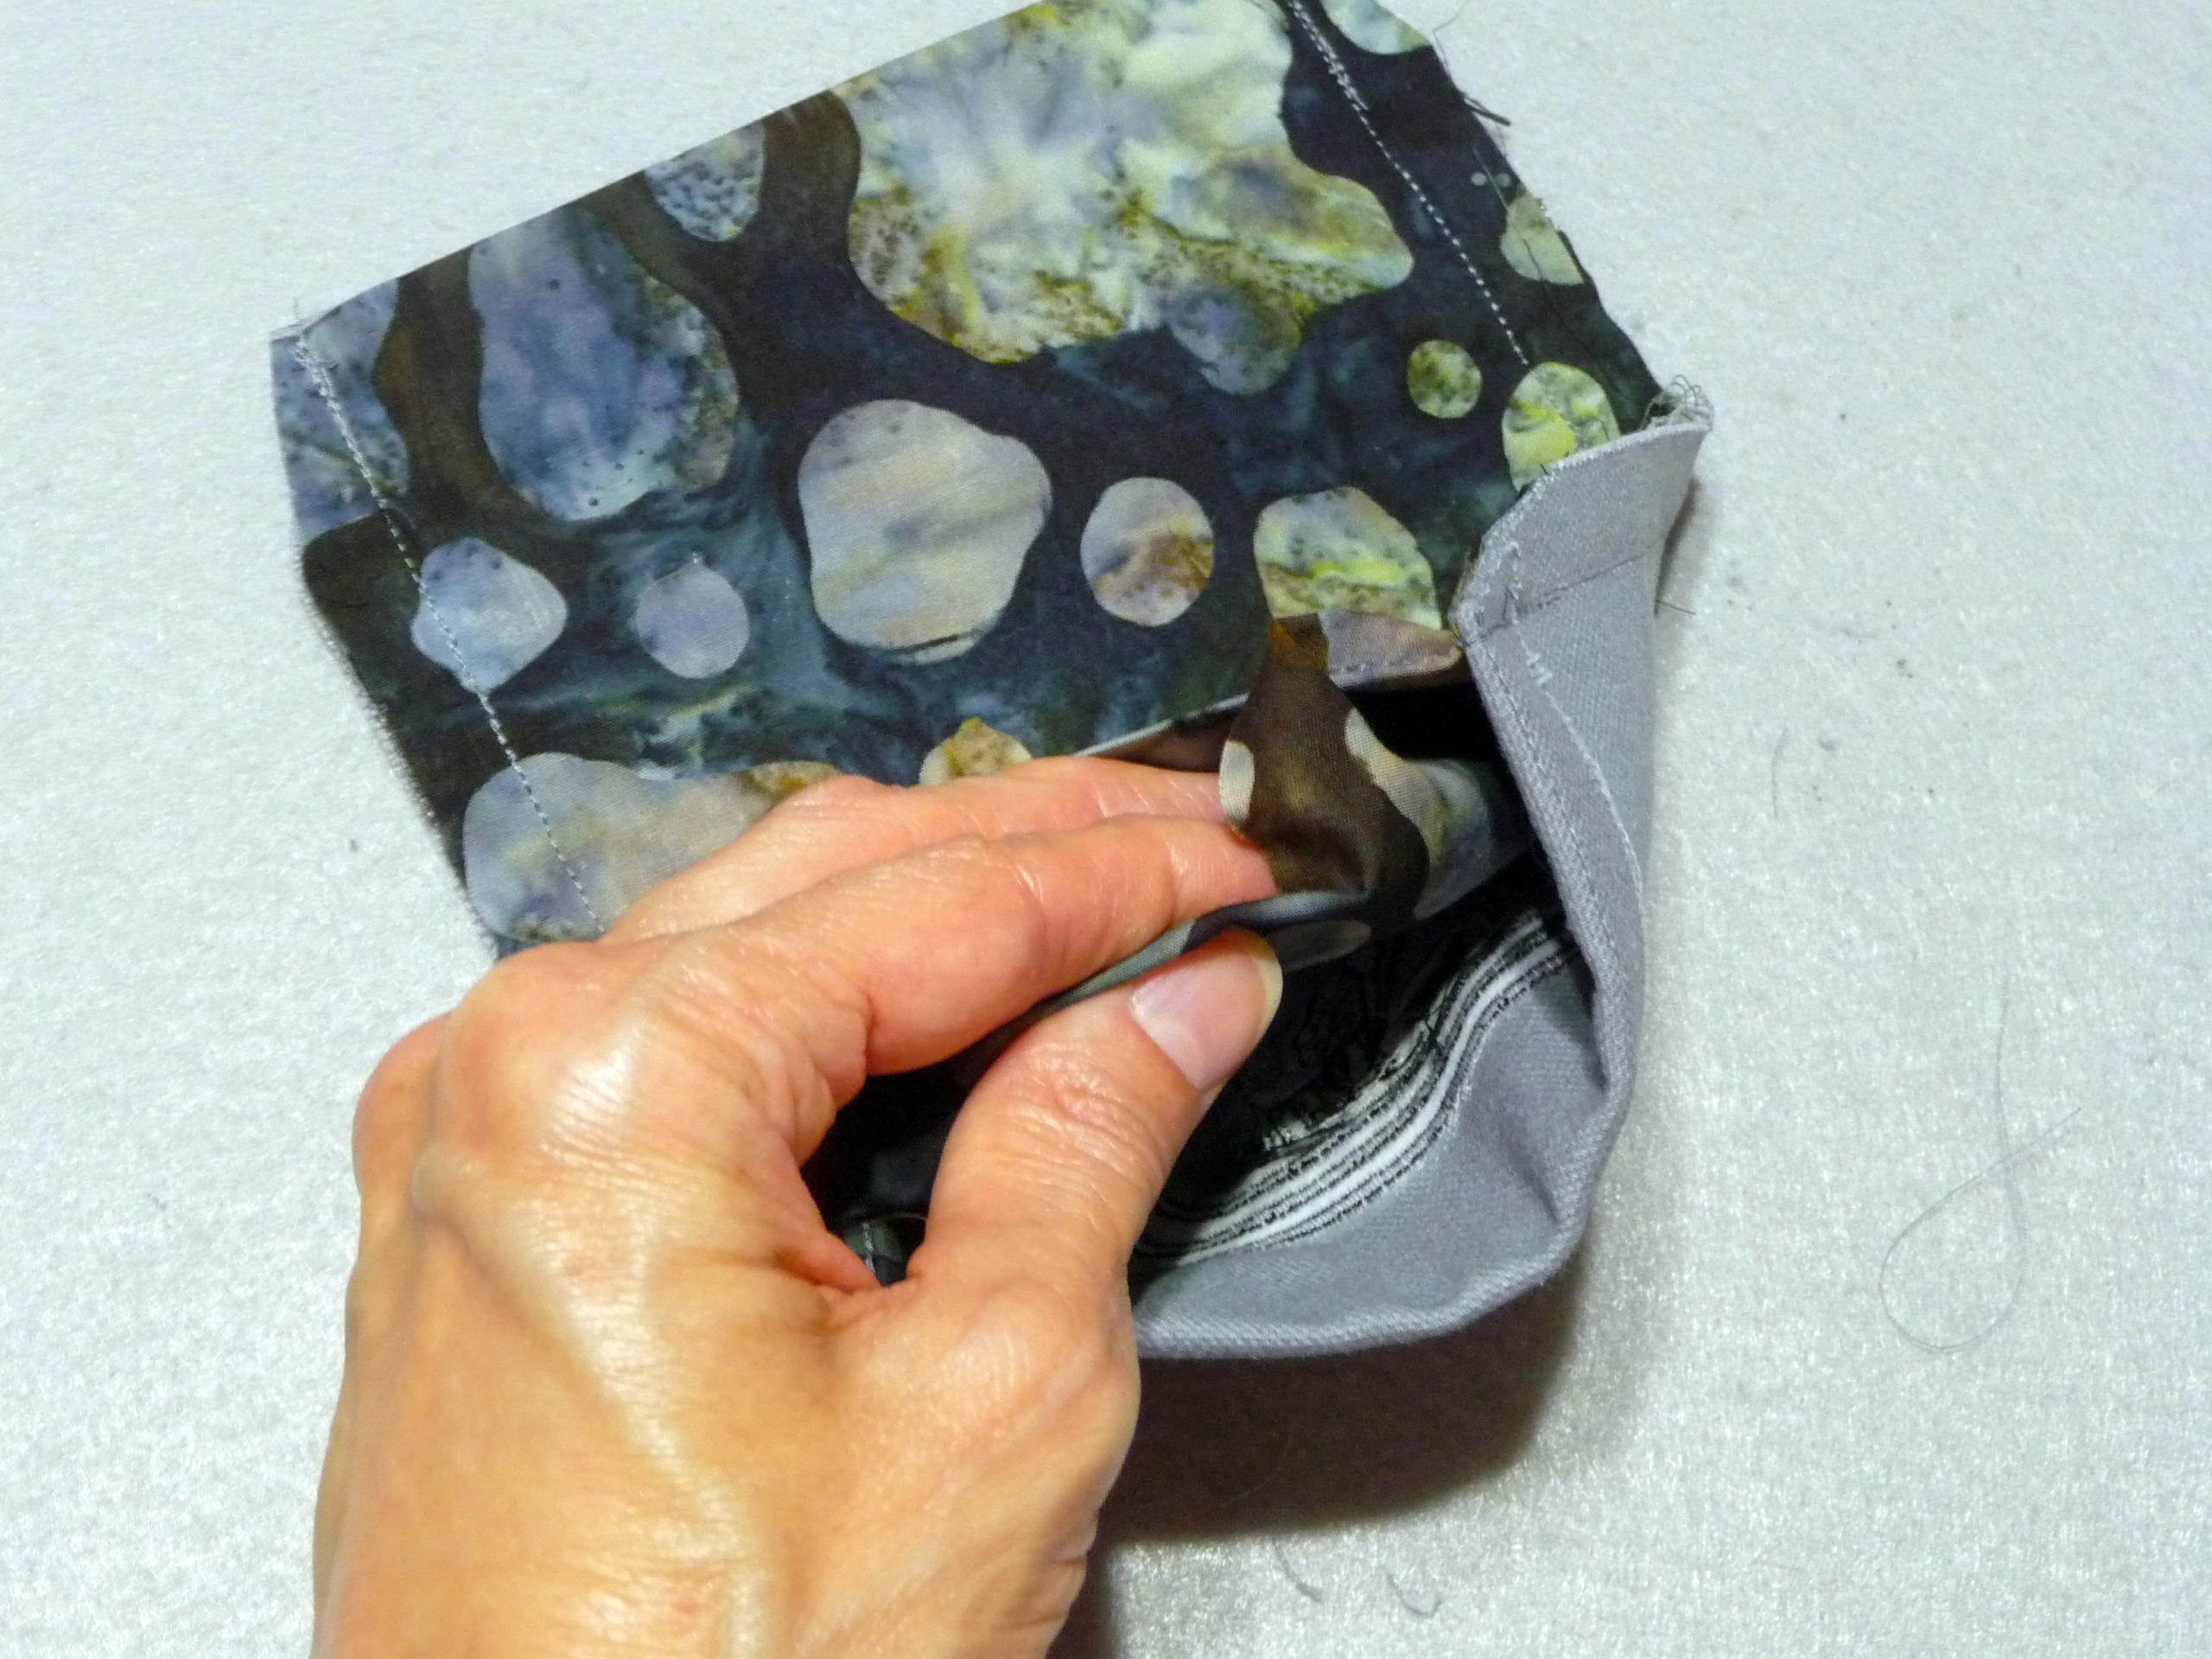 Figure #21
Close opening in bottom seam with hand or machine stitches. Reach through open zipper and pull pouch to outside. It’s going to look a little messy at this point. See Figure #22a and Figure #22b.
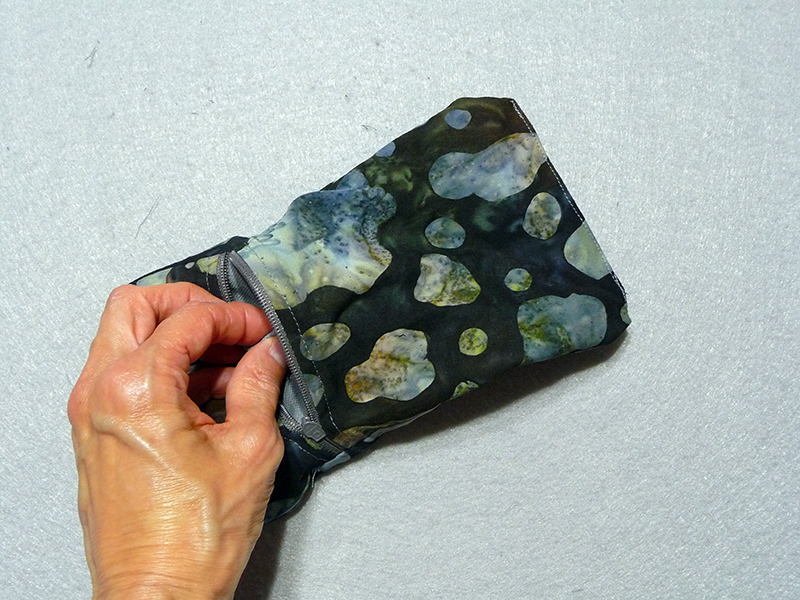 Figure #22a
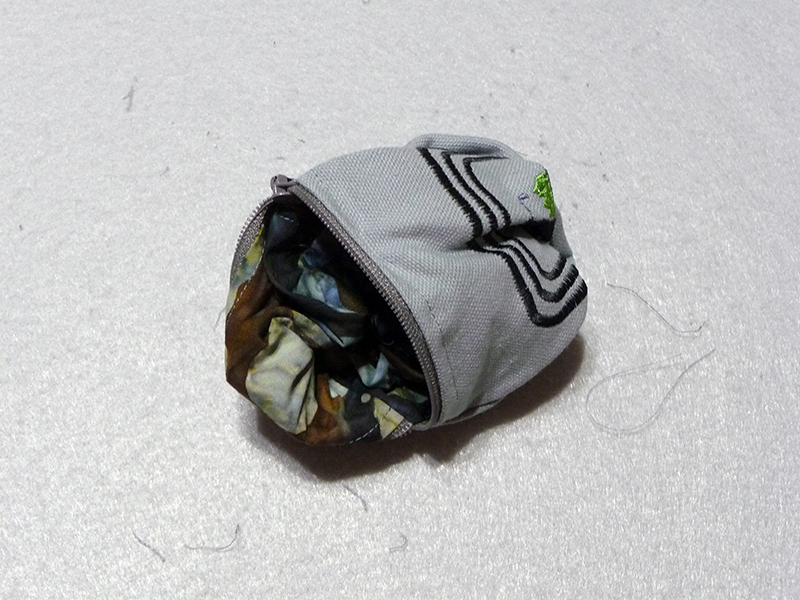 Figure #22b
Gently push out corners and press flat. The pouch is finished and ready for you to add a ring and a clip as desired. Notice how the lining encloses all raw edges, and covers the back side of embroidery, leaving the pouch neatly finished inside and out. See finished pouch at the beginning of these instructions.
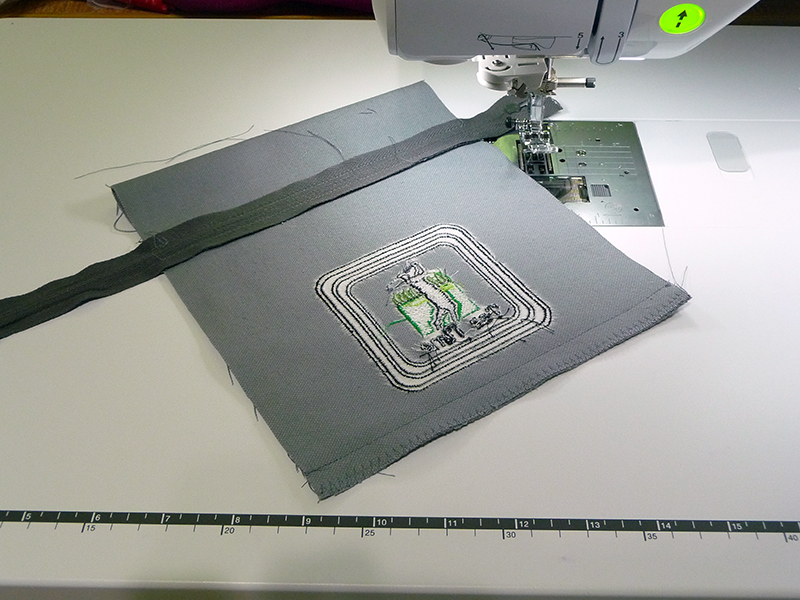
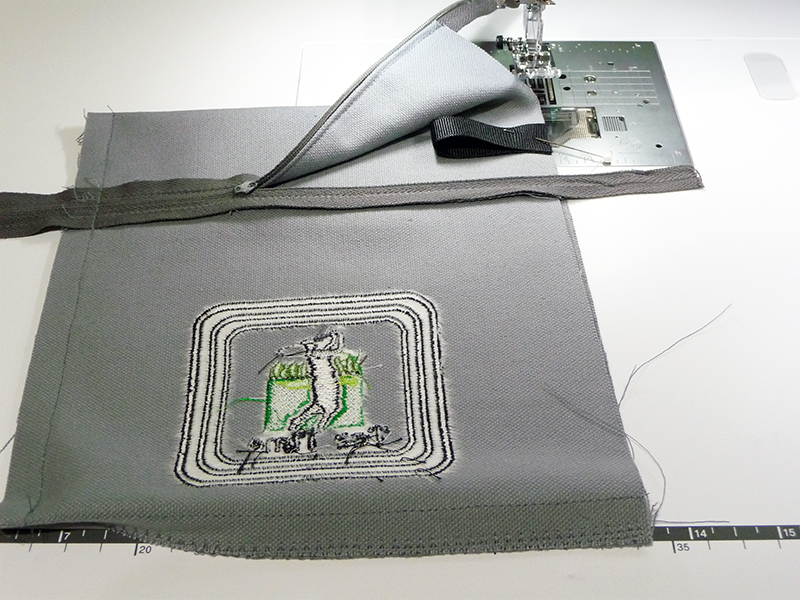
Make a quick unlined version of the pouch as follows: Clean finish two of the short raw edges, press under ½-inch and then stitch one side of zipper tape to each side. Place opposite short edges right sides together, sew bottom seam, and clean finish raw edges. Fold pouch with right sides together, having seam at the bottom. Open zipper halfway and sew both side seams, inserting ribbon on one side before sewing. Clip corners and clean finish raw edges. Turn to right side, push out corners and press as described for previous pouch. Your super simple version of this pouch is finished! See all steps in the four photos below:
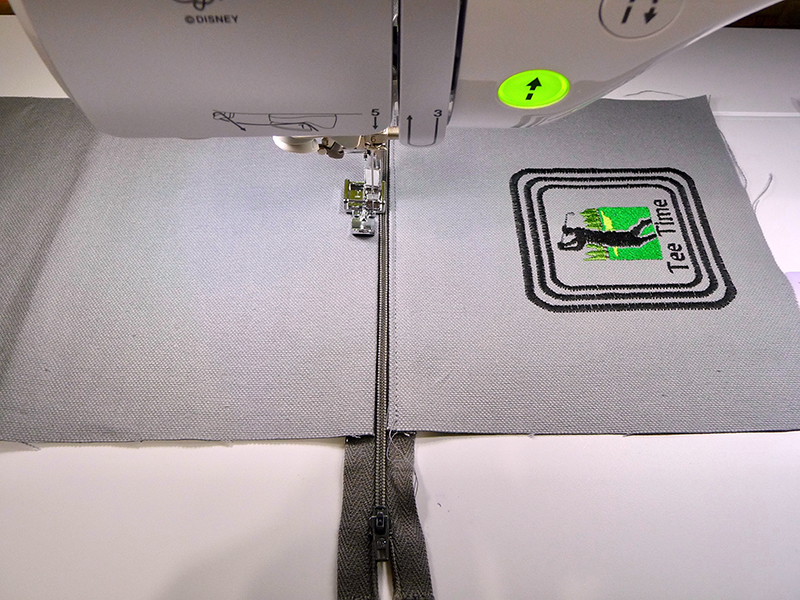

Options and Ideas:
- It’s easy to enlarge this pouch by increasing the width of pattern pieces A and B.
- Consider making this style pouch to use for sewing supplies, cosmetics, office supplies, back to school items, you name it! Personalize the pouch with lettering and appropriate designs built-in to your machine or choose from the many beautiful designs available on the Brother iBroidery.com download site. The unlined version is quick and easy. The lined version takes just a little longer to make, but the finished bag is truly a custom creation. Enjoy!

