Geometric Jewels Sampler Quilt Along Week 4

Hello! This is Wendy of The Weekend Quilter, and I’d like to welcome you all to the fourth week of the Geometric Jewels Sampler quilt along (QAL)! This week is all about quarter-square triangles (QSTs) and split quarter-square triangles (SQSTs).
Referring to the Geometric Jewels Sampler quilt pattern, we’re focusing on pages 7 to 11. The pattern is a FREE download from here if you haven’t got yourself a copy yet.
Now that you have learnt how to accurately trim half-square triangles (HSTs) in last week’s blog post, we are taking those fundamentals and applying it to trimming quarter-square triangles (QSTs) and split quarter-square triangles (SQSTs).
This blog post is the fourth out of six blog posts for the Geometric Jewels Sampler QAL. Each week of the QAL duration (starting from February 27, 2024), there will be a new blog post every Tuesday based around the tasks that will need to be completed for the QAL. Some of the tips are geared towards the Geometric Jewels Sampler quilt pattern. But with that said, you can take the fundamentals from that and apply it to other future quilt projects. To receive updates about the new blog posts as well as weekly QAL tasks, be sure to sign up for the weekly newsletter here. They will be sent via. The Weekend Quilter and only for the 6 weeks of the QAL*.
For more information on what the QAL entails (schedule, tools and supplies, etc.) please check out a previous Geometric Jewels Sampler QAL blog post here. The QAL officially starts on February 27, 2024. You’re more than welcome to join at any point and work at your own pace. You could also follow the same schedule as outlined in the first blog post with all the QAL info at a later date.
We’ll be keeping all our weekly tips, tricks and recommendations at the one location for reference here. So you may want to bookmark this one.
*By signing up for the Geometric Jewels Sampler QAL updates, you also agree to sign up to be on The Weekend Quilter and Brother International email newsletter list. We will not sell your email or spam you.
Supplies and Tools:
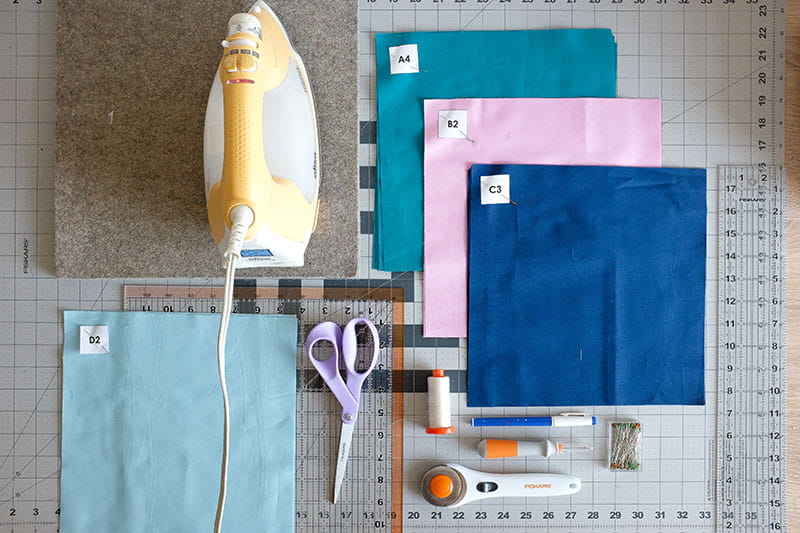
For this week’s task on making QST and SQST blocks, you will need the following:
- Download the Geometric Jewels Sampler quilt pattern for FREE from The Weekend Quilter’s website here.
- Basic sewing machine – the Brother Innov-ís BQ3100 from the Quilt Club Series was used in this tutorial
- Coordinating thread, 50wt cotton for piecing
- Corresponding fabric pieces for QST and SQST blocks – referring to the Geometric Jewels Sampler quilt pattern on page 3, you’ll need the following fabric pieces labelled as: A4, B2, C3 and D2.
- Pins
- Fabric pen or pencil
- Fabric scissors
- Seam ripper
- Iron and ironing board or wool pressing mat
- Rotary cutter
- Quilting rulers – a long ruler and a medium size ruler, at least 10in square in size and has a 45-degree angle guide for squaring up of the QST and SQST units.
- Cutting mat – preferably a rotating cutting mat. There will be an alternative tip if you don’t have one.
- Fabric scissors
- Non-slip quilting ruler grips (optional)
Accurately Trimming QST and SQST Units
I always like to say: if you know how to trim HST units, you would also know how to trim QST and SQST units. The only real key difference is in addition to ensuring the ruler covers the required trimmed size of the QST and SQST unit, and the 45 degree-angle guide is matched up with one of the diagonal seams on the unit; you’ll also need to identify the central point of the trimmed QST and SQST on the ruler and match that up with where all the seams meet in the centre of the units. Before I begin to explain this in more detail, be sure to go back to the previous post and read up on the ‘Tips on Accurately Trimming HSTs’ section. These trimming basics are also applicable to trimming QSTs and SQSTs.
How to Trim QST and SQST Units
Assuming that you have pressed the seams of your QST and SQST units, we are now ready to dive deep into the trimming (or squaring up). If you’re following along with the Geometric Jewels Sampler quilt pattern, they are step 7 on page 9 (QST blocks) and step 7 on page 11 (SQST blocks).
- Check the size of the trimmed QST and SQST as outlined in the quilt pattern. For the Geometric Jewels Sampler quilt pattern, each of the QST and SQST units need to be trimmed down to 9½in squares.
- This next step is all about finding the central point of the QST and SQST units. This central point is one of the variables used to line up the ruler for squaring up the units. By making a note of this measurement, it’s going to ensure the intersection of all the seams are in the centre of the trimmed QST and SQST unit.
To do this, you divide the required trimmed size of the QST and SQST units by two. For example, if the required trimmed size of the QST and SQST units in Geometric Jewels Sampler are each 9½in square, then 4¾in is the central point.
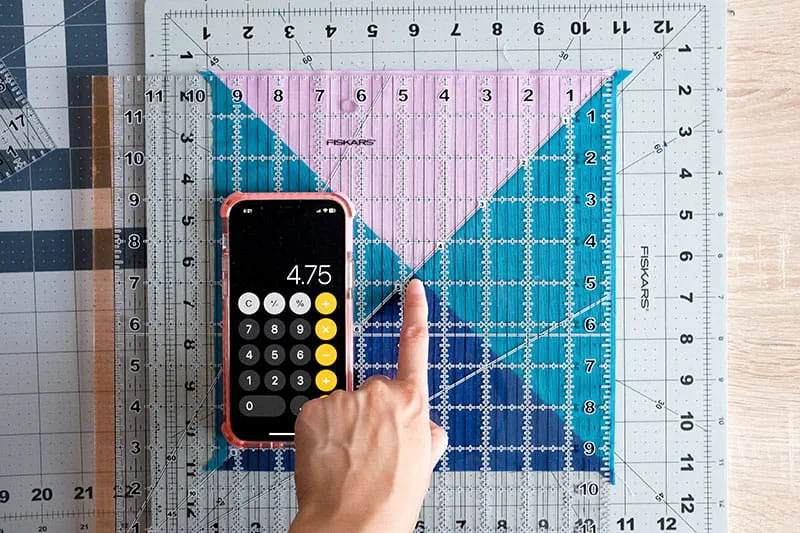
- With the right side of the QST or SQST unit facing up and on the cutting mat. Place quilting ruler on top of either one of the units, ensuring:
- The ruler covers the required size of the QST or SQST unit when ruler is placed on top of the unit (9½in square for Geometric Jewels Sampler quilt pattern).
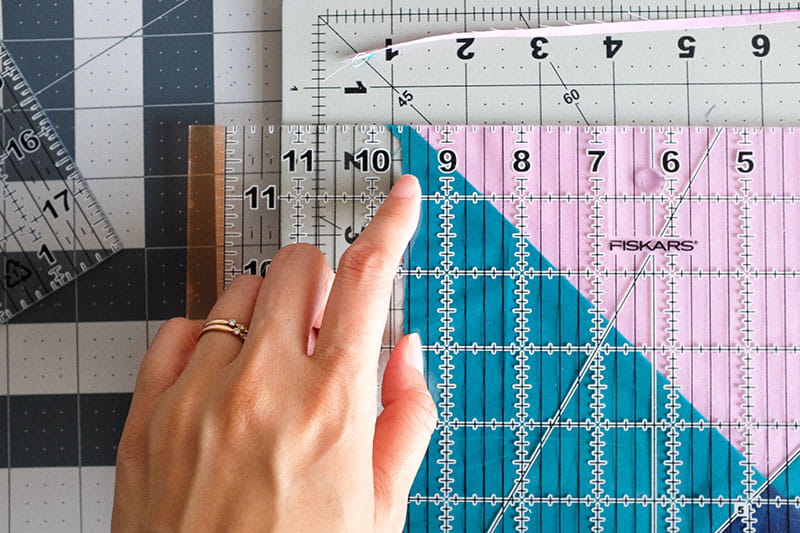
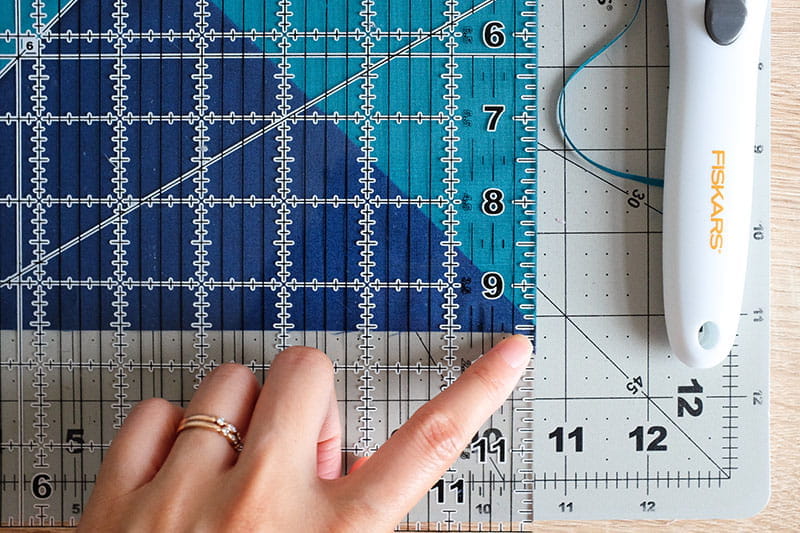
- The 45 degree-angle guide on the quilting ruler is matched up with one of the diagonal seams.
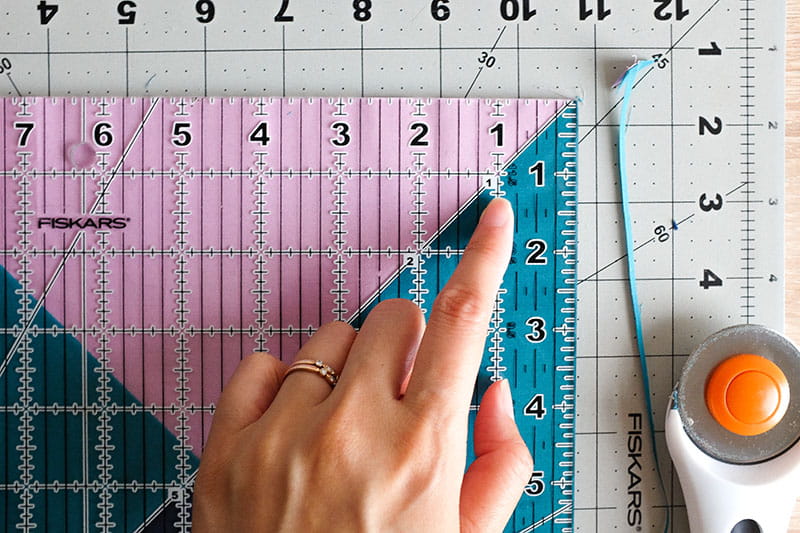
- The intersection of the central measurement on the ruler (4¾in in this case) is lined up with the point where all the seams meet on the QST or SQST unit.
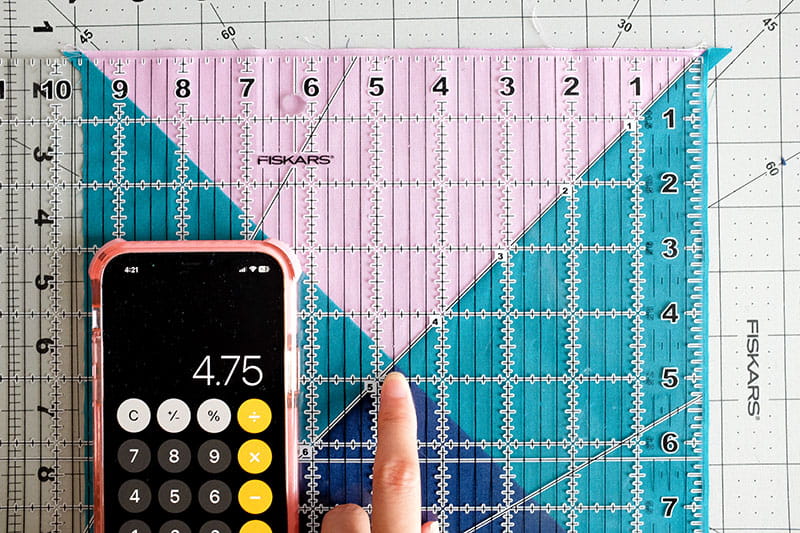
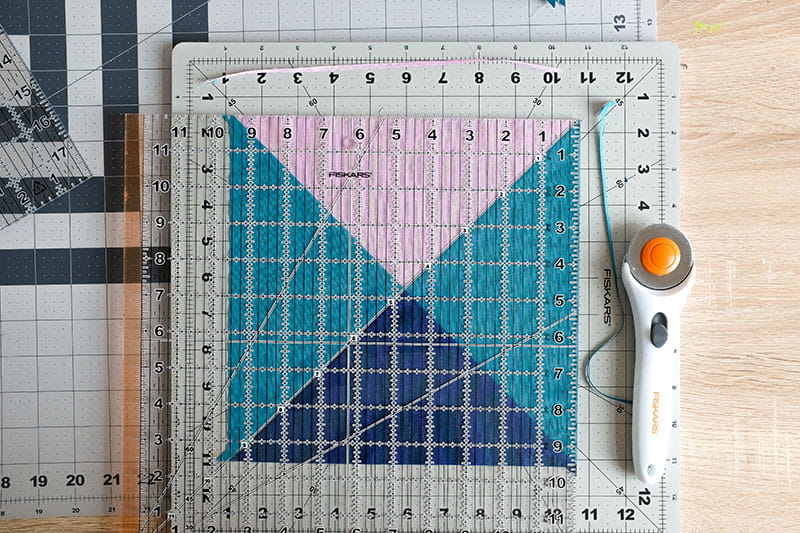
- The ruler covers the required size of the QST or SQST unit when ruler is placed on top of the unit (9½in square for Geometric Jewels Sampler quilt pattern).
- Rotate the QST or SQST unit 180-degrees. Therefore, the untrimmed edges are on the top and right edges if you’re right-handed and vice versa if you’re left-handed. Then with a ruler, using the trimmed edges from the previous step as a guide, measure out the size of the square the pattern calls for (9½in square in the Geometric Jewels Sampler pattern), and remove the remaining two edges.
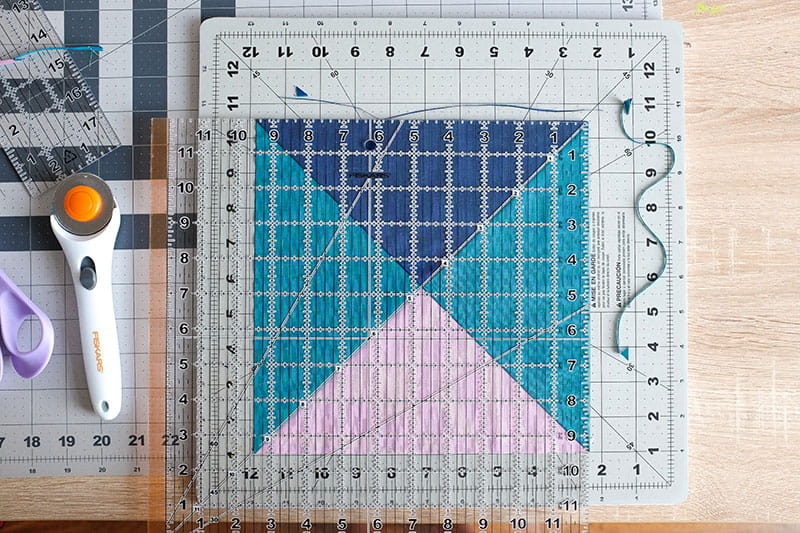
At this point of trimming the QST and SQST units, having the 45-degree angle guide matched up with the diagonal seam and central intersection lined up is not a massive concern, as that work has been done in the previous step.
Hope this deep dive into trimming QST and SQST units provides more clarity and ease, and that this wouldn’t be the last time you’ll be making QST and SQST units.

Seeing your work brings us so much joy. Be sure to also share your works-in-progress on social media by tagging Wendy @The.WeekendQuilter and @BrotherSews and using the #GeometricJewelsSampler #BrotherSews hashtags.
Till next time, happy sewing!

