Geometric Jewels Sampler Quilt Along: Week 5 - Flying Geese / Quick-Corners Blocks
Hello! This is Wendy of The Weekend Quilter, and I’d like to welcome you all to the fifth week of the Geometric Jewels Sampler quilt along (QAL)! This week we’re combining two different quilt piecing techniques in the one block: flying geese (FG) and quick-corners (QC).
Referring to the Geometric Jewels Sampler quilt pattern, we’re focusing on pages 11 to 14. The pattern is a FREE download from here, if you haven’t got yourself a copy yet.
In this blog post, we’re zoning in on using directional fabric with the no-waste flying geese method (also called 4-at-a-time flying geese). If you would like to read up on how to make flying geese with the stitch and flip method, there’s a separate blog post written by yours truly on the Brother Stitching Sewcial here. And as an added bonus, the instructions are part of a fun scrappy flying geese quilt project:
This blog post is the fifth out of six blog posts for the Geometric Jewels Sampler QAL. Each week of the QAL duration, there will be a new blog post based around the tasks that will need to be completed for the QAL. Some of the tips are geared towards the Geometric Jewels Sampler quilt pattern. But with that said, you can take the fundamentals from that and apply it to other future quilt projects. To receive updates about the new blog posts as well as weekly QAL tasks, be sure to sign up for the weekly newsletter here(Opens in a new tab). They will be sent via. The Weekend Quilter and only for the 6 weeks of the QAL*.
For more information on what the QAL entails (schedule, tools and supplies, etc.) please check out a previous Geometric Jewels Sampler QAL blog post here. You’re more than welcome to join at any point and work at your own pace.
We’ll be keeping all our weekly tips, tricks and recommendations at the one location for reference here. So you may want to bookmark this one.
*By signing up for the Geometric Jewels Sampler QAL updates, you also agree to sign up to be on The Weekend Quilter and Brother International email newsletter list. We will not sell your email or spam you.
Supplies and Tools:
For this week’s task on making FG / QC blocks, you will need the following:
- Download the Geometric Jewels Sampler quilt pattern for FREE from The Weekend Quilter’s website here.
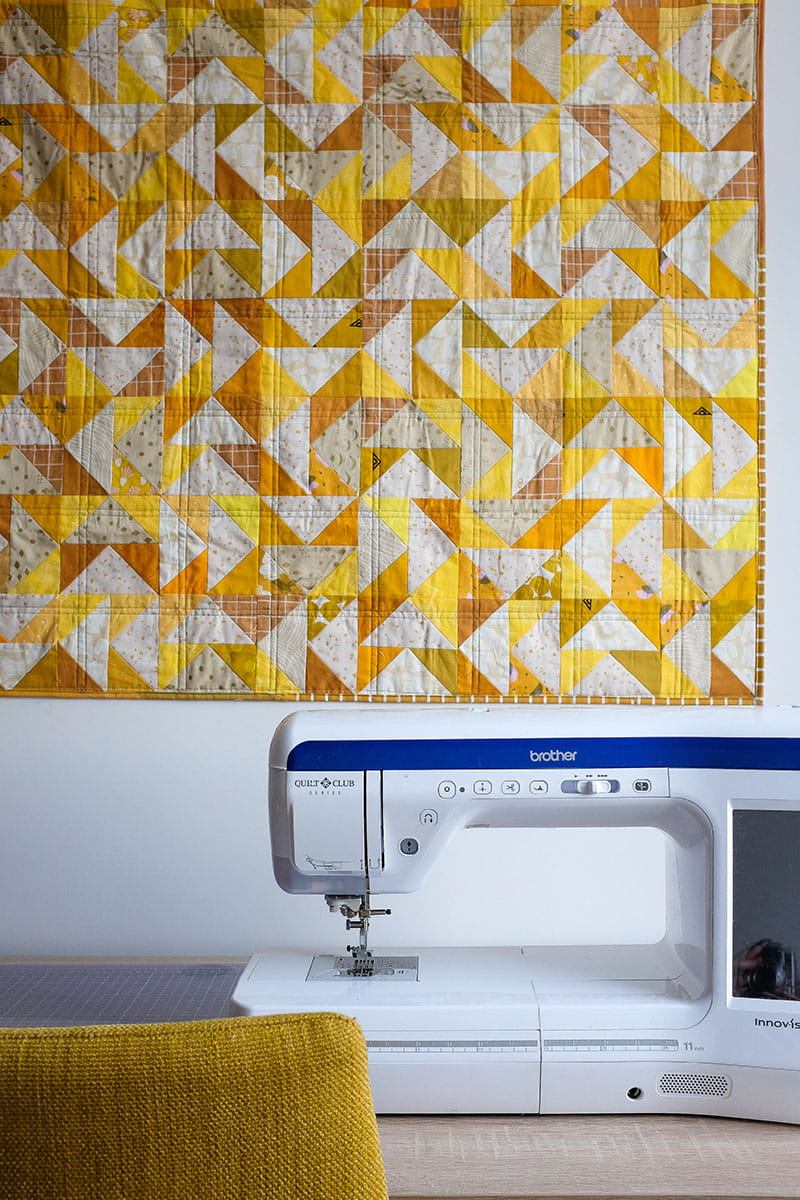
- Basic sewing/quilting machine – the Brother Innov-ís BQ3100 from the Quilt Club Series was used in this tutorial
- Coordinating thread, 50wt cotton for piecing
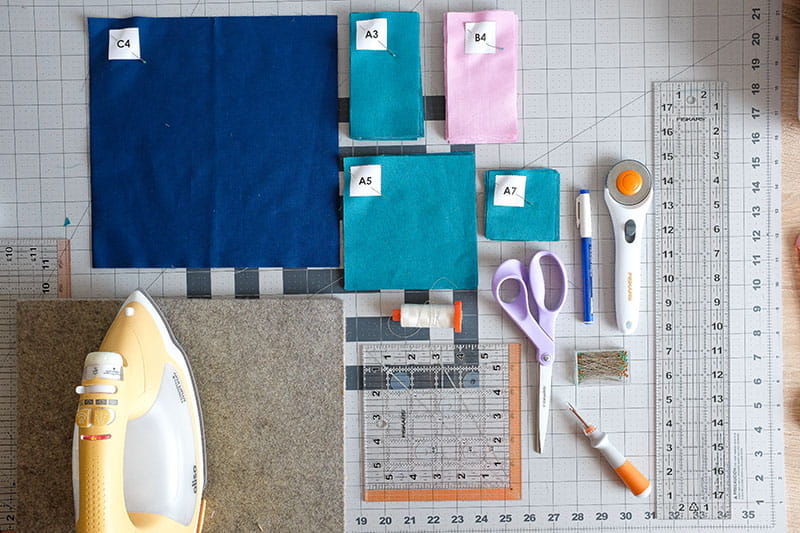
- Corresponding fabric pieces for FG / QC blocks – referring to the Geometric Jewels Sampler quilt pattern on page 3, you’ll need the following fabric pieces labelled as: A3 (QC), A5 (FG), A7 (QC), B4 (QC), C4 (FG)
- Pins
- Fabric pen or pencil
- Fabric scissors
- Seam ripper
- Iron and ironing board or wool pressing mat
- Rotary cutter
- Quilting rulers – a long ruler and a small or medium size ruler, one side of the ruler at least 6in long
- Cutting mat
What are Flying Geese?
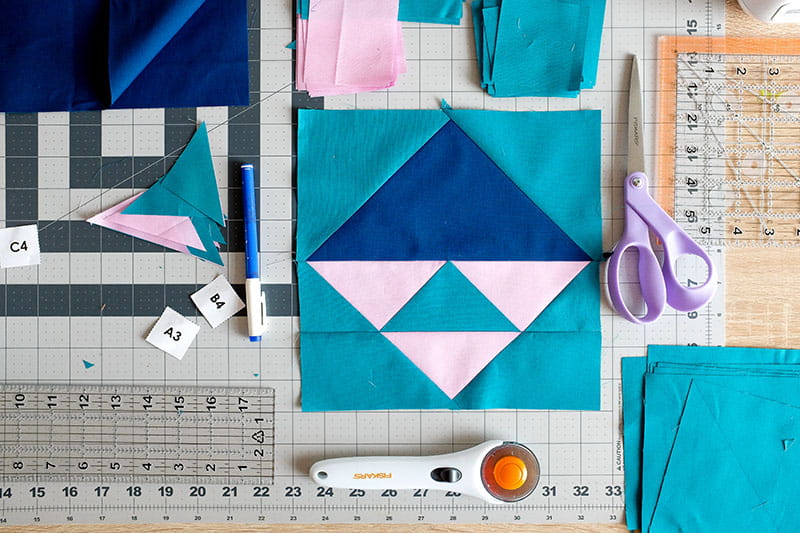
Flying geese units are made up of three right-angled triangles: a larger triangle (the geese and their flight direction) surrounded by two smaller triangles (the sky). This classic, versatile design has been around for hundreds of years and continues to be widely used in modern quilt designs.
There are a couple of ways in creating flying geese units. The top half of this week’s block, we’ll be implementing the no-waste flying geese piecing method. And the bottom half, we’ll be using the fundamentals of the traditional way of making flying geese units (the stitch and flip method) and use quick-corner method to make the three smaller triangles in the block. With this method you use a fabric pen or marker to mark a diagonal sewing guideline. Sew on the guide, trim a ¼in seam allowance and press to complete the unit.
Directional Fabric vs. Non-Directional Fabric
As previously mentioned, this blog post primarily focuses on creating flying geese units with directional fabric. But before we jump into the nuts and bolts, let’s talk about what is directional fabric.
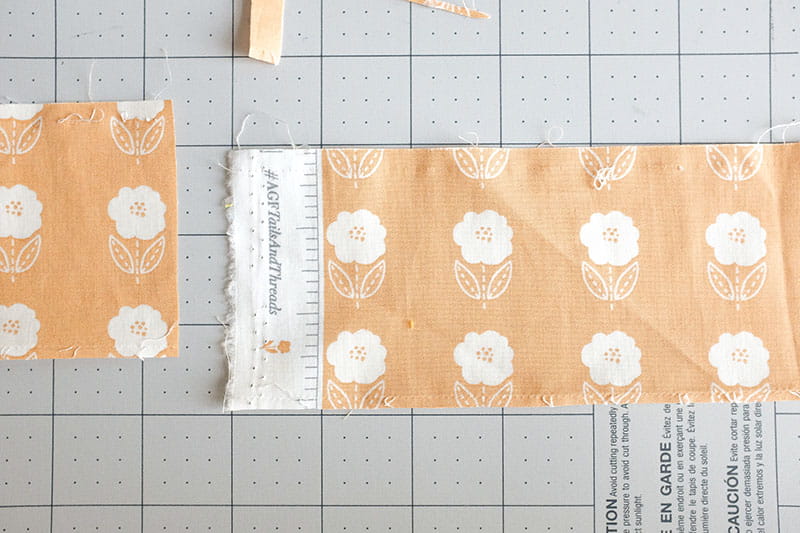
Directional fabric is a type of fabric design in which the design clearly faces or goes in one direction. If you turn the fabric around, you will then notice that the design is upside down or facing another direction. Sometimes quilters carefully plan to make sure that directional designs do not look odd when used in their quilt. Non-directional fabric is typically fabrics like solid colours or print fabrics with patterns / designs that look the same from any direction. See the photo below examples of the two types of print fabric. The print on the top is a directional print and the print at the bottom half is a non-directional.

No-Waste Flying Geese with Non-Directional Fabric
At one point of your quilting journey, you may encounter the use of directional fabrics when it comes to making flying geese with the no-waste method. The following steps and tips are going to ensure that you have all your directional fabrics in the right orientation using this method.
Following the no-waste method, you’ll need to cut four smaller squares for the sky (Fabric A) and one larger square for the geese (Fabric B). For this example, I’m making 2in x 4in flying geese units (finished size). Therefore, I have four Fabric A 2⅞in squares and one Fabric B 5¼ square.
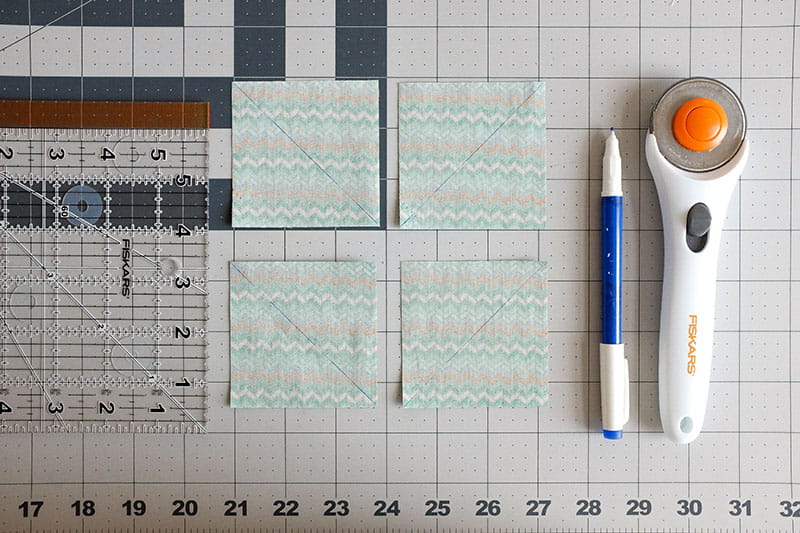
Step 1: Turn all Fabric A squares so the wrong sides are facing up and they are arranged so that the orientation of the print is facing the same way and upright. Then split them into two piles of two squares.
With a fabric pen or pencil, on each of two of the Fabric A squares, draw a diagonal guideline from the top left corner to the bottom right corner. With the remaining two Fabric A squares, on each square, draw a diagonal guideline from the top right corner to the bottom left corner. Keep the squares in their corresponding piles.
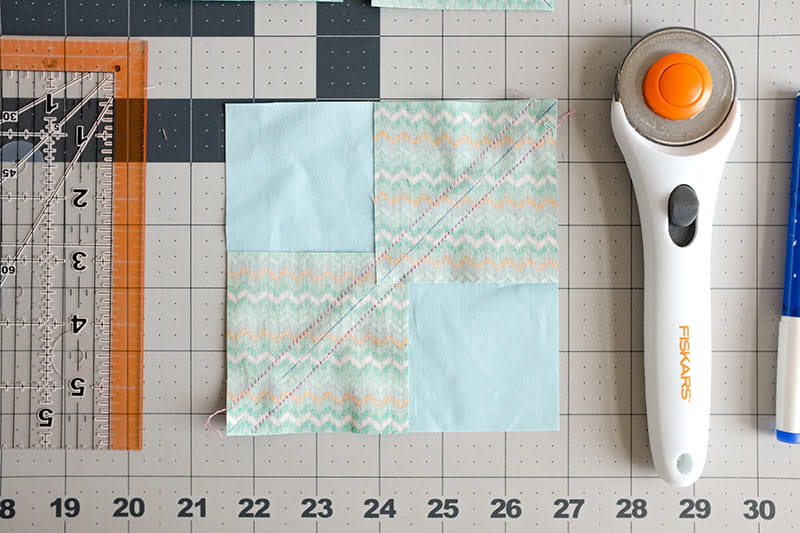
Step 2: As shown in the photo below, take two Fabric A squares from the one pile. With right sides together and diagonal guidelines lined up, place two marked Fabric A squares on top of one Fabric B square. Pin as needed to keep the pieces secure as you sew.
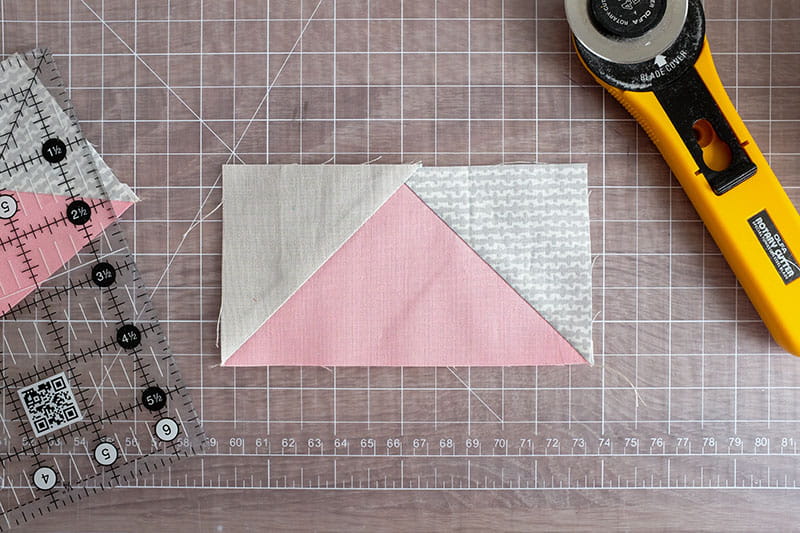
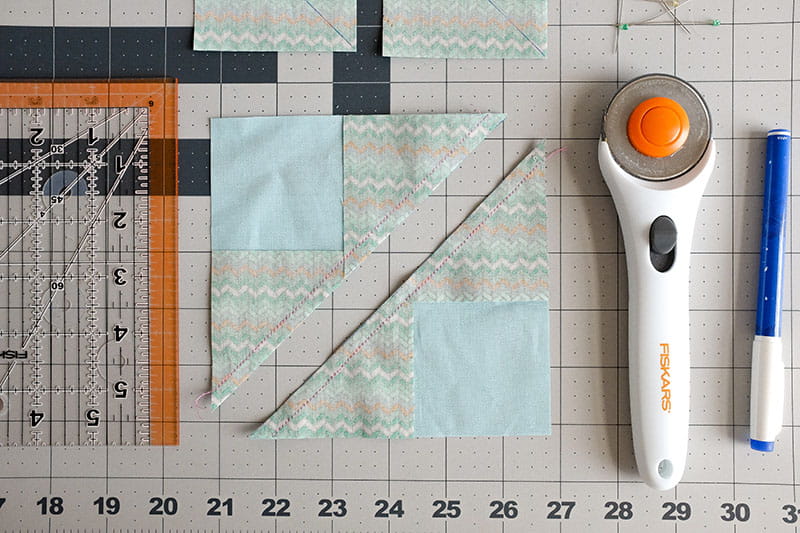
Step 3: Sew ¼in away from both sides of the drawn line and cut on the drawn guideline to create two flying geese sections and press the seams open or to the dark side.
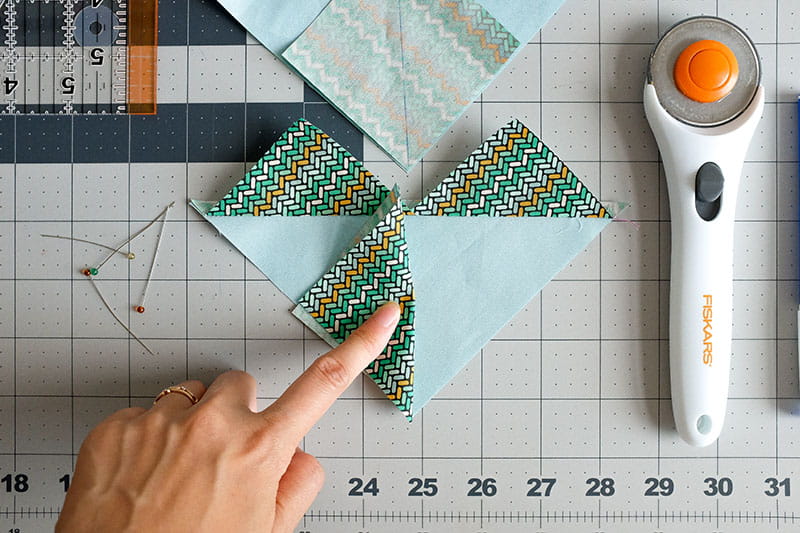
Step 4: Noting the orientation of the marked guideline of the remaining Fabric A squares, with right sides together, place one marked Fabric A square on top of one flying geese section created in the previous step.

Before you pin and sew the fabric pieces, check that the placement of Fabric A square is correct by roughly auditioning its placement. To do this, place marked Fabric A square on top of one flying geese section. Place a finger in the middle of Fabric A square, lift up either the left or right side of the square and check if the prints are going in the same direction in comparison to the already sewn Fabric A square(s). If it is not, just simply rotate the marked Fabric A square 180-degrees and pin in place. Repeat this for the second flying geese section created in the previous step.
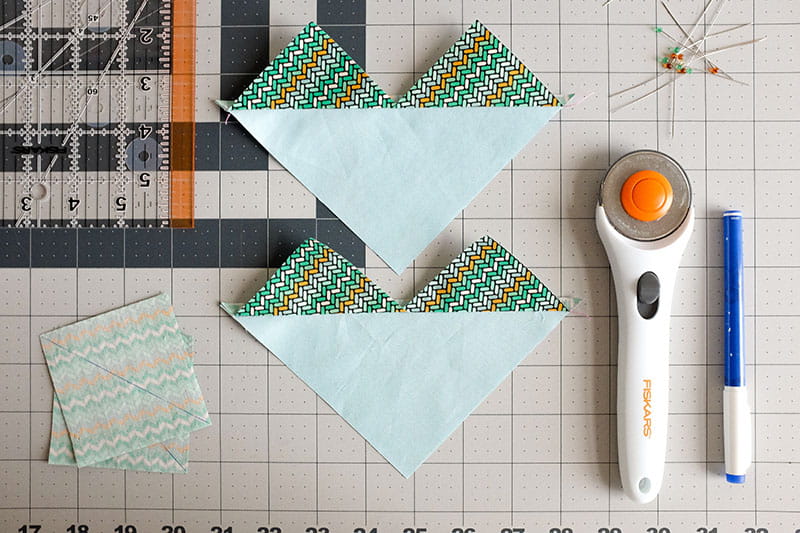
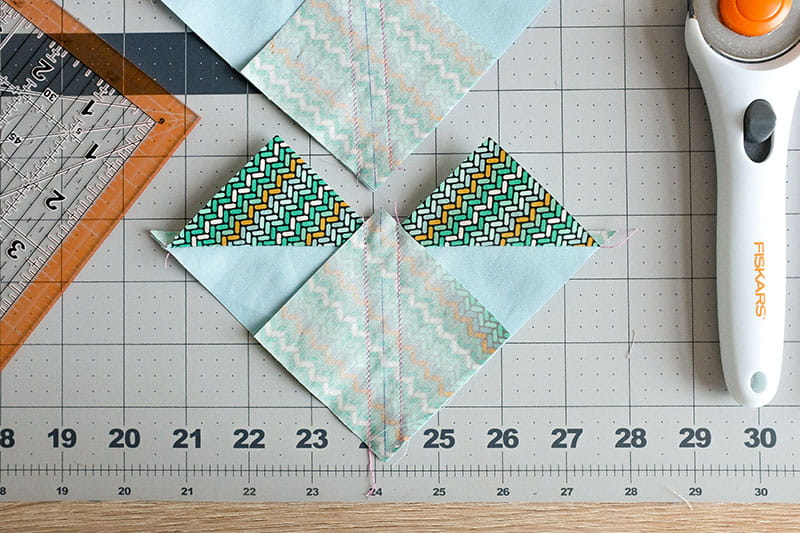
Step 5: Sew ¼in away from both sides of the drawn line and cut on the drawn guideline on each flying geese section. Press the seams open or to the dark side to create four flying geese units. Remove dog ears on each of the flying geese.
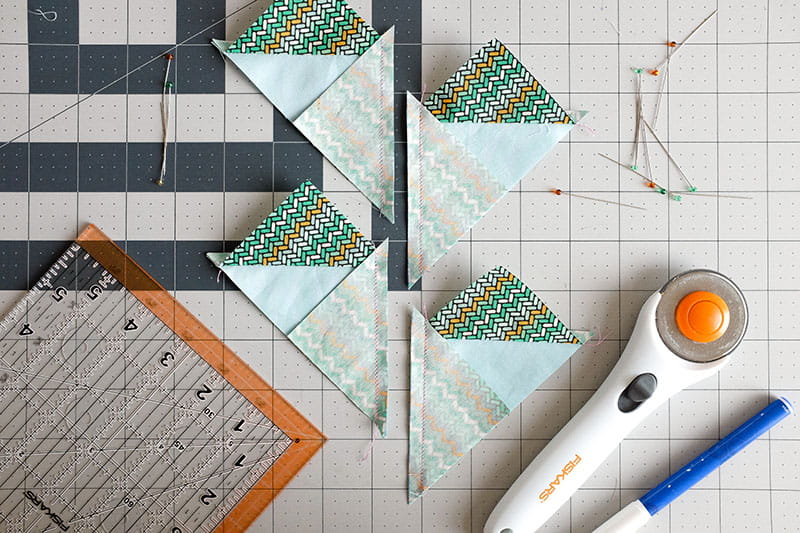
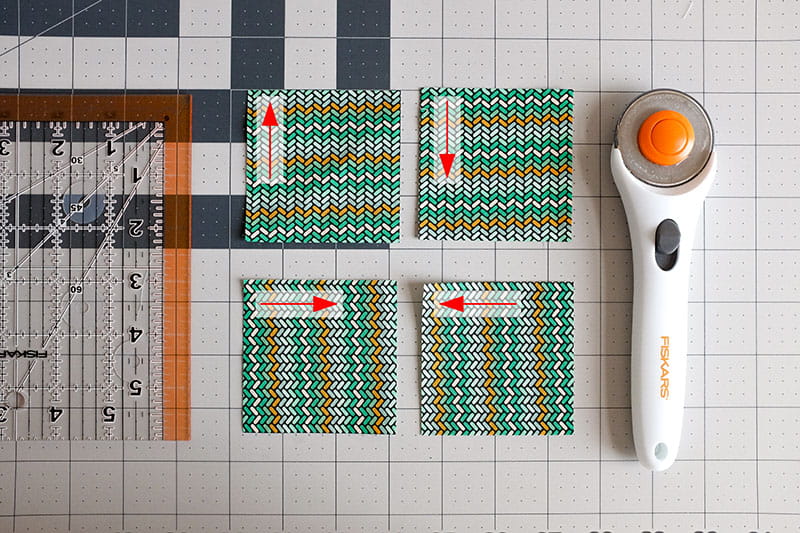
When you press the flying geese, you’ll notice that two of your flying geese will be going in the one direction, and the other two flying geese are going in another direction in this example:
This is because with this directional print if you rotate it, two of the four squares are going in the one direction and the other two are going the other direction even though they each are at different rotations.
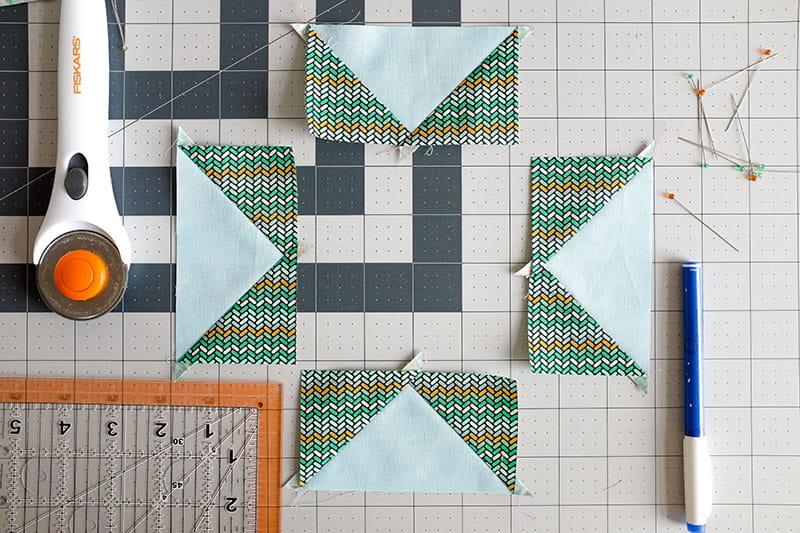
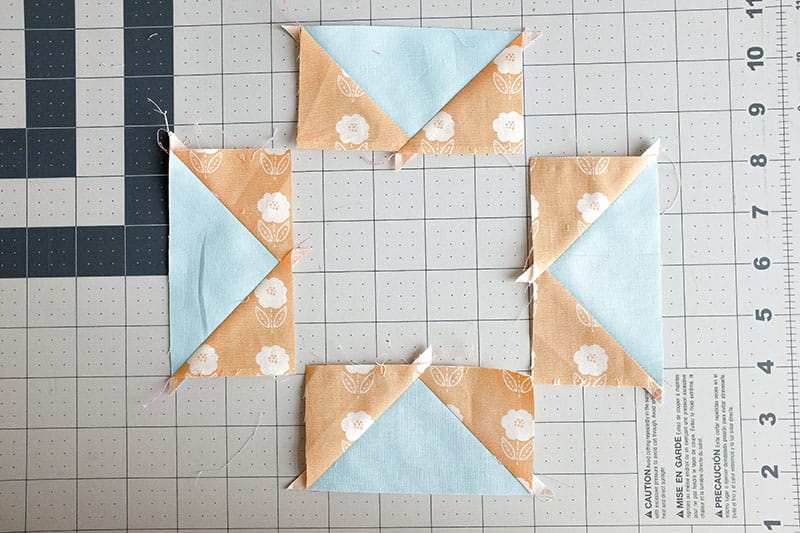
If you’re working with a directional print where you know for sure at any orientation, you can identify that the print is not facing upright like the flower print shown below…
… all the directional prints on the flying geese are going to go in the one direction:
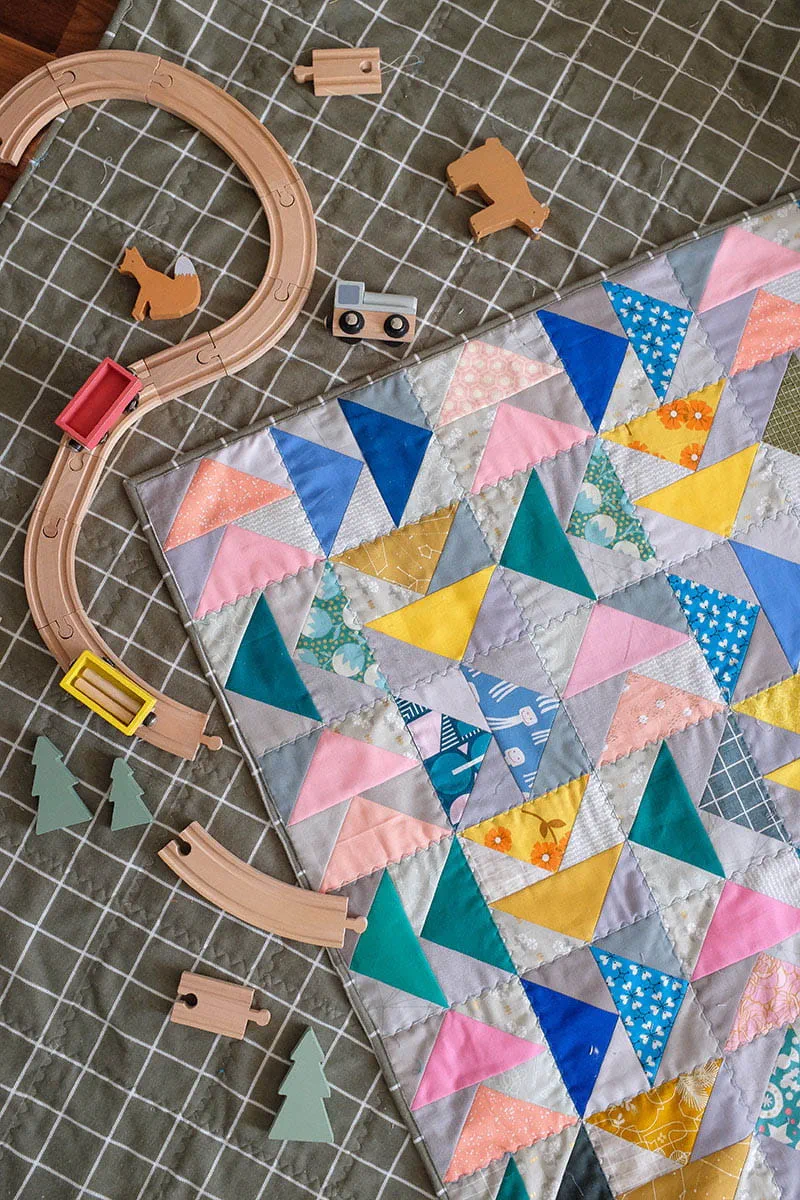
Bonus Project
As promised, here’s the bonus project. You’ll want to add this to your list of projects to make after this one, especially with the scraps you’ve been holding on to or have created from this project. It’s my easy scrappy Dutchman’s Puzzle quilt on the Brother Stitching Sewcial blog. The tutorial provides fabric requirements, cutting and sewing directions for baby (40in x 40in) and throw (60in x 70in) sized quilts. This project utilises the stitch and flip method. Check out the blog post here.
This wraps up this week’s theme around flying geese and quick-corner units. I hope you’ve found the content useful for your current (and future) flying geese or quick-corner unit projects. Seeing your work brings us so much joy. Be sure to also share your works-in-progress on social media by tagging Wendy @The.WeekendQuilter and @BrotherSews and using the #GeometricJewelsSampler #BrotherSews hashtags.
Till next time, happy sewing!
Related Projects
Stay Connected
* Required fields